Sample Force Rosters for the Broken
Posted on Wednesday Oct 10, 2018 at 06:00pm in Gaming
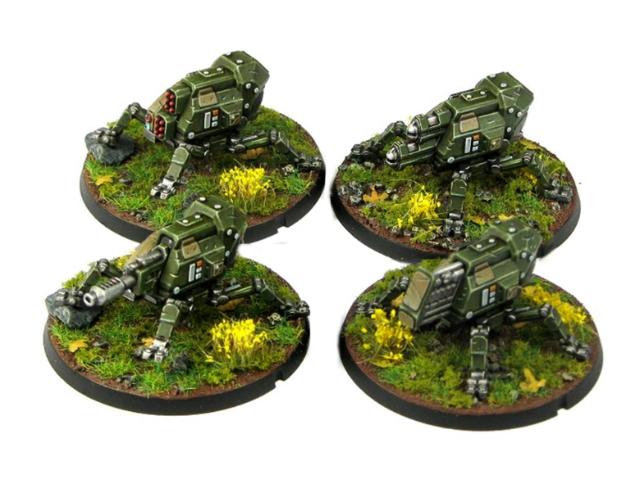
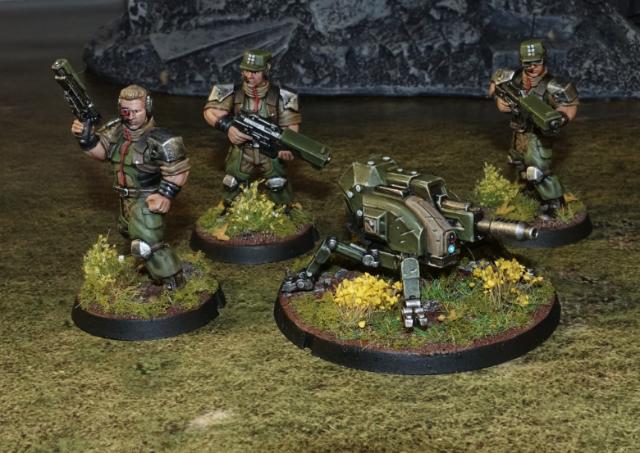
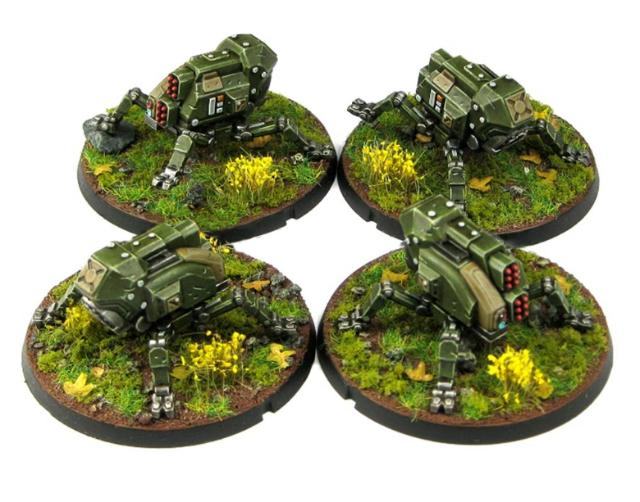
When the Battle For Zycanthus boxed set was released, we published some sample force rosters for the Karist and Epirian factions based on the models in the set, to help give new players an idea of what a Maelstrom's Edge force could look like. Since then, we have released a stack of new models and introduced a third faction, the Broken, to the game, so it seemed like a good idea to add some new force rosters to the sample collection. Below, you'll find three different sample force rosters for the Broken, and a breakdown of which models you would need to put them together.
LIST #1 - ALL-PLASTIC 120 POINTS
(a standard 'small' game, using just the plastic Broken Infantry Pack models)
Detachment #1 (of 2)
| TYPE | UNIT | UPGRADE | POINTS |
| [Command] | Forsaken Chieftain (8) | x2 Beam Pistols (+0) | 8 pts |
| [Core] | Broken Rabble (5) | x1 extra Broken Rabble (+1) | |
| x1 Chem Launcher (+1) | |||
| x1 EMP Harpoon (+1) | 8 pts | ||
| [Core] | Broken Rabble (5) | x2 extra Broken Rabble (+2) | |
| x1 Chem Launcher (+1) | |||
| x1 Glue Rifle (+1) | 9 pts | ||
| [Core] | Broken Rabble (5) | x2 extra Broken Rabble (+1) | |
| x1 Auto Slugger (+1) | |||
| x1 Longbeam Rifle (+1) | 9 pts | ||
| [Hammer] | Rabble Assault (8) | x2 extra Broken Rabble (+4) | |
| x3 EMP Harpoon (+0) | 12 pts | ||
| [Hammer] | Rabble Assault (8) | x2 extra Broken Rabble (+4) | |
| x3 Massive Torch (+3) | |||
| x2 replace Beam Blastgun with Chem Pistol & Slug Pistol (-2) | |||
| Boss replaces Beam Blastgun with Chem Pistol & Grenade Harness (-1) | 12 pts | ||
| [Anvil] | Rabble Fire Support (5) | x2 extra Broken Rabble (+2) | |
| x3 Longbeam Rifle (+6) | 13 pts | ||
| [Anvil] | Rabble Fire Support (5) | x2 extra Broken Rabble (+2) | |
| x3 Longbeam Rifle (+6) | 13 pts | ||
| DETACHMENT #1 TOTAL | 84 pts |
Detachment #2 (of 2)
| TYPE | UNIT | UPGRADE | POINTS |
| [Command] | Forsaken Chieftain (8) | replace Slug Rifle with Beam Blastgun (+1) | 9 pts |
| [Core] | Broken Rabble (5) | x1 extra Broken Rabble (+1) | |
| x1 Chem Launcher (+1) | |||
| x1 EMP Harpoon (+1) | |||
| Boss replaces Slug Rifle with Chem Pistol & Grenade Harness (+0) | 8 pts | ||
| [Core] | Broken Rabble (5) | x2 extra Broken Rabble (+2) | |
| x1 Emp Harpoon (+1) | |||
| x1 Glue Rifle (+1) | |||
| Boss replaces Slug Rifle with Grenade Harness & Slug Pistol (+0) | 9 pts | ||
| [Anvil] | Rabble Fire Support (5) | x2 extra Broken Rabble (+2) | |
| x3 Auto Slugger (+3) | 10 pts | ||
| DETACHMENT #2 TOTAL | 36 pts | ||
| GRAND TOTAL | 120 pts |
Models needed:
- Broken Infantry Pack x10.
The two Chieftains for this list are built from the plastic set, which is why there are two Rabble units that only have 5 in the unit.
LIST #2 - 120 POINTS
(a standard 'small' game, using a mix of plastic and resin Broken models)
Detachment #1 (of 2)
| TYPE | UNIT | UPGRADE | POINTS |
| [Command] | Forsaken Chieftain (8) | x1 Beam Pistol (+0) | |
| x1 Trophy Melee Weapon (+1) | |||
| Xeno Spotter (+1) | |||
| Customized Weapons (+2) | 12 pts | ||
| [Core] | Broken Rabble (5) | x2 extra Broken Rabble (+2) | |
| x1 Chem Launcher (+1) | |||
| x1 Glue Rifle (+1) | 9 pts | ||
| [Core] | Broken Rabble (5) | x2 extra Broken Rabble (+2) | |
| x1 Auto Slugger (+1) | |||
| x1 Longbeam Rifle (+1) | 9 pts | ||
| [Hammer] | Rabble Assault (8) | x1 Marsayan Hypnotist (+2) | |
| x3 Massive Torch (+3) | 13 pts | ||
| [Hammer] | Rabble Assault (8) | x1 extra Broken Rabble (+2) | |
| x1 Hakoyu Grand Master (+4) | |||
| x3 EMP Harpoon (+0) | 14 pts | ||
| [Vanguard] | x2 Sig Jammer (12) | 12 pts | |
| [Anvil] | Gnolti (10) | 10 pts | |
| [Anvil] | Rabble Fire Support (5) | x1 extra Broken Rabble (+1) | |
| x3 Longbeam Rifle (+6) | 12 pts | ||
| DETACHMENT #1 TOTAL | 91 pts |
Detachment #2 (of 2)
| TYPE | UNIT | UPGRADE | POINTS |
| [Command] | Forsaken Chieftain (8) | Customized Weapons (+2) | |
| Extensive Cybernetics (+2) | 12 pts | ||
| [Core] | Broken Rabble (5) | x2 extra Broken Rabble (+2) | |
| x1 Chem Launcher (+1) | |||
| x1 EMP Harpoon (+1) | |||
| Boss replaces Slug Rifle with Chem Pistol & Grenade Harness (+0) | 9 pts | ||
| [Anvil] | Rabble Fire Support (5) | x3 Auto Slugger (+3) | 8 pts |
| DETACHMENT #2 TOTAL | 29 pts | ||
| GRAND TOTAL | 120 pts |
Models needed:
- Broken Infantry Pack x6
- Forsaken Chieftain x1
- Forsaken Tech Chieftain x1
- Sig Jammer x2
- Marsayan Hypnotist x1
- Hakoyu Grand Master x1
- Gnolti x1
LIST #3 - 120 POINTS, SINGLE DETACHMENT
(a mix of plastic and resin models, optimized to fit into a single detachment)
| TYPE | UNIT | UPGRADE | POINTS |
| [Command] | Forsaken Chieftain (8) | x1 Trophy Melee Weapon (+1) | |
| Xeno Spotter (+1) | |||
| Customized Weapons (+2) | |||
| Extensive Cybernetics (+2) | 15 pts | ||
| [Core] | Broken Rabble (5) | x2 extra Broken Rabble (+2) | |
| x1 Auto Slugger (+1) | |||
| x1 Longbeam Rifle (+1) | 9 pts | ||
| [Core] | Broken Rabble (5) | x2 extra Broken Rabble (+2) | |
| x1 Chem Launcher (+1) | |||
| x1 EMP Harpoon (+1) | 9 pts | ||
| [Hammer] | Rabble Assault (8) | x2 Hakoyu Grand Master (+8) | |
| x3 Torch (+0) | 16 pts | ||
| [Hammer] | Rabble Assault (8) | x2 Hakoyu Grand Master (+8) | |
| x3 Massive Torch (+3) | 19 pts | ||
| [Vanguard] | x2 Sig Jammer (12) | 12 pts | |
| [Anvil] | x2 Gnolti (10) | 20 pts | |
| [Anvil] | Rabble Fire Support (5) | x2 extra Broken Rabble (+2) | |
| x3 Longbeam Rifle (+6) | 13 pts | ||
| TOTAL | 112 pts |
Models needed:
- Broken Infantry Pack x5 (you'll have a couple of models spare)
- Forsaken Chieftain x1
- Sig Jammer x2
- Hakoyu Grand Master x4
- Gnolti x2
Note that for the above list, you could get to 119 points by dropping the Rabble Fire Support and including another two Gnolti instead!
Hopefully the above force rosters will give you some idea of how to plan your force. If you're looking for the force rosters for the Karist and Epirian factions, you can find them on the Maelstrom's Edge website here.
To assemble your own force, you can pick up the above models, and the rest of the Maelstrom's Edge model range, from the webstore here.
Happy Gaming!
Painting Tutorial: Energy Blades
Posted on Monday Oct 08, 2018 at 06:00pm in Tutorials
- by Iain Wilson
The Maelstrom's Edge Faction Expansion Sprue introduced a couple of cybel-powered edged weapons - the Cybel Blade and Cybel Glaive - to the Karist faction. These weapons give the Karist troops a wonderful, savage look and add even more nasty, close-quarters options to their units.
Painting these sorts of weapons is a great opportunity to add some eye-catching detail to your force, so I thought it might be useful to offer some suggestions on different ways to do so, to suit varying levels of painting prowess. There's no right or wrong way - you can feel free to use whatever technique suits your style, but the below ideas might give you a starting point if you're unsure of how to go about it.
For each of the below methods, paint up the rest of the weapon however suits your force's colours, and then go to town on your blade!
The Silver Wash Method
An easy one to kick things off. Start with a silver blade. Apply a wash of purple ink (I've used Army Painter Purple Tone). Let it dry, and you're done!
The White Wash Method
Similar to the above, except that you start with a white blade. Apply a wash of purple ink, and let it dry.
To lift it just a little, you can then use a fine detail brush and a little white paint to highlight the raised edges.
The Drybrush Method
Start with a silver or gunmetal blade. Apply purple ink to the back half of the blade, and let it dry.
Blend the purple into the metal by lightly drybrushing with the same metal colour that you used on the blade. This will also pick out the raised edges.
The Crystal Method
Start with a white blade. Using a fine detail brush, apply light coats of purple ink which each successive coat covering slightly less of the blade so that you build up a gradient of purple fading gradually to white . You don't want the ink to pool - the lighter you apply each coat, the better the end result will be.
Work with the shape of the blade - you want the brightest (whitest) part of the blade on the curved part of the edge, so the purple builds up from that point towards the tip and the back end of the blade. On the top half of the blade this is reversed, so the darkest purple is on the inside of the curve, fading out to white on the ends. Once you've built up your colour to the level you want it, highlight the raised edges with a little white.
And that's it - 4 different techniques for some very different results. You can vary these up some more by using different colours - I've gone with purple as that's the 'canon' colouring for cybel energy, but if you're using a different colour throughout your force (or looking to apply these techniques for a different miniature altogether) then you can easily substitute any colour ink.
If you're feeling inspired, you can pick up the Expansion Sprue from the Maelstrom's Edge online store here, and make sure you share your efforts on the Comm Guild Facebook page (https://www.facebook.com/groups/MaelstromsEdge)!
For other Maelstrom's Edge modeling articles, including tutorials and walkthroughs of a wide range of different building and miniature projects, check out the article roundup here.
New Karist Faction Objective Card: First Contact
Posted on Wednesday Oct 03, 2018 at 06:00pm in Gaming
Although the existence of the xenos species called Angels was not completely unknown to the inhabitants of the spiral arm, only a handful of academics and long-standing spacefarers truly knew of them before the Karists began using Angels for their military and propaganda purposes. To everyone else, they were always simply a myth or legend bragged about by starship captains who had spent too many years traversing the void.
Karists tout that these creatures are emissaries of of the Maelstrom, with their priests having helped coined the name 'Angels' to describe them. When Karist priests attempt to sway the populace of a world to their cause, they often mention Angels, or even utilize a live Angel as a demonstration. For how can creatures so powerful and strange, they argue, serve the will of the Karists if their cause were not just and true?
The First Contact faction objective represents a number of new avenues for our game. It is the first of several planned new faction objectives tied to particular models, helping to create different types of themed forces you can choose to utilize within the overarching umbrella of the existing forces. To this end, your force must include an Angel Keeper for you to be able to use the First Contact faction objetive.
First Contact
This objective may only be utilized if your force contains an Angel Keeper. If an objective type requires you to choose a force commander, it must be an Angel Keeper.
This objective can generate a maximum of 3 VPs per game, after which your units no longer benefit from the IrratIonal Fear ability.
Partial: (conditional) Each time a non-fearless enemy unit fails any type of discipline check (even an automatic failure) while affected by the Fearsome ability of your Angel units, gain 1 VP.
Full: N/A
Irrational Fear: Friendly models with the angel designator gain the Fearsome (1) ability, or add +1 to their existing Fearsome ability.
You can download a printable version of this card here.
The existing basic faction objectives ('Secret Cache' for the Karists, 'Now You See Me' for the Broken and 'Automated Uplink Relay' for the Epirians) all work roughly the same way: they provide your forces an optional bonus, which you can choose to forgo each turn to instead gain +1 victory point. First Contact, on the other hand, provides your force with an automatic bonus: namely improving your Angel's 'Fearsome' ability, and successfully utilizing that bonus is what scores you the objective's victory points. Even better, this is the first faction objective where it is possible to earn the maximum 3 victory points in a single turn, even theoretically in the first turn of the game, which would definitely put your opponent on their back foot right out of the gate!
But that raises the obvious question: how can First Contact possibly be balanced compared to the existing two faction objectives? The answer is that the other two objectives provide you with better situational control. When you need a victory point, you can generate one, but when you need the bonus provided by the objective, you can utilize that instead. With First Contact, once you've generated your 3 victory points from it, the bonus provided by it ends and you're stuck the rest of the game without it, even if you would have preferred to keep the bonus around longer in lieu of gaining all 3 victory points.
We would love for you to try out some games with both the Angel Keeper and First Contact rules and let us know what you think about them. If you've got any feedback (with or without playing any games with the rules), please feel free to provide it either by replying to this article directly, or on our Comm-Guild Facebook group or in the Maelstrom's Edge forum on Dakka Dakka.
You can flesh out your shape-shifting alien force by picking up an Angel Keeper and any of the different types of angels from the Maelstrom's Edge webstore here!
Tags: faction gaming karist objectives rules
Terrain Tutorial: Salt Weathering
Posted on Monday Oct 01, 2018 at 06:00pm in Tutorials
- by Iain Wilson
The Maelstrom's Edge Terrain Sprue lets you quickly and easily build some awesome-looking terrain to play your games around and over. Finishing that terrain off with a stand-out paintjob is sure to make your games look even better!
A while back, I shared a tutorial on sponge weathering, which is a great way to quickly and easily add chipping effects to your paintjob. This time around, I'm looking at salt weathering, which is a little more involved than doing it with a sponge, but gives a much more detailed and realistic effect.
While it may look daunting at first, the most complicated part of the salt weathering process is actually just planning out what colours to use. The paint goes on in 2 or more layers, depending on how involved you want your weathering to be. For this tutorial, I'm going to just use a base layer which will become the 'weathered' part, and a top layer which provides the core colour for the building.
What you'll need.
- A building to paint
- Salt. You can use ordinary tablesalt, or rocksalt, or anything in between. The coarseness of the salt changes how your weathering will appear, so some experimenting can be required to find the effect that you like most. I use a coarse rocksalt that I grind up finely with a mortar and pestle. This gives the grains a less consistent size than just using table salt, which I think enhances the overall effect.
- Hairspray. The cheaper, the better. It doesn't need to hold your fabulous 'do for the whole party, just keep some salt in place while you spray it.
- A small, stiff brush. An old toothbrush is ideal.
- Spray paint. You can use an airbrush for this technique if you have one, but if you don't then spraycans will do just fine - that's all I use.
First step - Apply the basecoat. This is the layer that will show through as your weathering. If you're after a chipped cement wall look, then a dark grey is appropriate. You can use a metallic colour if you want a painted metal feature, or a rusty brown for more weathered metal. If you want multiple effects over the building, then you can mix-and-match as required. If you're worried about the basecoat scratching off, which can be a problem with some plastic or metal materials, then also apply a generous coat of gloss sealer at this point.
For my building, I'm going for cement walls with rusty metal details, so I've sprayed the whole building grey, and then gone over the parts that will be metal with brown for the rust.
The next step is to apply the salt. Working one facing at a time, spray on a generous (but not dripping!) coat of hairspray, and then sprinkle on the salt where you want your weathering to appear. For the most realistic effect, concentrate on areas that would be most likely to see wear and tear - exposed corners, raised edges and the like.
Note - You can use water for this step instead of hairspray, using a spray bottle or a paintbrush to apply the water where you want the salt to go. This can be a little more precise, but requires much more careful handling as the water doesn't bond quite as strongly to larger grains of salt and takes longer to dry than the hairspray.
When you're done, your building will look something like this:
Once the hairspray has dried, you can apply your next coat of colour - I'm using a flat white. Keep this coat light, as too much paint will make it harder to remove the salt. Set aside for the paint to dry.
Now comes the fun part!
Using your brush, gently scrub off the salt. If your building is made from water-proof materials, you can hold it under some running water while you scrub. If you have used something cardboard, foamcore or similar, dip your brush in some water and keep it wet while trying not to soak the building too much as you scrub instead.
As the salt comes away, your base layer is exposed in a lovely chipped pattern.
Let it dry before applying any final detailing. Any leftover salt residue will dry as a white powder on your paint, so can need a little bit of cleanup with a damp cloth. At this point, I like to apply a coat of matte sealer to keep everything pretty while I do any detail work to the building, to avoid damaging the paint with the extra handling. This also helps to avoid any leftover salt absorbing moisture from the air later on, which can damage paper, card or foamcore components.
You can apply multiple layers of colour by repeating the above steps, either over the whole building to show different paint layers or more detail on corroded metal, or by masking off part of the building to apply specific detailing. Here, I'm adding a building ID to the top and front by taping a stencil in place.
Salt is applied over the stencil, followed by a spray of the new colour. Once you remove the stencil and scrub away the salt, you're left with detailing that looks as weathered as the rest of the building.
Once you have applied as many layers of weathering as you feel it needs, all that remains is to apply your final detailing
And that's essentially it. You can vary the amount of weathering by using more or less salt, and can create all sorts of nifty effects through layering and careful use of colours. A good idea if you're not sure of what will work is to google images of derelict buildings or machinery and use those for inspiration.
Why not give it a go? You can pick up the Maelstrom's Edge terrain sprue along with the rest of the Maelstrom's Edge model range from the webstore here.
As always, feel free to pop along and share your work, or ask any Maelstrom's Edge- or hobby-related questions on the Comm Guild Facebook page!
For other Maelstrom's Edge modeling articles, including tutorials and walkthroughs of a wide range of different building and miniature projects, check out the article roundup here.
Tags: painting terrain terrainsprue tutorial
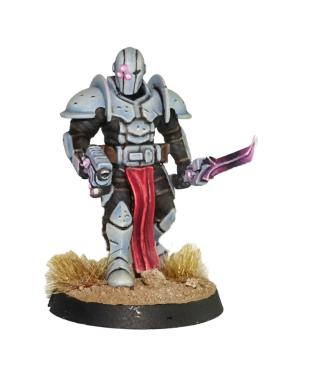
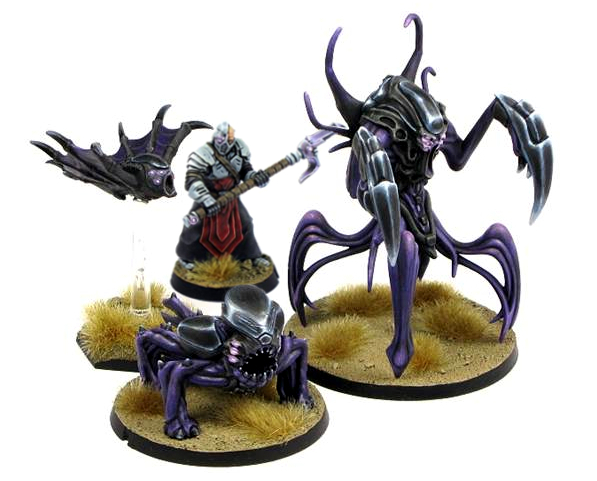
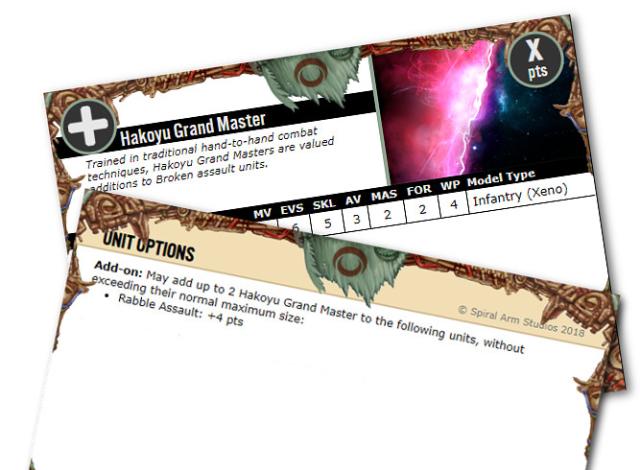
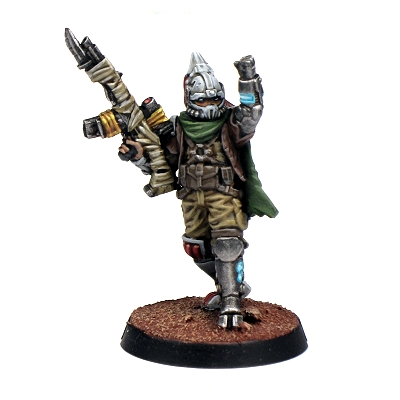
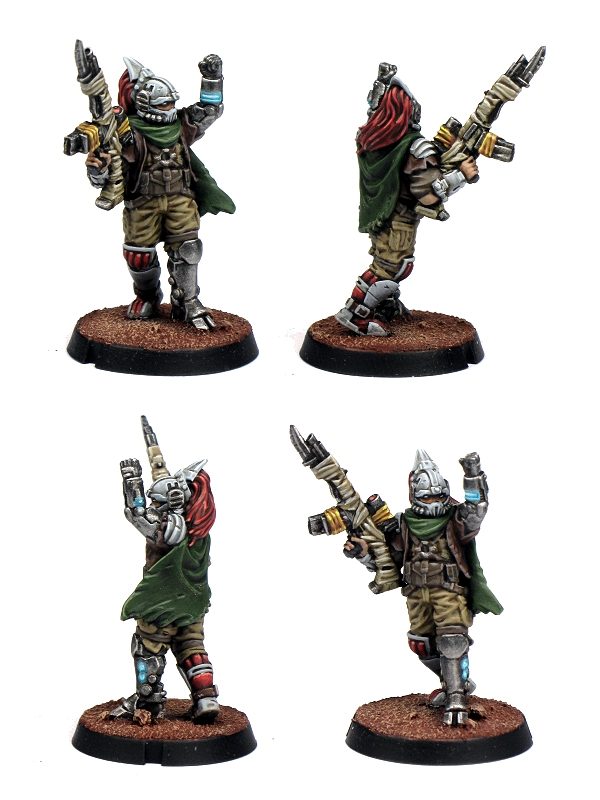
New resin release for the Broken: The Hakoyu Grand Master!
Posted on Friday Sept 28, 2018 at 06:00pm in The Broken
![]()
The Broken receive a bit of a boost to their melee capabilities this month, with the release of the resin Hakoyu Grand Master - available now from the Maelstrom's Edge webstore!.
The Hakoyu Grand Master is an optional add-on for Broken Assault units. Equipped with powerful close combat weapons and defensive shields, he can help to defend the unit from incoming close quarter attacks while also possessing the fighting prowess to stand toe-to-toe with a Karist Shadow Walker!
With four arms and a horn-like protrusion from their foreheads, Hakoyu can seem menacing at first glance, especially as most have trained for decades in various martial arts and tend to carry at least one large melee weapon with them at all times, despite the fact that they are quite passive by nature. When a Hakoyu does feel forced to fight, their lightning quick reflexes and zealous training means they can usually end the contest before their opponent even knows what has happened.
The Hakoyu hail from the remote Yedo system. Their society is governed by a strict code of honour that can be difficult for non-Hakoyu to decipher. They believe the needs of the group are paramount, with the desires and wants of any individual considered trivial. This means Hakoyu prefer to live their lives in their home system, which makes them one of the more rare alien species in the Spiral Arm, with most humans never encountering a Hakoyu in their lifetime. All is not perfect on Yedo however, as the Hakoyu have been locked in a centuries-old war with their neighboring species, the Cera, over territorial rites and a perceived slight to the Hakoyu peoples' honor that cannot forgive. The war has steadily sapped the resources of Yedo, with the Cera using their technological advantages to blockade Yedo from receiving much needed relief supplies for its civilians. This dire situation has forced increasing numbers of Hakoyu to flee Yedo in an attempt to earn a living selling their services throughout the spiral arm, usually as a bodyguard or enforcer, even though such work is in direct conflict with their morale code and likely means they would not be welcomed back to Yedo should they ever wish to return.
When the Maelstrom threatens a world, misplaced distrust in Hakoyu sell-swords means they're often discarded at the last second by their former employers and denied a place on escape craft, leaving them ripe to join the ranks of the Broken. The Broken offer the Hakoyu a way out and a collective where most everyone is an outcast to some extent, in which many Hakoyu have found a second home even as they long to someday find their way back to Yedo. The Broken, on their part, value the Hakoyu's fighting skills and their unselfish character. The most sought after Hakoyu are their pinnacle warriors: a Grand Master, as they tend to give any squad the upper hand in any close quarter fighting. The calm demeanor of a Grand Master under fire is enough to convince their Broken squad mates to charge into the teeth of enemy fire rather than to run away. Grand Masters wield deadly Hakoyu phase weaponry, a technology first seen on Yedo and whose methods of construction are a closely guarded secret. These weapons pass effortlessly through energy fields and can cause electronic circuitry to explode upon contact, both highly sought after abilities in the Hakoyu's fight against the Cera. Hakoyu are also renown for their exquisite skill with forearm deflectors, and Grand Masters in particular are able to use these to prevent an opponent from ever striking them, no matter what type of deadly melee weapon they might face.
The Hakoyu Grand Master is available now - You can find it in the Maelstrom's Edge webstore here!
The unit card will be up in the Force Builder section of the Maelstrom's Edge website in the next couple of days - but here's a sneak peek!
Terrain Spotlight: Building made from foamed PVC and the Maelstrom's Edge Terrain Sprue
Posted on Monday Sept 24, 2018 at 06:00pm in Tutorials
- by Iain Wilson
I've showcased a couple of customised Plast Craft Games buildings in the past - a scifi-d up pagoda, and a similarly modified western building. These kits are made out of a foamed PVC board which was really fantastic to work with, so I decided to track down some similar board to have a crack at putting together some of my own designs with it, with the below result:
Slightly unusually for my projects, I started this one by sketching out a plan to see how everything would fit together. This was partly due to my desire to take advantage of the flexibility of the PVC by adding a curved front wall to the building, so I wanted to make sure that I had my dimensions correct before I started cutting.
Once I was confident that I had it all worked out, I pencilled up the various panels that made up the building onto the sheet of PVC, and then used a steel ruler and hobby knife to cut it all out. The foamed PVC cuts really easily with a knife, and also sands well. It feels almost like something halfway between cardboard and foamcore*, without the inherent frailties, like the risk of damage from moisture or spraypaint.
*For the uninitiated, Foamcore, also sometimes called Foam Board, is a material made up of a thin sheet of expanded polystyrene sandwiched between layers of paper or thin card, and is a common building material for wargaming terrain and scale building construction.
Once everything was cut out, I did a quick dry-fit to check that everything slotted in where it should.
The curved panel on the front was made by cutting the piece to the right size and then laying it over an old baby formula tin while heating it with a hair dryer. This achieved the desired curve, but I suspect the hair dryer was a little too hot for the material as it caused it to swell on some of the cut edges. Next time around, I'll try just immersing it in hot water for a minute instead.
The door and windows are taken from the Maelstrom's Edge terrain sprue. I cut the holes in the wall panels for those by sitting them in place, drawing around them with a pencil, and then cutting the resultant rectangles out with a hobby knife.
I wanted a walled roof area for troops to take cover on, so marked down 20mm inside each wall and glued in some strips of leftover PVC to act as support.
The walls, door and windows were all glued into place, and the roof dropped into place with a little more glue. I used superglue for assembly - this grabs really well, and quite quickly, on the foamed PVC.
As the last step before painting, I took support struts from the terrain sprue and glued them over the exposed joints on the walls.
That left me with the building itself assembled, and a few details to add on once the walls were painted. For some added sturdiness, I glued the building down to a square of 5mm masonite.
To kick off the painting, I sprayed with red right around the top of the walls.
I then applied a line of masking tape over the red paint, just below the tops of the walls. I lined this up with one of the panels on the support struts, to make it look neater.
The whole building received a coat of a nice, sandy brown colour.
This was followed up with a spray of white from above, leaving the sandy brown in the crevasses and undersides of the detail.
(And yes, it does feel a little absurd to take a white building, and apply three different coats of paint just to wind up with a white building again!)
Once the spray was dry, I peeled off the masking tape, and painted the base and the roof with Vallejo Basalt Grey.
Everything was weathered with a sponge and some Vallejo Heavy Charcoal (for a how-to on sponge weathering, check out the article here!), and the base and roof were drybrushed with Vallejo Light Grey and a little white.
I dirtied everything up with a generous drybrush here and there with Vallejo Beasty Brown.
The lower edges of the weathering on the red strips was highlighted with a little Citadel Tentacle Pink and Army Painter Pure Red, and I blacklined some of the deeper detail lines on the terrain sprue components. The 'puddle' stains were added with Army Painter Strong Tone and Dark Tone, by dripping small drops onto the board and leaving it to dry.
For the finishing steps, I added a fan on one wall using the large pipe fitting from the terrain sprue some plasticard, built a small pipe coming out of the back wall using some more terrain sprue pipe fittings, a couple of short pieces of plastic tube and a piece of sprue cut from the terrain sprue, and hung a ladder on the back wall. To add handrails to the top of the ladder, I trimmed away the top rung, and cut a couple of pieces of sprue that looked about right, added a ninety-degree bend with by bending carefully with pliers, and then gluing it all in place. The ladder was painted using my normal weathered metal technique.
The end result looks like this:
You can pick up the Maelstrom's Edge terrain sprue along with the rest of the Maelstrom's Edge model range from the webstore here.
As always, feel free to pop along and share your work, or ask any Maelstrom's Edge- or hobby-related questions on the Comm Guild Facebook page!
For other Maelstrom's Edge modeling articles, including tutorials and walkthroughs of a wide range of different building and miniature projects, check out the article roundup here.
Tags: buildings modeling spotlight terrain terrainsprue walkthrough
Modeling Spotlight: Epirian SecDef Heavy Weapons Team conversion & rules!
Posted on Monday Sept 17, 2018 at 06:00pm in Tutorials
- by Iain Wilson
The addition of the SecDef to the Epirian lineup adds a much more 'military' feel to the faction, and I've been having a lot of fun exploring that with the models. I previously added my own homebrew SecDef Lieutenant and Scout Walker unit cards to the force builder (and if you missed the article, you can see how they were built here), and this week, I'm fleshing them out a little more with the addition of a dedicated heavy weapons team, based on the Master Bot Handler exo-suit.
My idea was for a slower-moving, but more heavily-armed team variant, for those situations that call for a little more firepower. With that goal in mind, I grabbed some parts from the SecDef and Master Handler sprues, and went to work!
From the Master Handler sprue, I took a torso and backpack, the weapon support arms and two weapons (I used the flakk guns, but it doesn't really matter which you use as you only want the mounting ring on the back of them). From the SecDef sprue, I took a head, two arms, two legs and a pair of machine guns.
I didn't want these guys to be quite as heavily armed as the Master Handler, so the first step was to remove the missile racks from the top of the backpack. I sliced them off using a razor saw, and cleaned up with a hobby knife to get rid of any rough cut marks.
As the SecDef arms have small shoulder pads on them, I removed the ridges that sit directly over the Master Handler's shoulders on each side of the torso. Otherwise, the arms would wind up sitting too low.
For the weapons, I cut the mounting ring from the back of the Master Handler's guns, and the grip and trigger assembly from the top of the SecDef gun, and then glued the mounting ring to the back of the machine gun's butt.
From there, the body was assembled pretty much as you would expect...
And finally, the weapons were glued onto the outside of the forearms - I didn't bother adding any specific mounting for them, as I figure they would magnetically lock to the SecDef exoskeleton's wristbands. Then I glued the support arms in place, and the model was ready for painting!
The same process works with the chainguns on the SecDef sprue, although in that case I also removed the weapon butt before attaching the mounting rings, to avoid the weapon looking too long against the model's arms.
For the team sergeant, I used a pointing arm, and for something different I put the gun for that arm in a 'standby' position. When he needs it, the support arm would drop it down and it would maglock to his wrist, ready for action.
Of course, pretty models are only half of the story! I have also generated an unofficial rules card for the heavy weapons team, which you can find in the Force Builder section of the Maelstrom's Edge website here.
To build your own heavy weapons team, you can pick up the Master Handler and SecDef sprues along with the rest of the Maelstrom's Edge model range from the webstore here.
As always, feel free to pop along and share your work, or ask any Maelstrom's Edge- or hobby-related questions on the Comm Guild Facebook page!
For other Maelstrom's Edge modeling articles, including tutorials and walkthroughs of a wide range of different building and miniature projects, check out the article roundup here.
Terrain Spotlight: 'Honest' Pete's Trading Post
Posted on Monday Sept 10, 2018 at 06:00pm in Tutorials
- by Iain Wilson
A few weeks ago, I picked up a couple of packs of scifi shipping containers from a company called 'Laser Cut Card'. They produce a range of different vehicles and building kits that are laser cut out of stiff cardboard, which are much cheaper and easier to work with than the more common MDF kits, and are surprisingly sturdy when assembled. I built four of the six containers I received as normal shipping containers, but then couldn't resist doing something a little different for the fifth one. And so for this week's modeling spotlight, I'm running through the construction of 'Honest' Pete's Trading Post!
The shipping containers come flat-packed in a set of three, with some pictorial building instructions on the back of the package insert, but assembly is essentially to roll a sheet of pre-scored card into an octagonal tube and then glue other bits onto the outside of it. I assembled mine with superglue, although you could use wood glue if you wanted to allow a little more working time to make sure you have everything lined up.
Obviously this wasn't going to be a particularly large shop, so the idea was to have a servery-style counter and awning rather than have customers go inside. So I began by cutting one of the large sections off the main body piece of the container, and then gluing the ends on to the result sideless tube.
A shop needs somewhere to put their merchandise, so I threw together a set of shelves from thin plasticard, to run along the back wall of the container. An angled bottom on the uprights allowed the shelves to sit flush against the container side.
Next up I cut another couple of strips of plasticard to create a counter, about a third of the height of the space in the container wall, and glued this in place.
For the finishing touches, I cut some 'concrete' stands for the container out of 5mm foamcore. These serve to lift the container up very slightly to allow a little extra head-clearance for the awning, and make the structure look more stable. The exposed foam center was sealed with a generous coat of PVA glue so that it wouldn't dissolve when hit with spray paint.
I added some corner reinforcing to the bottom of the front edge of the awning piece using some scrap card pieces, and built some corner support posts using the small pipe fitting from the Maelstrom's Edge terrain sprue, some plastic tube and a couple of lengths of plastic cut from the sides of the terrain sprue itself.
Finally, I took a large pipe fitting from the terrain sprue and added a fan cut from a piece of thin plasticard. I trimmed the edges of the pipe fitting away so that it would fit neatly over the circular detail on the roof of the container.
At this point, the trading post was looking like this:
With an MDF base added, and some paint on:
The sign on the awning was a last-minute addition. I was originally going to have the trading post sign on the front of the counter, but realised that this wouldn't be hugely visible on the gaming table, so built a quick rooftop sign from some more scraps of card. I also added a mesh grill above the counter after painting inside the container, to make the interior of the store less accessible.
The container was sprayed with black and then Army Painter Army Green, before being sponge-weathered with Vallejo Heavy Charcoal and dirt weathering drybrushed into the creases with Vallejo Beasty Brown. The text for the signs was created in Gimp, printed, and glued on prior to weathering so that it would match the rest of the container.
I added grafitti on the back and sides of the container to give it a little character and to make sure that all the interesting bits weren't on the front.
The grafitti was sketched in with a black fineliner pen, and then painted in whatever colours seemed appropriate.
The roof was left plain, with just the weathering to break up the green.
As an extra little detail, I printed up a shipping carton and some bottle labels using Gimp, adapting the fronts I made for my Vending Machine templates a few weeks back (article here). The shipping carton was cut and folded, and then weathered with a little Army Painter Soft Tone, while the bottle labels were glued to some bottle bombs taken from the Broken Infantry weapons sprue with their rag wicks cut off.
And with that, 'Honest' Pete's is ready for the table!
You can pick up the Maelstrom's Edge terrain sprue along with the rest of the Maelstrom's Edge model range from the webstore here.
As always, feel free to pop along and share your work, or ask any Maelstrom's Edge- or hobby-related questions on the Comm Guild Facebook page!
For other Maelstrom's Edge modeling articles, including tutorials and walkthroughs of a wide range of different building and miniature projects, check out the article roundup here.
Tags: buildings conversion modeling painting spotlight terrain terrainsprue tutorial walkthrough
Conversion Spotlight and Rules: Broken Skyboarders
Posted on Monday Sept 03, 2018 at 06:00pm in The Broken
- by Iain Wilson
Back when the plastic Broken Infantry kit was released, I cobbled together a conversion of a broken warrior riding a hovering skateboard-type affair, which featured in my 'Easy Broken Rabble Conversions' article. At the time, it was just something made for a little fun, but I found myself thinking that this would make for a cool unit option for the Broken, and so decided to sit down and write up some rules for them. Below you''ll find some ideas for building your own skyboarders using asorted components and some plasticard, and a link to the (unofficial) rules card to use them in your own Maelstrom's Edge games!
The primary consideration when putting together any sort of vehicles for the Broken is that they rely on scavenging and trading for whatever they can get, for the most part. As a result, there is very little uniformity in clothing and equipment, and I really wanted to carry this across to the skyboard unit. This meant coming up with three different designs for the three models in the unit, although you could just as easily stick with a single design and custimise them with additional bits and pieces stuck on, or simply with individualised paint schemes on the boards.
The first board is the one I build for the original article. I didn't take any in-progress pics of this at the time, but it's a fairly basic constructions - I glued two rectangles of textured plasticard together for the board itself, and then took four turbines (two left and two right) from Epirian Firefly drones, cut away the mounting pins and glued them onto the sides of the board. The rider was assembled from standard broken parts, posed to look like he is balancing on the board, which didn't actually require any converting.
My second board was also based on Firefly turbines, but this time I used two of them with the mounting pegs and trailing wings removed with a sharp hobby knife, as below:
I measured out the board on a piece of 2mm plasticard, allowing space for the turbines at either end with room for the rider to stand in between them. Then I drilled out holes the size of the turbines using a spade bit - a 10mm bit was very slightly too small, but was all I had. A little sanding after drilling the hole pushed it out to the right size.
I cut the board shape out, sanded down the edges, and glued the turbines in place in the holes. I also added a 'motor' piece using the heat shield cut from a torch (flamethrower) and a trimmed down overcharged powercell, but found on the Broken Infantry sprue.
For the final board, I made use of a part of a pipe fitting piece I had left over from the Maelstrom's Edge terrain sprue, from a building project a while back. I had cut through the pipe fitting to make it shorter, which left a nice circular piece that looked just perfect for a turbine surround. I cut a matching hole in a piece of 2mm plasticard using a 12mm spade bit, and then cut the plasticard to the shape I wanted.
I made the turbine fan itself out of a circle of 1mm plasticard, and added a circle of mesh to go over the top side of the hole, and a strut to hold the fan, using an injection point cut from an old model sprue. With all of this glued in place, I finished up with another overcharged powercell added for some sort of nod towards functionality.
After building riders for the two new boards, again just using components from the Broken Infantry sprue with minimal modification, I drilled holes in the bottoms of the boards to attach flight stems at suitably jaunty angles. With some paint thrown on, the skyboarder unit wound up looking like this:
Obviously, this is only a starting point - you can let your imagination out for a run and come up with different skyboard designs using whatever components you have on hand. The sky's the limit! (Sorry...)
As promised back at the start, I write up a rules card to include these guys as a Vanguard option in your Broken force. You can find this in the Force Builder section of the Maelstrom's Edge website here.
To build your own Skyboarders, you can pick up the Broken Infantry kit along with the rest of the Maelstrom's Edge model range from the webstore here.
As always, feel free to pop along and share your work, or ask any Maelstrom's Edge- or hobby-related questions on the Comm Guild Facebook page!
For other Maelstrom's Edge modeling articles, including tutorials and walkthroughs of a wide range of different building and miniature projects, check out the article roundup here.
New Epirian Resin Release: Contractor Drones!
Posted on Sunday Sept 02, 2018 at 11:19am in The Epirian Foundation
A reinforcement for the Epirian Foundation crawls into the online store this month, with the release of the Epirian Contractor Drone. Providing a more stable and reliable platform than human troops, Contractor Drones are used in Epirian forces to add heavy firepower or specialised tactical options to Contractor units.
The Contractor Drone changes the way Contractor units are structured. Instead of having a single Contractor Unit, we're introducing 4 different types of Contractor squads which are differentiated by the type of drone that accompanies them. This current Drone has parts to use it with the new Contractor Defender unit and Contractor Scout unit, with more drone variants and associated Contractor unit types to follow later on.
This resin kit is comprised of a Contractor Drone chassis, and optional parts to equip it with a Maglock Chaingun, linked Cluster Missile Pods or linked Flakk Guns, for inclusion in a Contractor Defender unit, or a Resupply Package to supplement a Contractor Scout unit. You can find it in the Maelstrom's Edge webstore here!
The rules cards for these units will be online very soon, but in the meantime, here's a look at the rules for the new units:
CONTRACTOR DEFENDERS
FACTION:Epirian Foundation
UNIT TYPE:Core Unit
POINTS:6 pts
Full Unit Profile:
Contractor:MV 7, EVS 4, SKL 3, AV 3, MAS 2, FOR 1, WP 2, Type: Infantry (Human)
Contractor Team Leader:MV 7, EVS 4, SKL 3, AV 3, MAS 2, FOR 1, WP 3, Type: Infantry (Human, Squad Leader)
Contractor Drone:MV 7, EVS 4, SKL 3, AV 3, MAS 2, FOR 1, WP 1, Type: Infantry (Robot, Slaved)
UNIT SIZE: 1 Contractor Team Leader & 2 Contractors.
EQUIPMENT: Maglock Assault Rifle & Maglock Guardian Pistol.
Contractor Drone: 2 linked Flakk Guns.
ABILITIES: None.
OPTIONS:
• May add up to 2 more Contractors: +2 pts each.
• May replace up to 2 Contractors with Contractor Drone: +2 pts each.
• Up to 2 models may replace Maglock Assault Rifle with Maglock Assault Rifle & Aux Grenade Launcher (Choke & Emp Rounds): +2 pts each.
• Contractor Team Leader may replace Maglock Assault Rifle with:
- Shock Baton: +0 pts.
- Shock Maul: + 1 pt.
• Contractor Drone may replace 2 linked Flakk Guns:
- 2 linked Cluster Missile Pods: +1 pt.
- 2 linked Strike Missile Pods: +1 pt.
- Maglock Chaingun: +1 pt.
Heavy Defenders: A Contractor Defender unit with 2 Contractor Drones is an [Anvil] selection.
Unique Abilities:
None.
Unique Equipment:
None.
CONTRACTOR SCOUTS
FACTION:Epirian Foundation
UNIT TYPE:Vanguard Unit
POINTS:7 pts
Full Unit Profile:
Contractor:MV 7, EVS 4, SKL 3, AV 3, MAS 2, FOR 1, WP 2, Type: Infantry (Human)
Contractor Team Leader:MV 7, EVS 4, SKL 3, AV 3, MAS 2, FOR 1, WP 3, Type: Infantry (Human, Squad Leader)
Contractor Drone:MV 7, EVS 4, SKL 3, AV 3, MAS 2, FOR 1, WP 1, Type: Infantry (Robot, Slaved)
UNIT SIZE: 1 Contractor Team Leader, 1 Contractor & 1 Contractor Drone.
EQUIPMENT: Maglock Assault Rifle & Maglock Guardian Pistol.
Contractor Drone: None.
ABILITIES: Scout.
Contractor Drone: Resupply Package, Scout.
OPTIONS: • May add up to 2 more Contractors: +2 pts each.
• Up to 2 models may replace Maglock Assault Rifle with Maglock Assault Rifle & Aux Grenade Launcher (Choke & Emp Rounds): +2 pts each.
• Contractor Team Leader may replace Maglock Assault Rifle with:
- Shock Baton: +0 pts.
- Shock Maul: + 1 pt.
• Contractor Drone may replace Resupply Package with Recon Package: +0 pts.
Unique Abilities:
Resupply Package: (squad ability) Friendly units within 6" of this unit (including itself) may re-roll one failed roll to hit during a round of shooting.
Recon Package: (squad ability) All of this unit's attacks have the [b]Paint (4+)[/b] ability, not including CQ attacks.
Unique Equipment:
None.
As you can see, the Contractor Defender unit basically replaces the existing Contractor unit type, with the optional addition of one or two heavy weapon drones. Note that this includes the option to equip the drones with Strike missiles, which aren't included in this release - there will be a conversion article for this option coming very soon!
The Scouts are the first new unit type, adding another Vanguard option to the Epirian line-up. With the new and planned units, you will soon have the ability to field an entire force of Contractors, although you can obviously still mix these new units with the existing bot units as well!
The new Contractor Drone is available now - You can find it in the Maelstrom's Edge webstore here!
Terrain Spotlight: PVC Pipe and PC Fan Cooling Towers
Posted on Monday Aug 27, 2018 at 06:00pm in Tutorials
- by Iain Wilson
On one of my periodic rambles through the plumbing department at the local hardware store (because how else would I spend my weekends?) I came across some pipe fittings that I thought would be just perfect for some different line-of-sight-blocking terrain to break up the sea of square buildings on my urban table setup. With the addition of a couple of old computer fans and a few components from the Maelstrom's Edge terrain sprue, I had a trio of cooling towers ready for the table.
The part that I used for the main body of the tower is a 'round socket downpipe' intended for rain guttering on a house.
As the downpipe is made of PVC, and is quite shiny, I started out by giving it a light sand with some fine grade sandpaper. This provided a better surface for glue and paint to adhere to, and also allowed me to remove the embossed manufacturer logo on the side.
Cooling towers tend to be largely featureless constructions of plain concrete, but that's a bit boring for a gaming table. So I grabbed four reinforcing struts from the Maelstrom's Edge terrain sprue, and chopped off the two square sections from the end, so that the remaining length would fit neatly onto the wider portion of the downpipe. Then I glued the pieces on using an 'all plastics' superglue, which is a two-part superglue that has the normal glue plus a 'primer' that goes on first to help strengthen the bond. For a more flush fit, I could have sanded down the side of the downpipe where the strut pieces would sit to form a flat strip on the curved surface, but the struts are narrow enough that the gaps that result from gluing them straight to the curved side aren't really noticeable, so I didn't bother.
To add some detail to the inside of the tower, I dug out an old computer fan from my box of assorted 'probably use this for terrain one day'
On the inside of the downpipe, there is a ridge where the thinner and thicker sections meet. I cut a piece of 2mm thick plasticard to fit neatly onto that ridge, providing a platform for the fan to sit on. I glued the plastic strip in place, but left the fan unglued for now, to make painting easier.
Painting went through a process that is probably familiar to anyone who has been following these articles. I started by undercoating with flat black spray.
Next I sprayed with a medium grey, and to add some texture to the flat surface added a light spray of light grey while the first coat was still wet. This creates a nice, dappled, concrete-like effect. As I only had gloss grey sprays on hand, once the grey was dry I gave the tower a generous coat of Testors spray lacquer. This both kills the gloss and protects the paint from scratching off the PVC as easily.
Next, I gave the strut pieces a coat of Vallejo Beasty Brown...
...followed by a quick drybrush of P3 Pig Iron...
...and finally a wash of Army Painter Strong Tone. While all of this was going on, I also cut a square of Masonite for a base, sprayed it grey, drybrushed with light grey and white, and added some hazard stripes that I created in Gimp and printed out. These were glued in place with PVA glue, and then weathered with a sponge and some medium grey (you can find a tutorial on sponge weathering here).
The fan was sprayed with some Rustoleum Aged Brass, and then given a light drybrush with Pig Iron, before being glued in place inside the tower.
The tower was glued onto the base - I lightly sanded the bottom of the downpipe to remove any spray paint, and then used the 'all plastic' superglue again. Finally, some weathering was added with a large drybrush and some more Beasty Brown.
I had bought three downpipes, but found that I only had two computer fans that matched. Rather than use a mismatching fan in the third tower, I decided to make one battle-damaged by cutting away a chunk of one side. I left a part of the fan platform to provide a place for a model to stand, and glued the pieces of the tower side inside and underneath the platform to give it some support. Obviously the tower was hit with some sort of implosion device, or a cleanup crew sorting out the damaged tower just threw all of the rubble inside to get it out of the way until the tower could be replaced.
The three towers together, ready for gaming:
To build your own cooling tower, you can pick up the Maelstrom's Edge terrain sprue, or any of the rest of the Maelstrom's Edge model range, from the webstore here.
As always, feel free to pop along and share your work, or ask any Maelstrom's Edge- or hobby-related questions on the Comm Guild Facebook page!
For other Maelstrom's Edge modeling articles, including tutorials and walkthroughs of a wide range of different building and miniature projects, check out the article roundup here.
Modeling Spotlight: Karist Shadow Walkers
Posted on Monday Aug 20, 2018 at 06:00pm in Tutorials
- by Iain Wilson
I'm taking a little break from new releases this week to have a look back at another of the original release units - The Karist Shadow Walker!
The Shadow Walker sprue contains two different torsos (twisted in different directions from the front) and two of each arm in different poses. This allows you to create two very different, dynamically posed models from those parts. You can find the general assembly guide on the Maelstrom's Edge website here.
Somewhere along the design process, the sprue went from being intended to create a single model to including parts for two full models with the lack of only a second head. Luckily, several other Karist kits come with extra heads, so it's not too difficult to purloin a leftover in order to build that second Walker. The right hand model below uses the bare head from the Karist Trooper sprue, and there's another bare head available on the Faction Expansion Sprue.
Alternatively, the resin Karist Heavy Weapons set comes with two troopers and three heads - two helmeted, and one bare. The helmeted heads are very similar in style to the Shadow Walker's, with a couple of extra eye lenses. The model below has also been reposed slightly, with the right arm extended and filled with 'green stuff' putty, and the right shin repositioned so that his front foot matches his line of fire.
While we're reposing our models, it is really easy to add a little more motion to the pose by cutting off the bent leg just below the knee and reattaching it at a sharper angle and off the ground, to create a 'lunging' pose. The below Shadow Walker has clearly just Rifted in and is charging into the action:
Borrowing parts from different kits does, of course, work both ways. The Karist Praetorians below were given Shadow Walker legs to help them stand out a little from regular troopers and to create a more dynamic pose than is possible from the Trooper legs. The added loincloths are from the Faction Expansion sprue.
As I was working through these models, I found myself wondering what it would look like if Shadow Walkers had their own specialised mini-factions. From there, I wound up with the 'Shadow Dancer', carrying a regular cybel blade on place of the usual Shadow Walker's wrist-mounted version, and with an added prehensile, mechanical topknot which, I expect, would whip around as the Dancer flips and whirls about his opponents, and shoot out toxic darts or hallucinogenic gas from the emitter on its tip. The cybel blade was taken from the faction expansion sprue, and the topknot made from a piece of guitar string and the muzzle from a Karist radwave emitter.
By contrast, the 'Shadow Stalker' eschews close range combat where possible, opting instead to carry out his work from afar with his nox rifle. This model has an assault rifle arm taken from the new Broken Forsaken Tech Chieftain model with the bayonet and muzzle removed and a silencer made from a length of plastic tube attached. The head is the bare head option from the Karist Heavy Weapons pack.
I don't have a name for this next one yet (feel free to leave suggestions in the comments!) but how about a Shadow Walker sect that has found an alternative to teleporting? Using arcane science to fuse Angel DNA to the human form, this Shadow Walker variant is equipped with void-gel wings!
Of course, if you're going to have bizarre sub-sects of the Karist Walker breed, it wouldn't be too surprising to have a clandestine offshoot of the regular Kaddar priesthood overseeing them. And so the Kaddar Noctis was born - like the flying Walker above, this model fuses Human and Angel DNA, with the traditional Shadow Walker cybel blade replaced with an Angel's void-gel tentacles. The legs and torso are from the Kaddar Nova sprue, with most of the Cybel reactor removed and replaced with a modified cybel glaive head from the Faction Expansion sprue. Arms and head are from the Shadow Walker sprue, with the small tentacle parts taken from a pair of Mature Angel models.
To add some sneaky, pointed 'negotiation' to your own Karist Force, you can pick up the Shadow Walker along with the rest of the Maelstrom's Edge model range from the webstore here.
As always, feel free to pop along and share your work, or ask any Maelstrom's Edge- or hobby-related questions on the Comm Guild Facebook page!
For other Maelstrom's Edge modeling articles, including tutorials and walkthroughs of a wide range of different building and miniature projects, check out the article roundup here.
Tags: conversion converting karist modeling models spotlight
Terrain Tutorial & Templates: Vending Machines
Posted on Monday Aug 13, 2018 at 06:00pm in Tutorials
- by Iain Wilson
Someone on the Maelstrom's Edge Facebook Group page this week was looking for templates for making vending machines. While I have put together a bit of a range of assorted scatter terrain, this was something that I hadn't got around to yet, and so this seemed like a perfect excuse to have a look into it. As a result, I wound up spending a chunk of this week playing around with some cardboard and foamcore, and sketching up some panel designs in Gimp, with the end result below:
I have put together two different designs, which you can download from the Maelstrom's Edge website here. The first is a basic, square box design, while the second is a slightly more complicated build with a rounded front. The download also includes a sheet of assorted fronts for both types of machine. My original fronts were all somewhat tongue-in-cheek, because I like to amuse myself by inserting random bits of dubious humour into my gaming tables. As I realise that this isn't to everyone's taste though, I have also included a set of less silly, generic fronts. Of course, you could also just make your own, using mine as a template.
I recommend printing the templates directly onto thin card - I used some old manilla folders cut to A4 size, which is light enough to go through most inkjet printers but solid enough when assembled to survive on the gaming table. Alternatively, you could print on paper and then glue the templates to thin card and assemble from there.
The page with the fronts on can be printed on paper, although I recommend using a good quality printer paper as glue can bleed through and affect the colours on cheaper, thinner paper.
ASSEMBLY
The square machine is extremely easy to assembly. Just cut along all of the solid lines with a sharp hobby knife, and score lightly along the dotted lines without cutting all of the way through. Then fold along the dotted lines and glue the tabs inside the resultant box. Superglue is fine for this if you are confident of getting everything lined up right, or you can use PVA glue to give yourself a little more working time. The small rectangle piece is glued inside the front, over the rectangular dispenser hole.
Then glue the tabs on the bottom of the vending machine onto a piece of MDF or masonite, cut just a little larger than the bottom of the machine - I used some 3mm MDF left over from a building kit, cut to 35mm x 30mm. This helps to give the machine some weight, to help it stay put on the gaming table.
It's a good idea to paint the machine at this point, and then glue on the front after cutting out the white rectangle. Then grab a control panel from the Maelstrom's Edge terrain sprue, trim off the thin strips on the sides as below, and then glue in place above the dispensing slot - it's up to you whether you paint the panel before or after gluing it in place.
The end result will look something like this:
For the rounded front machine, you will need a little foamcore or MDF, to form the top and bottom of the machine. This avoids trying to form a curved cardboard surface using a series of little tabs to hold everything together on the curve - that's fiddly and never looks quite right.
As with the square machine, cut out the template by cutting along the solid lines, scoring lightly on the dotted lines, and then folding. There is one dotted line that folds the opposite way to the others - this line is grey instead of black. To get this line to fold in the right place, place a ruler along the line and push from the other side to crease the card up along the ruler's edge. As with the square version, there is a small rectangle that glues inside the dispensing slot.
The separate base template is used as a tracing guide to mark out your foamcore or MDF. You will need to mark out two of these for each machine, and then cut them out.
Once you have cut out the base pieces, fold the machine around them without any glue to check the fit, and trim up or recut them as necessary to get a snug fit. Then glue in the bottom piece as pictured below. Note: If you are using foamcore, you can't use superglue on the exposed foam edges. Use PVA glue instead. It's fine to use superglue to glue the bottom flaps to the paper bottom of the foamcore, though.
Then glue the top piece in flush with the top edge of the machine's sides, as below. As before, use PVA glue here as you're gluing to the foam.
You can then add a wood base and control panel as for the square machine above, paint, and then add a front panel onto the curved face of the machine. The end result will look something like this:
If you would like to have a go at building your own vending machines, the templates are here, and you can pick up the Maelstrom's Edge terrain sprue or any of the rest of the Maelstrom's Edge model range, from the webstore here.
As always, feel free to pop along and share your work, or ask any Maelstrom's Edge- or hobby-related questions on the Comm Guild Facebook page!
For other Maelstrom's Edge modeling articles, including tutorials and walkthroughs of a wide range of different building and miniature projects, check out the article roundup here.
Tags: terrain terrainsprue tutorial
Modeling Spotlight: Converting Broken Chieftains
Posted on Monday Aug 06, 2018 at 06:00pm in Models
- by Iain Wilson
This week we released the second of our resin Forsaken Chieftain models for the Broken faction. These two models allow Chieftains to take a few extra options that weren't available from the plastic kit, and are a wonderfully characterful pair of models. However, since I find it physically painful* to assemble models the way they were intended to be built, I thought I would take this opportunity to slice a few of them into pieces and see what interesting conversion possibilities they opened up.
*May not be an actual medical condition, but why take the chance?
Built straight out of the package, the two models each come with a pair of weapon options. The 'regular' chieftain has a xeno spotter perched on his/her (it's deliberately ambiguous) raised right hand, and also has a two separate left forearms, one with a poisoned blade and the other with a trophy melee weapon. The 'tech' chieftain has two separate right arms, with a custom beam blastgun and a custom slug rifle.
You can easily double-up your command options by using the leftover weapons on plastic Broken Rabble bodies. On the below models, I equipped one with the leftover slug rifle by slicing off the locator peg and gluing it on in place of a regular plastic arm. The other has the leftover trophy weapon in place of the plastic forearm, which just requires cutting the lower arm off just below the elbow and gluing the weapon arm piece in its place.
Parts can also be mix-and-matched onto the resin Chieftain models to switch around the available options a little. On the below tech Chieftain model, I left off the resin right arm and equipped him with a plastic arm and beam pistol from the Rabble sprue, and cut off his left arm at the elbow and attached a trophy weapon from the other Chieftain model.
On the regular Chieftain below, I replaced the right forearm with a plastic one, and added a regular blastgun from the Rabble weapon sprue. I also cut off a plastic left forearm and added a grenade.
For a more action-posed Chieftain, I cut the legs off this one at the waist, using a razor saw. Then I glued on a pair of running legs from the Rabble sprue, added a slightly modified slug pistol hanging off the belt, and glued the xeno spotter on tilted just a little bit forwards.
Since I now had a pair of leftover Chieftain legs, I did the obvious thing and glued them to a Karist heavy weapon trooper torso I had left over from a previous conversion. This Chieftain has the right arm with custom beam blastgun from the tech Chieftain, and a left arm and alien head from the Rabble sprue.
Mixing things up a little more, I added a xeno spotter and trophy weapon to a Broken Sig Jammer body, to create a less ostentatious Chieftain model. A head and left hand from the Rabble sprue finished the conversion off nicely.
And finally, a Chieftain equipped with a trophy weapon from a more civilised age, which is apparently less clumsy and random than a blaster. The laser sword is made from an overcharged powercell from the Rabble sprue, with a cut-down blade stolen from a Star Wars figurine. I also cut the left arm off, carefully cutting around the cape so that a plastic arm would fit in neatly underneath it. This Chieftain will no doubt take to the battlefield and display his displeasure at the lack of faith shown by his underlings...
Hopefully, that's inspired you to have some fun with your own Chieftains. You can pick up the resin Chieftain models, the plastic Broken Rabble sprues, or any of the rest of the Maelstrom's Edge model range, from the webstore here.
As always, feel free to pop along and share your work, or ask any Maelstrom's Edge- or hobby-related questions on the Comm Guild Facebook page!
For other Maelstrom's Edge modeling articles, including tutorials and walkthroughs of a wide range of different building and miniature projects, check out the article roundup here.
Tags: broken chieftains conversion modeling models spotlight
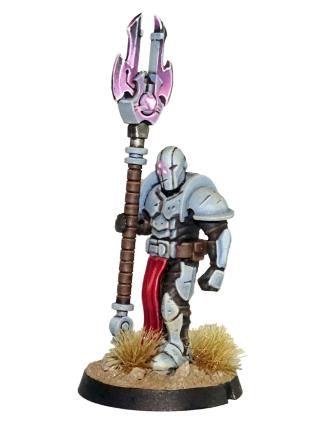
New Forsaken Tech Chieftain now available!
Posted on Thursday Aug 02, 2018 at 05:05am in The Broken
The Forsaken are commonly dismissed as simple, degenerate pirates, but the truth is that they usually attack only out of necessity. Piracy is many times the only way their community can survive a hostile galaxy: stealing food, fuel, ammunition and anything else of value they can get their hands on. The Forsaken rarely send out their forces en masse, knowing that a single crushing defeat could mean the end of their entire tribe's existence. Instead, they strike in small patrols, typically led by a Chieftain.
Though a Chieftain is granted his or her position of authority by The Assembly, they must first earn the respect of their fellow Forsaken to even be nominated. A Chieftain must be equal parts fighter, diplomat and cunning tactician. Knowing that their forces can never win a stand-up fight against a prepared opponent, a Chieftain leads his warriors to strike unseen from the shadows, quickly fading away before the enemy can root them out and respond in kind. Many an opposing force has underestimated the ingenuity of a Broken force led by a Chieftain, only realizing too late their folly, as improvised booby traps decimate their defensive positions and Broken secretly approach from their rear.
The appearance of a Chieftain can vary wildly both based upon the culture of their original homeworld, but also from that of the Broken Freeport they are now a part of. Chieftains tend to have slightly nicer clothing and equipment than standard Broken rabble, and many see it as almost their duty to show that even amongst the ranks of the Broken, an individual can still rise up and carry themselves with dignity and class. When the Broken do manage to defeat an enemy officer with particularly fancy clothing or an heirloom weapon, a Chieftain will confiscate these valuable items. A Chieftain wears these purloined treasures into battle, as both a reminder of their past victory, and to display their status as an iconic Broken leader.
This high detail monopose resin model comes with two different weapon options for the right hand - a customised slug rifle or a customised beam blastgun, and is available now from the webstore here! You can also find the updated rules for this model in the Force Builder section here.
