Terrain Tutorial: The Foam Ball Cactus!
Posted on Monday Feb 12, 2018 at 05:00pm in Tutorials
- by Iain Wilson
You may have noticed by now that I make a lot of buildings. Sometimes, though, it's nice to get away from the urban sprawl, and venture out into the untamed countryside where enemy troops may wind up being less scary than the native flora and fauna.
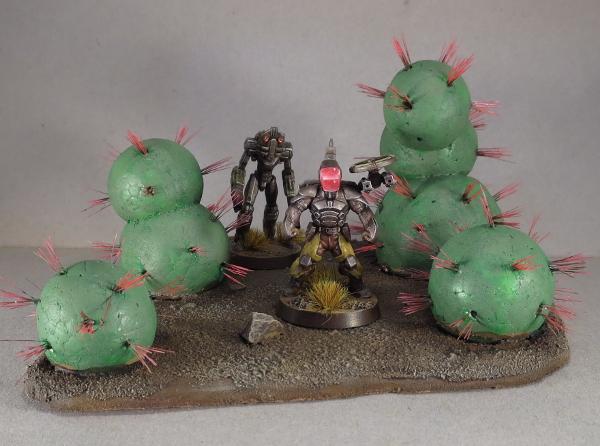
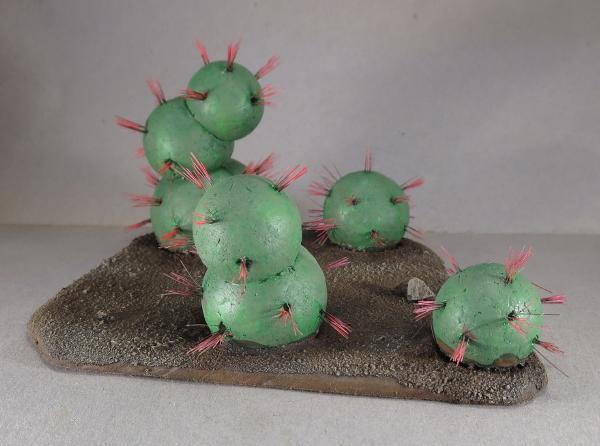
If you were gaming back in the '90s, you might be familiar with some of the scratch-built terrain that was featured in White Dwarf magazine back then. One of my favourites, and a staple on many a scifi gaming table back then, was the foam ball and toothpick-spine cactus. It was a little goofy, but also really easy to make and looked rather effective on the table in place of all those mass-produced train set trees. So I thought it might be fun to revisit the idea, and see what I could do to modernise it a little and maybe remove some of the danger of taking out an eyeball while checking line of sight. And so I came up with this:
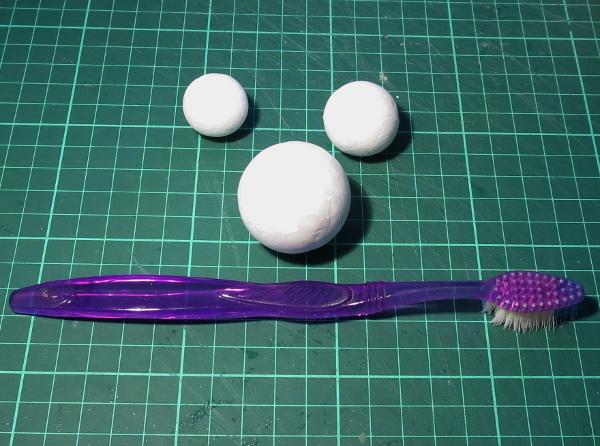
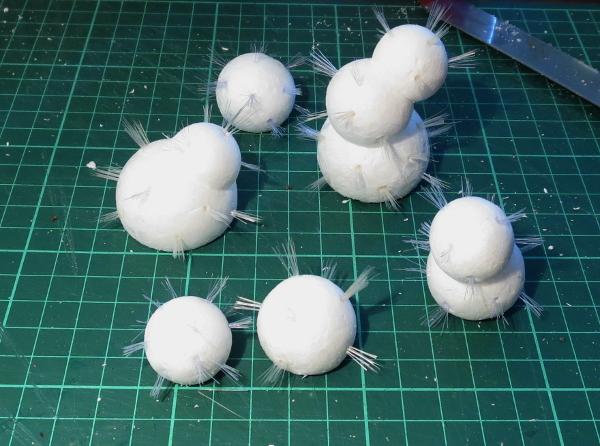
Staying true to the original, I found a bunch of different sized expanded polystyrene balls at a local discount store. To replace the old-school toothpick spines, I dug out an old toothbrush.
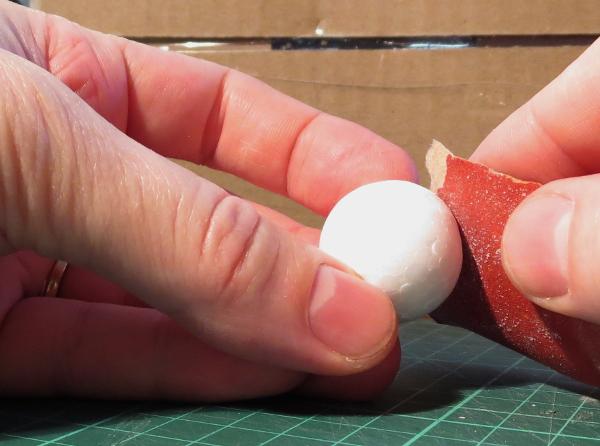
The first step is to give the foam balls a little touch-up with some fine sandpaper. This removes the mould line around the middle of the ball, and roughs up the outer surface a little to help the paint stick.
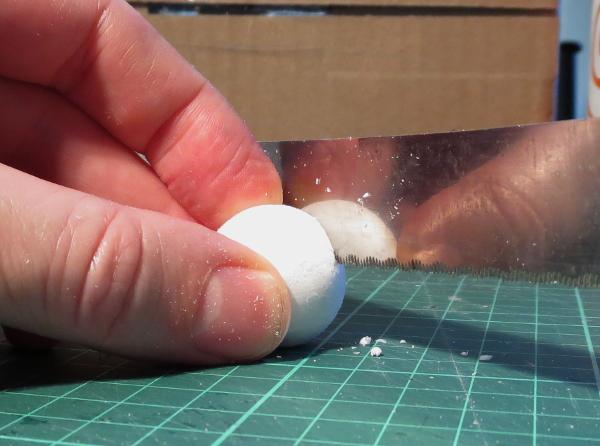
To make the ball easier to stick down to a base board, use a fine-tooth breadknife or other sharp knife to cut a slice off, making a flat surface for the bottom of the cactus.
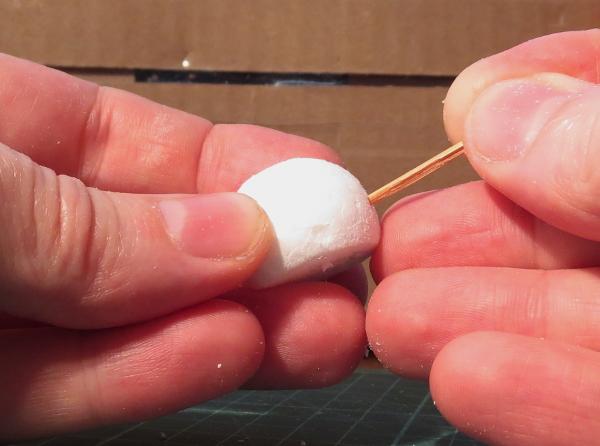
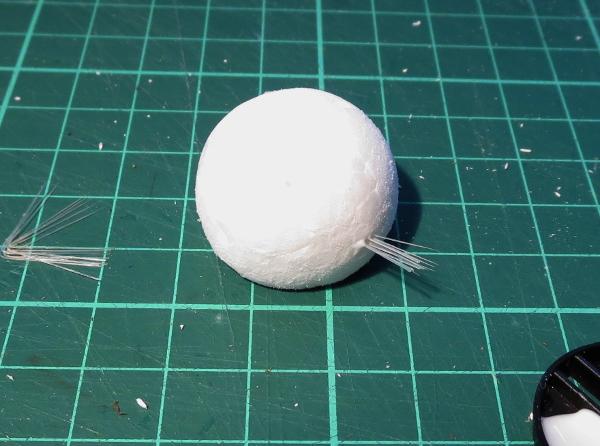
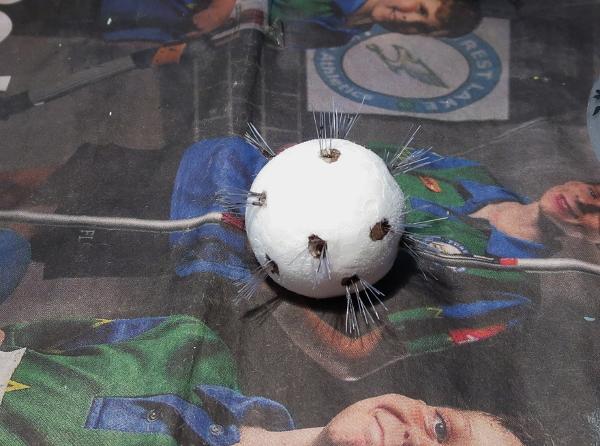
Next we need to pike some holes in the ball to add the spines. Serendipitously, I used a toothpick, but anything pointy will do the job. Make the holes at least 5mm deep, although it doesn't hurt if they go in further. They're spaced around the ball in rough layers, without being too neat about it - slightly haphazard spacing adds to the organic look.
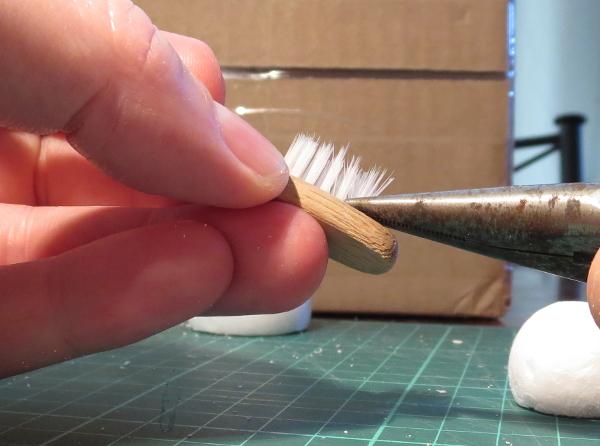
Toothbrush time! Take your toothbrush and, using a pair of pointy pliers, rip out a bunch of bristles. Try to hold them together - they tend to scatter if you're not careful when you let go.
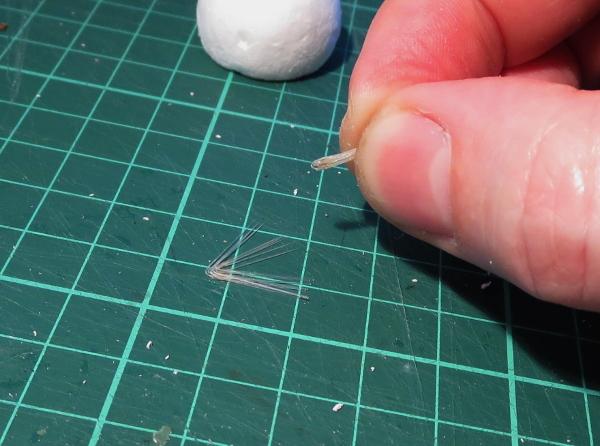
Depending on how many bristles are in a clump, you might want to split the clump into halves or thirds, or use the whole thing as a single clump of spines. It's entirely up to the look you want.
In most toothbrushes, there is a small piece of metal in the fold at the base of the bristles that anchors them into the brush. Tease this out and discard it, and then separate the bristles into the size clump you want, being careful to put the extras down so that they stay together for later.
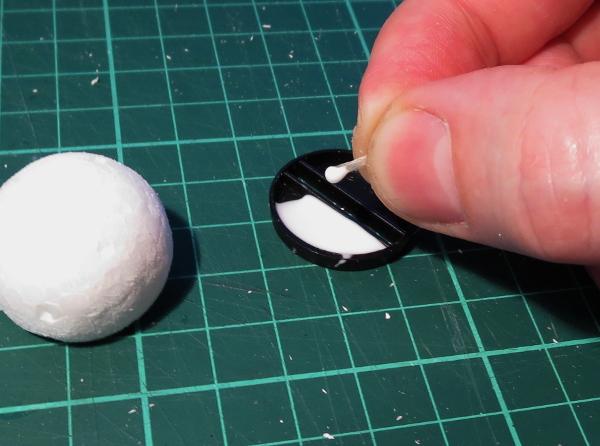
Dip the base of the bristle clump in some PVA glue, and then insert it into one of the holes in the foam ball. Mine have about half of the bristle inside the ball, to give them a good anchor and to stop them from splaying out too much.
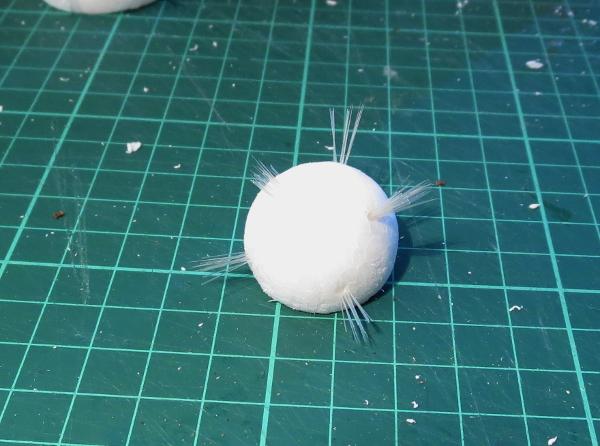
Repeat until you have all of the holes filled with bristles.
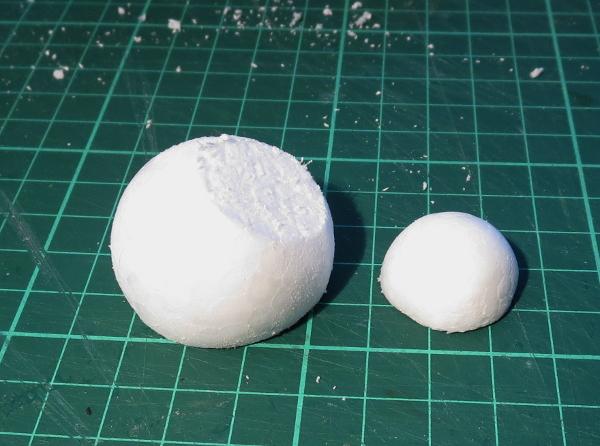
For an older cactus, you can add extra nodules by slicing off a section on the top of the first ball and gluing the flat bottom of another ball into place on top. Reinforce with a toothpick glued in the middle, if you want a little extra strength. When that's set, poke in the holes and add bristles as above.
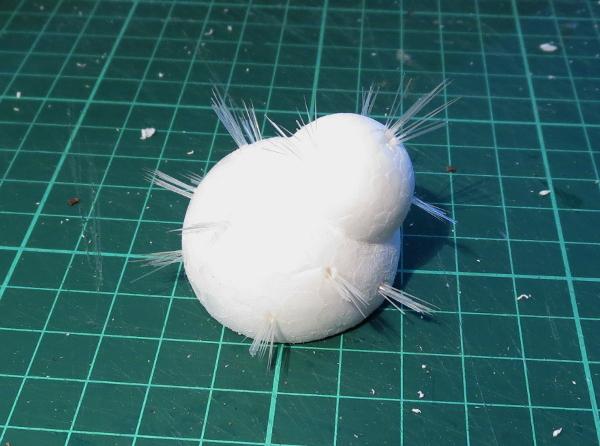
Mixing in some different configurations and different sized balls will help create a nice, varied look on the terrain piece.
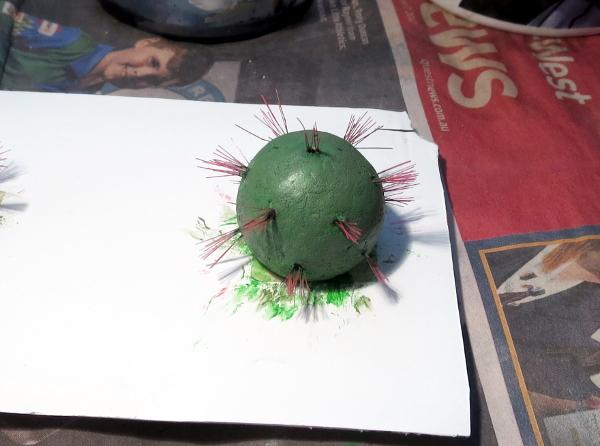
To paint, first work around the holes with a pointy brush and a dab of brown wash or thinned brown or green paint to mask the white interior of the holes. (If you're more forward-thinking than me, you could alternatively do this before you glue the bristles in, which might be a bit easier!)
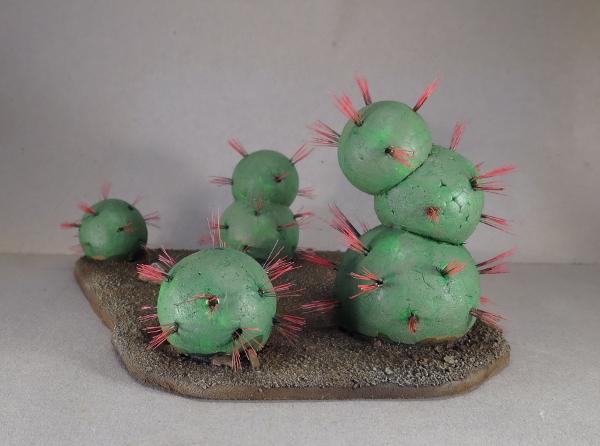
Then paint the rest. I've gone for standard green cacti, with red spines for some contrasting colour, but for alien flora you could obviously use whatever colours you please.
From there, glue your painted cacti onto a base board, and your cactus grove is ready for the table!
Do you have ideas for your own alien area terrain? We'd love to see them! Come along and share on the Comm Guild Facebook page.
For other Maelstrom's Edge modeling articles, including tutorials and walkthroughs of a wide range of different building and miniature projects, check out the article roundup here, and you can find the Maelstrom's Edge model range and boxed game in the webstore here.
Tags: scratchbuilding terrain tutorial
