Modeling Spotlight: Speedpaint SecDef
Posted on Wednesday May 18, 2022 at 05:00pm in Tutorials
 - by Iain Wilson
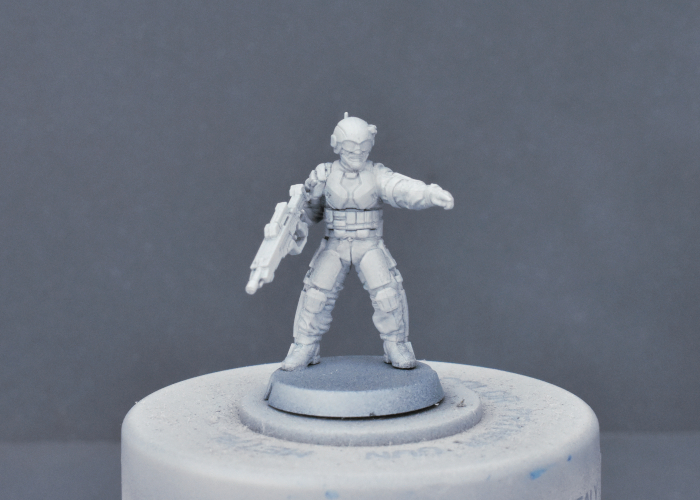
My long-awaited Army Painter Speedpaint Starter Set finally arrived last week, and I was impatient to give them a test run. I've had a bunch of plastic SecDef models assembled for a while, for a little side-project, and figured they would be perfect for the job. So I grabbed the first squad of models out of the hobby box and set to work!
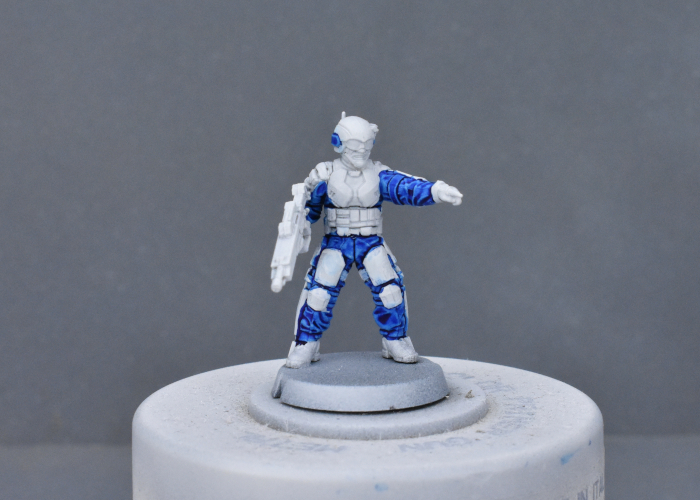
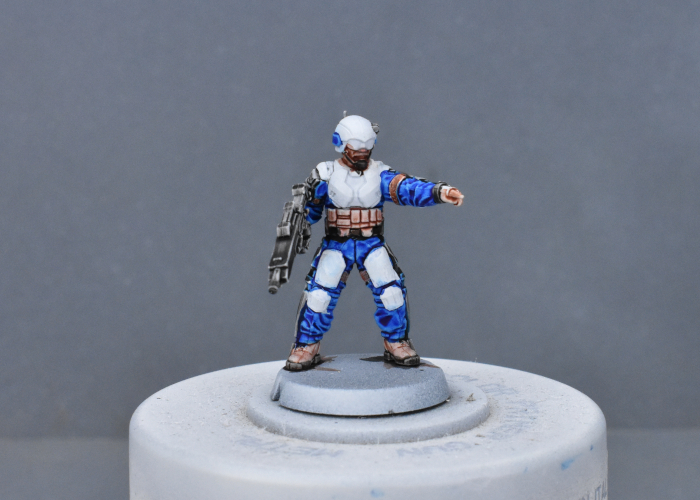
I started off with a basecoat of Army Painter Matt White spray. I did experiment on a couple of initial test models with a plain white basecoat and a zenithal base using white and purple, but decided that the zenithal basecoat didn't make enough of a difference to the end result to be worth the effort.
(A zenithal basecoat is where two layers of colour are used - a darker colour in the recesses/undersides of the mode, and a lighter layer sprayed down from above. This can be handy when combined with certain painting methods, particularly using thinner 'glazing' paints to accentuate shading and highlights.)
For the uniform, I went with Highlord Blue, applying to any visible cloth areas and trying to avoid too much spillover onto the armour plates. I also added the blue to the raised surround on the helmet.
After a quick touchup where necessary with some Matt White, I painted a layer of Hardened Leather over pouches, straps, boots, gloves and face, and then went back over the face with Crusader Skin. The double layer on the skin was to give a darker skin colour - my initial test showed the Crusader Skin to be a bit more washed out than I wanted, but layering it over the Leather gave a nice, dark tone.
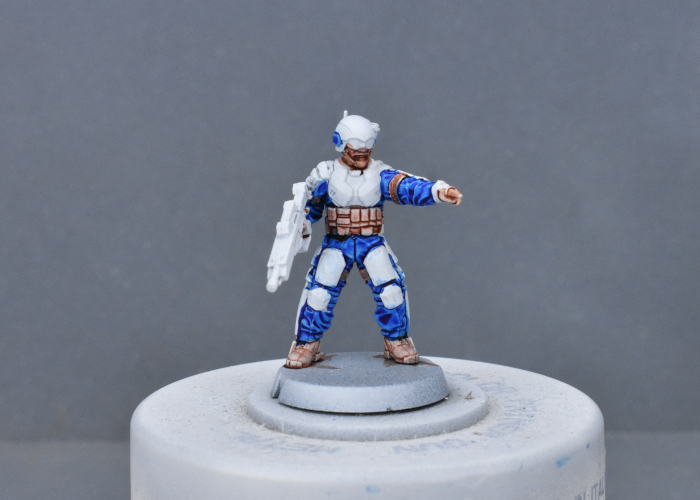
Next up, I painted over the weapon, belt, exoskeleton, and helmet commlink, targeter and chinstrap with Gravelord Grey.
For the armour plates and helmet, I went with a coat of Zealot Yellow. This settled nicely on the lower areas of the plates, providing a lovely contrast against the blue uniform.
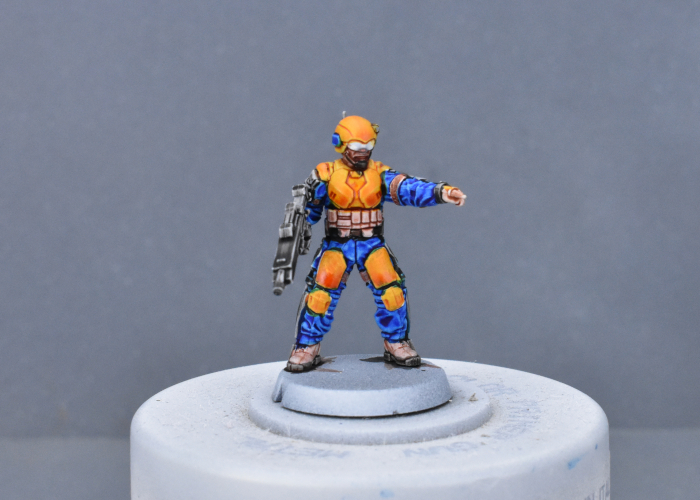
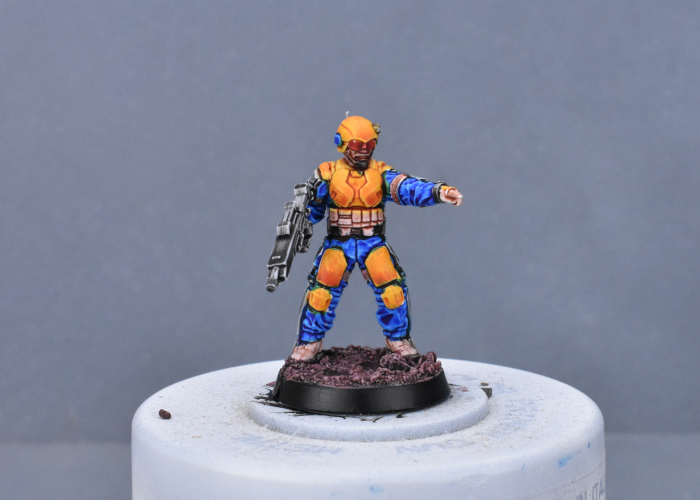
To finish up, I added some Blood Red over the goggles, and while that was drying added some gravel mix to the base. Without a dark brown in the starter set, I used a 1:1:1 mix of Hardened Leather, Blood Red and Hive Dweller Purple over the gravel, giving it a drybrush of Tanned Flesh and Ash Grey (regular acrylic paints) when it dried. With a quick run of Matt Black around the base rim and some white specular highlights on the goggles, he was ready for the table.
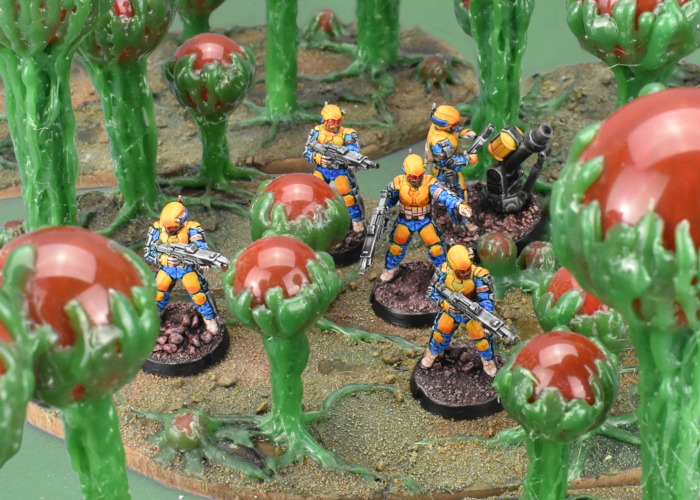
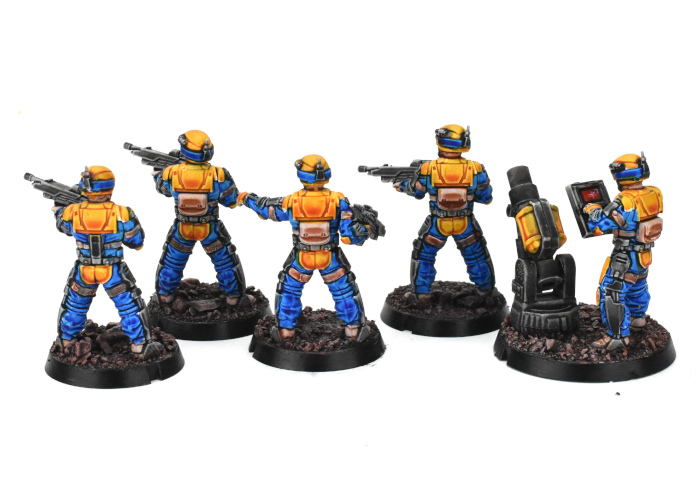
The unit assembled - regular SecDef models, with a custom made energy mortar using some plastic tubing and parts from the 2nd Maelstrom's Edge terrain sprue.
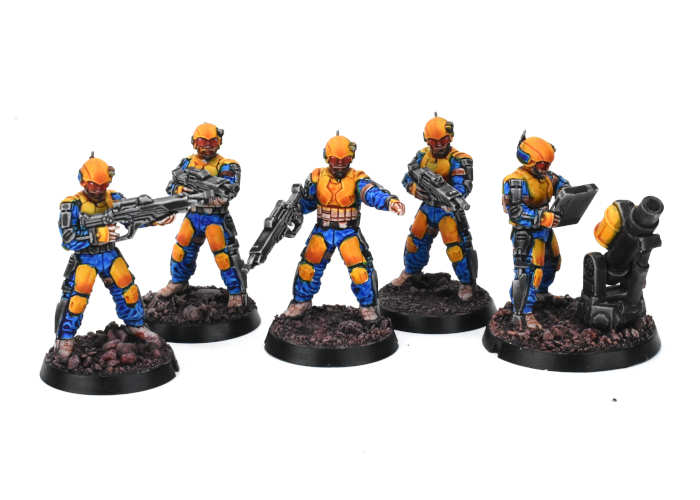
They're not perfectly neat, but for a quick, table-ready paintjob these paints are fantastic, giving some perfectly acceptable shading and highlights with a single coat. I'm looking forward to getting the rest of this force painted up!
To have a go yourself, pick up the plastic, multi-part SecDef kit from the Maelstrom's Edge webstore!
While you're there, you can download the V2 rules from the Trial Rules section of the Maelstrom's Edge website here. The Beta rules documents contain all of the rules for playing V2 games, but keep in mind that these are just 'preview' documents - some rules may be revised based on feedback, and the final layout including background material for the factions and the Maelstrom's Edge universe, artwork and other 'flavor' material is missing.
For other modeling ideas, tutorials, army spotlights and conversion walkthroughs, check out the Hobby section of the Maelstrom's Edge website here.
What are you working on? We would love to see your models and terrain in the Comm Guild Facebook group!

Like this? Like us on facebook to see more...