Entries tagged [spotlight]
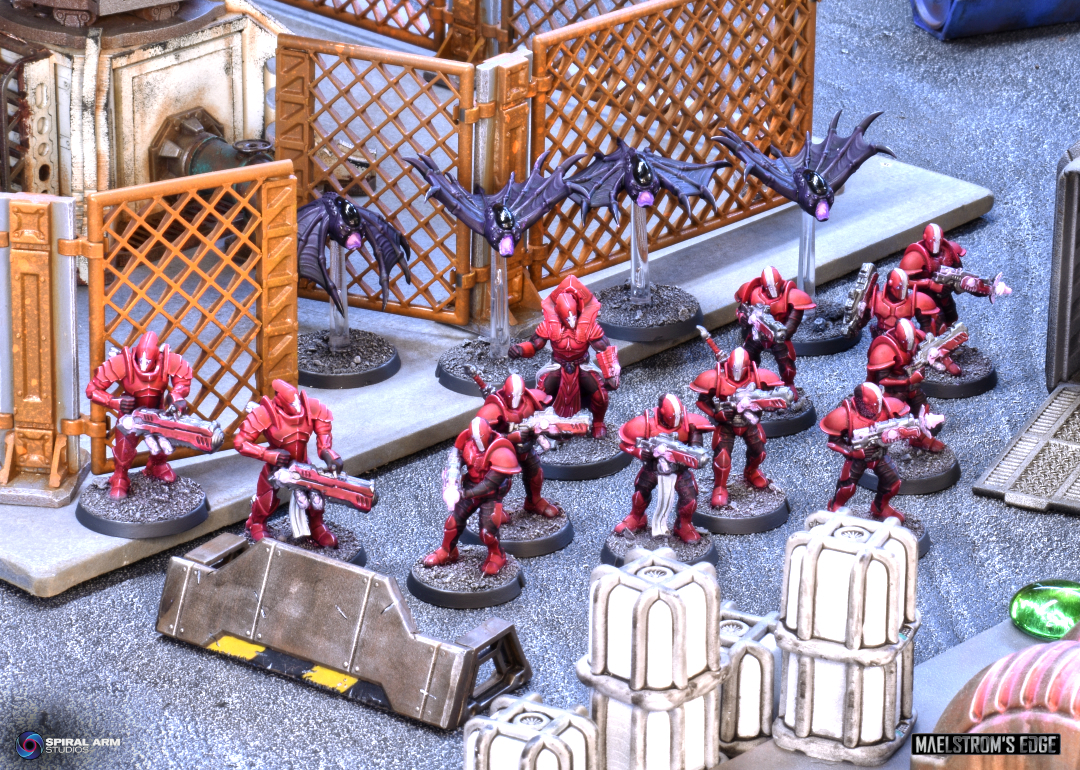
Force Spotlight - 50 point Karist Enclave Starter Force
Posted on Friday Nov 28, 2025 at 05:00pm in Models
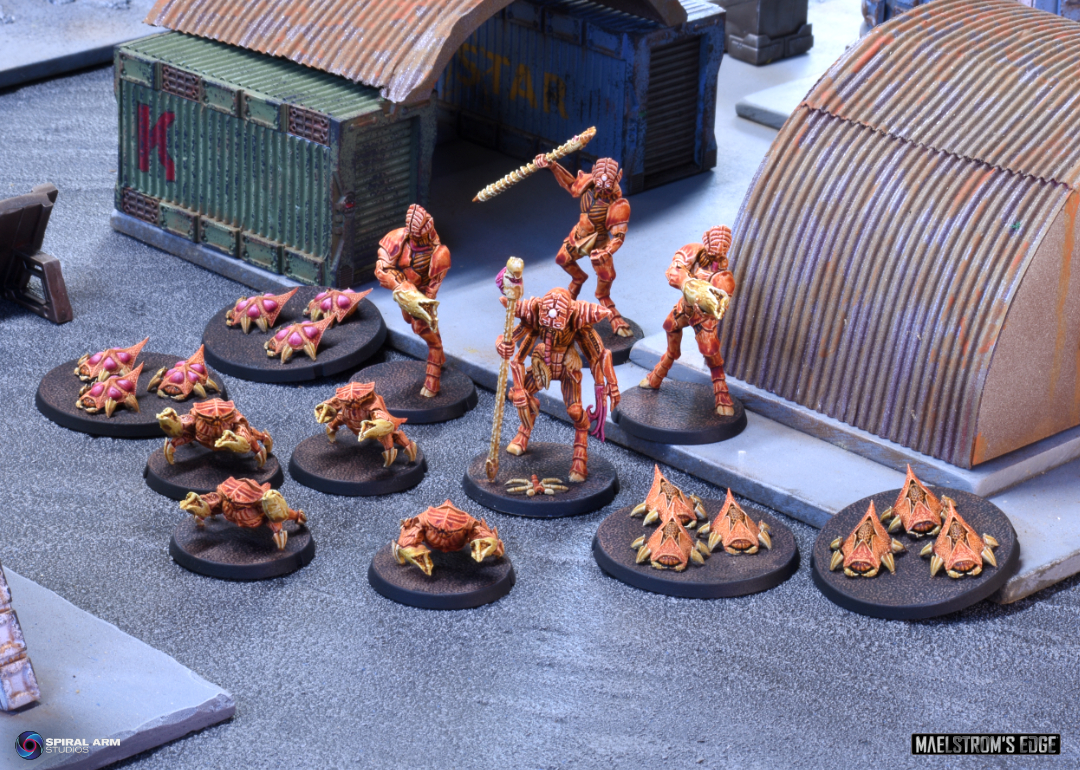
Force Spotlight - 50 point Kaigus Pact Starter Force
Posted on Thursday Nov 20, 2025 at 05:00pm in The Kaigus Pact
Model Spotlight - The Kaigus Pact Troops Sprue!
Posted on Wednesday Oct 15, 2025 at 05:00pm in The Kaigus Pact
 - by Iain Wilson
The arrival of the Maelstrom's Edge V2 rulebook was accompanied by the addition of an all new faction to the game - the Kaigus Pact! We're all very excited about them as the Kaigus Pact are very different to the other models we've released so far, with their alien appearance and organic approach to technology. This week, I thought I'd take a closer look at one of the new plastic kits - the Kaigus Pact Troops sprue.
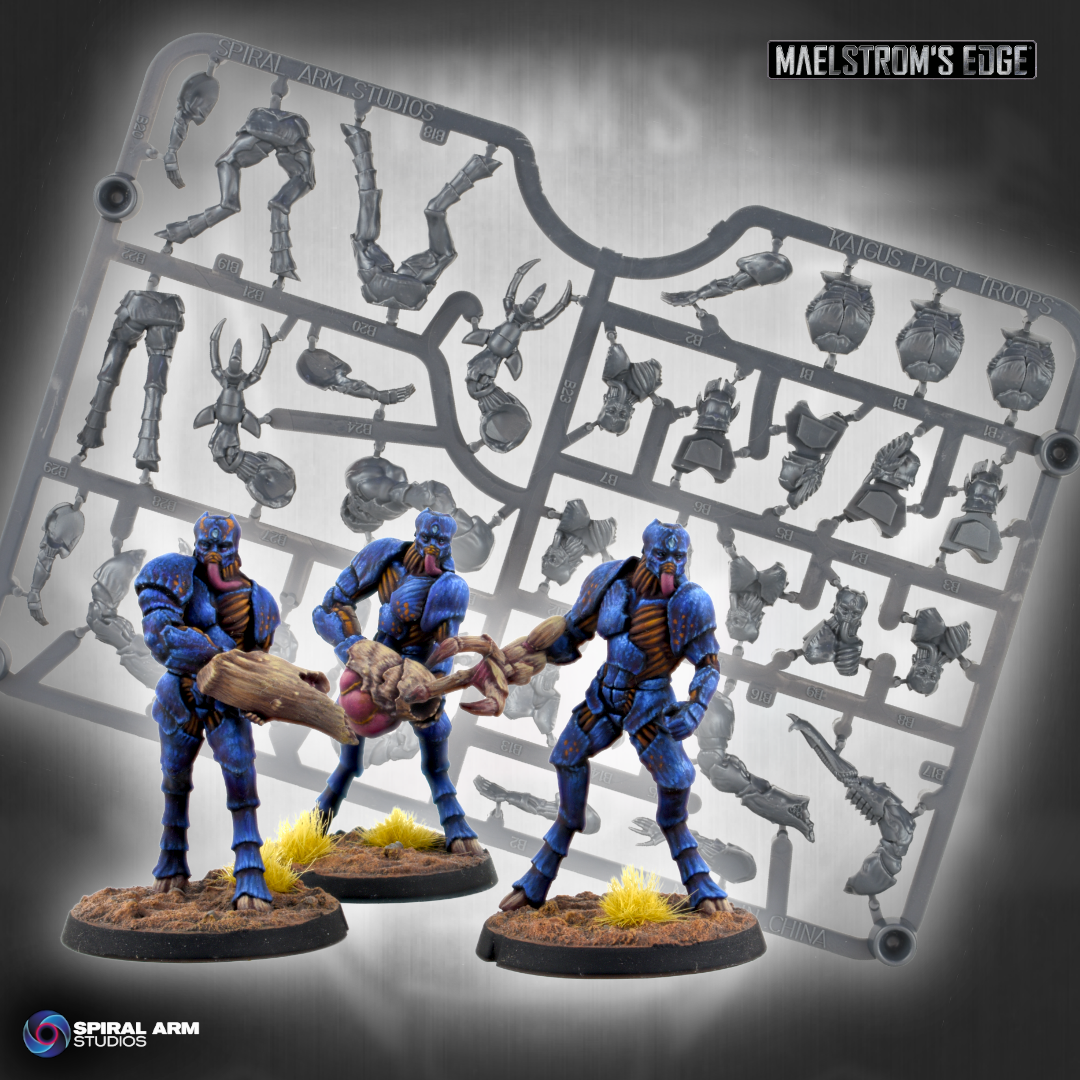
The troops sprue is one of a number of plastic sprues that we created for the Kaigus Pact launch, building three bioengineered warriors.

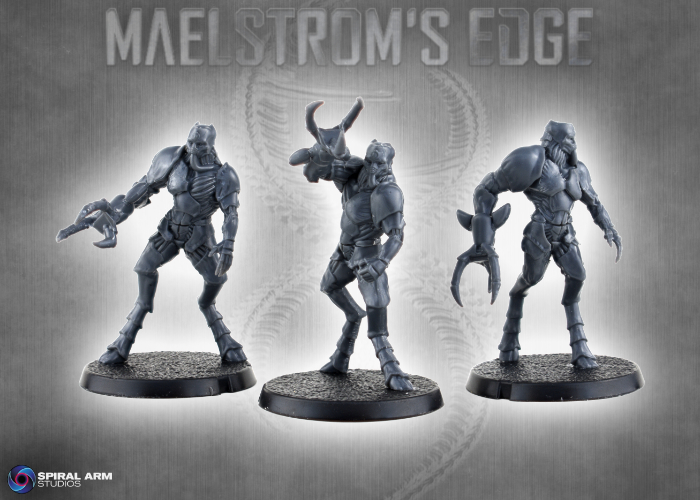
The Kaigus Pact Troops sprue, sculpted by Kevin Johnson.
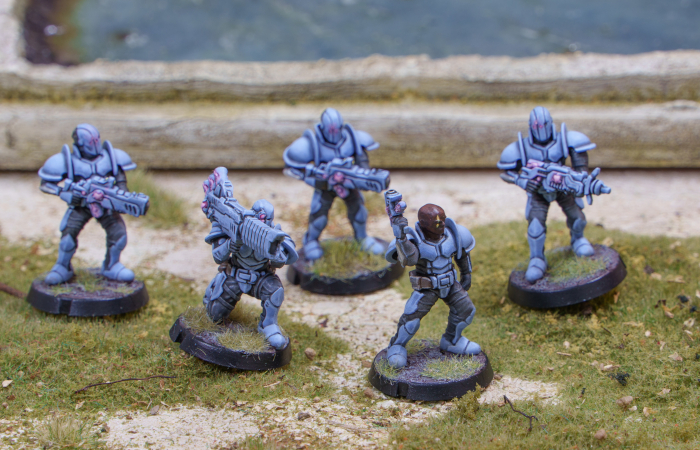
Kaigus Pact soldiers, known as Muharis, generally take to the field armed with organic weapons called Dart Hosts. These are bioengineered crustacean-like organisms that clamp over the Muharis' weapon arm and, as their name suggests, spit lethal darts with the same force as a more normal firearm. More at home in space, the massive forms of the Muharis are gangly and awkward looking on the ground, their asymmetrical torsos and giant, carapace-clad forms a stark contrast from their human forbears.
Kaigus Pact Muharis with Dart Hosts, painted by Todd McNeal.
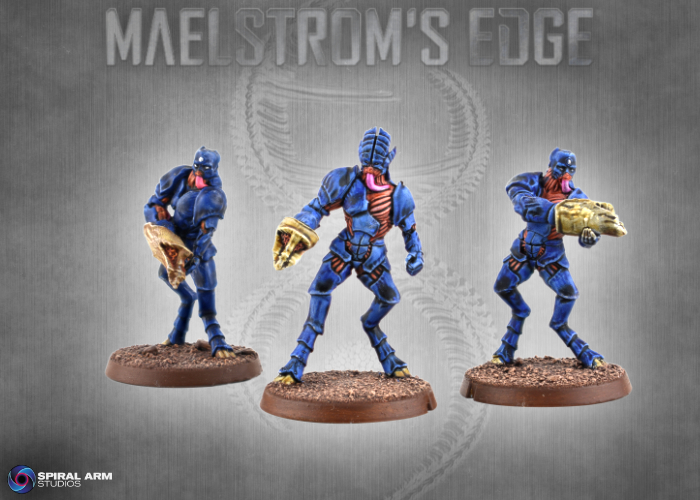
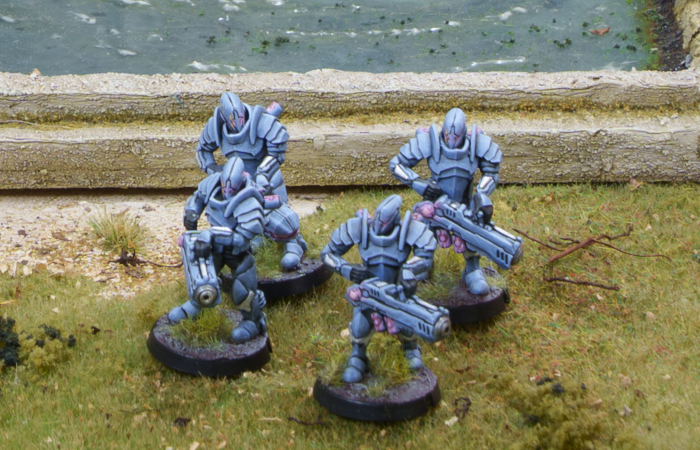
Muharis have access to a number of other lethal weapon symbiotes, including a heavier version of the standard Dart Host, the armor-piercing Spike Rifle and explosive-lobbing Brood Host. When more close-range assaults are called for, Muharis make use of the giant taloned Ripper Claw.
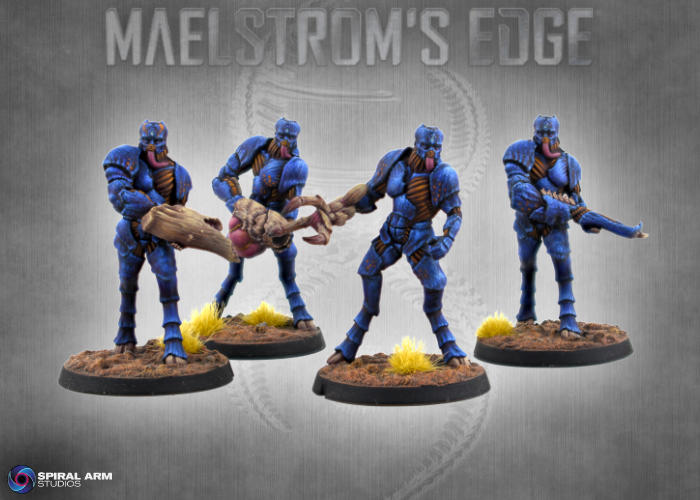
(Left to right) Heavy Dart Host, Brood Launcher, Ripper Claw & Spike Rifle, painted by Todd McNeal.
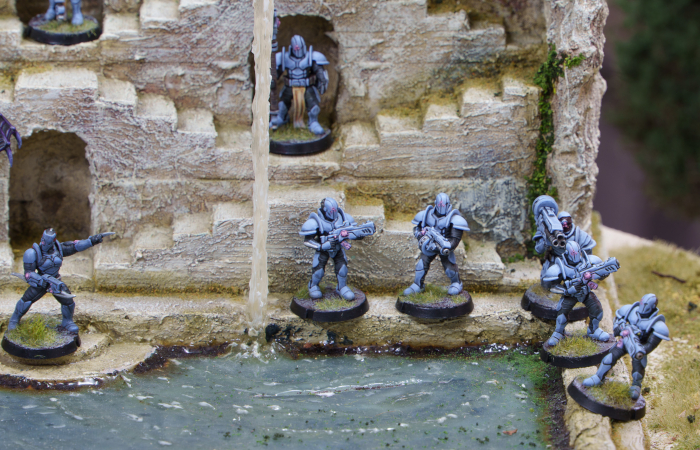
Regular Muharis Sentinel units have more limited access to these, while Sentinel Strongpoint units provide battlefield support with access to multiple heavier weapons.
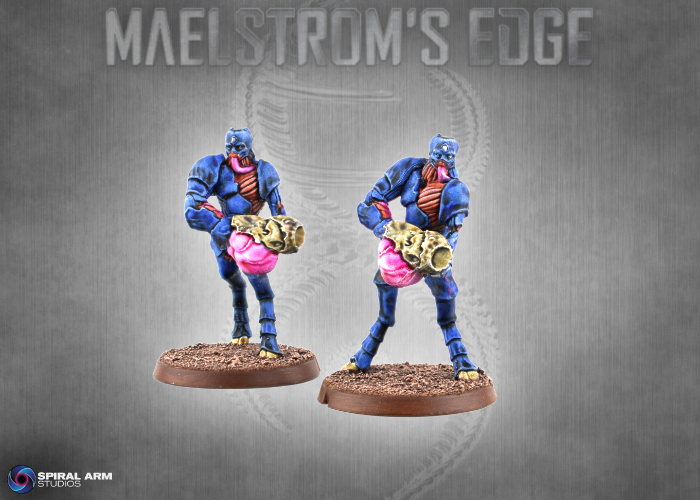
Sentinel Strongpoint unit with Brood Launchers, painted by Iain Wilson.
The troops sprue also allows you to build Biologis troops. more specialised than the Muharis soldiers, Biologis Attendants carry a shorter ranged but poisoned version of the Dart Host. The parts from the troops sprue can also be combined with the Proctat Upgrade sprue to build a Biologis Proctat, a Genostaff-equipped squad leader upgrade for Attendant units.
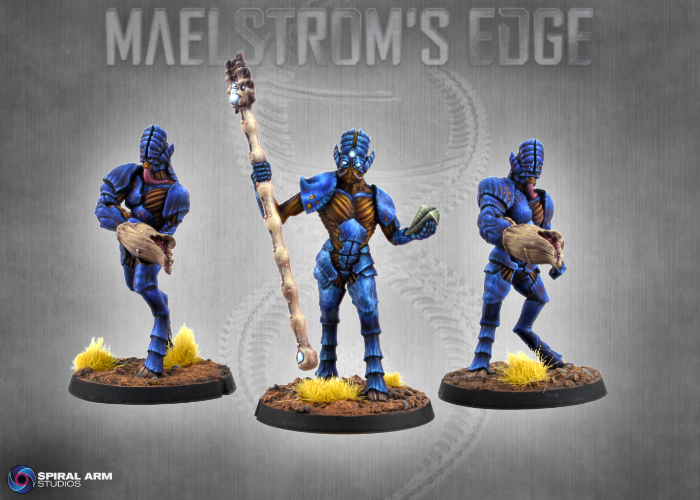
A Biologis Attendant unit, painted by Todd McNeal.
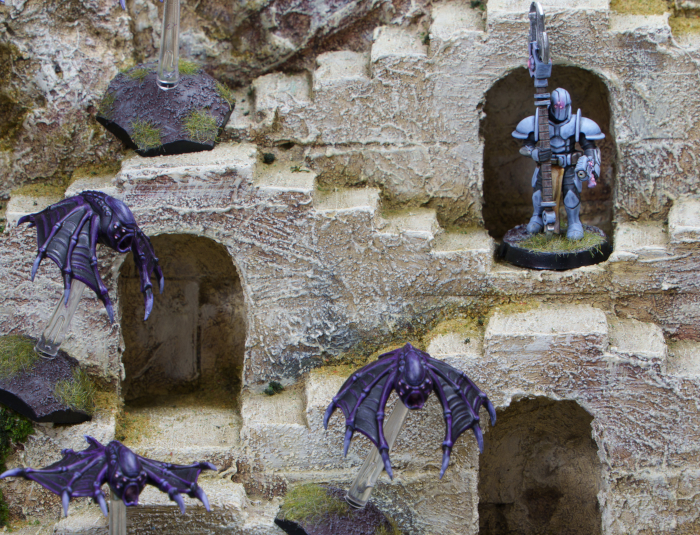
Biologis Adepts also serve as leaders in some Muharis Sentinel units, providing them the ability to spawn Thrall units on the battlefield.
A Muharis Sentinel unit with attached Biologis Adept, painted by Iain Wilson.
Because of the unique design of their armour and equipment, the Kaigus Pact troops are not quite as modular as some of our other plastic kits. The most notable difference is in the heads, which we couldn't separate at the neck as we usually do. Instead, the sprue provides a number of different torso fronts, so you still get a wide range of posing options by combining different legs and torso fronts.
Muharis with Ripper Claws.
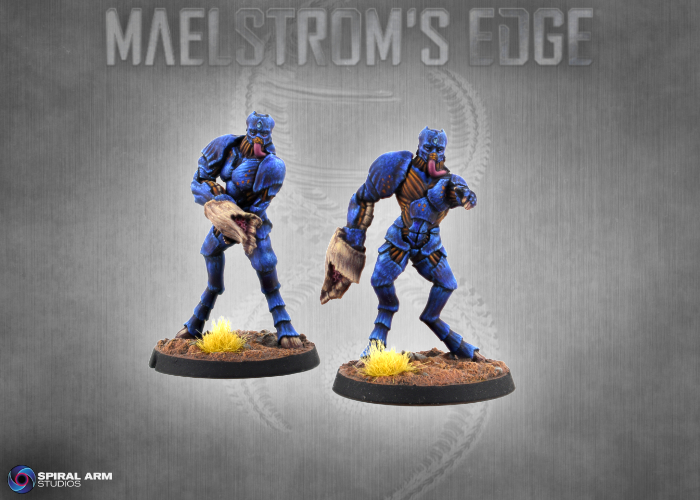
Being plastic, the models are of course easy to chop and change to suit yourself! While weapons are fixes to the arms, again due to their unique design structure and the limitations of plastic tooling, it's easy enough to slice weapons off and switch arms to give yourself some different posing options.
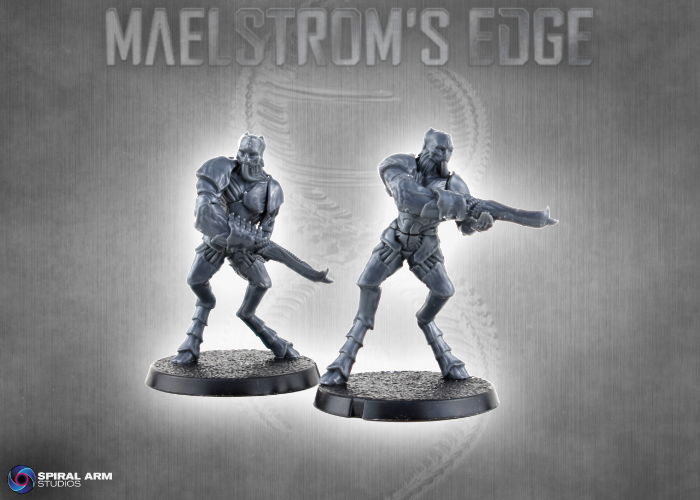
Muharis with Spike Rifles. the model on the left is the standard arm configuration, while the model on the right has had the weapon switched to a different arm, and a left arm from the Proctat Upgrade sprue.
And, of course, if you're like me and enjoy wandering outside the bounds of the 'official' game units, there's nothing stopping you from going to town with these kits and creating your own units!
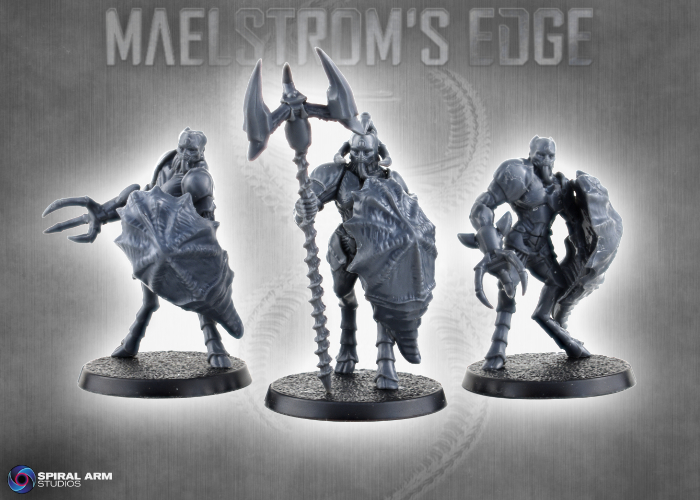
A unit I'm calling a 'Sentinel Bulwark', equipped with shields taken from the soon-to-be-released Orakan Shield Thrall, and a polearm made from a Proctat staff and Orakan legs!
The painted models shown here (both Todd's fantastic studio models and my more table-level versions) are representative of the Koritanii moot, found active in Zycanthus space. The Kaigus Pact models lend themselves to a wide range of organic color-schemes - we recommend looking to sea-dwelling crustaceans for inspiration!
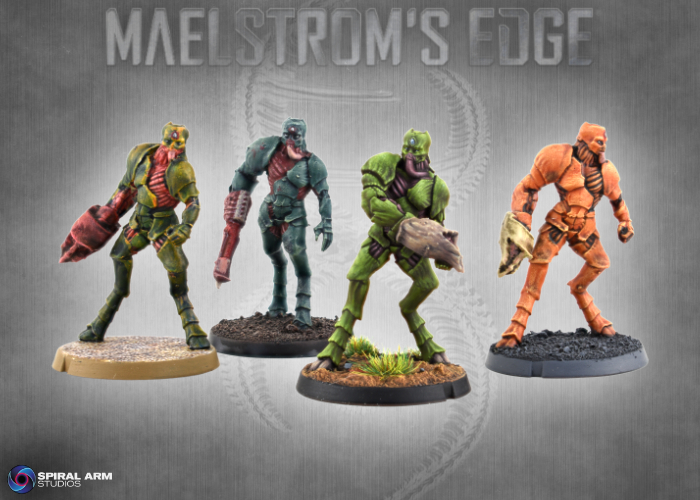
Some alternate Kaigus Pact color schemes.
The Kaigus Pact Troops box is available to buy soon, but in the meantime you can nab the sprue in the Kaigus Pact Starter Force box available now from the Maelstrom's Edge webstore here!
What are you working on? We would love to see your models and terrain in the Comm Guild Facebook group!
For other building ideas, modeling tutorials, army spotlights and conversion walkthroughs, check out the Hobby section of the Maelstrom's Edge website here. And while you're there, grab a copy of the Maelstrom's Edge V2 Beta rules!
V2 Sample Force - Epirian Foundation
Posted on Thursday Aug 08, 2024 at 05:00pm in The Epirian Foundation
- by Iain Wilson
Maelstrom's Edge V2 is on the way, so this seems like the perfect time to build some new armies! The upcoming V2 Rulebook includes sample lists for each faction, and I thought it would be fun to build them all so that I can use them for some battle reports. I decided to start with the Epirians, because, well, robots are cool.
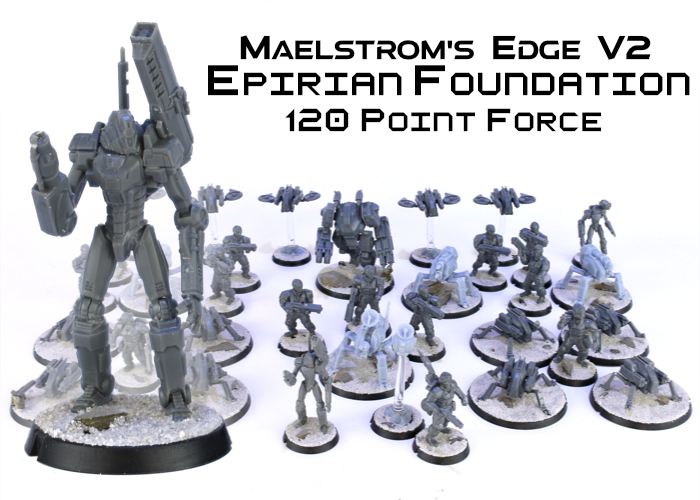
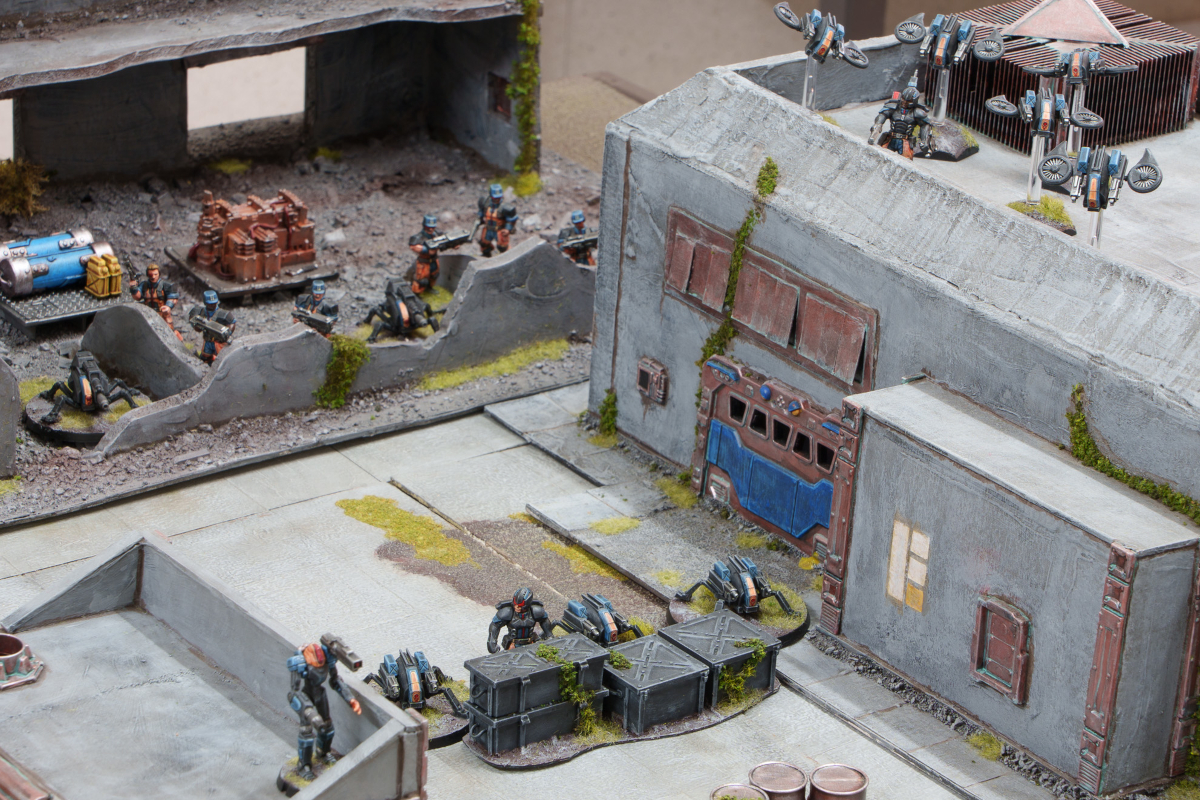
The force list for this project is focused around bots, although has a few Contractor units in there as well for variety. For simplicity, the rulebook sample list is built as a single detachment led by a Journeyman Handler and includes two Scarecrow Snipers. I decided to tweak things slightly by making one of the Scarecrows a Command unit and splitting some of the bots into a second detachment, but otherwise this force is the same as will appear in the book.
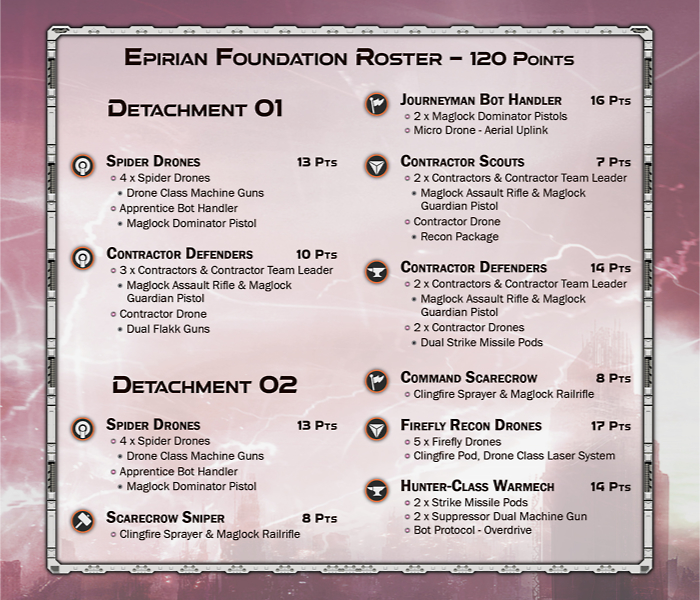
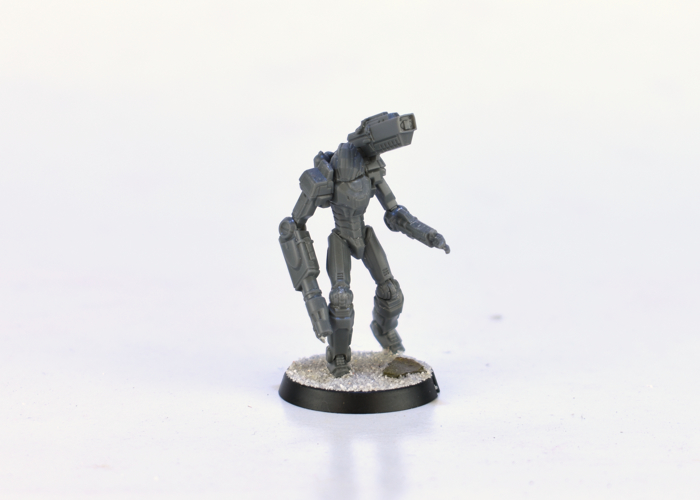
In a force led by a Handler, bots are the main focus. The Journeyman’s Bot Handler ability, improved by the Aerial Uplink, allows them to keep suppression under control for the force’s bots, while their Push the Machines ability allows you to reactivate an already activated bot unit, doubling the effectiveness of the Hunter or a Scarecrow each turn. By including the Command Scarecrow, the force gains an additional command point each turn, and having the second command model allows the force to be more spread out while remaining in a command radius bubble for orders and bot protocols.

These Command models are largely built stock, although I repositioned the head and weapon on the Command Scarecrow, and used a Broken head (with the helmet hung on the belt) for the Journeyman. The Aerial Uplink drone is a 3D print of an upcoming model.
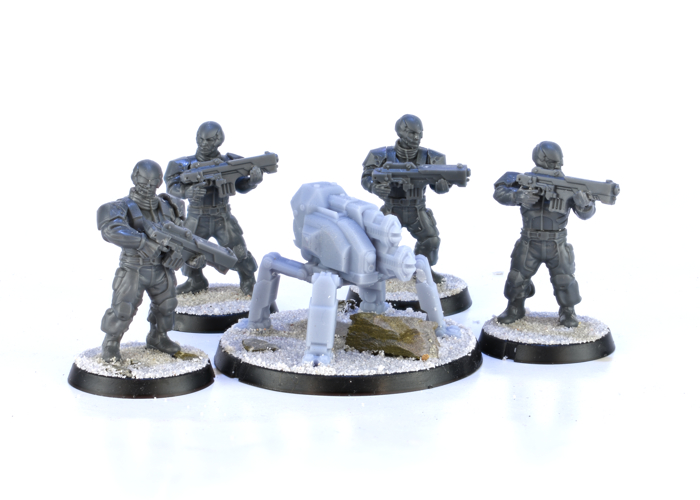
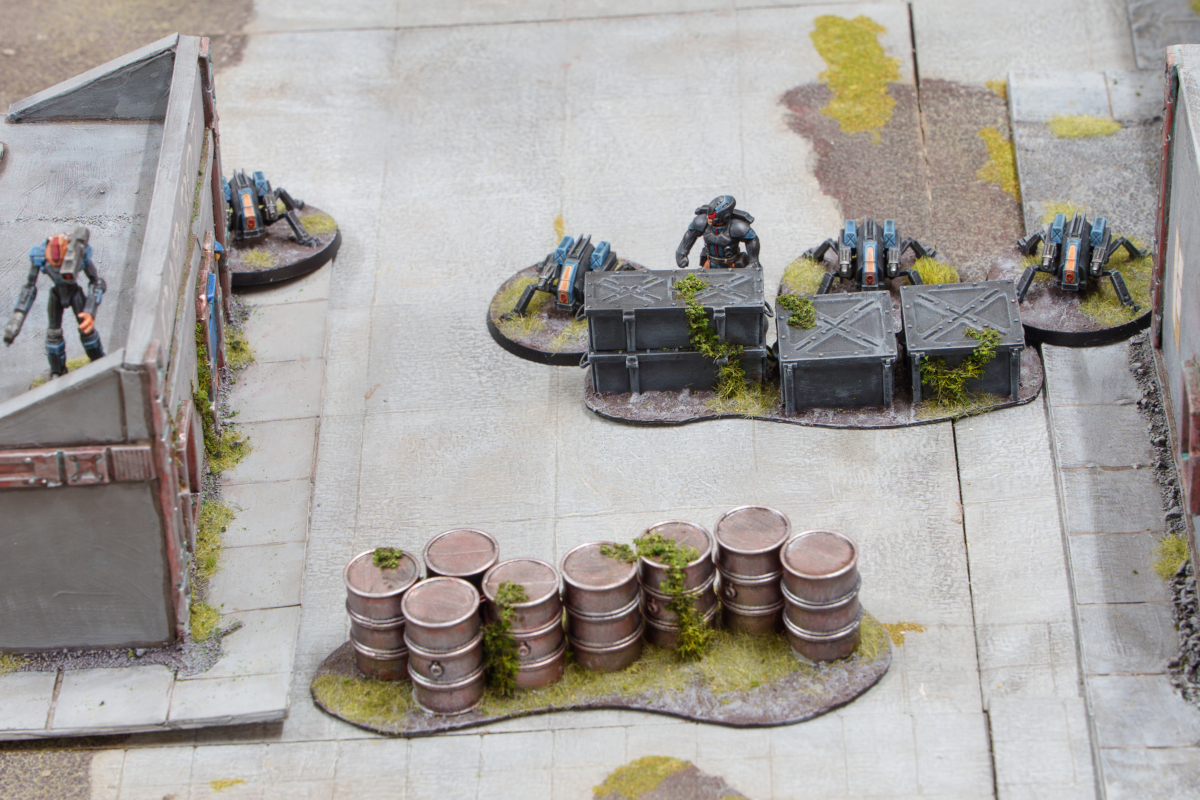
The presence of the Apprentice Handlers in the Spider Drone units gives them the freedom to move out of the Scarecrow or Journeyman’s command radius without losing the benefit of orders and bot protocols.
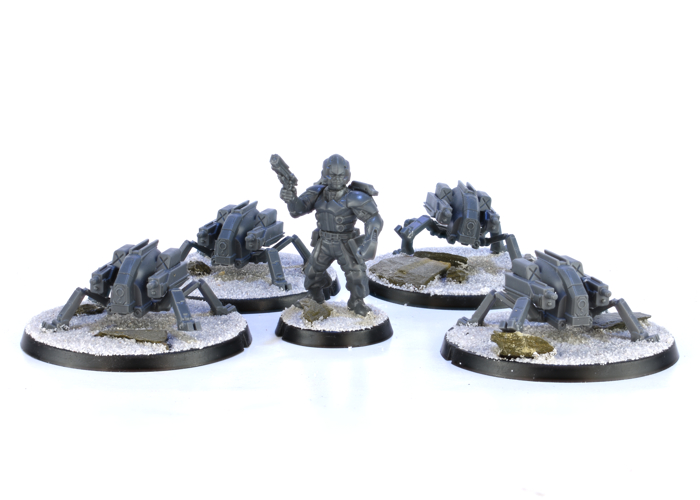

I used another Broken head for one of the Apprentices, and repositioned some of the Spider Drones' legs to add a little variety in their posing.
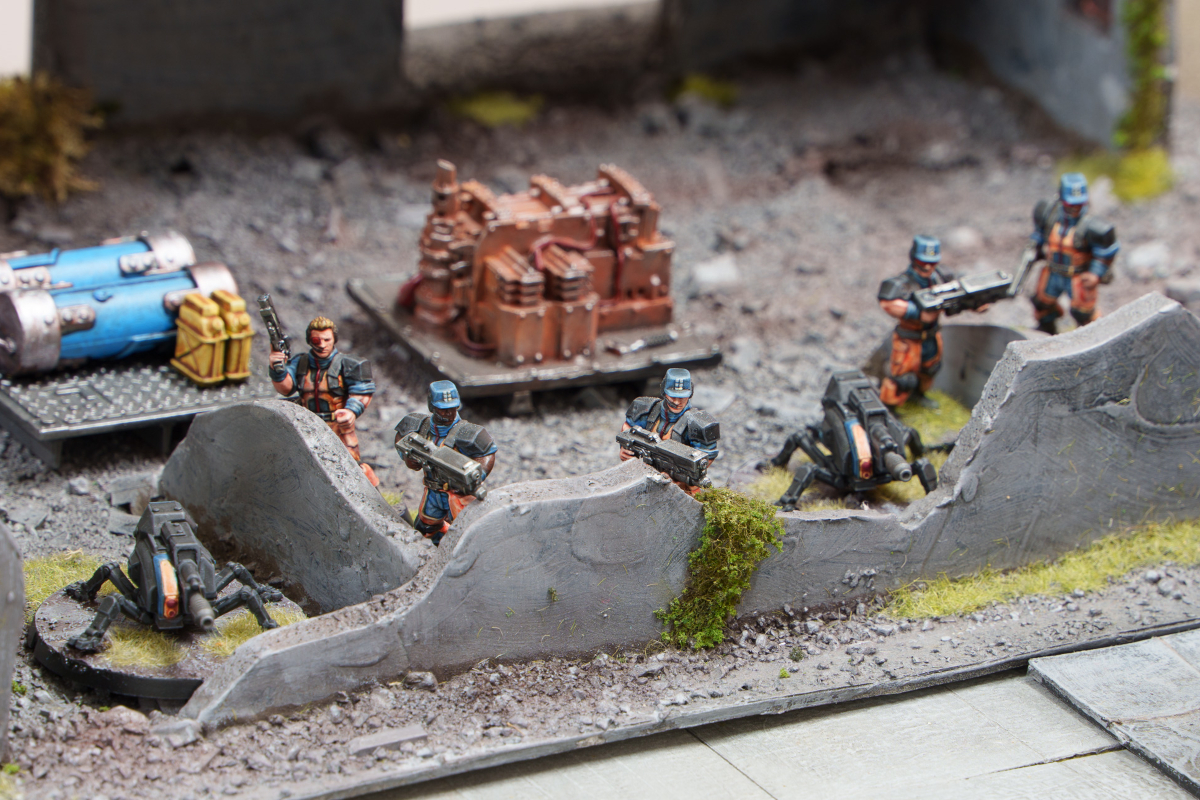
The inclusion of a few Contractor units helps provide some additional firepower in the force. The Recon Package in the Scout unit can paint enemy units for the attention of the Strike missiles on the Defender's weapon drones and the Hunter mech.
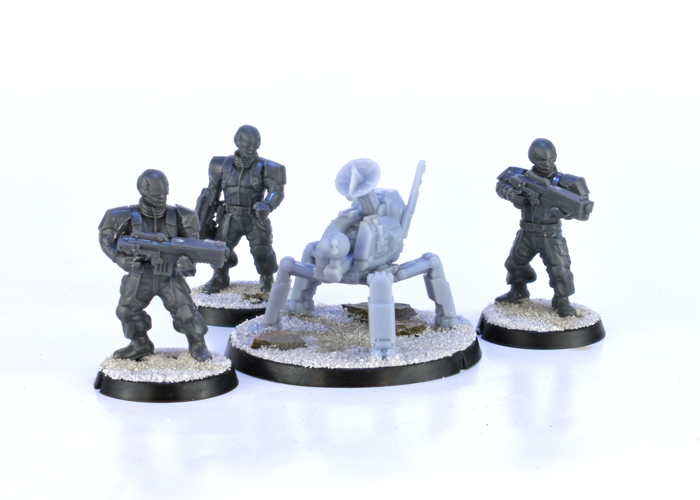
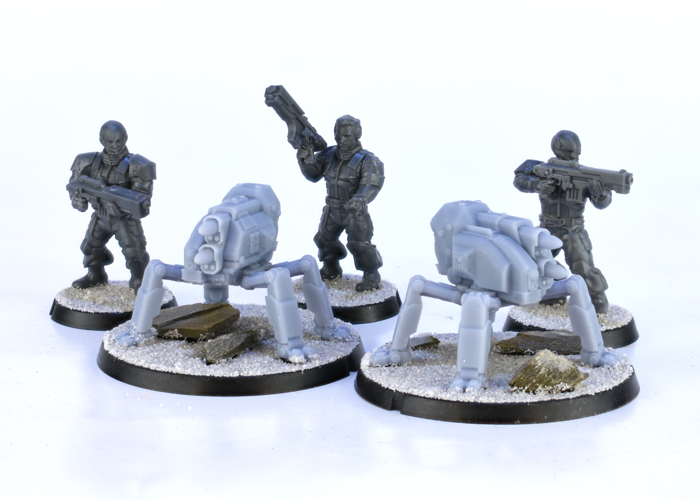
I used the arms and helmets from the Faction Expansion Sprue on the Contractors, as I wanted this force to have that better armoured look. The drones in these units are 3D prints, and these models are currently available as printable STLs, although a plastic kit is currently in development, for release as soon as possible!
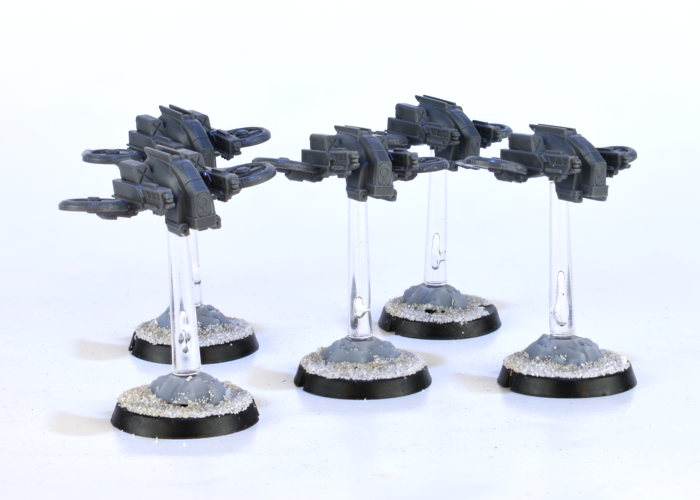
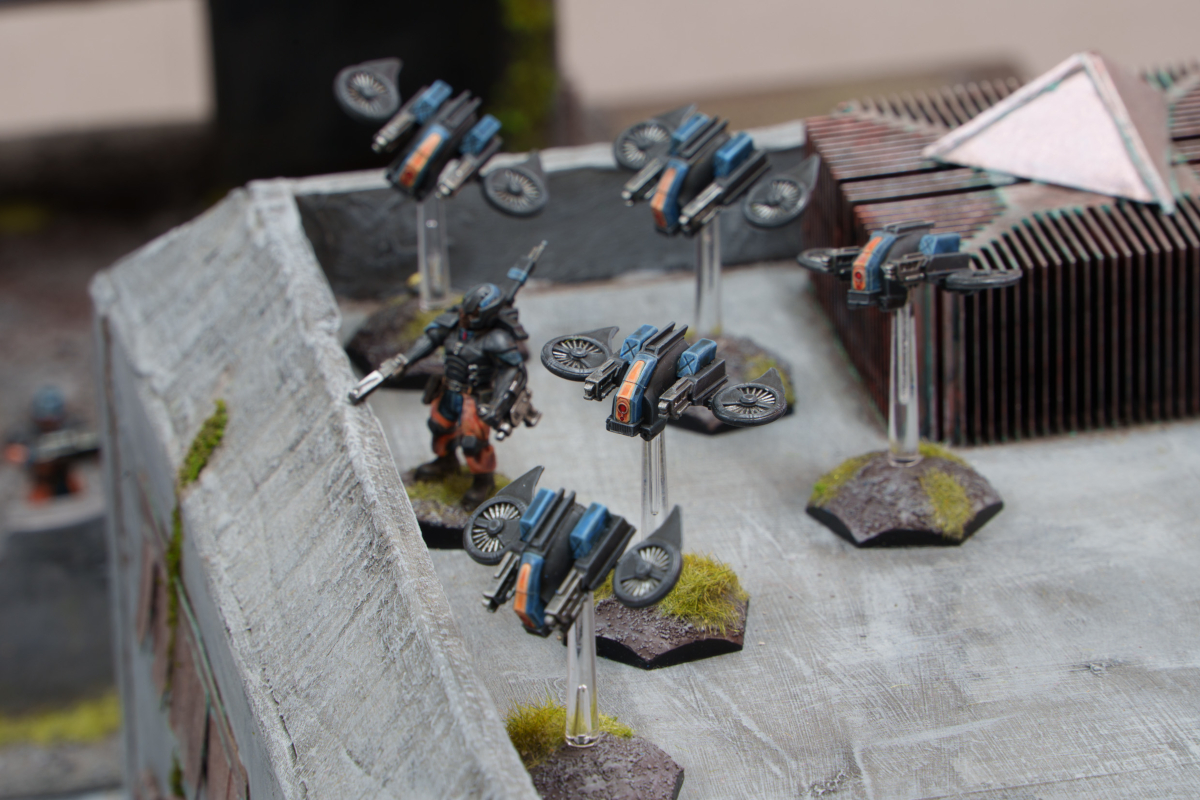
To round out the force, the Firefly drones provide some fast-moving harassment and paint enemies for the Strike missile units, while the Scarecrow and Hunter serve as mobile fire support and focus on taking out enemies too tough for the Contractors or Spiders to deal with. In addition, selecting the Master of Machines faction objective potentially gives the force an additional free bot protocol activation each turn, allowing the Hunter to move more quickly around the battlefield, the Scarecrows to pump out additional firepower, and the Fireflies to more effectively dodge enemy fire.
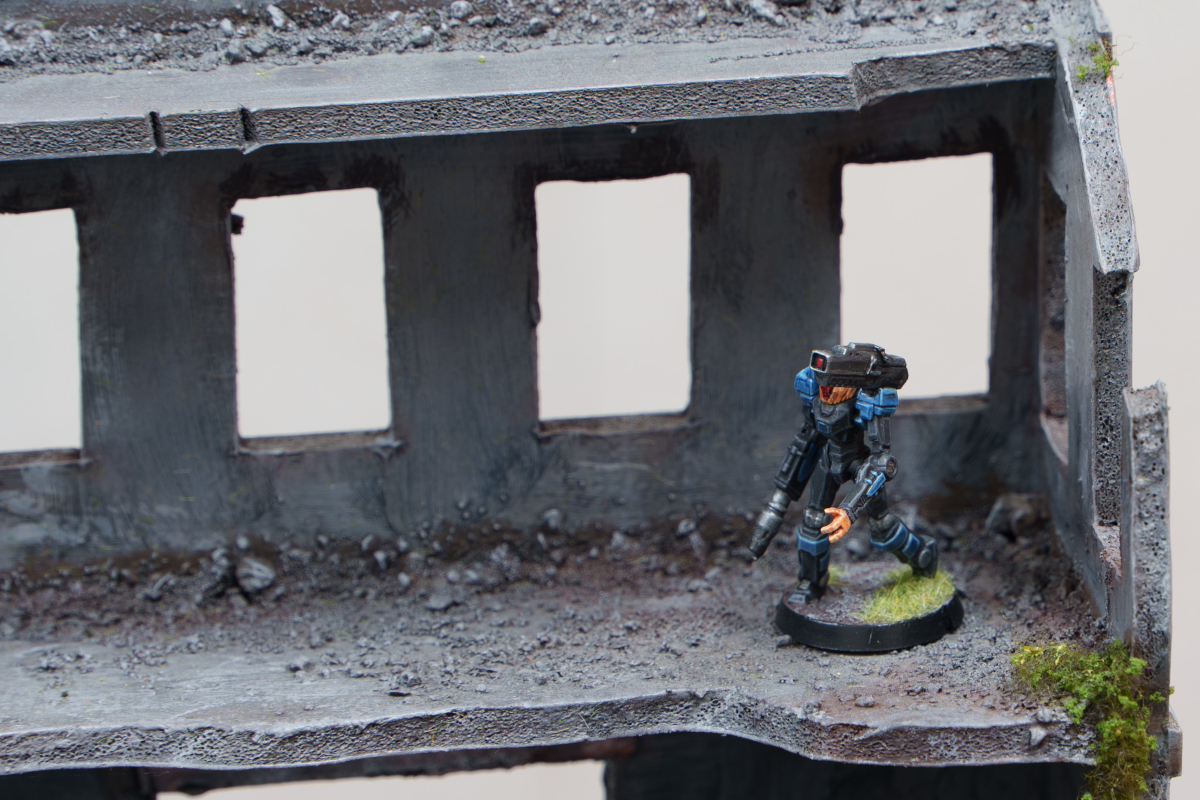
 With everything built and based, I'm looking forward to getting some paint on! I'm going with a blue and black scheme, as I don't have anything already in those colours, making it a nice opportunity to do something different.
Stay tuned for part 2!
To build your own force of remote controlled robotic doom, grab some Epirian models from the Maelstrom's Edge webstore here!
What are you working on? We would love to see your models and terrain in the Comm Guild Facebook group!
For other building ideas, modeling tutorials, army spotlights and conversion walkthroughs, check out the Hobby section of the Maelstrom's Edge website here. And while you're there, grab a copy of the Maelstrom's Edge V2 Beta rules!
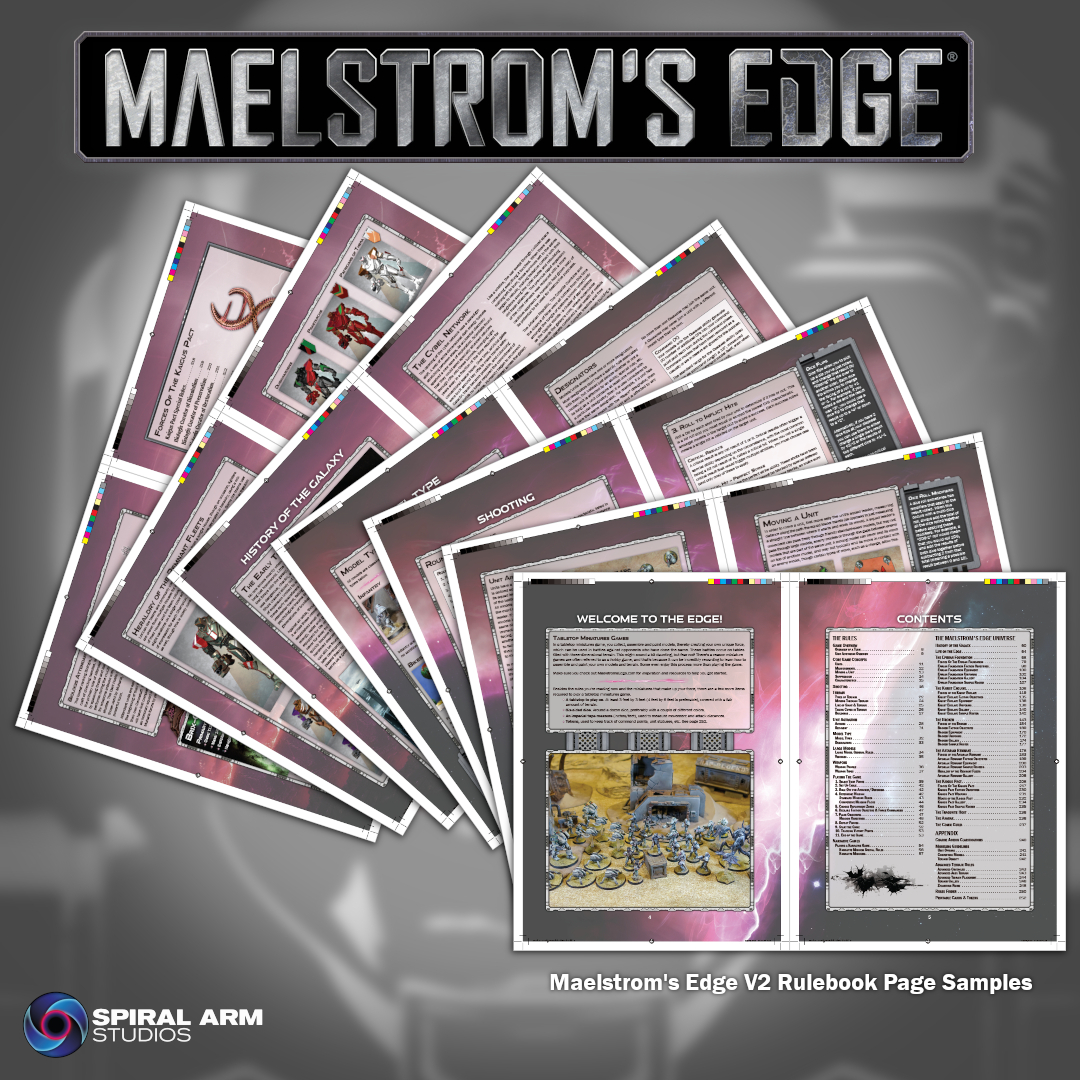
Maelstrom's Edge V2 - What's Going On?
Posted on Wednesday Jun 26, 2024 at 05:00pm in General
Click for larger image
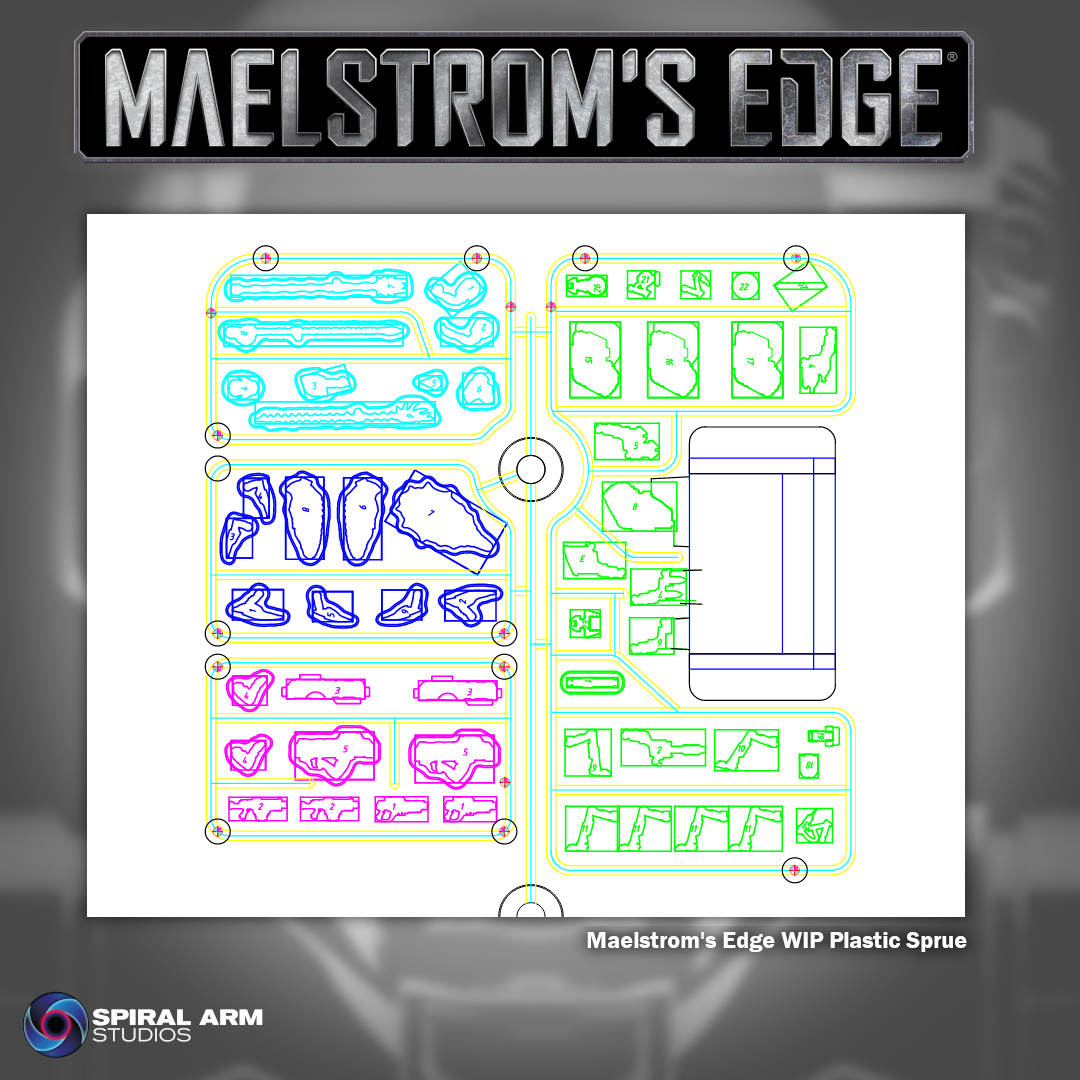
So, what's next?
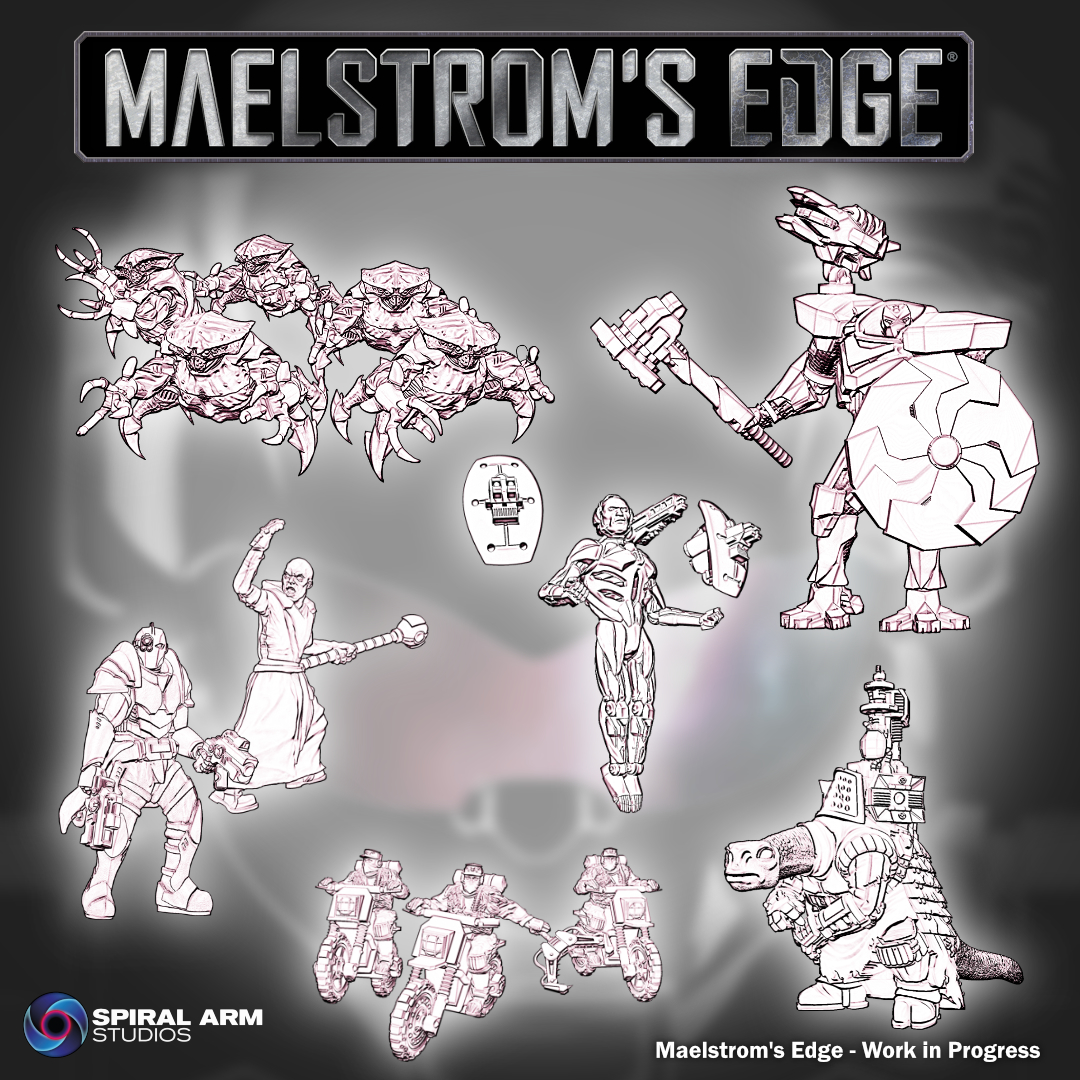
Well, we've still been working on other bits and pieces in the background. We currently have a new plastic frame in tooling that includes four separate small kits - two to bolster the upcoming Kaigus Pact release, some upgrades for the Epirian SecDef, and a plastic replacement for the resin Epirian Contractor Drone!
Click for larger image
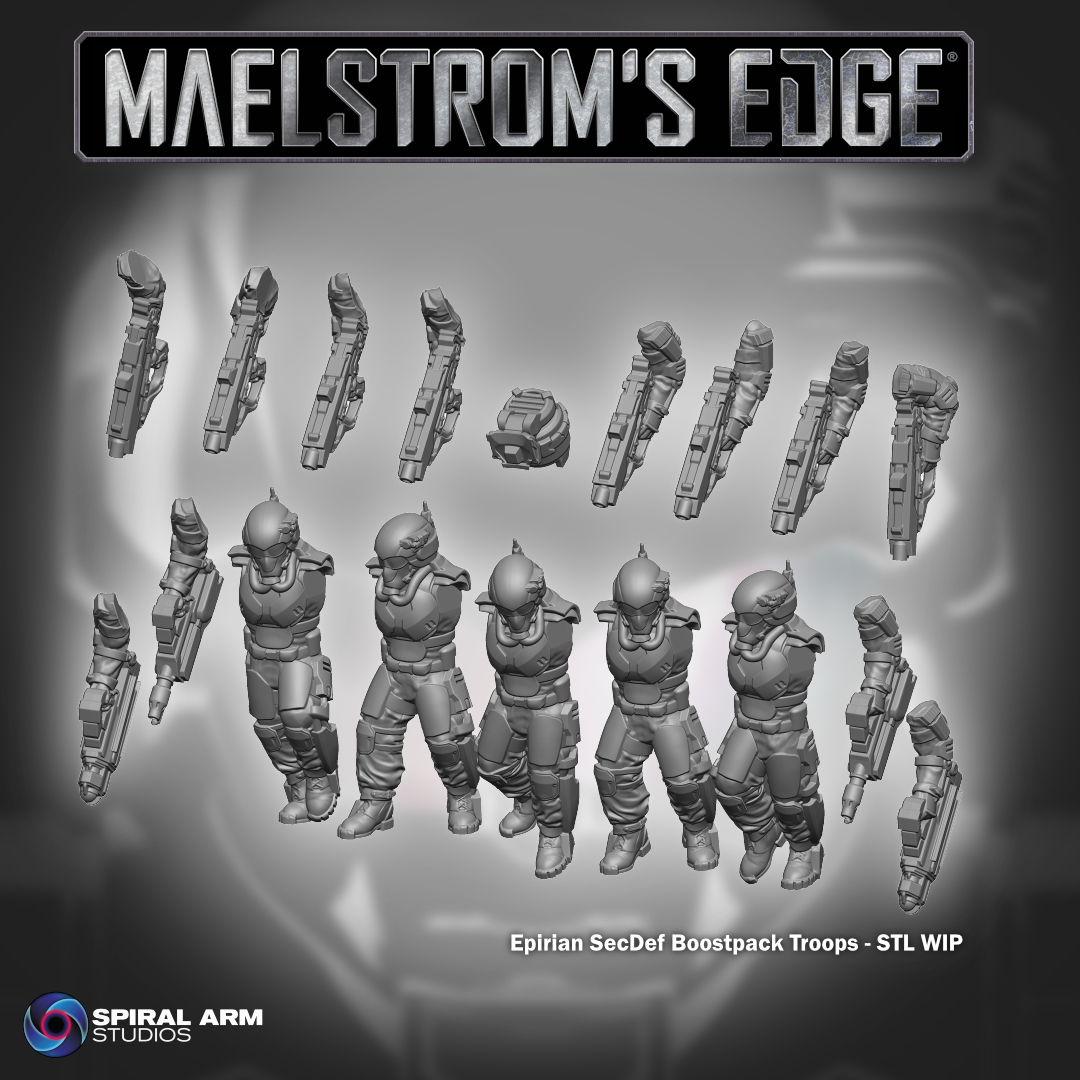
Our rollout of 3D printable STL files to go alongside our resin model range is also set to continue, with Epirian SecDef boostpack troops on their way at the start of July.
Click for larger image
After that, there is plenty more to come! We have a number of models currently in development to flesh out gaps in the existing range, along with the aforementioned Kaigus Pact entering the battle as a new faction. We'll have more on these very soon.
Click for larger image
And now that he's released from editing duties, Iain will be getting back to work on modeling articles and battle reports to showcase the new rules. Stay tuned!
In the meantime, try out the Beta version of the V2 rules by grabbing the PDFs from the Maelstrom's Edge website here, and grab models to assemble your force from the webstore here! Free shipping applies to qualifying orders - check your cart for details.
You can also find a series of articles looking at different aspects of the V2 game here.
If you have any questions on the V2 rules, the model range, or any other aspect of the Maelstrom's Edge game, feel free to pop in to the Comm Guild Facebook group here.
Terrain Spotlight: Juice Bottle Advertising Hub
Posted on Friday Dec 22, 2023 at 05:00pm in Tutorials
- by Iain Wilson
It's been way too long since I made some terrain, so I thought I would squeeze in one last article before Christmas!
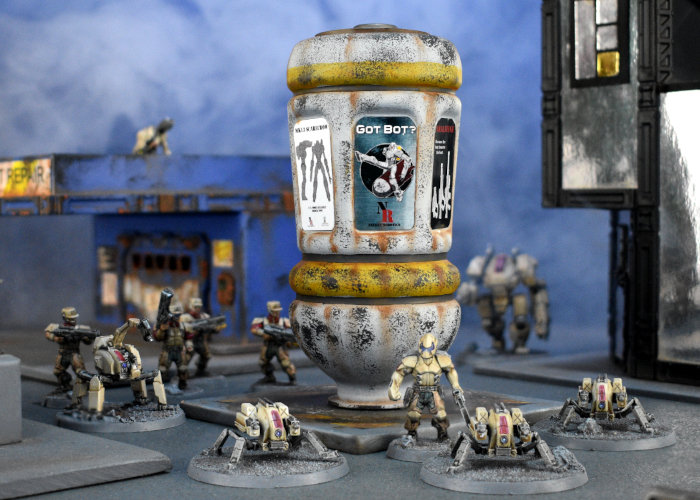
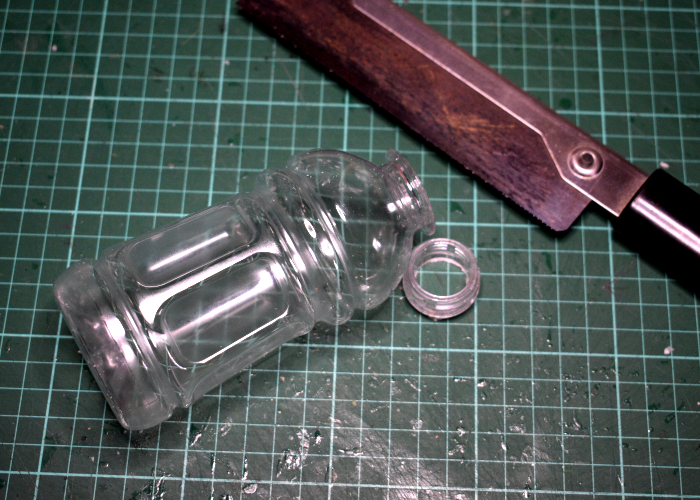
My kids had some juice in a takeaway meal the other day that came in an interestingly shaped bottle that I thought was worth having a play with. After giving the empty bottles a wash, I set to with tools and terrain sprue bits and came up with this little advertising hub.
The first step, as mentioned above, was to wash the bottle and remove the label.
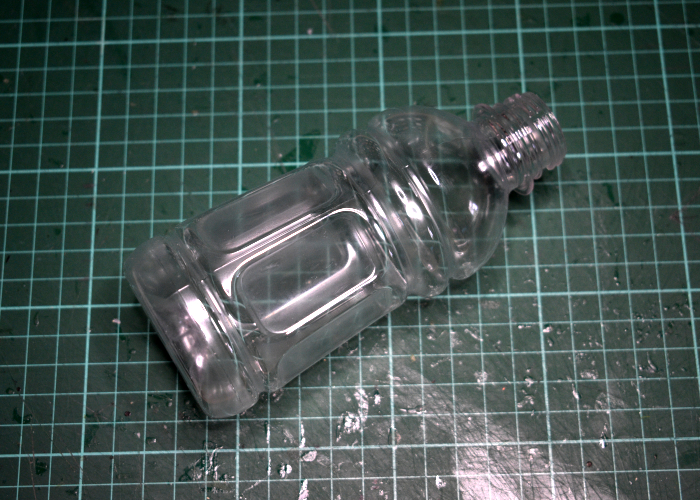
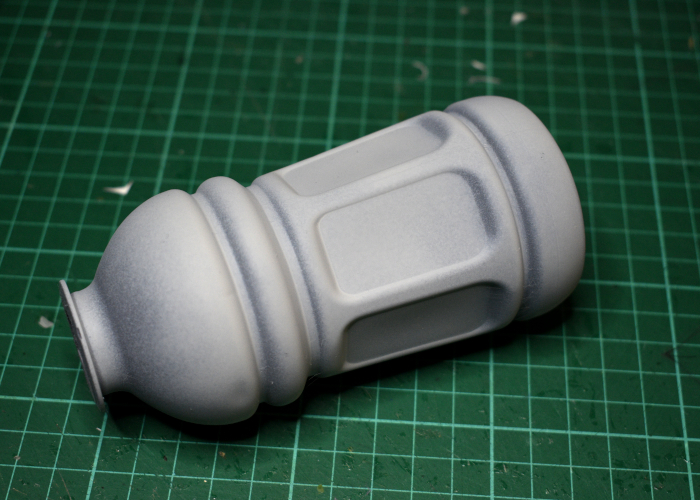
I used a razor saw to remove the screw thread part of the neck, and then gave the cut end a bit of a sand to smooth it down.
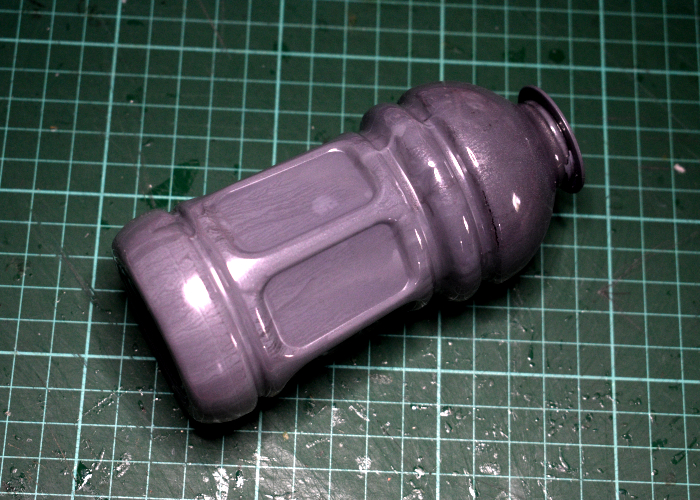
Then I sprayed inside the bottle with some grey paint. This isn't an essential step, but it does help to make the finished piece a little more opaque, particularly if the exterior paintwork gets scratched on the table later on.
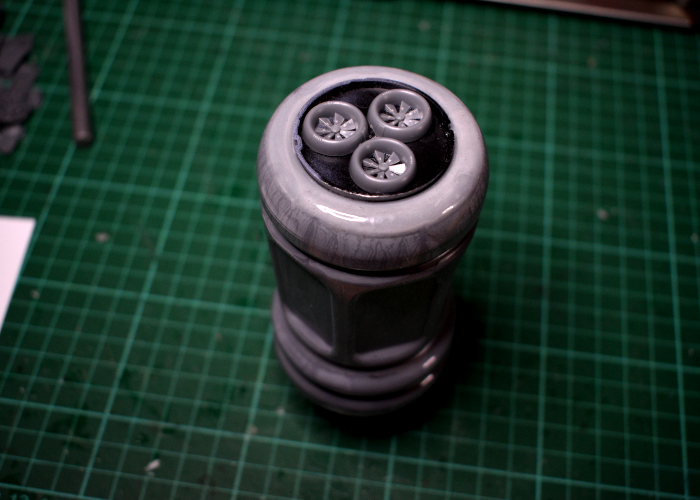
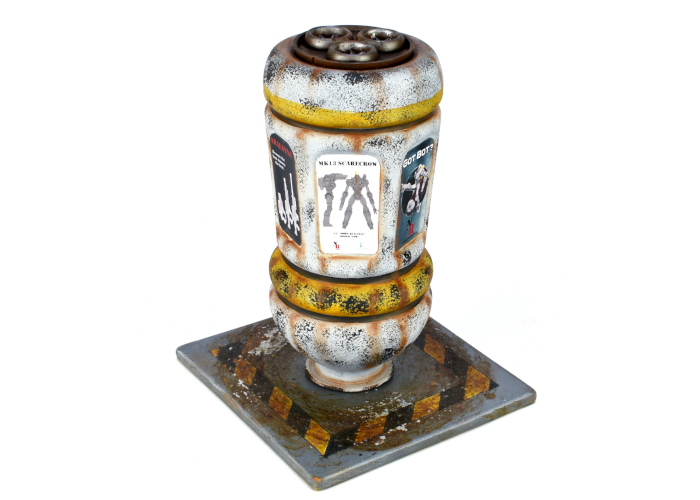
To disguise the bottle's bottom, I grabbed an appropriately sized miniature base and a trio of fans from the second Maelstrom's Edge Terrain Sprue and glued them in place with some Oily Glue.
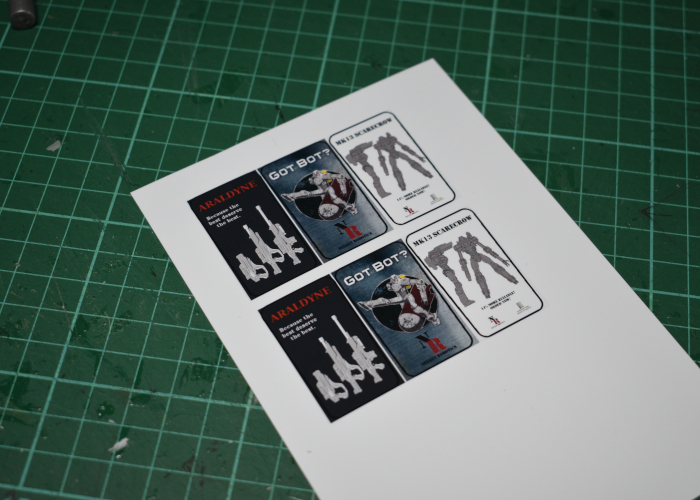
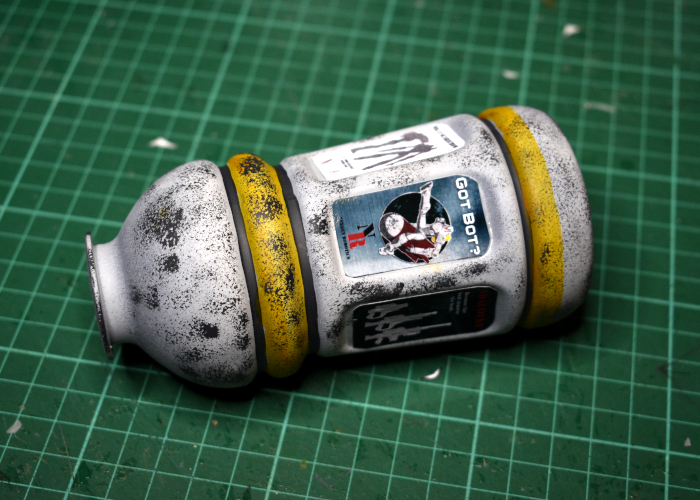
For the advertising part of the build, I whipped up some signs to fit into the recesses around the bottle, printing them out on photo paper so that they were nice and glossy and bright.
On to painting! I sprayed the bottle with a medium grey primer, and then a zenithal layer (sprayed from an angle above, to leave the darker grey underneath) of a very pale grey. This went straight over the shiny plastic, as the Rustoleum primer that I use generally sticks fairly well. If you're wanting to make your paint more durable and stick better, you can give the outside of the bottle a light sand with some fine sandpaper to break the gloss.
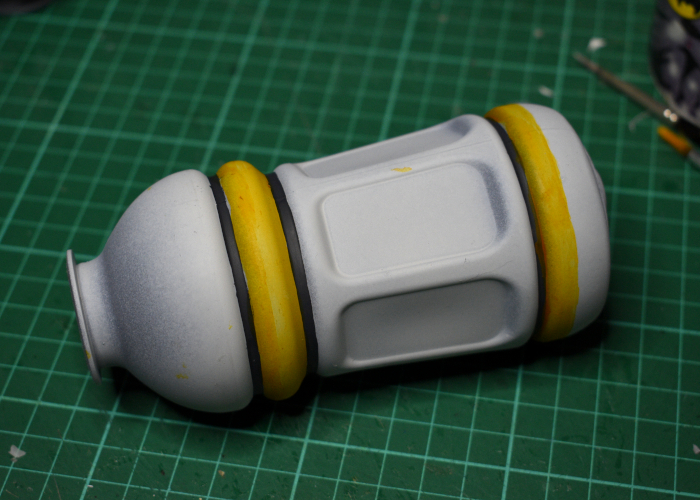
I added in some dark grey (Vallejo Heavy Charcoal) into the deep creases, and added a couple of strips of yellow using Vallejo Nuclear Yellow.
Next up came some weathering with a sponge and some more Heavy Charcoal, before gluing the signs in place.
Finally, I painted up the fans on top with some a Vallejo Beasty Brown basecoat, a drybrush of Citadel Chainmail and a wash of Army Painter Strong Tone, and then dirtied everything up with a drybrush of some more Beasty Brown into the creases and forming some drip marks down the sides. Then I dropped it onto an old base I had prepared a while back, and it was ready for the table!
If you wanted to break up the original bottle shape some more, you could easily add some supporting buttresses around the bottom, or add some lights above the signs.
To build your own pillar of commercial doom, grab the Maelstrom's Edge terrain sprues from the webstore here!
What are you working on? We would love to see your models and terrain in the Comm Guild Facebook group!
For other building ideas, modeling tutorials, army spotlights and conversion walkthroughs, check out the Hobby section of the Maelstrom's Edge website here. And while you're there, grab a copy of the Maelstrom's Edge V2 Beta rules!
Sneaky Spotlight: Kaigus Pact Tamakin Combat Thralls
Posted on Monday Dec 11, 2023 at 05:00pm in Models
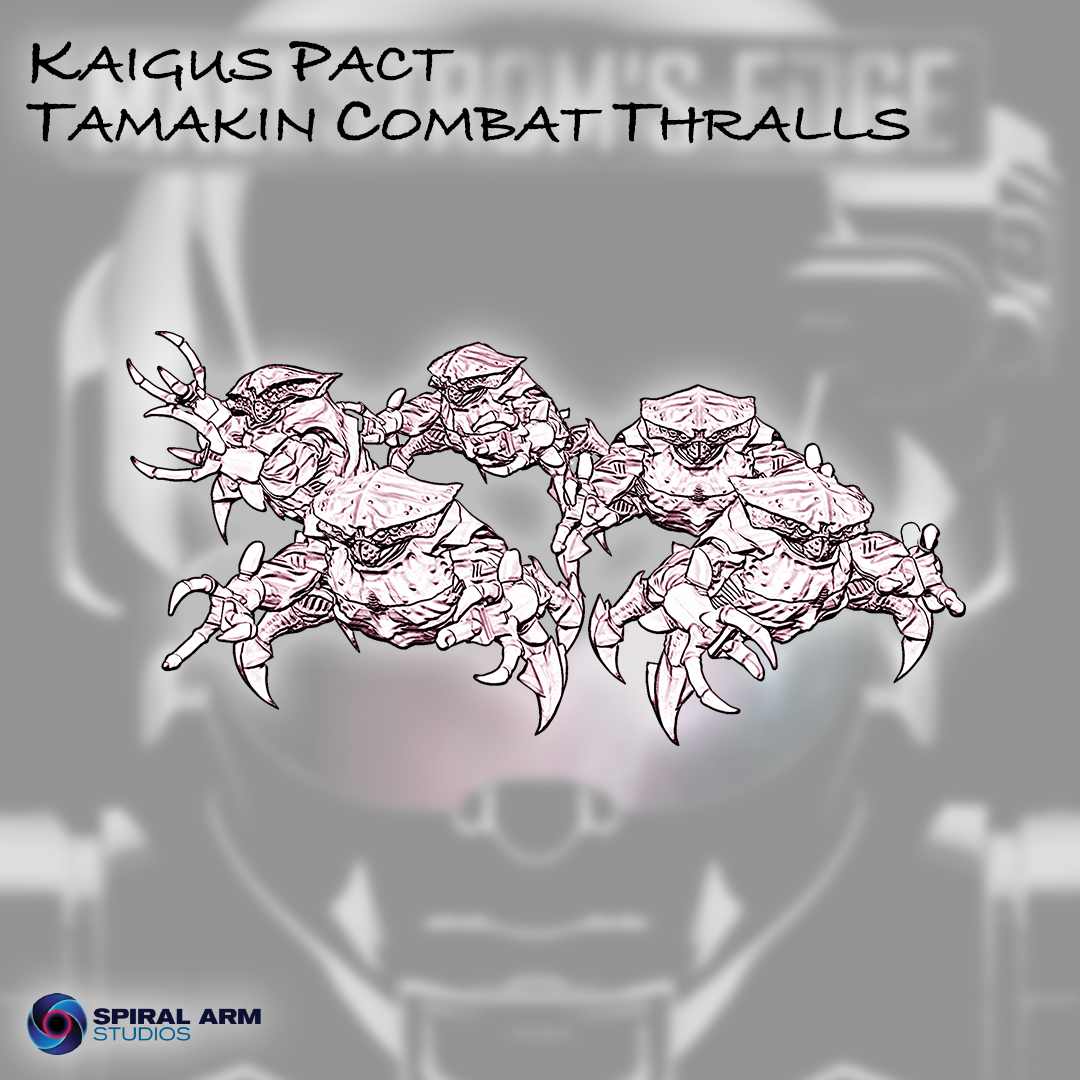
Click for larger image
Stay tuned for more sneak peeks! In the meantime, try out the V2 Beta rules by grabbing the PDFs from the Trial Rules section of the Maelstrom's Edge website here, and grab your models from the Maelstrom's Edge webstore here! Free shipping applies to qualifying orders - check your cart for details.
You can also find a series of articles looking at different aspects of the V2 game here.
If you have any questions on the V2 rules, the model range, or any other aspect of the Maelstrom's Edge game, feel free to pop in to the Comm Guild Facebook group here.
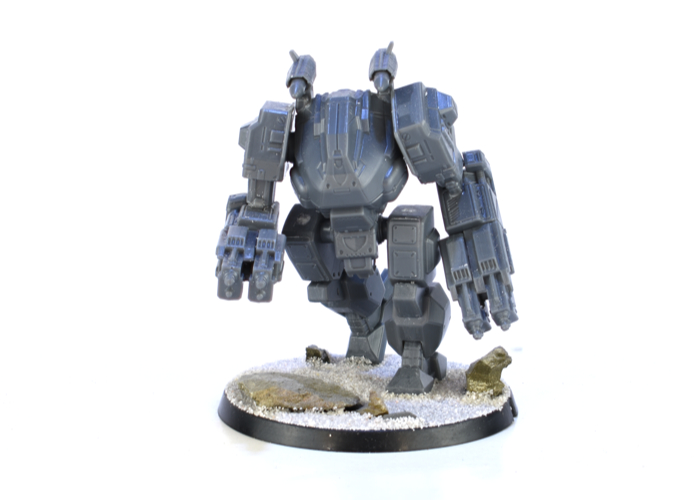
Sneaky Spotlight: Artarian Remnant Brutus Battlesuit
Posted on Friday Nov 24, 2023 at 05:00pm in General

Click for larger image
Stay tuned for more sneak peeks! In the meantime, try out the V2 Beta rules by grabbing the PDFs from the Trial Rules section of the Maelstrom's Edge website here, and grab your models from the Maelstrom's Edge webstore here! Free shipping applies to qualifying orders - check your cart for details.
You can also find a series of articles looking at different aspects of the V2 game here.
If you have any questions on the V2 rules, the model range, or any other aspect of the Maelstrom's Edge game, feel free to pop in to the Comm Guild Facebook group here.
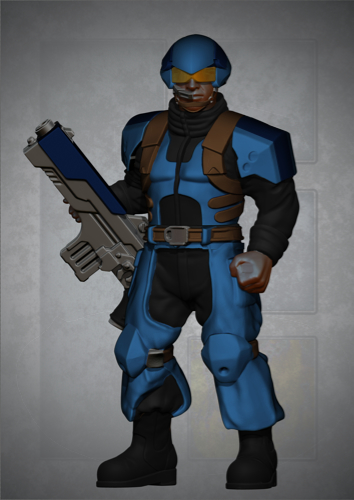
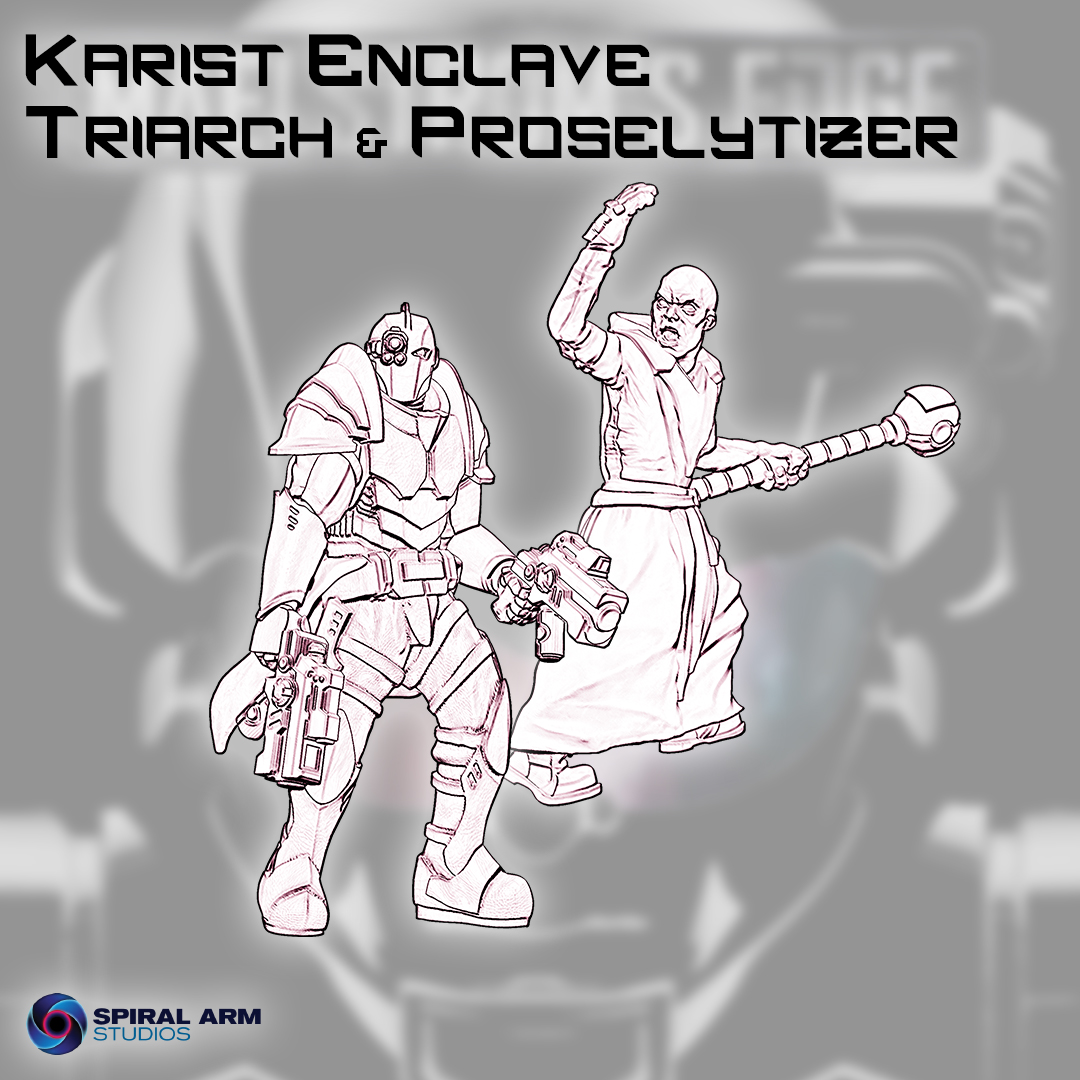
Sneaky Spotlight: Karist Enclave Triarch and Proselytizer
Posted on Friday Nov 17, 2023 at 06:00am in The Karist Enclave
Click for larger image
The lowest rank of ordained priest amongst the Kaddar, Proselytizers have yet to develop the oratory skills to sway whole crowds, or lead a large military offensive. As missionaries, Proselytizers work quietly amongst a planet’s population, gathering small groups of believers and setting the stage for their more experienced brethren to expand the movement into something greater. When combat is called for, Proselytizers are embedded within military units, where they inspire the troops to greater efforts, or use vocal tricks and the message of their faith to weaken the combat zeal of nearby enemy troops.
Stay tuned for more sneak peeks! In the meantime, try out the V2 Beta rules by grabbing the PDFs from the Trial Rules section of the Maelstrom's Edge website here, and grab your models from the Maelstrom's Edge webstore here! Free shipping applies to qualifying orders - check your cart for details.
You can also find a series of articles looking at different aspects of the V2 game here.
If you have any questions on the V2 rules, the model range, or any other aspect of the Maelstrom's Edge game, feel free to pop in to the Comm Guild Facebook group here.
Modeling Spotlight: 'Lightyear' Hyperspeed Truck Repaint!
Posted on Thursday Mar 16, 2023 at 05:00pm in Models
- by Iain Wilson
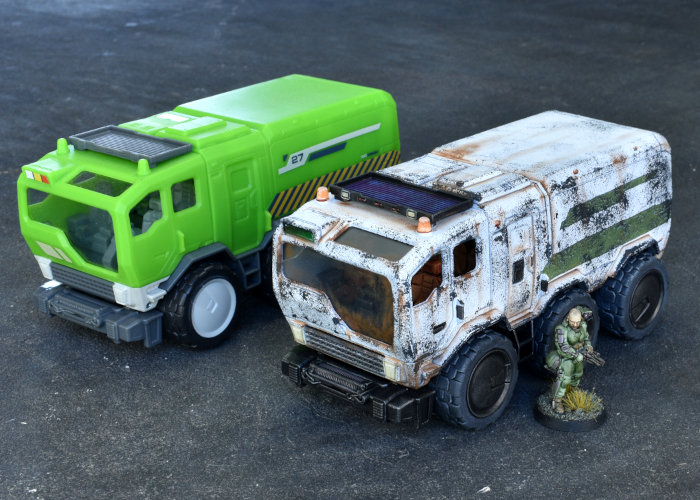
The 'Lightyear' movie from Pixar was accompanied by a 'Hyperspeed' range of rather cool vehicle and ship toys. While the 1" figures are too small to be useful, some of the vehicles actually wind up looking just about perfect alongside gaming miniatures. The truck, in particular, was just too good to not put on the table. So after grabbing some on special from a local department store, I pulled one apart and painted it up, to see how it would look!
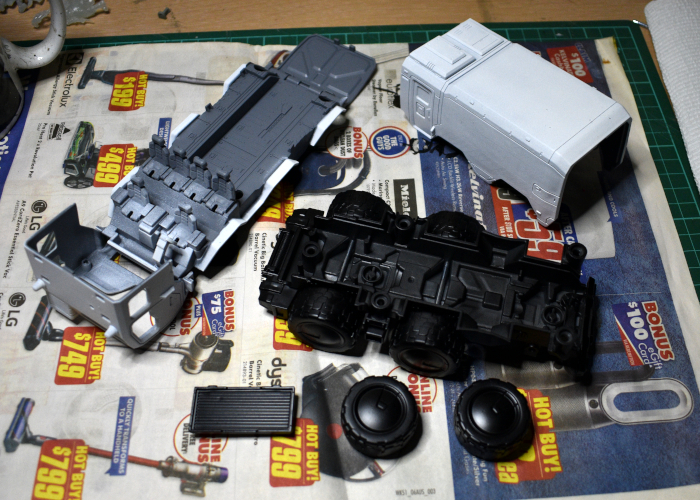
The truck is reasonably well detailed, and so to get the best results I decided to take it apart rather than trying to paint the fully assembled model. This turned out to be more difficult than expected, as two of the screws holding the back of the truck together are hidden behind the rear wheels, and the axles have textured ends that don't just pull out of the wheels - I wound up having to cut them and make a new rear axle. If I do any more of these, I'll probably just go the easy route and paint them assembled.
The truck in question before any modification:

I sprayed the chassis and wheels with Army Painter Matte Black, and the rest of the truck with Uniform Grey and then a zenithal spray of Matte White, so the grey stayed in the creases.
I didn't sand the vehicle before painting, as I was feeling lazy. The paint stuck fine to the plastic, although the printing on the sides of the truck back is slightly raised, which left a noticable shape under the paint. So I decided to just use that existing shape as a template for my own coloured decoration.
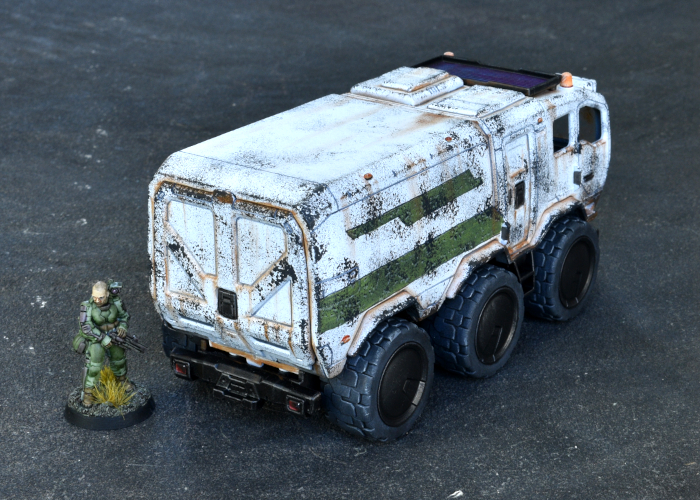
I kept the painting fairly simple, painting the seats with Army Painter Hardened Leather Speedpaint, and drybrushing the chassis with Citadel Boltgun Metal. The tyres were painted with Army Painter Uniform Grey, and then the chassis and wheels given a coat of Speedpaint Gravelord Grey. I wanted the truck to look a bit used, so after reassembling everything I weathered the white with some Vallejo Heavy Charcoal applied with a sponge, and drybrushed on some Vallejo Beasty Brown in the crevasses. The various lights were picked out with white and then various appropriate Speedpaints.
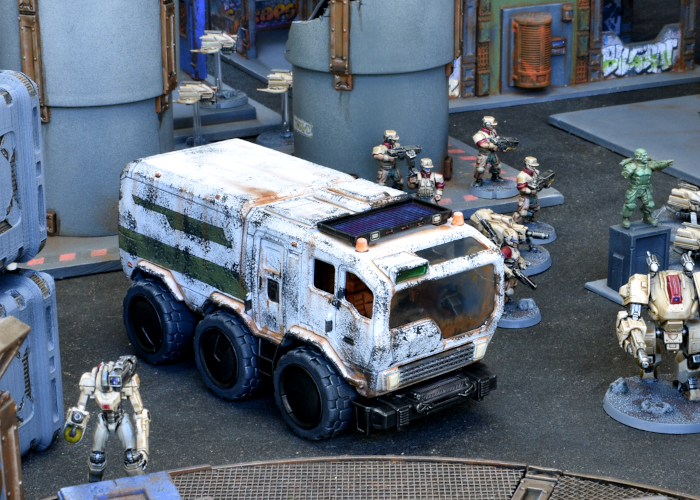
The finished truck, with the original for comparison:
I'm calling it the 'ParSec 12 Medium Transport'. You'll get there in a ParSec!
Once you've built your own fleet of cargo-carrying doom, head to the Maelstrom's Edge webstore here, to pick up some miniatures to attack it with!
We would love to see your models and terrain in the Comm Guild Facebook group. Pop in over there and share what you're working on!
For other building ideas, modeling tutorials, army spotlights and conversion walkthroughs, check out the Hobby section of the Maelstrom's Edge website here. And while you're there, grab a copy of the Maelstrom's Edge V2 Beta rules!
Army Spotlight: Marten's 90 point Karists
Posted on Tuesday Feb 14, 2023 at 05:00pm in The Karist Enclave
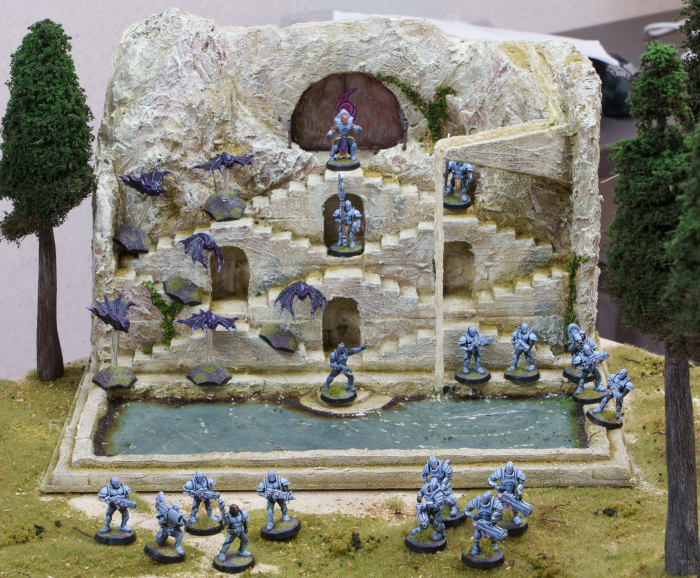
About his force, Marten says: "This is my 90pt Karist force. It's fairly small, which I find convenient for trying out new rules at first. I'm a fan of 'regular guys' in my forces. Hence there is no mature Angel, but two full sized squads of troopers, four Tempest Elites carrying the force's big guns and two Praetorians because they're cool. A Shadow Walker and a full complement of Minnows make up the fast element of the force, led by a Kaddar Nova.
The colour scheme was inspired by the painted examples on the Maelstrom's Edge kickstarter of 2015, combined with then new-to-me Warcolours paints which had a nice 5 tone 'blue grey' set.
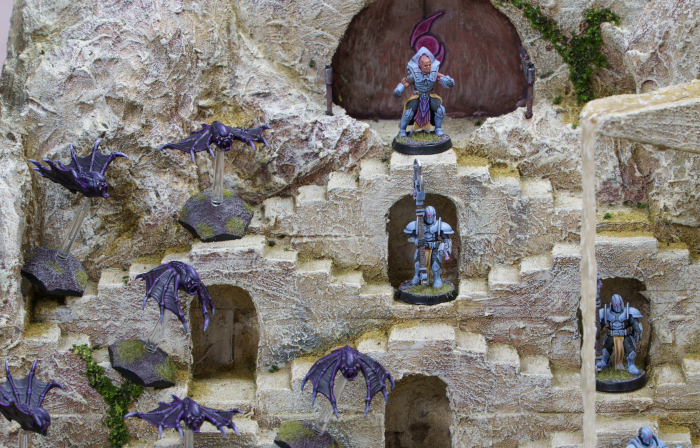
The Kaddar Nova overlooks his force, accompanied by his Praetorian escort.
Karist Troopers, including a Heavy Trooper equipped with a devastating Cybel Lance.
The second unit of Troopers, with a Ripper Heavy Grenade Launcher, and the deadly, teleporting Shadow Walker.
Tempest Elites are implacable fire support for Karist forces.
Though comparatively small, Minnows are no less ferocious than older Angels.
To get started on your own army of over-zealous doom, pick up the Karist models, or any of the rest of the range from the webstore here.
What are you working on? We would love to see your models and terrain in the Comm Guild Facebook group!
Remember to also grab a copy of the Maelstrom's Edge V2 Beta rules so you can get into the action!
Army Spotlight: Marten's 90 point Epirians
Posted on Wednesday Dec 14, 2022 at 05:00pm in Models
Built to fit on the table in 90 points for the V1 rules, Marten's force leans heavily into the various bot options. Contractors are all well and good, but accompanying them with chaingun-equipped support bots is even better!
Contractors wisely ensconced in cover.
Fireflies are comparatively fragile compared to most other Epirian bots, but are superb when you need to get some firepower across the battlefield in a hurry.
A Journeyman Bot Handler directs his Firefly cohort onto the battlefield.
Spider Drones are handy for decimating enemy troops, coming equipped with twin machine guns or flakk guns, and also excel at digging into cover to avoid enemy fire.
A unit of Spider Drones with their Apprentice Handler move up the centre under the watchful targeting lens of a Scarecrow bot.
A Scarecrow Sniper is a much more fearsome presence than its gangly frame might imply, capable of pummeling the toughest enemies at range with its shoulder mounted Maglock Railgun, or repelling closer foes with clingfire or chemical spray.
A second Scarecrow Sniper stands overwatch at the rear of the deployment.
To get started on your own army of robotic doom you can pick up these models, or any of the rest of the Epirian range from the webstore here.
What are you working on? We would love to see your models and terrain in the Comm Guild Facebook group!
Remember to also grab a copy of the Maelstrom's Edge V2 Beta rules so you can get into the action!
Terrain Tutorial: Cheap Trees from Pine Cones!
Posted on Friday Oct 14, 2022 at 05:00pm in Tutorials
- by Iain Wilson
A good collection of trees is handy for fleshing out your battlefields, but commercially-made trees made specifically for scale modeling can be expensive. I've shared a few different ideas in the past for making your own foliage, including using aquarium plants, expanding foam, and Christmas baubles covered in hot glue.
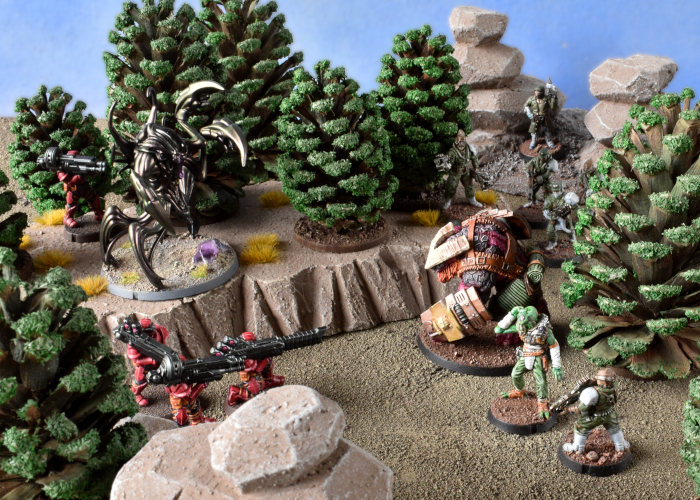
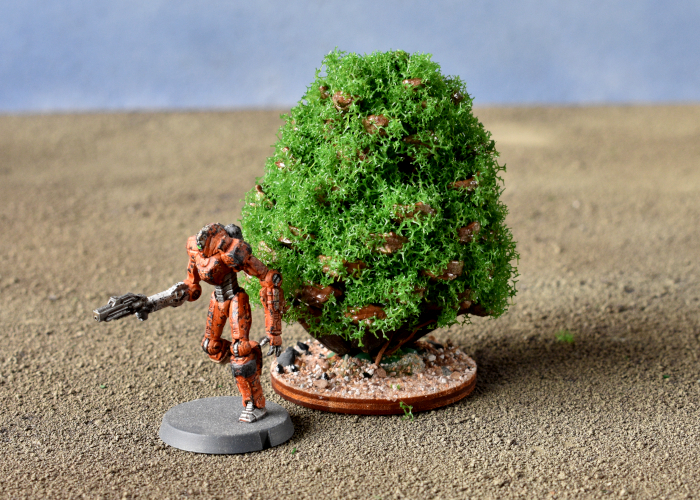
Over the years, one of the more common budget tree ideas I've come across is to use pine cones painted green. They have the advantage of being vaguely tree-shaped and inexpensive if you have pine trees nearby, but tend to wind up just looking like pine cones painted green. I thought I would see if I could come up with an easy and cheap way of improving on this idea a little, with this result:
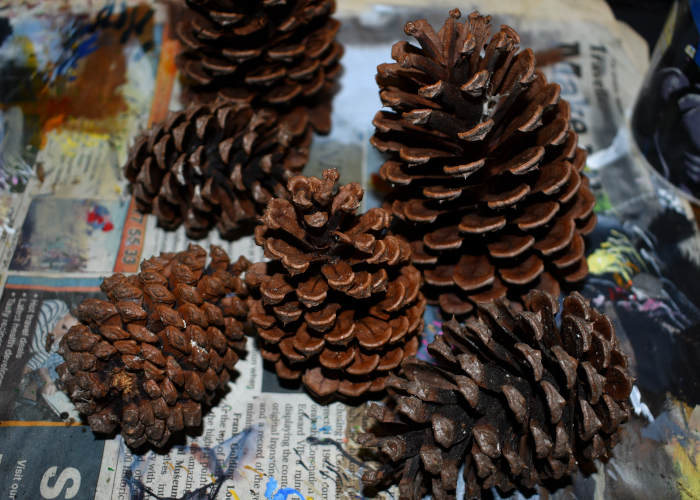
To get started, I collected a bunch of pine cones in assorted sizes, preferably as close to fully opened up as possible.
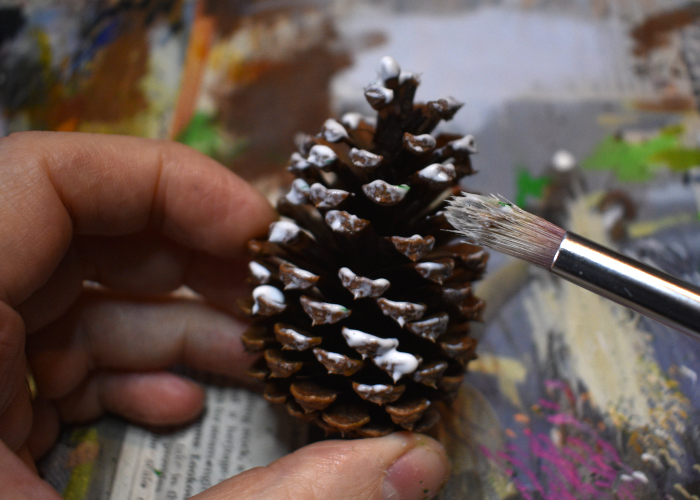
I took an old, large paintbrush and painted the outside of each pine cone with a generous layer of PVA glue.
Then while the glue was still nice and wet, I dipped the cones in a tub of green flock, rolling them around to get the flock covering all of the glued areas.
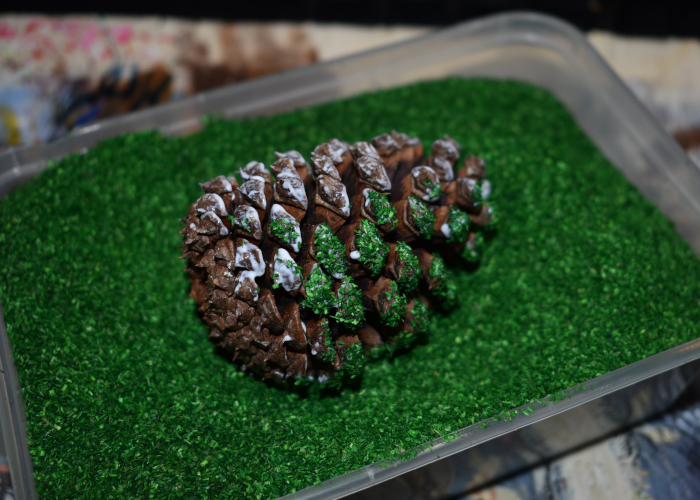
I don't normally use sawdust flock for modeling, as for its primary use (for grassed areas) I don't like how it looks, although I have used a finer flock in the past for making hedges. But I had a big tub of this stuff that someone gave to me years ago, and this seemed like a good use for it.
The flocked pine cones:
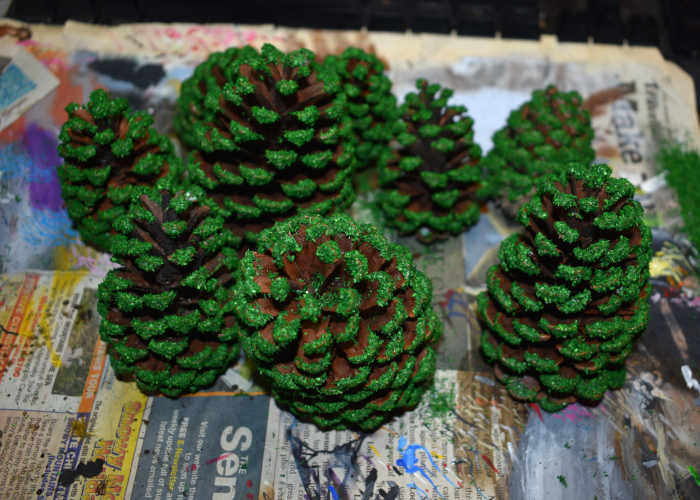
To finish up, I gave the trees a light spray from above using Army Painter Army Green. This dulled down the bright green of the flock and gave it some depth. I then used hot glue to attach the trees to some circular plywood bases. At this point, they can be put on the table as single trees, placed on top of a shaped terrain piece to make a forest base, or fitted to a textured base board. For the latter, you can glue the trees directly to the base board instead of using the circles, or texture around the circles so that the trees are removable, making for easier storage or the ability to remove trees when they are in the way for model movement.
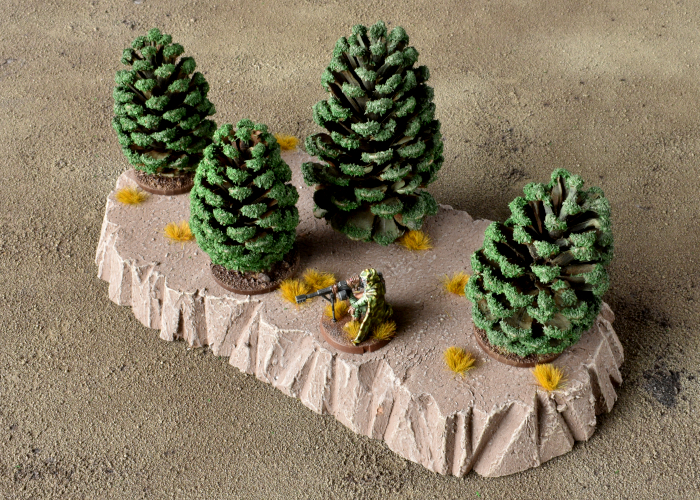
The end result, to be honest, still looks somewhat like pine cones painted green, although the illusion works a little better from above at normal playing height. For a little more work, you can also prune away the pieces from the base of the pine cone to create a trunk protruding from the bottom, like this:
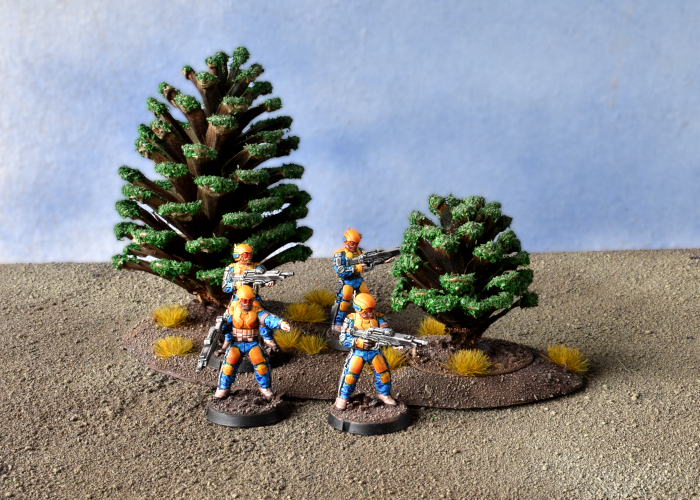
Or, to get even further away from the pine cone look, you can use a slightly more liberal coat of glue and cover the whole thing in landscaping foliage, like this:
Once you have your forest of pine-scented doom, head on over to the Maelstrom's Edge webstore here, to pick up an army to run around in it!
What are you working on? We would love to see your models and terrain in the Comm Guild Facebook group!
For other building ideas, modeling tutorials, army spotlights and conversion walkthroughs, check out the Hobby section of the Maelstrom's Edge website here. And while you're there, grab a copy of the Maelstrom's Edge V2 Beta rules!
Terrain Spotlight: Levitating Generator Platform!
Posted on Friday Sept 16, 2022 at 05:00pm in Tutorials
- by Iain Wilson
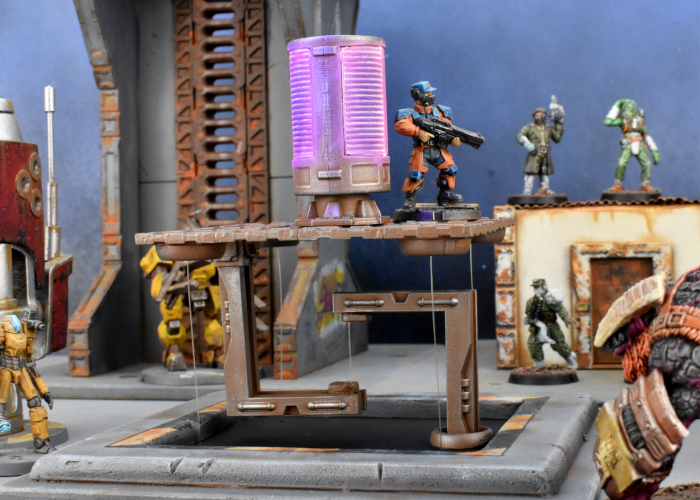
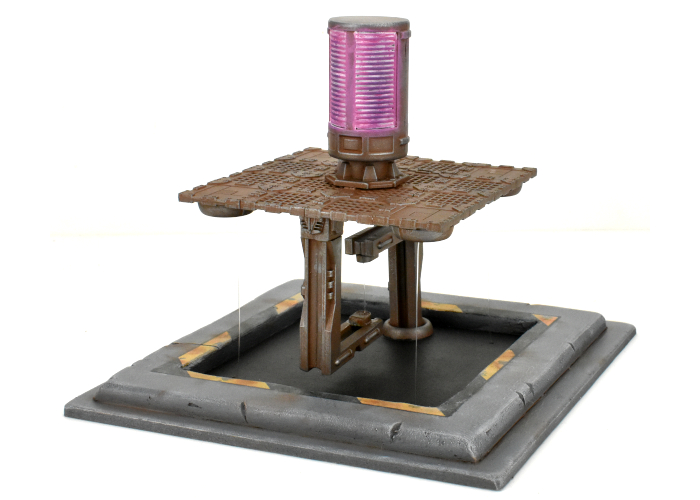
I've been fascinated for a while now by the various designs floating around for coffee tables and the like that 'float' with some clever cable design making it look like they have no actual support. In a moment of whimsy this week, I thought it might be fun to recreate this sort of design for the gaming table. And so... this happened:
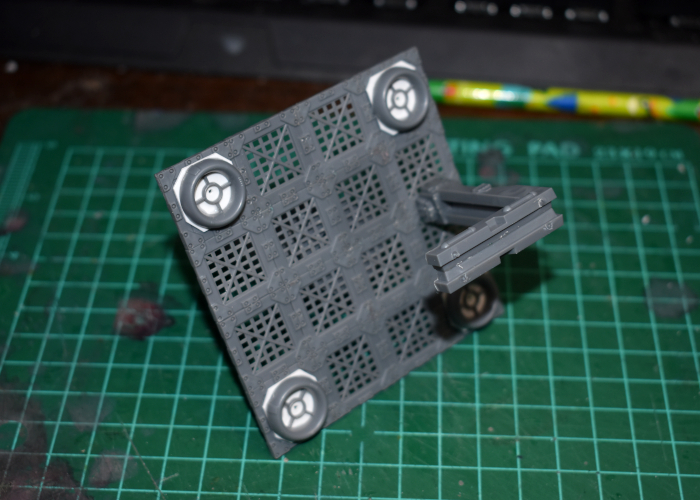
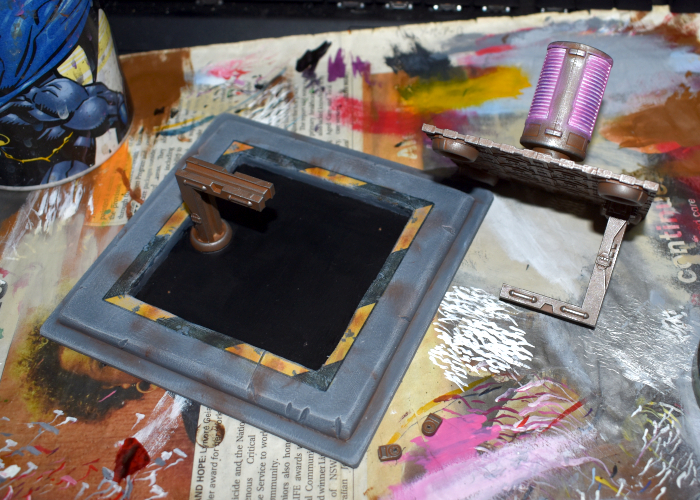
The main part of the structure is made from various bits and pieces from the Maelstrom's Edge terrain sprues. The circular windows on the bottom of the platform have a piece of thin plasticard behind them with a hole drilled through the centre. This allowed me to feed some clear fishing line through the holes and glue it onto the back of the plasticard. Once everything was painted and assembled, this would (I hoped!) securely hold the fishing line in place.
The base for the piece was made from a sheet of 2mm foamed PVC and some 6mm foamcore, with a few more bits from the terrain sprues for the support piece. I drilled holes in the base piece matching up to the holes on the platform corners, and made an indent beside each hole on the bottom of the base. This would allow the fishing line, when glued in place, to sit in the indents leaving the bottom of the base nice and flat.
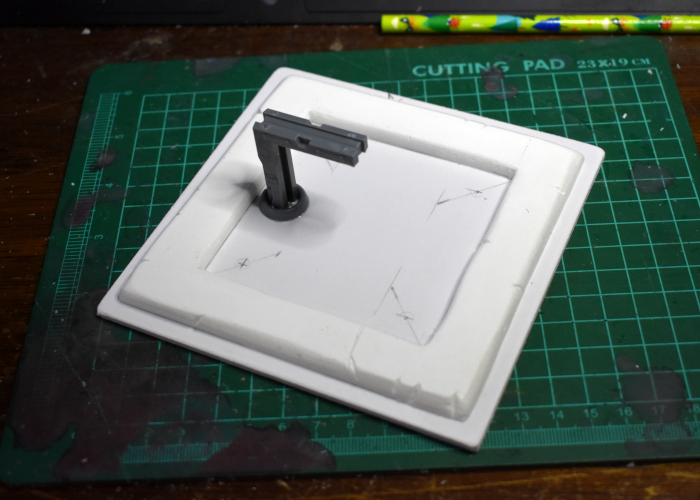
Everything needed to be painted before final assembly, to avoid getting paint on the fishing line - I wanted the line to remain as unobtrusive as possible.
I glued the fishing line into the window ports and glued those in place on the bottom of the platform, and then glued the central support line in place. The it was just a matter of pulling the corner lines through the base holes until everything was sitting square and secure, and gluing the ends of the lines in place on the bottom of the base. There was a bit of breath-holding when I turned it over, and much rejoicing when it turned out to work as intended!
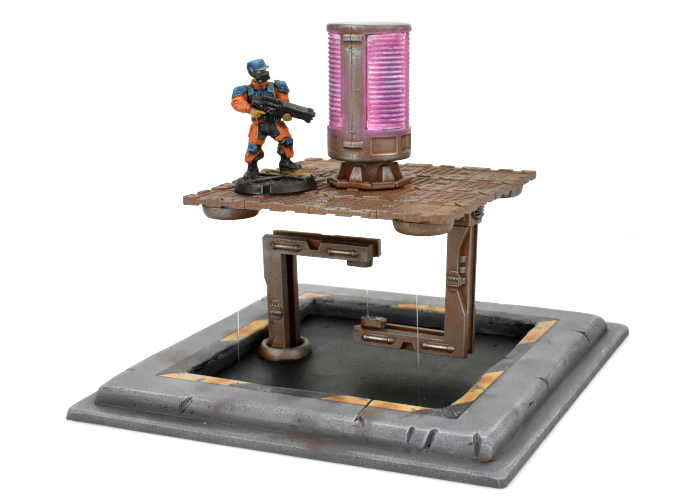

It's a bit of an odd piece for gaming terrain, but sometimes it's fun to make something just to find out if you can!
To build your own generator platform of floating doom, you can pick up the terrain sprues along with the rest of the Maelstrom's Edge range from the webstore here.
What are you working on? We would love to see your models and terrain in the Comm Guild Facebook group!
For other building ideas, modeling tutorials, army spotlights and conversion walkthroughs, check out the Hobby section of the Maelstrom's Edge website here. And while you're there, grab a copy of the Maelstrom's Edge V2 Beta rules!
Tags: modeling spotlight terrain terrainsprue
Terrain Tutorial: Quick and Easy Fences!
Posted on Friday Sept 09, 2022 at 05:00pm in Tutorials
- by Iain Wilson
Fences can provide an interesting extra dimension to miniature battlefields, as they block movement without necessarily also blocking line of site. This can force some tactical decisions around model placement and movement around the table. In this week's article, I'm sharing a quick and easy way to make some fences for your table.
I came across these Lego-compatible fence pieces on AliExpress completely by accident, and thought they seemed ideal for gaming. They come as a pack of fence sections, and join together with separate clip pieces, and they're a nice, dark metallic grey colour. So for the really quick and easy version, you could just take these, clip a bunch of them together and plonk them on the table as-is and call the job a good-un.
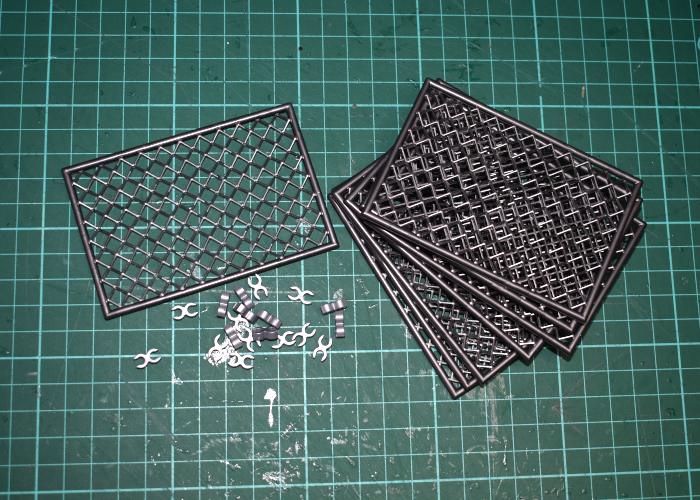
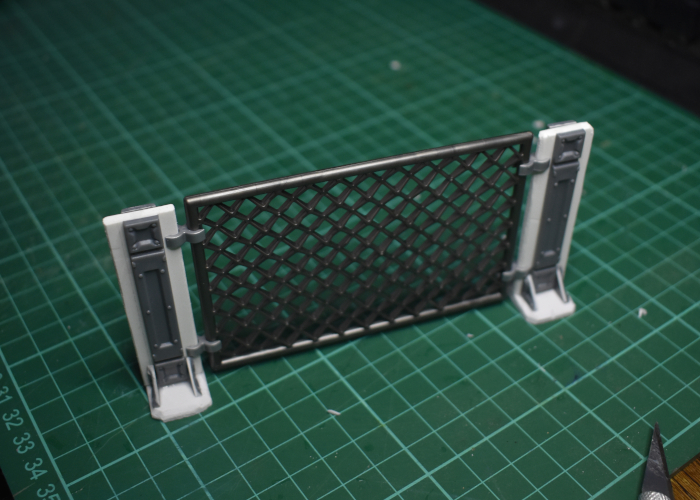
I wanted to fit them in with my existing terrain a little better, though, so I grabbed a couple of Maelstrom's Edge terrain sprues and set to work. I started by trimming up some reinforcing struts to about the same height as the fence panels by cutting off the top and bottom segments.
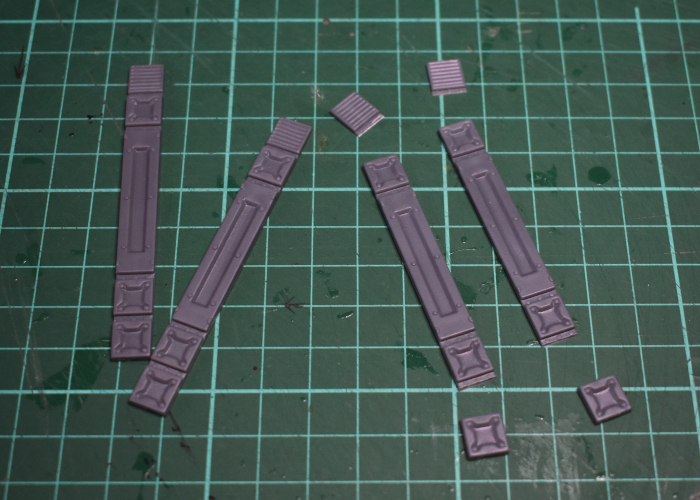
Then I took some 3mm foamed PVC and cut strips the same height as the struts, with about 4mm extra width either side - as a happy coincidence, this was the same width as two of the struts, so laying the struts side-by-side on the PVC served as a handy cutting guide.
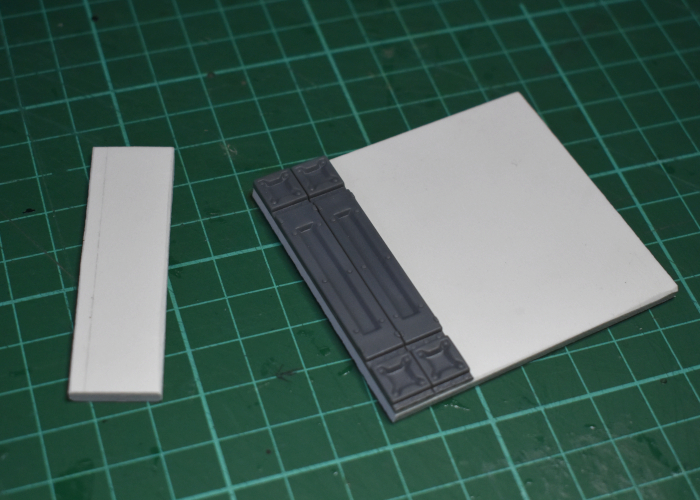
I glued the struts in place on either side of the PVC strips to form reinforced fence posts, and then cut some shorter strips to serve as bases for the posts. The bottom segment removed from the struts, cut in half diagonally, made some perfect supports to strengthen the attachment between post and base.
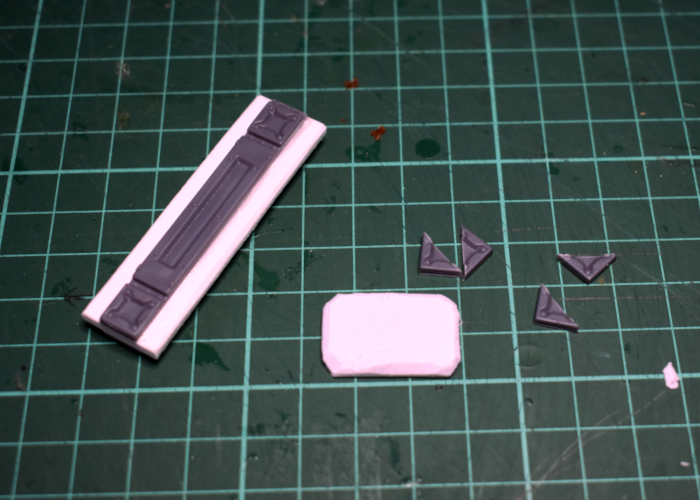
With everything glued together, the clips for the fence pieces slot snugly onto the PVC and it all stands up nicely.
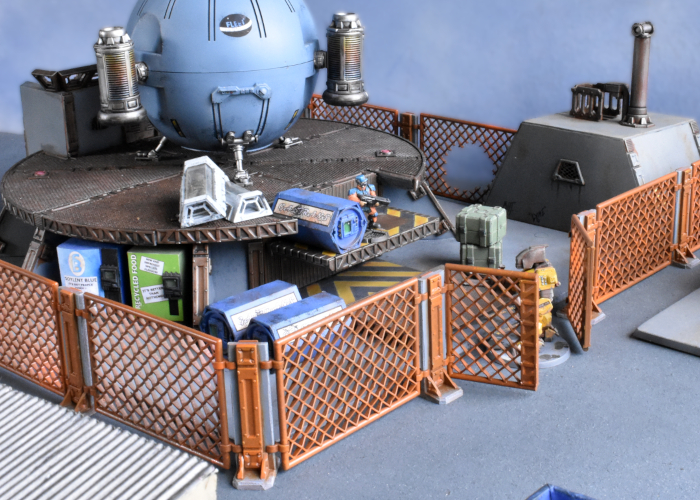
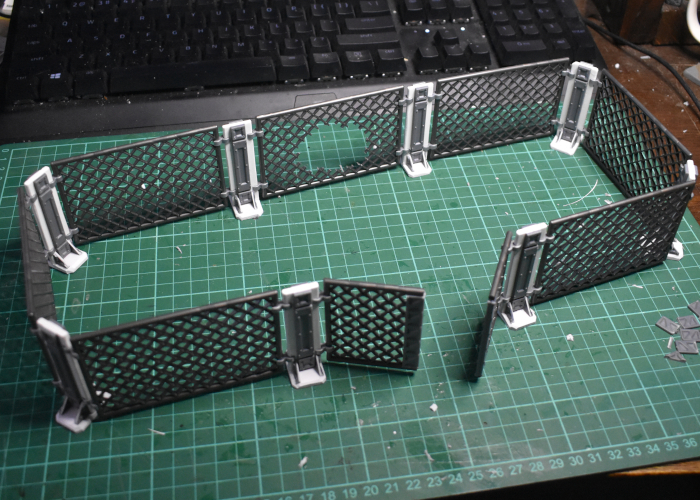
I made a bunch of posts, and for good measure cut one of the fence segments in half and attached some more reinforcing struts on the inner sections to make a two-part gate. The whole thing slots together and by twisting the holding clips can go around corners into whatever configuration is needed.
With a quick coat of rusty paint (Vallejo Beasty Brown spray with some splotchy spray of Tamiya Pure Orange and a light drybrush with Army Painter Fire Lizard) and some grey for the PVC parts (Army Painter Uniform Grey with a drybrush of white and some Vallejo Beasty Brown drybrushed into the creases) the fence is ready for the table!
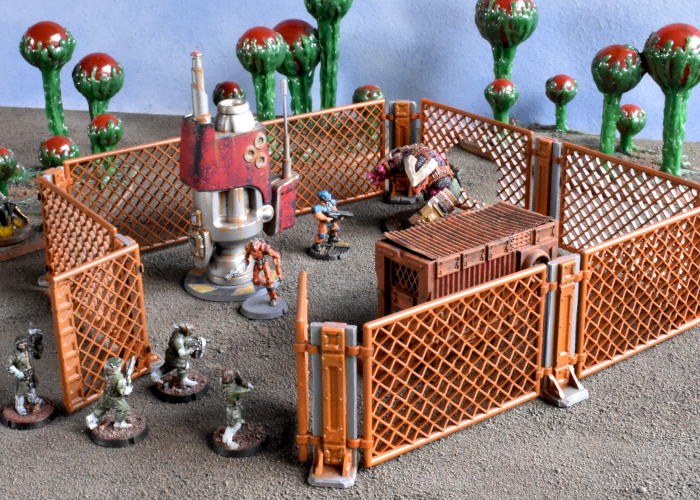
To build your own fence of chainlinked doom, you can pick up the terrain sprues along with the rest of the Maelstrom's Edge range from the webstore here.
What are you working on? We would love to see your models and terrain in the Comm Guild Facebook group!
For other building ideas, modeling tutorials, army spotlights and conversion walkthroughs, check out the Hobby section of the Maelstrom's Edge website here. And while you're there, grab a copy of the Maelstrom's Edge V2 Beta rules!