Terrain Tutorial - Hedges
Posted on Monday Jul 31, 2017 at 05:00pm in Tutorials
- by Iain Wilson
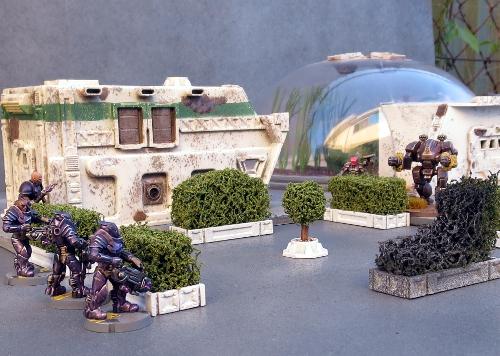
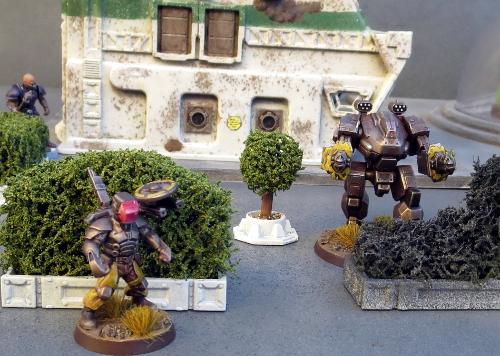
Stands of forest or jungle trees are staples of most of our gaming collections. Sometimes, though, you want your greenery to suit a more civilised warzone, and for that, you just can't go past the humble hedge. So this week, we're looking at a quick and easy way to churn out some shrubby scatter terrain.
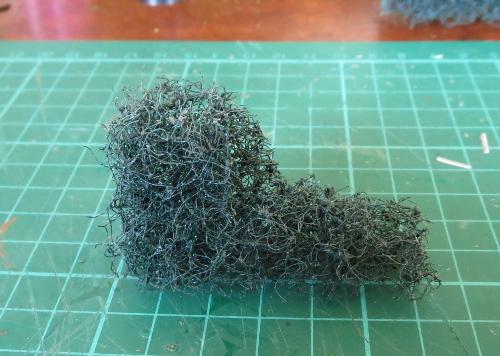
We start with a thick kitchen scourer. For a standard green hedge, you would ideally want a dark green or black scourer, although you could easily use other colours to make alien hedges. The scourer I'm using here is about 20mm thick, and has a really coarse texture. You could use thinner scourers by gluing a couple together, but that may wind up with a visible seam line.

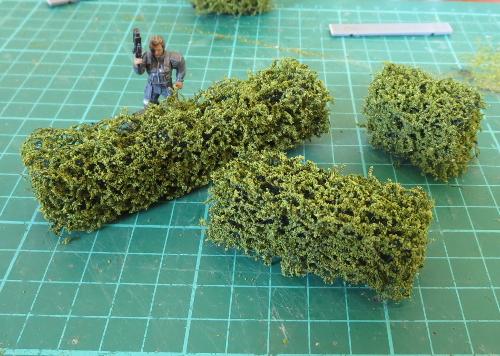
Cut the scourer into strips using a sharp knife or a fine saw. The width of the strips is up to you, depending on how tall you want to make your hedges.

Next, paint the strips of scourer with some PVA glue. Work the glue into the weave of the scourer a little, but try to not leave any big lumps of glue right on the surface, as that may make the outside of your hedge a little blobby.
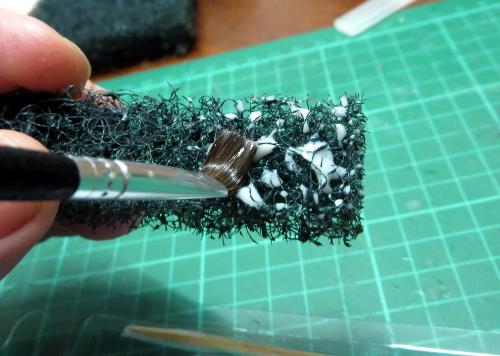
Finally, scatter flock over the glue. You'll get the best results here with a fine grade flock, which you should be able to find in most gaming stores' modeling supply sections or anywhere that sells model trains. Don't use the chunkier, dyed-sawdust stuff - it will just wind up looking like dyed sawdust stuck to a sponge.
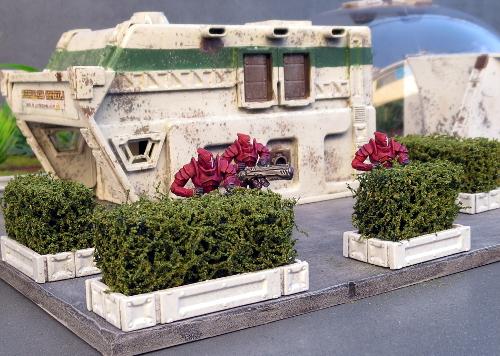
Let the glue dry, and you could easily use your hedges as is to stick onto terrain pieces or scatter around a table. For a slightly more urban look, you can add some boxwork to them using strips of plasticard or the support struts from the Maelstrom's Edge terrain sprue. For the below, I've used a strip of 5mm masonite as a base, which will help to give the hedge section a little more weight.
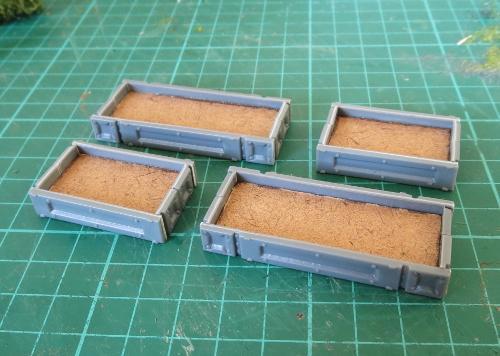
Paint the boxwork up however suits your terrain collection, and then glue the hedges in place with some superglue or PVA glue.
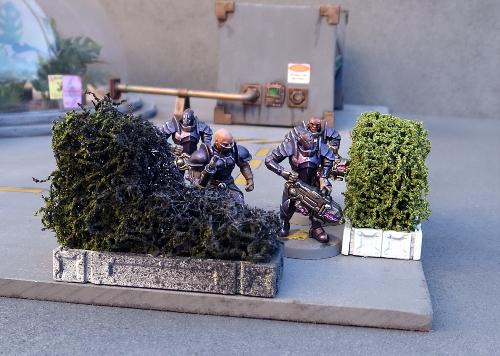
You can mix things up a little by making sections in different heights, to create some lower cover and some full line-of-sight-blocking barriers. Battle damage can be added by cutting or tearing away pieces of the scourer before adding the flock.
To create a burnt effect, I left the flock a bit patchy around the damaged part of the hedge, and once the glue was dry gave it a quick spray with some flat black, followed by a light dusting of flat grey.
If you want to get really carried away, you can also shape the scourer using a knife or some sturdy scissors and create some topiary features.
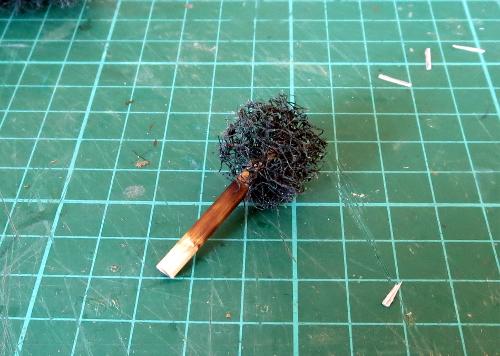
The trunk of this ball topiary was made from a short piece of a wooden skewer, dyed with a little brown ink and then glued into the scourer ball with superglue.
If this all has your green thumb itching, grab yourself some scourers and hedge away! As always, feel free to share your creations on the Comm Guild Facebook page - first one to post a miniature garden maze for their gaming table wins a cookie! (Or possibly just the adulation of the masses and fleeting fame...)
You can find the full range of Maelstrom's Edge models, including the ever-useful terrain sprue, in the Maelstrom's Edge webstore here, and a collection of modeling articles, tutorials and walkthroughs of a wide range of different building and miniature projects in the article roundup here.
