Entries tagged [angel]
The final resin-to-digital conversion release arrives - Karist Angel Keepers!
Posted on Thursday Oct 03, 2024 at 09:18pm in Models
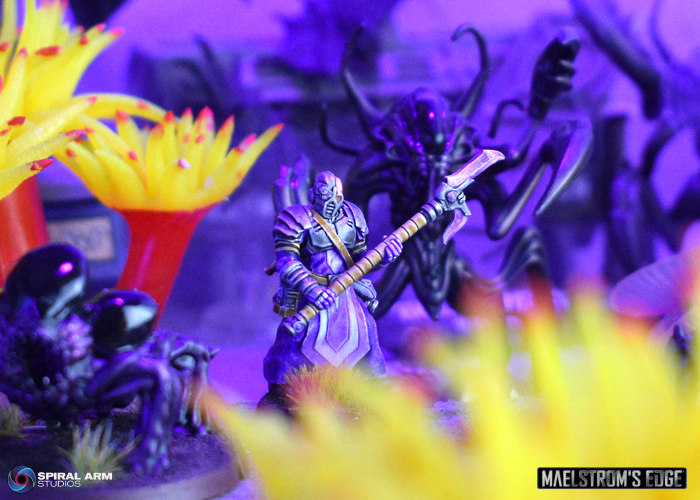
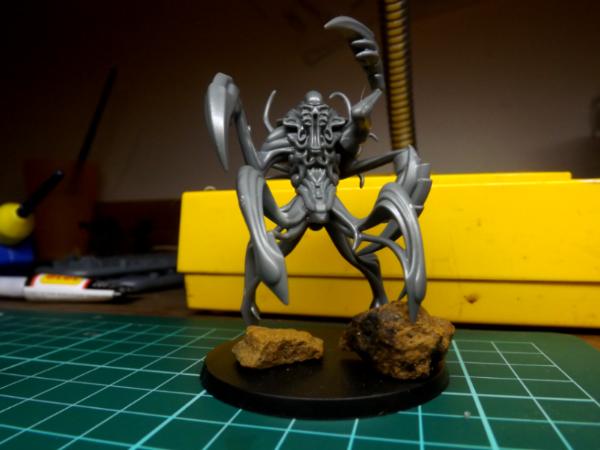
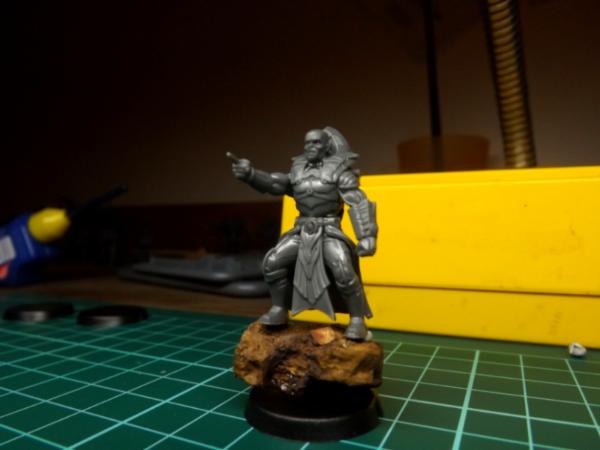
An Angel Keeper leads their alien charges into battle.
A strange and isolated offshoot of the Karist priesthood, Angel Keepers train enslaved Angels using regimented doses of cybel energy, and marshal these alien creatures on the battlefield.
This release required a bit of resculpting as the original model sculpt was lost, and so it had to be reconstructed from a partial sculpt. The resin original was also only designed to have one of the Keeper's two main weapons, with separate hand options holding the cybel goad and grenade launcher. The STL version now has the cybel goad in hand and the grenade launcher slung and ready when the Keeper needs it. The model also comes with two pose variants, an optional holstered pistol, and a male and female head - although the differences in appearance are minor due to the Keeper's mask!
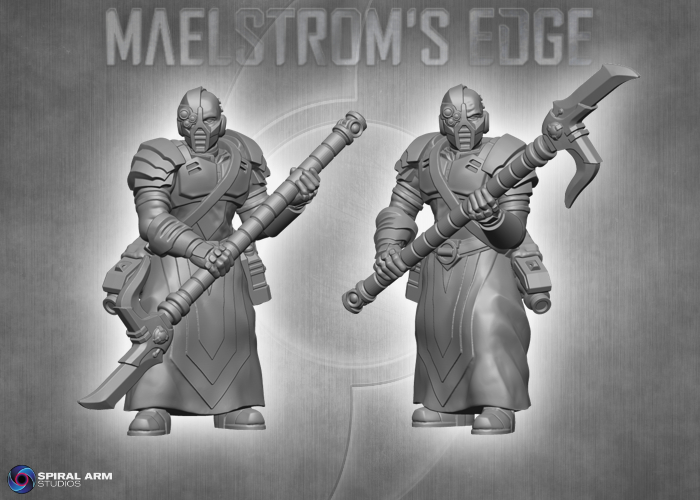
The digital file includes supported and unsupported versions of the Angel Keeper.
You can find the rules for using Angel Keepers in your Karist Enclave force in the downloads section of the Maelstrom's Edge website here.
Start building your elite army of shapeshifting doom by grabbing your Angel Keeper from the webstore here!
Painting Spotlight: Metallic Angel
Posted on Monday Sept 06, 2021 at 06:00pm in Tutorials
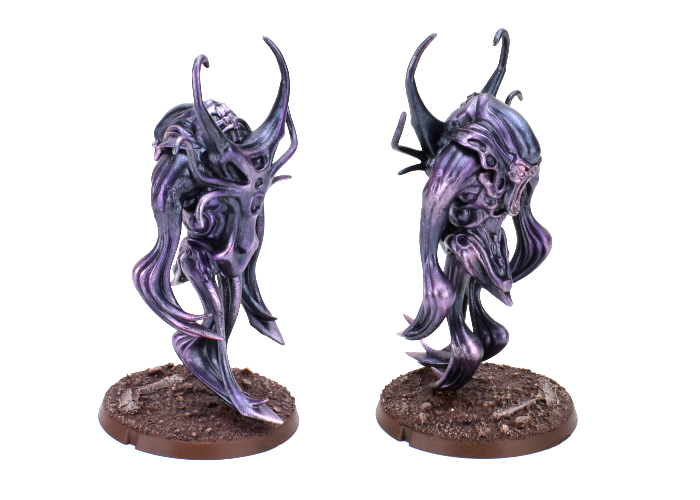
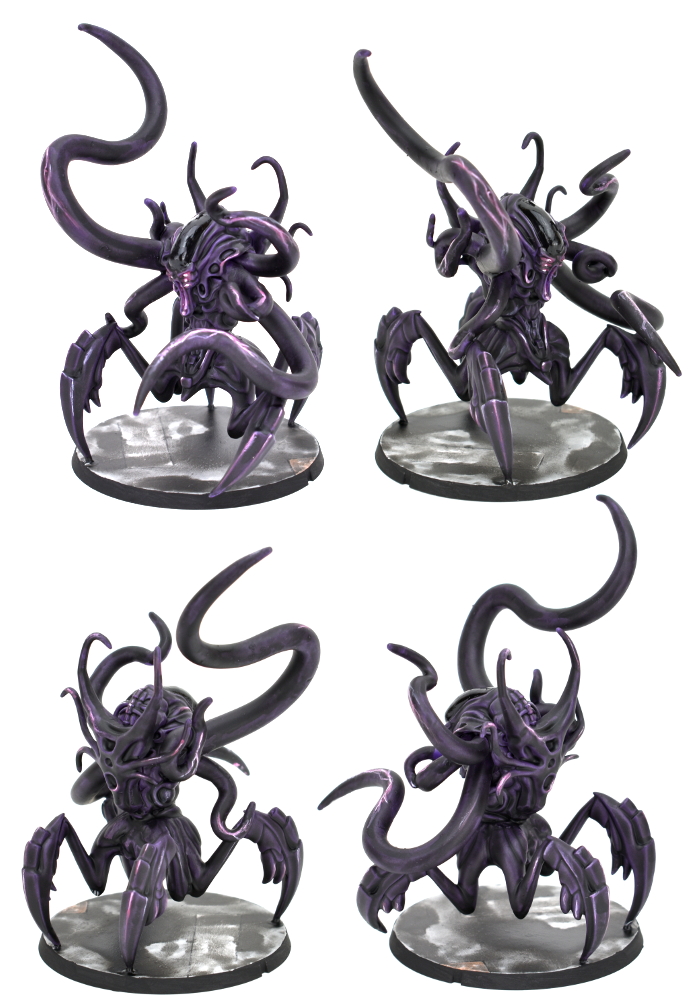
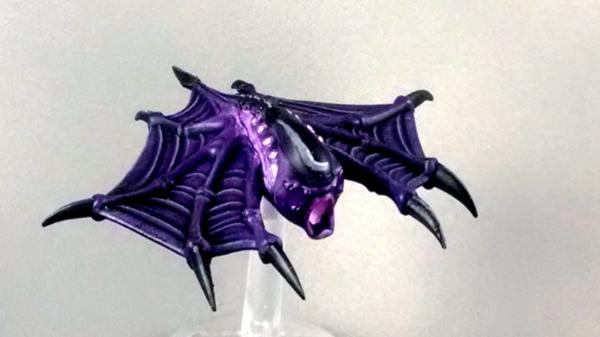
A while ago, I picked up a set of the Army Painter coloured metallic paints, and decided this week it was time to take them for a spin. The paint set includes some lovely purples that were just screaming out for a friendly little angel to bring to life. And so that's what I did.
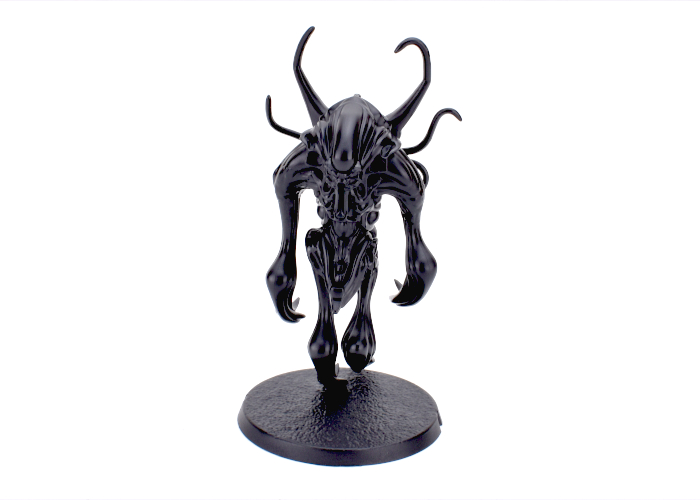
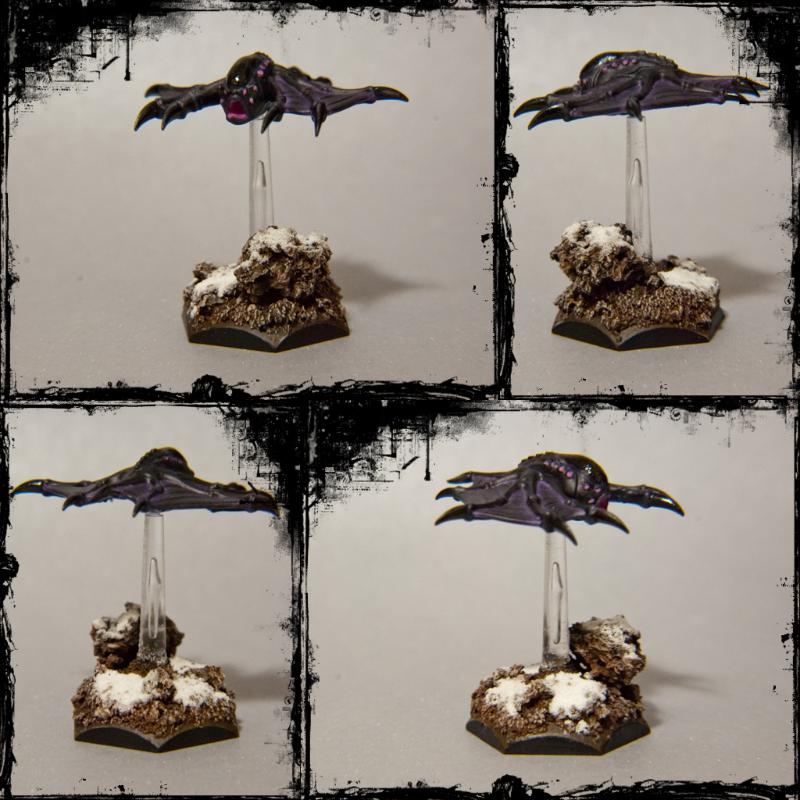
The model I chose to use for this was a conversion that I put together some time ago while playing around with the Mature Angel kit. The end result is a slightly sinister-looking, floaty juvenile angel.
Metallic paint generally goes best over a dark basecoat, so I started out by spraying the model with some Army Painter black.
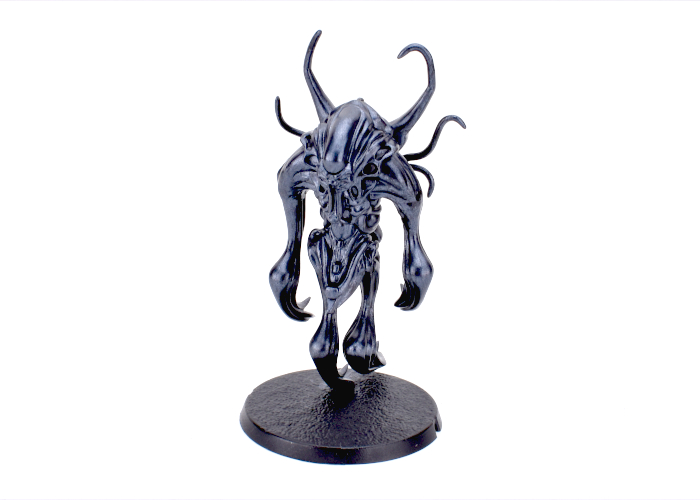
I then gave the whole model a coat of Night Scales, a metallic black from the Army Painter set. This has a slight bluey-purple tint to it that is just perfect for the angel. I was tempted to just leave it like this and call the job a good'un.
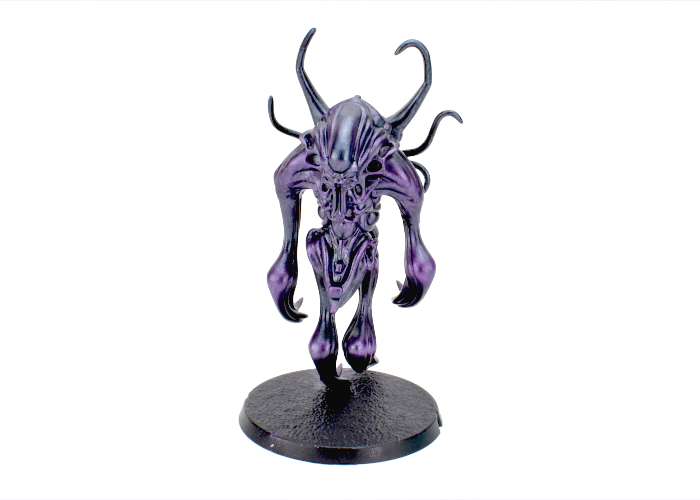
Deciding to go for a little more 'wow', though, I grabbed the bottle of Royal Purple, a midrange purple metal colour, and drybrushed the angel with it, building up more colour on raised areas and tentacle tips.
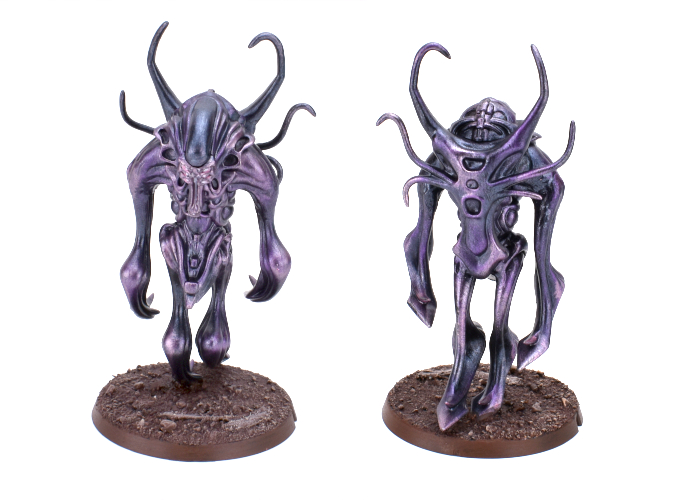
I used a light drybrush of Zephyr Pink to add some extra highlights wherever it seemed appropriate. I also went back over the top of the head with some more Night Scales, and picked out the eye sockets with Zephyr Pink before adding some white over on the eyeballs and inside the mouth. Finally, I added some coarse sand mix to the base with PVA glue, and then painted with Army Painter Dirt Spatter, then a wash of Mid Brown ink, and finally a drybrush with Kobold Skin, also picking out the base edge with more Dirt Spatter.
To build your own angel of floaty, screamy doom, you can pick up the Mature Angel kit along with the rest of the Maelstrom's Edge range from the webstore here.
What are you working on? We would love to see your models and terrain in the Comm Guild Facebook group!
For other building ideas, modeling tutorials, army spotlights and conversion walkthroughs, check out the Hobby section of the Maelstrom's Edge website here.
Painting Spotlight: Mature Angel Conversion
Posted on Monday Nov 23, 2020 at 05:00pm in Tutorials
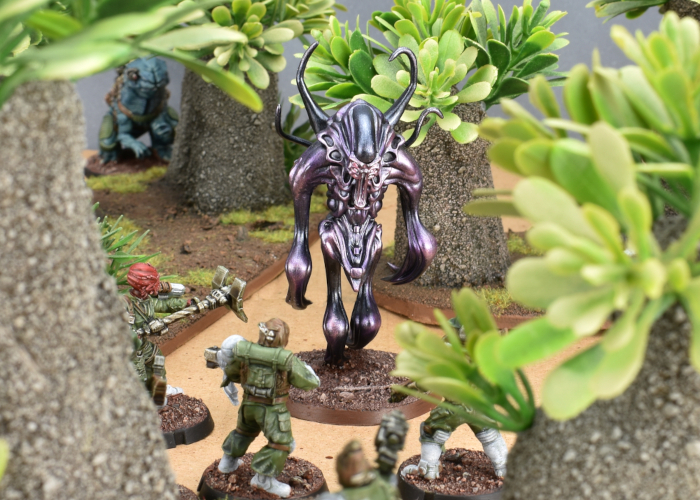
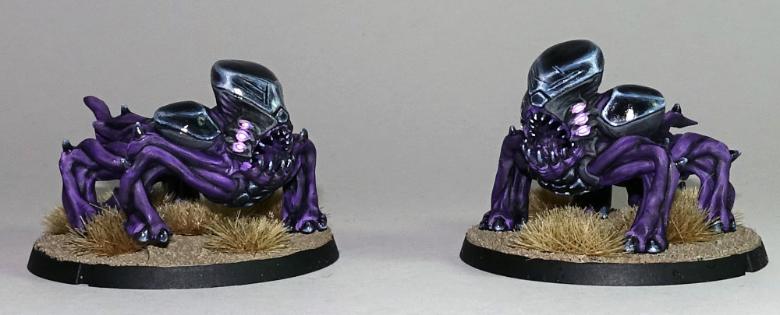
Last week, I added another Hobby Basics article to the Maelstrom's Edge website, covering some general information and quick tips for working with modeling putty. As part of that article, I wound up converting up a Karist Angel with more tentacles than is generally considered safe, and I couldn't resist taking the time this week to slap some paint on it. I've painted up a few different angels in the past, playing with different techniques each time to create a suitably inky-black and cybel-purple alien appearance for them. For this one, I decided to try something new once again, and broke out the Army Painter paints for a quick experiment. Here's a quick walkthrough of the painting process!
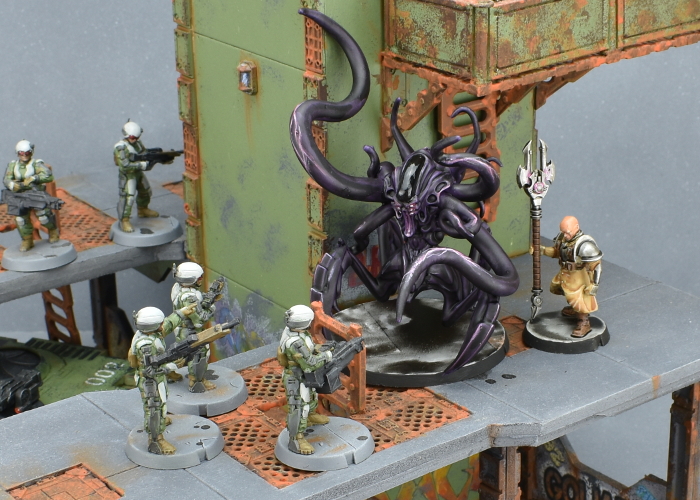
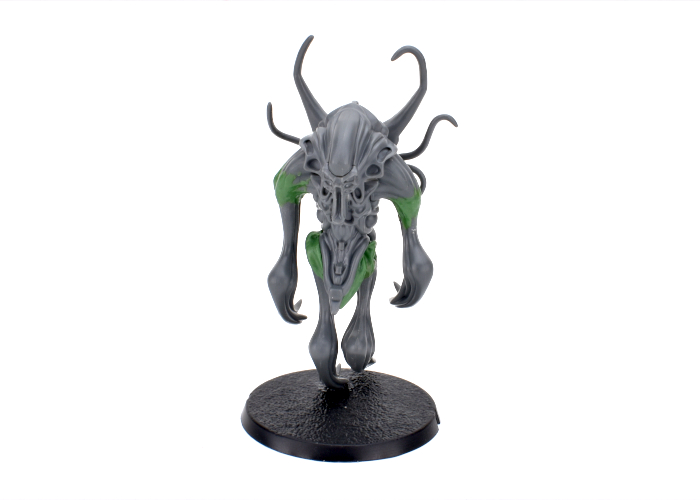
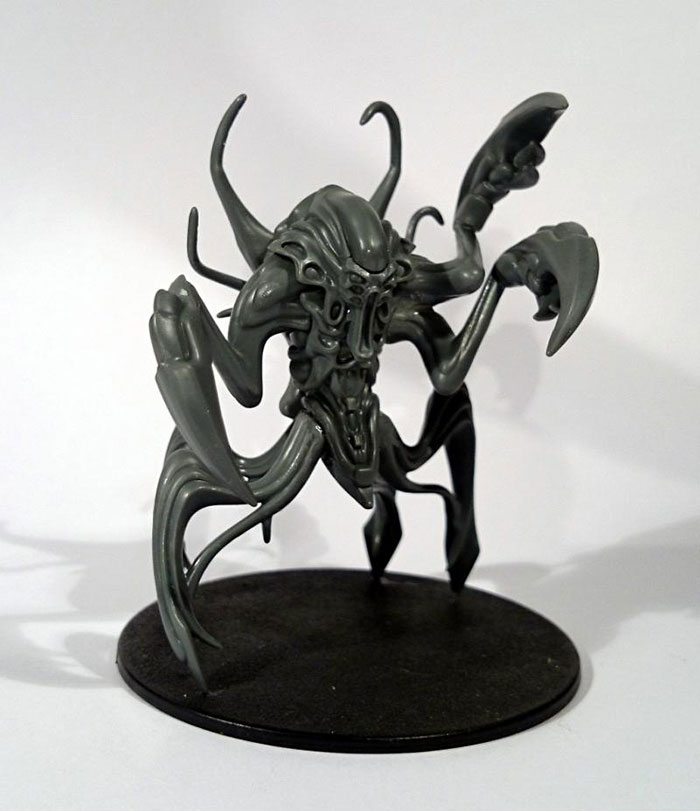
Before we get the paint on, here's a proper look at the converted model. It's based on the plastic Mature Angel kit, but with the claw arms modified slightly to form crab-like legs, and lots of tentacles added with 'green stuff' modeling putty.
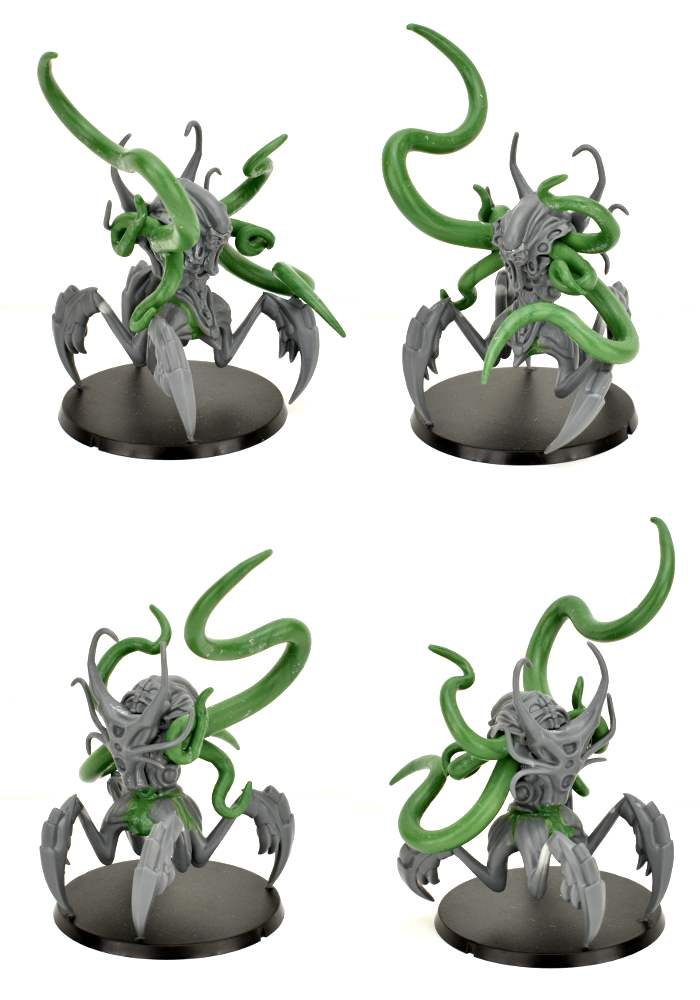
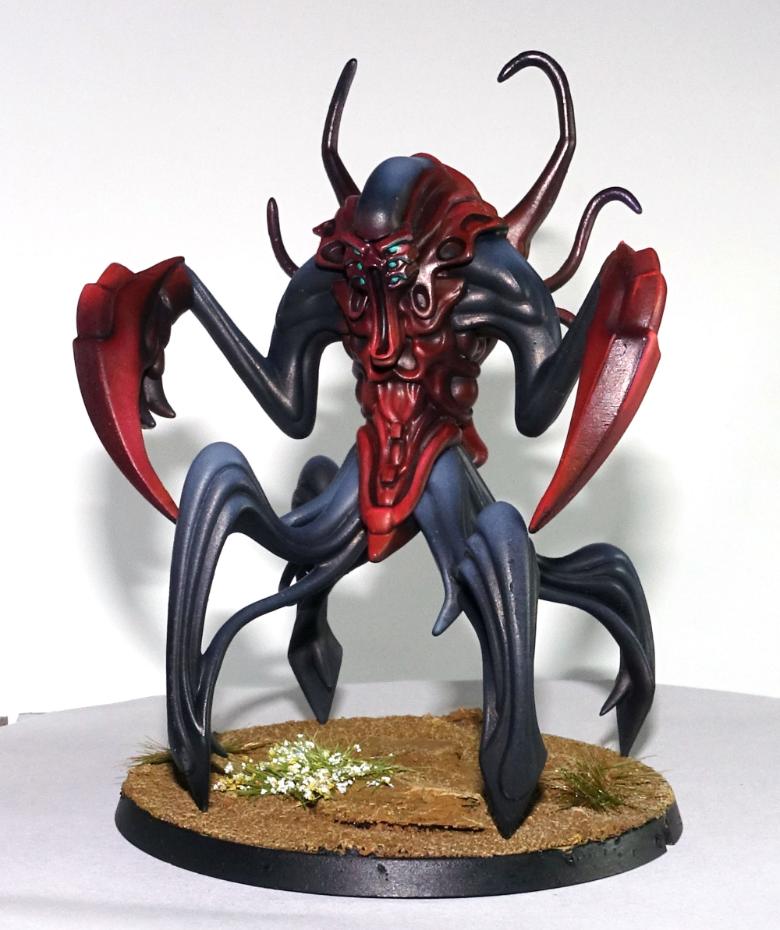
I gave the model an initial basecoat with white, to get a consistent colour for the next steps. Over that, I used Army Painter Alien Purple. Then, grabbing a nice, big brush, I painted three coats of Dark Tone over the entire model, leaving it to dry between each. This darkened everything up to an almost-black, while leaving hints of purple showing through.
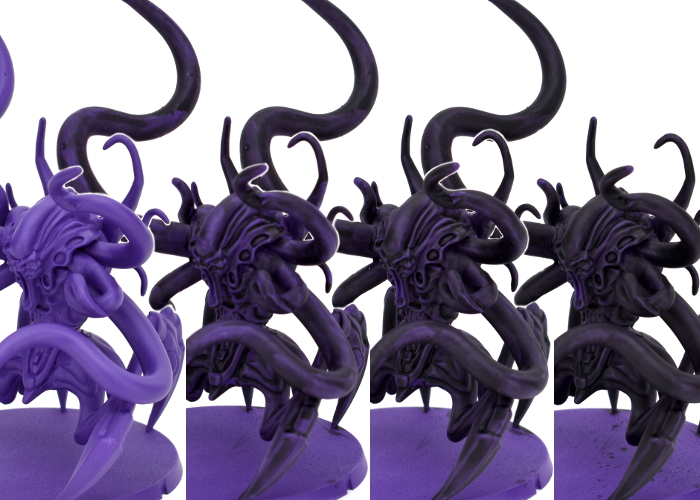
I then used a mix of Wasteland Soil, Warlock Purple and white to add highlights. I didn't highlight everywhere, as I didn't want to brighten the model up too much, and wanted the details to be slightly shadowy to accentuate the fluid nature of the Angel's body. I just added the highlights in places where they would add a little 'snap' to the model, accentuating specific features. I also painted in some lightning-like effects on the larger flat areas, to show the cybel energy coursing through the Angel's void gel, and painted the smooth top of the angel's head with black, and then a coat of gloss varnish. The base was painted similarly to my Greatcoat Karist Trooper kitbash, using Ash Grey and a generous layer of Dark Tone.
To paint up your own squidgy alien of tentacled doom, you can pick up the Mature Angel kit along with the rest of the Maelstrom's Edge range from the webstore here.
What are you working on? We would love to see your models and terrain in the Comm Guild Facebook group!
For other building ideas, modeling tutorials, army spotlights and conversion walkthroughs, check out the Hobby section of the Maelstrom's Edge website here.
Painting Spotlight: Colorshift Angel
Posted on Friday May 01, 2020 at 02:36am in Tutorials
Time to build something!
For this week's article, I decided to have a go at a project that I've had percolating in the back of my brain for a while now. I bought some Colorshift paints from Green Stuff World some time ago, because they looked to pretty to not try them out on something, and I thought that they would be just perfect for conveying the otherworldly nature of the Karist Angel. So, I dug out an Angel that I had built way back when the Battle for Zycanthus box was first released and got some paint on it, with this result:
So, the first thing to mention here is that the Colorshift paint gives a really neat, subtle colour effect that is frustratingly difficult to photograph! There's a video at the end of this article that shows the transition effect a bit better than the pics fo, although the purple still looks more subdued than it does in the 'flesh'.
Back to the model! The Angel that I used here was built from the regular plastic kit, with some reposing of the legs and a second claw added on the left, just because I thought it would look cool.
As per the directions for the Colorshift paint, I started out with a coat of gloss black. I don't have an aurbrush, so this was just from a spraycan.
Once the black was dry, I started painting light layers of 'Evil Forest', taking care to leave the forehead so that it would stay a nice, shiny black. Evil Forest is shown on the bottle as a red to green transition, but the red actually comes out a deep purple over the black, which is exactly what I was looking for. I painted it on in light coats using a large, flat brush and brushing downwards to leave the black in the crevasses - traditional highlighting and shading tends to kill the shifting effect, so I was trying for whatever shading I could get.
Once I had built up sufficient colour with the Evil Forest, I added some highlights on raised edges and surfaces using 'Emerald Getaway'. This is a pale greeny-blue to blue shift, so over the Evil Forest it helped to accentuate the green shift a little, although that really doesn't show well in these pics.
To finish up, I painted the base, and painted in the eyes and mouth using some old Citadel Liche Purple, Tentacle Pink and white.
And the aforementioned video rotation:
You can pick up the plastic Mature Angel, along with the rest of the Maelstrom's Edge model range from the webstore here.
What are you working on? We would love to see what your models and terrain in the Comm Guild Facebook group!
For other Maelstrom's Edge modeling articles, including tutorials and walkthroughs of a wide range of different building and miniature projects, check out the Hobby section of the Maelstrom's Edge website here.
Tags: angel karist painting spotlight walkthrough
Terrain Spotlight: Specimen Tank
Posted on Thursday Nov 07, 2019 at 05:00pm in Tutorials
The new Maelstrom's Edge terrain sprue introduced a whole lot of fun new bits and pieces to play with, and I've been having a blast coming up with different ways to make best use of them. This week, I'm using some iris portals in a slightly un-portal way, to create a laboratory-style specimen tank!
For the top and bottom of the tank, I used a pair of the irises from the terrain sprue.
The two irises are joined together using a piece of 1mm thick, transparent plasticard. I cut this into a rectangle 74.5mm long, to match the circumference of the iris' inner rim. I then curled the plasticard around into a cylinder, and used another thin strip of plasticard as a tab to glue the edges together.
The instrument panel mount serves both to hold the controls for the tank, and to disguise the join in the cylinder. I used a piece cut from the side of the terrain sprue itself for the upright strut, a computer panel and the base of the sentry turret to create a sliding mount for the panel.
Finally, it's not much of a specimen tank without a specimen to put in it! I took a mature angel torso, and filled in the arm, leg and back sockets with 'green stuff' putty, to create a 'resting' angel form with no void gel extrusions.
On to painting! This was mostly done with Army Painter paints. I gave the tank parts (aside from the cylinder) a basecoat with a spray of Plate Metal, and the angel with Wolf Grey.
I followed up with a wash of Dark Tone on the metal parts. I wanted a grimy, green ooze look to the cylinder without messing about with water effects, so I painted the inside of the cylinder with some brush-on gloss varnish with a couple of drops of Green Tone mixed in.
The angel received a couple of heavy coats of Dark Tone over the grey.
To suspend the angel in the tank, I attached it to the upper iris with a piece of copper wire glued into holes drilled into the top of the angel's head and the underside of the iris.
With a final drybrush of P3 Pig Iron over the metal parts, and some detailing on the computer panel, I then assembled the tank by gluing the cylinder into the top of the base iris, sliding the angel inside and gluing the upper iris on top, and then attaching the panel strip to the side.
To give it a go yourself, you can grab the new terrain sprue along with the rest of the Maelstrom's Edge range, from the Maelstrom's Edge webstore.
As always, feel free to share your models and terrain, or ask any Maelstrom's Edge- or hobby-related questions on the Comm Guild Facebook page!
For other Maelstrom's Edge modeling articles, including tutorials and walkthroughs of a wide range of different building and miniature projects, check out the Hobby section of the Maelstrom's Edge website here.
Modeling Spotlight: The Angel Hellblaster (or 'Fun with Resin!')
Posted on Monday Nov 13, 2017 at 05:00pm in Tutorials
- by Iain Wilson
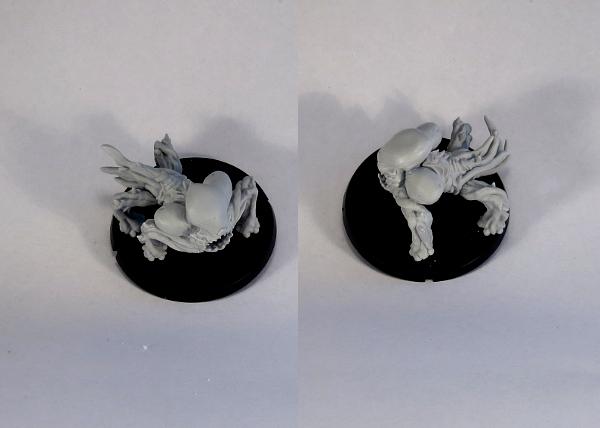
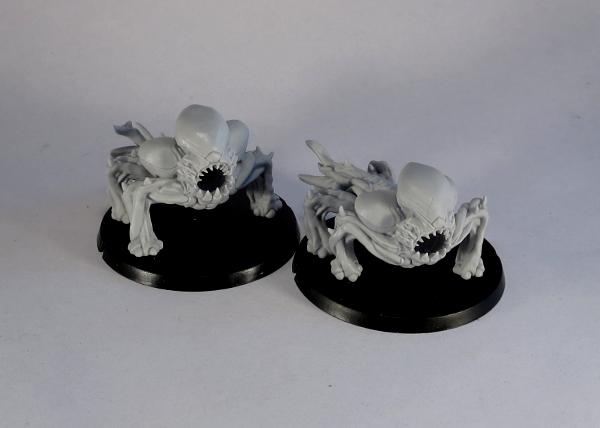
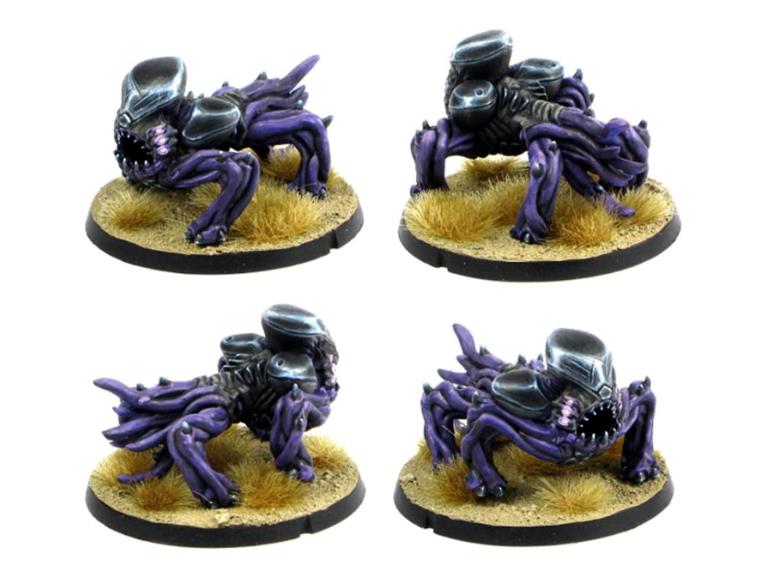
The Karist Hellblaster is the first of a range of resin models for Maelstrom's Edge, to help flesh out the factions with some more fun and freaky options. This week, I'm having a look at some modeling options with this great little kit.
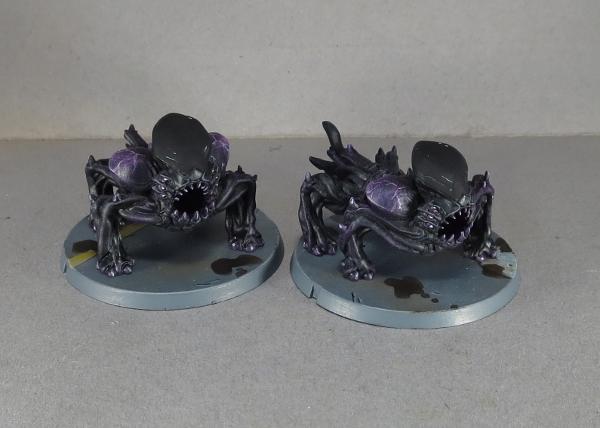
The Hellblaster comes in a pack of two variants, with slightly different posing and tail tentacles.
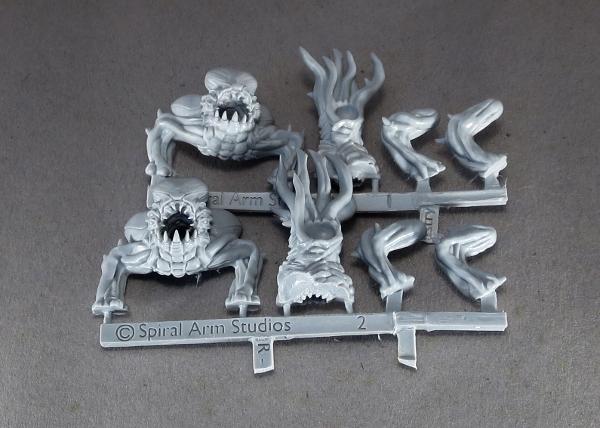
Assembly is really easy - It's always a good idea to wash resin models in warm, soapy water before assembly, to clean off any mould release residue (this may affect paint adhesion, otherwise), then cut off the sprue and trim off any mould lines, glue the head piece to the front of the torso, and the rear legs into their sockets. There's a little posability in the rear legs, as the sockets allow for some movement.
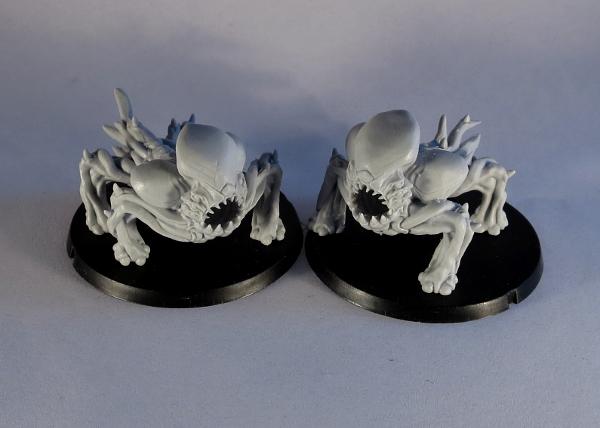
If you want to branch out a little from stock poses, one of the really fun aspects of resin models is that they can be easily reshaped. Drop the part you want to reshape into some hot water for a minute or so. When the part has had time to warm through, fish it out and quickly bend it into the shape you want. Then pop it into some cold water to set it in that shape.
Obligitary safety warning: It's always a good idea to avoid breathing in fumes from heated resin or plastic, so boil your miniatures somewhere with good ventilation. And use an appropriate tool (tweezers, long-nose pliers, etc) to fish the resin pieces out of the hot water and handle hot parts with care.
Using this method, you can add a bit of a bend to the Hellblaster's torso, to give it more of a sinuous, in-motion appearance.

You can also reposition legs and tentacles to suit. It helps that angels don't have a fixed skeletal structure - tentacles are fairly forgiving when it comes to finding appropriate poses!
Note that as an alternative to the hot water technique above, you can achieve a similar result using a hair dryer to heat smaller parts. As above, through, handle with care to avoid damage to both the parts and yourself.
With a little more work, you can carefuly cut through in between the cheek sacs and the tops of the forelimbs, to allow for more movement. In the below example, I have stretched the legs out to raise the head and shoulders up higher, and added a slight forwards arch to the angel's back.
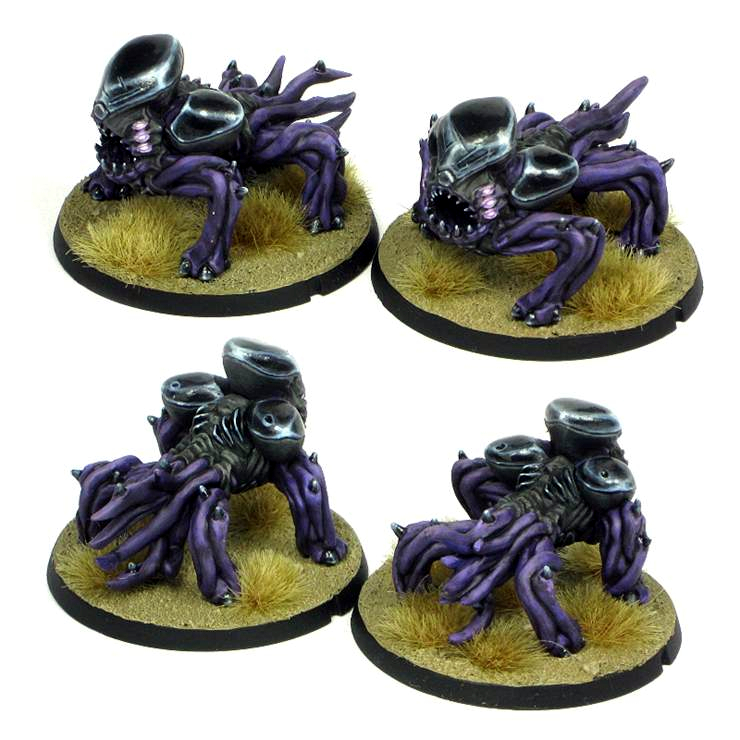
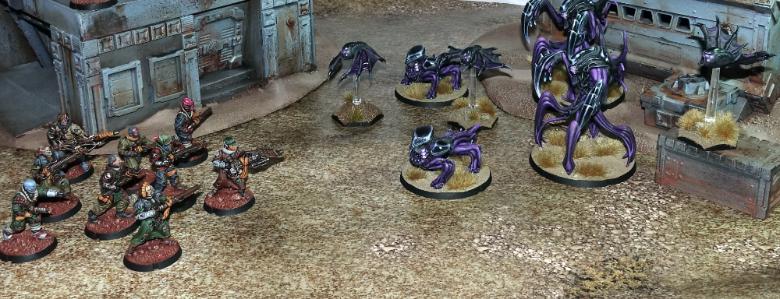
Painted up in an appropriate colour scheme, the Hellblaster fits in nicely with the Mature Angels and Minnows to add a bit more variation to an angel force.
But where to from here?
There's no reason to stop with basic reposing! Angels love nothing more than experimenting with different forms, and while the Hellblaster is a form forced on them by Karist Keepers, it also makes a good base for some different angel types, like the (very work-in-progress) examples below:
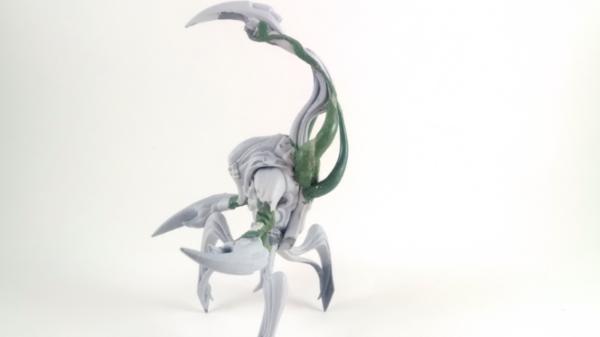
Snake-angel, converted using the front of a Hellblaster, the wings from a Minnow and a wire armature covered in 'green stuff' putty.
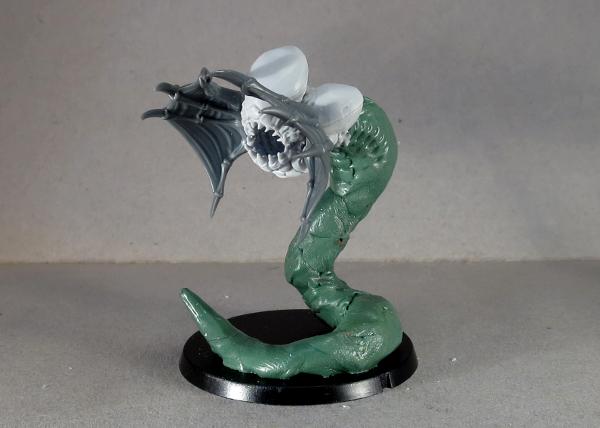
The snake body will be smoothed out with another layer of putty, and some exterior tentacles added for some detail.
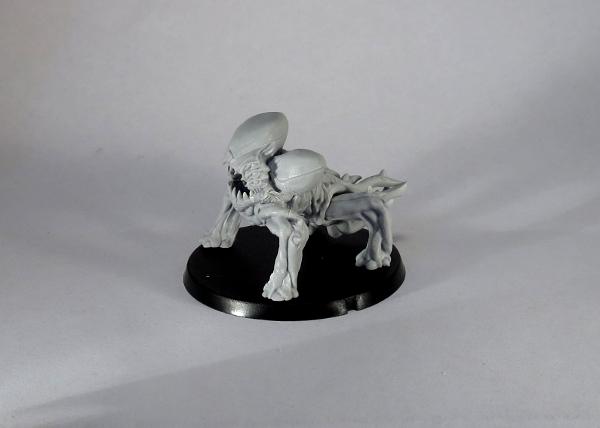
Shrike-angel, converted using a Hellblaster body with the forelimbs and energy sacs cut off, and the wings from a Minnow.
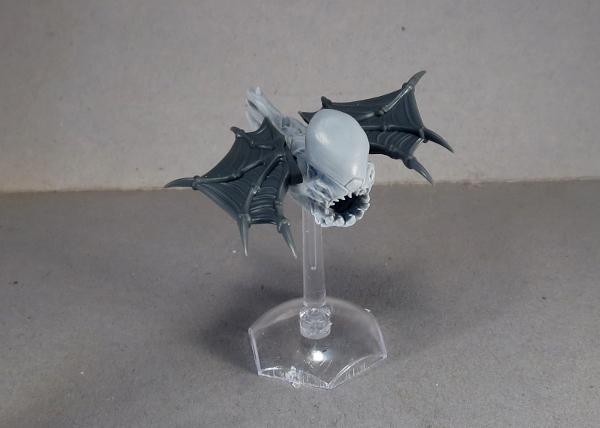
The body of the Hellblaster is considerably bigger than a Minnow's, so this guy has a much smaller wing to body ratio, but I think it's still close enough to work, particularly given angels fly using gravitic manipulation and the wings are largely just for show anyway. As with the snake, this model still needs some putty work to join the wings properly to the torso and fill in the flat spots where the legs and sacs were removed. I may also trim down the crest a little, to something more closely resembling the head of the Minnow.
Or, for something completely different, how about angel cavalry?
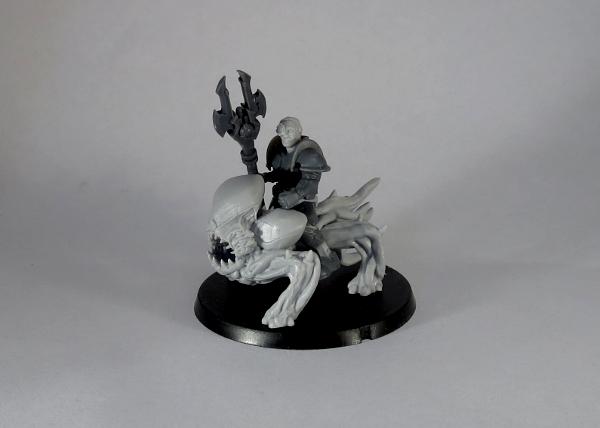
(Ok, this one's stretching the background a little - chances are that anyone trying to ride an angel wouldn't be riding it for very long... But it was too fun an idea to not have a play with it!)
To build your own shape-changing army of alien doom, you can pick up the Hellblaster along with the rest of the Maelstrom's Edge range from the webstore here. As always, feel free to share your creations on the Comm Guild Facebook page!
For other Maelstrom's Edge modeling articles, including tutorials and walkthroughs of a wide range of different building and miniature projects, check out the article roundup here.
Tags: angel conversion converting hellblaster modeling spotlight tutorial walkthrough
The Karist Angel Hellblaster - Available Now!
Posted on Tuesday Oct 31, 2017 at 03:00pm in Models
We at Spiral Arm Studios are proud to announce the immediate release of the Karist Angel Hellblaster unit. A valuable addition to any Karist force and our first ever resin model! It seems fitting to release a monstrous creature on Halloween!
The Angel Hellblaster is a juvenile form of an Angel. Larger than a minnow but smaller than a mature Angel, juvenile angels can take many forms, but Karist Keepers try to goad certain Minnows into a Hellblaster form for the many tactical advantages the Hellblaster type offers.
First and foremost, the Cybel Blast ability sets these guys apart from the rest of the Karist forces. Using a powerful template blast, they can really hold their own.
Cybel Blast: Range 24", SHO 2+SB, PEN 4, DAM 1, Special: AoE (SB), Explosive (6+).
The full Angel Hellblaster profile and force builder elements can be found on the Force Lists section of the Maelstrom's Edge website.
Two distinct models are available in a single pack:
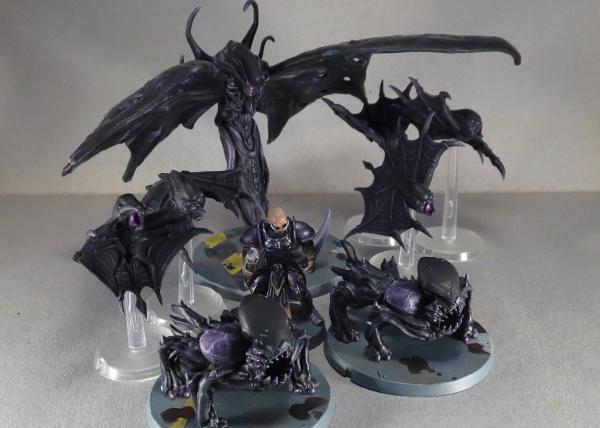
The Hellblaster sits on a 44mm base, the same as the Epirian Spider Drones and Hunter Warmechs. Here's what the Angel range looks like now:
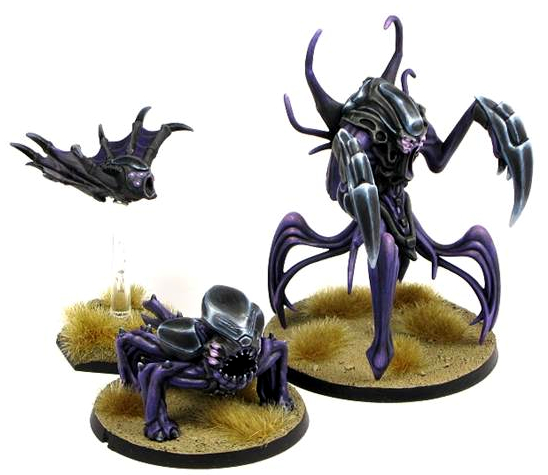
If you have wanted to build an all-Angel army, we are just one model away from it being completely viable, and the Angel Hellblaster will be the Hammer of your force.
The Angel Hellblaster is available now in the Maelstrom's Edge webstore.
Tags: angel hellblaster karist model resin
Modeling Spotlight: Winged Angel
Posted on Monday May 29, 2017 at 05:00pm in Models
 - by Iain Wilson
‘Nobody knows what the hell they’re even made of, never mind what they’re thinking.’
- - Gladius Belaru, survivor of the Angel attack on Morningstar Station, Thusia system
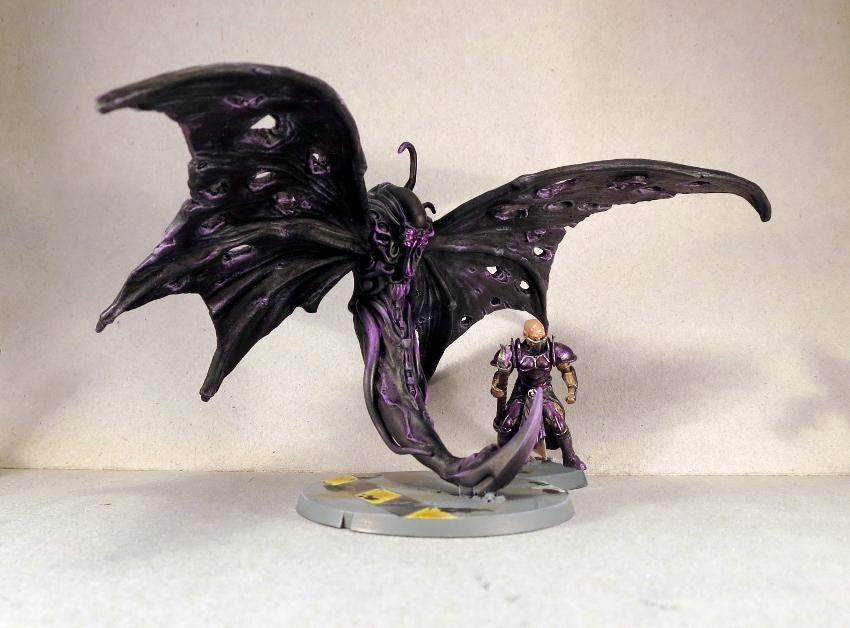
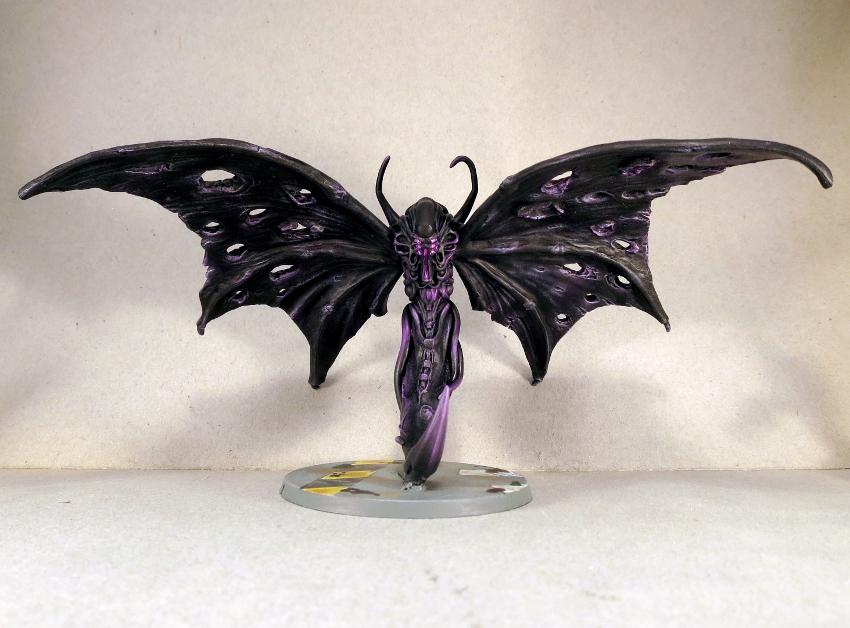
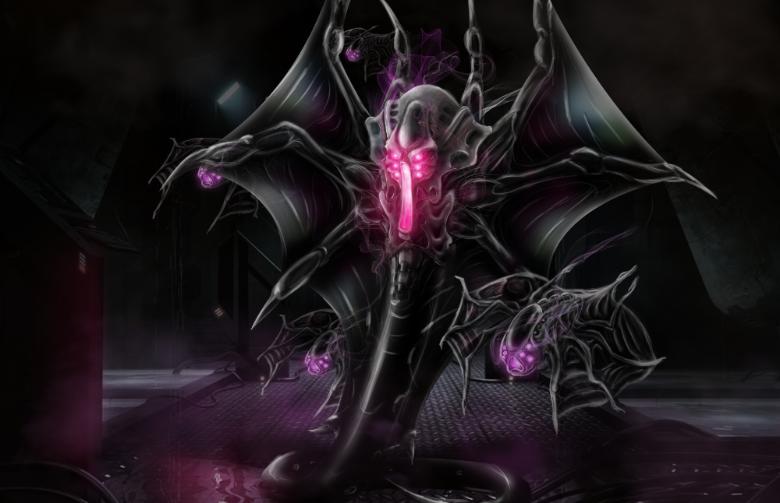
The fully mature Angel is a truly terrifying creature to encounter in the flesh, and their otherworldly scream is a harbinger of nightmares across the Spiral Arm. Dwarfing even the tallest of humans, the Angel is a tapering mass of writhing tentacles, gelatinous membranes, and bristled claws, smelling of sulphur and ozone.
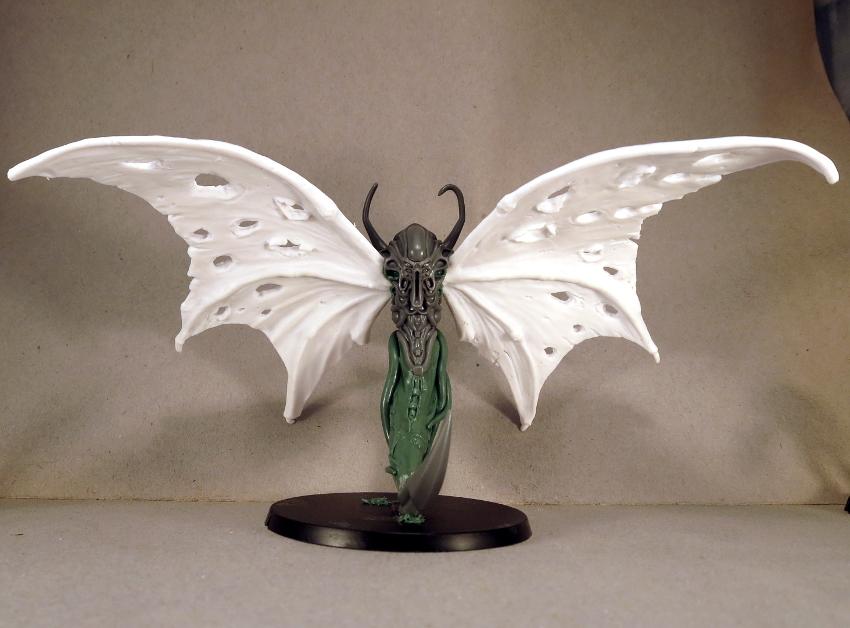
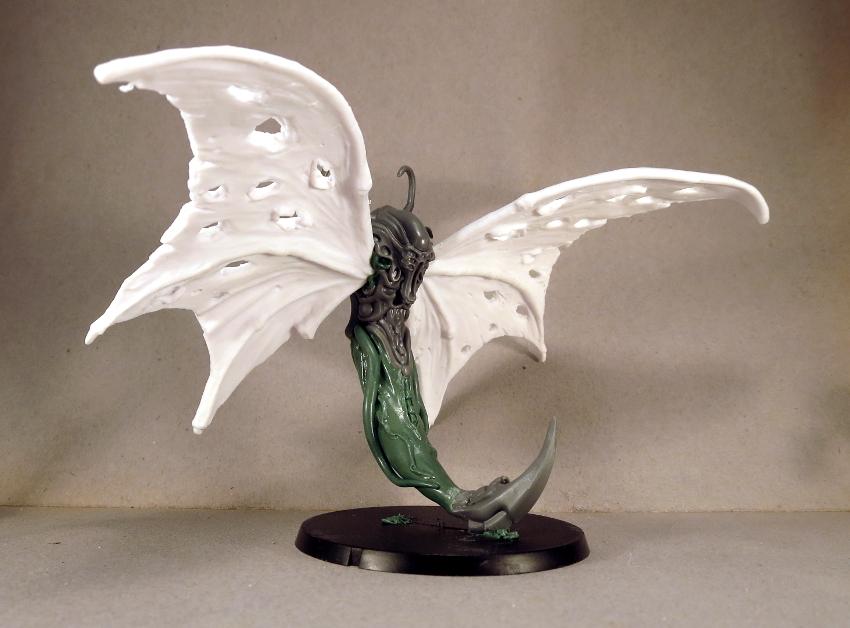
The plastic Mature Angel kit allows players to build angels in their combat form, which is one of the three common forms favoured by these bizarre creatures. While there is no particular need to model the angel's other forms, where would we be if we just went around assembling kits to spec? So this week, I'm building a Mature Angel in its flying form.
I started out with a length of wire glued into a hole drilled up into the bottom of the angel's torso. This was curved around to the front, with a spike cut from one of the angel's claws glued onto the other end.
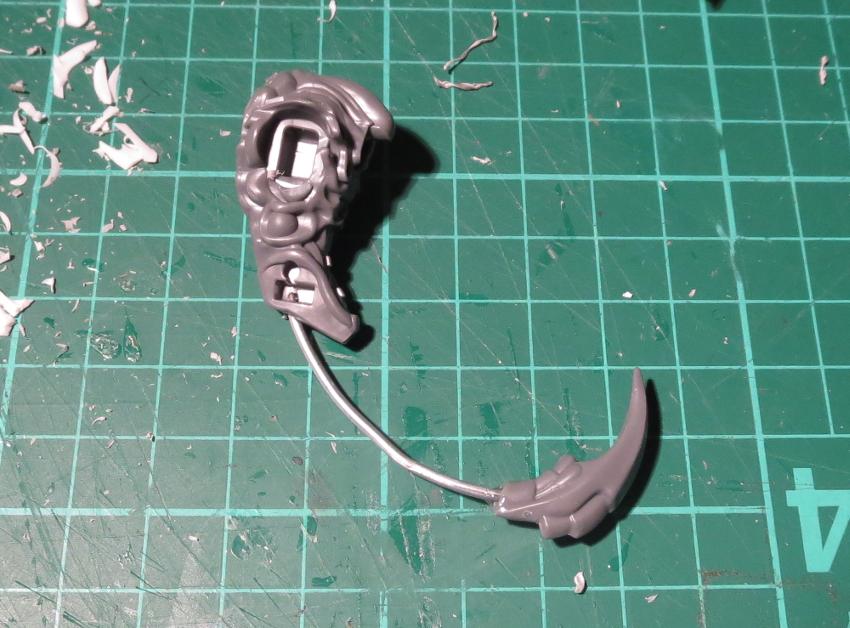
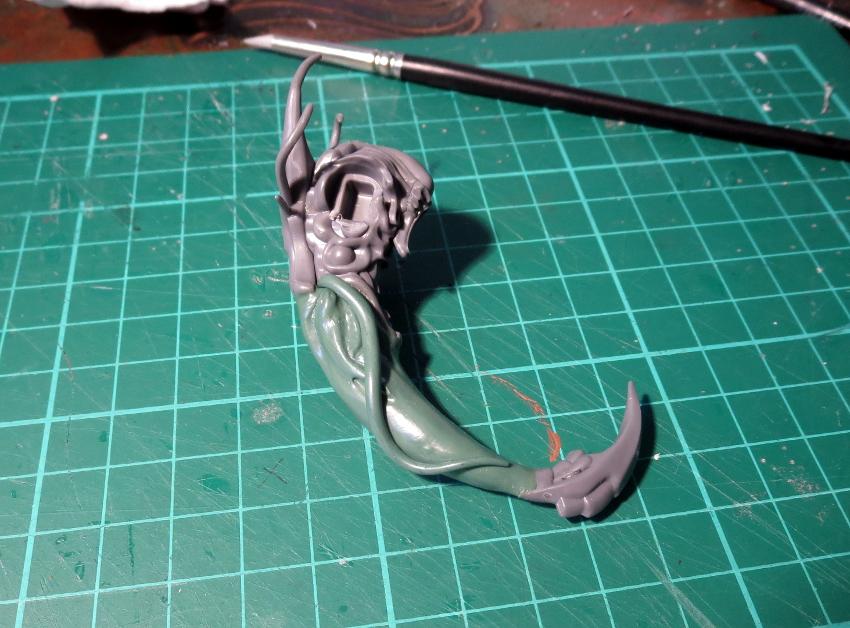
 Over the wire, I sculpted a tail from 'green stuff' putty, and added some tentacles down the side to make it a little more visually striking and to help represent the angel's fluid nature.
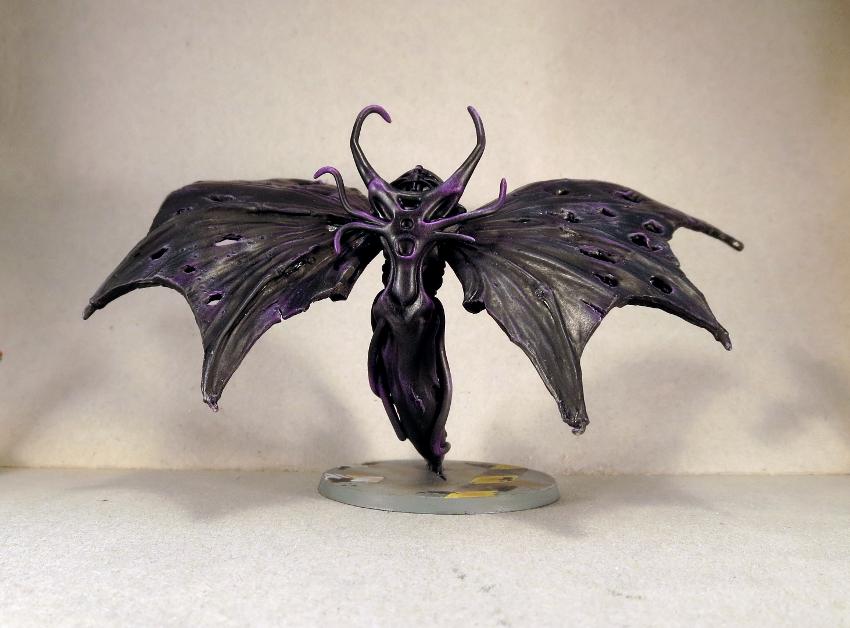
Wings can be sculpted over a similar wire armature, but to save a little time and effort here, I decided to purloin some from another model instead. The donor was a fire demon from Reaper's Bones range.
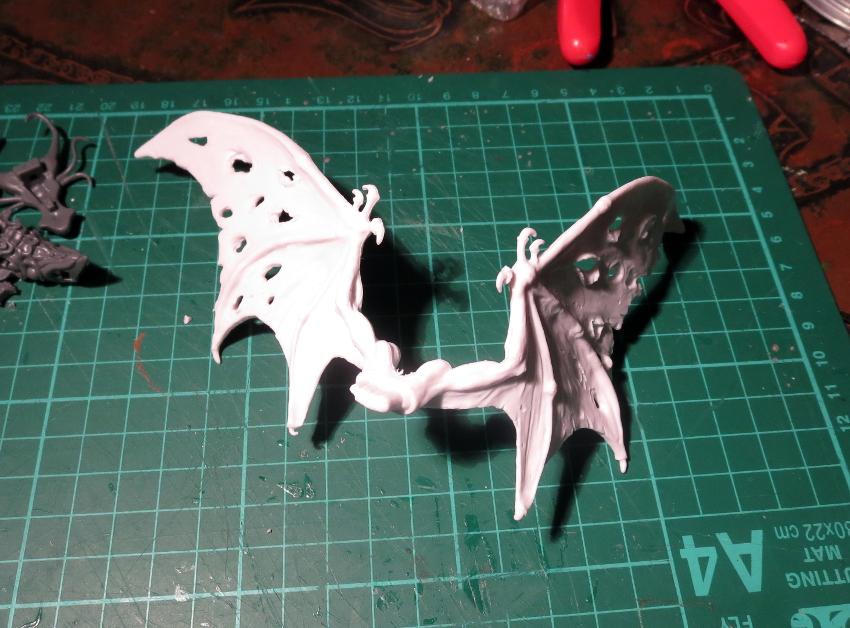
I cut the wings at the elbows, trimmed off the 'fingers' and glued the wings in place in the angel's arm sockets. A little more green stuff filled in the gaps.

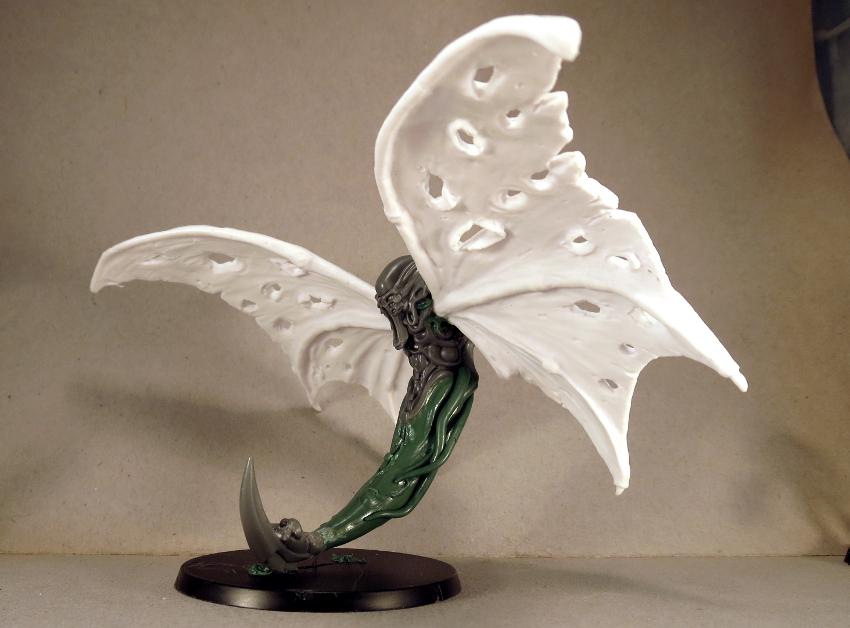
Painting - I kept the colour-scheme fairly simple, as angels are basically just black. Visually, just going with plain black isn't very interesting, though, so I tried to represent the angel's internal cybel energy by adding some purple highlights wherever seemed appropriate. The eyes and mouth were similarly painted purple, but highlighted up closer to white, to help them to stand out.

'Family' shot, with some minnows for company:
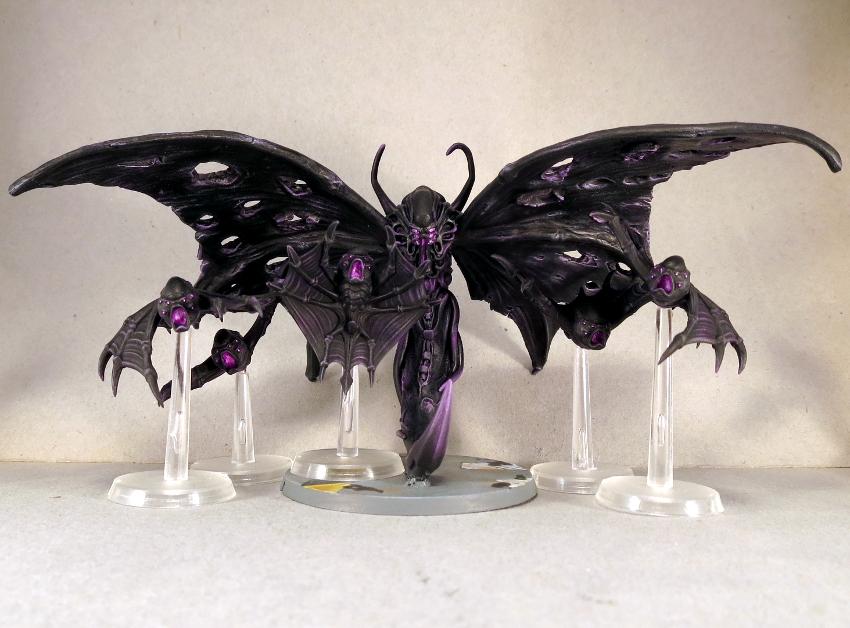
If you would like to build your own hideous flying spectre of doom, you can pick up the Mature Angel kit from the Maelstrom's Edge webstore here. As always, feel free to share your creations on the Comm Guild Facebook page!
For other Maelstrom's Edge modeling articles, including tutorials and walkthroughs of a wide range of different building and miniature projects, check out the article roundup here.
Spotlight: The Mature Angel
Posted on Monday Oct 24, 2016 at 05:00pm in The Karist Enclave
The Karist Angel was the final sculpt which we completed from the Battle for Zycanthus set. While the core of the model was completed quite early on, one of our first sculpts in fact, the limbs and details were quite a challenge to create. Here are some early pieces of concept art for the mature angel...

We wanted the Karist centrepiece model to be visually striking and much taller than anything else in the box set, which meant we had quite a lot of limitations with regards to sprue size and cost restrictions which stopped us from doing plastic wings. Each angel has three different morphing modes of which wings is just one option, so not getting wings in to the set was not a big issue for us. Trying to come up with some limbs that did not look comical and still showed the model capable of flowing and reforming took a lot of design iterations though.
Ultimately the mature Angel ended up as a fairly static pose for such a dynamic creature, with two alternate sets of claws that had little major difference between them, but with the benefit that the model is very easy to convert. Between the shapes being the easiest thing to sculpt (sausages of putty!), and the existing model being very easy to repose, we've seen a great range of conversions, and the model being so forgiving allows all manner of experimentation. Even boiling the plastic allows it to soften and be reposed in any shape without the obvious distortion you'd see from a model with sharp edges and lines.
The sprue is a sliding core sprue which makes such a large model have practically no visible seams, despite being completely made of plastic.
The legspan of the model is huge as well, and led to the creation of our huge bases. This was possible thanks to success in our kickstarter project allowing us to fund the tooling.
Community Spotlight: TP^DC Deputy Manager's Angel Minnow
Posted on Wednesday Oct 19, 2016 at 05:00pm in The Karist Enclave
We've previously covered TP^DC Deputy Manager's excellent mature Angel, and this minnow complements it very well, with a similar basing scheme and colourscheme. The monochromatic base really helps draw the eye to the purple and pink in the minnow.
The Comm Guild's community spotlight focuses on sharing something from the Maelstrom's Edge community each week, if you have anything you'd like to get in to the queue, please get in touch with us via the Maelstrom's Edge website
Friday Photo - The Big Red Beast
Posted on Friday Oct 14, 2016 at 05:00pm in Models
This striking Angel colourscheme is part of our red studio army by Lil'Legend Studios. The contrast makes it quite difficult to photograph effectively, but the sinister undertones can't be missed. Definitely not a creature you'd like to find tearing through the hull of your vehicle.
Community Spotlight: SexierThanYou13's Blog
Posted on Wednesday Sept 14, 2016 at 05:00pm in General
For our third week of converted Angel images in a row, here's a great lunging Angel from Dakka user SexierThanYou13
There's also a great Kaddar Nova that has massive presence when mounted on some cork
Along with some nicely posed Scarecrows
The Comm Guild's community spotlight focuses on sharing something from the Maelstrom's Edge community each week, if you have anything you'd like to get in to the queue, please get in touch with us via the Maelstrom's Edge website
Community Spotlight: Keltikhoa's Blog
Posted on Wednesday Sept 07, 2016 at 05:00pm in General
In today's community spotlight, we wanted to share the lovely work that Keltikhoa did on their project blog. From metallic Karists to this awesome Angel conversion:
and in keeping with Monday's Minnow spotlight, here's their Angel Minnow colourscheme:
The Comm Guild's community spotlight focuses on sharing something from the Maelstrom's Edge community each week, if you have anything you'd like to get in to the queue, please get in touch with us via the Maelstrom's Edge website
Tags: angel conversion epirian karist spotlight