Entries tagged [broken]
A new digital reinforcement for the Broken - the Skoti Streamweaver!
Posted on Monday Mar 02, 2026 at 05:00pm in Models
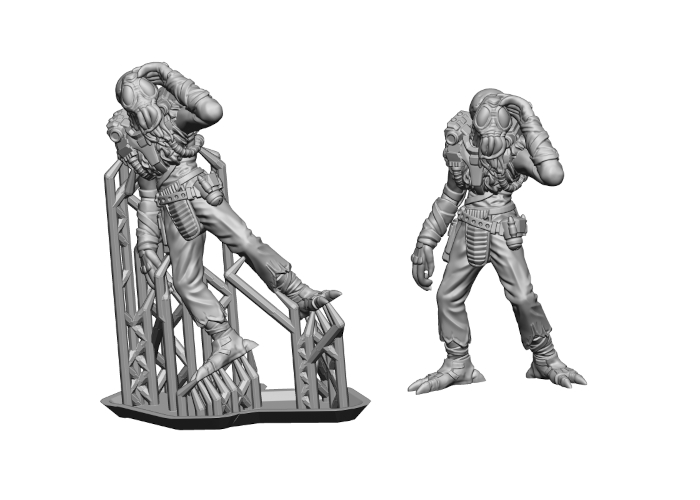
A physical model for the Skoti Streamweaver is in the development queue for release when we can, but in the meantime you can grab the 3D printable STL file from the Maelstrom's Edge webstore here!
Broken STL Updates - and some free tokens!
Posted on Monday Feb 23, 2026 at 05:00pm in Models
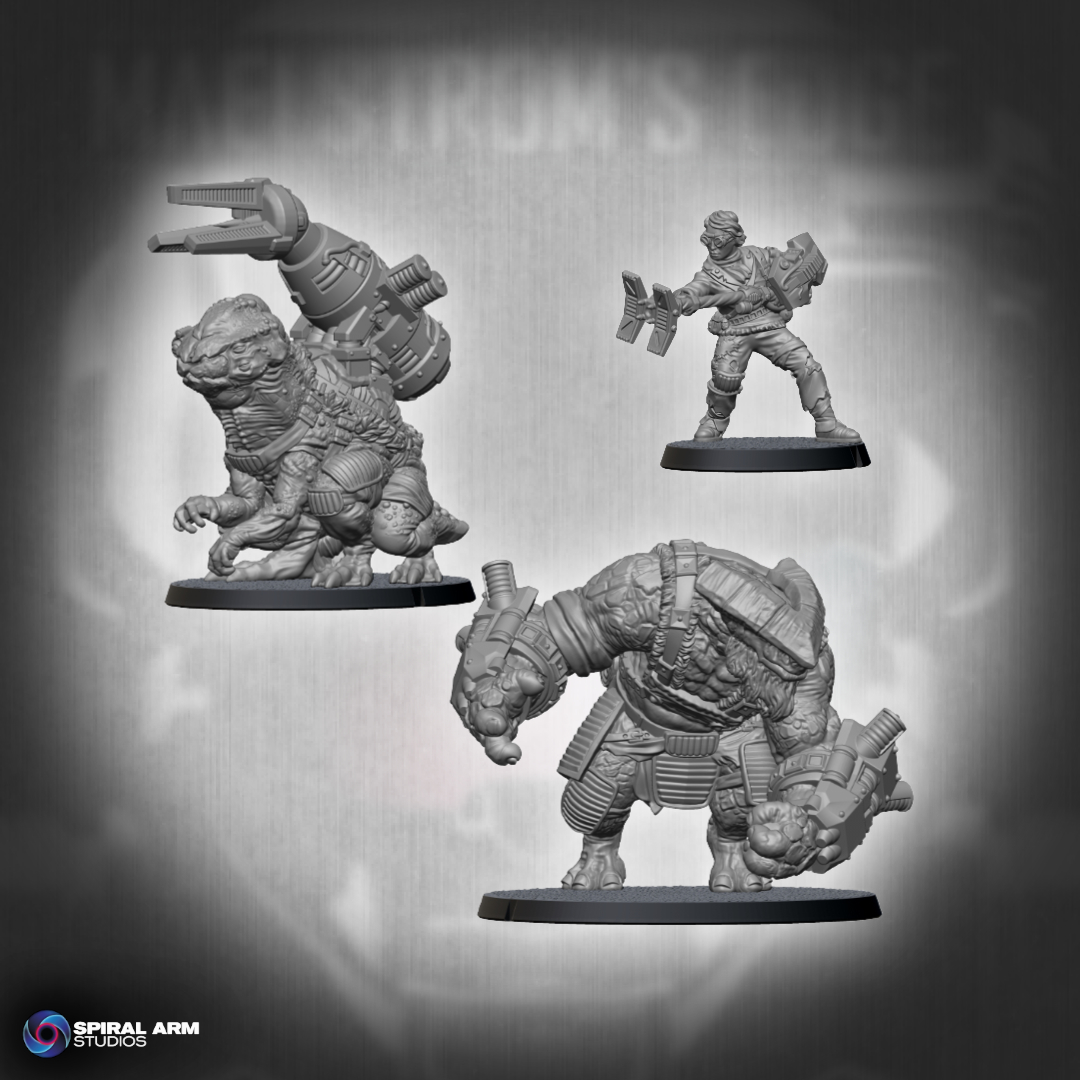
This update adds EMP Gauntlet arms to the existing Gnolti STL file, a Voltcaster to the Pa'ku and a Network Spike to the Sig Jammer, all available now through the Maelstrom's Edge webstore here. If you have previously purchased the STL files for these models, you can access the additional parts through the downloads section of your user account page on the Maelstrom's Edge website.
Also in this week's updates, we have added a free STL file to the downloads section with 3D printable tokens for Maelstrom's Edge V2. These feature the same designs as the paper versions in the rulebook, and are perfect for those who would like a more solid option than paper cutouts.
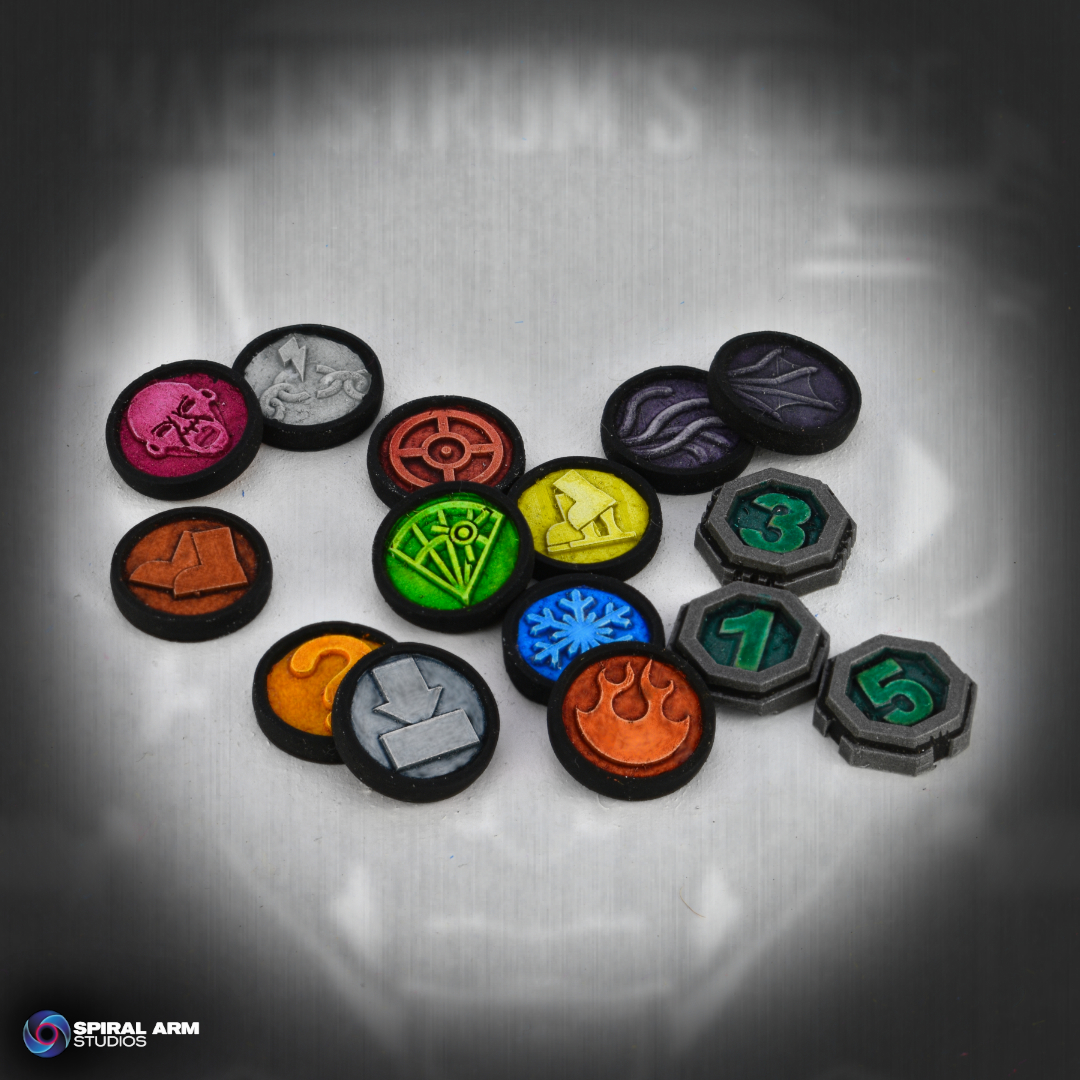
The file includes both single and double sided versions of the tokens, and supported versions of the double sided tokens - the single sided tokens can be printed flat on your build plate. Find them now in the downloads section of the Maelstrom's Edge website here!
Revised Homebrew Broken Unit rules!
Posted on Thursday Oct 10, 2024 at 05:00pm in Gaming
 - by Iain Wilson
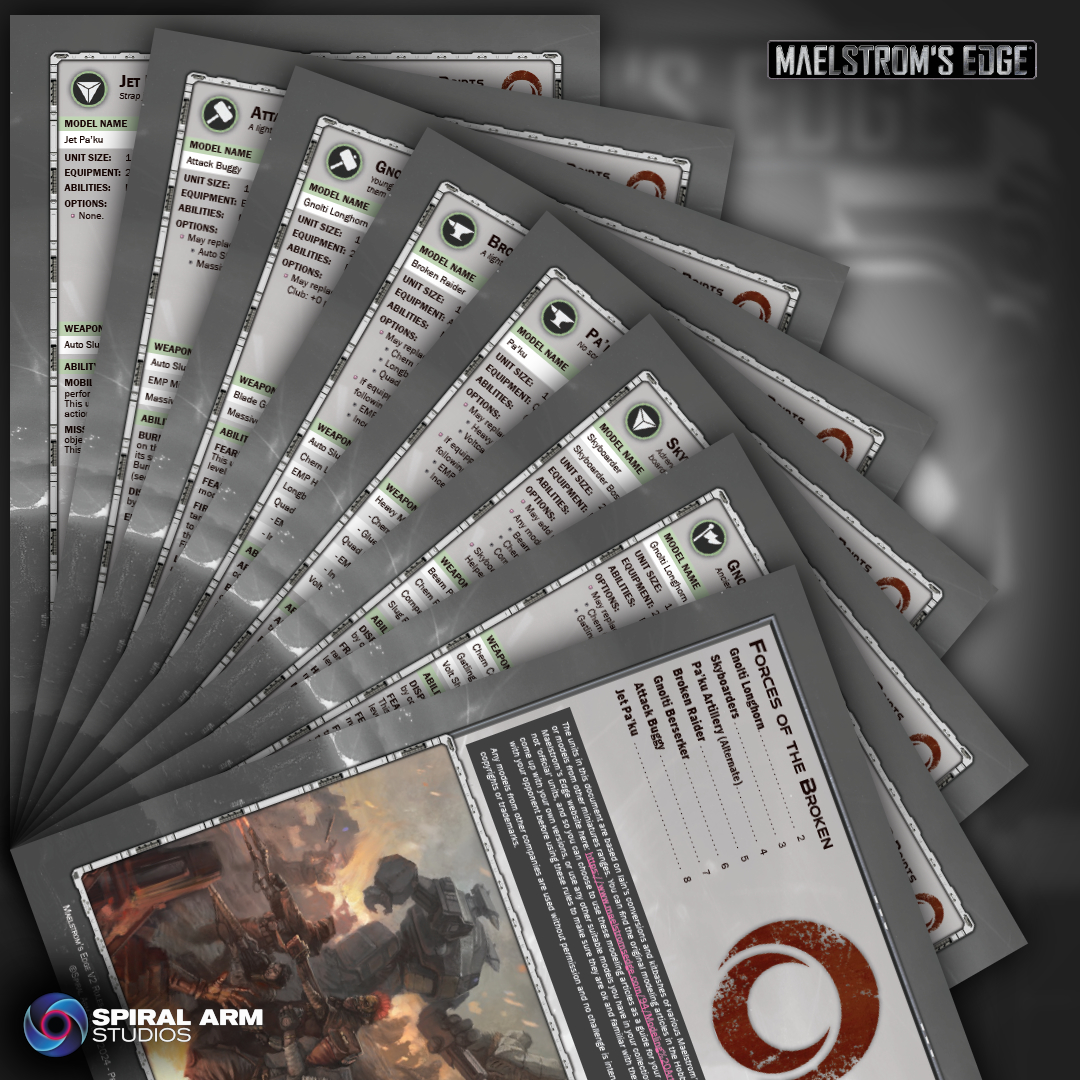
Continuing my homebrew unit updates, I have now revised my Broken units from V1!

As with the Epirian and Karist units, these units are converted from assorted Maelstrom's Edge parts, or modified models from other games. To duplicate them, you can find the original modeling articles by following the links below, or you can choose to use whichever other appropriate models you have to hand. Note that as these are unofficial rules, you should ensure that you discuss it with your opponent before using them, to make sure they're familiar with and ok with them!
Download the rules PDF from the V2 Trial Rules page here, and check the links below for the original modeling articles for each unit!
Gnolti Longhorn - an older, wiser Gnolti in a command role.
Gnolti Berserker - a rampaging Gnolti driven into a frenzy by the madness of war.
Pa'ku Heavy Mortar - an alternate rules page for the Pa'ku Artillery unit, adding a heavy mortar option.
Skyboarders - Rabble troops equipped with hoverboards.
Jet Pa'ku - A gun-toting, boostpack-wearing Pa'ku, originally just built for the fun of it, but I couldn't resist giving it rules!
Attack Buggy - a light assault vehicle made from a Mantic Marauder vehicle.
Broken Raider - This one I don't have a conversion built for - these rules were originally put together for the V1 Trial Transport rules article. Feel free to use whatever light truck or buggy models seem like a good fit!
To build your own force of ramshackle, kit-bashed doom, grab some Broken models or STL files from the Maelstrom's Edge webstore here!
What are you working on? We would love to see your models and terrain in the Comm Guild Facebook group!
For other building ideas, modeling tutorials, army spotlights and conversion walkthroughs, check out the Hobby section of the Maelstrom's Edge website here. And while you're there, grab a copy of the Maelstrom's Edge V2 Beta rules!
New STL Release for the Broken - Pa'ku Artillery!
Posted on Thursday Sept 05, 2024 at 05:00pm in Models
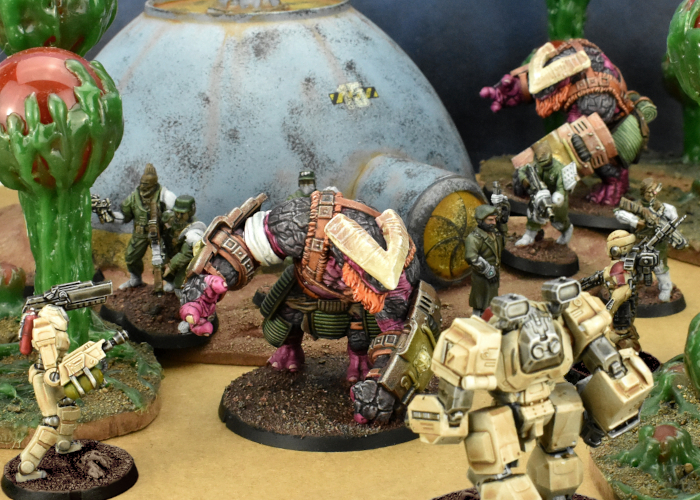
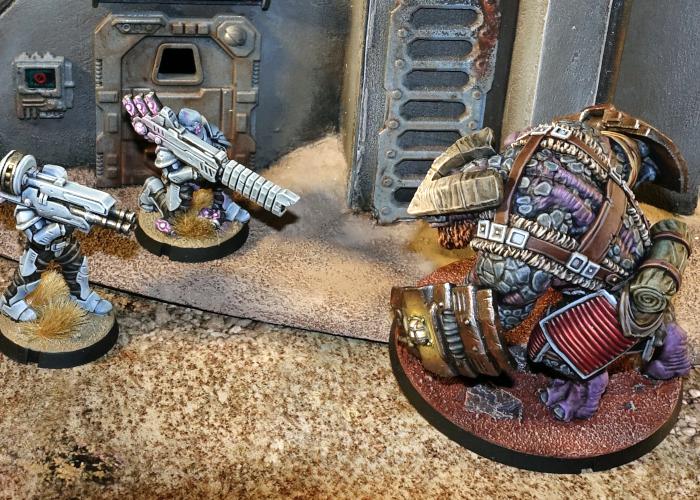
Pa'ku provide much needed fire support for Broken forces.
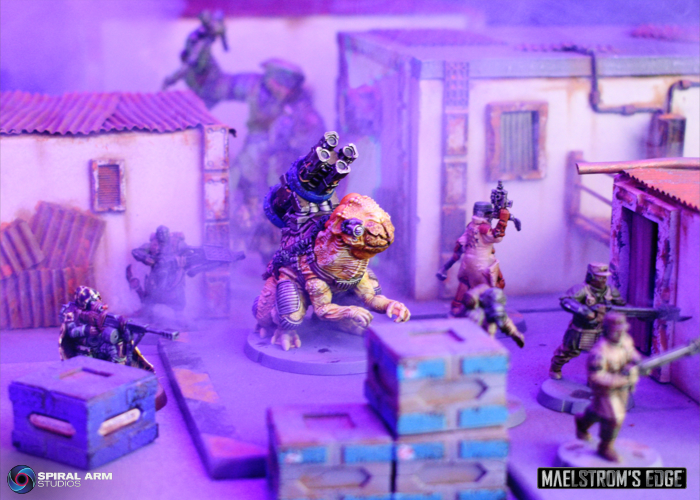
Despite their peculiarities, Pa’ku are especially desirable to the Broken. Their impressive physiques make them suitable for carrying heavy loads, including the biggest artillery the Broken can manage to cobble together. As a bonus, the Pa’ku can extend their very long tongue with enough force to cave in a man’s skull. Pa’ku only speak to other species when necessary, and their language is difficult for most races to translate or speak. Combined with their large size, this results in them being overlooked by evacuation efforts, making the choice to join the Broken the only reasonable one they can make.
The digital file includes supported and unsupported versions of the Pa'ku parts.
You can find the rules for using Pa'ku Artillery in your Broken force in the downloads section of the Maelstrom's Edge website here.
Start building your elite army of bombarding doom by grabbing your Pa'ku Artillery from the webstore here!
New STL Release for the Broken - Hakoyu Grand Master!
Posted on Thursday Aug 01, 2024 at 12:36am in The Broken

Hakoyu Grand Masters leading a counterassault against a SecDef attack force.
It's not easy for an outcast to survive alone on the Edge, and the Broken offer the Hakoyu not just a means of escape, but also a collective which can feel much like the communal family structure of Yedo. The Broken, for their part, value the Hakoyu's fighting skills and character. Wielding deadly phase weaponry, able to pass through enemy fields as though they are not there, they provide their squad an upper hand in any close quarter fighting.
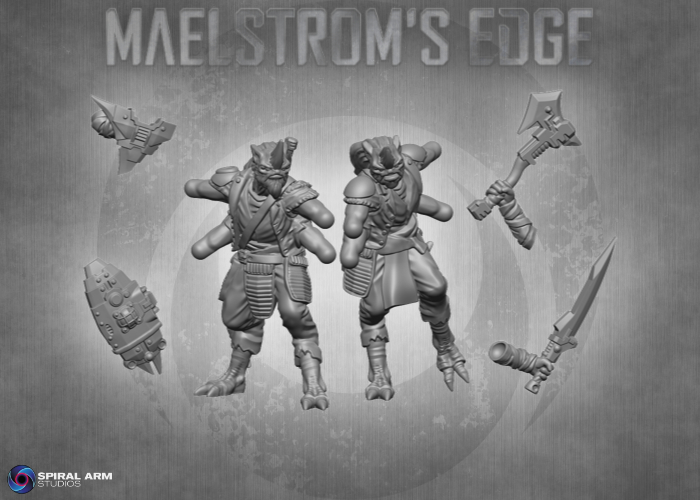
The digital file includes a male and female Hakoyu Grand Master body option.
You can find the rules for using Hakoyu Grand Masters in your Broken force in the downloads section of the Maelstrom's Edge website here.
Start building your elite army of restrained but violent doom by grabbing your Hakoyu Grand Master from the webstore here!
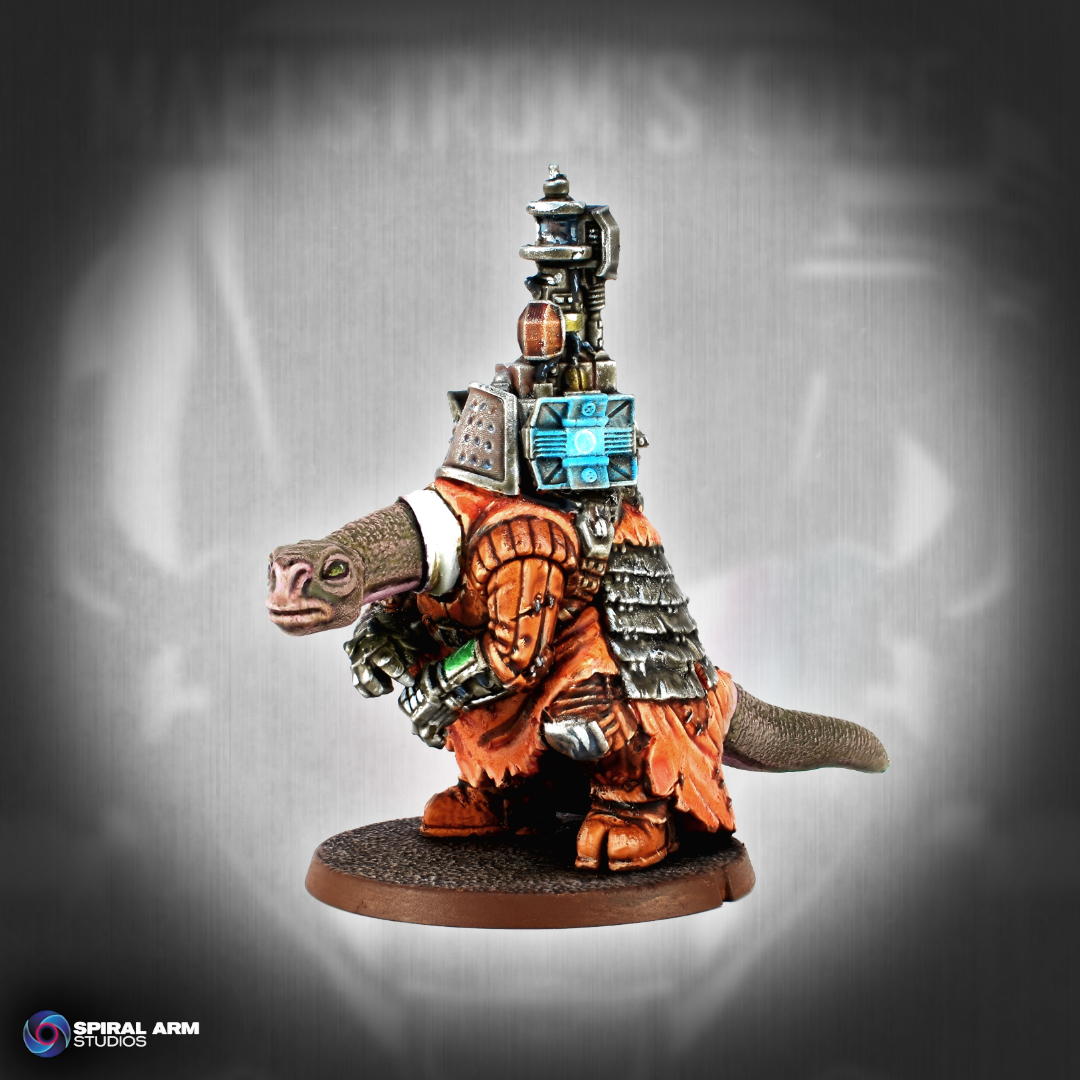
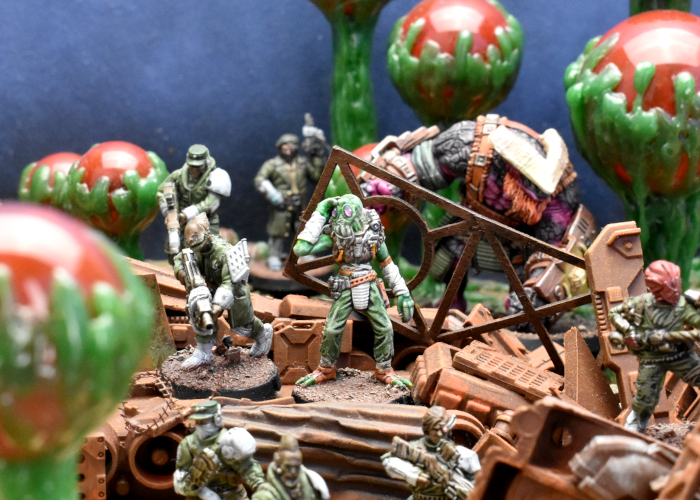
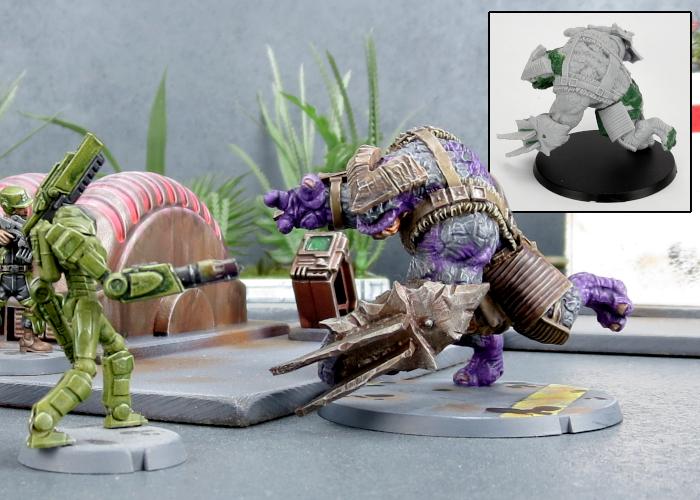
Sneaky Spotlight: The Skoti Streamweaver
Posted on Monday Oct 16, 2023 at 05:00pm in The Broken
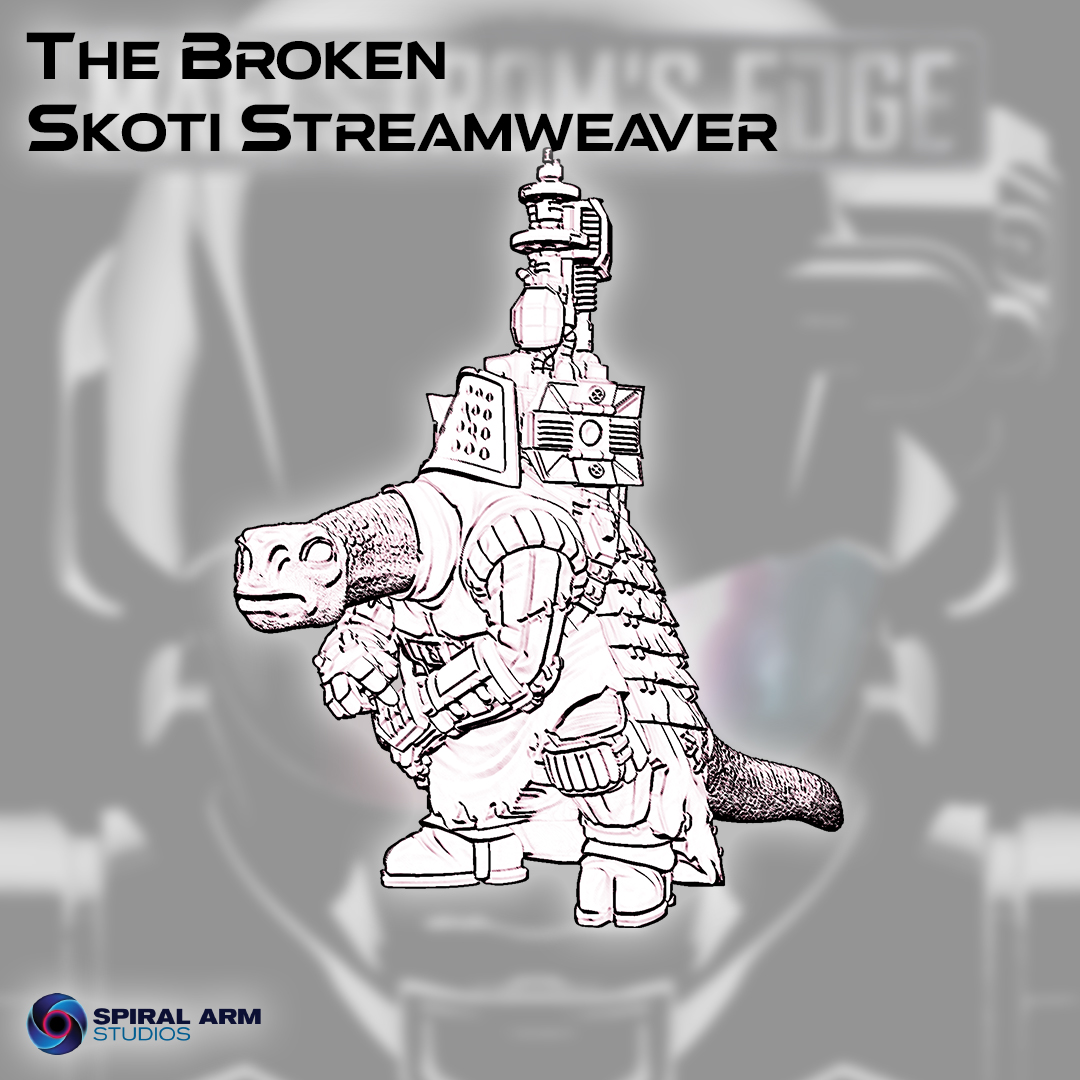
We're kicking things off this week with an addition to the Broken line-up: The Skoti Streamweaver!
Click for larger image
A fascinating and little understood species, Skoti are slow moving herbivores who evolved an innate defensive ability to teleport, which they call a “stream” in their tongue. Similar in function to an Angel’s ability to “rift”, Skoti are generally only able to trigger their stream involuntarily in order to escape danger. This ability is made possible through a unique, massive brain structure composed of multiple nodes stretched along their prehensile necks. Broken weaponsmiths devised a way to boost this ability into something more predictable and useful. The complex machinery on the Skoti's back both provides them with additional energy and helps them with their spatial calculations, allowing their streams to span further distances and stay open long enough to allow friendly units to travel through them. In addition, a Skoti is able to utilize their stream like a weapon, creating an opening above an enemy unit and dropping nearby debris onto them, or in some cases even teleporting the enemy against their will!
Stay tuned for more sneak peeks! In the meantime, try out the V2 Beta rules by grabbing the PDFs from the Trial Rules section of the Maelstrom's Edge website here, and grab your models from the Maelstrom's Edge webstore here! Free shipping applies to qualifying orders - check your cart for details.
You can also find a series of articles looking at different aspects of the V2 game here.
If you have any questions on the V2 rules, the model range, or any other aspect of the Maelstrom's Edge game, feel free to pop in to the Comm Guild Facebook group here.
New STL Release for the Broken - Forsaken Tech Chieftain
Posted on Monday Jul 10, 2023 at 05:00pm in Models
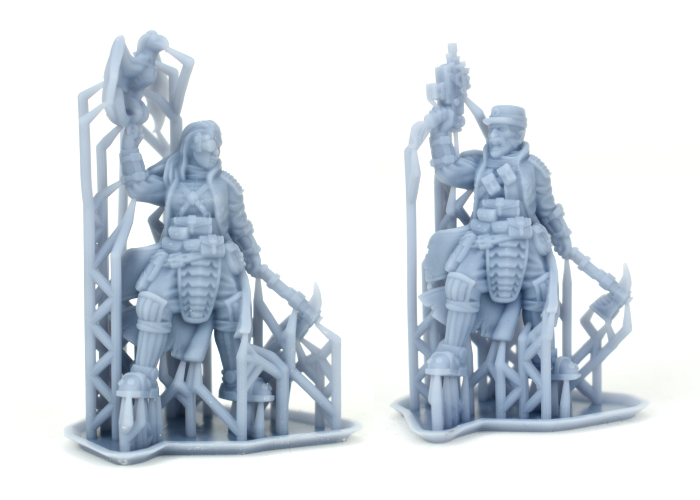
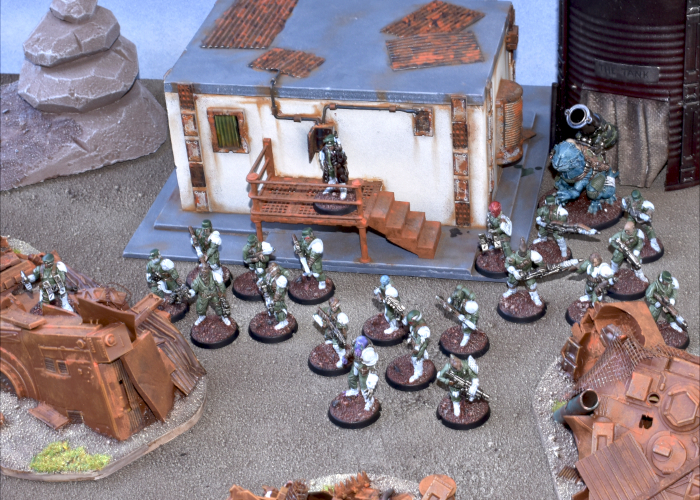
A Chieftain leading a Rabble unit into battle.
This digital pack includes both supported and unsupported files of a male and female version of the Tech Chieftain, and with options for two different customised weapons: a beam blastgun or a slug rifle.
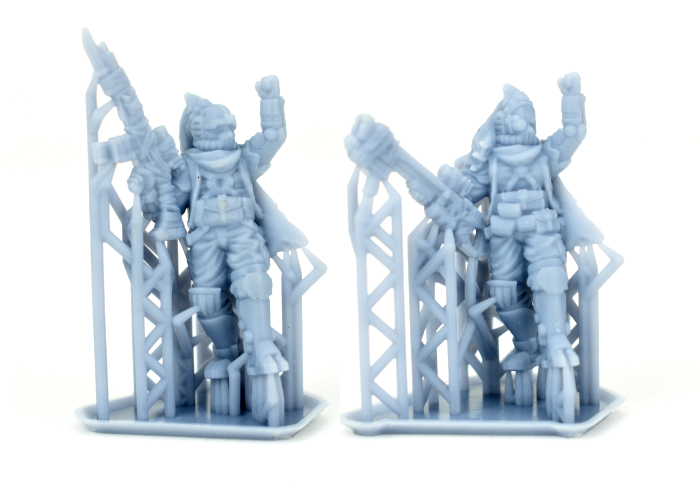
3D printed examples, printed on an Anycubic Mono 4K using Elegoo ABS-like resin at 35μm using Lychee slicer.
Printing results will vary depending on your printer, resin and settings.
You can find the rules for fielding these models in the downloads section of the Maelstrom's Edge website here.
Start building your strike force of cybernetic doom by grabbing some Broken models from the Maelstrom's Edge webstore here!
New STL Release - Broken Forsaken Chieftain
Posted on Monday May 29, 2023 at 05:00pm in Models

The appearance of a Chieftain varies wildly based upon the culture of their original planet and also the Freeport that they currently call home. They tend to have slightly nicer clothing and equipment than standard rabble, and many Chieftains see it as their duty to show that an individual can still rise up through the ranks of the Broken while carrying themselves with dignity and class. When a powerful enemy combatant is felled in battle, a Chieftain will confiscate something of value from them, whether it be a chunk of armor or an heirloom weapon. These purloined treasures are worn into future battles by the Chieftain, both as a reminder of the victory, and a symbol of their great leadership.
Originally released in resin, the Chieftain now available to purchase in STL form for 3D printing, from the Maelstrom's Edge store here!
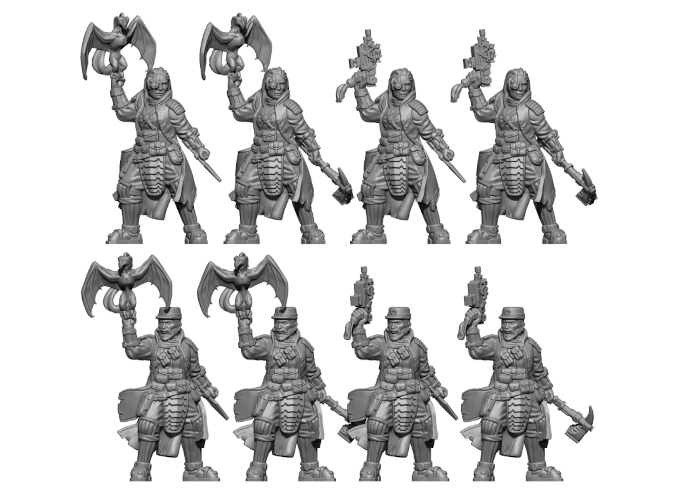
The included model variants.
This digital pack includes both supported and unsupported files of a male and female version of the Forsaken Chieftain, and with options for a poisoned blade or trophy melee weapon in the left hand and a slug pistol or xenos spotter for the right hand.
3D printed examples, printed on an Anycubic Mono 4K using Elegoo ABS-like resin at 35μm using Lychee slicer.
Printing results will vary depending on your printer, resin and settings.
You can find the rules for fielding these models in the downloads section of the Maelstrom's Edge website here.
Start building your strike force of sneaky doom by grabbing some Broken models from the Maelstrom's Edge webstore here!
New Release: Broken Marsayan Hypnotist 3D Printable STL File.
Posted on Tuesday Aug 30, 2022 at 05:00pm in Models
The Marsayan Hypnotist is the second model from our resin range to make the transition to digital release for 3D printing.
The Marsayan Hypnotist digital pack includes a single piece Marsayan Hypnotist STL file, and a pre-supported version to make printing a little easier.
The included STL models.
In Maelstrom's Edge games, the Marsayan Hypnotist is fielded on a 25mm base, available here, and accompanies Broken Rabble, Assault and Fire Support units.
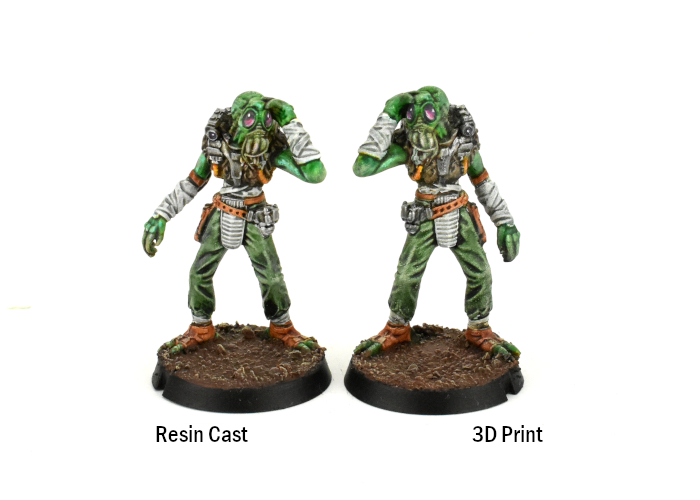
Table-ready resin production model and a 3D printed (and mirrored) example - printed on an Anycubic Photon using Siraya Tech Fast resin at 50μm using Lychee slicer.
Printing results will vary depending on your printer, resin and settings.
Get started with your rebel force of digital doom by grabbing the Marsayan Hypnotist from the Maelstrom's Edge webstore here - or if you would prefer the resin version, you can find it in the store here!
New Release: Broken Gnolti - 3D Printable STL files!
Posted on Tuesday Jul 05, 2022 at 05:00pm in Models
The resin Gnolti is one of our most popular resin kits. This month it makes the leap into the digital domain, with the release of an STL pack that you can use to print your own rampaging alien behemoth!
With 3D printing becoming ever more accessible as an option for producing table-top quality miniatures, it seemed like a good time to start offering some DIY options for digital hobbyists to add to their collections. As such, the Gnolti is the first of an ongoing release series, as we will be gradually working to make STL packs for all of our current resin models.
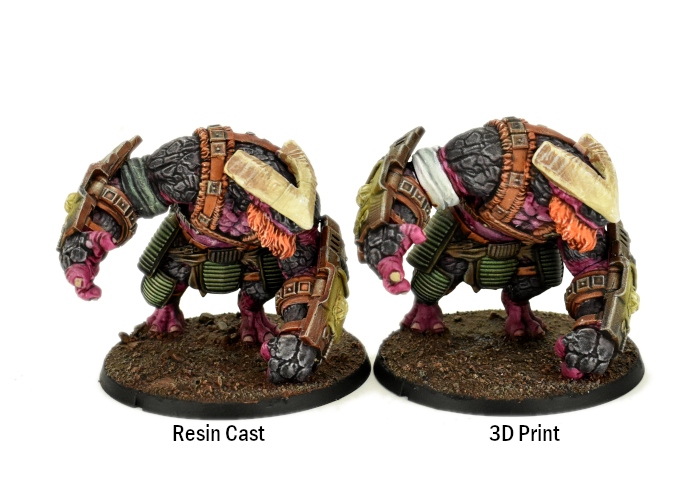
Table-ready resin production model and a 3D printed example - printed on an Anycubic Photon using Anycubic Grey resin at 50μm using Lychee slicer.
Printing results will vary depending on your printer, resin and settings.
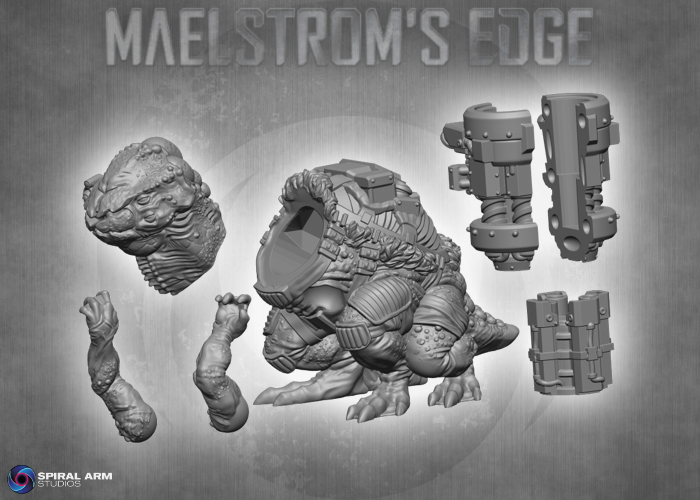
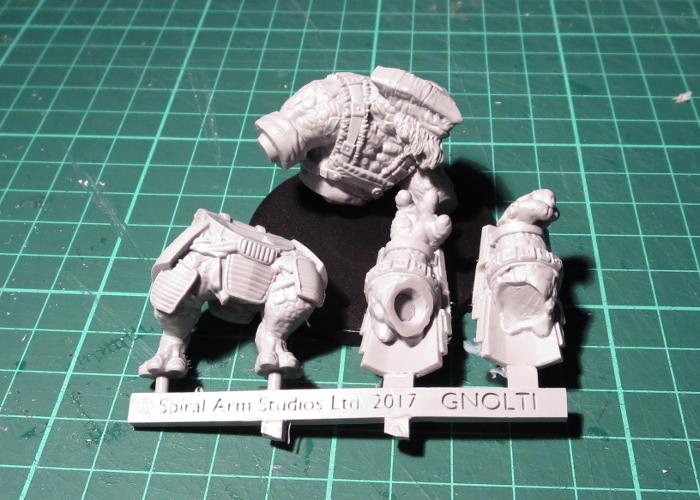
The Gnolti digital pack includes the following:
- Single-piece Gnolti model, unsupported
- Single-piece Gnolti model, supported
- Split Gnolti model parts, matching the resin production version
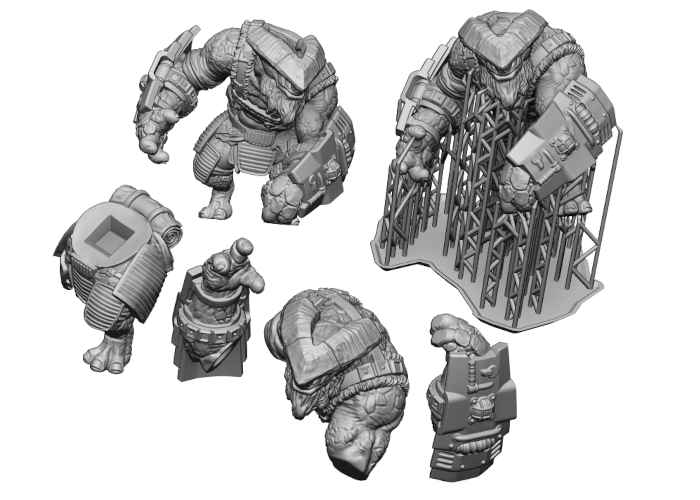
Included STL components
In Maelstrom's Edge games, the Gnolti is fielded on a 54mm base, available here.
Get started with your rebel force of digital doom by grabbing the Gnolti digital file pack from the Maelstrom's Edge webstore here!
Painting Tutorial: Quick & Easy Camouflage using Speedpaint!
Posted on Tuesday Jun 14, 2022 at 05:00pm in General
- by Iain Wilson
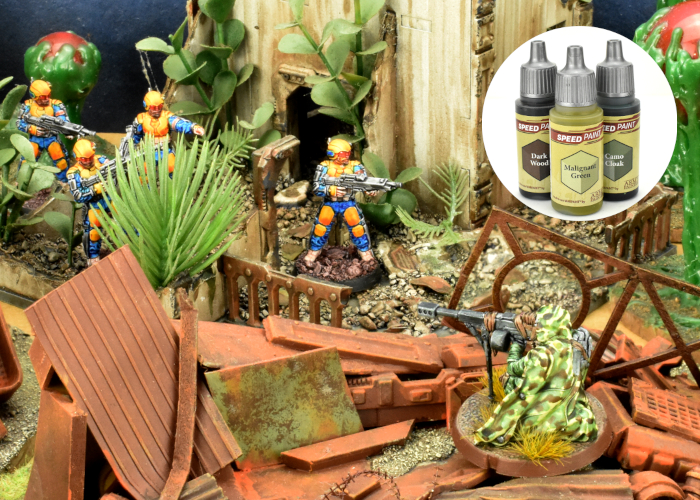
I've been having some fun experimenting with Army Painter's Speedpaints, to see what can be done with them. This week, I'd like to share this simple method that I stumbled upon for painting a camouflage pattern using just a trio of Speedpaints!
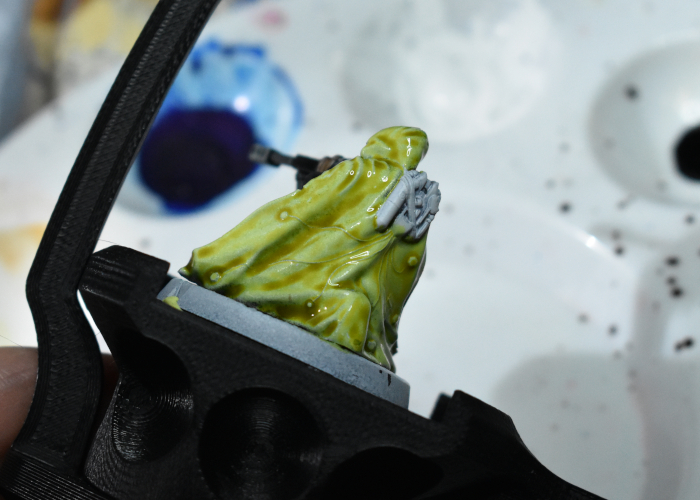
Step 1 - Basecoat the model with white spray.
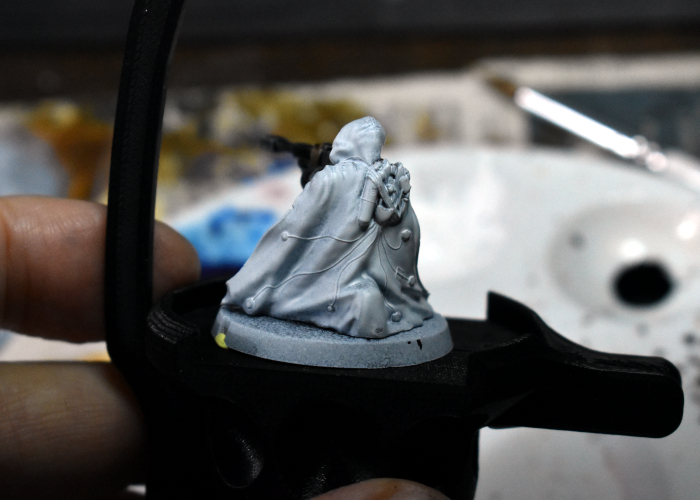
Step 2 - Go over the camouflage area with a generous coat of Malignant Green.
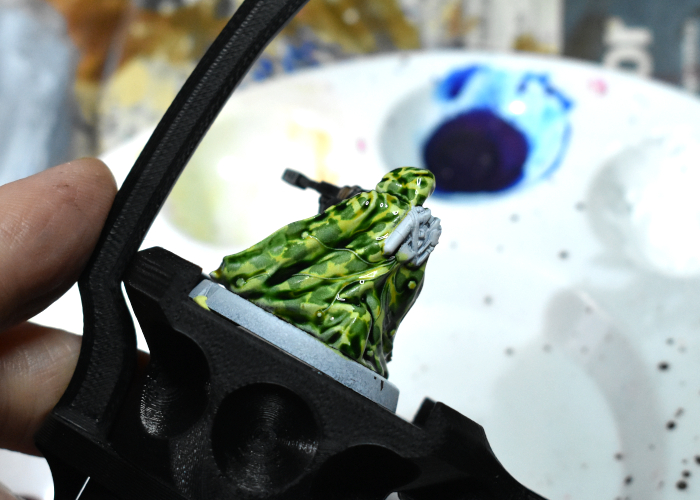
Step 3 - While the Malignant Green is still wet, dab on dots of Camo Cloak. Make these dots about half the size you want them, as they will spread out. Try to mix up the spacing of the dots as you go, so they don't wind up forming a regular pattern. Doing this while the first green is still wet allows the second colour to spread organically, creating irregular, random shapes.
Step 4 - While those first two colours are still wet, go back over with slightly smaller dots of Dark Wood. This will spread across and through the other two colours, creating the layered camo effect.
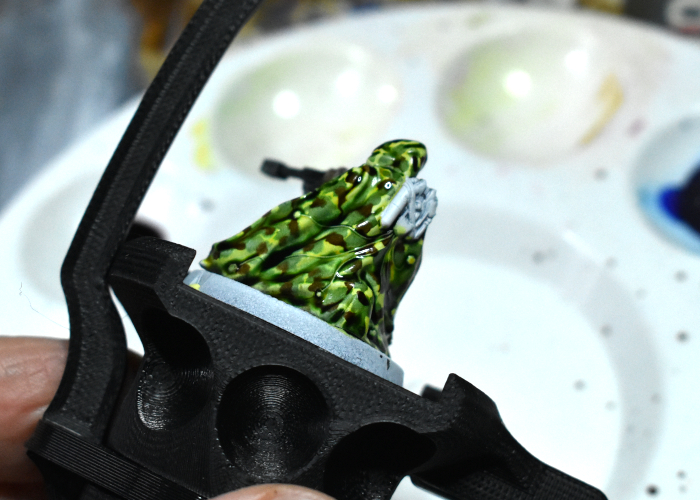
Step 5 - Let it all dry. It can help if you can lay the camouflage surface as flat as possible, to avoid the wet colours from running downwards.
The completed model - the rest of the model was also painted with Speedpaint, mostly Camo Cloak, Dark Wood and Grim Black.
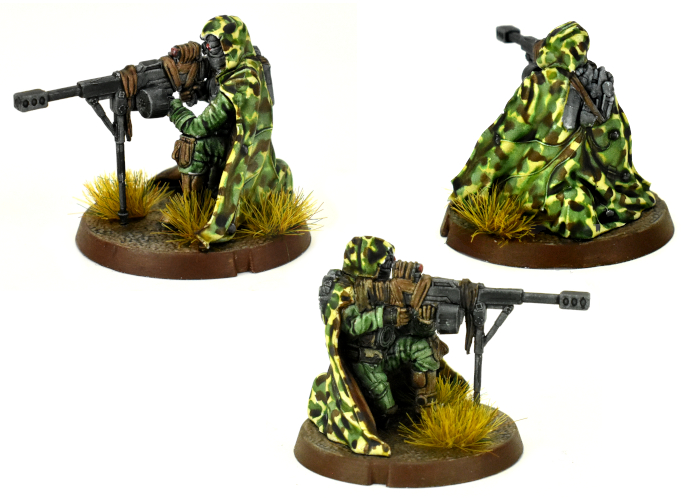
To have a go yourself, pick up the plastic Broken Sniper kit from the Maelstrom's Edge webstore!
While you're there, you can download the V2 rules from the Trial Rules section of the Maelstrom's Edge website here. The Beta rules documents contain all of the rules for playing V2 games, but keep in mind that these are just 'preview' documents - some rules may be revised based on feedback, and the final layout including background material for the factions and the Maelstrom's Edge universe, artwork and other 'flavor' material is missing.
For other modeling ideas, tutorials, army spotlights and conversion walkthroughs, check out the Hobby section of the Maelstrom's Edge website here.
What are you working on? We would love to see your models and terrain in the Comm Guild Facebook group!
Tags: broken painting tutorial walkthrough
Model Spotlight: The Broken Gnolti
Posted on Tuesday Oct 05, 2021 at 06:00pm in Models
With its horned visage towering over the rest of its force, the Gnolti cuts an imposing presence on the battlefield. The resin Gnolti kit is one of our most popular, and makes for a fantastic centerpiece for any Broken force. Let's take a look at it!

Originally hired and transported to systems requiring extreme manual labour or exposure to elements lethal to humans, their normally calm, thoughtful temperament made Gnolti easy to integrate into human society. Gnolti are extremely loyal to those who treat them well, gladly risking themselves to protect their friends. Despite being incredibly useful, Gnolti are often denied berths on planetary evacuation ships due to their extreme size. Gnoltis have few opportunities to escape the Maelstrom, and stranded Gnolti are a common recruit into the ragtag warbands of the Broken, where their physical power can be a huge asset.
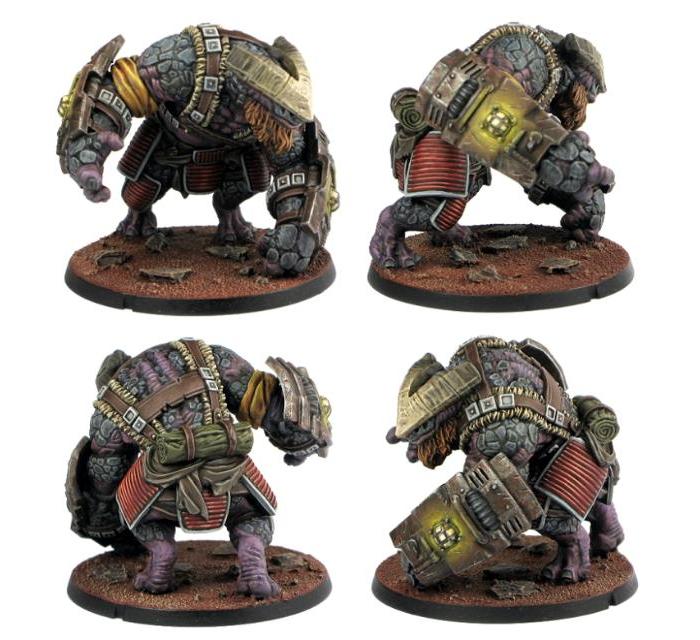
The studio Gnolti model, painted by Winterdyne Commission Modelling
The Gnolti's impressive physique is clad in makeshift harness and armour, its forearms covered by jury-rigged protective shields that it uses to protect nearby Broken units. The multi-part kit was sculpted for us by the resin techno-wizards at Anvil Industry, and cast in high quality resin.
While the Gnolti kit is easy to assemble and impressive on the table, the resin is also easy to convert, which led to a few conversions that we've featured in previous articles:
Raging Gnolti
Gnolti Longhorn
Gnolti Berserker
Pick up your own towering behemoth of muscly doom along with the rest of the Maelstrom's Edge range from the webstore here.
What are you working on? We would love to see your models and terrain in the Comm Guild Facebook group!
For other building ideas, modeling tutorials, army spotlights and conversion walkthroughs, check out the Hobby section of the Maelstrom's Edge website here.
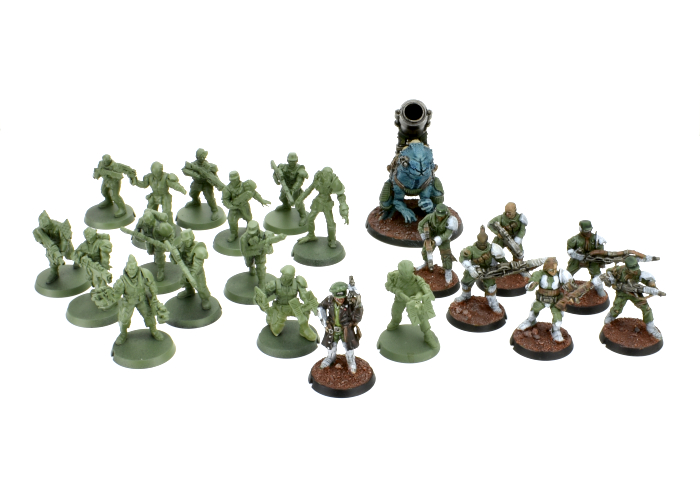
Army Spotlight: Broken SARA Detachment
Posted on Monday Aug 23, 2021 at 09:06pm in The Broken
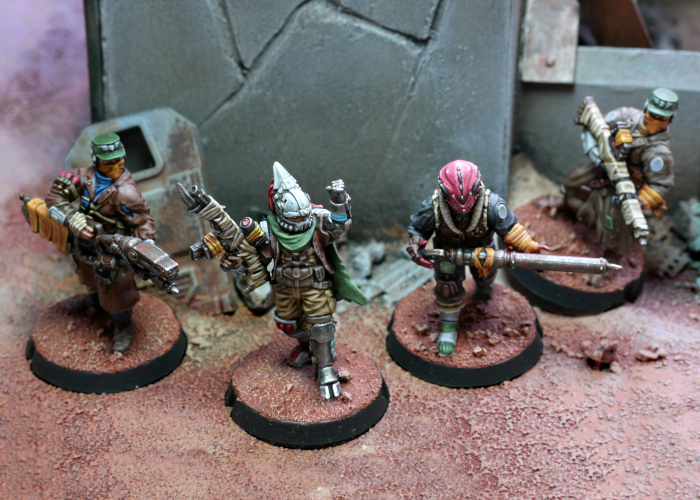
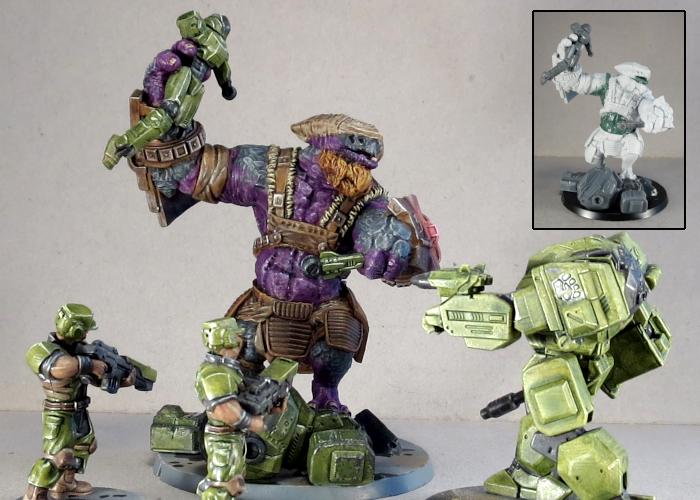
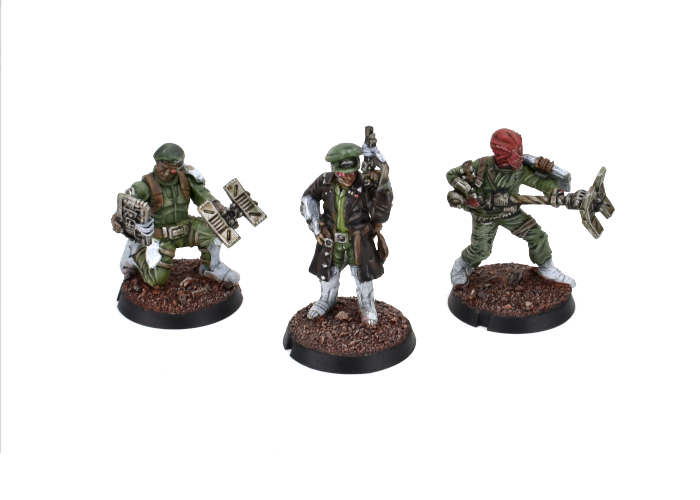
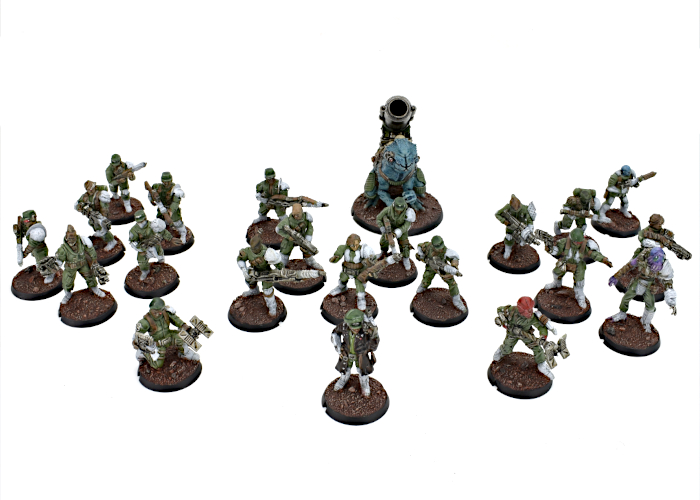
Last week, I shared a Revolutionary Captain conversion that I had painted up to lead a new SARA force for my army collection. This week, I completed work on the rest of his detachment!
The leader for the detachment is obviously the aforementioned Revolutionary Captain, equipped with his signature pistol and an added trophy melee weapon. To accompany him into battle, I filled out a Vanguard slot with a pair of Sig Jammers, on using the regular resin model, and another converted up using a bunch of assorted parts, including the beret head that I didn't use on the Captain. Sig Jammers provide support to Broken forces by interfering with enemy Fields and forcing additional Suppression Points onto enemy units with their Tech Disruptors.
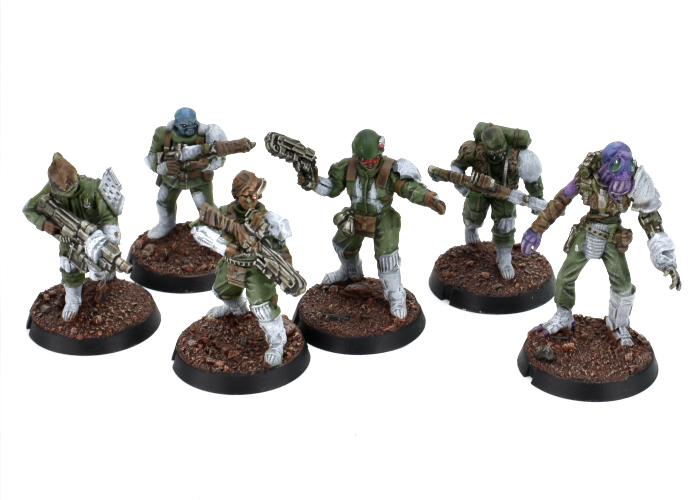
Rabble units make up the core of any Broken force. For my SARA, I wanted to give them a more military look than my Forsaken force, so I mostly stayed away from long coats and robes, and borrowed some extra armour parts from Epirian and Karist kits, and also a few bits and pieces from some Stargrave plastic models for a little extra variet. I also gave all of the models a shoulder pad on their left shoulder, as something to help unify the various assorted models... although in true Broken fashion, these pads are also sourced from a range of different places.
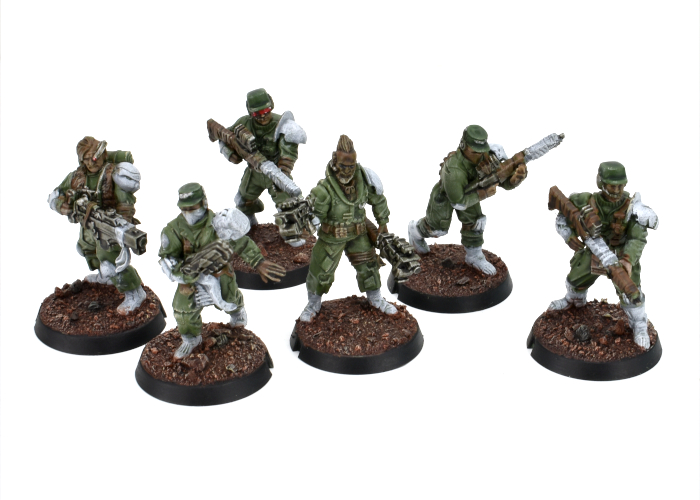
The second Rabble unit is accompanied by a Marsayan Hypnotist, to provide some tentacle-faced disruption to enemy shooting. Units accampanied by a Marsayan are difficult to hit, always counting as a Fleeting target and gaining a dodge against close range attacks.
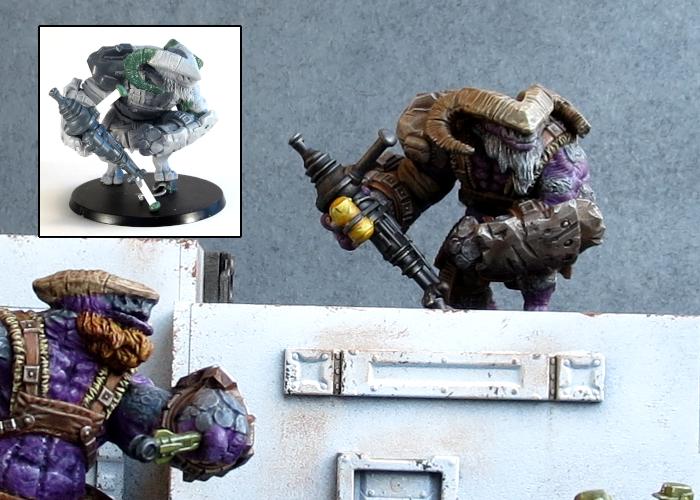
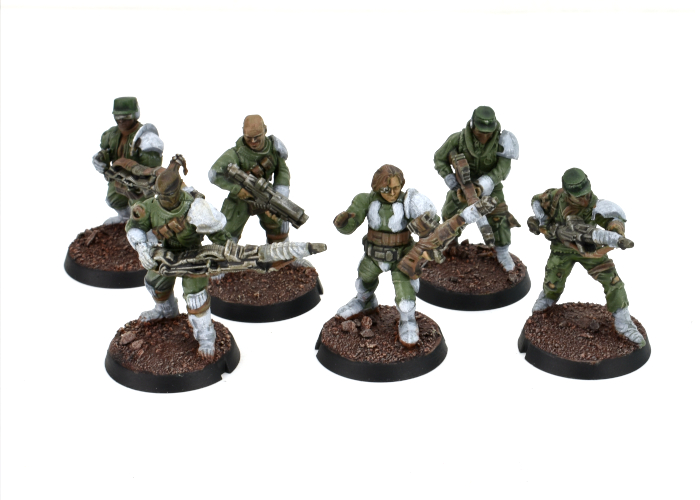
For a bit of long range coverage, I added a Rabble Fire Support unit with beam longrifles to fill one of my Anvil slots.
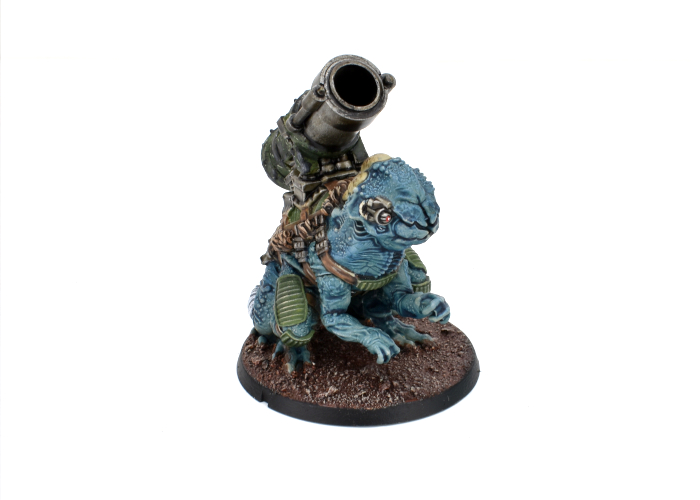
To round things out, I took a Pa'ku for the other Anvil slot, because how can you go past a giant toad with a cannon. The model I've used here is one I converted up for the spotlight article some time ago to count as a 'heavy EMP mortar' instead of the usual quad mortar... but could still be used as just a variant version of the usual gun if I want to keep things official. The Pa'ku's EMP mortar is great for dropping large blasts on enemy formations, although it works best in concert with other Pa'ku due to their Coordinated Barrage rule. So I'll probably look at painting up a second Pa'ku with the second detachment, potentially retrofitting it back into this detachment with the Multi-Unit Selection rule allowing both of them to count as a single Anvil choice.
All up, this detachment currently comes in at 67 points, so is just under half of a 'standard' 150 point force. I'll be working on the second detachment as I have time, putting in another Revolutionary Captain, some snipers, and an assault unit featuring a couple of Hakoyu for some up-close-and-personal, pointy doom. In the meantime, I can always use these as a detachment alongside my Forsaken force.
More to come - stay tuned!
To build your own army of revolutionary doom, you can pick up the Broken along with the rest of the Maelstrom's Edge range from the webstore here.
What are you working on? We would love to see your models and terrain in the Comm Guild Facebook group!
For other building ideas, modeling tutorials, army spotlights and conversion walkthroughs, check out the Hobby section of the Maelstrom's Edge website here.
Tags: broken conversion modeling painting sara
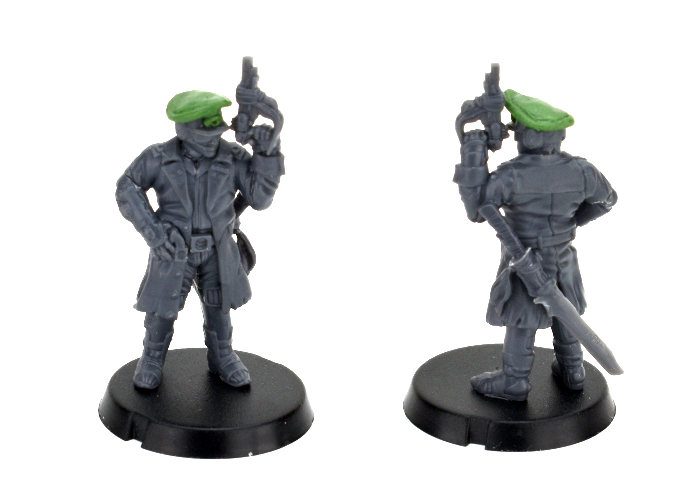
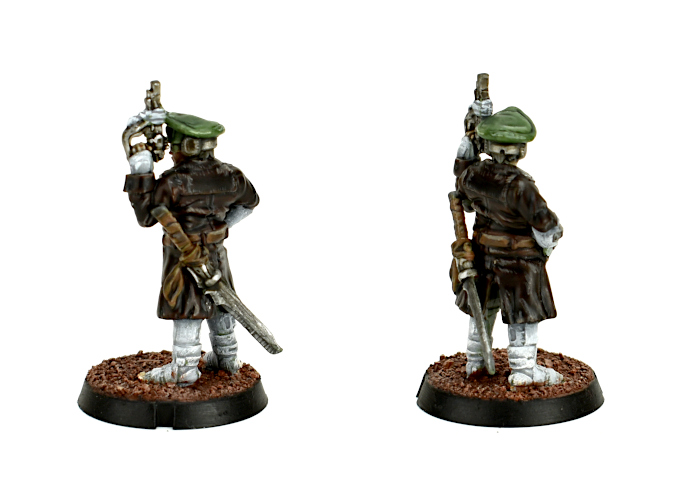
Painting Spotlight: Converted Broken Revolutionary Captain
Posted on Monday Aug 16, 2021 at 06:00pm in Tutorials
With the release of the Revolutionary Captain and Sniper models for the Broken, I couldn't resist the lure of that new army smell, and so I've been working away to put together a SARA force to sit alongside my existing Forsaken collection. The model I chose to lead the force was one that I showed back in the Conversion Spotlight article when the Revolutionary Captain was released, but this week I finally got some paint on him!
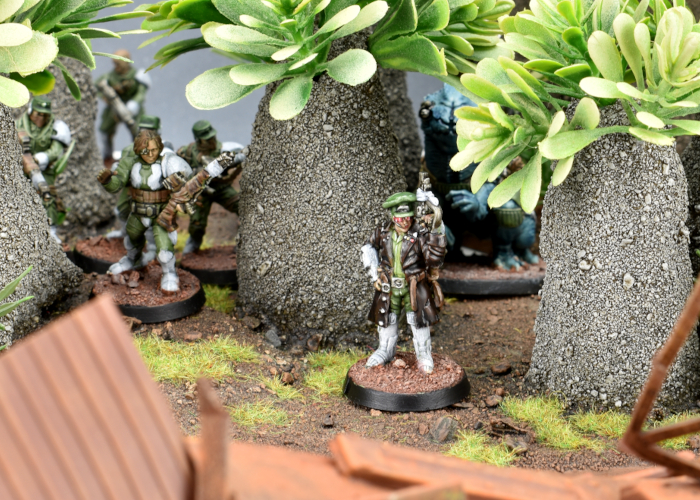
For those who haven't checked out the article linked above, this model was a conversion of the plastic SARA Captain model. The head was taken from an Epirian Contractor, with a hat added using 'green stuff' putty. I also gave him a sword built from a couple of chopped up weapons from the Broken Rabble sprue and a slightly reshaped Karist sword blade taken from the Faction Expansion sprue.
For this force, I chose to go with a colour scheme fairly similar to the Maelstrom's Edge studio model, using a lot of Army Green with white 'techy' bits. To make the Captain stand out a little more from the horde, though, I swapped out the studio model's green coat for a dark brown leather one. This was painted with Scalecolor Bosh Chestnut and several layers of Army Painter Dark Tone, before highlighting with Army Painter Leather Brown with a little Skeleton Bone mixed in.
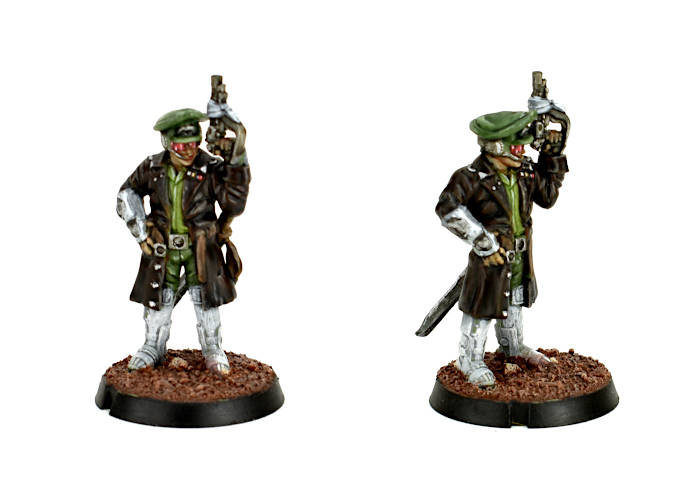
The rest of his uniform is Army Painter Army Green for the pants and hat, and Army Green mixed with Coat D'Arms Putrid Green for the shirt. These were washed with Army Painter Military Shader, and then the hat given two coats of Green Tone, before it was all highlighted with some more Putrid Green and Army Green mix. The metal was painted with Army Painter Plate Mail Metal and washed with Dark Tone and Strong Tone, with a Shining Silver highlight, while the white parts were given a coat of Army Painter Uniform Grey and then a heavy drybrush of white. It's a little rough up close, but quick and easy and looks suitably beaten up on the table!
The next job is to finish up the painting on the rest of his detachment, and then start on a second detachment so that I can work in a sniper or two!
To build your own army of revolutionary doom, you can pick up the Revolutionary Captain along with the rest of the Maelstrom's Edge range from the webstore here.
What are you working on? We would love to see your models and terrain in the Comm Guild Facebook group!
For other building ideas, modeling tutorials, army spotlights and conversion walkthroughs, check out the Hobby section of the Maelstrom's Edge website here.
Tags: broken conversion model painting sara
New Broken model release: The Sniper!
Posted on Monday Jun 28, 2021 at 06:00pm in Models
Broken Snipers originate either as marksmen from a planetary military that is displaced by the Maelstrom or pulled from within the ranks of the SARA and trained when it is noticed that they display a high level of accuracy with their rifle. Unfortunately, the Broken simply do not have the types of training facilities that other factions have access to, nor the manufacturing and technology in place to produce state of the art high-powered sniper rifles. All of which means that, one-on-one, Broken Snipers will never be a direct match with their foes. Therefore, the role of a Sniper focuses more on being a jack of all trades thorn in the enemy’s side.
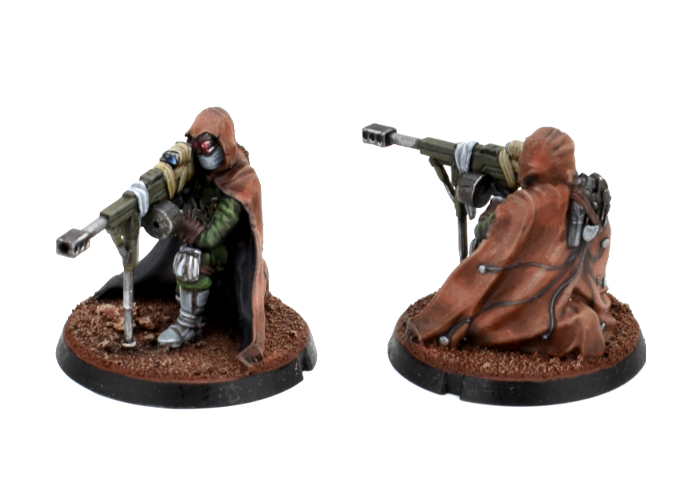
A Sniper amongst the Broken is an immensely valuable battlefield tool and therefore Broken commanders commission their weaponsmiths to produce custom, high-end weapons and tech for their Snipers, so as to give them a fighting chance on the battlefield. Though each Sniper has a slight variation in their kit, their basics usually entail a cloak with powered optical and anti-radar camouflage, along with a drum-fed sniper rifle, which is able to switch on the fly between several different custom-made specialty ammunition types.
As with all Broken, Snipers are the master of stealth, and their ability to pick the right ammunition type to most punish their target before disappearing into the mists before the enemy can return fire in earnest makes them one of the most loathed foes in the spiral arm.
The Broken Sniper is a plastic kit on a single sprue, and is supplied with a 32mm plastic base.
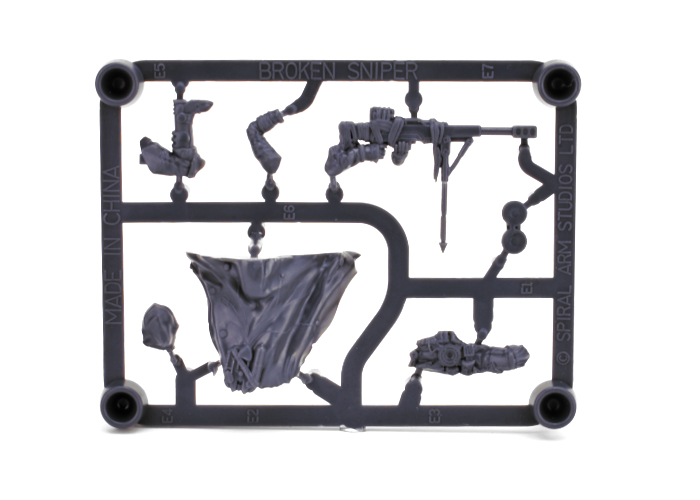
Grab your Sniper from the Maelstrom's Edge webstore now!