Entries tagged [remnant]
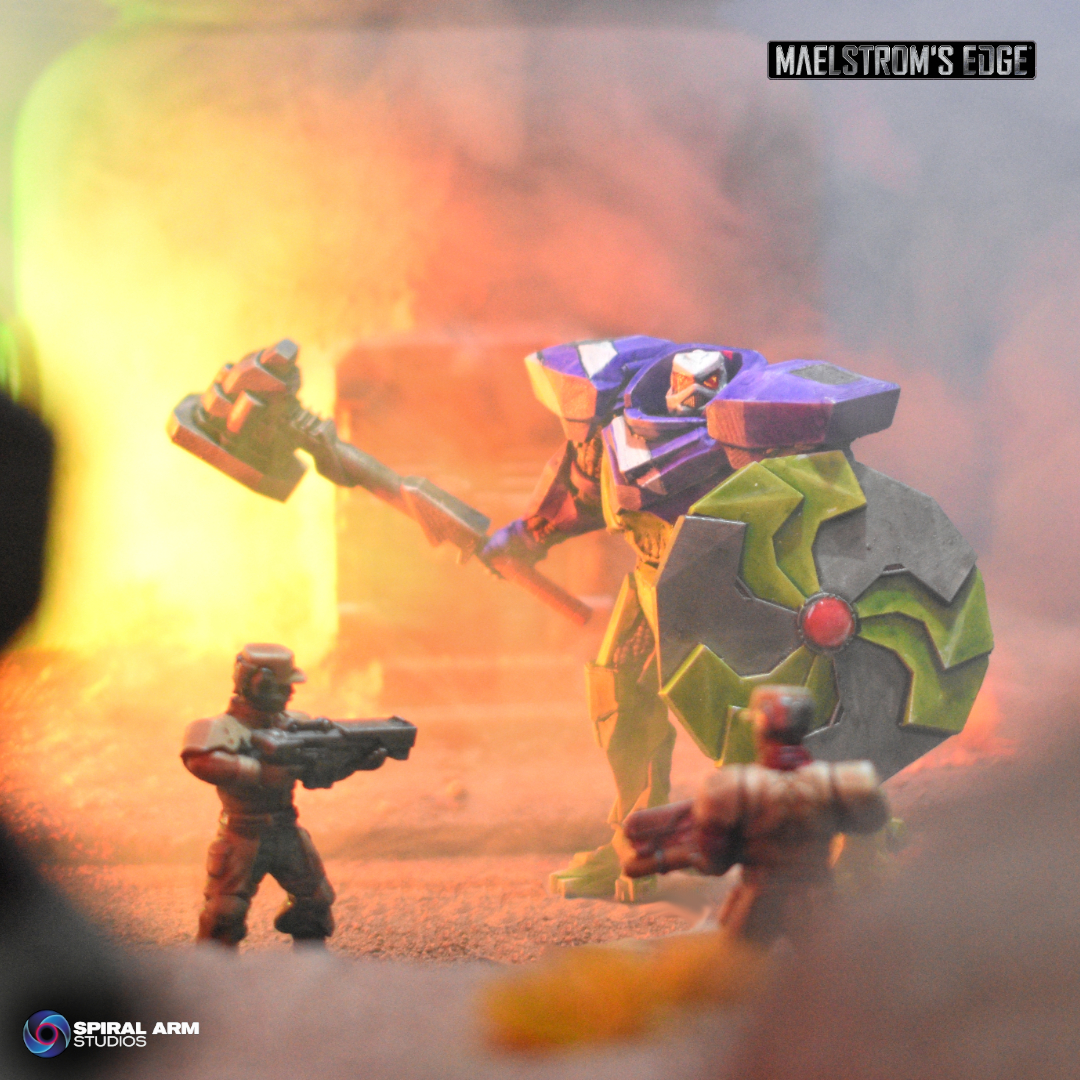
The Brutus Battlesuit thunders onto the field!
Posted on Monday Jun 01, 2026 at 05:00pm in Models
This digital model pack contains STL files to print a Brutus Battlesuit with multiple weapon and backpack options, and a 54mm base. All options unique to the Brutus are included - other weapon and gear options can be used from the plastic Militus Battlesuit kit. Available now through the Maelstrom's Edge webstore here.
New Remnant STL Releases for the Nimbus Battlesuit
Posted on Friday Dec 01, 2023 at 05:00pm in Models
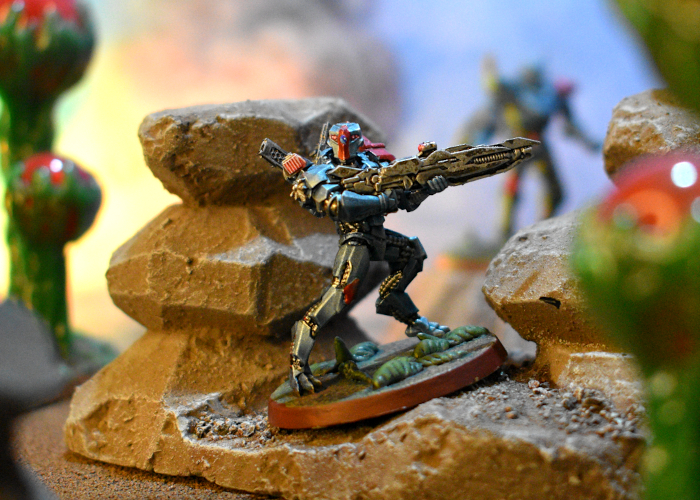
A Nimbus Longshot seeks out their next target.
This month's release includes two packs - A Nimbus Battlesuit pack, and a Nimbus Add-on Parts pack. The Battlesuit pack is a printable digital version of the resin production model, expanded to include an Arc Splitter and variants of the arms with no vent systems, while the Add-on Parts pack includes components designed to fit the plastic Pathfinder kit, to give it access to the same range of weapons and upgrades as the resin kit.
Both digital packs have supported and unsupported versions of the included parts.
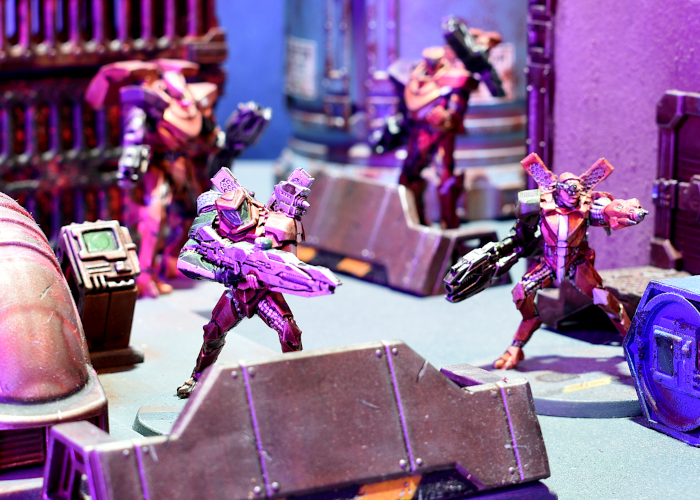
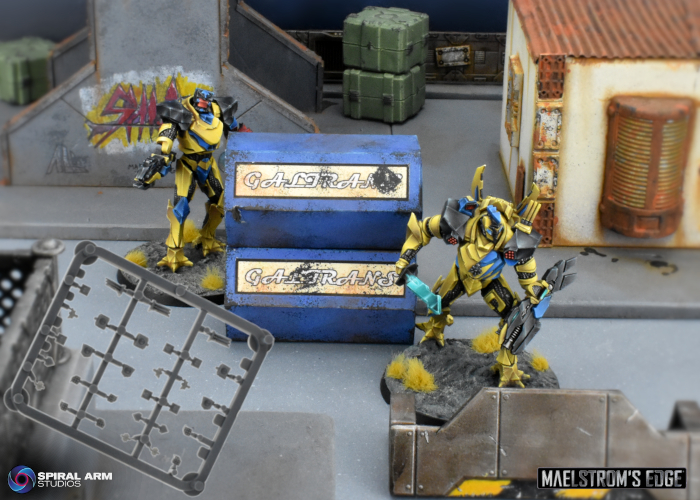
A Remnant fire team advances through the twilight.
You can find the rules for using Nimbus Battlesuits in your Artarian Remnant force in the downloads section of the Maelstrom's Edge website here.
Start building your army of elite army of gladiatorial doom by grabbing your battlesuits from the webstore here!
Sneaky Spotlight: Artarian Remnant Brutus Battlesuit
Posted on Friday Nov 24, 2023 at 05:00pm in General

Click for larger image
Stay tuned for more sneak peeks! In the meantime, try out the V2 Beta rules by grabbing the PDFs from the Trial Rules section of the Maelstrom's Edge website here, and grab your models from the Maelstrom's Edge webstore here! Free shipping applies to qualifying orders - check your cart for details.
You can also find a series of articles looking at different aspects of the V2 game here.
If you have any questions on the V2 rules, the model range, or any other aspect of the Maelstrom's Edge game, feel free to pop in to the Comm Guild Facebook group here.
New Release: Artarian Remnant Character Upgrade STLs.
Posted on Tuesday Nov 08, 2022 at 05:00pm in Models
Holistas serve in a support role, boosting the effectiveness of their fire teams by syphoning excess heat off their suits using their massive heat sinks. This comes at the expense of some offensive capability, so while still formidable warriors, Holistas must rely on their fire teams doing well rather than seeking personal glory. This makes the role of Holista an unpopular one amongst the glory-hungry champions of the Artarian Remnant.
Originally released in resin, the parts for customising plastic Militus suits to build Prime and Holista variants are now available to purchase as STL files for 3D printing.
This digital pack includes both supported and unsupported set files, including the Prime's Phase Sword, Holista's Heat Exchange, and two variant heads. For assembly convenience, the supported version of the heat exchange has the upper elbow joint already attached, with three posing variants included.
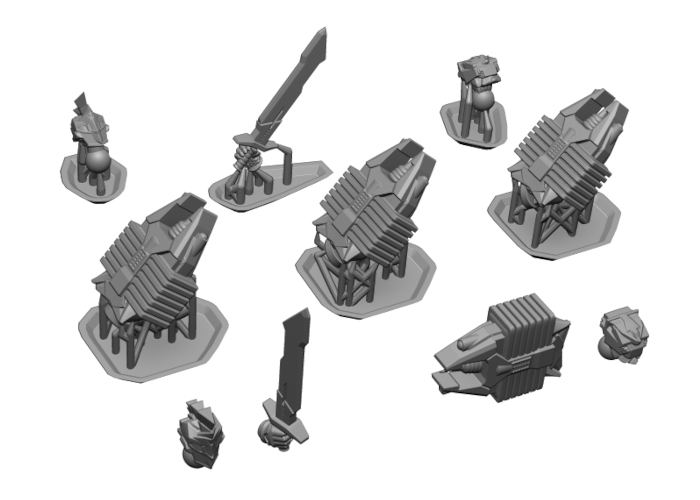
The included parts.
These parts are designed to fit onto the plastic Militus suits, although the heads will fit onto any Remnant suit. You can also equip your suits with additional gear using the plastic Upgrade Sprue.
3D printed examples, painted to a tabletop-ready standard - printed on an Anycubic Photon using Siraya Tech Fast resin at 50μm using Lychee slicer.
Printing results will vary depending on your printer, resin and settings.
Start building your fire team of glory-seeking doom by grabbing the Artarian Remnant models from the Maelstrom's Edge webstore here!
New Release: Plastic Remnant Upgrade Sprue!
Posted on Monday May 30, 2022 at 05:00pm in Models
This sprue has components to represent various upgrades on your suits, including three each of the following:
- Prime/Pathfinder Array
- Defensive Countermeasures
- Enhanced Targeter
- Target Tracker
- Mark Of the Initiate badge
- Prime Sigil
- Veteran Prime Sigil
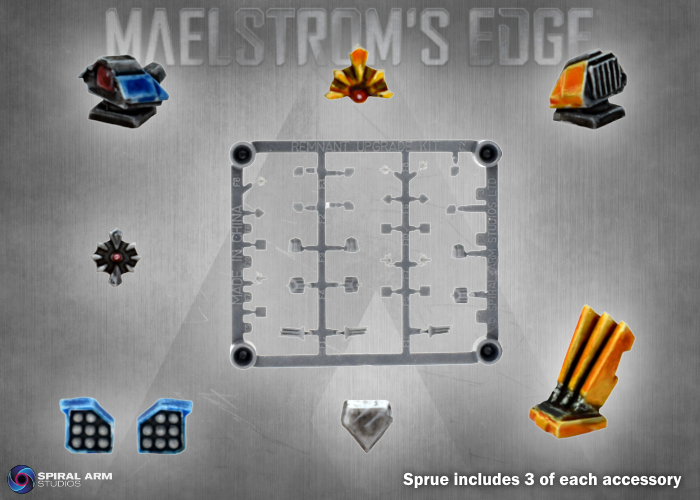
These parts are designed to fit on any of the Remnant suits, where relevant to their unit rules.
Grab the sprue from the Maelstrom's Edge webstore here!
New Release: Plastic Artarian Remnant Nimbus Pathfinder!
Posted on Monday Feb 28, 2022 at 06:00pm in Models
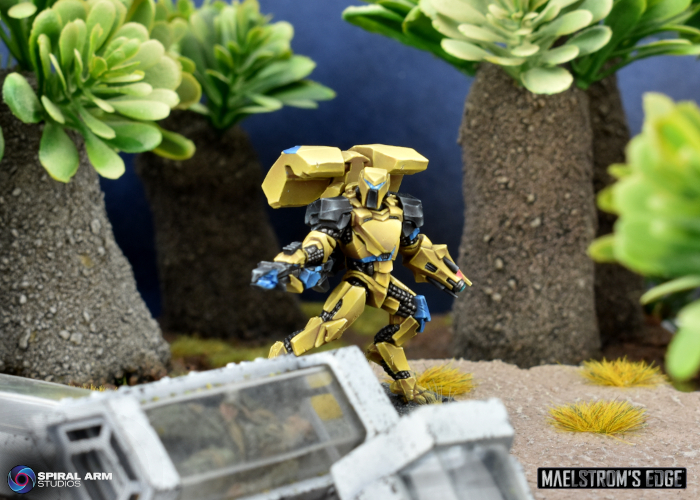
A Nimbus Pathfinder surveys the battlefield.
The Nimbus Pathfinder fills a scouting role within Remnant fire teams, using its Pinpoint Scanner to paint enemy units for the attention of heavier Remnant firepower.
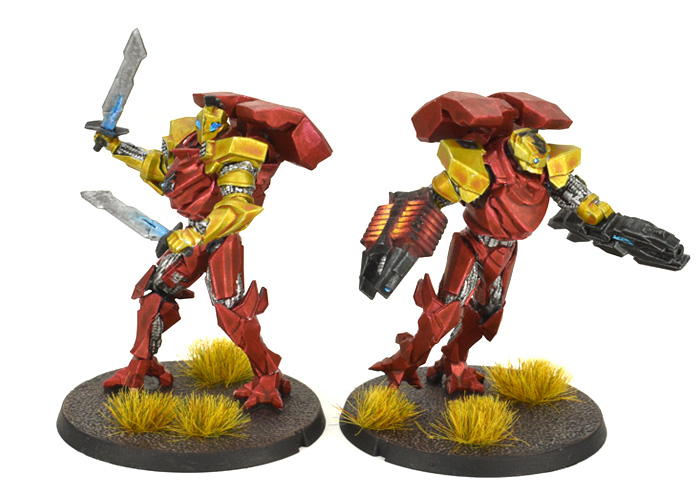
The studio model, painted by Todd McNeal from Toad Painting
This is the second Nimbus model we have released, with the first being a resin model designed to be used as either a Pathfinder or Longshot. Check out the pic below for a comparison of the two (plastic on the left, resin on the right!):
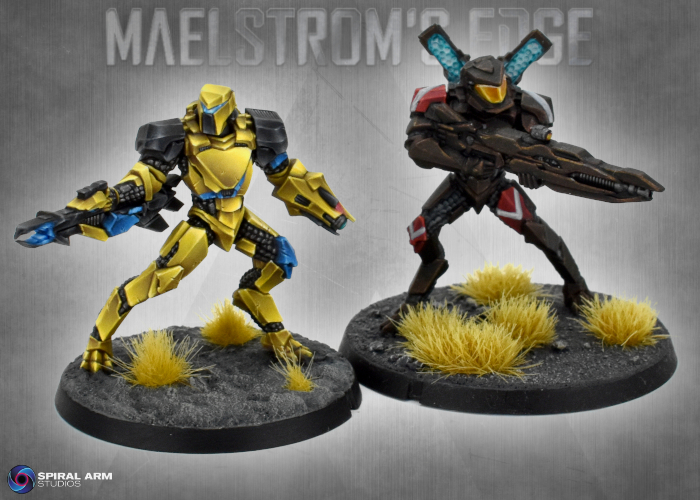
The new model, alongside the original resin model, painted by Winterdyne Commission Modelling
Rules-wise, the Nimbus can be equipped with an array of additional equipment, including Hologram Projectors and Cloak Generators to confound enemy targeting, Vent Systems to assist with cooling, Thermal Trackers to enhance their already formidable shooting, and a Lorican Boostpack when additional speed is required. This kit is compatible with heads and boostpack parts from the plastic Militus kit, and also with the head and cloak generator backpack from the resin Nimbus model. And we'll be releasing a handy upgrade sprue a little later in the year that will cover off some of those other options!
The Pathfinder with a plastic Boostpack from the Militus sprue.
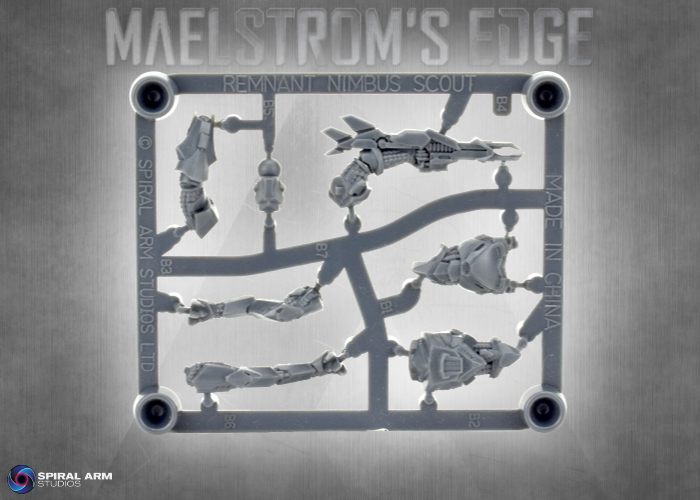
This kit contains a single, plastic Nimbus suit, along with a 40mm plastic base, for use as a Nimbus Pathfinder or Nimbus Pathfinder Prime. The rules for these units can be found in the Force Lists section of the website, or in PDF format in the rules section here.
Grab yours now from the Maelstrom's Edge webstore here!
Tags: models newrelease nimbus remnant
Model Spotlight: Remnant Nimbus Battlesuit.
Posted on Monday May 24, 2021 at 06:00pm in Models
You can find this fantastic resin miniature in the Maelstrom's Edge webstore here.
Model Spotlight: Remnant Nimbus Suits.
Posted on Thursday Mar 19, 2020 at 05:00pm in Tutorials
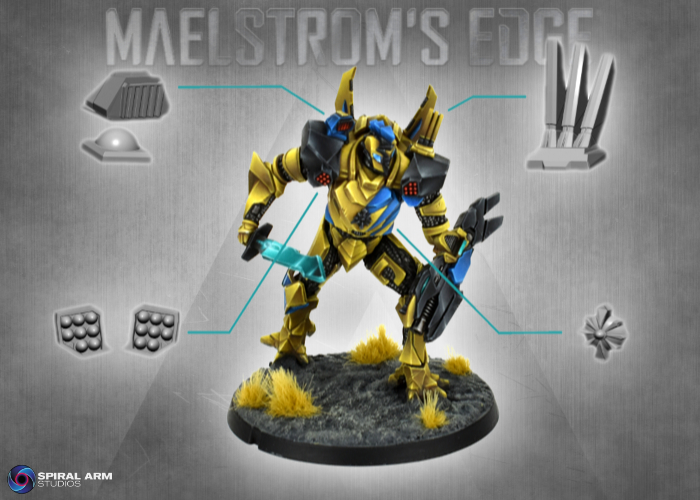
This week, I'm taking a break from terrain and having a closer look at the fantastic resin kit for the Nimbus battlesuit for the Artarian Remnant!
A smaller suit than the more common Militus, the Nimbus comes in a few less pieces as a result of being resin rather than plastic. The kit includes options for both the Longshot's sniper rifle, and the Pathfinder's Incursion Blaster and pinpoint scanner, as well as the thermal tracker and hologram projector for the shoulders and a cloak generator backpack.
While there is only a single head includedin the kit, the neck joint is the same size as on the Militus. This allows you to use plastic heads in place of the regular Nimbus head.
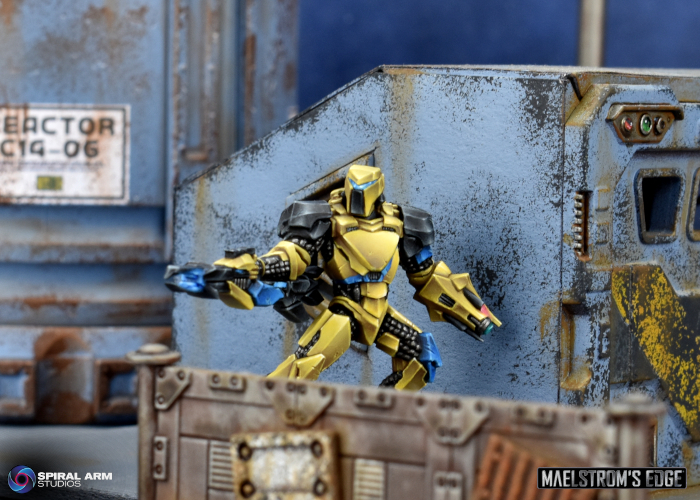
While they may not fit as neatly without some tweaking, you can also borrow heads from other factions for a bare head option. The model below has the head from a Karist heavy weapon trooper kit.
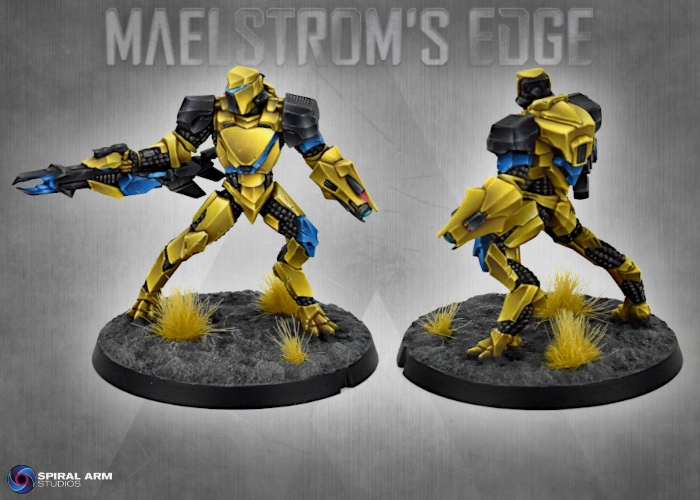
For faster-moving Nimbus variants, you can use a boostpack from the Militus kit. If you're building a boostpacking Pathfinder, be sure to glue the boostpack in place before the weapon arm, as the back of the blaster overlaps the bottom of the boostpack.
Alternatively, you can make a removable boostpack by trimming off the triangular pieces on the bottom, and then sitting it in place with a little bluetack.
Including multiple shoulder pads would have made the kit a little too fiddly, so the pads were sculpted with the venting systems in place. If you're using any other shoulder mounted equipment, it just glues over the top of the vents, but if you not, and if you don't want the vents either, they can be easily covered over with a little putty. Just push the putty in place in the vent and smooth it down flush with the flat of a knife. If necessary, let it set and then give it a little sand to finish flattening it out.
The arms mount at the shoulders with square locator pegs. These are there to make it easier to get the sniper rifle arms to fit together. You can reposition the arms by just slicing off the peg, so that the inside of the shoulder is flat, and then gluing it on however suits you.
For some more extreme repositioning, resin is easy to cut through with a sharp knife or razor saw, and then reattach with superglue.
What have you done with your Remnant suits? We would love to see them on the Comm Guild Facebook page!
You can pick up the Nimbus suit, along with the rest of the Maelstrom's Edge model range from the webstore here.
For other Maelstrom's Edge modeling articles, including tutorials and walkthroughs of a wide range of different building and miniature projects, check out the Hobby section of the Maelstrom's Edge website here.
Tags: conversion modeling nimbus remnant spotlight
Remnant Faction Summary now online!
Posted on Monday Mar 16, 2020 at 08:14pm in The Remnant
The Faction Summary for the Artarian Remnant is now online!
This summary lists all of the special rules, equipment and weapon profiiles used by the Remnant units released so far, and will be updated as future options are released. You can download the PDF here!
The Aurum Blade - A 120 point Remnant Fire Team
Posted on Thursday Aug 15, 2019 at 05:00pm in The Remnant
As fun as it is to mess about with different colour schemes and builds, sooner or later you just have to throw some dice. I decided it was time to stop building random Remnant Militus suits, and put together an actual, playable fire team.
And so, after consulting the force lists and jotting down a quick list, and piecing together the remaining suits that I needed to make it work, the Aurum Blade was born!
This is a 120 point force, which is a good size for small, quick games. It also serves as a nice core for expansion later, as I intend to add some Nimbus and Brutus suits once those kits are ready to go.
The Aurum Blade - 120 point Artarian Remnant force
Command - Militus Warrior Prime - 34 points
- Arc Splitter
- Aruval Phase Blade
- Prime Array
- Vent System
- Defensive Countermeasures
Some of the gear that I wanted for this model isn't available yet (coming in an upgrade pack as soon as we can get it finished!), so I used a couple of fill-in parts. The Aruval Blade is taken from a Warhammer 40000 Space Wolf kit, the Defensive Countermeasures are trimmed off the Epirian Master Handler's missile pods, and the Prime Array is the back end of an Incursion Blaster, sliced off and flipped upside down.
***
Core - Militus Warrior - 17 points
- Combat Gauntlet
- Combat Gauntlet with Reflex Shield
- Lorican Field Generator
This model was a conversion I had to make after I wound up with some leftover parts from a Warhammer 40000 Ork Trukk that I kitbashed into an Epirian Contractor Truck. While the saws are big and showy, it made the most sense to just treat them as combat gauntlets, rules-wise. The saws are attached to trimmed-down reflex shield arms, but that's just represented as a single reflex shield due to there being no benefit to taking two of them!
Core - Militus Warrior - 21 points
- Conflagration Launcher
- Combat Gauntlet
- Incursion Blaster
This was one of the first models I painted up for the Remnant, and is still one of my favourites, so it was a fairly obvious idea to base a fire team around him.
Anvil - Militus Dominator - 30 points
- Conflagration Launcher x2
- Incursion Blaster x2
You might remember this suit from such articles as Building the Militus Dominator! He's just itching to lay down some firepower.
Vanguard - Militus Skyrunner Initiate - 18 points
- Incursion Blaster x2
- Mark of the Initiate
This last model was also assembled and painted for a previous article, showing how to paint the gold used on this fire team. The Mark of the Initiate means that he takes to the field with lower stats then the rest of the team, but also makes him five points cheaper, which meant that the fire team came in bang on the 120 points without having to sacrifice any gear.
As an initiate, I left his suit simpler than the rest of the fire team, with the only white decoration being the initiate shield on his left shoulder pad.
The team all assembled:
All that's left now is to test them out on the table! I'll make no promises on their performance there - I tend to build lists around the models that I want to I like the look of, with very little regard for what will be most effective in battle. Part of the challenge is in taking whatever you wind up with and finding ways to make it work!
More on that soon!
To put together your own Remnant fire team, pick up the Militus battlesuit from the webstore here.
As always, feel free to pop along and share your creations, or ask any Maelstrom's Edge- or hobby-related questions on the Comm Guild Facebook page!
For other Maelstrom's Edge modeling articles, including tutorials and walkthroughs of a wide range of different building and miniature projects, check out the Hobby section of the Maelstrom's Edge website here.
Conversion Spotlight: Building the Militus Dominator.
Posted on Thursday Aug 01, 2019 at 05:00pm in Tutorials
With the Remnant rules released this week, players now have a range of different options for building their Militus suits. Four of the currently available suit classes are buildable straight off the sprue, but the Dominator class does require a very small (and very easy!) conversion to give it a second shoulder-mounted weapon.
The plastic militus kit only comes with a single shoulder-mounted weapon, which hangs on a rig that only fits on the left shoulder. To build the Dominator, you need two weapons. The easiest way to do this is to leave off the shoulder rig, and borrow a second mounting joint (parts L16 and L21 on the sprue) from a second Militus kit.
If you have built a suit or two with combat gauntlets, you will also have some leftover elbow mounts, which you can use instead.
Simply assemble the mounting joint on the weapon as normal, then flip it upside down and glue it directly to the top of the shoulder pad.
The rest of the suit can be assembled as normal.
With a coat of paint, the new Dominator is ready for the table!
Of course, that's just the easy way to do it. Being plastic, the Militus kit offers all sort of other conversion options if you want to get creative with clippers and glue!
Build up your own crusading force of indomitable firepower by picking up the Militus kit from the Maelstrom's Edge webstore here.
As always, feel free to pop along and share your creations, or ask any Maelstrom's Edge- or hobby-related questions on the Comm Guild Facebook page!
For other Maelstrom's Edge modeling articles, including tutorials and walkthroughs of a wide range of different building and miniature projects, check out the Hobby section of the Maelstrom's Edge website here.
Tags: conversion militus modeling remnant tutorial
Rules for the Artarian Remnant are now online!
Posted on Tuesday Jul 30, 2019 at 05:00pm in Gaming
This month, the forces of the Artarian Remnant assemble to storm the battlefields of the Edge, with the release of rules cards for the Militus battlesuit!
With a wide array of different gear and weapons available to them, the Militus is the most widespread of the suit types in use by Remnant champions. The suit classes that can be built straight from the plastic Militus kit are represented on five rules cards - two different command options, and three different troop options, which you can now find in the Remnant section of the online Force List.
Faction Abilities
All Militus suit types have the 'Aerial Insertion' rule, to represent the fire team deploying from orbit. What makes them truly special compared to other armies, though, is the 'Crowd Favorites' rule. Combat is an extreme sport for Lorican Champions, and fire teams broadcast their exploits back to adoring fans on the vast ships of the Remnant Fleets, who in turn convey their support to their chosen Champions in the form of Favor.
While Remnant forces receive Command Points each turn for any Command models in play, they also gain an additional point for every 3 Lorican Champions currently on the table. This represents the Champions being boosted by the support of the watching crowds back in the fleet. These Command Points can then be used by the Champions to Overcharge their suits, allowing them to move faster, buff their weapons, or improve their defensive abilities, at the expense of generating heat. Heat is represented by additional Suppression, and can be dispersed through the use of Venting systems.
Militus Warrior
The most common Militus class is the Warrior. A Core choice in a Remnant detachment, the Militus Warrior wields powerful ranged or melee weapons on its arms. It can be equipped with a field generator backpack, and also has access to a third, shoulder-mounted weapon or an assortment of support equipment.
Note: We will be releasing a resin upgrade pack which will include all of the support equipment options, but we have included these options on the cards for now to let you try them out!
Militus Warrior Prime
Experienced Lorican champions may eventually wind up commanding fire teams in combat, and bear the rank of 'Prime' to show their status. The Warrior Prime's 'Counterattack' ability gives his units a boost when retaliating against enemy fire.
Militus Skyrunner
The Skyrunner eschews the protection of a field generator, or the extra firepower of a shoulder mounted weapon in favour of the mobility boost provided by a Lorican Boostpack. While more limited in options than other Militus classes, the Skyrunner serves as a handy Vanguard option for capturing territory and getting the drop on slower enemy units.
A Skyrunner Prime retains the mobility of their class, and can use their enhanced view of the battlefield to better co-ordinate the movement of their units with the 'Mobile Strike' ability.
Militus Dominator
A more specialised class like the Skyrunner, the Dominator trades in support options in favour of overwhelming firepower. While they lack the ability to take the heavier weaponry available to larger Brutus class suits, Dominators opt for twin ranged weapons on their shoulders to maximise their ability to rain punishing fire on their opponents.
So, What's Next?
Well, as we mentioned, there will be a resin upgrade pack coming, with an array of different support options and some special parts to customise your Primes.
Of course, the Militus isn't the only weapon in the Remnant arsenal, and many Lorican Champions take to the field in the heavier Brutus or super-light Nimbus suits. Both of these will be added to the force with resin models later this year.
In the meantime, though, the multiple variants of Militus suit give you plenty of options for building different forces and taking on the less-well-equipped and considerably squishier factions opposing them on the Maelstrom's Edge!
The Militus kit is available now, along with the rest of the Maelstrom's Edge model range in the webstore here.
You can see the unit cards in the online Force Listing section here, and you can also find a downloadable, printable version in the 'Rules' section of the website here!
Happy Gaming!
Painting Spotlight: Militus Battlesuit painted with layered Contrast paint.
Posted on Thursday Jul 18, 2019 at 05:00pm in Tutorials
I picked up three of the new Citadel Contrast paints to have a play with when they were released - a yellow, orange and red. This was partly just from curiosity as to how they worked, and partly hoping to plug the colour gaps not filled by the other washes (mostly Army Painter) in my current paint collection. I showed off my initial dabblings a few weeks back, with a metallic red and yellow Militus battlesuit (here, if you missed it), using the Contrast as intended, but with the orange I wanted to see of these paints could be used for a thinner, layering style instead of just glopping it on and hoping for the best. So I broke out another Militus suit, and wound up with this:
The model I started with was a Militus suit that I had slightly converted by adding some spare knee wings to the shoulder pads and a flappy cape sort of thing hanging from his belt that was taken from the Karist Kaddar Nova kit.
As with the previous suit, I started out with a basecoat of Army Painter Plate Metal spray.
Over the mechanical undersuit parts and the arm-mounted conflagration launchers, I painted a layer of Army Painter Dark Tone.
When that was dry, I gave the rest of the armour a light coat of Gryph-Hound Orange, keeping it thin enough that it didn't pool. This looked a bit scrappy, but that's ok for now.
I then started building up the orange with successive, light layers. These layers slowly work back from raised edge, building up heavier colour in creases, lower edges of plates and other shaded areas. Once the orange was about as dark as I thought it was going to get, I used a little Blood Angels Red to add some extra shading.
Once I was finished with the Contrast layers, I painted the helmet crest and the cape with Citadel Macragge Blue, and the eyes, inner strip details on the cape and some detail on the sides of the guns with Army Painter Ash Grey. I also basecoated the base with Vallejo Basalt Grey.
To finish up, I gave the blue a light drybrush with some old Citadel Ice Blue to pick up the detail and then washed it with a generous coat of Army Painter Blue Tone. Over the Ash Grey I added a highlight of white, and then I went over the raised edges of the armour with some Coat D'Arms Fiery Orange, with a final spot highlight of white wherever it seemed appropriate. The base was finished off with a drybrush of Vallejo Light Grey and my usual 'urban' detailing.
Some final thoughts: Over the Plate Metal basecoat, the orange wound up more of a coppery brown. I don't dislike the colour, but a white or cream base would be needed for more of an 'orange' orange. I also found that the red faded considerably as it dried, so the final level of contrast on the armour plates isn't as high as I had intended. Some over-compensation would clearly be required when shading this way with the Contrast paints in this way.
Another minor issue is that the Contrast rubbed off on raised edges really easily with handling during painting. I had heard that the Contrast paints were a little more fragile than regular acrylics, and are best sealed for handling, and this would seem to be made worse by the thinner coats used here. A light coat of sealer between layers now and then would probably be a good idea for keeping the paint intact while working, although I'm not sure how the Contrast goes over sealer.
Overall, though, the process seems to work, it just needs some refining as the Contrast behaves quite differently to the Army Painter Quickshades that I usually use for this sort of method.
You can pick up the Militus battlesuit, along with the rest of the Maelstrom's Edge model range in the webstore here.
As always, feel free to pop along and share your creations, or ask any Maelstrom's Edge- or hobby-related questions on the Comm Guild Facebook page!
For other Maelstrom's Edge modeling articles, including tutorials and walkthroughs of a wide range of different building and miniature projects, check out the Hobby section of the Maelstrom's Edge website here.
Tags: militus modeling painting remnant spotlight tutorial walkthrough
Painting Spotlight: Remnant Militus Suit with Contrast Paints
Posted on Monday Jun 24, 2019 at 05:00pm in Tutorials
If you've been following my articles for any length of time, you may have noticed that I like using lots of ink washes in my painting. Washes are a great way of quickly adding shading to a model, and so are an invaluable tool if you want to get your models painted speedily and easily. So when the new Citadel Contrast paints came out this month, I couldn't resist taking them for a spin to see what they could do. I specifically wanted to try out a bright red and a yellow, as these are shades that weren't already covered well by my existing collection of washes, and so dug out a Militus Battlesuit from the to-be-painted pile that seemed like a good candidate for the experiment.
The model I chose to paint up was one of the conversions featured in the Militus conversion spotlight article from back in April. This is a mostly-stock model, with a little trimming on the leg joints to allow more of a crouched pose than is otherwise available to the kit.
There are a range of specific basecoat sprays available for the Contrast range, but working on the assumption that following instructions never got anyone anywhere interesting, I chose to use Army Painter Plate Metal spray as a base instead.
Red inks tend to give a richer colour over gold than silver, but that worked into the overall plan. I started out by giving the whole model a generous coat of Iyanden Yellow.
After leaving that to fully dry, I went back over the armour plating with Blood Angels Red, leaving the yellow on the suit's mechanical underlayer and a few other strategic spots.
And just like that, the model was 90% finished. I finished up by adding in some blue detailing on the weapon, chest, boostpack exhaust and helmet eye-lens, and some dark grey on the incursion rifle barrel. I also painted up the metal grating base structure with some Macragge Blue on the vertical panels, and then some Army Painter Strong Tone and Dry Rust over the whole thing. Finally, the base itself was painted with Vallejo Basalt Grey, drybrushed with Vallejo Light Grey and Beasy Brown, and given a few nicks and scratches with black and some more light grey.
As with any ink-painting technique, the end result is not perfectly neat, but what it lacks in accuracy it makes up for in speed. Although if you wanted to spend some more time on it, it should be possible to get neater shading by applying multiple, light coats - This won't be as subtle, or as suitable for paler colours as when done with Army Painter Quickshades, due to the Contrast paints being so much more heavily pigmented, but it should still work ok for darker shades. I'll be testing that theory in a later article.
If you're feeling inspired, you can pick up the Militus kit, along with the rest of the Maelstrom's Edge model range in the webstore here.
As always, feel free to pop along and share your creations, or ask any Maelstrom's Edge- or hobby-related questions on the Comm Guild Facebook page!
For other Maelstrom's Edge modeling articles, including tutorials and walkthroughs of a wide range of different building and miniature projects, check out the Hobby section of the Maelstrom's Edge website here.
Tags: militus painting remnant spotlight tutorial walkthrough
Another look at the converted Militus from this week's painting guide!
Posted on Friday May 10, 2019 at 05:49am in The Remnant
You can find the painting article here.
The Militus kit is available now from the Maelstrom's Edge webstore!
Tags: conversion militus modeling painting remnant