Terrain Tutorial: Scatter Terrain
Posted on Monday Apr 03, 2017 at 05:00pm in Tutorials
 - by Iain Wilson
The Maelstrom's Edge terrain sprue is a fantastic resource for detailing scifi buildings made from all sorts of things - You can find a bunch of different ideas and tutorials here. The terrain sprue components are also handy though for making smaller detail pieces to scatter around your gaming tables for a little extra cover. I have previously shared a tutorial for building small shipping containers from a couple of doors, some ladders and a little foamcore (you can find that tutorial here), and this week I thought I would run through a few more small scatter terrain ideas.
First up: Barricades
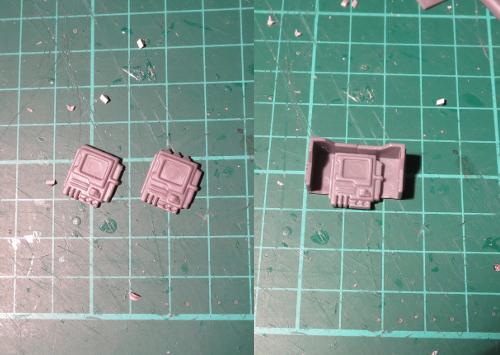
For this, you'll need one garage door, and two trapezoid windows.
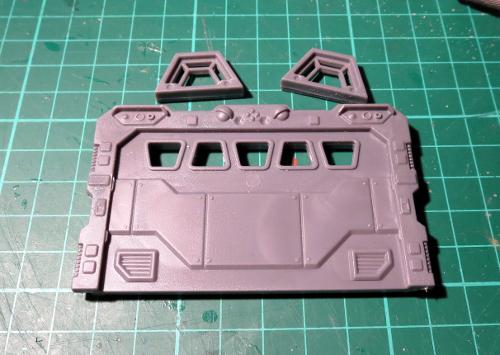
Start by removing the door from the door frame. You can do this with a jeweller's saw or razor saw, or by running around the inside of the frame with a sharp hobby knife from both sides until the door pops out.
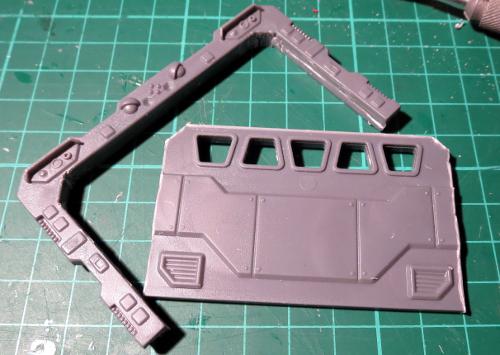
This gives you an open door frame that you can use on a building or ruin, and a handy detailed panel that can be cut up as below:
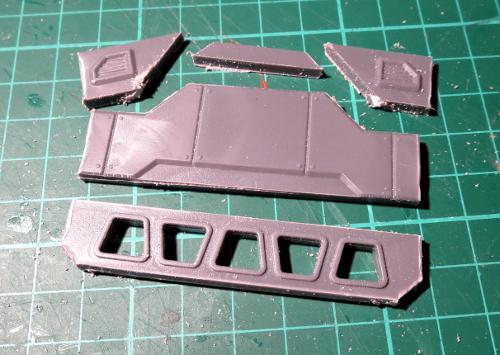
Throw the off-cuts into your bits box (they'll come in handy for a ruin or scrapheap down the track, and the strip of small windows is a nifty bit of detail for a building or other wall feature) and glue the trapezoid windows to the back of the lower section of the door.
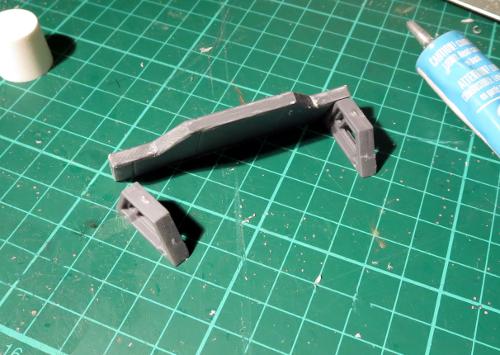
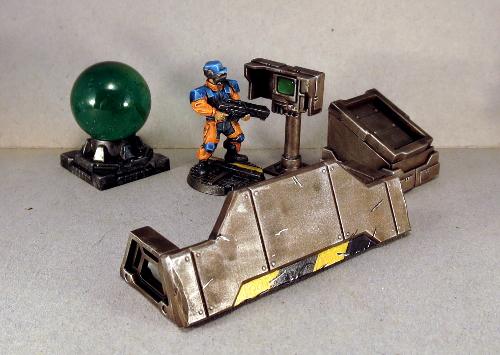
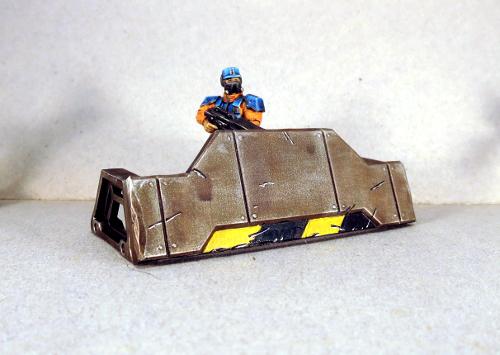
Once the glue has set, you have some barriers just perfect for huddling behind and feeling all suppressed.
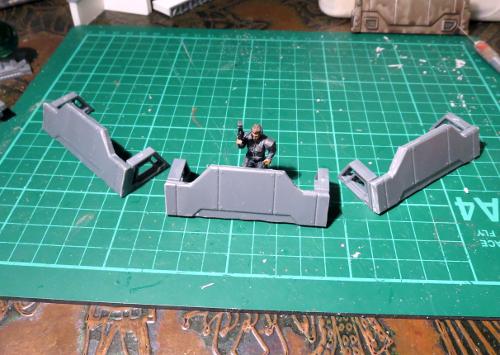
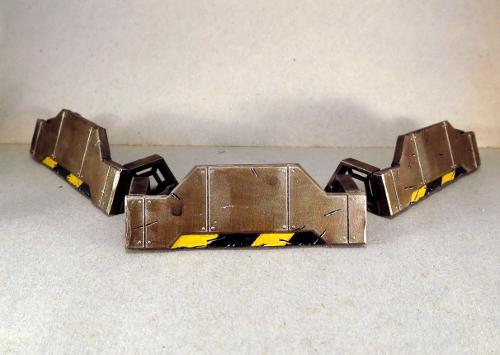
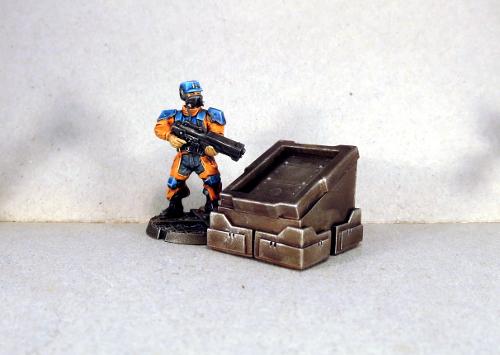
I've painted these up fairly plain, so that they will fit with whatever sort of table I throw them on. You can easily paint them to match your buildings, or paint on mis-matched panels for more of a ramshackle look.
Next: The Orb!

I picture this device as a 3d map tank, so the ball on top would represent either a hologram or a glass ball with a projection inside.
You will need a square hatch, a large pipe fitting, and a suitable-size marble (the one I've used is around 25mm (1") diameter).
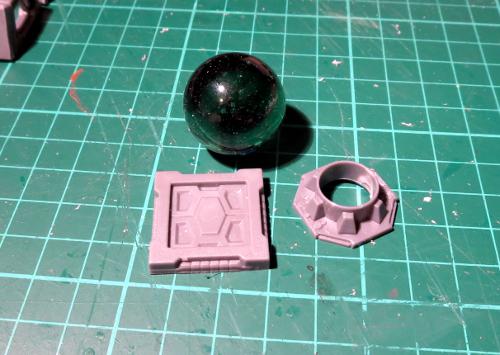
No cutting required on this one - Simply glue the pipe fitting to the top of the square hatch, and put the marble on top. If you hold off on gluing the marble in place until you have painted the base unit, you won't need to worry about cleaning stray paint splatters off the glass.
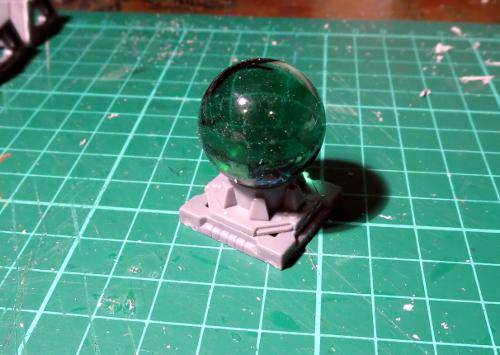
You could also paint the marble, or use a ball bearing or small plastic ball, to make it into a planetary globe sculpture or some other artistic installation.

Next: Public Comm Unit
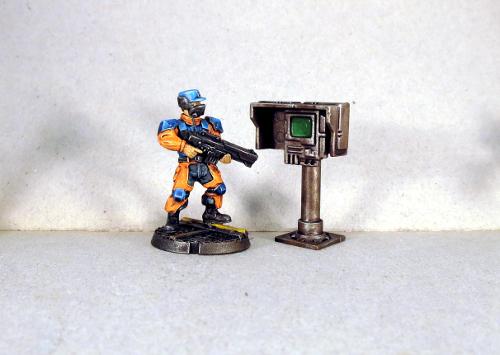
The little computer screen on the terrain sprue shows up all over the place on my terrain pieces. I picture it as a generic, multi-purpose unit that can be configured to display whatever information or controls are required for any given application. In this case, as a public access comm unit or data terminal.
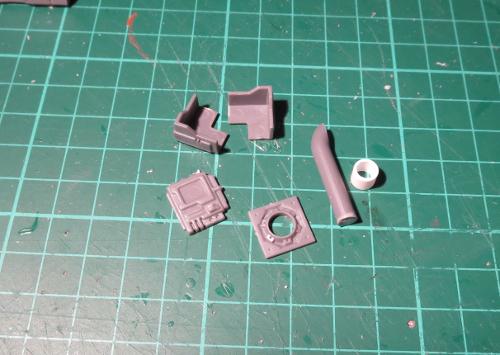
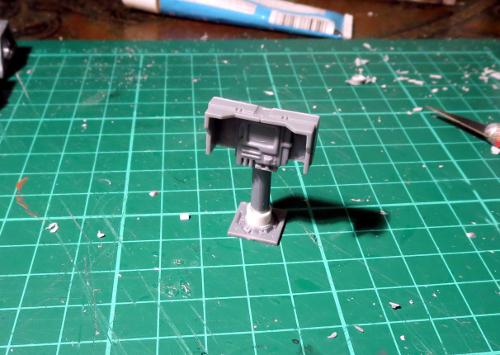
To build this, you need the small pipe fitting, two corner braces, a computer screen, and a 5mm-long piece of 6mm (1/4") plastic tube. You also need a piece of sprue from the terrain sprue - The sprue has a thicker half and a thinner half. From the thinner sprue, cut a piece around 25mm (1") from a corner, with the corner cut off flush with the length of the sprue piece. The end result is a length of plastic rod with a rounded end that has one flat face, as pictured below.
Take the screen and cut off the wedge-shaped protuberances running along the top. Then glue the corner braces together and the screen into the middle, inside the corners and butting up against the top, so that the corner braces form a shade around the screen.
Then glue the plastic tube into the pipe fitting, and the sprue piece inside that, with the rounded end at the top. Make sure the flat face is parallel to one of the edge of the pipe fitting. Then glue the back of the screen to the flat face of the sprue piece.
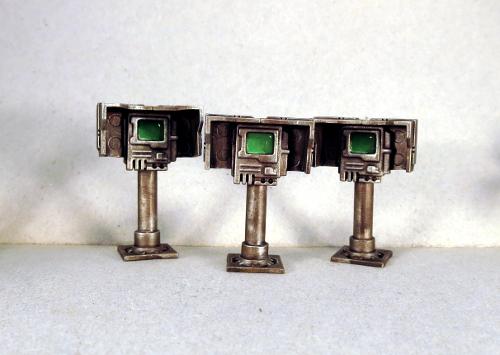
Once painted up, these can be glued onto your terrain pieces for a little extra detail. They also stand quite well on their own, or you could glue them to a base for a little extra stability, and then they can be scattered around as needed - they would make handy objective markers.
And finally: Thermal Vents
No self-respecting, quasi-military terraforming base is complete without some sort of underground installation. The problem with underground installations, though, is that they need some sort of ventilation shaft, otherwise nobody has any way to sneak in!
To build some suitable clandestine access, (or just some nice, blocky, solid cover for your solo models, depending on your point of view and the specific game objectives at hand) you will need a shutter window, four corner braces and some thin plasticard - I've used .5mm sheet here.
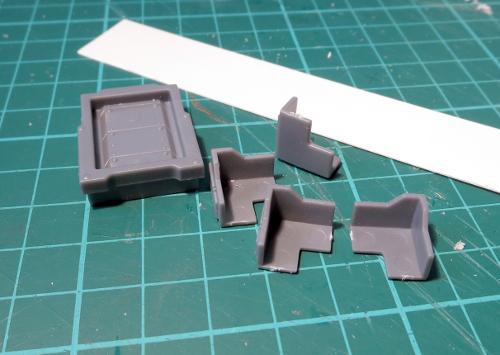
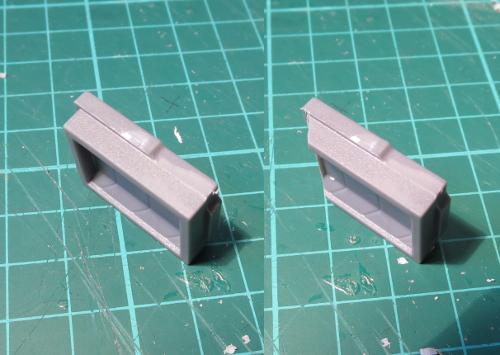
Take the shutter window and on the rear frame, cut or file down the top edge at around a 45-degree angle, as below, leaving the raised frame at the front intact.
Cut sections of plastcard to run around the window frame. The measurements I've used are below:
Rear section - 21mm wide x 20mm tall
Front section - 21mm wide x 9mm tall
Sides - 23mm wide x 20mm/9mm, to match the front and rear sections.
If you're using thicker or thinner plasticard, you will need to tweak the width of the front and rear sections by a matching amount. You can also change the angle of the window frame by making the side pieces longer or shorter.

Check your plasticard sections for fit, and then glue them in place around the window frame.

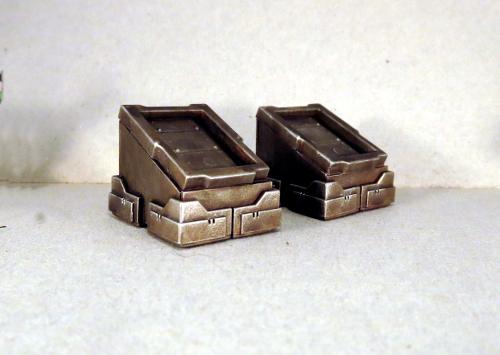
The corner braces are then glued around the base.

As with the barricades back at the start, you can paint these up to match whatever buildings you have, or put them in more generic colours to scatter around multiple tables.
That's the lot for this week - although it's just scratching the surface of what you can do with the terrain sprue components. If you like what you have seen here and want to try building some scatter pieces of your own, you can pick up the terrain sprue in a pack of two from the Maelstrom's Edge webstore here.
We love seeing what people create with the sprues, so as always, please feel free to share your work on the Comm Guild Facebook page!
