Search Results for 'buildings'
Entries found for "buildings": 75Showing 1 - 10 of total 75 search results
Bring Me The Head... Epirian vs Karist V2 Battle Report
Posted on Friday Sept 12, 2025 at 05:00pm in Gaming
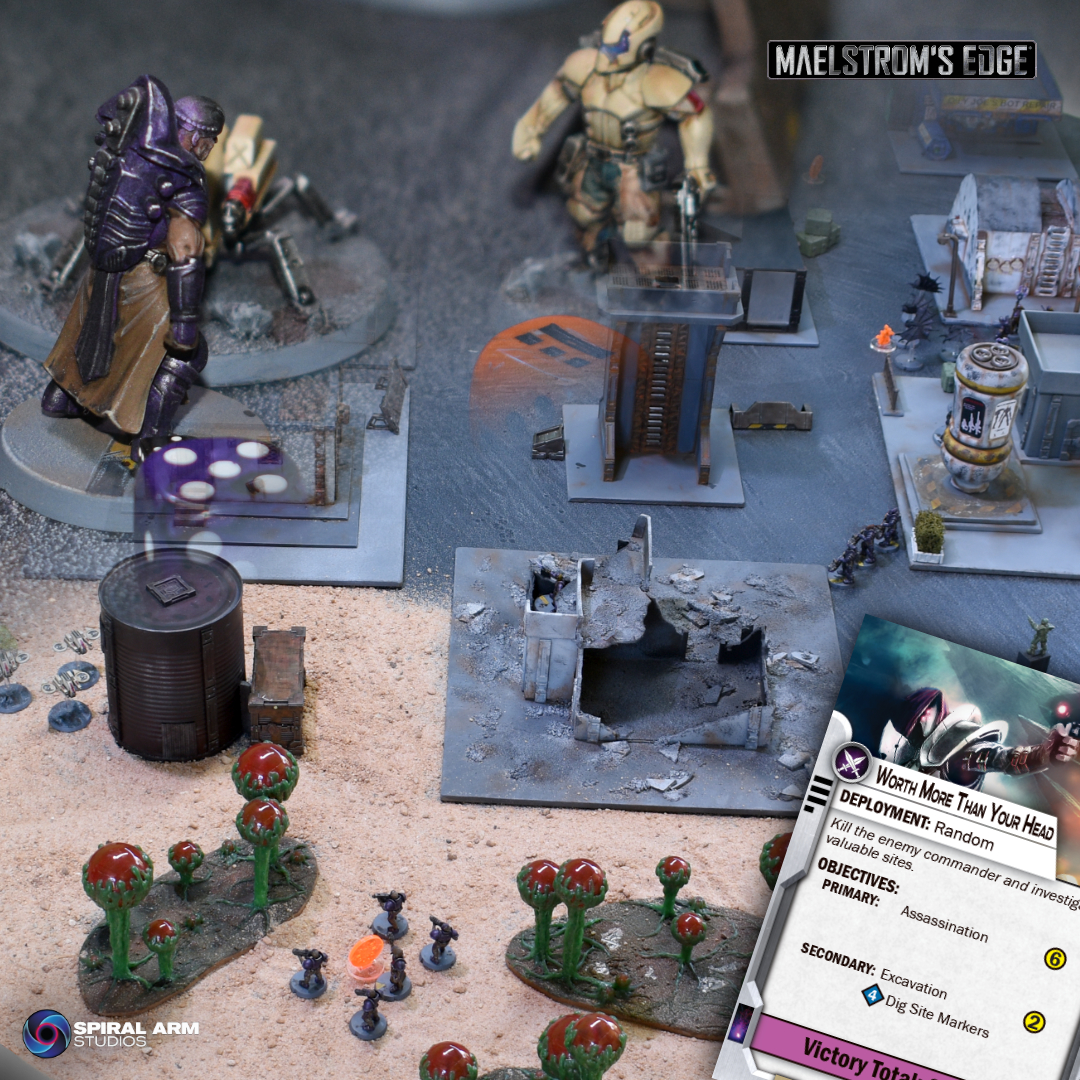
A new Maelstrom's Edge V2 battle report, featuring 120 points of Karists taking on Epirians in a Worth More Than Your Head mission! Check it out here!
Terrain Spotlight: Drone Substation Quick-paint.
Posted on Friday Sept 05, 2025 at 05:00pm in Tutorials
 - by Iain Wilson
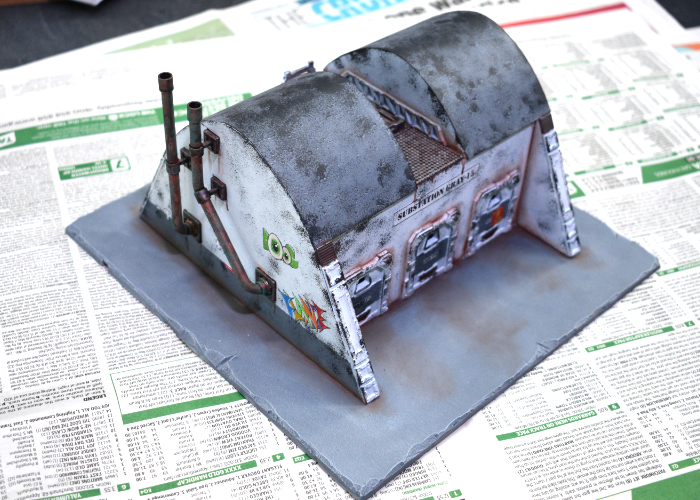
I was rummaging through some storage boxes the other day and came across a building that I had assembled a very long time ago and never got around to finishing. And since it has once again been a little while since I played with terrain, that seemed like as good a reason as any to take some time to get some paint on it!
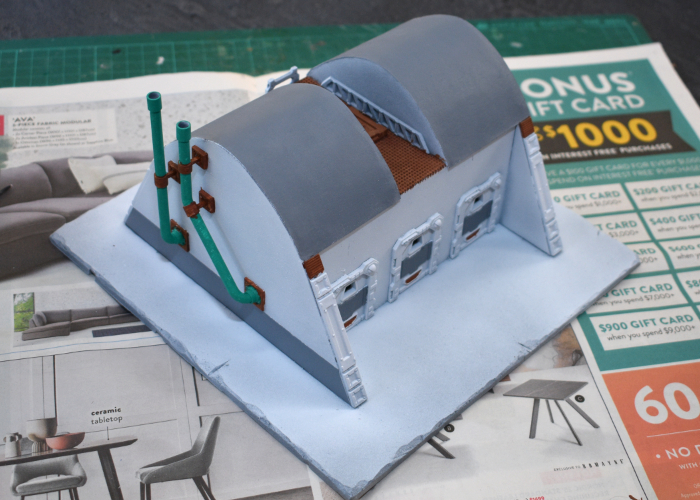
The building in question was built from foamcore, thin card, and bits from the first Maelstrom's Edge terrain detail sprue, and was made to be somewhat ambiguous as I hadn't decided when I built it what it was actually going to be. For some reason, I had (badly) sprayed it with a slightly watery pale green paint. I obviously had a plan for this when I did it, but I couldn't for the life of me remember what it might have been.
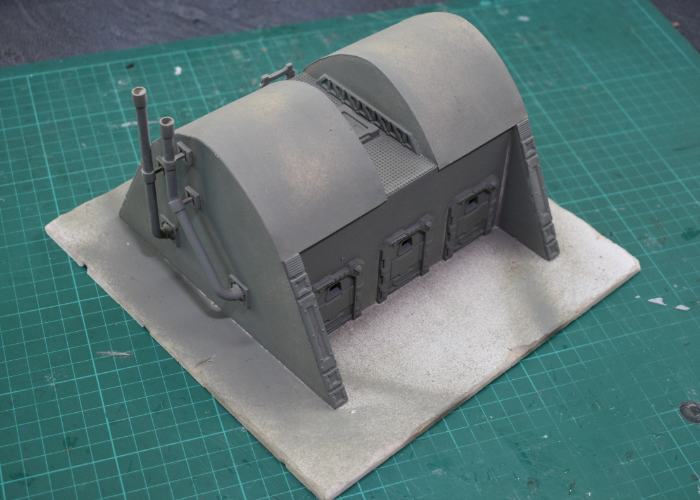
The first step, obviously, was to do something about that dodgy basecoat, so I gave the whole building a good spray with some Army Painter Uniform Grey.
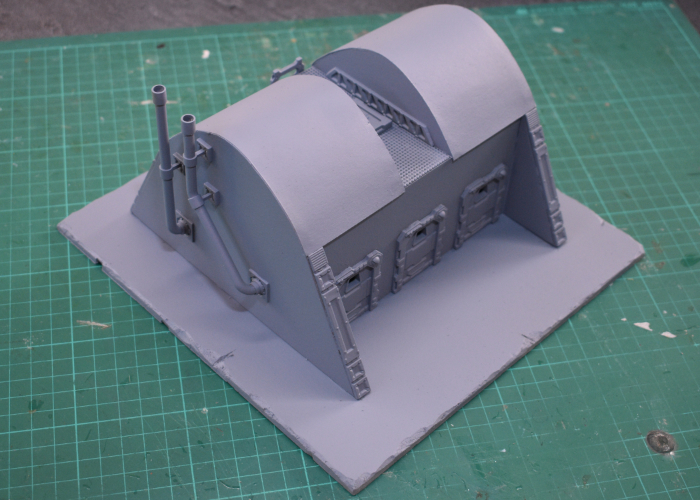
I wanted the building to be white (ish) but solid white buildings are a little boring. So to give it some detail, I broke out some masking tape and masked a strip along the bottom of each end wall before spraying with a coat of white. This was somewhat risky, as my masking tape has been sitting in my toolbox for about 15 years, and doesn't look quite right... There was a certain air of 'will it come off again?' in this operation. Luckily, though, it came off just fine.
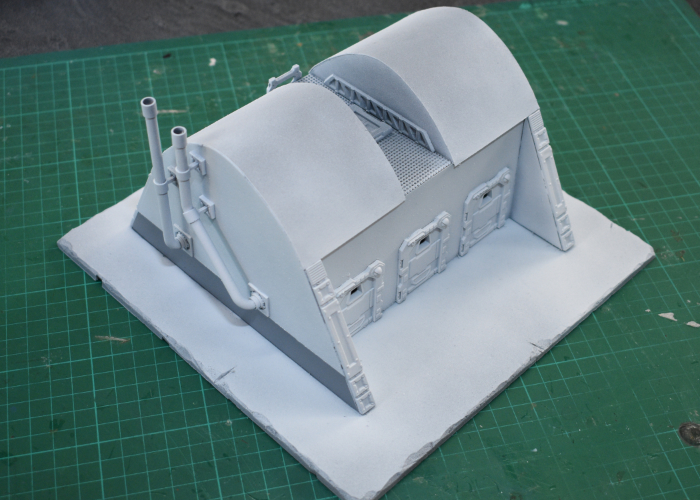
Now it was time to start painting the things that weren't going to be white. I gave the chimney pipes (made from cut off pieces of sprue and plastic tubing) a coat of VMC Emerald, and the other bare metal areas a layer of Beasty Brown. The roof and armour strips on the doors received a coat of uniform grey to match the side walls. I could have done this with masking, but that seemed too fiddly given the state of my masking tape, and these areas were easy enough to paint over neatly.
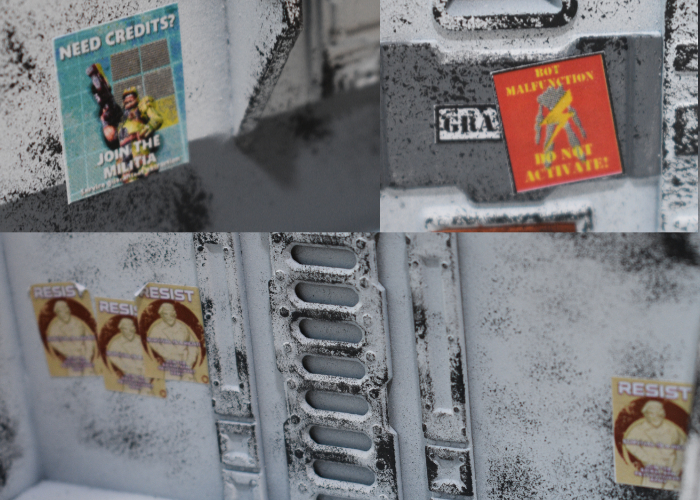
I wanted some signs here and there that looked like they had been there a while, so these needed to go on before any weathering. I printed off some appropriate signage, and glued them in place with some PVA glue.

Then it was time for aforementioned weathering. I broke out a sponge and some Game Color Heavy Charcoal, and went to work, concentrating most heavily on edges and top surfaces. This is the first part of the process where I usually start wondering if I've ruined it, but it usually comes together as it goes along...
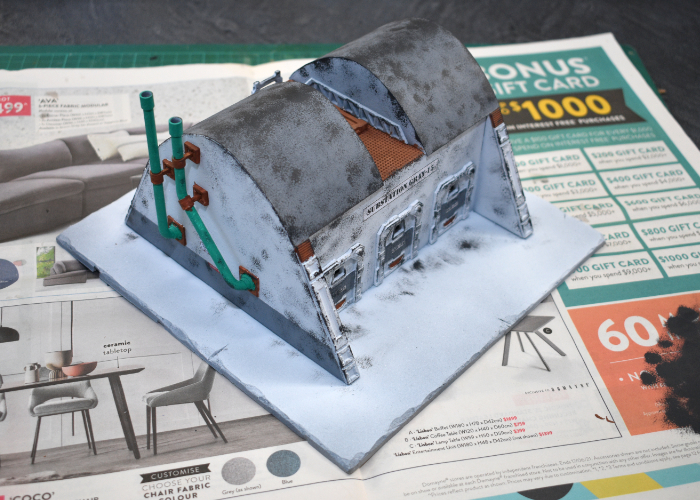
With the initial weathering in place, I added some additional signage.
Then on with the detailing. The chimneys were painted with some old Citadel Copper, and the rest of the metal with a coat of Speedpaint Broadsword Silver. I also painted the base with a coat of Vallejo Neutral Grey.
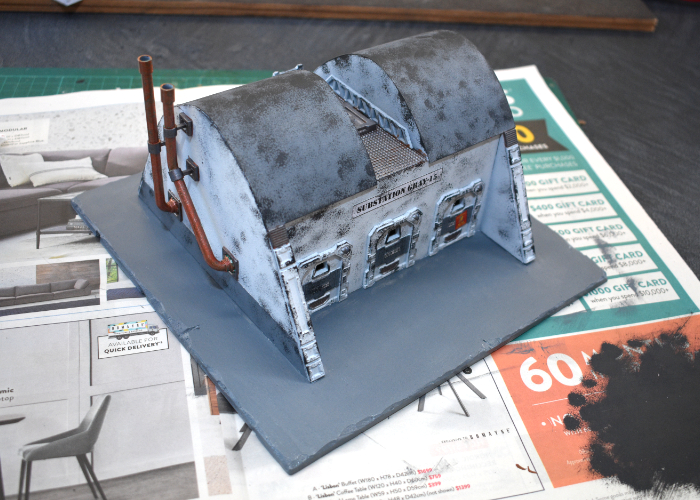
On sponged areas that aren't white, I like to go over and add some highlights on the larger chip marks. This isn't essential, but does help to give it some more texture and looks better at table height.

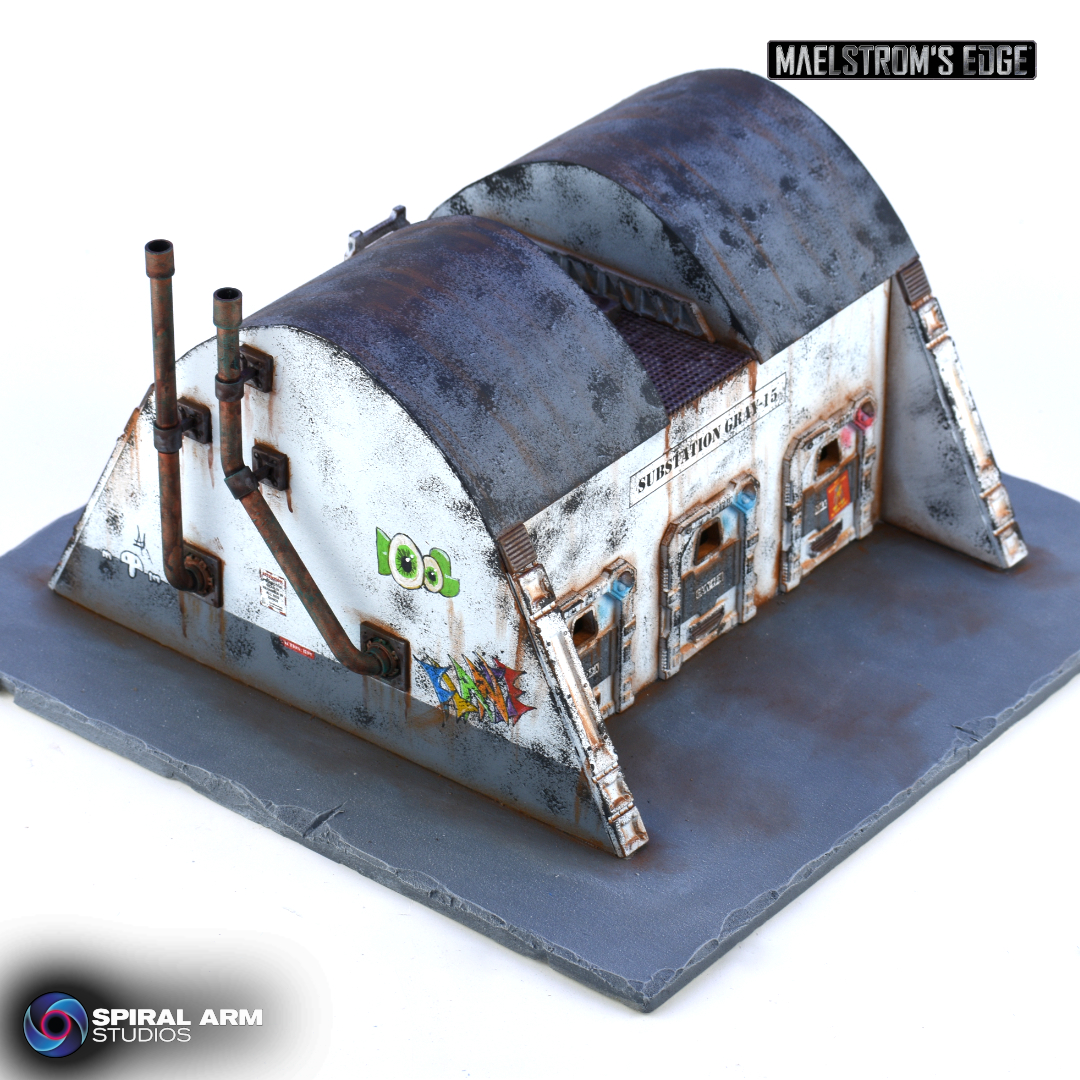
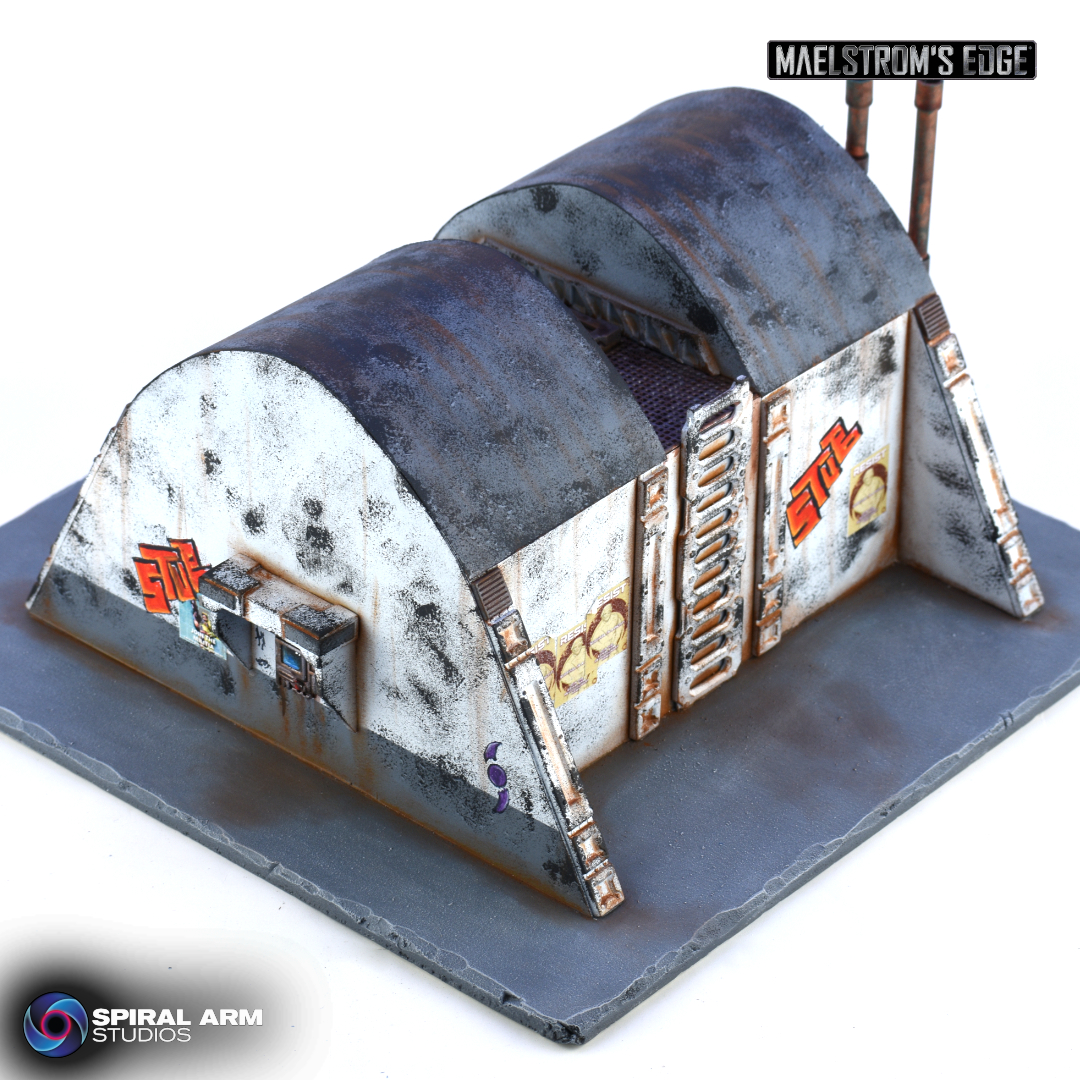
Then it was time for final detailing and weathering. I gave all of the exposed metal a coat of Army Painter Mid Brown ink, added some graffiti, and then got stuck into my favourite part - drybrushing on some dirt! I used Beasty Brown, working it into all of the creases and raised surfaces, and added some streaking here and there where it seemed appropriate.
And with dirt in place, the building was ready for the table!
(Click for bigger pics!)
To build your own building of maintenance-neglected doom, grab the Maelstrom's Edge terrain sprues from the webstore here!
What are you working on? We would love to see your models and terrain in the Comm Guild Facebook group!
For other building ideas, modeling tutorials, army spotlights and conversion walkthroughs, check out the Hobby section of the Maelstrom's Edge website here. And while you're there, grab a copy of the Maelstrom's Edge V2 Beta rules!
Tags: modeling painting terrain terrainsprue
Looking for hobby content?
Posted on Wednesday Sept 21, 2022 at 05:00pm in General
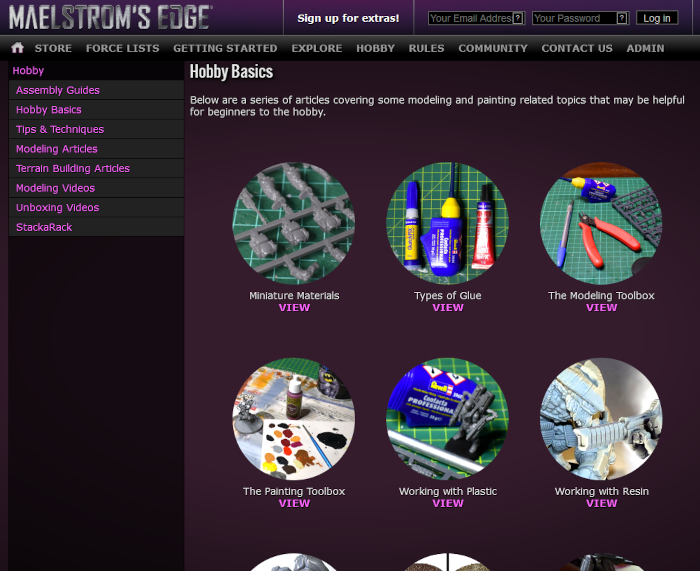
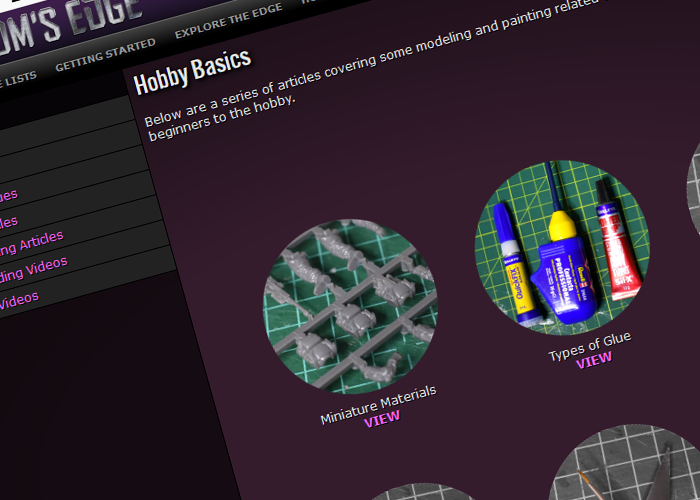
The 'Hobby Basics' section is aimed at beginners to the world of miniature modeling, and includes a series of articles covering some useful information on tools and techniques to get you started.

In the 'Tips & Techniques" section you will find articles on different modeling or painting techniques that can be applied to all sorts of different hobby projects.
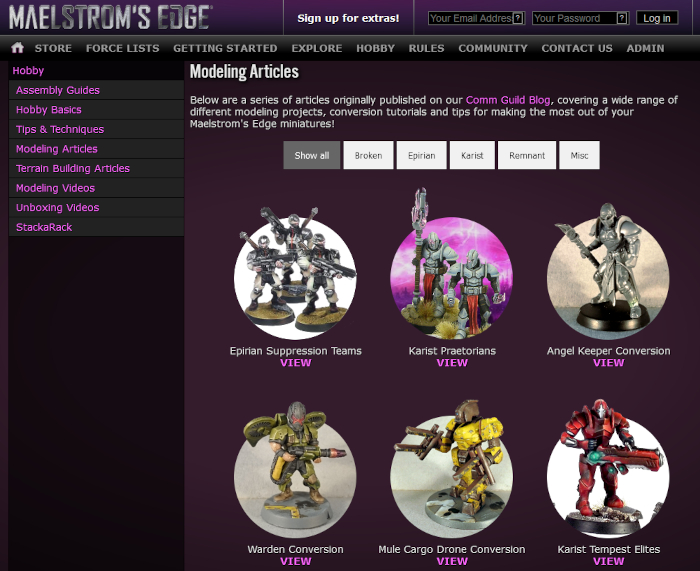
The "Modeling Articles" section covers articles that take a closer look at the Maelstrom's Edge model range, or detail different modeling projects using Maelstrom's Edge models or kitbashes borrowed from other ranges of miniatures.
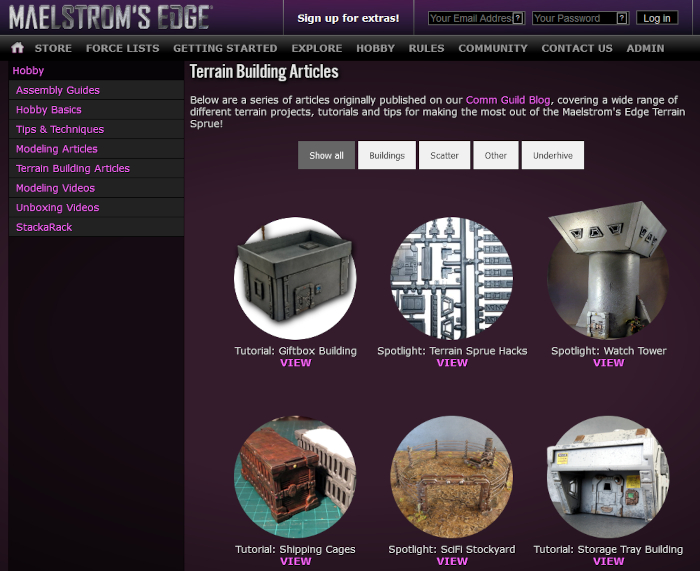
Iain's favourite, the "Terrain Building Articles" section contains a wide range of articles detailing different wargaming terrain projects. Many of these use the Maelstrom's Edge terrain sprues and found objects (storage containers, plumbing supplies, assorted bits of trash) or foamed PVC or foamcore sheets to create buildings and other structures for your gaming tables. There are also kitbashes of 3rd party terrain kits, scratchbuilding ideas for alien forests, and much more.
To get started building up your own little corner of the Maelstrom's Edge universe, you can pick up the entire Maelstrom's Edge range from the webstore here.
What are you working on? We would love to see your models and terrain in the Comm Guild Facebook group!
Remember to also grab a copy of the Maelstrom's Edge V2 Beta rules so you can get into the action!
Terrain Spotlight: Terrain from 'Found' Objects
Posted on Tuesday May 03, 2022 at 05:00pm in Tutorials
- by Iain Wilson
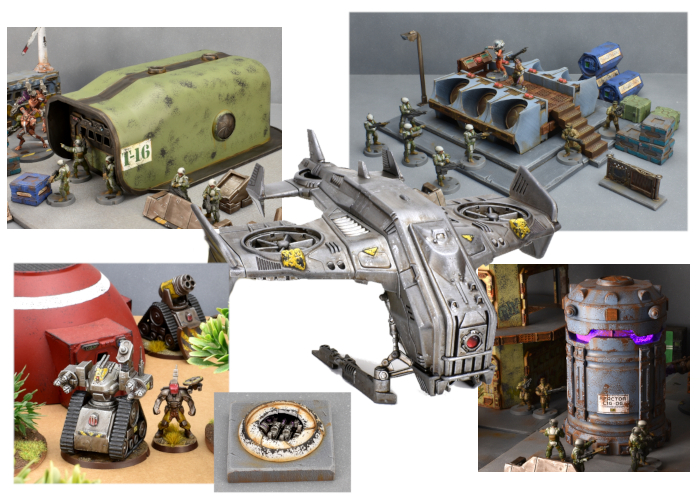
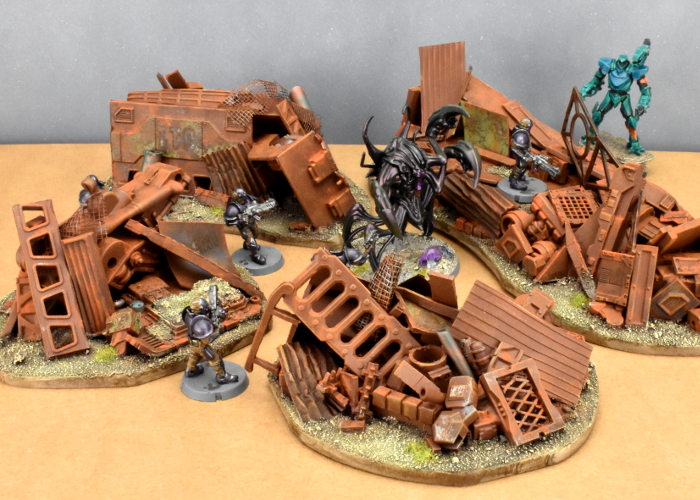
One of my favourite parts of this hobby is building terrain from things that were originally intended for very different purposes. To this end, I tend to keep an eye out when I'm walking around a store or sending things to the recycle bin for anything that has an interesting shape. You can find quite a few of the resultant terrain projects in the Hobby section of the Maelstrom's Edge website, but here's a few highlights from the last couple of years.
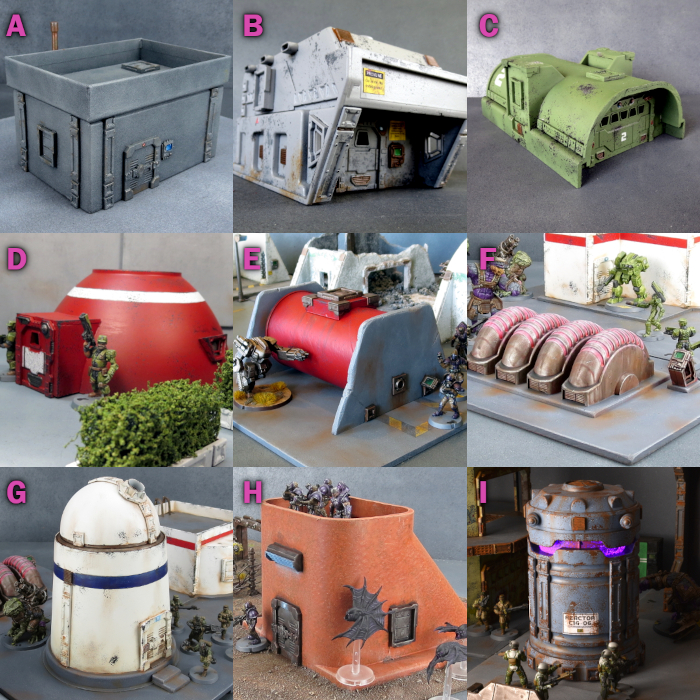
All of these make use of various assorted detail pieces from the Maelstrom's Edge terrain sprues. Click on the Walkthrough links to see how they were put together.
A - Basic building made from a cardboard gift box. Walkthrough
B - Portable building made from a plastic storage tray. Walkthrough
C - Military building made from a plastic stormwater drain. Walkthrough
D - Small Hab Dome made from a plastic bowl. Walkthrough
E - Storage Tank made from a Pringles tube. Walkthrough
F - Generator made from bubble gum tape canisters. Walkthrough
G - Observatory made from a yoghurt tub and a Christmas bauble. Walkthrough
H - Bunker made from a plastic air conditioning duct piece. Walkthrough
I - Generator made from a collapsible LED lamp. Walkthrough
To build your own battlefield terrain of recycled doom, you can pick up the terrain sprues along with the rest of the Maelstrom's Edge range from the webstore here.
What are you working on? We would love to see your models and terrain in the Comm Guild Facebook group!
For other building ideas, modeling tutorials, army spotlights and conversion walkthroughs, check out the Hobby section of the Maelstrom's Edge website here.
Tags: spotlight terrain terrainsprue
Terrain Kitbash: Sci-Fi Barn
Posted on Monday Sept 20, 2021 at 06:00pm in Tutorials
Time to get some terrain on!
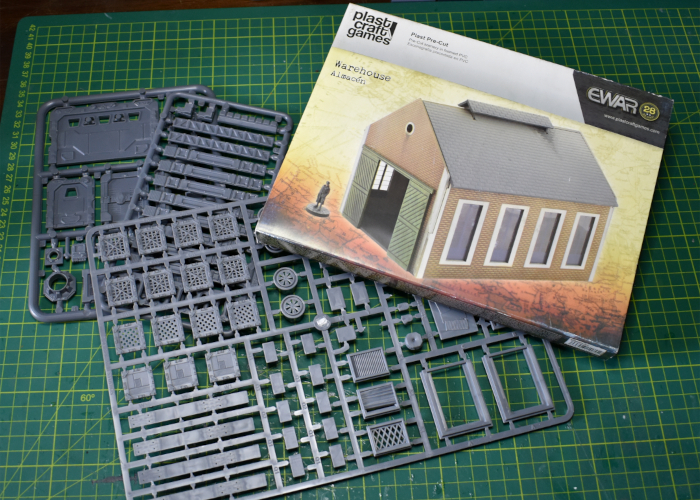
Back in 2017, I put together a sci-fi 'western' gunshop, using the Maelstrom's Edge terrain sprue and a foamed PVC western shop kit from Plast Craft Games. Plast Craft sadly appear to have gone out of business, but I picked up a few building kits on clearance from a local retailer to start fleshing out a themed table. The first (and probably largest) off the rank is an appopriately upgraded barn!
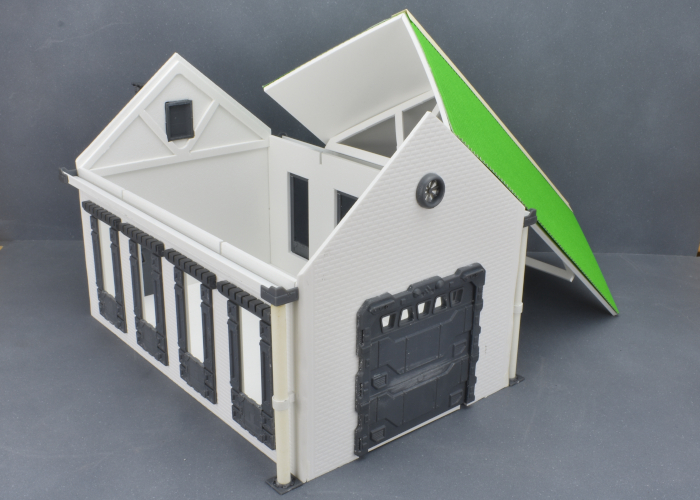
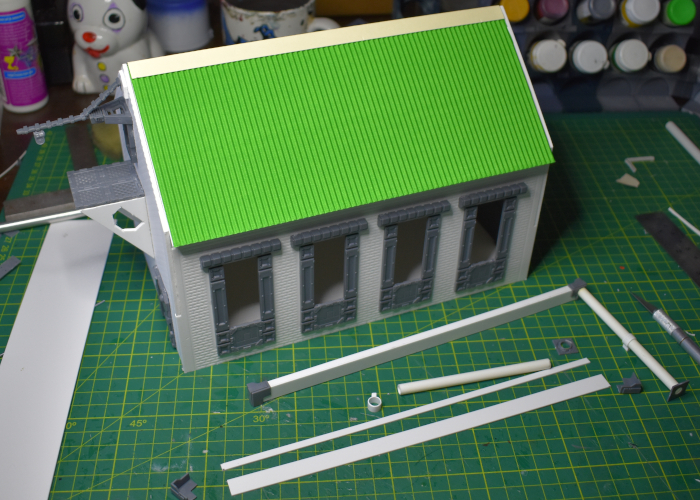
Along with the Maelstrom's Edge terrain sprues, the kit I used for this build is an urban warehouse. If you want to build something similar yourself, while you may not be able to still track down this specific kit, there are other similar buildings available in MDF from other manufacturers, or you could use foamed PVC or foamcore to build your own from scratch.
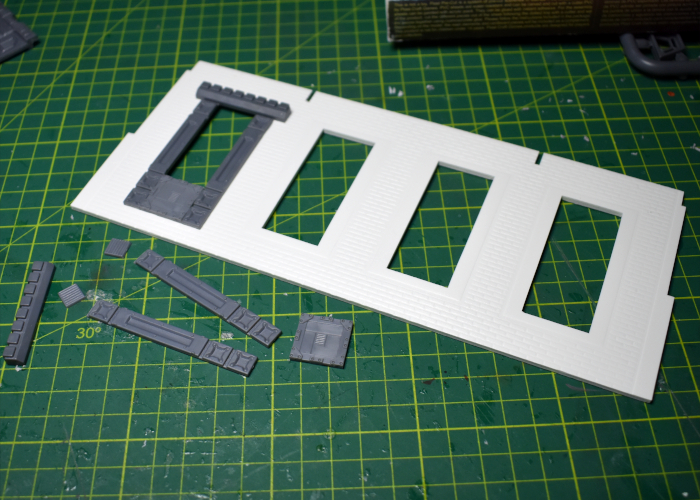
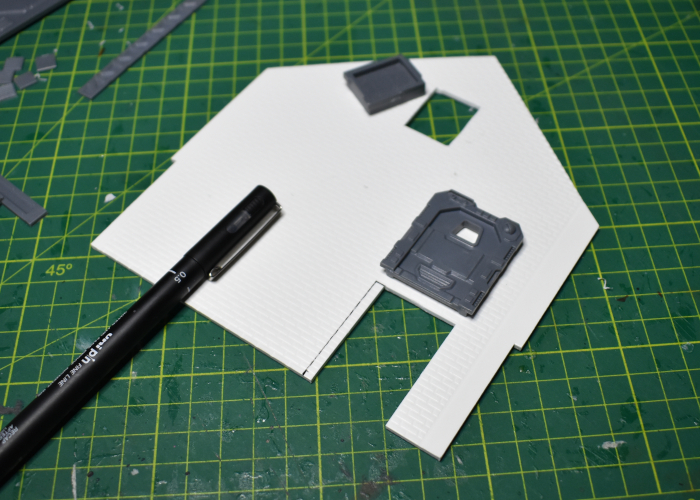
I started out by adding some tech details to the windows, bulking out the frames using support struts and lintel pieces from terrain sprue #1, and floor panels from terrain sprue #2.
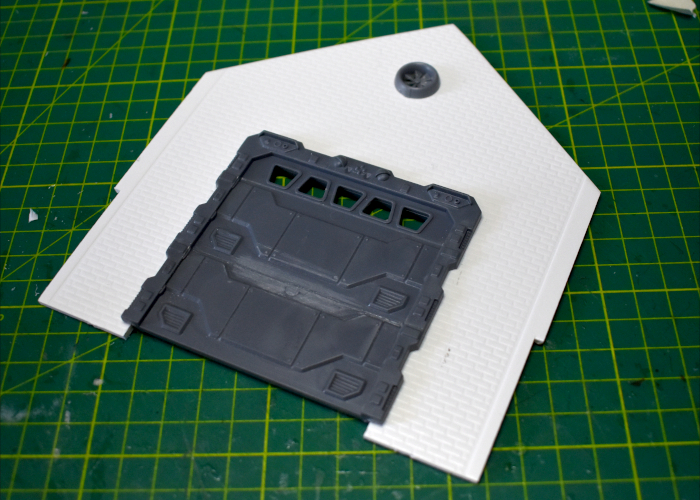
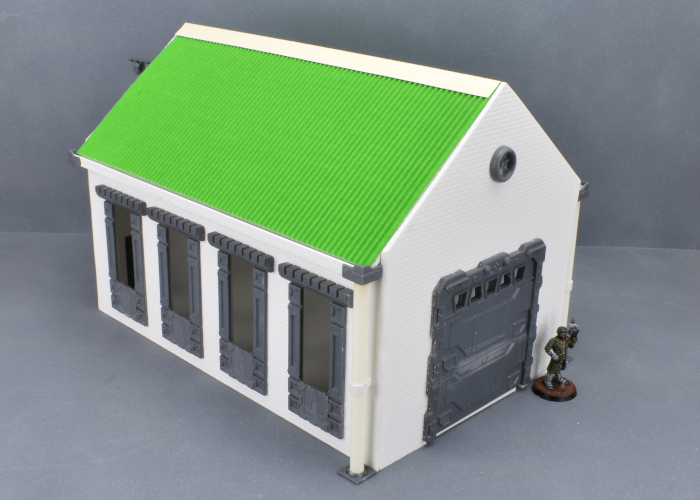
On the front of the building, I replaced the sliding wooden doors with a garage door from terrain sprue #1. To make up the extra height, I cut off the top of a second garage door with a razor saw and glued the two together.
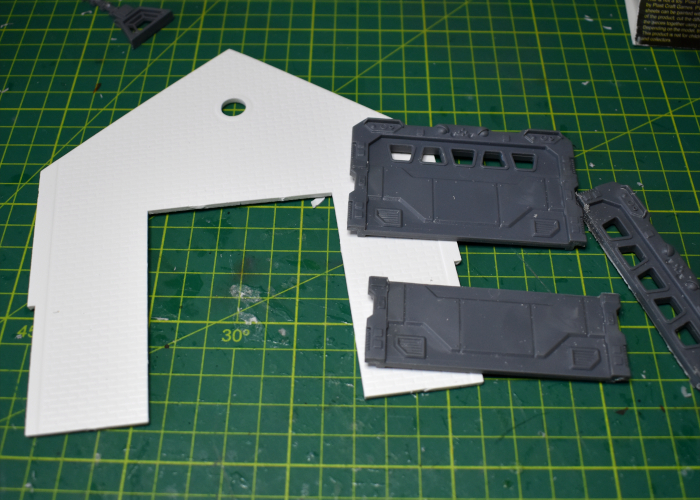
The resultant door was the right height, but too wide, so I also widened the door cavity in the wall with an exacto knife before gluing the door in place. The round window at the top of the wall turned out to be exactly the right size for the exhaust fan from sprue #2..
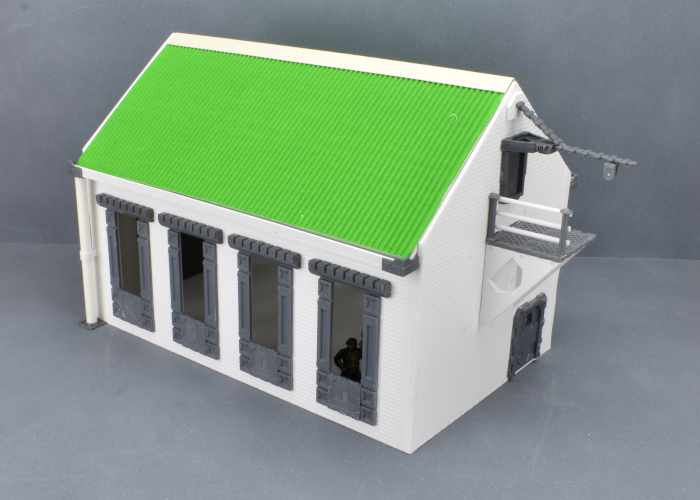
The other end of the building has a smaller door and a rectangular window up high. I enlarged the cavities slightly and glued in a shutter window and door from sprue #1.
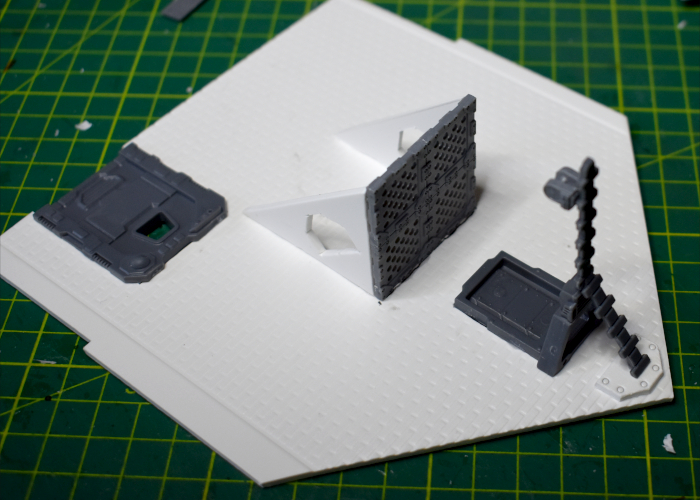
To avoid the building from just winding up looking like a plain box, I built a small platform and crane onto the wall, turning the small window into an access point for small freight. The platform was constructed from sprue #2 floor grates and some scrap pieces from the warehouse kit's roof trusses. The crane used a trapezoid window and a couple of energy fence pieces from sprue #1, the upright supports from the gun unit on sprue #2 and another scrap piece of PVC. I'll need to find some string or fine chain for it to finish up.
At that point, it was time to start slotting everything together.
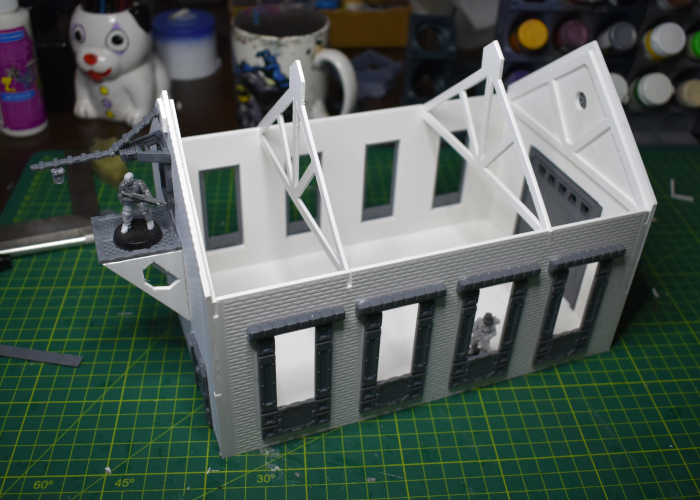
The warehouse kit has a tiled roof, but I wanted to go with corrugated iron instead, for a better contrast from the brick walls. With the top ventilation struts trimmed off, the assembled roof provides a solid base for the iron roof. I've left the middle two roof trusses and the roof itself unglued, so that the roof can be removed and the building interior used during a game.
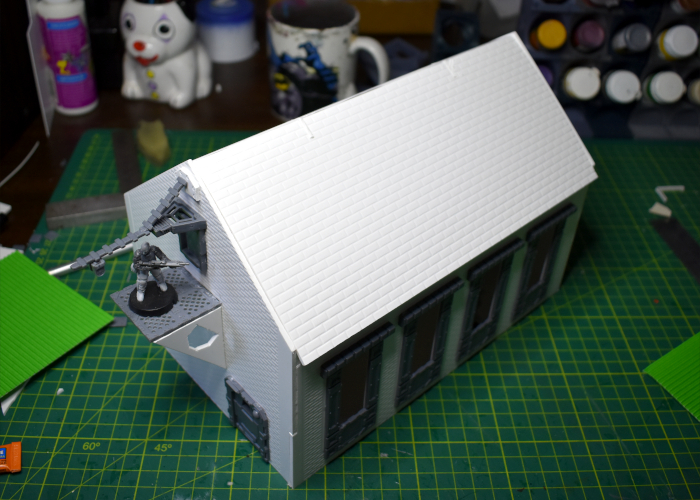
Over the original roof, I glued two sheets of corrugated cardboard, adding a strip of thin, folded card for the ridge capping. That didn't look quite right as-is, so I decided to also add some rain guttering, using some plasticard and a few more components from terrain sprue #1.
The windows are still missing their 'glass' - some thin, translucent plastic that comes with the warehouse kit. This will be glued in place after I've painted the barn. Otherwise, the finished exterior:
As a final touch, I decided the small platform needed a hand rail, so I whipped one up using a pair of posts from terrain sprue #2 and some thin plastic rod.
Coming up in part 2: I'll add some detail to the interior of the building before painting. Find it here!
To build your own outbuilding of rural doom, you can pick up the terrain sprues along with the rest of the Maelstrom's Edge range from the webstore here.

What are you working on? We would love to see your models and terrain in the Comm Guild Facebook group!
For other building ideas, modeling tutorials, army spotlights and conversion walkthroughs, check out the Hobby section of the Maelstrom's Edge website here.
Tags: buildings conversion kitbash spotlight terrain terrainsprue tutorial
2021 Mid(ish)year Roundup!
Posted on Monday Jul 26, 2021 at 06:00pm in General
Iain continued to smoosh things together in the workshop, working through a range of the usual sorts of modeling articles - kitbashes of kits, buildings made from bits and pieces and just generally getting paint all over everything in sight. You can find all of these modeling articles in the Hobby section of the Maelstrom's Edge website here.

On the new release front, we've given Epirian Contractor units some support with a new resin drone, and launched the Spiral Arm Revolutionary Army as a subfaction for the Broken, with the addition of plastic kits for a Revolutionary Captain and a cam-cloaked sniper. We also picked up the PDC Gaming heavy weapons carriage - a plastic kit that lets you build a range of different mobile weapons platforms, for those gamers looking for some heavier firepower. You can find all of these in the Maelstrom's Edge webstore.
Our biggest reveal for this year so far was, of course, the launch of the kickstarter for StackaRack - a plastic, customisable paint storage system! Our Kickstarter funded successfully, and we're currently hard at work finalising the design work so that we can get it sent off to our plastics production people. If you missed the Kickstarter, you can find out more information and follow our progress on the StackaRack Facebook page here.
So... what's next?

In the coming months, we have new plastic model releases for the Karists and Remnant, a couple of resin upgrades for the Remnant Militus kit, and a whole new range of bases to add to the webstore. There's also a new faction - our fifth! - to crawl forth from the destruction of the Edge. On top of that, we're still beavering away behind the scenes on version 2 of the Maelstrom's Edge rules. Our original target had to be pushed back significantly thanks to the pandemic, but we're aiming to have the Beta version of the rules out before the end of this year. If you want to get in early, you can find a very early draft of the new rules in the development thread on the DakkaDakka forums here.
So much great stuff still to come - Stay tuned!
For the full range of Maelstrom's Edge products, including the Battle for Zycanthus starter set, the plastic and resin model range, the ever-useful Maelstrom's Edge Terrain Sprues, novels and audiobooks, check out the webstore here.
For building ideas, modeling tutorials, army spotlights and conversion walkthroughs, have a look at the Hobby section of the Maelstrom's Edge website here.
Terrain Spotlight: Converted Renedra Desert Buildings
Posted on Monday Dec 07, 2020 at 05:00pm in Tutorials
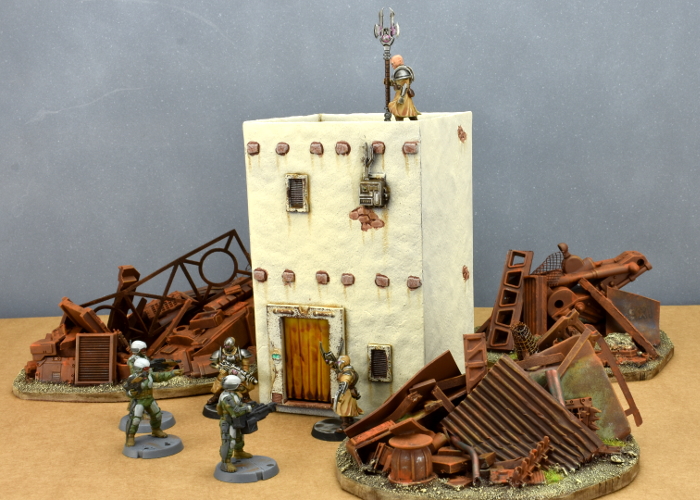
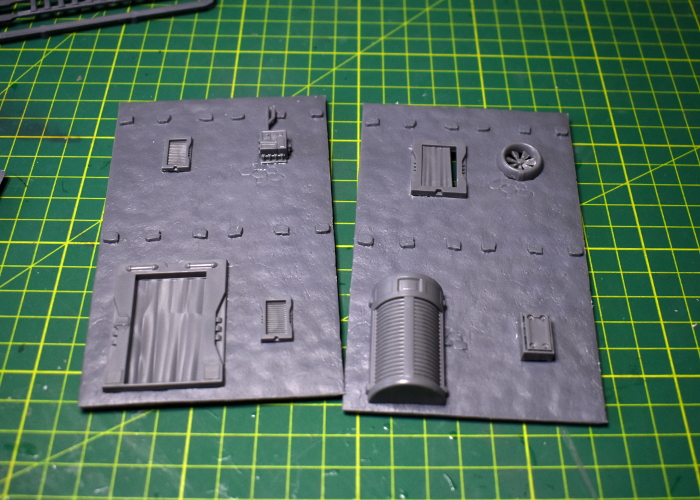
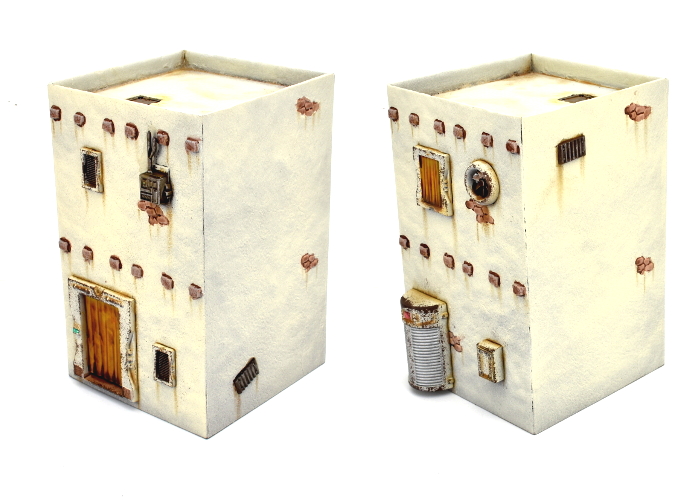
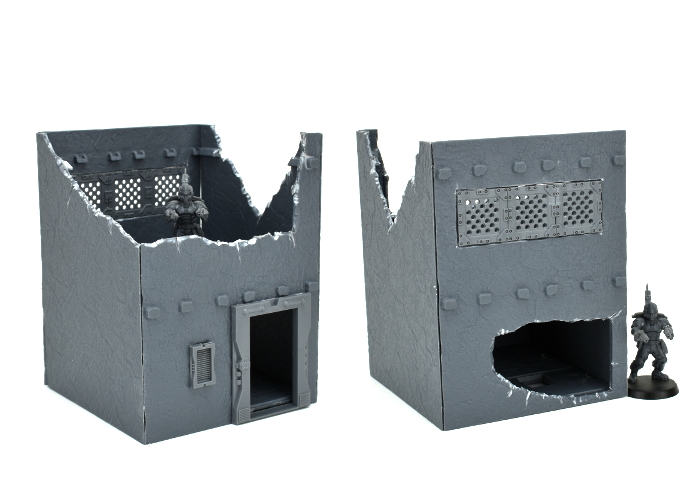
Browsing around online a few weeks back, my eye was caught by a neat looking new release from Renedra. They have a slowly-growing range of plastic historical building kits, and had just added to it with some two-story desert houses. While these are intended for historical settings, I thought it would be fun to see how they prettied up with the addition of some Maelstrom's Edge terrain sprue parts for a rustic sci-fi look. After a short and impatient wait for the post, I came up with this:
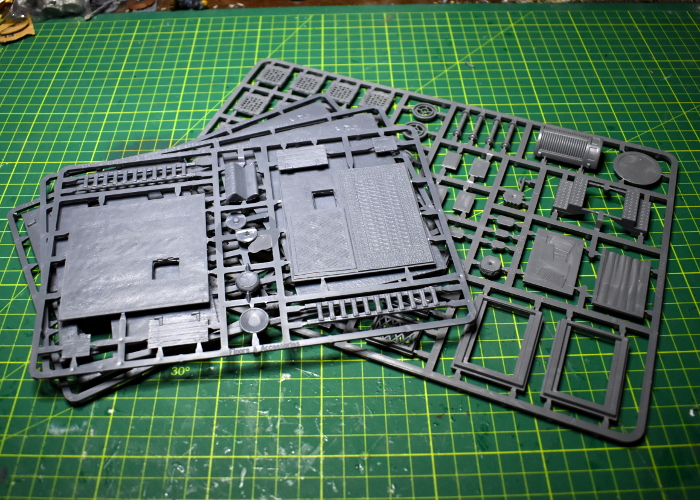
The pack I ordered includes parts for three houses. They all utilise the same floor and roof sprue, so are all the same width, just having different configurations of windows and doors, and differing overall heights. There are three sprues per building - the floor/roof sprue, and two identical wall sprues. To these, I added a Maelstrom's Edge terrain sprue.
The doorways on the buildings are quite small, and have timber doors that fit into them. That wasn't going to do here, though, so I took a doorway from the Maelstrom's Edge sprue and laid it over the existing doorway, using it as a guide to trace around with my hobby knife. Then, tracing gradually deeper cuts into that guideline, I carefully cut out the hole for the new doorway.
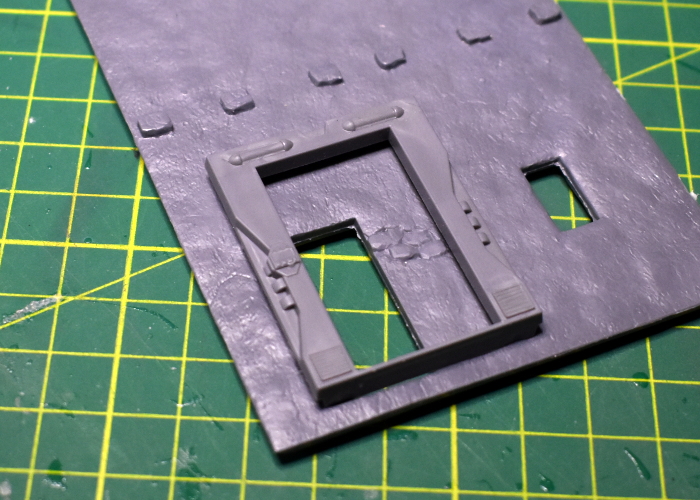
With the new door glued in place, I covered over the window cavities and the second doorway with various bits from the terrain sprue. As with the doorway, I used the curtained window as a guide to trace around in order to enlarge the original window hole.
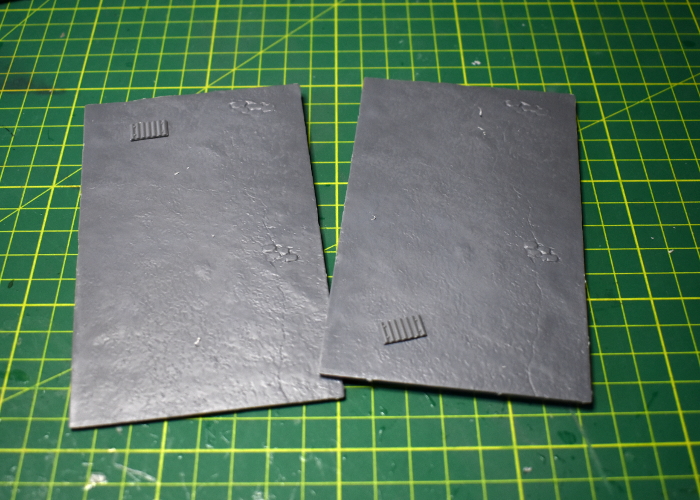
I left the side walls largely as is, adding just a couple of corrugated patches so they weren't identical.
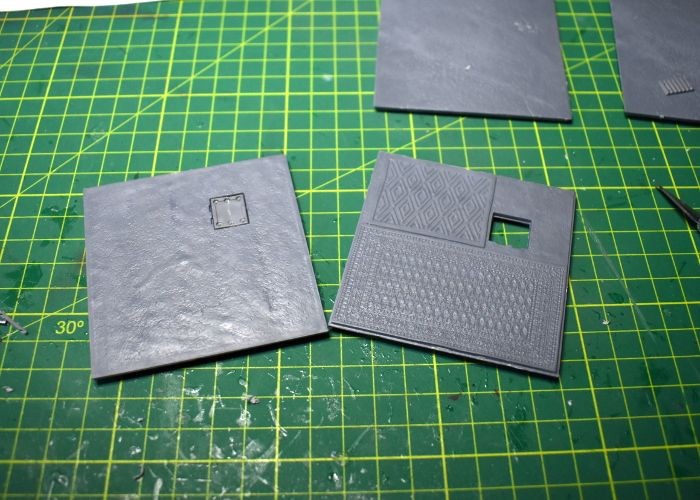
The floor/roof pieces were also left alone, although I replaced the wooden trapdoor in the roof with a metal one made from two strut panels trimmed to fit.
From there, I just had to glue everthing together. I also added a little filling putty along the corner seams and around the edge of the roof to neaten everything up a little.
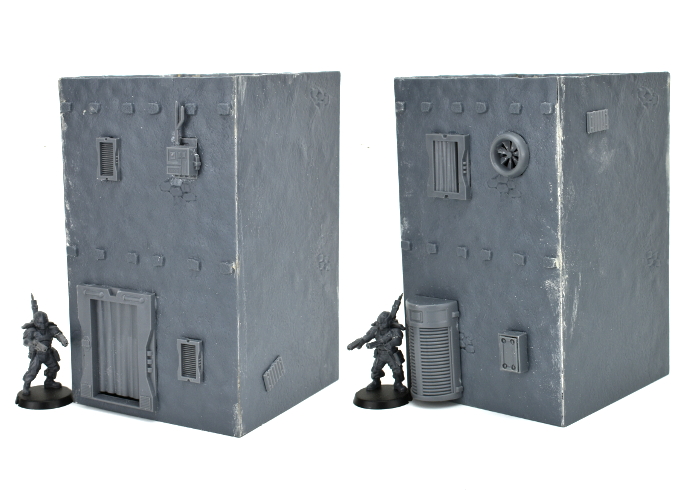
With a quick coat of paint, it wound up looking like this:
Now to get the other two finished off!
Why not give it a go? You can find the Maelstrom's Edge terrain sprues for your own terrain re-imaginings, along with the rest of the Maelstrom's Edge range from the webstore here.
What are you working on? We would love to see your models and terrain in the Comm Guild Facebook group!
For other building ideas, modeling tutorials, army spotlights and conversion walkthroughs, check out the Hobby section of the Maelstrom's Edge website here.
Tags: buildings conversion modeling spotlight terrain walkthrough
Terrain Spotlight: Junkyard!
Posted on Monday Oct 19, 2020 at 05:00pm in Tutorials
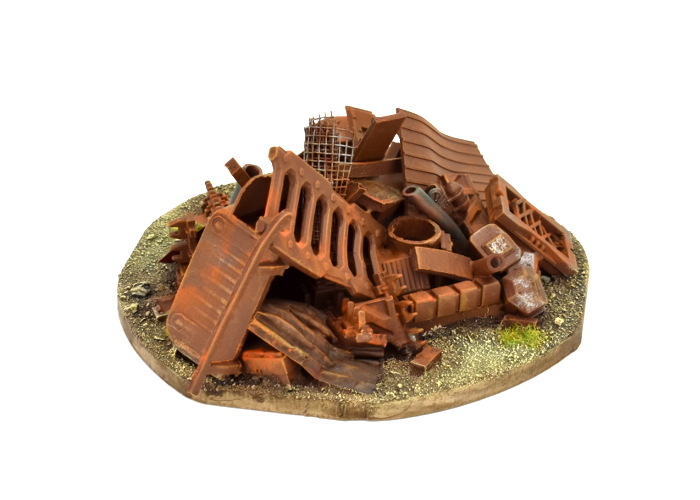
When you do a lot of conversion work on models or terrain, you tend to accumulate an ever-growing collection of discarded remnants - model or terrain components that have been cut up to use specific parts or them, leftover parts from different kits, random off-cuts of plasticard or cardboard, and other odd bits and pieces collected because they were interesting. Unless you have bottomless storage, it's handy to clean these out from time to time. Since I hate throwing anything away, however, I wanted a way to make use of these parts that I otherwise might not have an immediate project for. And so, I decided to make some junkyard terrain!
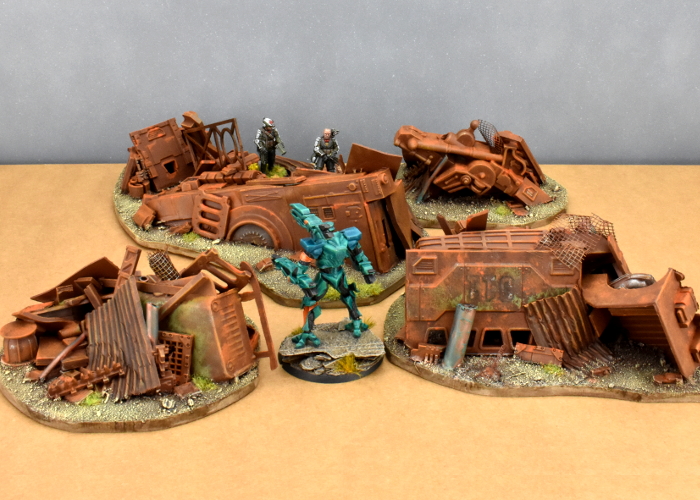
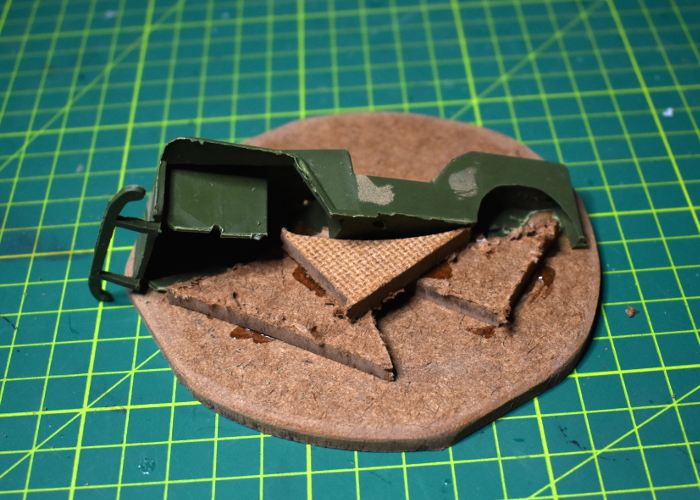
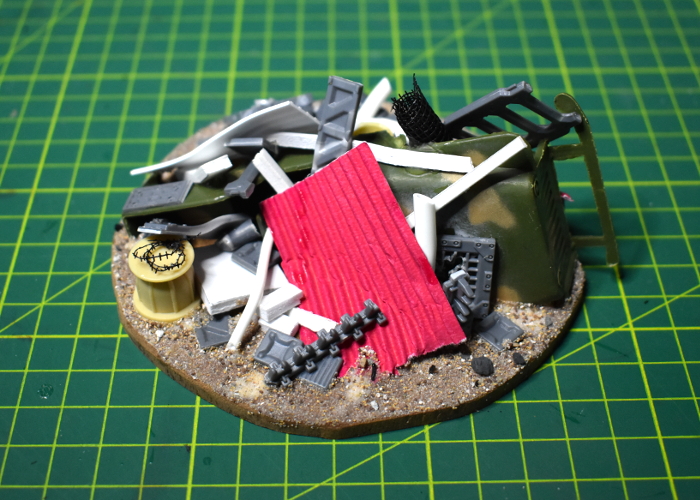
I wanted junk piles that would, at least in part, completely obscure human-sized models, so needed a bit of bulk to get started. For this purpose, I used some military vehicles from my daughters' toy soldier collection that had broken parts that couldn't be easily fixed. Cutting these more or less in half diagonally provided some interesting shapes to build on, and also doubled the number of terrain pieces I could potentially make from them!
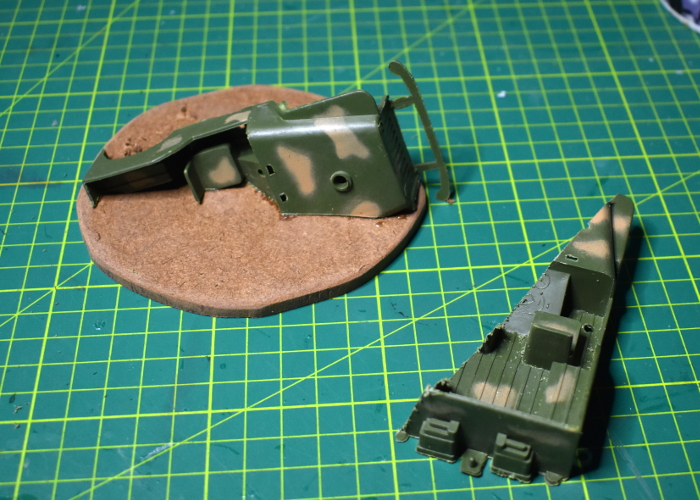
The vehicle parts were glued down onto some irregular pieces of hardboard, using Power Grip (a 'glue anything to anything else' sort of glue). I used some small hardboard off-cuts to add a little more bulk as well.
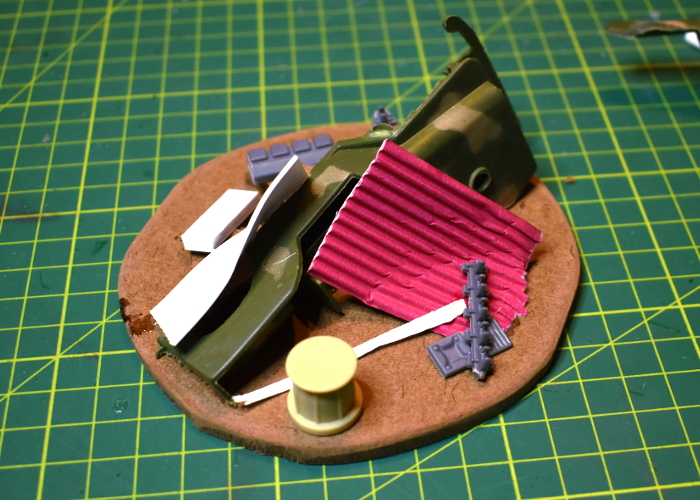
From there, it was simply a matter of grabbing interesting bits of this and that and gluing them on wherever seemed appropriate. As mentioned above, this included model and terrain parts, in some case chopped up a bit, bent, or otherwise cut or dented up in places to make them look more junk-worthy, and also whatever other scraps of building materials I had to hand, including plasticard, foamed PVC, plastic tubing, corrugated cardboard, flyscreen, and a few other odds and ends.
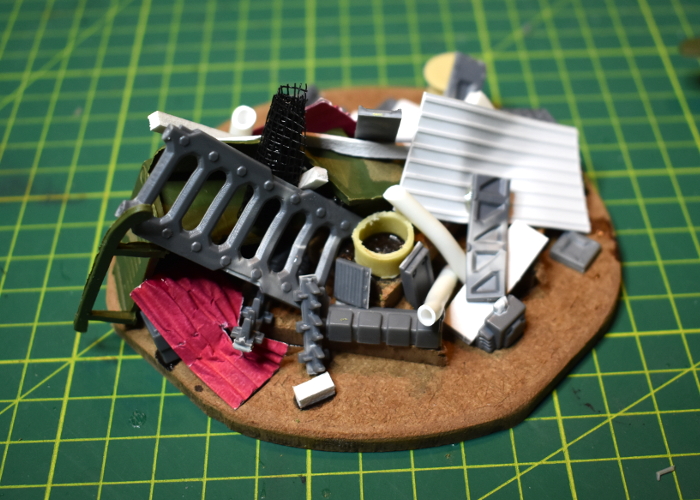
I kept piling up bits until I was happy with the amount of detail and cover on the base.

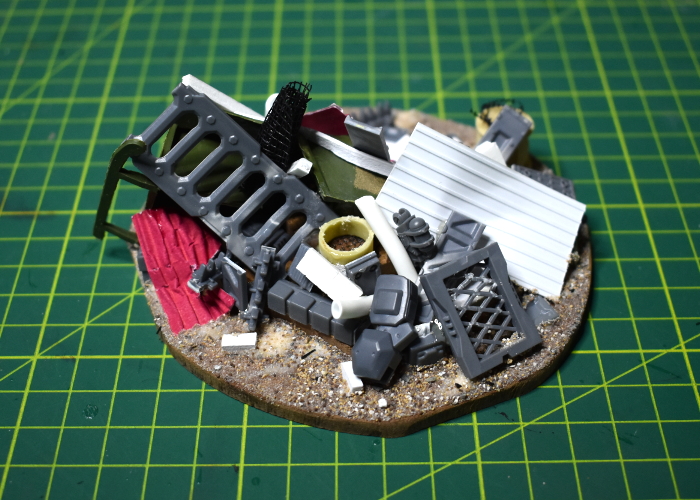
To finish up, I glued on some light gravel and sand mix anywhere on the hardboard where there was empty space.
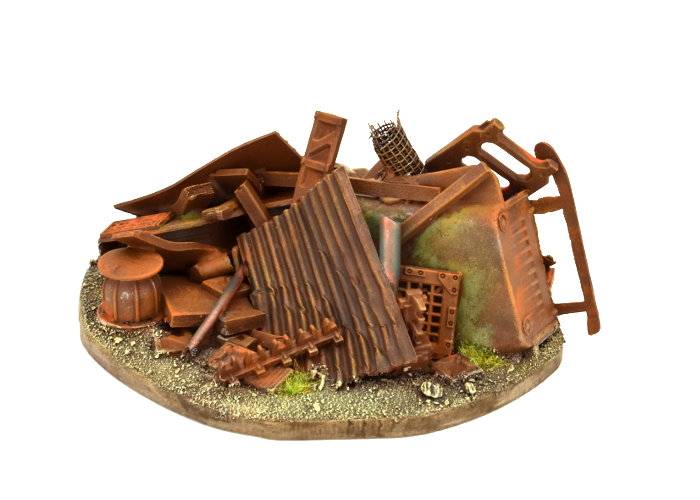
That just left painting. There were a few different potential ways to go here: painting everything up as heavily rusted and old, making it a newer junkyard with lots of shinier metal and painted parts, or something in between. To help disguise the mix of different building materials used, I decided on the first option.
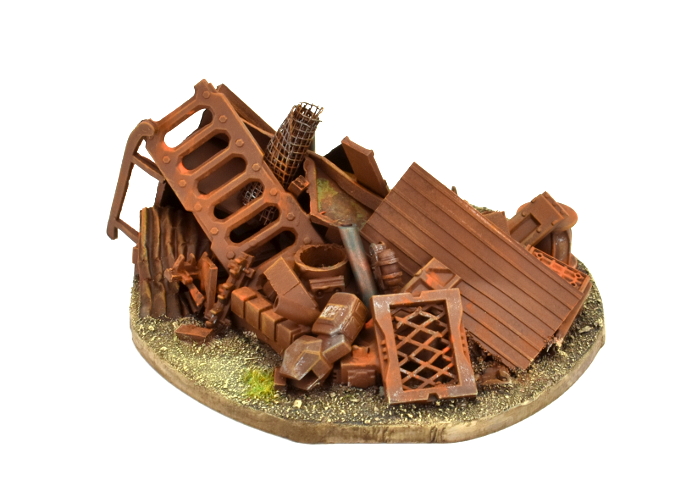
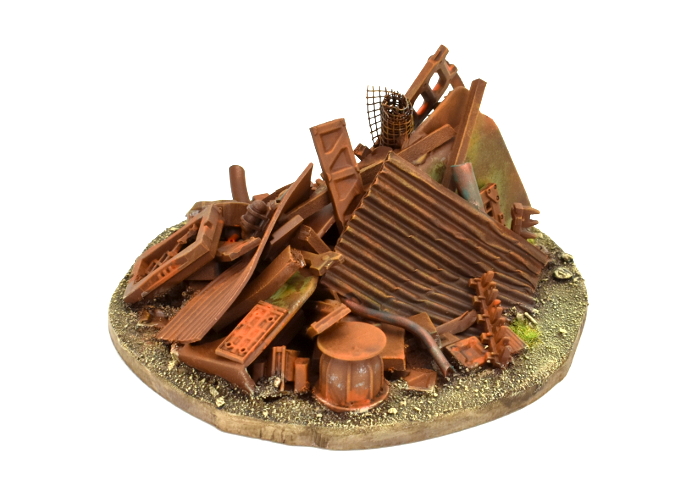
For the most part, I used the same rusted metal technique as for my shanty buildings and elsewhere. Some panels have some weathered paintwork still showing, and I couldn't resist adding in some aged copper pipes for a little extra colour, using the same method as in my copper tutorial. The gravel around the junk was painted in the same style as I used for my crystal outcrops, to provide some contrast to the rusty metal.
To get in some terrain action of your own, you can pick up the Maelstrom's Edge terrain sprues along with the rest of the model range from the webstore here.
For other building ideas, modeling tutorials, army spotlights and conversion walkthroughs, check out the Hobby section of the Maelstrom's Edge website here.
What are you working on? We would love to see your models and terrain in the Comm Guild Facebook group!
Tags: conversion modeling painting spotlight terrain terrainsprue tutorial walkthrough
Terrain Spotlight: Expanding Foam Trees!
Posted on Friday Aug 28, 2020 at 05:00pm in Tutorials
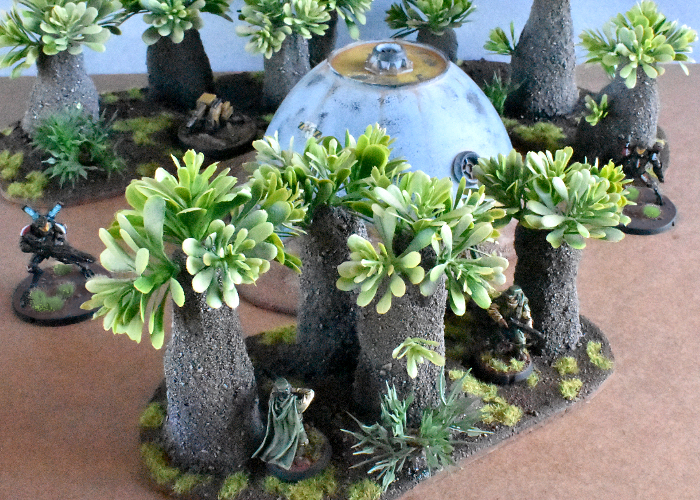
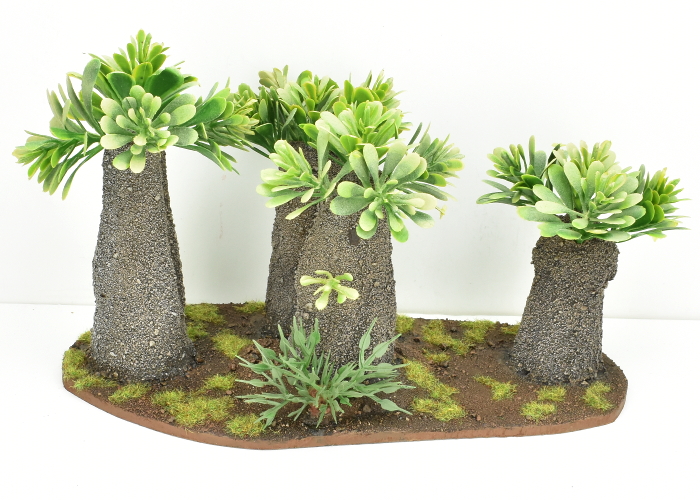
Most of my terrain building focuses on buildings and other urban-styled features, because tinkering with plastic terrain sprues is just too much fun. Sometimes, though, I like to venture outside the urban sprawl and into the forest. Previously, I've dabbled with old-school, polystyrene ball cacti and alien forest bases made from silicon aquarium plants. This week, I'm working on some boab-inspired trees made from expanding foam!
There are various tutorials floating around for expanding foam trees, but all of those that I found were using twigs or plastic tree trunks with the foam used for filling in foliage. I wanted to turn that idea upside down, using plastic plants for foliage, and the foam used for the trunk. (For the uninitiated, expanding foam is sold in hardware stores for filling holes in walls and the like. It comes in an aerosol can, and when you spray it out it expands to around 300% of its original volume, setting into a lightweight, hard-shelled foam)
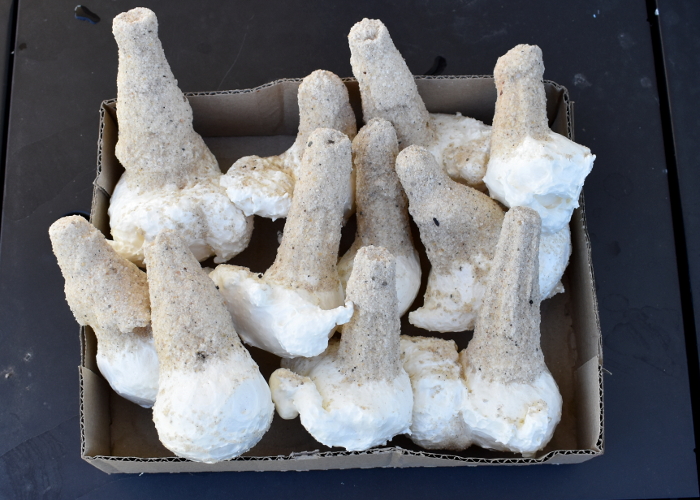
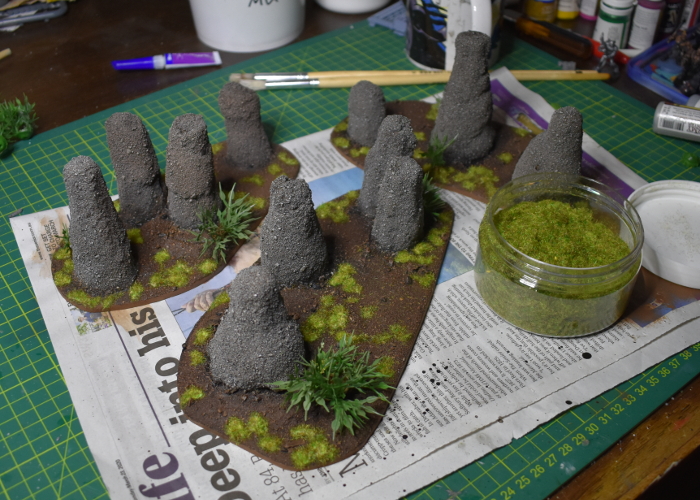
My first attempt used large bases with a piece of sprue stuck vertically on them as a support, with the foam sprayed around it, but this wasn't overly successful - they just settled into giant blobs of foam. So instead, I hit on the idea of using a mould for them. I took a screwdriver and used its handle to make a number of vaguely-conical holes in some damp playsand, and then sprayed the foam into these holes, leaving it to set.
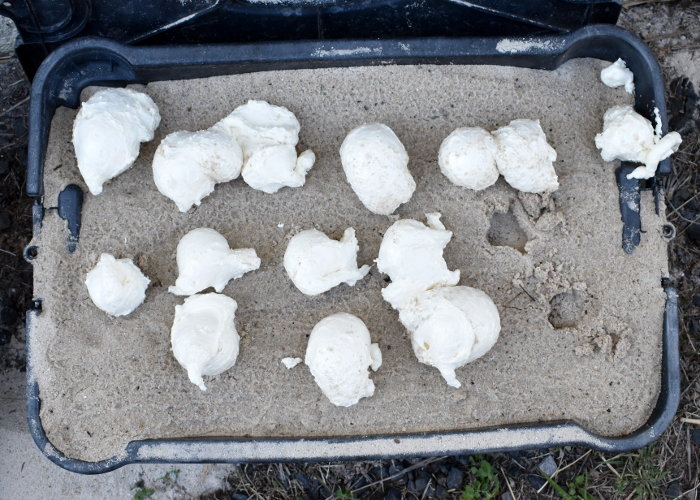
Once the foam was set, I pulled the pieces out of the holes, brushing off any loose sand. Because the foam is quite sticky when it is setting, they wound up with a layer of sand quite firmly glued to the outside, which made a nice texture on the trunks.
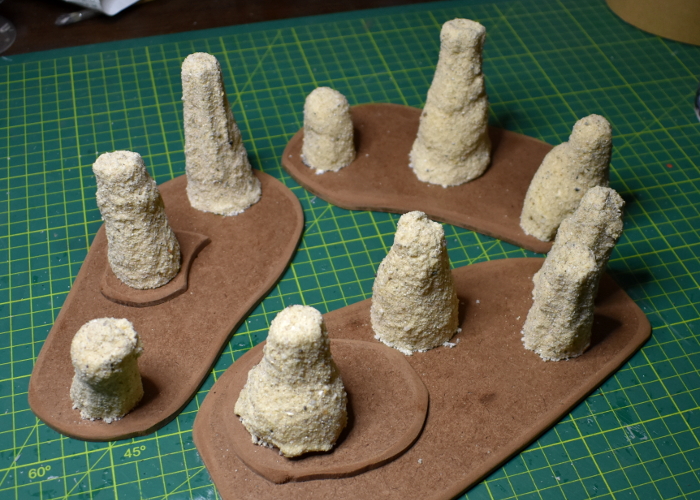
I used a mitre saw to cut the blobby excess bits off the bottom of the trunks, and then glued them down to some hardboard. A knife probably would have done this job, as the foam is quite easy to cut, but the deep-bladed saw made it easy to get a nice, flat cut.
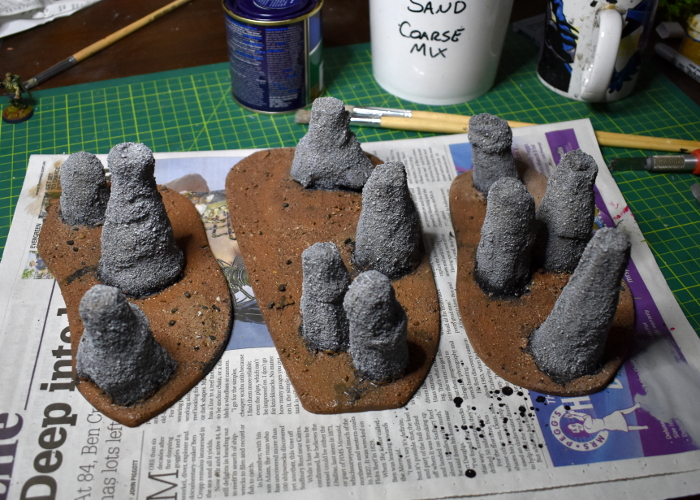
After texturing the bases with some light gravel and sand mix, I tried painting the trunks with a coat of the same charcoal wood stain that I used for last week's wood stain painting tutorial. While it worked great on the models, here it just tinted the sand but left the lighter, yellowy foam peeking through, so I painted over the top with a coat of Army Painter Ash Grey, and also basecoated the base with some Army Painter Leather Brown.
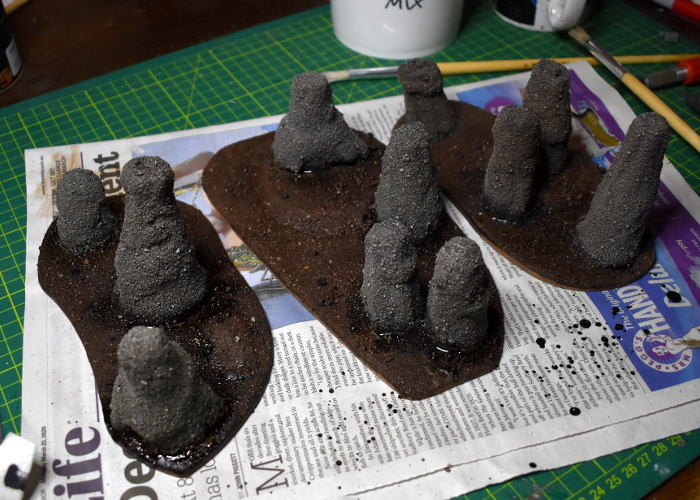
I then went over the whole lot with a generous coat of Army Painter Strong Tone.
To finish up the painting, I gave the bases a light drybrush with some more Leather Brown, also painting the edges with the same colour. Then I glued on some patches of static grass, and a few bushes made from plastic indoor decorating plants - these come from large sheets of plants that are sold for making artificial garden walls.
At this point, these terrain pieces could easily pass for rocky outcrops or some sort of giant insect mounds, but I decided to go the final step and foliage them up. Using some more decorative plastic sheet plants, I pierced around the top of the trunks with a spike, and then glued clumps of plants on to form a canopy.
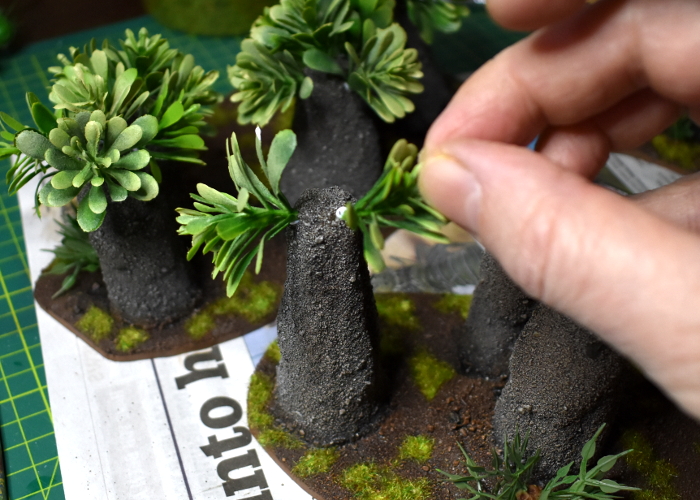
The end result:
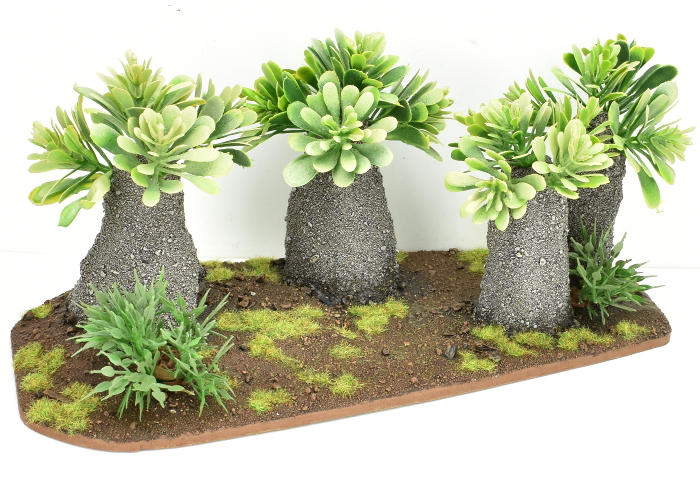
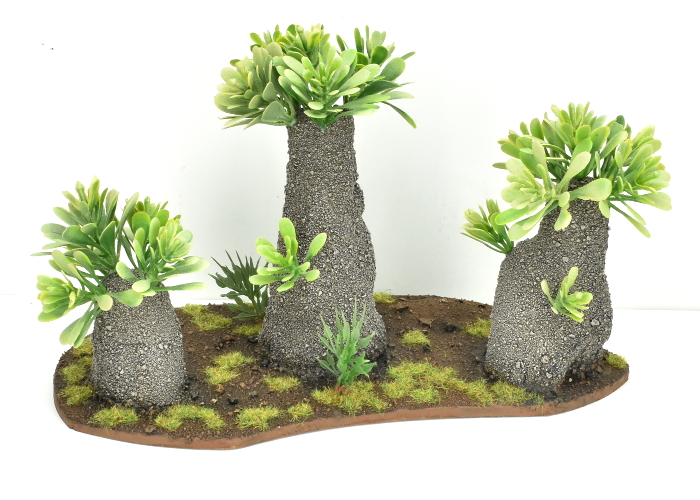
And the forest cluster, all together:
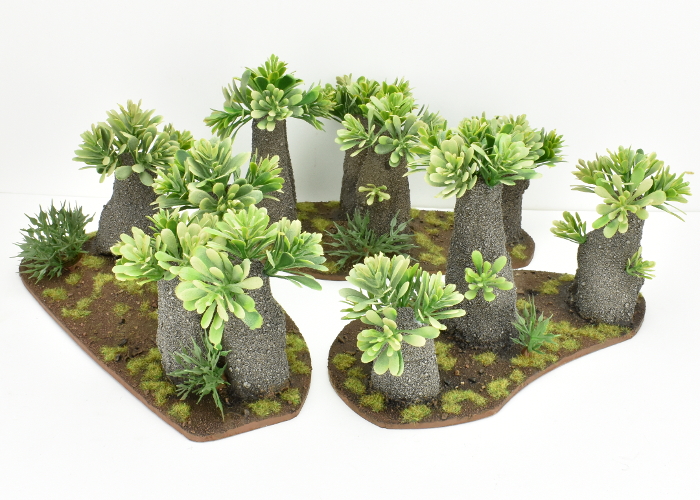
The texture on the trunks winds up a little unusual for bark, but given that they're intended for a sci-fi table it could easily be something other than wood as we know it - maybe some sort of calcium deposit, or a silicon-based extrusion on which the plants grow. It might also give an interesting bark effect to paint over the sand with some crackling, desert-earth texture paint.
If you feel like building your own alien forest of water-retaining doom, be sure to show your results in the Comm Guild Facebook group!
Meanwhile, don't forget that you can pick up the entire Maelstrom's Edge model range from the webstore here.
For other building ideas, modeling tutorials, army spotlights and conversion walkthroughs, check out the Hobby section of the Maelstrom's Edge website here.
Maelstrom's Edge Mid(-ish) 2020 Roundup!
Posted on Friday Jul 24, 2020 at 05:00pm in General
This year has certainly come with its share of challenges. While things have been a little quieter on the Edge than usual, we're still here, in no small part thanks to the support of our fantastic customers around the world. So I thought I'd take a pause this week to look back at what we have done so far this year.
Our usual monthly release schedule has been significantly disrupted this year due to our usual production partners having to close up or refocus their businesses, so the Artarian Remnant's Nimbus Battlesuit has the distinction of being our sole release so far this year. We have plenty more in the pipeline, however, including the next round of reinforcements for each of the existing factions, and the first couple of units are underway for another new faction!
Even without shiny, new models to play with, the weekly modeling article continued on, covering a wide range of ground. Articles so far for this year have included a serial underhive build, featuring a bunch of redesigned buildings inspired by classic Necromunda, rocky outcrops studded with crystals brimming with rogue cybel energy, and assorted other hobby tips and modeling ideas. You can find all of our modeling articles in the renovated Hobby section of the Maelstrom's Edge website, along with a new section where we will be periodically adding basic 'starter' tips aimed at beginner hobbyists.
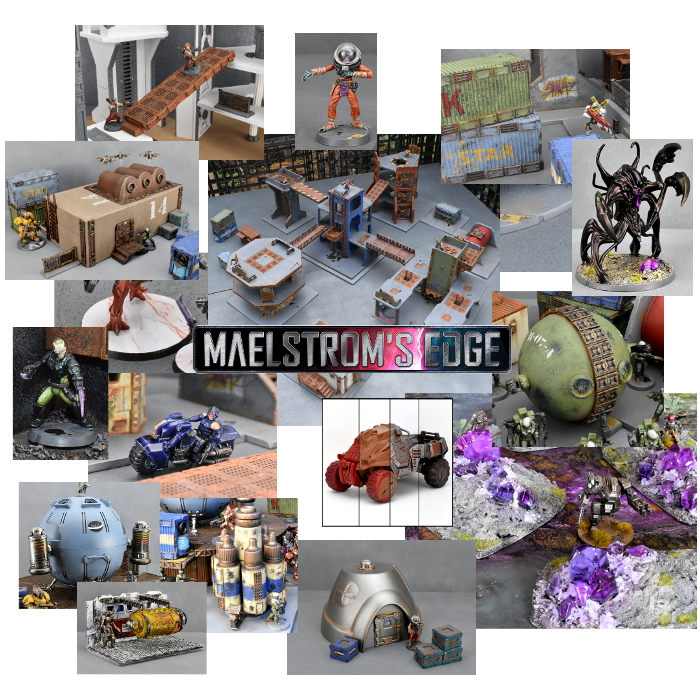
This year has also seen some great models shared by the community on the Comm Guild Facebook Group. The Group is a handy place to share your models, ask for hobby advice, or talk about the Maelstrom's Edge game. We would love to see more, so be sure to pop along and show us what you are working on!
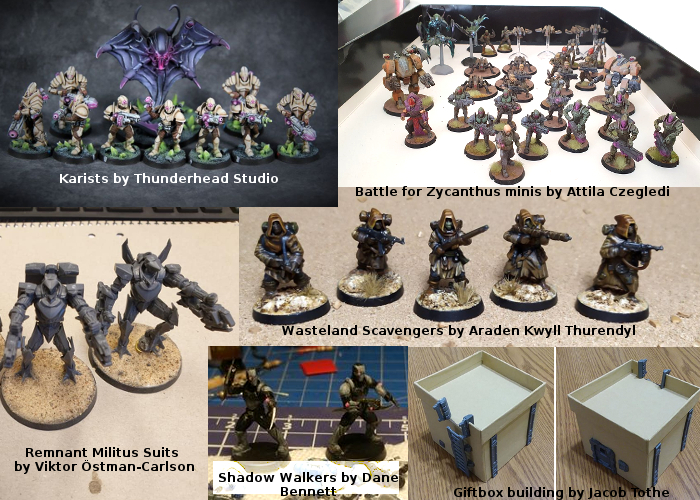
(Just a few of the fantastic projects we've seen!)
For the full range of Maelstrom's Edge products, including the Battle for Zycanthus starter set, the plastic and resin model range, the ever-useful Maelstrom's Edge Terrain Sprues, novels and audiobooks, check out the webstore here.
For building ideas, modeling tutorials, army spotlights and conversion walkthroughs, have a look at the Hobby section of the Maelstrom's Edge website here.