Terrain Tutorial: Plastic Storage Tray Buildings
Posted on Monday Feb 06, 2017 at 05:00pm in Tutorials
 - by Iain Wilson
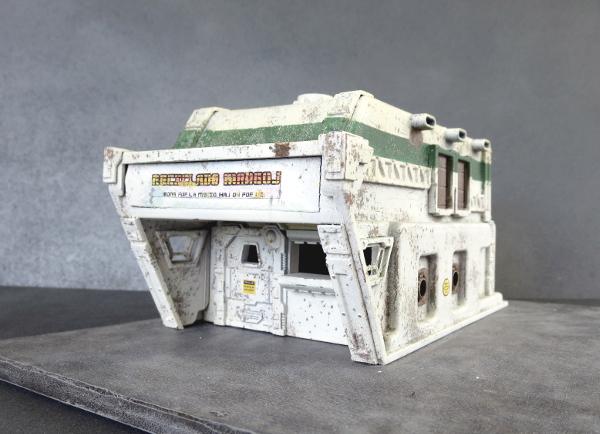
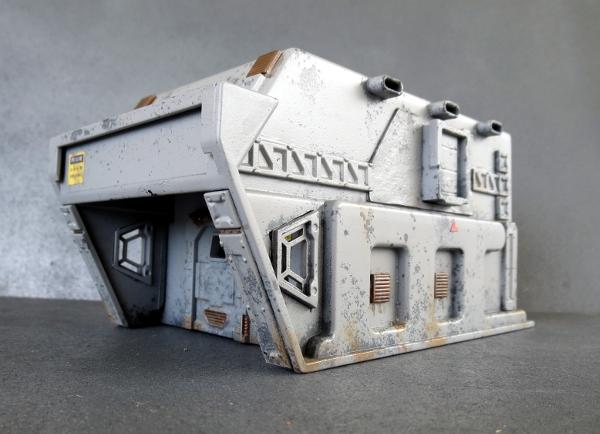
The Maelstrom's Edge Terrain Sprue contains a slew of assorted plastic bits and pieces that can be used to pretty up your home-made scifi terrain, including a bunch of essential elements like doors, windows and pipe fittings. A few months ago I posted a tutorial on using cardboard gift boxes to create quick and easy buildings, which you can still find here. This time around, I'm using plastic modular storage trays to create buildings like this:
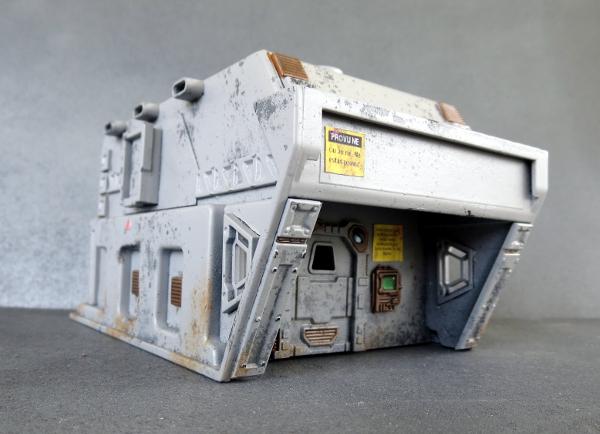
These trays can be found at most hardware stores, or anywhere online that sells plastic storage - you can find a few different examples on Amazon, and they're generally pretty inexpensive and available in a bunch of different sizes.
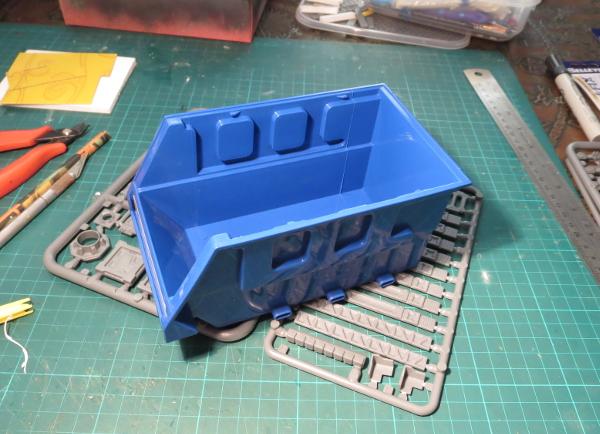
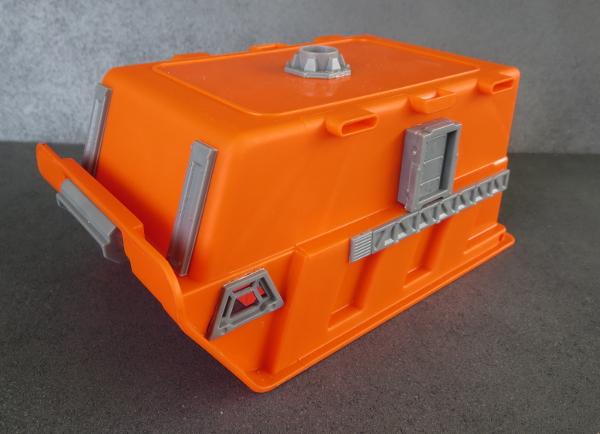
Here's a glimpse of what we're going to do to it:
Before getting started, a quick note on glue.
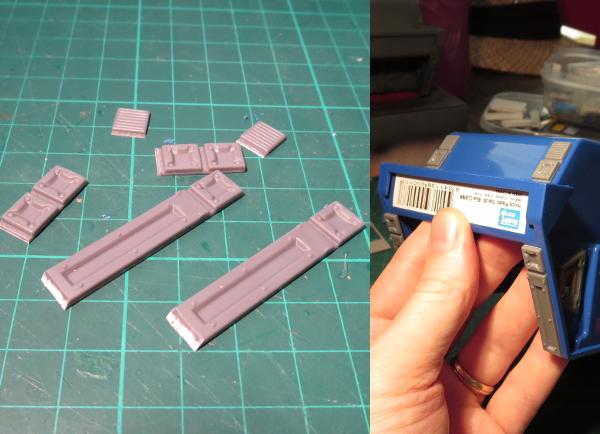
Obviously, versatility for making wargaming terrain isn't a prime design consideration for the people making these trays, and so the plastics used for them can be a little variable to work with. Plastic (polystyrene) cement won't work on them, but for the most part I've found that superglue works just fine. If they have a waxy feel to the plastic, or if you try the superglue and it doesn't hold particularly well, there are specific glues out there for dealing with recalcitrant plastics that look something like this:
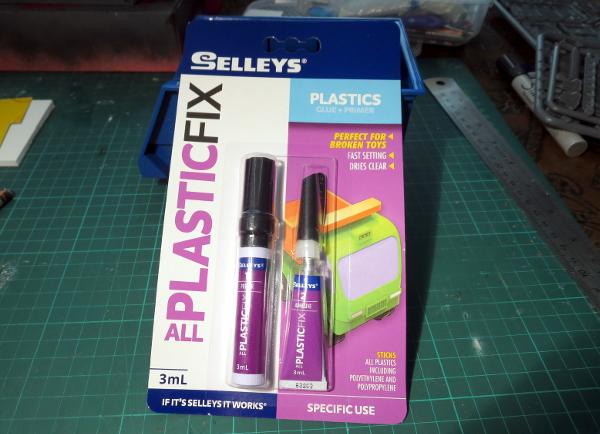
This is a two-part system that uses a primer to help the glue stick. Just apply the primer, then apply the glue, push the parts together, and they'll never come apart again. I don't use it all the time simply because it's more bother than a single tube of glue, but for those trickier jobs it works a treat.
Edit: It can also help when gluing this sort of shiny plastic product to give it a sand with some fine sandpaper. This breaks up the glossy surface, giving the glue a better purchase.
SO, onto the building!
There are a few parts on the terrain sprue that are designed to be inset into a wall. If you're using any of these, I recommend cutting the holes for them as the first job, to avoid accidentally popping glued parts off when the plastic flexes while you're trying to cut it.
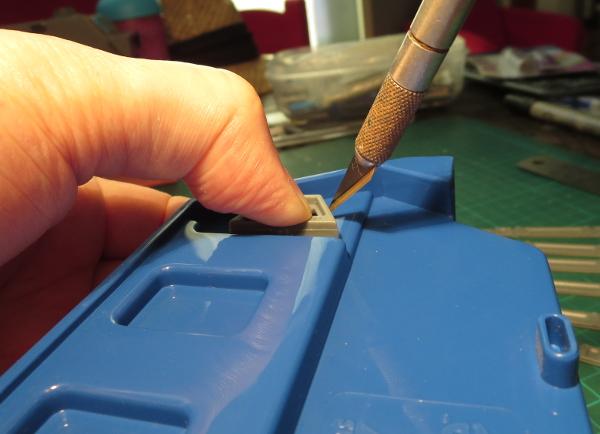
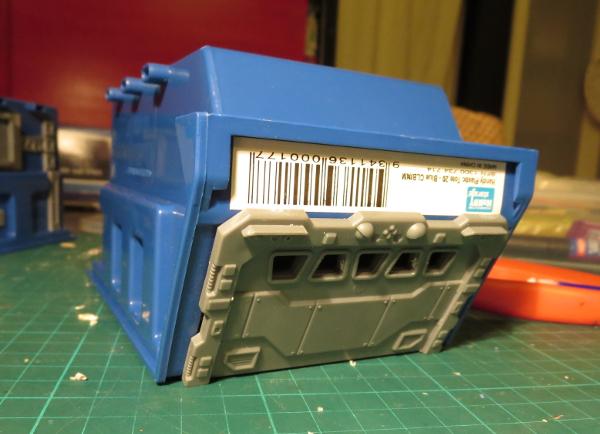
I'm starting here with the trapezoid windows, which will go into the front sides of the tray. This adds a nice little detail at what will be the front of the building, and also serves in this case to get rid of some imprinted text on the sides of the tray. I vary the orientation of these depending on the exact shape of the tray that I use, as different trays will have different angles at the front. Go with whatever looks best with the trays you use - for this one, I'm putting the long edges vertical.
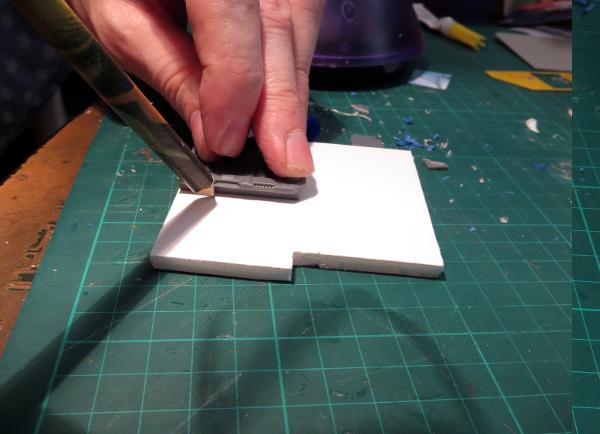
To cut out the hole for them, hold the window against the side of the tray and trace lightly around it with a sharp knife.
You can then drop the window and carefully cut along the traced lines. If you have a Dremel-style rotary tool with a saw or small router bit, that might save some effort here, but otherwise just going slowly and carefully with the knife and not trying to cut right through in one go does the job.
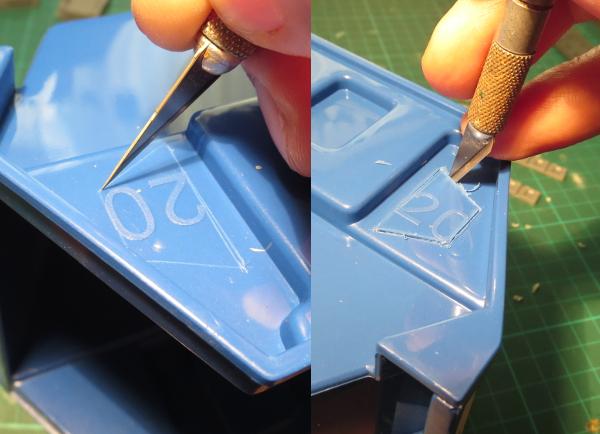
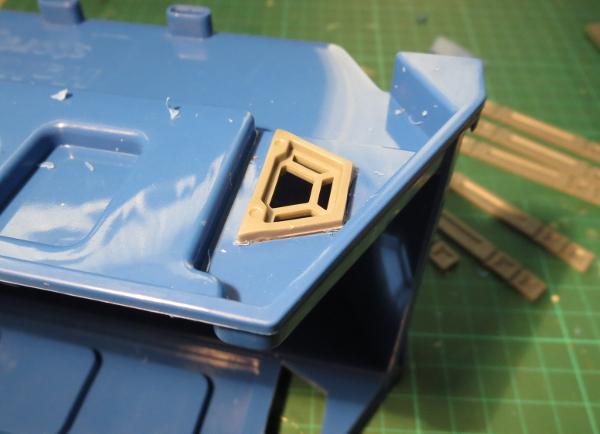
Once you have all for sides cut through, check the window for fit and neaten up as necessary. The mould line on the window serves as a handy guide to get the windows on both sides of the building pushed through their respective walls an even amount.
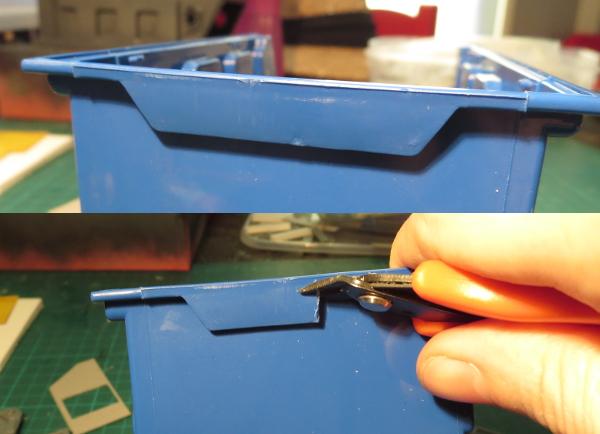
There is generally a small lip of plastic at the back of these trays that is used for clipping them onto racking. If you're feeling lazy you can just leave it there and work around it, but I find it looks better to remove it. A decent pair of clippers will get rid of the bulk of it and then you can just clean up with the knife.
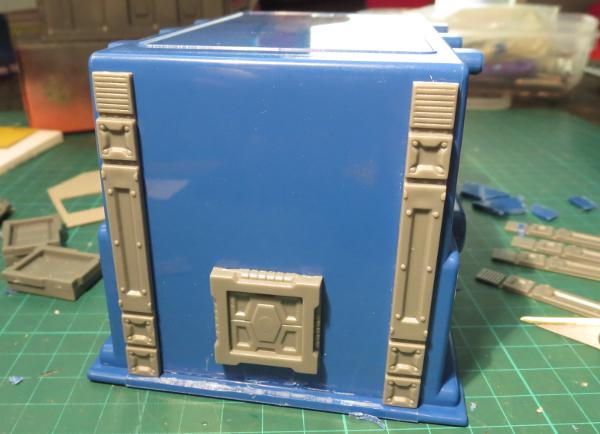
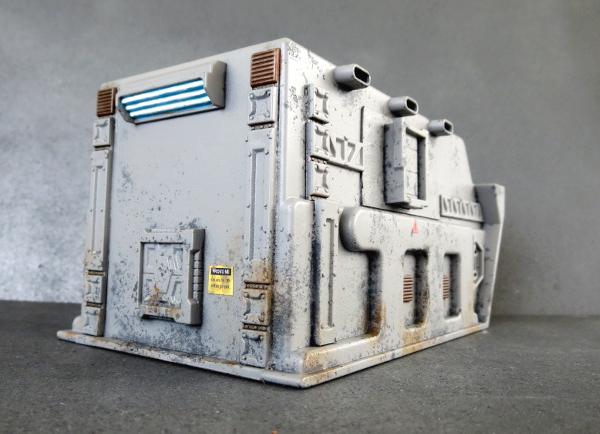
The reinforcing strips off the terrain sprue are the real heroes of this build, as they do such a great job of making otherwise bare plastic look like a manufactured structure. They can be used intact where there is room, like this:
Alternatively, you can chop them up along the edges of the panels to fit them around the moulded shapes on the tray.
There will sometimes be writing imprinted onto the sides of the tray.
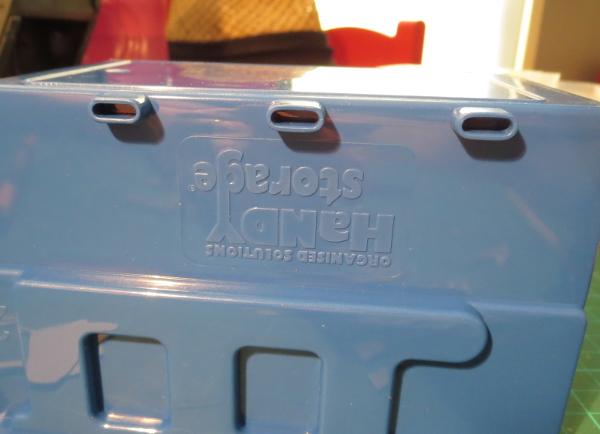
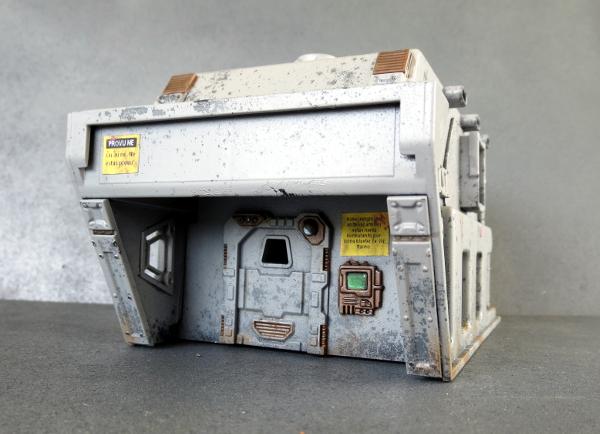
This can be removed by cutting it out and replacing with detail parts, as with the trapezoid windows back at the start, or the shutter windows on this building:
Alternatively, you can cover it over with a little cardboard, plasticard or foamcore cut to an appropriate shape. Here, I've used a small piece of thin cardboard to cover the bulk of the text, with a rectangle cut in the middle for a shutter window. These are designed so that they can be inset into the wall, but they look fine just stuck directly onto the surface as well, and that saves cutting more holes in the plastic.

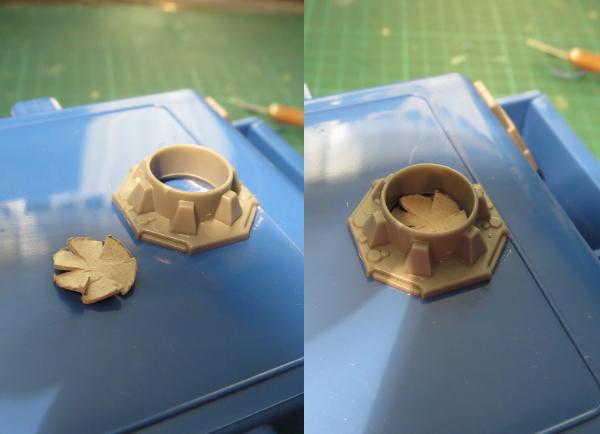
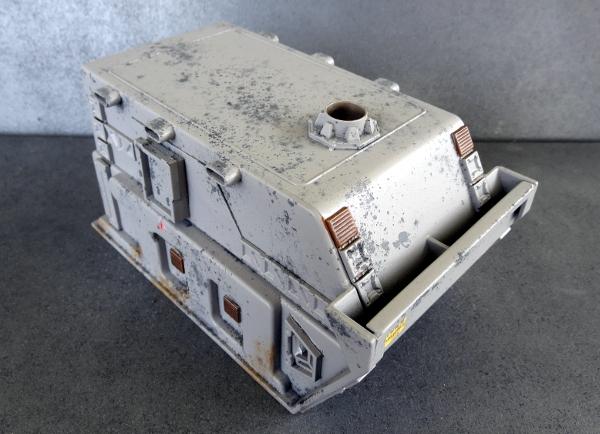
There is also usually a small nub on the bottom of the tray (which is forming the building's roof) from the moulding process used to manufacture the tray. I like the cover these over with the large pipe fitting from the terrain sprue:
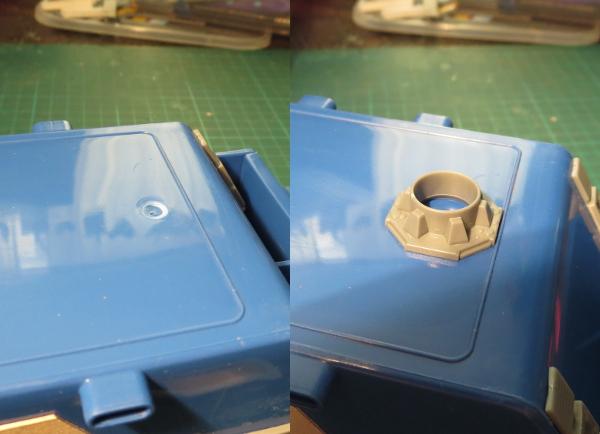
This can then have some plastic rod added to create a chimney, or a fan blade cut from a circle of cardboard to make an exhaust fan.
The exact layout of parts on the sides of the building is driven by the shape of the moulding, and by how detailed you want your building to be.
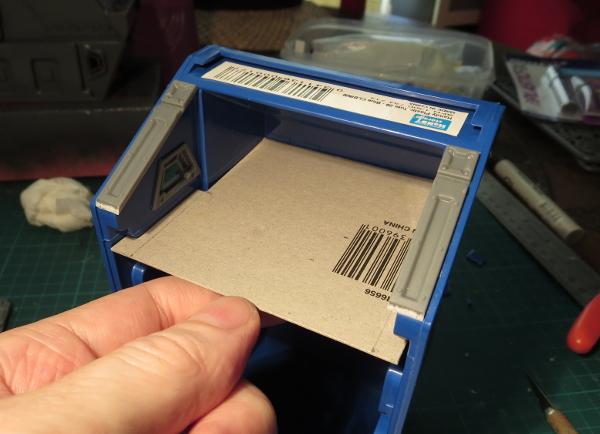
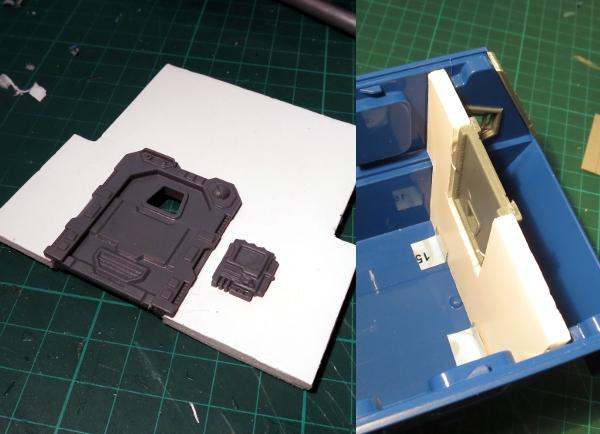
With the outside all detailed up, it's time to seal in the front. I generally use foamcore for this for ease of cutting and strength, but plasticard or cardboard would also do the job, as does corrugated plastic sign board. There can be a little trial and error getting a piece cut to fit just right with the shape of the tray - I start by fitting to the bottom of the tray (the widest part), pushing the cut piece into the tray up to the narrower point which is usually about halfway in, marking the foamcore with a pencil using the interior of the tray as a guide, and then cutting to match.
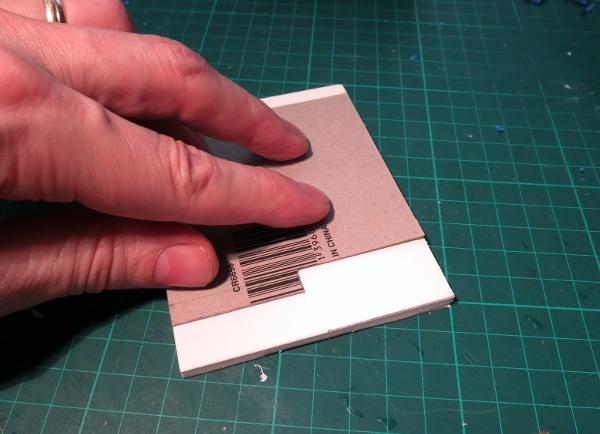
If you're making up a bunch of these buildings using identical trays, it's a big time-saver to make a template out of a piece of cardboard or plasticard and use that to mark out your wall pieces.
You can then trace around whichever door you are using.
Cut out the door hole and glue the door in (remember not to apply superglue directly to the foam interior of the foamcore, as it will melt). Once the door, control panel, and anything else you're putting on the wall is attached, just slide the wall into the tray and glue it in place.
On this building, I added a service counter using a trimmed down lintel piece.
As an alternative to the small doors, some trays fit the garage door quite well, although sometimes with a little trimming to shape required.
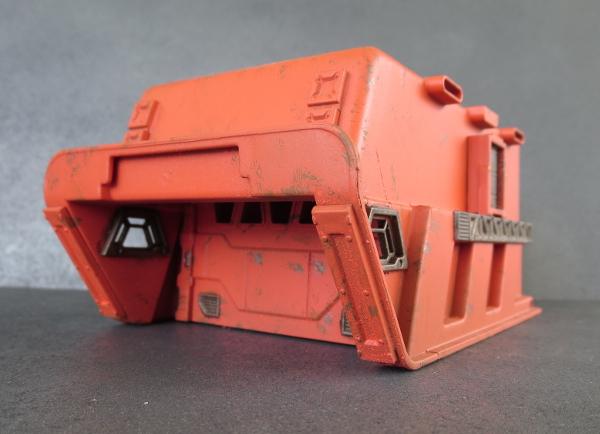
Alternatively, some trays are sized just right to glue the garage door directly to the outside front of the tray, which creates an interesting angled front, although loses you the nice little awning for models to hide in.
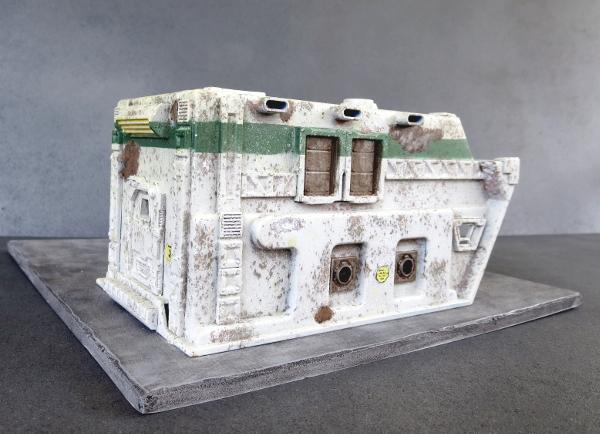
Once you have the building all detailed up, all that's left is to paint it.
These are a perfect canvas for weathering effects - I'll be looking to cover some different techniques for that in coming tutorials.
As with the glue, painting can be a slightly variable experience, depending on the specific plastic used. You can use an etching primer if you want to make sure it will stick, but I've been getting by with regular spray paint and sealer.
Unsealed, the paint can scratch off, although just how easily will depend on the plastic and the quality of your paint. If you're planning on using a rigorous weathering technique like salt weathering, I recommend applying a light coat of sealer over the base coat to make it a little more durable.
When you're done, a good spray of matte sealer over the top should keep everything where it belongs.
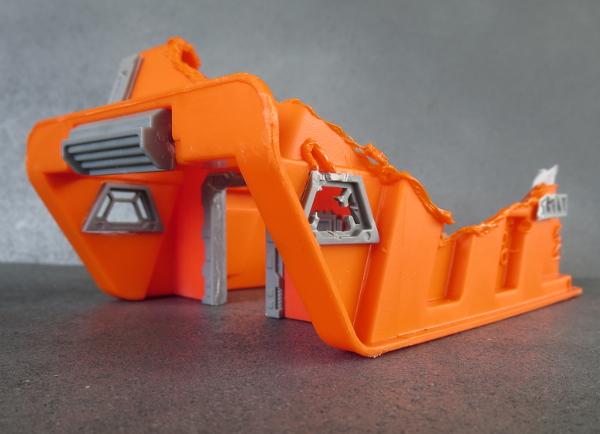
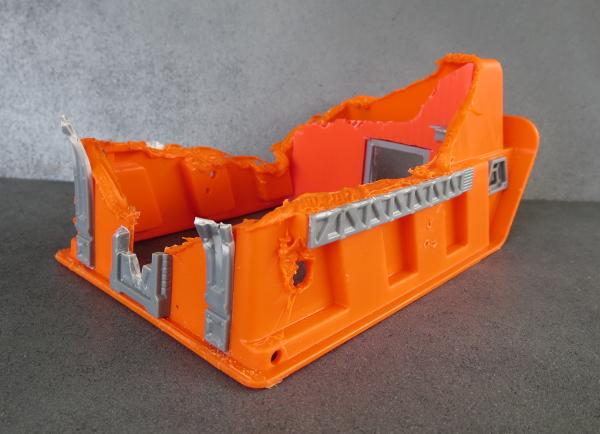
For a break from solid buildings, you can create ruins by chopping out the bottoms of the trays and applying suitably damaged terrain parts.
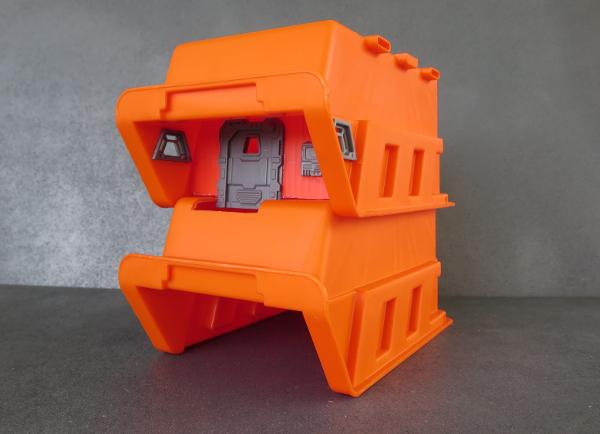
Or for something a little more ambitious, the modular nature of these trays makes it relatively easy to stack them up and make multi-story units. This one below will eventually have a little balcony off the front of the upper level, perfect for hiding sneaky sniper units.
You can quickly and easily assemble a table-full of modular terrain units using a bunch of identical trays, or mix-and-match different size or brand trays for more of a ramshackle, cobbled-together settlement, just perfect for a stellar refugee camp or a temporary staging base, and buildings can be easily customised to fit different roles in the settlement.
If this has inspired you to create your own modular settlement, grab yourself some terrain sprues from the Maelstrom Edge online store here, and as always be sure to share your creations on the Comm Guild Facebook page!
Tags: buildings terrain terrainsprue tutorial

Like this? Like us on facebook to see more...
Fantastic idea and write up. I noted that you have templated the pieces (smart); if you are interested, I have a laser cutter and could make many pieces for you. Nothing gained on my end other than getting to build a couple of these, but I love sharing my tools to help creative ideas become easier.
Cheers,
Thomas
Posted by Thomas Foss on February 07, 2017 at 10:25 pm GMT #