Gift Box Building with the Maelstrom's Edge Terrain Sprue
Posted on Thursday Oct 06, 2016 at 05:00pm in Models
 - by Iain Wilson
The Maelstrom's Edge terrain sprue is a fantastic resource for enhancing your games. Packed as it is with different bits and pieces for crafting buildings and scifi accessories, it serves as a handy base to combine with foamcore, cardboard, plastic containers, the cat*, foam packaging inserts, plumbing supplies, or anything else you can think of to create distinctive and personalised battlefield terrain.
*Don't glue things to the cat. Seriously.
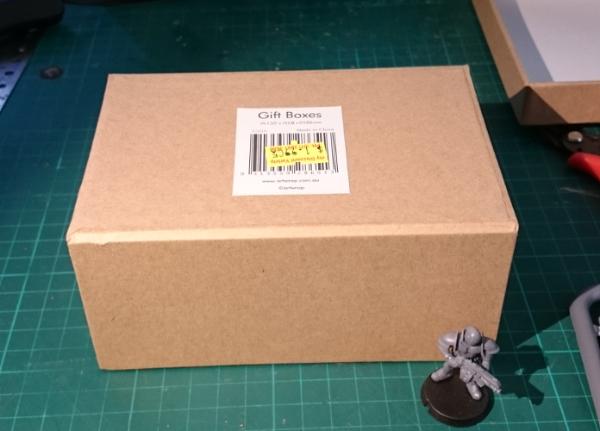
For now, I'd like to focus on one particular way to use the sprue, by crafting a basic building using a cardboard gift box.
These are fairly readily available all over the place, are generally made of a fairly sturdy cardboard, and are (best of all) cheap. You can also get them with all sorts of pretty patterns on them, but you'll probably want to paint them, so that’s less important, really.
Here’s a quick video showing the build process:
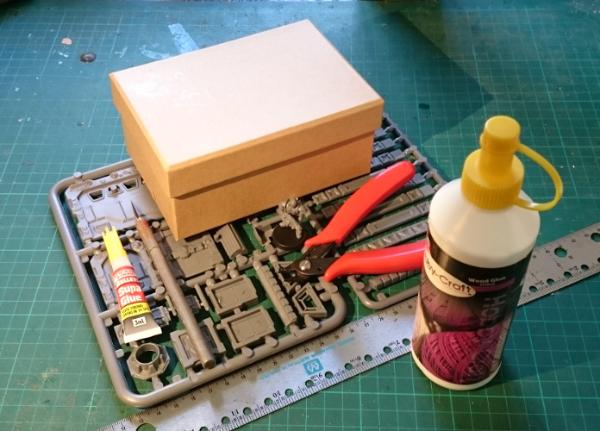
You will need: a giftbox, the terrain sprue, some glue (superglue for gluing the plastic parts on, PVA/wood glue for gluing the box lid on) clippers, a pencil, a sharp knife, and a ruler can be useful for marking out parts.
I want a building with a walled roof, as that gives some nice line of sight-blocking terrain while giving troops somewhere elevated to stand. So the box will be turned upside down, and the lid will eventually be glued on top, also upside down.
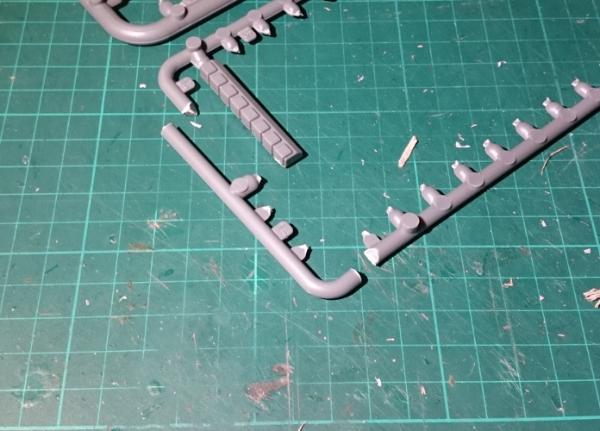
First step is to cut the parts you want to use off the sprue and clean up any mould lines.
I'm using the long support pieces vertically on the walls of the building, so they need to be trimmed down to the height of the box. That's simply a case of taking the lid off, holding one of the supports against the box to mark where to cut it, and then cutting them all off at that point.
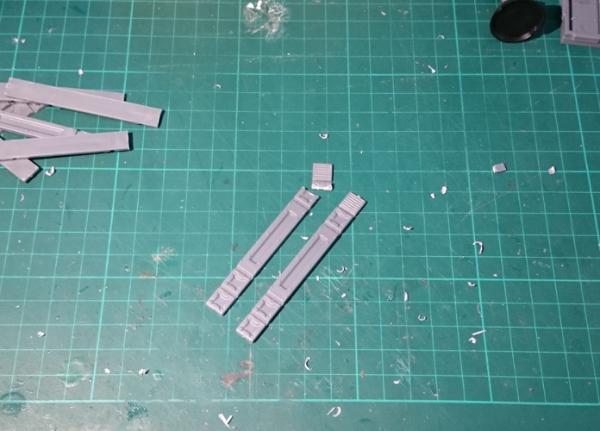
Put the leftover pieces aside - they'll come in handy for other projects.
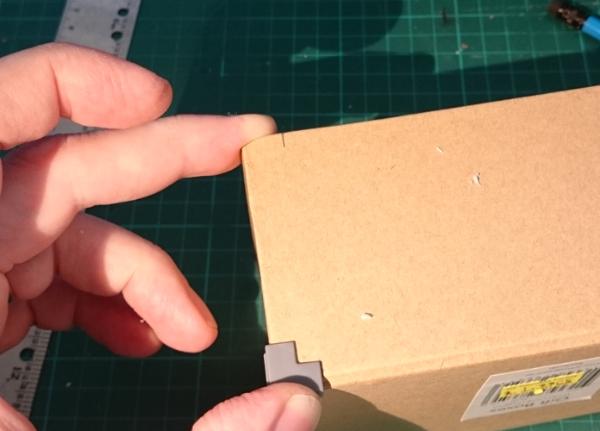
Next, measure out where the supports will go on the building. I tend to use them slightly in from the corners of my buildings, rather than as corner bracing - this looks neater, as they don't meet in a flush corner if you butt them up against each other right on the edge.
You can put them wherever you like, so long as it's consistently spaced around the building. Here, I've used a corner brace to mark out the spacing, by placing it up against the corner and marking against the side of it. Repeat top and bottom on both sides of each wall.
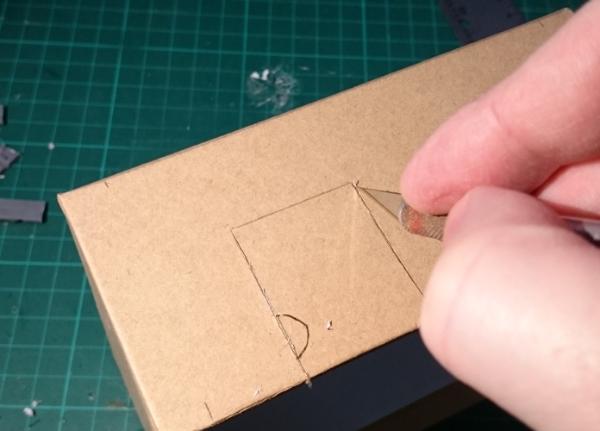
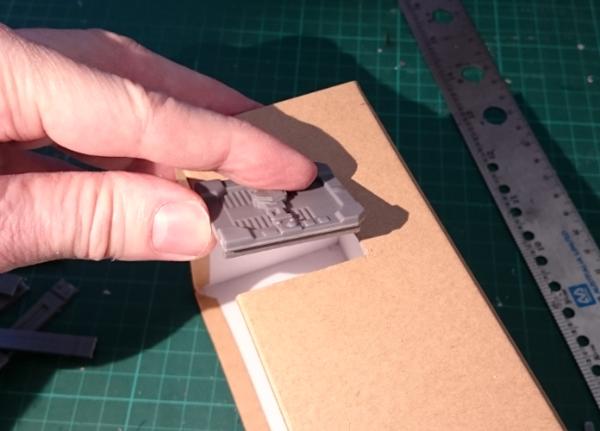
Next, work out where you want to put your door. Hold it in place against the building wall and draw around the back of the door frame with a pencil.
Do the same for the windows - I've gone for one on each end of the building.
Then take your knife and carefully cut out the door and window holes. Note that the windows don't actually have to be inset into the walls - the box frame design means that they actually look pretty good just glued on the outside. So you can save yourself some cutting if you're in a hurry. I do prefer to inset them, though, as it looks a little more polished.
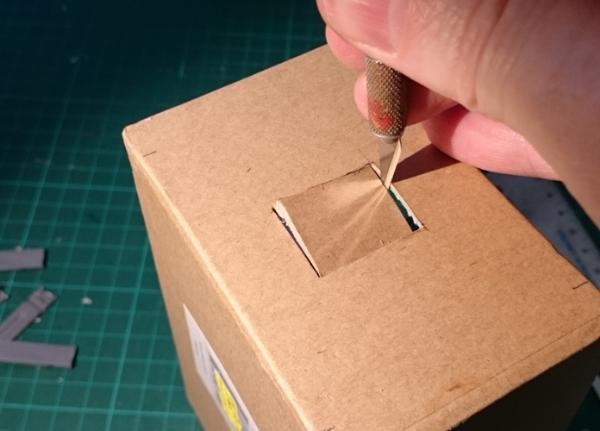
Once the holes are cut out, check that the parts fit in securely - trim up if necessary.
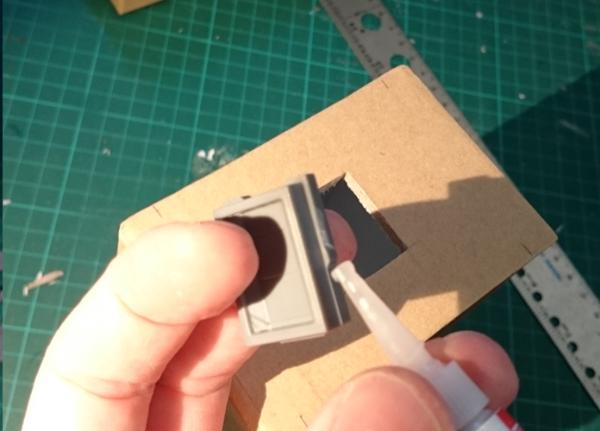
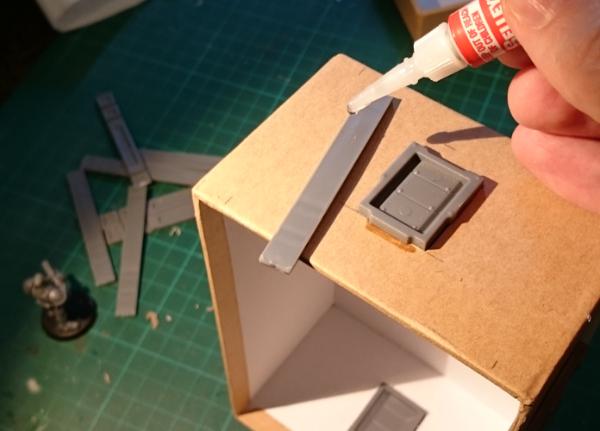
Then it's time to glue everything in place. Apply a small amount of glue around the door and window frames and push them into place. You can 'hide' the glue behind the protruding frame on the sides and bottom of the windows, so that you get less overflow onto the cardboard.
Run a line of glue down the back of the supports, and press them into place against your pencil marks on each wall.
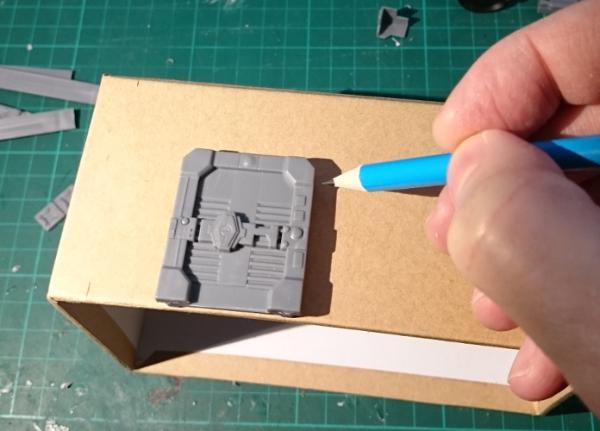
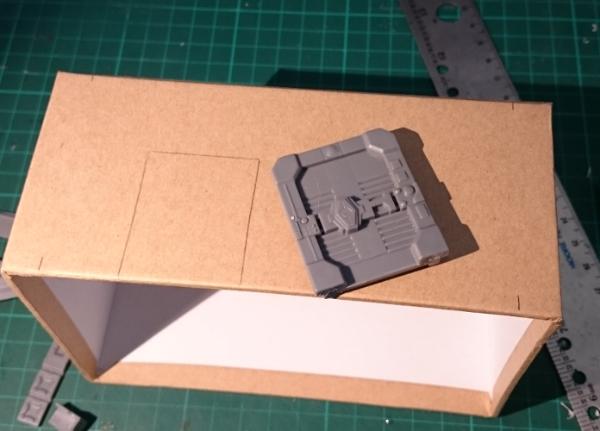
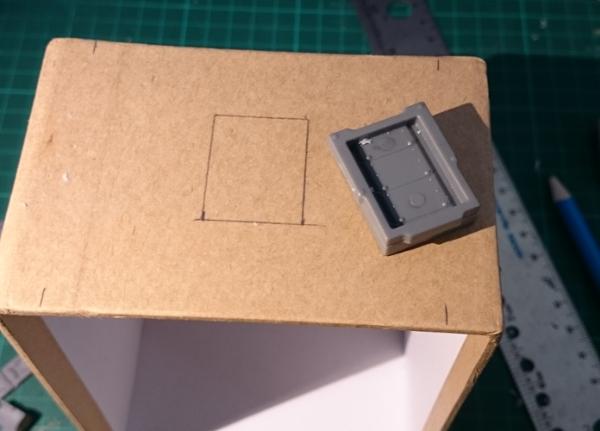
Next, grab your box lid, and on the inside mark out where you want the roof hatch to go. Once again I've used the corner brace to mark out an even distance from the sides of the box lid. Then glue the hatch in place.
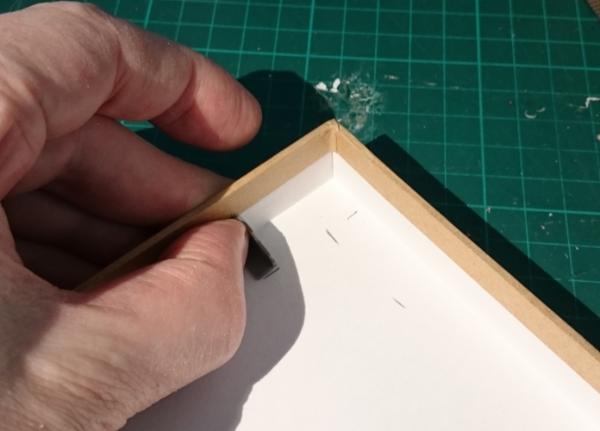
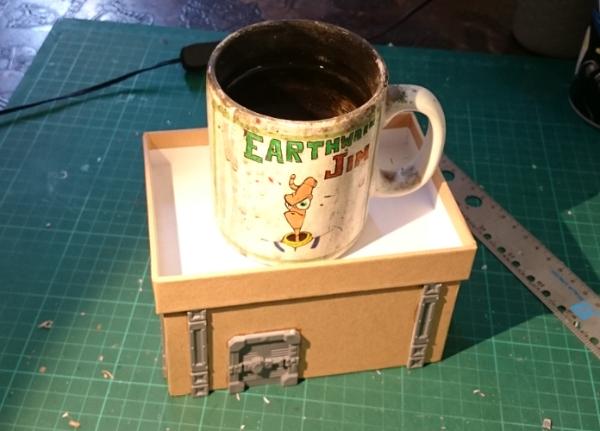
Now we can glue the roof on. Spread some PVA glue liberally over the top side of the building, press the lid on upside down, and sit something heavy on top to hold it snugly in place while the glue sets.

You could use superglue for this if you don't have any PVA or if you're in a hurry, but the PVA glue gives a better bond if there are irregularities in the cardboard that stop the two pieces from meeting perfectly flush.
While the roof is setting, we can hack the sprue a little to add some extra detail to the back of the building. Cut a corner piece off the narrower side of the sprue, as below. This will become the pipe for a small chimney or air vent.
Clean off the extra tabs and the mould line, and grab the small pipe fitting off the sprue.
A handy feature of this part of the sprue is that it fits perfectly into a 1/4"(7mm) plasticard tube, which in turn fits snugly into the small pipe fitting. So cut yourself two short segments of tubing - one for each end of the 'pipe'. If you don't have any plasticard, you can also use a strip of thin cardboard (cereal packet or the like) wrapped around the sprue instead.
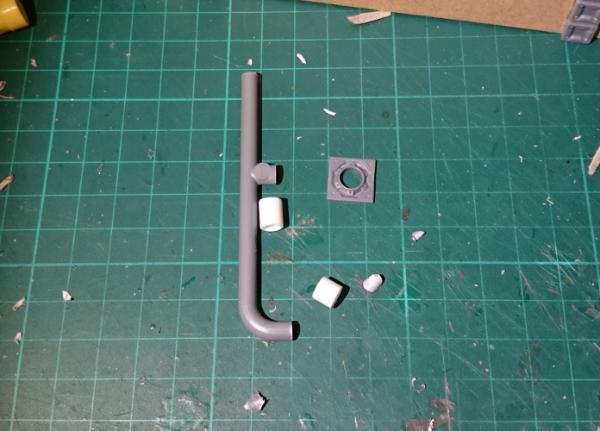
Glue the tubing (or cardboard strips) onto the 'pipe', glue the curved end into the pipe fitting, and check the fit against the back wall of the building. You can trim up the protruding sprue support as necessary to make sure the chimney sits vertically and the pipe fitting is flush against the wall. Then glue in place.
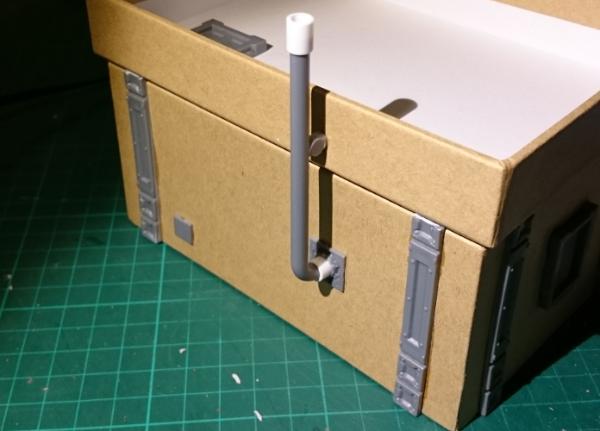
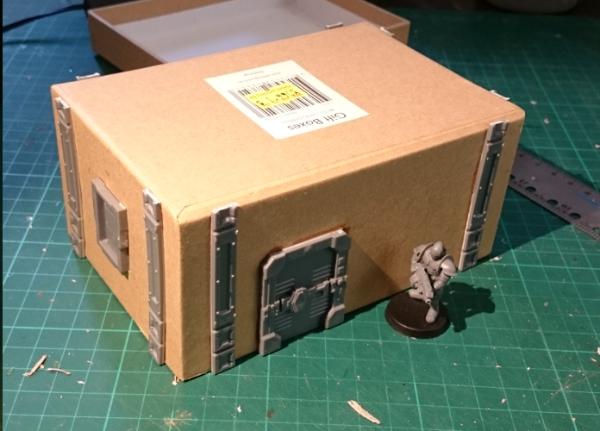
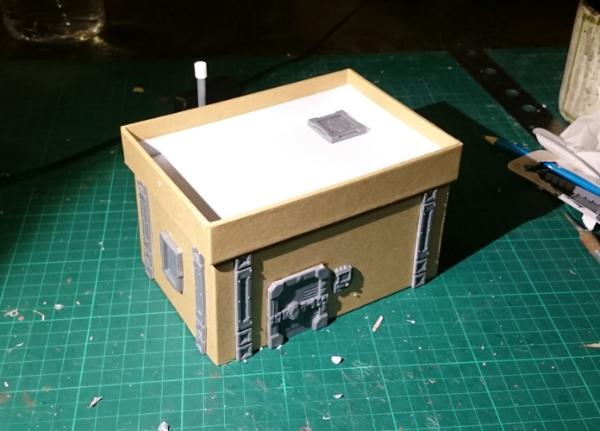
I have also added one of the small vent pieces that was trimmed off the wall supports right at the start, just for a little extra detail, and glued a comm panel onto the front wall beside the door.
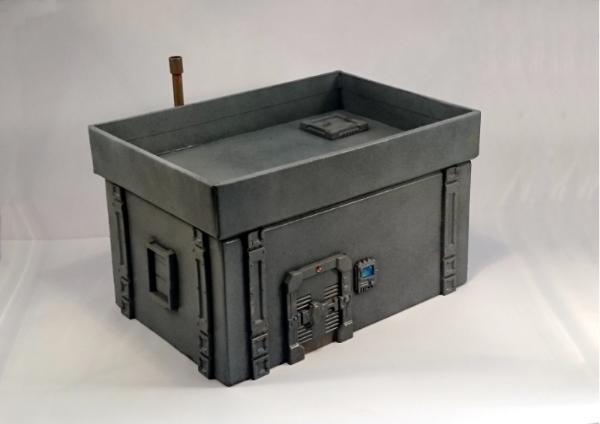
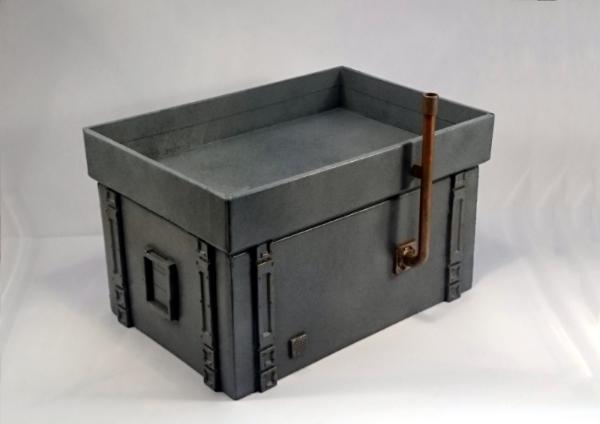
So the finished building looks something like this:
This can then be decorated however you like. I would recommend a good spray paint for the basecoat, particularly if the boxes you are using have a glossy finish. The building below was basecoated with black spray, and then given a spray coat of a medium grey, and a final highlight with a light grey spray from above, to leave the darker colour in the recesses and undercuts.
The 'chimney' pipe was painted in copper with a light drybrush of green to dirty it up, and some details like the comm panel screen and the light above the door picked out for a little extra colour. You could also add on building numbers, posters, warning signs, or anything else that you might find on a real building - we'll be covering some different ways to pretty up your battlefield terrain in a later article.
Pick up the terrain sprue from the Maelstrom's Edge online store here and give it a go! You can share your creations on the Comm Guild Facebook page here: https://www.facebook.com/groups/MaelstromsEdge
