Painting Tutorial: Weathered Metal
Posted on Monday Feb 27, 2017 at 05:00pm in Tutorials
 - by Iain Wilson
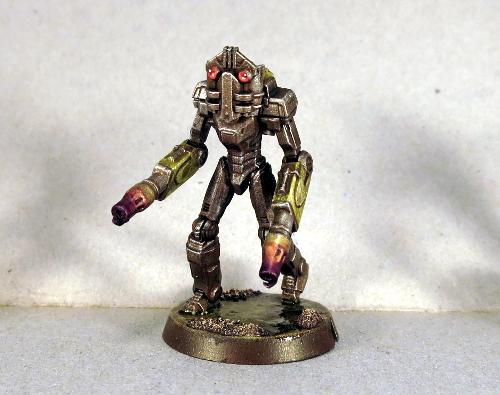
Terraforming planets is hard work, particularly on those worlds where conditions are less than favourable to begin with. Equipment has to contend with a huge range of different environments and, particularly once the Maelstrom come close, maintenance schedules can be somewhat less rigorously clung to than they might be on more 'civilised' worlds. This gives a bit of scope for painting terrain and models with a less polished finish, so this week, I thought I'd share an easy little method that I use to paint weathered metal. My guinea pig here is an Epirian Hunter Warmech.
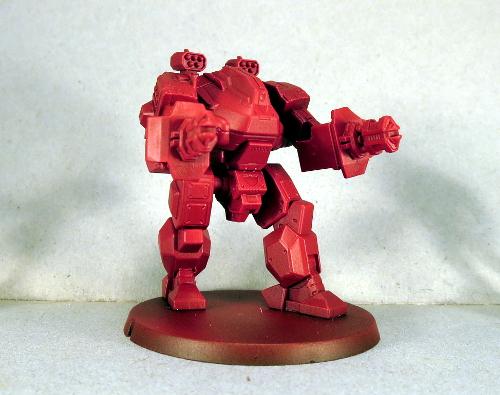
This all starts with a red undercoat - Here I've used Army Painter Pure Red. Just a light coat, as it doesn't have to be super-bright. Going straight over the grey plastic dulls the red down a little as well.
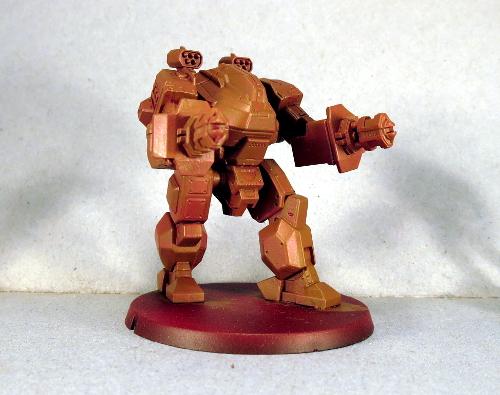
Over the red, paint a coat of a medium brown colour. I've used Vallejo Beasty Brown. This doesn't need to be perfectly even - If a bit of the red tint shows through, all the better. It will look a little odd to begin with, but it all pulls together at the end.
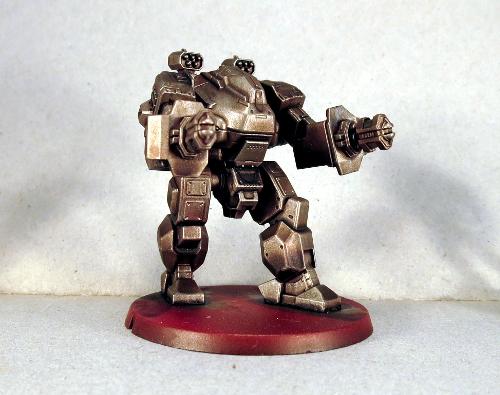
Next, paint a light coat of a medium metal tone. I've used P3 Pig Iron, which is roughly equivalent to the old Boltgun Metal/Leadbelcher. Again, you don't want to completely cover the brown. For a more rusted, dirty look, just lightly drybrush the metal on. For a more lightly weathered look, use a heavier coat of metal while leaving the brown in the creases. And as with the red, if a little brown tint shows through the coat of metal, that's excellent for our purposes here.

Now the magic step: Give the model a liberal coat of brown ink. The below is done with Army Painter Strong Tone, which is more or less identical to the old Citadel Devlan Mud. (Agrax Nightshade replaced this in the Citadel range. It's probably close enough for these purposes, but I haven't tried it.)
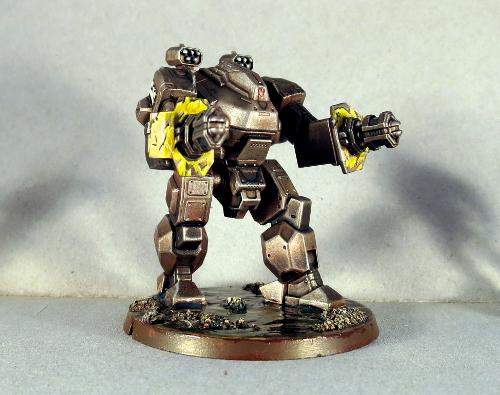
Once the ink is dry, it's time for final detailing. You can highlight with a little silver to pick out raised edges, just to brighten things up a little bit. I also like to go over weapons and working parts with a coat or two of black ink, to make them stand out a little more. You can also paint over the top with a patchy layer of colour to show worn paint with the metal showing through.
Here's the same technique on a different model, this time a slightly converted Epirian Scarecrow.
This is also a great way to pick out metal detail on buildings or ruins. Below is an example with a more dirty effect, achieved by just lightly drybrushing the metal over the brown before washing, as described above.
You can also add extra weathering by drybrushing brown or rusty red over the top, wherever looks like an appropriate place for rust or dirt to gather, or experiment with different coloured washes to create different metal effects.
You can pick up the models shown in this article from the Maelstrom's Edge webstore here. As always, we'd love to see what you're working on, so feel free to swing by the Comm Guild Facebook page!

Like this? Like us on facebook to see more...