Entries tagged [basics]
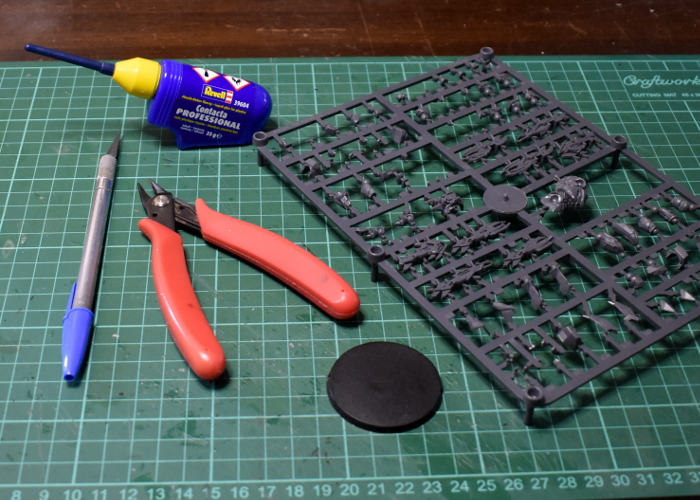
Hobby Basics: Working with Plastic
Posted on Monday Sept 14, 2020 at 05:00pm in Tutorials
This week in our series of hobby basics modeling articles, we're taking a look at what's involved in building plastic models. This article, intended for the beginner modeler, can be found here!
Stay tuned for more!
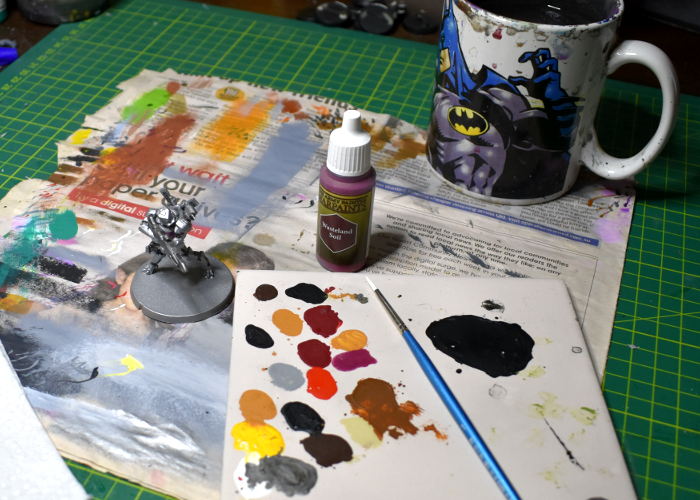
Hobby Basics - The Beginner Painter's Toolbox
Posted on Thursday Aug 13, 2020 at 05:00pm in Tutorials
Last week we ran through the basic necessities for your modeling toolbox. This week, we're having a similar look at what you need to get started painting your miniatures! You can find the article here!
Stay tuned for more!
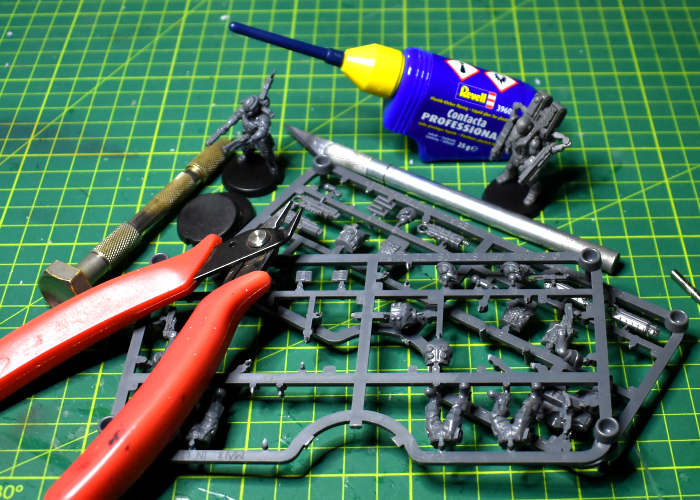
Hobby Basics: The Beginner Modeler Toolbox
Posted on Thursday Aug 06, 2020 at 05:00pm in Tutorials
This week's article is the next installment in our series of basic hobby tutorials, taking a look at the tools that you need to get started building models. You can find the article here!
Stay tuned for more!
Hobby Basics: Types of Glue
Posted on Friday Jun 26, 2020 at 05:00pm in Tutorials
Continuing on with our basic tutorial series, this week we're having a look at the common types of glue used in the hobby. This article explains what the different glues are like, and what you can and can't use them for. You can find the article here!
Stay tuned for more!
Hobby Basics: Miniature Materials
Posted on Thursday Jun 11, 2020 at 05:00pm in Tutorials
I'm going back to basics this week! Bunging together structures from assorted odd and ends, and showcasing conversions is all well and good, but for those just getting into the hobby it can all be a lot to take in. So I'm launching a series of articles on the Maelstrom's Edge website aimed at beginners, covering a range of basic modeling and painting related topics. This week, I'm breaking down the different materials commonly used for making wargaming miniatures, and the differences between them. You can find the article here!
Stay tuned for more!
'The Broken' Rules - Part 2: Fighting with The Broken
Posted on Thursday Oct 12, 2017 at 02:00pm in Gaming
For those who love our new Broken Rabble models but are curious as to how the faction performs on the tabletop, have no fear, we've got some answers for you today. The first thing you have to know is that the Broken individually aren't very good at all. They're the 'common man' of the spiral arm, and therefore they have terrible skill, terrible armor and a terrible willpower characteristic. But have heart! The Broken's true power lies in their sheer strength of numbers. There's a whole lot more Broken with nothing left to lose stranded near the Maelstrom's Edge then the troops from all the other factions put together! The Broken draw tremendous strength from the fact that they greatly outnumber their foes, and as a Broken player, you will definitely outnumber your opponent. Not only do basic Broken units cost the fewest points in the game by a pretty wide margin, but they also tend to have a maximum size of 6 models (while most other factions are limited to squads of 5 or less models). You'll probably want to go with the maximum number of models in each of your units, because the Broken's poor Skill characteristic means they miss with a lot of their shooting, so the more models you have firing, the more chance you'll be able to score some quality hits on the enemy. The other reason you'll want to max out your squad size is because of a little force-wide ability the Broken have called 'Mob Mentality':
MOB MENTALITY: This model’s WP characteristic is equal to the total number of models in the unit that share this ability, unless that number is lower than the model’s actual WP characteristic value. Models with the Mob Mentality ability have an asterisk listed with their WP characteristic value as a reminder of this ability.This ability makes full-sized Broken units into some of the most reliable units in the entire game, especially when you join a character to them, making a 7-man strong unit...it takes 21 suppression tokens on such a unit to shell shock it and guarantee that it will have to retreat! Of course as an opponent of the Broken, don't fret about this too much, because the Broken are some of the easiest models to kill in the game, meaning it doesn't take too much work to whittle down that 7-man unit to a much more manageable size.
The Broken know that their technology and weaponry can't normally match that of the other factions they fight against, so they are willing to modify their weapons to dangerous levels to put themselves on more of an even playing field. When looking across the characteristics of Broken weapons, at first glance it might seem like they are as good, if not better, than those fielded by other factions, and in many cases they are! But this potency comes with a price, and that's the 'Unstable' ability:
UNSTABLE: When a ‘1’ is rolled to hit with this attack, place a number of STs onto the firing unit equal to the current DAM value of the attack.Pretty much all of the really good weapons the Broken have are Unstable. While this ability doesn't actually kill Broken models, it can quickly start tacking tons of suppression onto Broken firing units. All this extra suppression is all well and fine while your units are at their maximum size, but as soon as the enemy starts killing a few of your models, the suppression generated by your own weapons will start to haunt you. So deciding whether or not to equip your Broken units with Unstable weapons plays a huge part in how your force will behave on the table. If you're a gambler, then pack in the Unstable weapons and hope to obliterate your foes before you drown in your own suppression!
The Broken know they cannot win in a straight-up fight against the other factions in the spiral arm, and so they have developed a method of fighting that relies on darting into and out of the shadows, confounding and frustrating their foes. This is represented by a faction-wide ability known as 'Shadow Strike':
SHADOW STRIKE In the end phase of each turn, before calculating VPs, a Broken player may select a single friendly infantry unit that is at least 12” away from the enemy and has every single one of its models in cover (from every enemy unit). The selected unit takes a shadow strike discipline check. If the check is successful, the unit is removed from the table and is put into reserve, keeping any STs it has.As you can see, this ability really gives the Broken a huge advantage of being able to put a unit pretty much anywhere on the table each turn (as long as the unit is put into cover). Of course, a unit that is placed onto the table via Shadow Strike is only able to fire wildly that turn (meaning they only hit on rolls of '6'), so you do sacrifice most of the unit's firepower to get this benefit, but its generally worth it to be able to control the table and capture objective markers when and where you need to. On top of that, the abilities of a Forsaken Chieftain make Shadow Strike even better, but we'll talk more about that in the next installment, where we'll be looking a bit closer at the different sub-factions of the Broken, including the Forsaken Chieftain.
In any future turn, a unit that was put into reserve via the Shadow Strike ability can either elect to arrive normally, or may instead deploy via the Shadow Strike main action. The Shadow Strike action allows the unit to be placed anywhere on the table that is both entirely in cover and at least 12” away from the enemy, and then, after being placed this way, the unit may fire a single round of wild shooting. A unit that is placed on the table via the Shadow Strike action counts as having moved.
When putting a Broken infantry unit into reserve before the game, its owning player may declare that the unit will arrive during the game via the Shadow Strike main action described above. Only a single Broken unit per side (including a joined character) may start the game this way.
Painting Tutorial: Weathered Metal
Posted on Monday Feb 27, 2017 at 05:00pm in Tutorials
 - by Iain Wilson
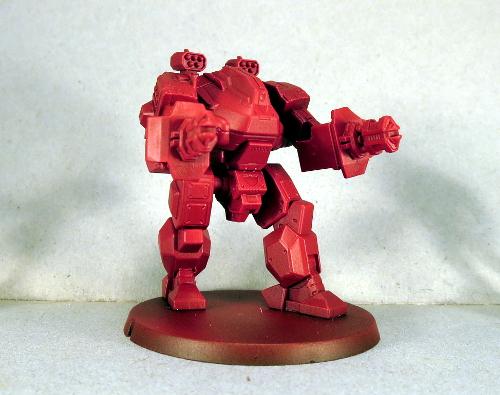
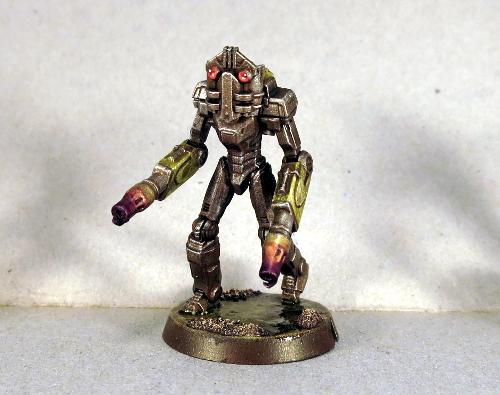
Terraforming planets is hard work, particularly on those worlds where conditions are less than favourable to begin with. Equipment has to contend with a huge range of different environments and, particularly once the Maelstrom come close, maintenance schedules can be somewhat less rigorously clung to than they might be on more 'civilised' worlds. This gives a bit of scope for painting terrain and models with a less polished finish, so this week, I thought I'd share an easy little method that I use to paint weathered metal. My guinea pig here is an Epirian Hunter Warmech.
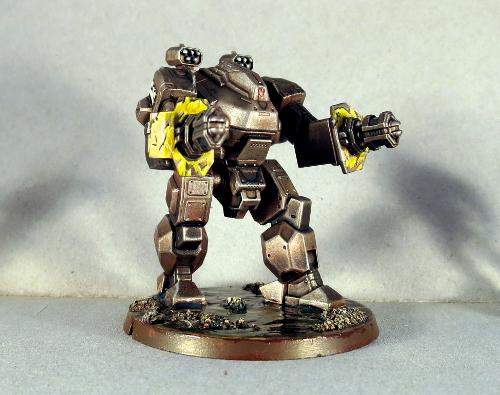
This all starts with a red undercoat - Here I've used Army Painter Pure Red. Just a light coat, as it doesn't have to be super-bright. Going straight over the grey plastic dulls the red down a little as well.
Over the red, paint a coat of a medium brown colour. I've used Vallejo Beasty Brown. This doesn't need to be perfectly even - If a bit of the red tint shows through, all the better. It will look a little odd to begin with, but it all pulls together at the end.
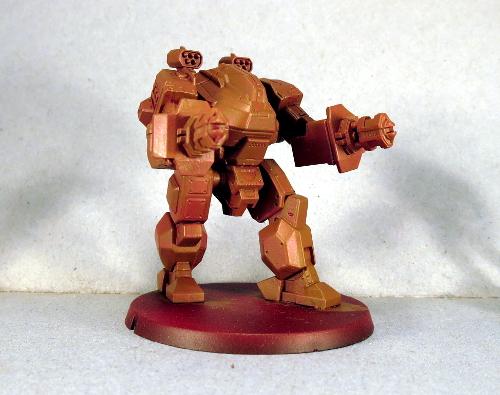
Next, paint a light coat of a medium metal tone. I've used P3 Pig Iron, which is roughly equivalent to the old Boltgun Metal/Leadbelcher. Again, you don't want to completely cover the brown. For a more rusted, dirty look, just lightly drybrush the metal on. For a more lightly weathered look, use a heavier coat of metal while leaving the brown in the creases. And as with the red, if a little brown tint shows through the coat of metal, that's excellent for our purposes here.

Now the magic step: Give the model a liberal coat of brown ink. The below is done with Army Painter Strong Tone, which is more or less identical to the old Citadel Devlan Mud. (Agrax Nightshade replaced this in the Citadel range. It's probably close enough for these purposes, but I haven't tried it.)
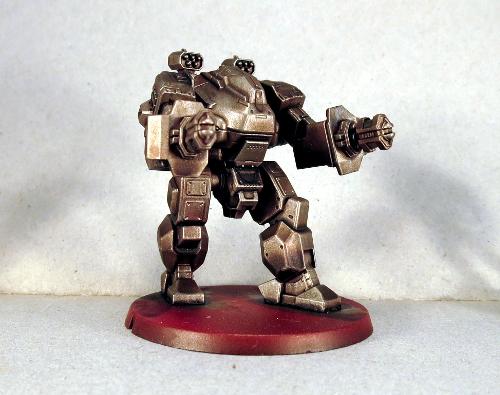
Once the ink is dry, it's time for final detailing. You can highlight with a little silver to pick out raised edges, just to brighten things up a little bit. I also like to go over weapons and working parts with a coat or two of black ink, to make them stand out a little more. You can also paint over the top with a patchy layer of colour to show worn paint with the metal showing through.
Here's the same technique on a different model, this time a slightly converted Epirian Scarecrow.
This is also a great way to pick out metal detail on buildings or ruins. Below is an example with a more dirty effect, achieved by just lightly drybrushing the metal over the brown before washing, as described above.
You can also add extra weathering by drybrushing brown or rusty red over the top, wherever looks like an appropriate place for rust or dirt to gather, or experiment with different coloured washes to create different metal effects.
You can pick up the models shown in this article from the Maelstrom's Edge webstore here. As always, we'd love to see what you're working on, so feel free to swing by the Comm Guild Facebook page!