Entries tagged [trooper]
Magnetizing Karist Heavy Weapon troopers
Posted on Wednesday Feb 28, 2018 at 05:00pm in Tutorials
Originally posted on Dakkadakka by Sgt.Oddball.
Hey all,
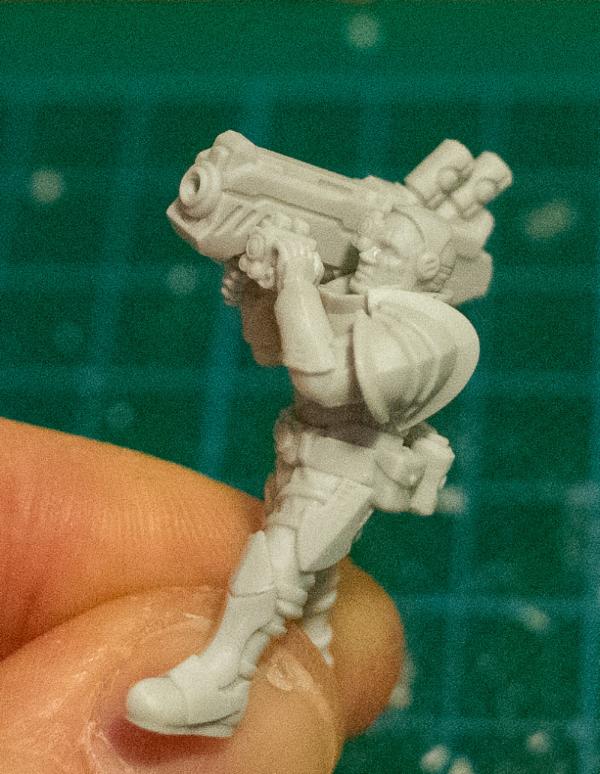
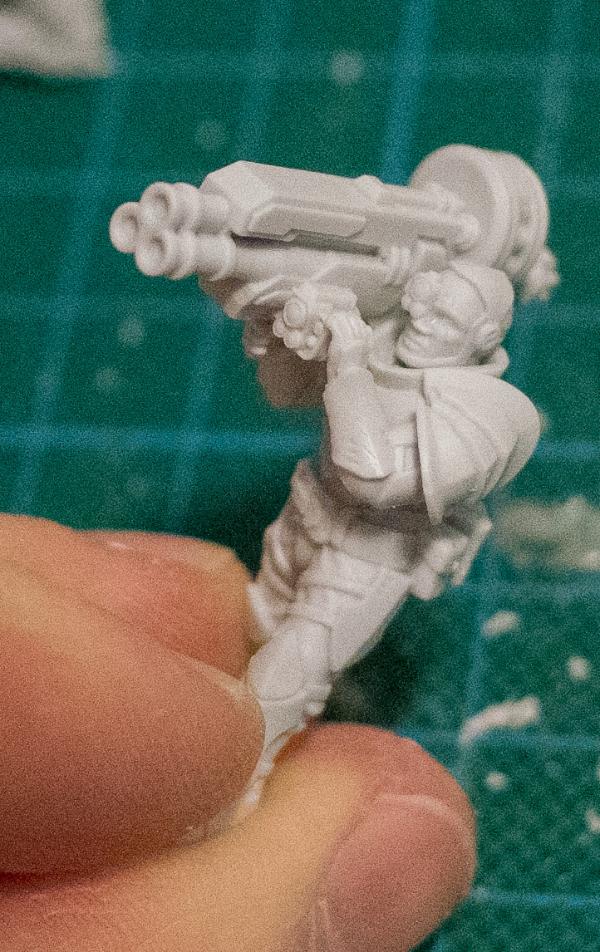
When you buy Karist Heavy Weapon troopers, you get two guys a pack, with a selection of 3 weapons. I want to be able to use all the weapon types, but I dón't want to paint three guys just so I can use any of the three weapon types (my chosen way of painting Karists is slow...). Magnets are the answer. Luckily, these guys are quite simple to magnetize. Here's how:

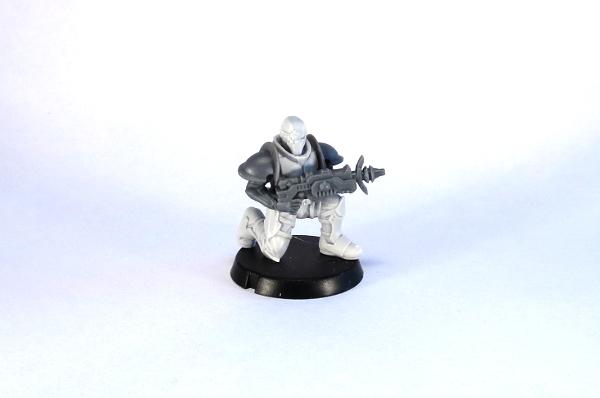
What you get in a pack. I love these sculpts and the model quality is fantastic. Very crisp.

Long thin resin bits can end up bent.

This is easy and quick to fix: dip in hot water, straighten, dip in cold water.

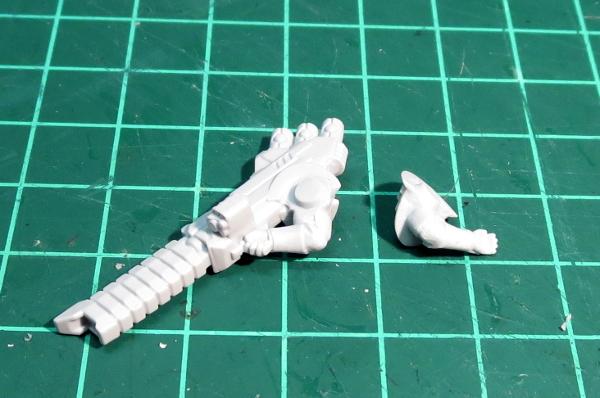
All the bits for one guy, without the ammo I forgot at this point.
I drilled a 3mm hole in the torso. The sculpt is such that you know exactly where to drill. If you go too deep you may end up making a hole on the other end where the head goes. You won't see this with the head in place.

In the hole goes a 3x2mm magnet. Try to match the amount which the magnet sticks out to the amount the original resin stuck out. If you want to use the left arm that holds the gun, it's critical that the magnet doesn't stick out too much, or you won't be able to line up the gun with the left arm.

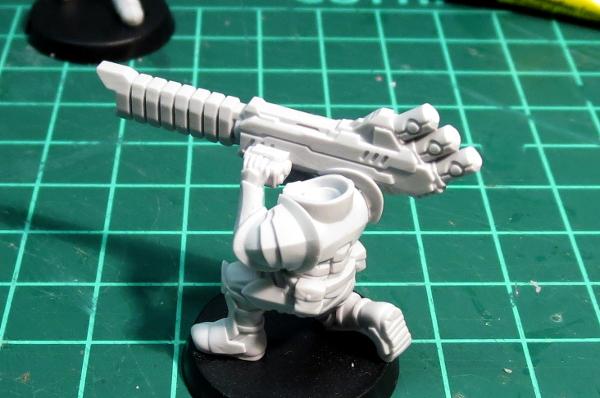
Then put a magnet in the gun arm in the same way. The sculpt shows you where to drill. Don't drill too deep or you'll go out the shoulder guard. Also, if you lay the arm down like this and then press down hard with your drill, you could deform the shoulder guard a little.

As with the torso, you want the magnet to stick out as much as the resin did, or else your left arm won't line up. It's not just the amount by which the magnet sticks out, but also the angle. It's better to have the magnet in a little too deep: it'll still catch and your alignment will work. Of course, if you just use the left arm that holds the ammo, alignment isn't a problem. Easiest way to get it right is to have the left arm glued in place and then dry-fit.

The other guns get the same treatment. Beware of polarity ;)

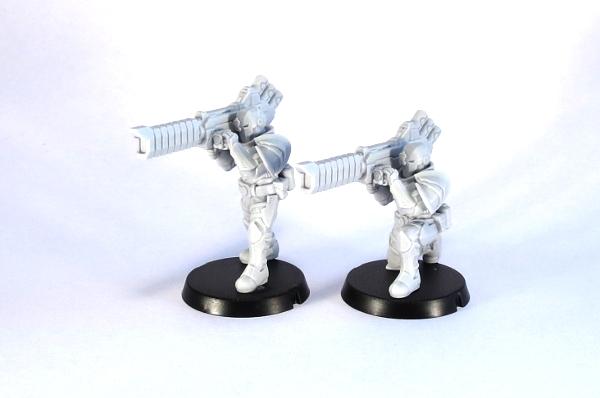
Here's the missing ammo, which I glued to his belt. Also, you can see the torso and arm line up nicely on the rear.

Front alignment also works out with the left arm in place.
Ravager gun works too.
As does the grenade launcher.
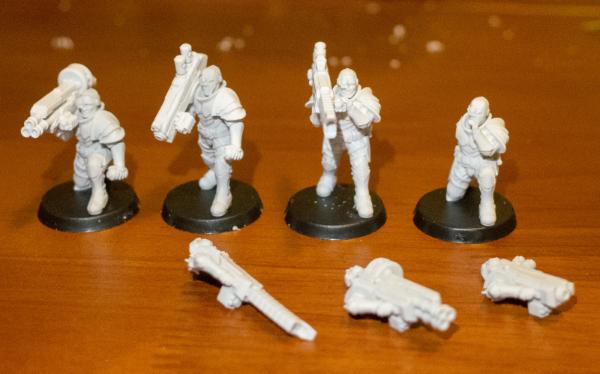
Four guys with interchangeable weapons.
Once I paint these, they'll show up in my 'painted stuff' topic on Dakka :)
Tags: assembly heavy karist modeling trooper tutorial walkthrough
Modeling Spotlight: Assembling Karist Heavy Troopers
Posted on Monday Dec 04, 2017 at 05:00pm in Tutorials
- by Iain Wilson
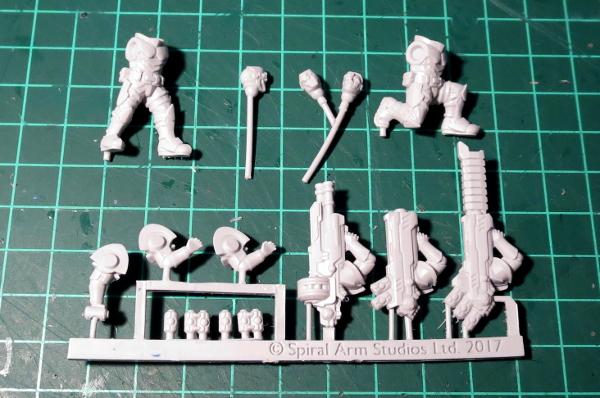
This week saw the release of the next Maelstrom's Edge resin set into the wild, with the addition of heavy weapon troopers to the Karist Enclave lineup. Here, we're having a quick look at how to assemble these great new models!
The Karist heavy troopers come in a pack of two troopers, with three heavy weapons between them. They also include 3 optional heads - two with helmets and one open-face, an extra left arm with a spare cybel cannister, and a bunch of extra cybel cannisters to attach to their belts.
As always with resin models, it's a good idea to give them a quick wash in warm, soapy water to clear off any residual mould release, as this can affect paint adhesion. If any of the parts are a little bent, this is also the time to drop them in some hot water and then reshape them - although the casts I received of these models were all beautiful and straight, with extremely minimal mould lines, so very little clean-up work involved.
The two bodies are all one piece, and so once the frame lugs are trimmed off the bottom of the feet, can be glued straight onto your base. Because these are resin rather than polystyrene like the regular plastic kits, use a good quality superglue or fast-setting epoxy glue, rather than plastic cement.
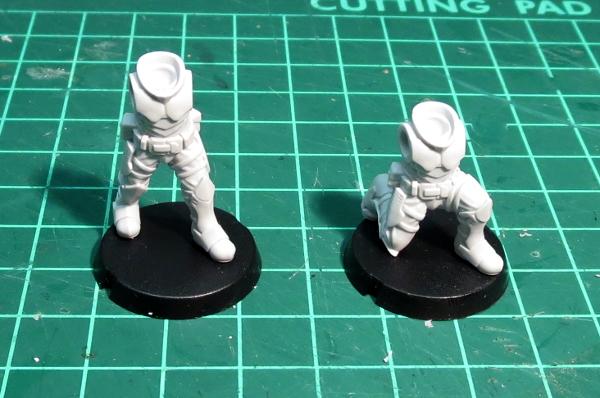
The arms have nice, sturdy locator pins that fit snugly into the sockets in the shoulders.
Dry-fit them first to get a feel for how they sit, and then I find the easiest way to ensure the arms fit together nicely is to put a drop of glue into each shoulder socket, a small drop on the left palm, and then sit everything into place and make any minor adjustment quickly before the glue grabs. You can glue one arm at a time if you prefer, but it can be trickier to get a perfect fit that way, depending on the angle of the arms.
Finally, glue the heads in place, and you're ready for paint!
You can add a Quintarch to the unit using a regular Karist trooper, or you can add parts from the Trooper sprue and/or Faction Expansion Sprue to another heavy trooper body to keep with the heavier armour look for the whole unit.
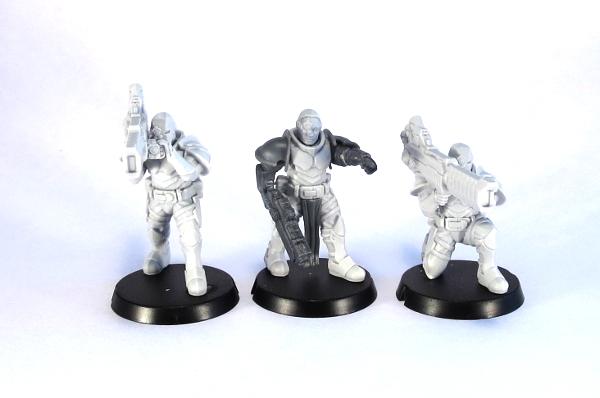
You could also use weapons and arms from the Trooper sprue on the heavy trooper bodies to make special weapon troopers for your regular Karist units.
And for a final bit of fun, I made some conversions a while back of some Tempest Elites with shoulder-mounted weapons (from the Spotlight article here). That conversion becomes even easier with the pulse cannon and cannister arm from the heavy trooper set!

To build your own army of Maelstrom-worshipping, explody Doom, you can pick up the Karist Heavy Trooper set, along with the rest of the Maelstrom's Edge model range, from the webstore here. As always, we would love to see your creations on the Comm Guild Facebook page!
For other Maelstrom's Edge modeling articles, including tutorials and walkthroughs of a wide range of different building and miniature projects, check out the article roundup here.
Tags: conversion converting heavy karist modeling trooper tutorial walkthrough
Artwork: The First Karist
Posted on Tuesday Oct 18, 2016 at 05:00pm in Artwork
This piece of artwork is very important to us, as it was our first completed piece. It also served as the initial concept and reference for sculpting the Karist troopers. You'll spot a few small differences as we made the model in plastic, notably on the chestplate. This pose has popped up quite a few times in our conversions when we've played around with the sprue as tribute to this original piece of artwork which launched the rest of the range.
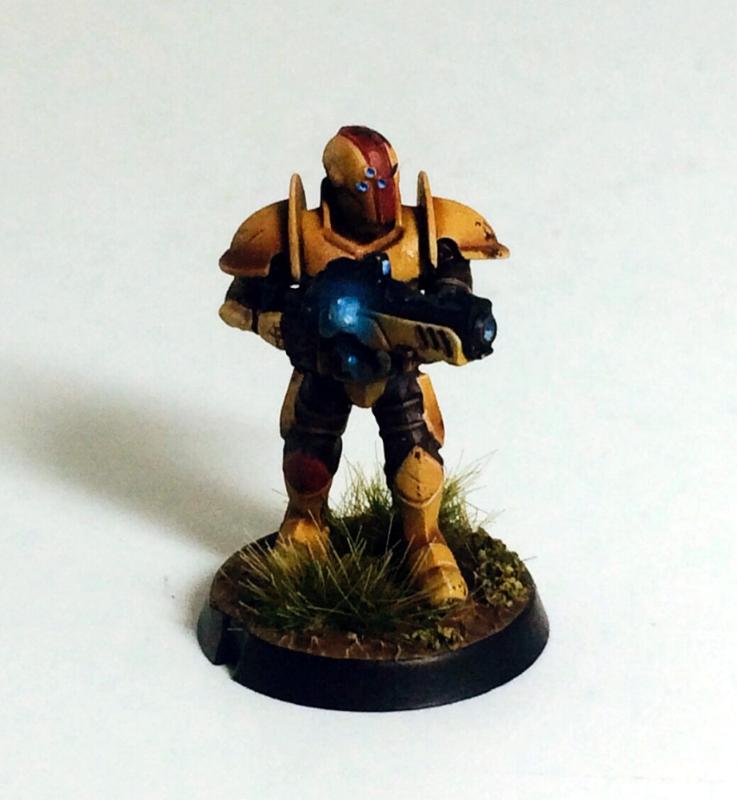
Friday Photo - Yellow Karist Trooper
Posted on Friday Sept 09, 2016 at 05:00pm in Models
We really love how this Karist Trooper turned out in yellow, with a complementary blue cybel glow. Using the indents on the face plate as a stripe marker was something we'd considered doing to mark out sergeants in the squad, but it never looked half as good as it does here as a natural part of the colour scheme.