Entries tagged [assembly]
Assembly Guide - Epirian Secdef
Posted on Wednesday Jul 04, 2018 at 05:00pm in Tutorials
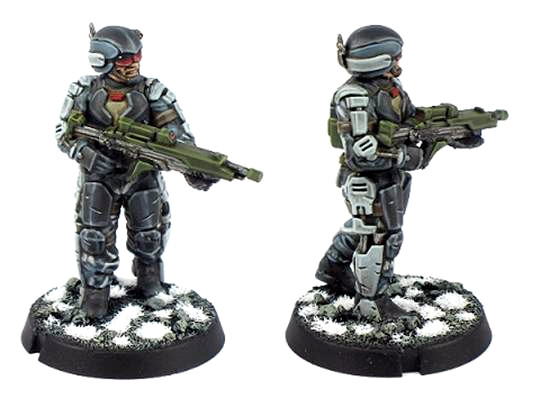
We are very proud to announce the immediate availability of our latest plastics - the Epirian SecDef. These guys have exo-augmented armour, allowing them to be a much more powerful and effective fighting force than their contractor allies.
Available now at https://www.maelstromsedge.com/store/41/3x%20Epirian%20Secdef%20Infantry, along with details of their history and background.
Below, you can find instructions for assembling these great new models!
Assembling Epirian Secdef
General Notes
Polystyrene cement - only use superglue if you want to go insane! All of our models are designed to be assembled with polystyrene cement as it gives some time to re-pose while gluing, fuses the models together and prevents brittle joins like other glues do. Make sure you have polystyrene cement in your toolkit before you begin!
We want you to experiment! We've broken our models up into lots of parts and given a fair few spare parts so that you can push yourself out of your comfort zone, learn new skills and create some really unique models. We've tried to price things so that it won't break the bank if you make a mistake, so please cut stuff up and have some fun. Start simple with a slice here and a re-pose there, and watch your confidence and skills increase until you are a master modeler!
Basing - Always make sure you glue your model to its base with an eye on the arc markers on the sides of the base. The arc marker indents should be at the halfway point between the front and back of the model to show the front and back halves of the model when gaming. See the Maelstrom's Edge rulebook for more detailed notes on this.
Dry fit before gluing! - There are lots of pose options possible, but that means there is also the freedom to screw up and make some bad poses! Sticking the parts together and seeing how things look will usually lead to a model that is fairly static and repetitive. You should consider knee, hip, torso, and arm positions when gluing and ensure that you have a pose in mind before you start gluing things together. If in doubt or insecure about your talents in the posing area, we recommend you try to copy the poses from some of our studio models found here in the gallery.
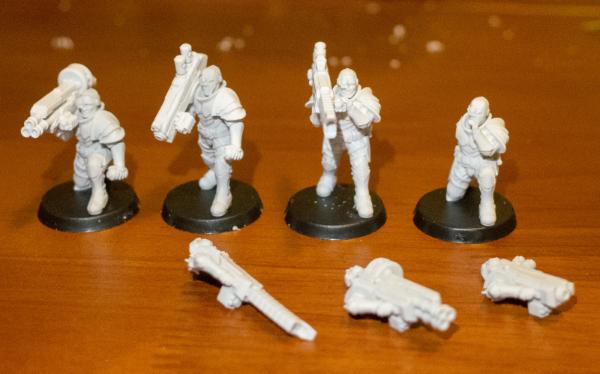
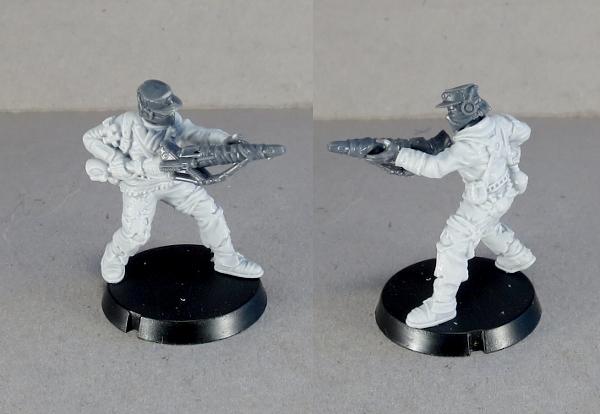
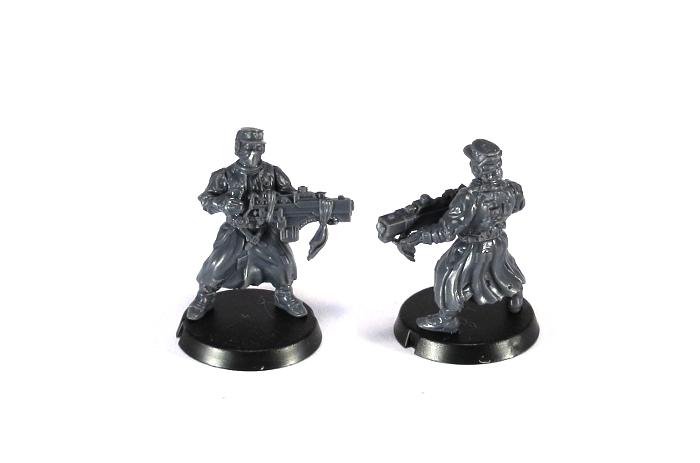
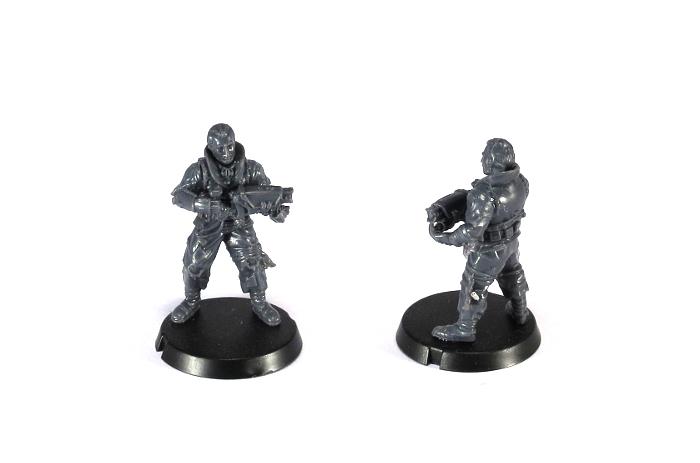
Epirian Secdef Assembly Notes
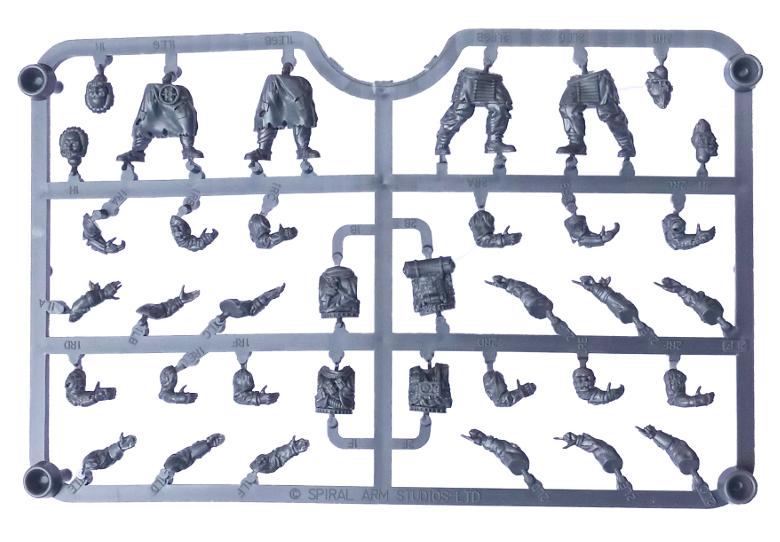
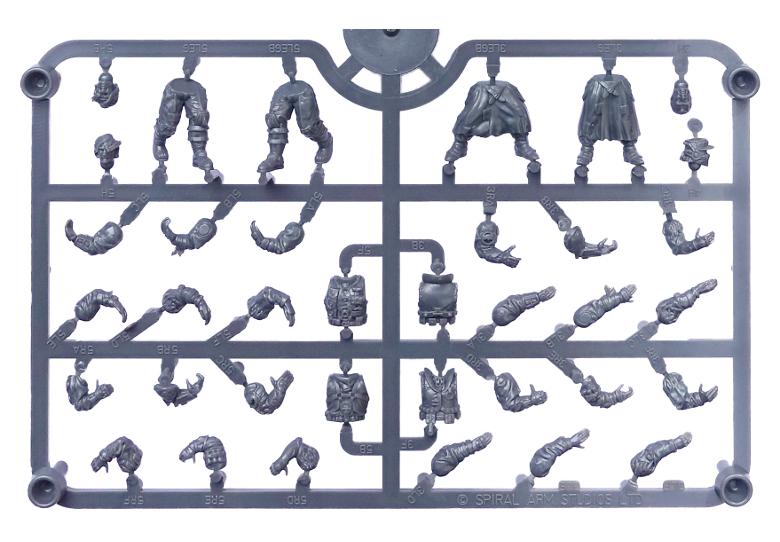
Three Secdef models can be made from one sprue. The sprue includes the following weapons: 2 x AR60 Assault Rifle, 1 x SR40 Sniper Rifle, 1 x CG100 Chaingun and 1 x LM14 Machine Gun.
Legs have three different poses and are paired, left and right, with differently-sized locator pins to keep them straight. Leg 5 goes with leg 7, 8 with 4 and 6 with 9.
The three torsos have two different designs (two with chest pouches and a backpack, one without), but the chestplate is identical for each, and any of the three torsos fit with any of the legs.
There are five 'sets' of arms, including two that have right hands with fingers together, and three with the fingers more splayed and the trigger finger separate. The closed-finger version works best for the Machine Gun or Chaingun, while the more open fingers work best for the Assault Rifles or Sniper Rifle. These are more-or-less matched with the extended left arms for the rifles and the left arms with more bent elbows for the heavier weapons. The pointing left arm obviously works with whichever right arm you choose, although there is one rifle arm that has the weapon held out to the side rather than across the body.
There are two small parts labelled as part 24 on the sprue. These are optional, and can be glued in between the belt and the heavier weapons as a support strut.
Finally, the three heads all fit with either of the two torso variants.
For some more ideas for building your Secdef models or to share your own creations, head on over to the Comm Guild Facebook page.
You can pick up the Secdef sprue, and the rest of the Maelstrom's Edge miniature range, from the webstore here.
For other Maelstrom's Edge modeling articles, including tutorials and walkthroughs of a wide range of different building and miniature projects, check out the article roundup here.
Assembly Guide - Epirian Master Bot Handler
Posted on Monday Apr 30, 2018 at 11:00pm in Tutorials
Assembling the Epirian Master Bot Handler
General Notes
Polystyrene cement - only use superglue if you want to go insane! All of our models are designed to be assembled with polystyrene cement as it gives some time to re-pose while gluing, fuses the models together and prevents brittle joins like other glues do. Make sure you have polystyrene cement in your toolkit before you begin.
We want you to experiment! We've broken our models up into lots of parts and given a fair few spare parts so that you can push yourself out of your comfort zone, learn new skills and create some really unique models. We've tried to price things so that it won't break the bank if you make a mistake, so please cut stuff up and have some fun. Start simple with a slice here and a re-pose there, and watch your confidence and skills increase until you are a master modeler!
Basing - Always make sure you glue your model to its base with an eye on the arc markers on the sides of the base. The arc marker indents should be at the halfway point between the front and back of the model to show the front and back halves of the model when gaming. See the Maelstrom's Edge rulebook for more detailed notes on this.
Dry fit before gluing! - There are lots of pose options possible, but that means there is also the freedom to screw up and make some bad poses! Sticking the parts together and seeing how things look will usually lead to a model that is fairly static and repetitive. You should consider the parts available and ensure that you have a pose in mind before you start gluing things together. If in doubt or insecure about your talents in the posing area, we recommend you try to copy the poses from some of our studio models found here in the gallery.
Master Bot Handler Assembly Notes
The sprue comes with parts to assemble one model, with two different body options, two each of four different arm weapons and two each of the backpack equipment options:
You can find the rules and options for the Master Bot Handler's equipment in the Force Builder section of the Maelstrom's Edge website. It's worth noting that rules-wise, if you go all out on ranged weapons you'll wind up with one more weapon than the Master can actually fire in a turn, so while that can be handy for versatility if you have the points available, it's worth considering how you will use him on the table before you start gluing bits on!
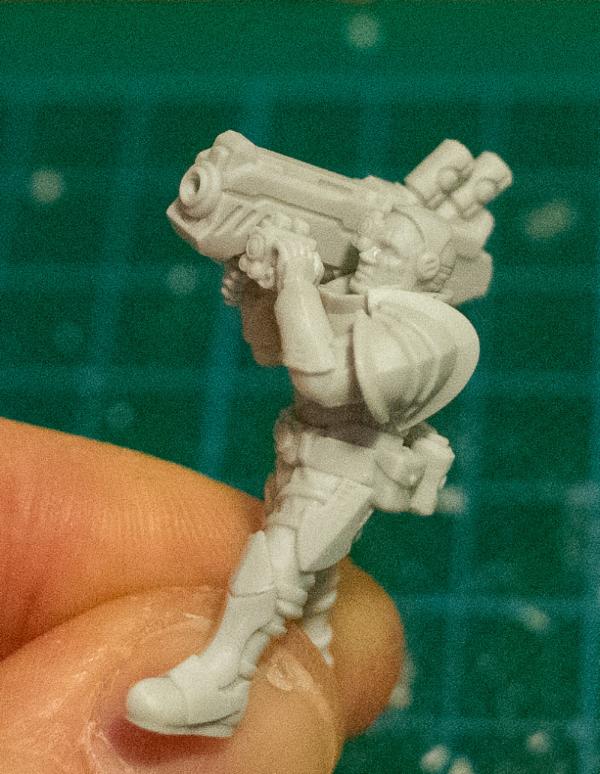
The body options provide two different poses, with the torso paired with the legs to create a crouched, braced-for-firing pose, or a more upright stance. Torso parts 1 & 2 go with legs part 5, and torso parts 3 & 4 go with legs part 6, although the torsos do fit on either pair of legs if you want to play around with the posing.
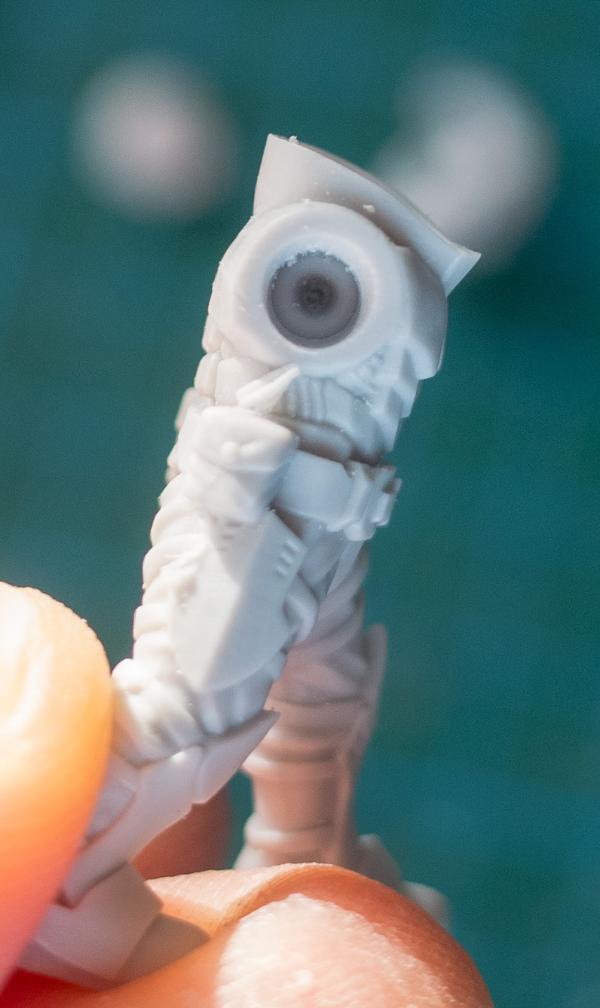
The neural nodes (part 16) cluster missiles (part 17) fit into the rectangular recesses on the top of the backpack, and can be paired or taken as one of each.
Note: Due to a well-intentioned but mistaken last minute change by the sculptor before the sprue went for tooling, the neural nodes and cluster missiles have differently-sized locator bars on their backs that slot into matching recesses on the backpack. As the bar on the neural node is slightly longer than that on the cluster missile pod, this means that if you want to use a dual-node configuration (or just want to put a single neural node on the left instead of the right) you need to trim off the ends of the bar to allow it to fit into the missile pod's slot.
Backpack, head and arms can be glued in place to set up the basic posing.
Assembling the weapon arms all in one go is a little fiddly, so it's best to glue your chosen weapons onto the arms first. The sprue comes with the following weapons:
- 2 x Repair Claw (part 10)
- 2 x Cutter Machine Gun (parts 13 & 14)
- 2 x Drone Class Laser System (parts 19 & 20)
- 2 x Flakk Gun (parts 11 & 12)
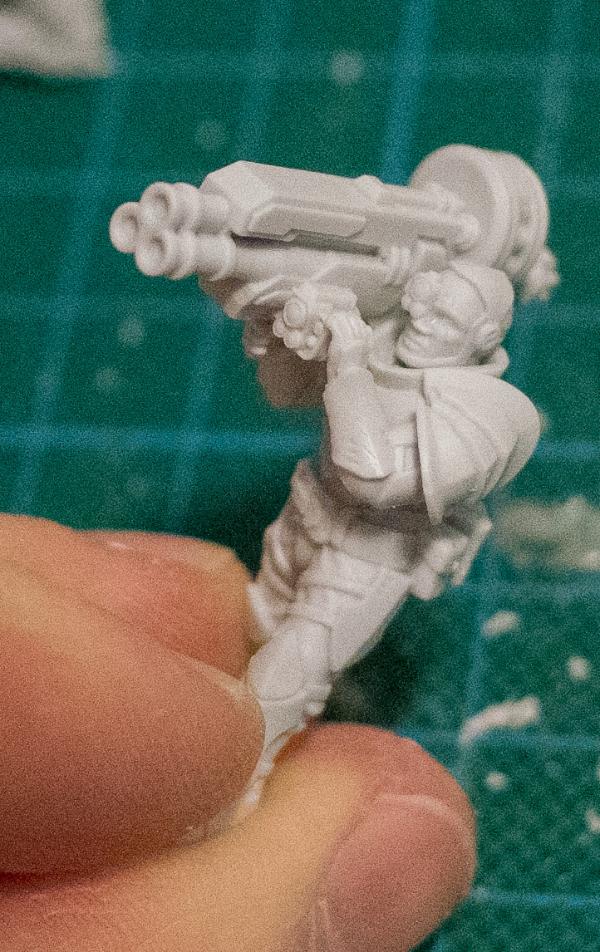
The support arms for the weapons are made up of parts 21 and 22, and two of part 18.
The flat disc on part 18 slots into the middle of the two matching discs on parts 21/22. If the fit is a little too snug, you can file or shave down the sides of the disc a little. Don't get too carried away, or you'll make it fit too loosely.
The two parts joined at whatever angle fits the posing of the arms and weapons. The best bet is to glue the join with a touch of plastic glue and then dry fit the support arm against the model to get the right angle on the joint, ensuring that the larger ball fits neatly into the recess on the backpack, and the smaller ball sits into the outside of the ring on the weapon. Once you're happy with the angle of the joint, glue the ends in place.
From there, your model is ready for painting!
For modeling help, to discuss how best to use the Master Bot Handler in your games, or to share your models, head on over to the Comm Guild Facebook page.
You can pick up the Master Bot Handler, his accompanying Firefly Drones, and the rest of the Maelstrom's Edge miniature range, from the webstore here.
For other Maelstrom's Edge modeling articles, including tutorials and walkthroughs of a wide range of different building and miniature projects, check out the article roundup here.
Magnetizing Karist Heavy Weapon troopers
Posted on Wednesday Feb 28, 2018 at 05:00pm in Tutorials
Originally posted on Dakkadakka by Sgt.Oddball.
Hey all,
When you buy Karist Heavy Weapon troopers, you get two guys a pack, with a selection of 3 weapons. I want to be able to use all the weapon types, but I dón't want to paint three guys just so I can use any of the three weapon types (my chosen way of painting Karists is slow...). Magnets are the answer. Luckily, these guys are quite simple to magnetize. Here's how:

What you get in a pack. I love these sculpts and the model quality is fantastic. Very crisp.

Long thin resin bits can end up bent.

This is easy and quick to fix: dip in hot water, straighten, dip in cold water.

All the bits for one guy, without the ammo I forgot at this point.
I drilled a 3mm hole in the torso. The sculpt is such that you know exactly where to drill. If you go too deep you may end up making a hole on the other end where the head goes. You won't see this with the head in place.

In the hole goes a 3x2mm magnet. Try to match the amount which the magnet sticks out to the amount the original resin stuck out. If you want to use the left arm that holds the gun, it's critical that the magnet doesn't stick out too much, or you won't be able to line up the gun with the left arm.

Then put a magnet in the gun arm in the same way. The sculpt shows you where to drill. Don't drill too deep or you'll go out the shoulder guard. Also, if you lay the arm down like this and then press down hard with your drill, you could deform the shoulder guard a little.

As with the torso, you want the magnet to stick out as much as the resin did, or else your left arm won't line up. It's not just the amount by which the magnet sticks out, but also the angle. It's better to have the magnet in a little too deep: it'll still catch and your alignment will work. Of course, if you just use the left arm that holds the ammo, alignment isn't a problem. Easiest way to get it right is to have the left arm glued in place and then dry-fit.

The other guns get the same treatment. Beware of polarity ;)

Here's the missing ammo, which I glued to his belt. Also, you can see the torso and arm line up nicely on the rear.

Front alignment also works out with the left arm in place.
Ravager gun works too.
As does the grenade launcher.
Four guys with interchangeable weapons.
Once I paint these, they'll show up in my 'painted stuff' topic on Dakka :)
Tags: assembly heavy karist modeling trooper tutorial walkthrough
Modeling Spotlight: Assembling the Broken Sig Jammer
Posted on Monday Feb 26, 2018 at 05:00pm in Tutorials
- by Iain Wilson
The Broken Sig Jammer adds some elite tech skill to the Broken faction, taking to the field with Tech Disruptor and Targeting Scrambler in hand to make life awkward for oppressors and invaders alike. This week, we're having a closer look at this fantastic resin model.

The ramshackle fleets of the Broken don't possess extensive R&D departments or mass production facilities, but what they lack in investment, they make up for in unregulated ingenuity and daring invention. The Broken is a haven for technological savants and rebellious hackers, rulebreakers ostracised and hunted by a society scared of their technological prowess. Whether driven to the Broken by the Maelstrom or the authorities, these maverick inventors are encouraged to experiment and tinker. These 'Jammers' soon thrive among the Broken ranks, using their skills to break into computer networks, disrupt signals, and generally set technology against their users. It is a rare mercurial talent to be able to invent the kind of disruptive equipment the Jammers carry, and sending a Jammer Savant deep into enemy territory is not a viable strategy. Instead, Broken leadership encourages anyone with a natural aptitude for technology to become an apprentice, or 'Sig Jammer'. In peacetime, these neophytes are a mixture of servant and apprentice, taking care of a Savant's every need, or searching for the particular parts needed to complete the Savant's latest technological masterpiece.
The Sig Jammer model comes in 5 parts - body, head, Targeting Scrambler and the shaft and emitter for the Tech Disruptor.
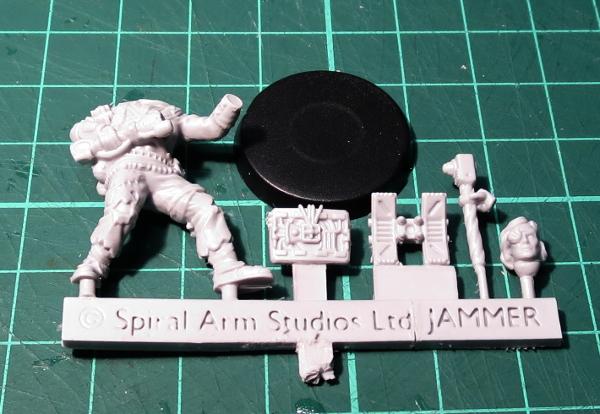
Assembly is nice and easy, although if you haven't built resin models before you might want to check out my handy guide to working with resin.
The emitter piece for the Tech Disruptor glues neatly on the end of the shaft with a locator socket to seat it firmly in place. The bottom end of the shaft then glues into the haft, and the left hand joins to the extended arm. It's worth dry-fitting the disruptor before you try to glue it in place, just in case the arm isn't sitting quite right - if the disruptor doesn't fit neatly in place, check out the "Nothing to get bent out of shape about..." section in the article linked above.

The Targeting Scrambler is designed to glue onto the model's left forearm, but goes quite neatly on either shoulder, on the model's leg, or even on the back.

Finally, the head sockets into the torso, with the ball joint allowing for a wide range of movement.

The head is compatible with the rest of the Broken range, so you can easily mix up your Jammers a little by using any of the plastic heads from the Broken Infantry Pack.

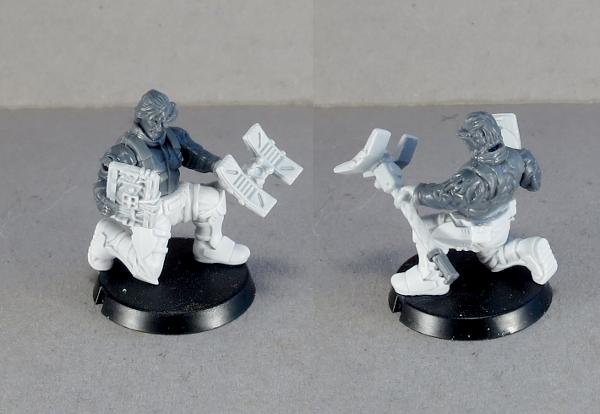
You can vary the posing a little with the addition of some other parts of the Broken infantry sprue as well. The model below has the Scrambler attached to the haft of the Distruptor, and an aerial-style Disruptor made using part of an EMP harpoon and a left hand from the infantry sprue.

In keeping with the scavenging nature of the Broken, you can also mix-and-match parts from the other factions. The below model has legs from a Karist Heavy Weapon trooper and the torso from an Epirian Contractor, with arms and head from the Broken Infantry Pack.
With a little creative trimming and chopping, the Jammer model also makes a great fire support team member. Here, I have used the front half of a Longbeam Rifle in place of the Disruptor.
Do you have a Sig Jammer model to show off? Need help with assembly, painting or gaming? Pop along to the Comm Guild Facebook page and share your work!
To pick up the Sig Jammer or any of the rest of the Maelstrom's Edge model range, visit the webstore here.
For other Maelstrom's Edge modeling articles, including tutorials and walkthroughs of a wide range of different building and miniature projects, check out the article roundup here.
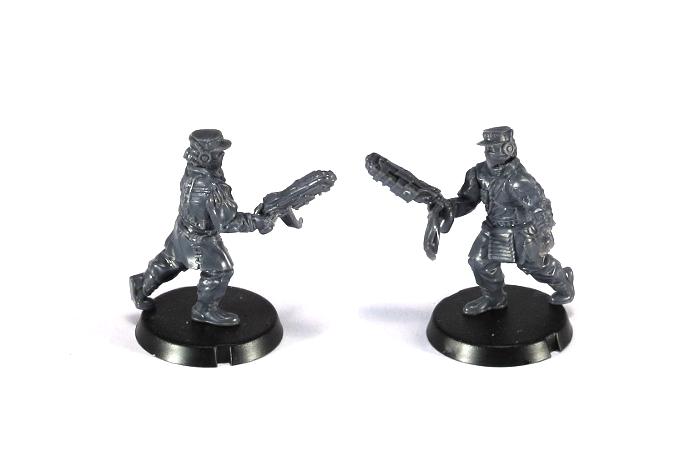
Assembly Guide - Broken Rabble
Posted on Monday Oct 02, 2017 at 05:00pm in Tutorials
Assembling Broken Rabble Units
General Notes
Polystyrene cement - only use superglue if you want to go insane! All of our models are designed to be assembled with polystyrene cement as it gives some time to re-pose while gluing, fuses the models together and prevents brittle joins like other glues do. Make sure you have polystyrene cement in your toolkit before you begin!
We want you to experiment! We've broken our models up into lots of parts and given a fair few spare parts so that you can push yourself out of your comfort zone, learn new skills and create some really unique models. We've tried to price things so that it won't break the bank if you make a mistake, so please cut stuff up and have some fun. Start simple with a slice here and a re-pose there, and watch your confidence and skills increase until you are a master modeler!
Basing - Always make sure you glue your model to its base with an eye on the arc markers on the sides of the base. The arc marker indents should be at the halfway point between the front and back of the model to show the front and back halves of the model when gaming. See the Maelstrom's Edge rulebook for more detailed notes on this.
Dry fit before gluing! - There are lots of pose options possible, but that means there is also the freedom to screw up and make some bad poses! Sticking the parts together and seeing how things look will usually lead to a model that is fairly static and repetitive. You should consider knee, hip, torso, and arm positions when gluing and ensure that you have a pose in mind before you start gluing things together. If in doubt or insecure about your talents in the posing area, we recommend you try to copy the poses from some of our studio models found here in the gallery.
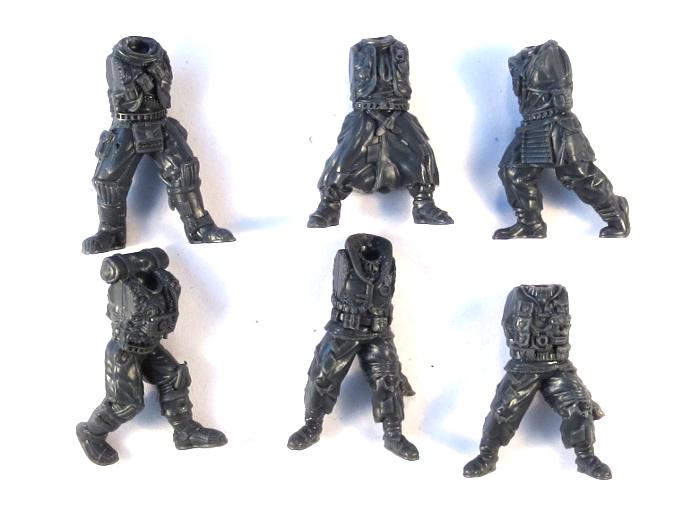
Broken Rabble Assembly Notes
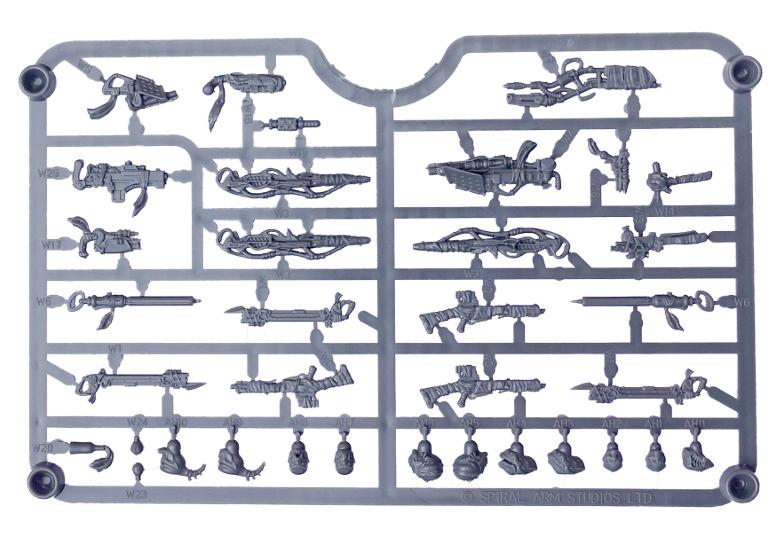
Six Broken models can be made from one set of the Broken Infantry sprues:
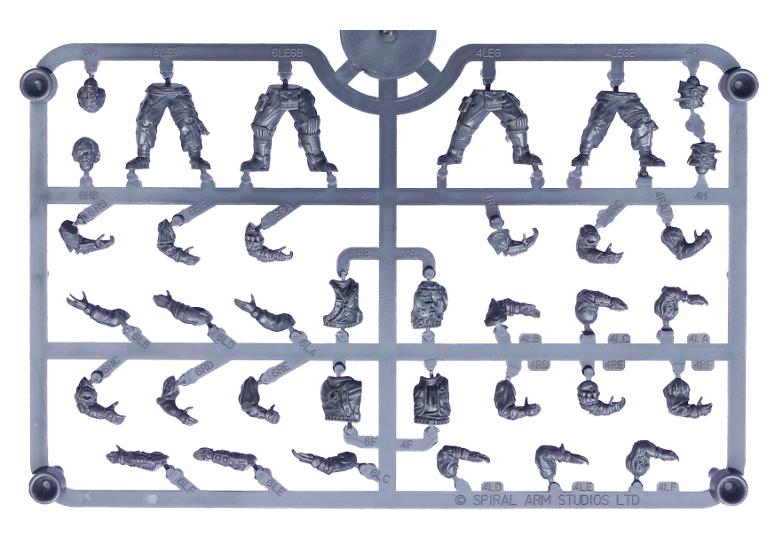
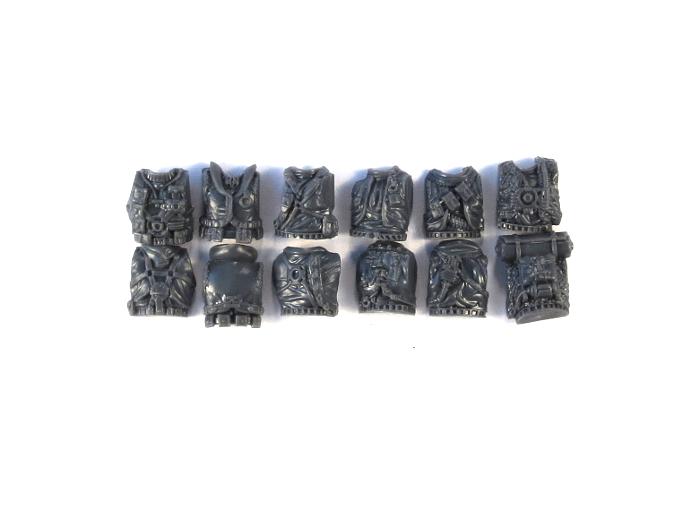
Assembly is fairly straightforward, with everything fitting together where you would expect. There are six different torsos, each with a unique front and back.
You can save yourself some aggravation if you keep the matching parts together when you cut them off the sprue. If they do get mixed up it will help that the fittings are different on each pair, so each front and back will only go together with its correct partner.
The twelve different sets of legs give you a whole slew of options for posing, as with one exception any of the torsos will work with any of the legs. The exception is torso 3 (parts 3B and 3F) which has pouches hanging from the belt. This torso fits with the legs labelled 3LEG and 6LEG, and slightly less flush with 3LEGB, although the pouches hide any slight gap you wind up with on that last set. You can also make this torso fit with some of the other legs if you trim up the bottom of some of the pouches a little.
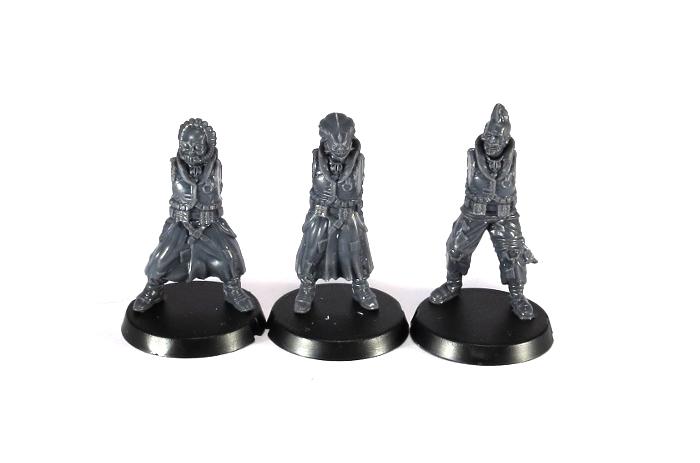
With the torsos glued in place, you might notice that there is a reasonable amount of height variation between the models, which makes for a much more ragtag look to the unit than the usual identically-sized military units.
As with the torso/leg pairing, most of the huge range of heads on the sprues will work with any of the torsos. Torso 2 (2B and 2F) has a rolled cloak across the shoulders and torso 3 (3B and 3F) has a high collar, both of which may get in the way for heads 3H, 4H, 6H, 6HB and AH11.
With the massive range of arms available to choose from, a little experimenting may be required to get just the look you want. Because of the different grips and sizes of the various weapons, some weapon hands have a more open grip and others are more closed, so this needs to be kept in mind when fitting them onto your models. In some cases the 'matching' left arm will work, but for some weapon/arm combinations you may want to tack the right arm and weapon together and then find a left arm that fits best.
The Slug Rifle is the basic weapon of Broken Rabble units. It works best with a more open right hand, as does the Chem Launcher.
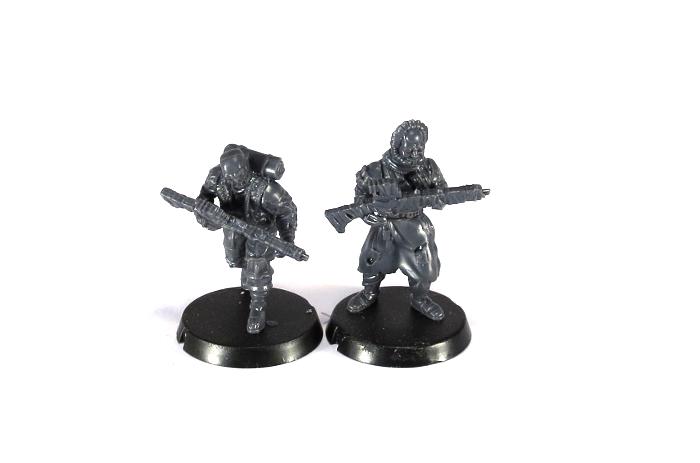
The Auto Slugger and Glue Carbine also work with a more open right hand, but work best with hands 1RC, 3RA, 4RC, 5RB or 6RC.
The Longbeam Rifle and EMP Harpoon can use a more closed hand to latch onto their rear grips, or you can use an open hand for a more relaxed grip.

Likewise, the Glue Rifle can potentially work with either grip style. It's such an unusually-shaped weapon, and can work held a few different ways, so have a play with it and see what you like best!
For some more ideas for building your Broken models or to share your own creations, head on over to the Comm Guild Facebook page.
You can pick up the Broken Infantry Pack, and the rest of the Maelstrom's Edge miniature range, from the webstore here.
For other Maelstrom's Edge modeling articles, including tutorials and walkthroughs of a wide range of different building and miniature projects, check out the article roundup here.