Entries tagged [weathering]
Painting Tutorial: Sponge Weathering
Posted on Sunday Mar 25, 2018 at 05:00pm in Tutorials
- by Iain Wilson
We can wind up spending a lot of time painting miniatures for our games, so it can often be tempting when it comes time to paint terrain to just slap on a quick coat of spray and call the job a good'un. There are a number of quick and easy ways to add a little more detail (and subsequent awesomeness) to your terrain, though, and the difference it makes on the visual impact during your games is well worth making that little bit of extra effort. With that in mind, I would like to share a simple sponge method for adding chips and weathering to your building paintwork.
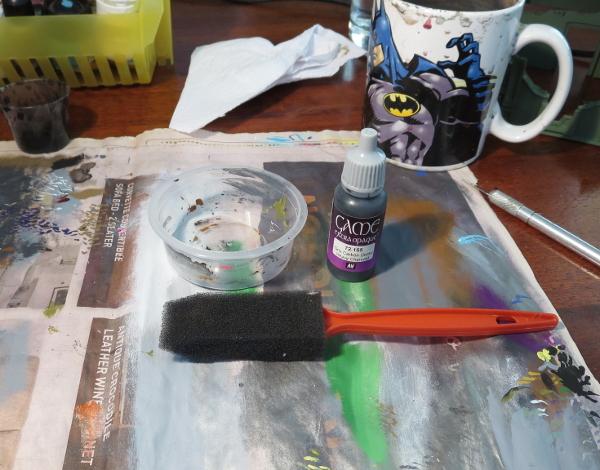
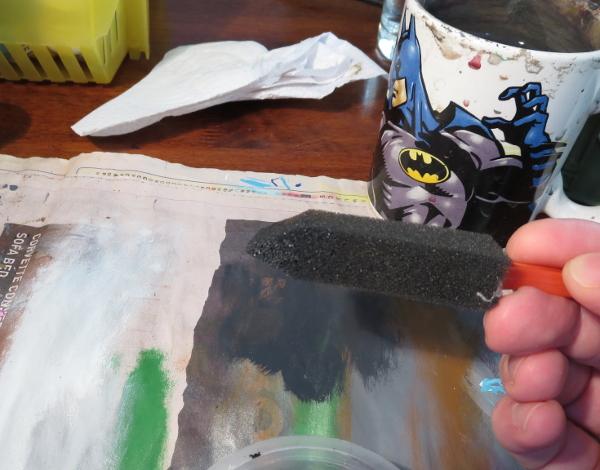
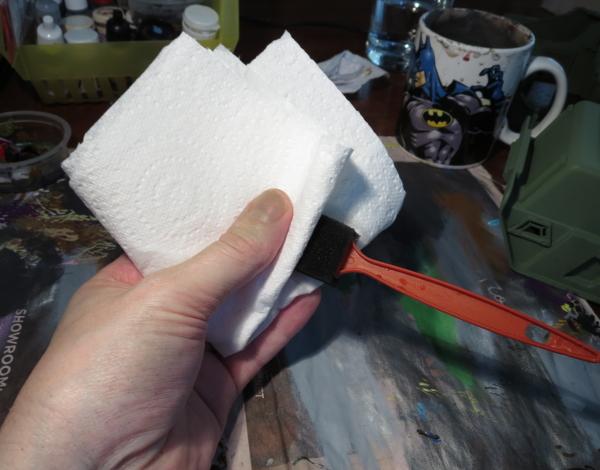
You will need a craft sponge - something fairly soft and fine-weave. I like to use a painting sponge like the one pictured below, as the pointed tip helps to get into difficult corners where necessary. You will also need something to put some paint in or on, some newspaper or paper towel, and (obviously) some paint. This method looks best when applied as dark chipping over a lighter shade of paint. I tend to use Vallejo Heavy Charcoal as a bit of a catch-all. It's darker than most of the colours I use on my buildings, and is indeterminate enough to cover for cement or aged metal. I avoid metallic paints for this sort of weathering, as they can look a little weird unless they catch the light just right. If you want some metalic touches, you can always use a dark grey and then highlight the bigger patches of chipping with a little metal colour.
The weathering is applied once you have the basic colour and any higlighting done on your building, and the process is really simple - Drop out some paint onto whatever palette you are using and dip the tip of your sponge in the paint.
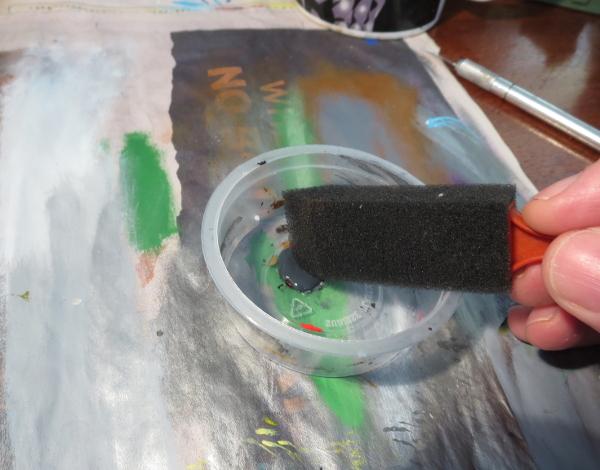
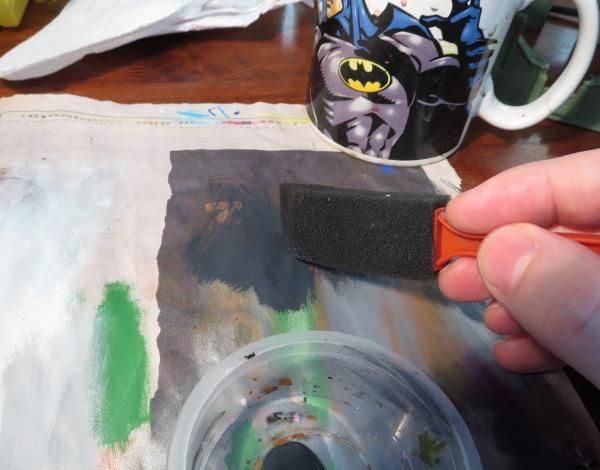
Rub the sponge on the paper to remove any excess paint. You want the sponge to be wet, but not have any gloopy patches of paint. If in doubt, press the sponge against a clean section of the paper and check the result - you're aiming for small specks of colour, not big blobs.
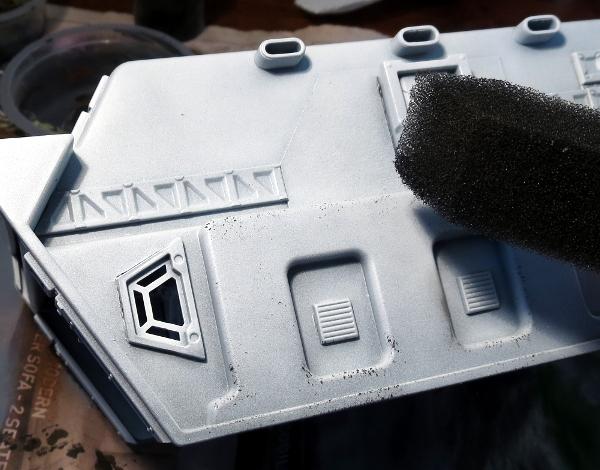
Press the sponge onto your terrain, using a straight up and down motion. You want to dab the paint on, not brush it. Experiment with turning the sponge different ways and using different amounts of pressure to vary the way the chipping is applied, reapplying paint to the sponge as necessary. Apply heavier weathering to places on the terrain that would naturally get knocked or abraded more, like protruding corners of walls or the edges of doors and windows.
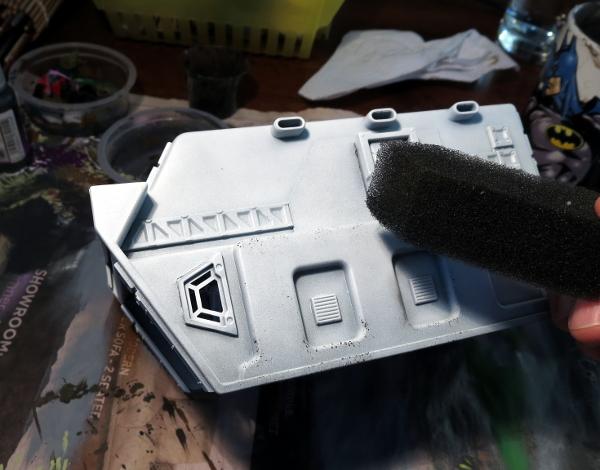
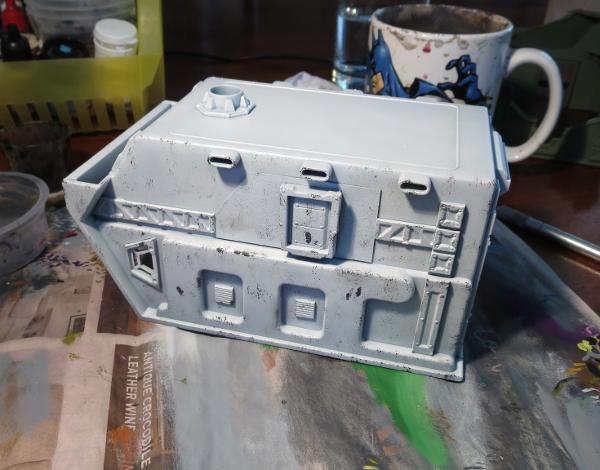
Keep going until you have worked over the whole building.
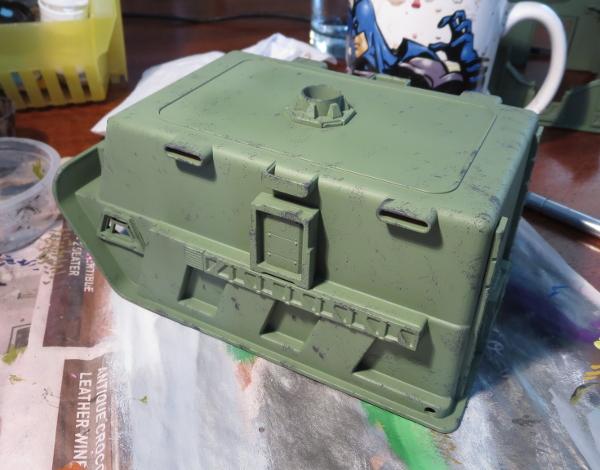
Here's the same thing on a green building.
If the sponge starts to get tacky with drying paint, you can wash it out, squeeze out as much water as you can, and then squeeze it between a couple of sheets of paper towel to get it as dry as possible before going back to the paint.
Once you're happy with your chipping, you can add other details or weathering as required. A strategic drybrush of brown in high-traffic areas, or just here and there for a bit of added grime, can go a long way to complete the weathered look.
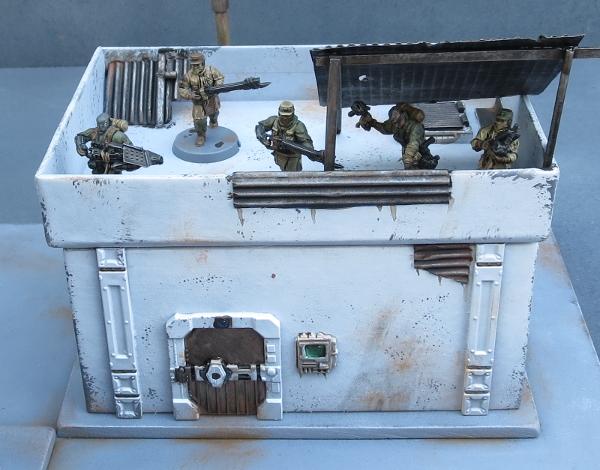
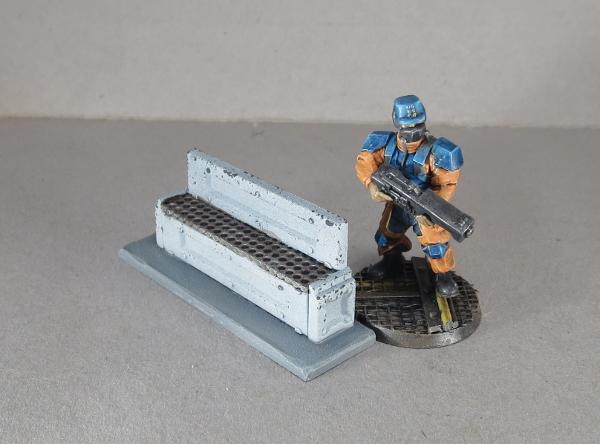
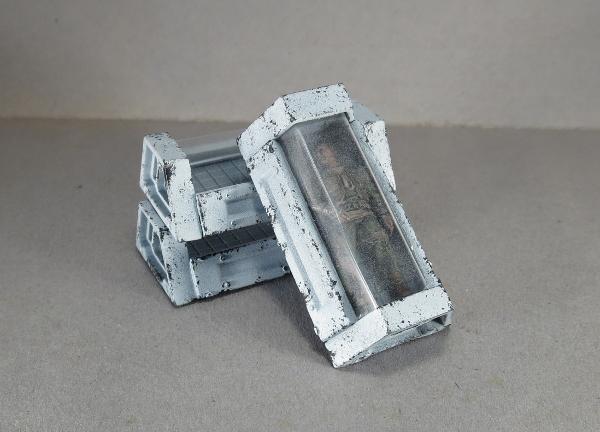
Here's some finished examples of the technique in action:
Broken Settlement building (Tutorial)
Park Bench (Tutorial)
Sleeper Caskets (Tutorial)
Hab Dome (Tutorial)

You can find the Maelstrom's Edge terrain sprue along with the rest of the game range in the webstore here. As always, we would love to see your creations on the Comm Guild Facebook page!
For other Maelstrom's Edge modeling articles, including tutorials and walkthroughs of a wide range of different building and miniature projects, check out the article roundup here.