Terrain Walkthrough: Epirian Stockyard
Posted on Monday Jan 16, 2017 at 05:00pm in Models
 - by Iain Wilson
Someone once declared that there are no cows in space. Which would be disappointing, because then there would be no Space Cowboys... and then where would we all be?
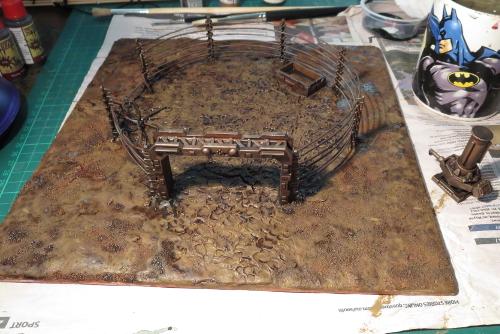
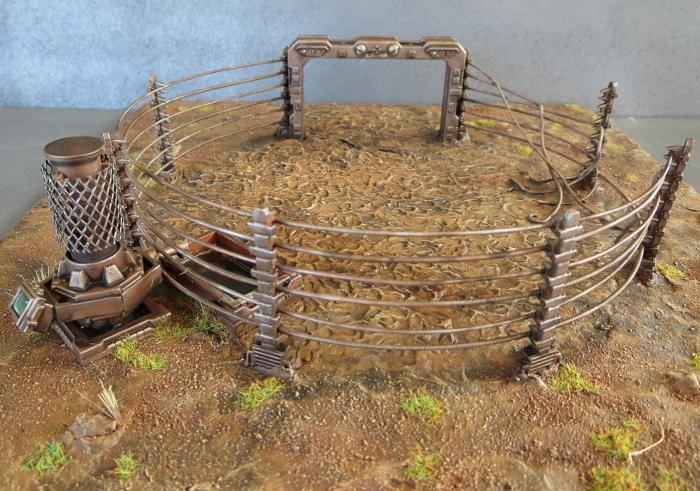
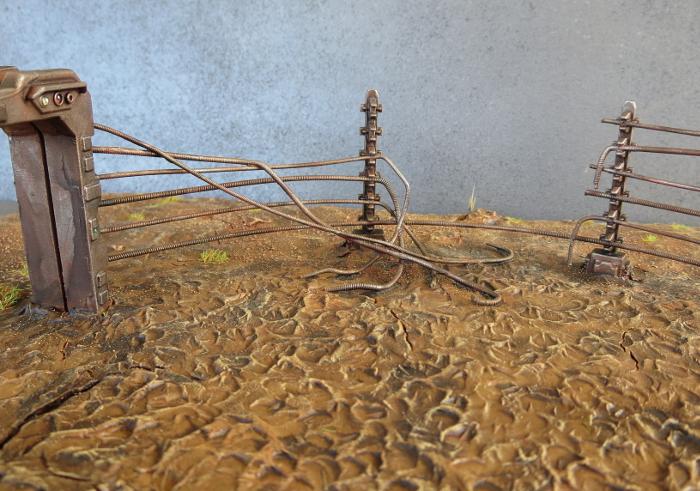
Since I prefer to believe that there are cows in space (can't stop the signal!), I decided to have a bash at building somewhere to put them, using the Maelstrom's Edge terrain sprue, some old guitar strings and some air-drying clay.
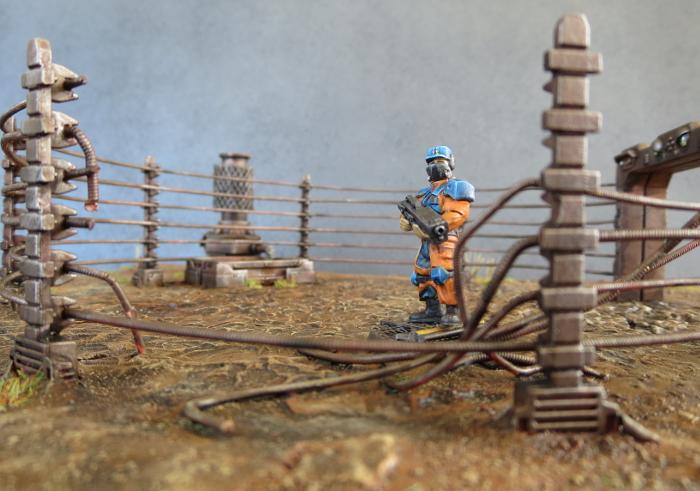
The aim here is for a terrain piece that will block movement in certain directions while still allowing fairly open fire lanes, just to mix things up a bit. To this end, rather than building a nice, neat yard, I decided to make it a bit of a beaten-up derelict - something that you would find on an old battlefield, rather than in the midst of a new settlement.
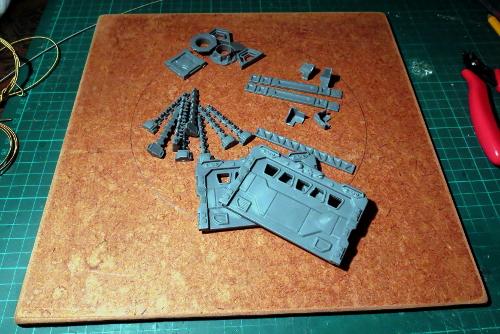
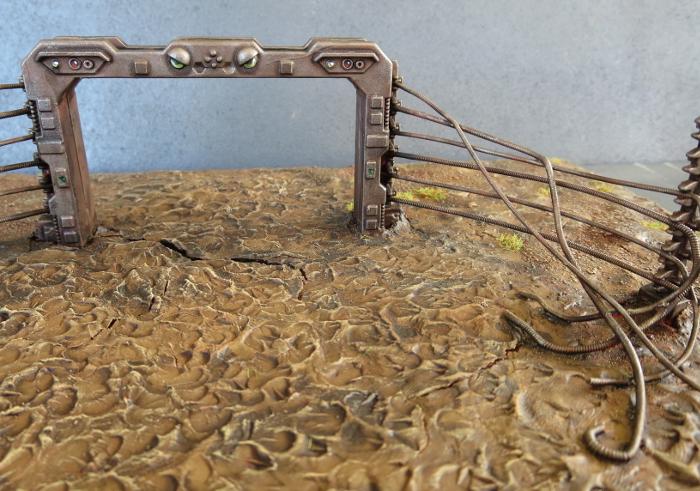
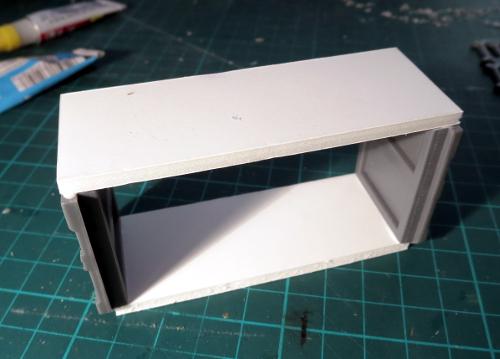
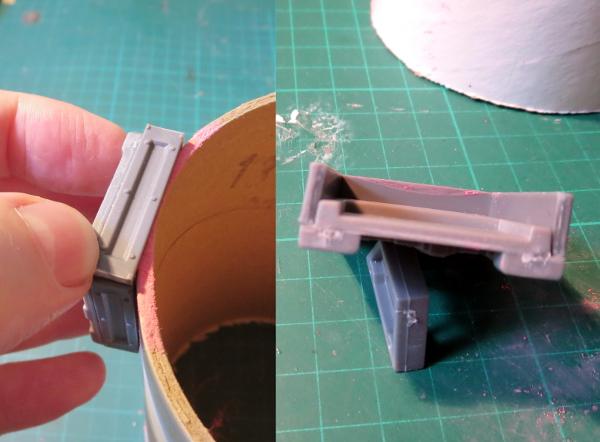
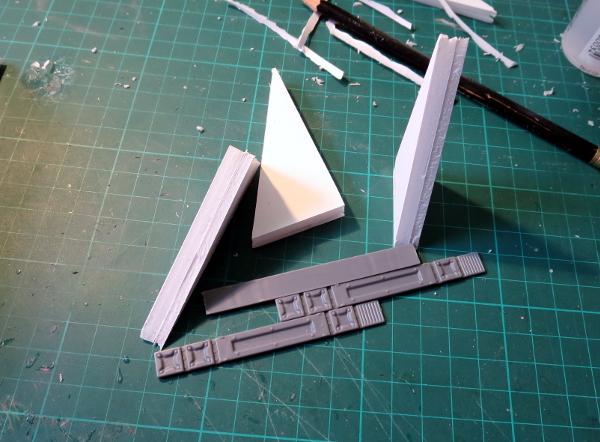
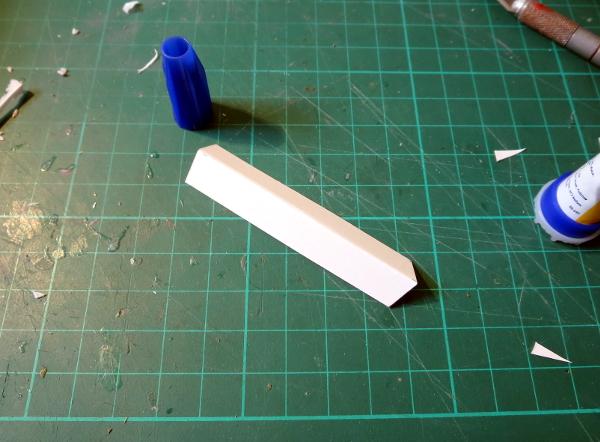
The first thing to do was to remove the doors from the doorframes. I cut as far down each side of the door as I could with a razor saw, and then scored around the top with an exacto knife until it was weak enough to snap the door out. This was repeated on the other door, and then the two door frames glued together back-to-back with a support strut running along the top joint and some fence posts on either side.

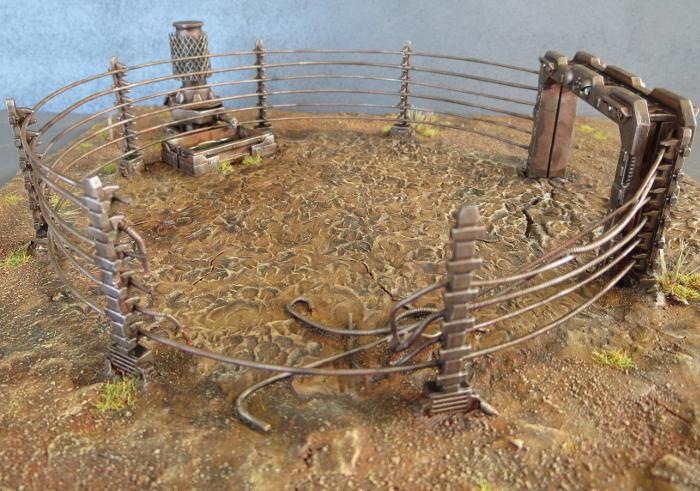
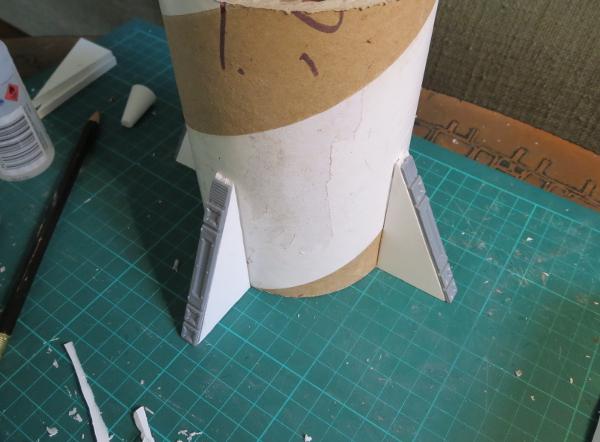
Next I traced a circle onto the base board using a bowl as a guide, and spaced out the doorway and the fence posts around the circumference. This would form the boundary of the yard.
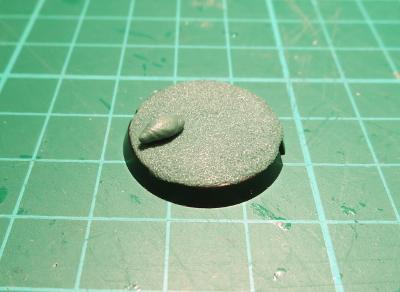
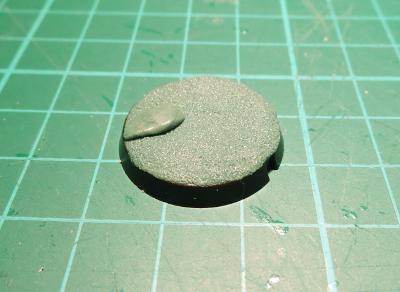
I wanted the ground in the yard to look churned up by the constant stream of livestock that would have been going in and out when it was operational. To this end, I pressed a thin, rough layer of air-drying modeling clay over the interior of the circle and the area just outside the doorway.
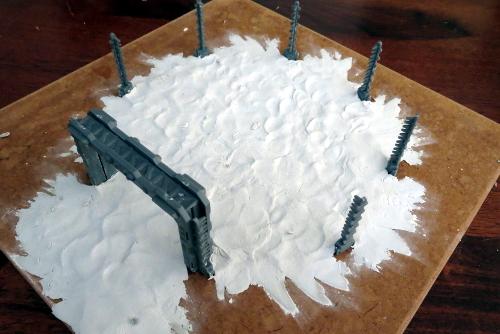
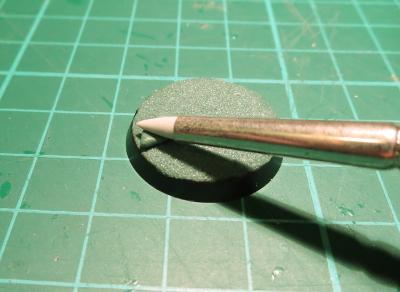
Into this, I pressed hoof-prints with a piece of sprue trimmed off square and carved into a rough hoof shape.

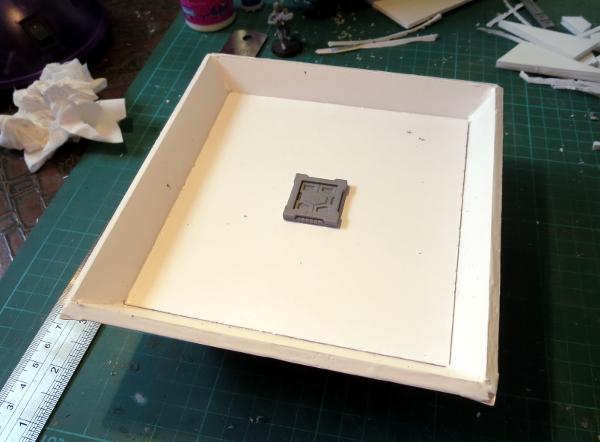
While this was drying, I built a trough out of the corner pieces and the cut-down support struts. This was pushed into the clay beside the fence line, so that it would sit flat once the clay was dry.
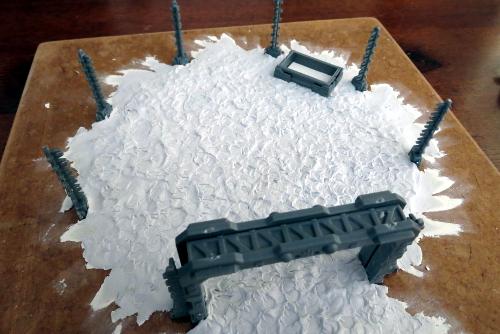
Once the first lot of clay was dry, I prepared a second batch of clay by kneading in some fine sand/gravel mix for texture and a little PVA glue to help the gravel bond in. I pressed this around the area outside the fence, wearing rubber gloves to avoid leaving fingerprints. To create some patches of slightly chunkier texture, I then pressed some scattered patches of gravel into the surface.
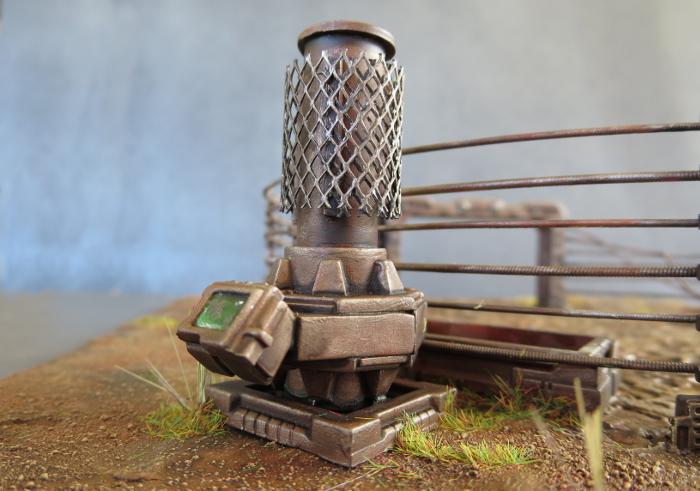
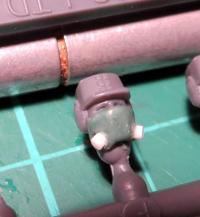
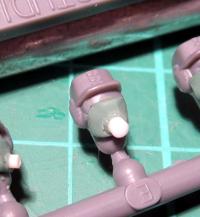
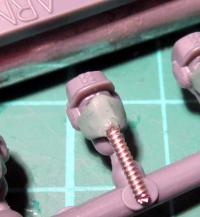
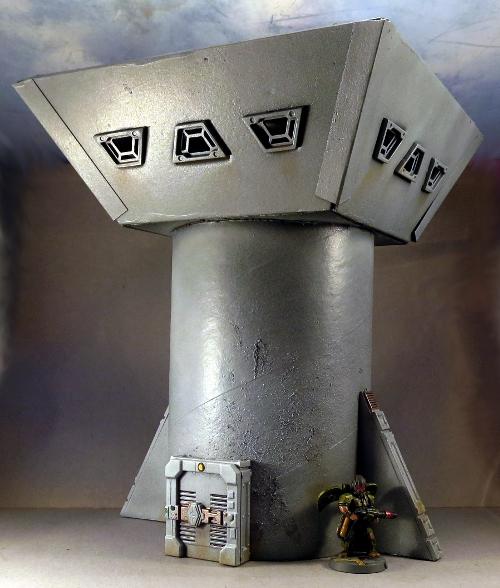
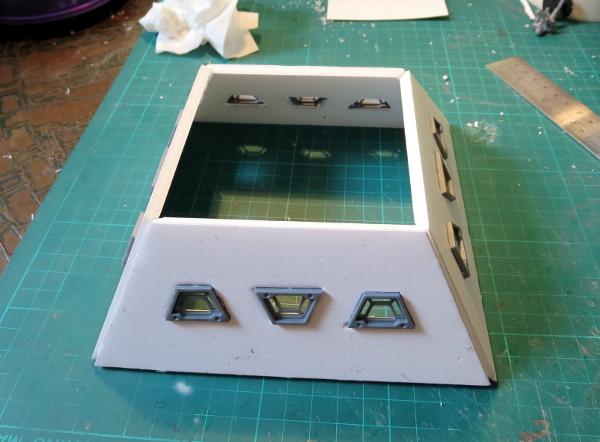
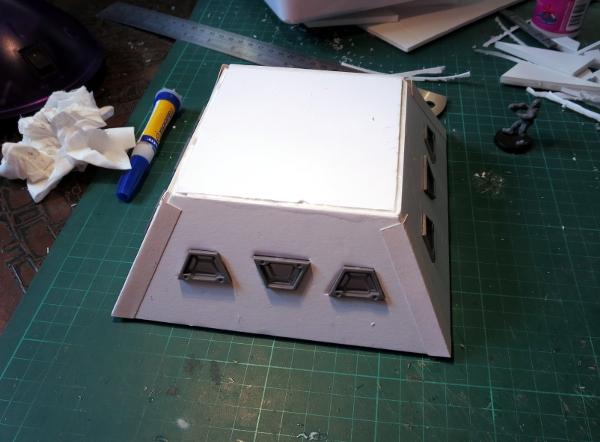
As this left me once again waiting for clay to dry, I built a condenser unit to fill the trough. This used the square hatch as a baseplate. On top sits an upside-down large pipe fitting, then two trapezoid windows butted up together along their bottom edges to create a hexagon shape, and then another large pipe fitting. A length of plastic pipe with some metal mesh wrapped around it over some spacers, capped off with the top of a knife blade cylinder, finished off the condenser itself, and then I added a control panel using a cut down display unit and a piece cut off the end of a lintel.
The condenser unit would sit on the outside of the fence, with a fill pipe running between the railings and over the trough.
At this point, it was time to add the fence. I ran lengths of guitar string around the perimeter, gluing the strings into the emitter forks on the fence posts.
To create a little extra detail and avoid only having a single entrance to the terrain piece, I put a break in the fence on the side opposite the trough.
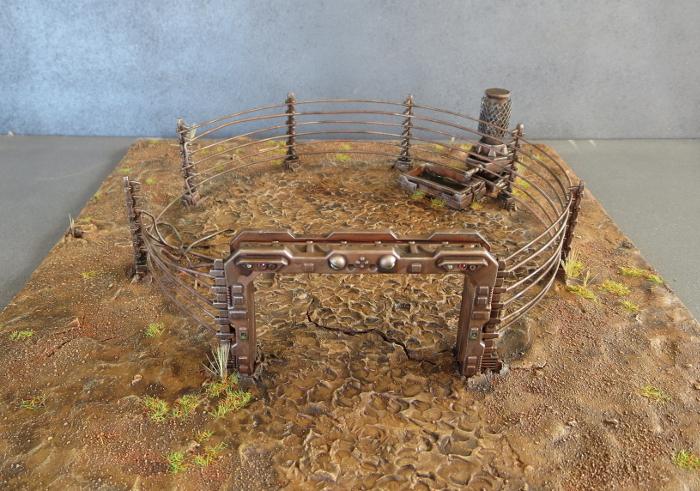
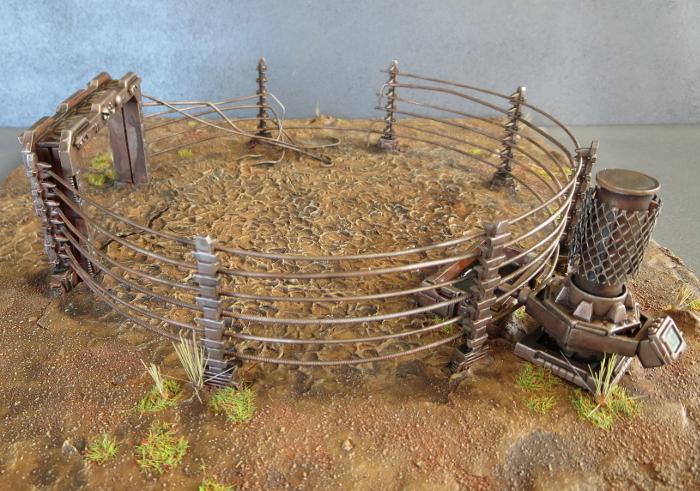
From there, all that's left is to paint it.
The whole thing was sprayed with some matt red. I then basecoated the metal parts with Coat D'arms Hairy Brown, followed by a heavy drybrush with Citadel Boltgun Metal. The ground was painted with a coat of Vallejo Heavy Brown, slightly watered down so that the red tint would show through in patches. The whole thing was then doused in a liberal coat of Army Painter Strong Tone.
Once that dried, the metal was given another light drybrush with Boltgun Metal and the various panels and lights painted in. The ground was drybrushed with P3 'Jack Bone.
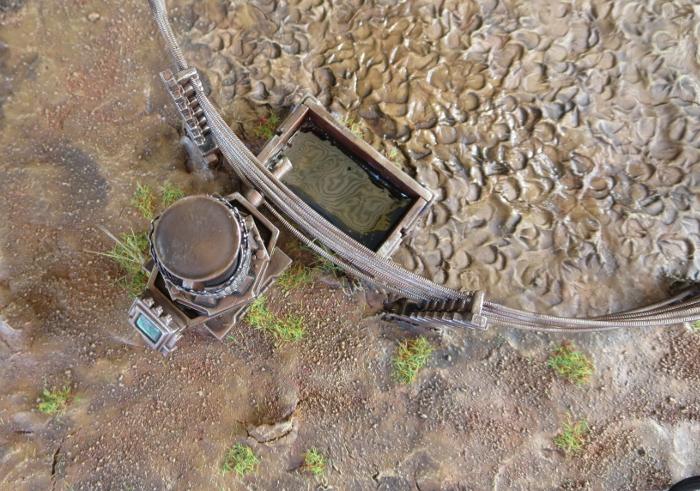
Some tufts of static grass were scattered around for some colour, and some longer grass tufts made from toothbrush bristles placed wherever seemed appropriate. I concentrated the grass patches a little around the condenser and trough, as the plan was for this to still be functional. To this end, I poured a small amount of Woodland Scenics water effect liquid into the trough, and stirred in a couple of drops of Strong Tone and Green Tone to make it look sufficiently ick.
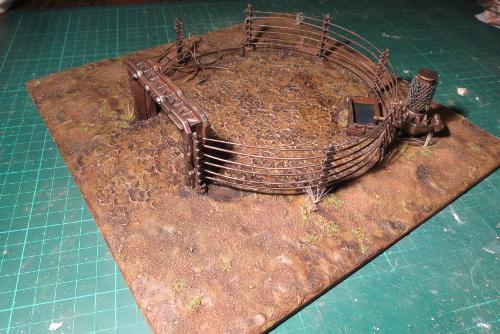
You may notice a shiny patch in front of the trough in the above picture. This was the result of some messy pouring from the water effects bottle dripping onto the ground in front of the trough. Accidental, but I decided I liked the effect so made sure the shiny patch goes all the way up to the side of the trough where it is presumably leaking out through a hole or crack underneath somewhere.
With the first layer of water effects dry, I added just a touch extra on top to reduce the concave shape of the water surface. As a final touch, the toothbrush bristle grass tufts were given a wash of Strong Tone and a drybrush of Coat D'arms Putrid Green.
If you would like to have a go at building your own stockyard, you can get the Maelstrom's Edge Terrain Sprue (in a handy two-pack) from the online store here. If you don't happen to play a guitar, cultivate a friend who plays for their cast-off strings. Otherwise, stores that sell guitars will often have discount strings that they are clearing out (the quality of the string as an actual guitar string is irrelevant here, so cheap ones are just fine!) and may even have some broken strings laying around that they would be happy to get rid of.
As always, we would love to see what you come up with, so please feel free to share your creations on the Comm Guild Facebook page here!
Tags: ruin terrain walkthrough
Terrain Tutorial: Shipping Container
Posted on Monday Jan 09, 2017 at 05:00pm in Tutorials
- by Iain Wilson
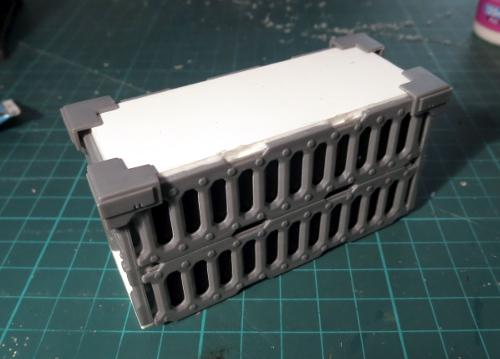
A while back, we showed off a shipping container made from components from the Maelstrom's Edge Terrain Sprue. This week, I'll be showing how to build it for yourself.

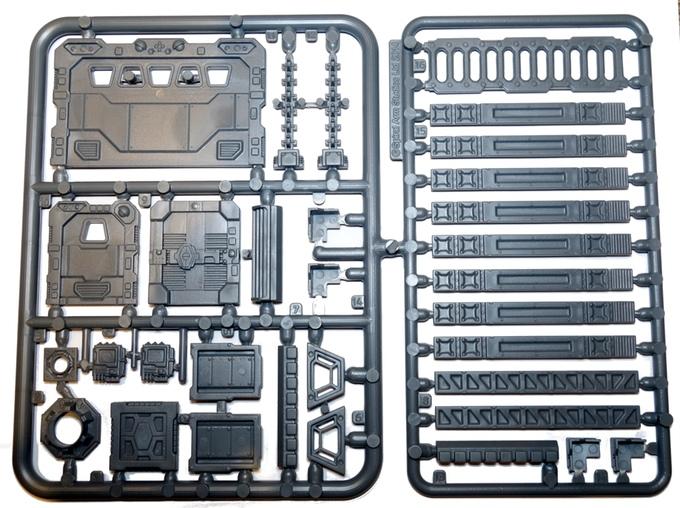
The terrain sprue is a fantastic source of interesting bits and pieces to spruce up your homemade terrain and, for the uninitiated, looks like this:
What you need:
You'll need four terrain sprues for this build, from which you will need:
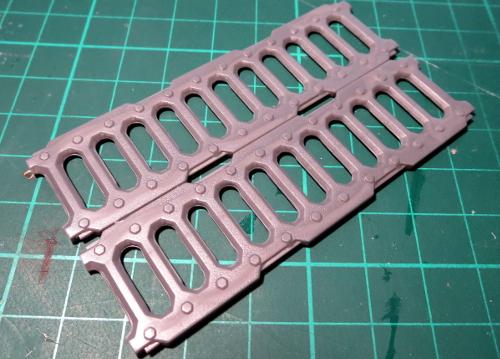
- 4 x ladders
- 8 x corners
- 2 x heavy doors
 (I will be going through some ideas for using the other sprue components in the coming weeks.)
You will also need:
- 3mm foamcore
- A sharp hobby knife
- A steel ruler
- A pencil
- Superglue
- PVA glue or Foam glue (more or less the same as PVA, but slightly faster setting and formulated specifically for gluing foam)
What you do:
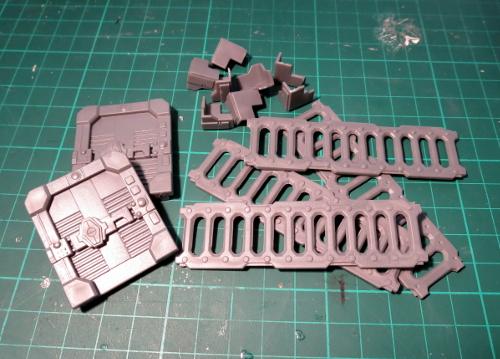
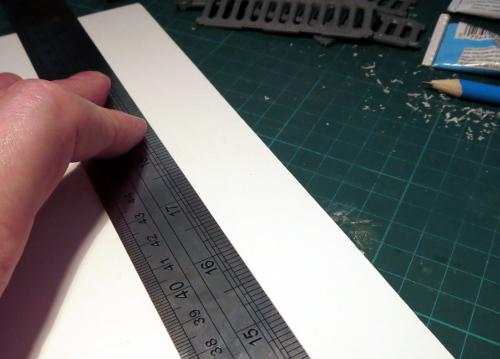
Clean the mould lines off the components. Then from your sheet of foamcore, measure out and cut a strip that is 31mm wide.
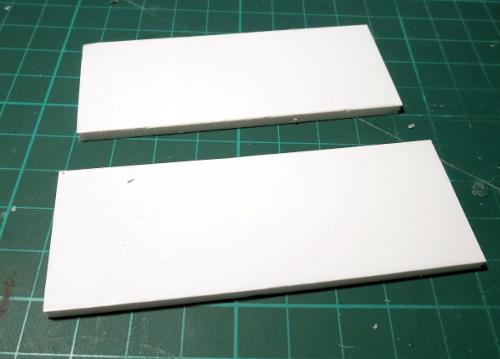
From this strip, cut one piece that is 81mm long, and another 87mm long.
Using your PVA/foam glue, glue the 81mm strip bridging the tops of the two doors and sitting on top of the inset support that runs around the back of the door. The PVA is better than superglue for this initial assembly partly to avoid melting the edges of the foamcore (superglue melts expanded polystyrene) and partly to give some time to manipulate the structure as you build it, to ensure that it winds up square.
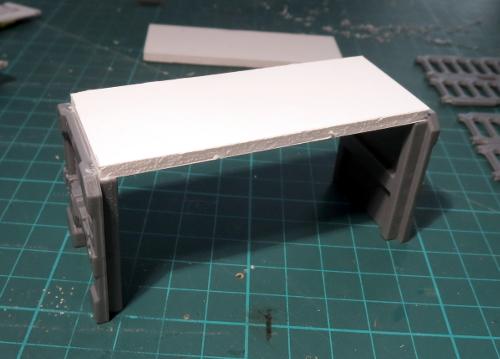
Once the glue has grabbed sufficiently to stop everything from falling apart when you move it, flip the structure over and glue the longer strip bridging the bottoms of the doors. The ends of the foamcore strip should be flush with the widest part of the bottom of the doors.
Using the superglue (or plastic glue if you prefer) glue two of the ladders together along their long edges. You can use the edge of the steel ruler to make sure that the ends are square. The do the same with the other two ladders.
Then, using the PVA/Foam glue again, glue the first pair of ladders into place along the side of the structure, with the raised-detail side outwards. You can lay the container on its side on a gridded cutting mat or use a set-square to make sure that the structure is all squared up at this point, and nudge it into shape off it doesn't all quite line up.
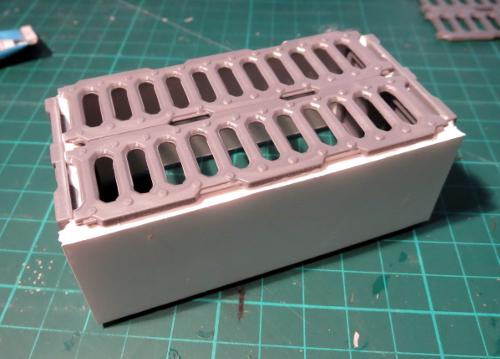
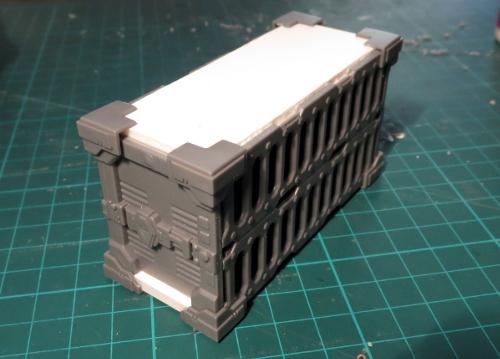
If you're building an open cage-style container like the one pictured at the start of the article, this is a good time to stop and let the glue set, and then paint the inside of the container - otherwise, it's going to be considerably harder to do once both sides are glued on.
Alternatively, you can cut a couple of pieces of foamcore or thin cardboard to glue to the inside of the ladder-walls to create an enclosed container.
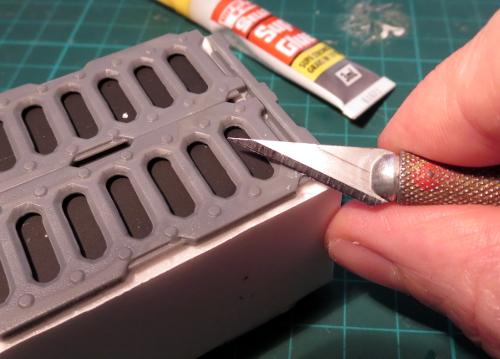
Once you have painted the interior, or glued the interior panels in place, glue the second set of ladders on the other side. Then, using the hobby knife, trim off the bolts closest to the corners of the walls.
Take four of the corners, and glue them over the top corners of the container. Use superglue for this step, to give the structure some extra strength.
The other four corners will be going on the bottom. They need a little trimming so that they don't protrude over the bottom of the door - just bevel on corner off as below, and then opposing corner on the matching edge.
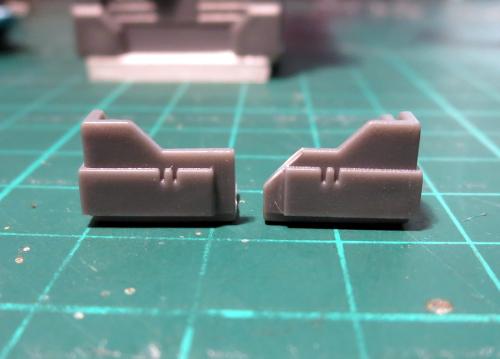
These can then be superglued in place around the bottom of the container. For this step, make sure you only get the superglue on the card side of the foamcore and on the plastic components where they touch - avoid getting glue on the foam edge of the base piece.
Once all your glue has set, the container is ready to paint! If you are intending to use spray paint, you will need to paint a thin layer of PVA or Foam glue over any remaining exposed edges of the foamcore first as, like superglue, most sprays will at least partially melt the polystyrene.
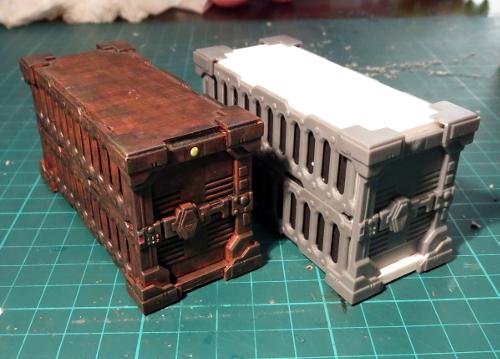
If you want to have a try at building your own containers, you can pick up the terrain sprue from the Maelstrom's Edge Online Store here. And as always, be sure to share your creations on the Comm Guild Facebook page (https://www.facebook.com/groups/MaelstromsEdge)!
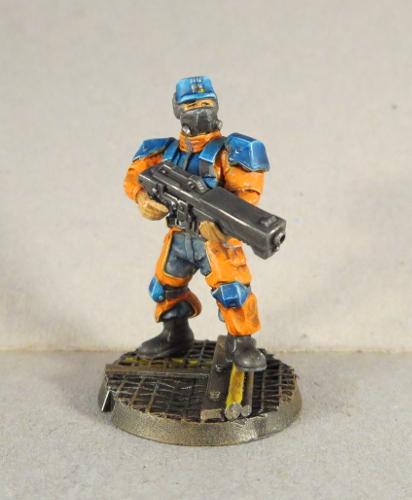
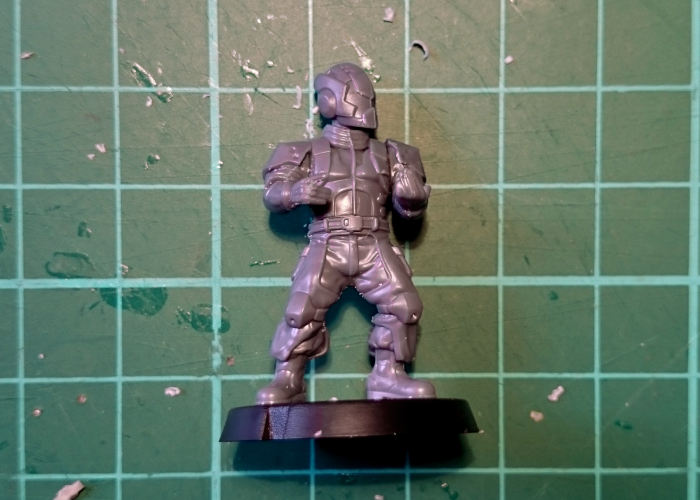
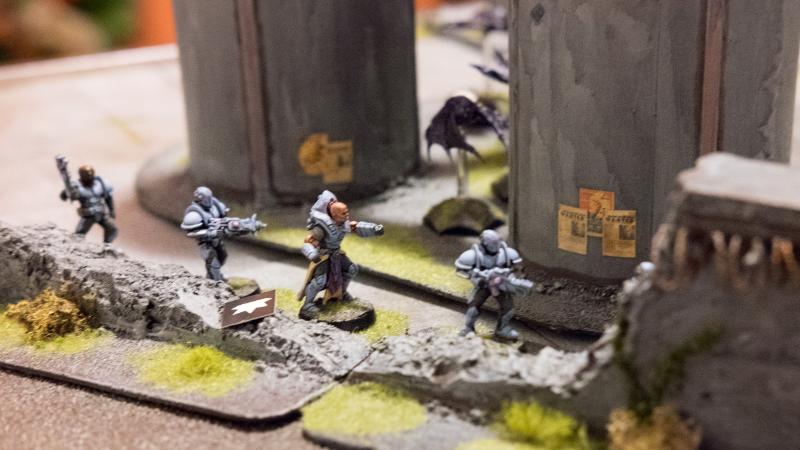
Modeling Tutorial: Epirian Contractor Gas Masks
Posted on Monday Jan 02, 2017 at 05:00pm in Models
- by Iain Wilson
In my continuing quest to find all of the fun and cool ways to customise the range of Maelstrom's Edge plastic models, this week I'm having a look at enhancing the humble Epirian Contractor, through the addition of a gas mask or rebreather to help him to stay upright and functional in some of those less human-friendly environments that they might come across on frontier worlds.
What You Need:
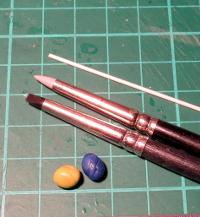
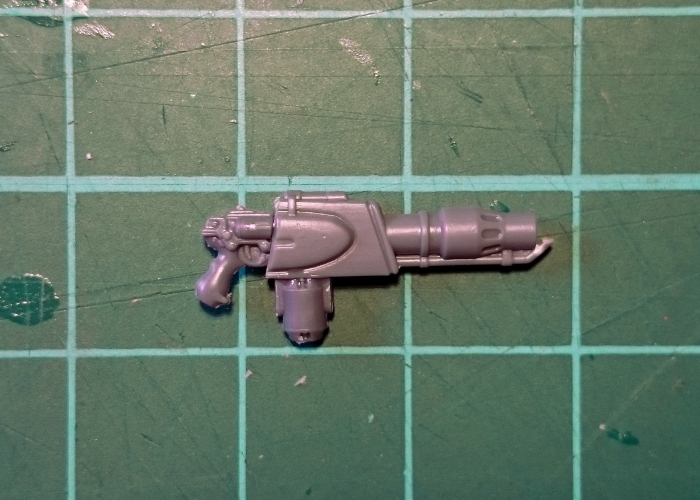
Aside from your contractors, you'll need a little green stuff, some sculpting tools (something flat, and something rounded - I like silicon clay shapers (also sometimes sold as 'color shapers' for painting), as they don't stick to the putty the way metal tools do), a little 1mm plastic rod and you may also find a hobby knife and some superglue useful.
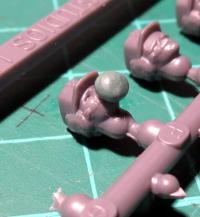
You're best off working with the heads before they have been glued on the model, as you have a little more room to maneouvre that way. I find just working with the head on the sprue works well for this.
Note: For those new to putty work, 'green stuff' is the common name for a product called 'Kneadatite', which is a two-part epoxy putty. You have a blue component and a yellow component that you mix together until they go green, at which point they are pliable for sculpting for an hour or two, after which they set to a slightly-rubbery-plastic consistency.
What You Do:
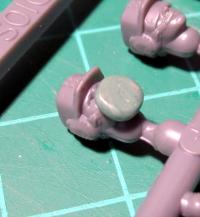
Roll a small ball of green stuff, and press it lightly onto the Contractor's lower face.
Tip: If you're trying to make a number of identical masks, roll out a long, thin sausage of green stuff, and cut off segments for each mask. This makes it much easier to get the same amount of putty for each mask.
Using a flat sculpting tool, press the front of the ball down flat, angling down towards the chin.
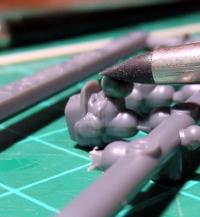
Using a rounded or conical tool, roll the sides of the ball down to meet up with the Contractor's earpieces on either side.
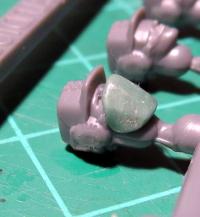
If necessary, use a sharp knife to cut the mask off just a fraction below the chin. If it juts down too far, you'll have problems getting the head to sit right without cutting off the front of the collar.
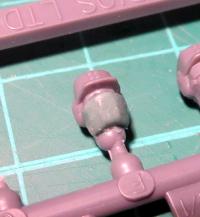
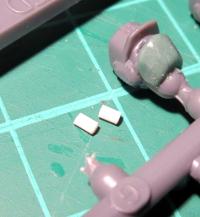
Then, cut yourself two 1-2mm lengths of plastic rod.
Press these into the 'cheeks' of the mask so that they protrude out diagonally downwards. It can help to add a small touch of superglue to the end of the rod that goes into the putty, to help it stick in place. Otherwise, they can work loose once the putty has set.
Leave for a couple of hours to let the putty set, and you're ready to glue the head in place and paint.
You can easily vary the design by modifying where you place the rebreather canister...
...using some guitar string instead if plastic rod, and running it down to a canister on the belt or armour harness...
...or leaving the canister off entirely and having an inset rebreather grill. This style also works well for converting a Karist Angel Keeper.
Working away at your own Contractor Squad? We'd love to see your work! Wander on over to the Comm Guild Facebook page to share your creations!
Battle report: Taking Positions
Posted on Monday Dec 26, 2016 at 05:00pm in Gaming
Originally posted on DakkaDakka by Sgt. Oddball.
Fluff bits are in italics, game bits in plain text.Introduction
Dionne pressed a slip of paper in front of Bacaro. “Here, this is good as you’ll get. The centre lies here in the woods. The scientific crew is packing up their stuff as quick as they can, it’s up to you to get them out safely. The Karists have been spotted in the woods, so I hope you’re on time. Good luck!” With that, Dionne hopped back into the prowler that had just arrived and now blew up a cloud of dust as it tore away into the distance. The whole city was in chaos since the Karists had started their offensive on yesterday morning. Utilising the element of surprise, they had established a more or less coherent front, concentrating on key positions on the outskirts of town. The Director had issued orders for the evacuation of all northern districts and the securing of anything of importance, amongst them VIPs and technical equipment. Having been driven off from the Tusculi Compound at first contact with the Karist forces, Bacaro happened to come across this remote research centre en route to his rallying point. Apparently, the scientific crew here were taking their sweet time getting their stuff together and now risked becoming Karist hostages. Snatching up the bit of paper with the layout of the centre, Bacaro gave the order to advance, still not really sure what to expect. The idea was to help evacuate the entire centre, but priority was to be given to four apparently hot shot Cybel energy scientists, of whom he’d never heard. His only clue was: “look for people with garish outfits, they’re bound to be important scientists”. This would be another crappy day.Mission and objectives
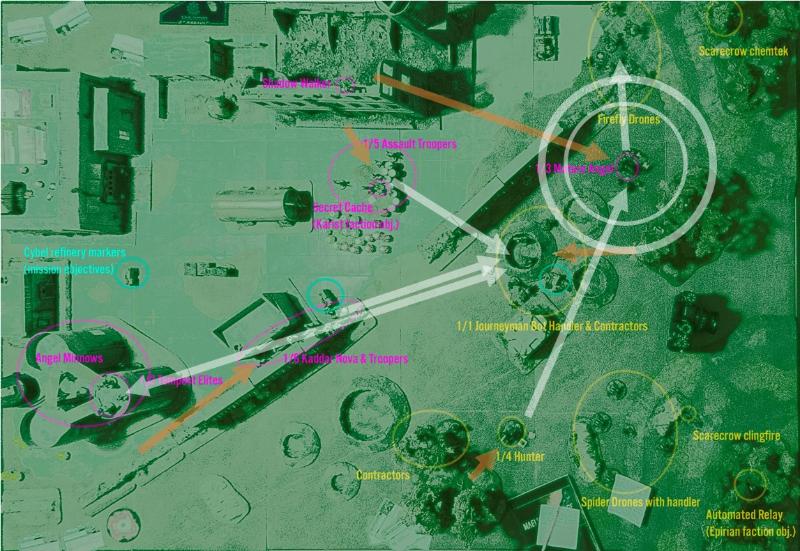
Here’s for our second game, still learning the rules and general flow of the game. The mission was Split Research, which means players got points for keeping an artifact safe, and also for capturing 4 VIPs running around the board.Terrain
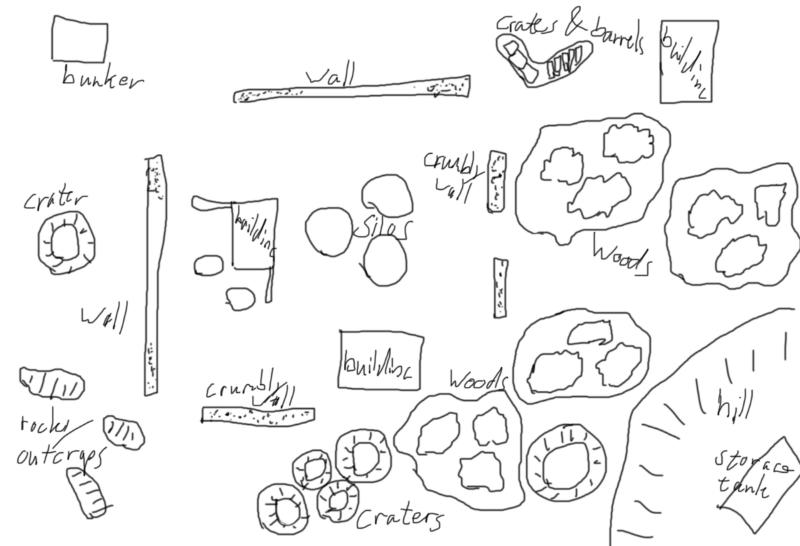
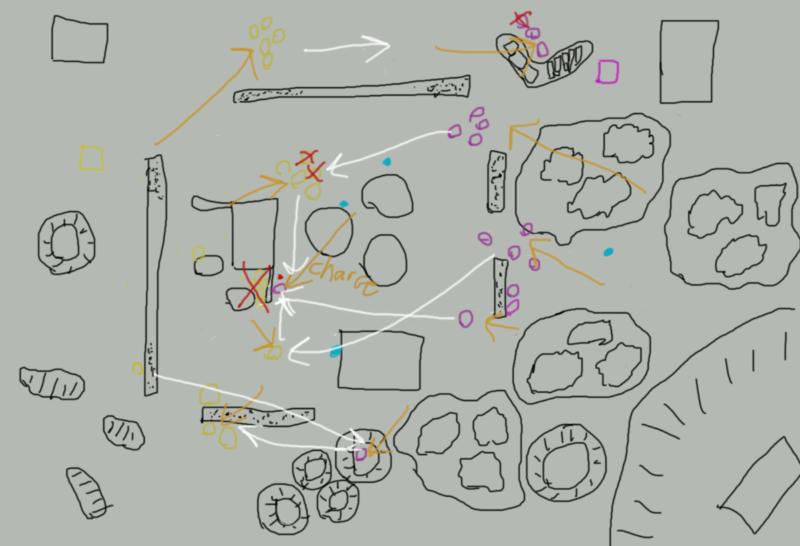
Dionne's doodle
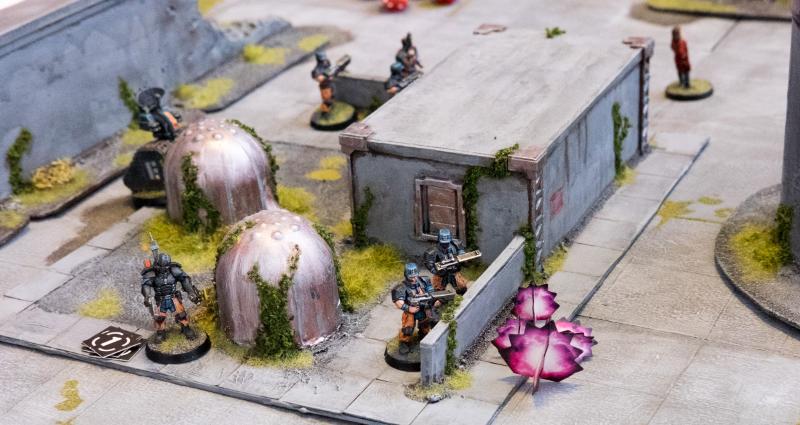
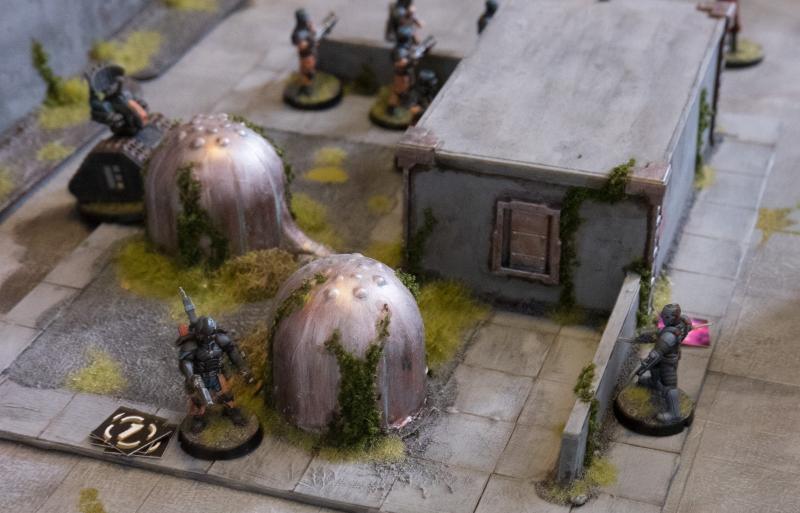
All terrain was assigned cover value 2. The woods and craters are area terrain, the rocky outcrops, buildings, crates & barrels and the walls are obstacles. We didn’t use the actual building rules, so units couldn’t enter.
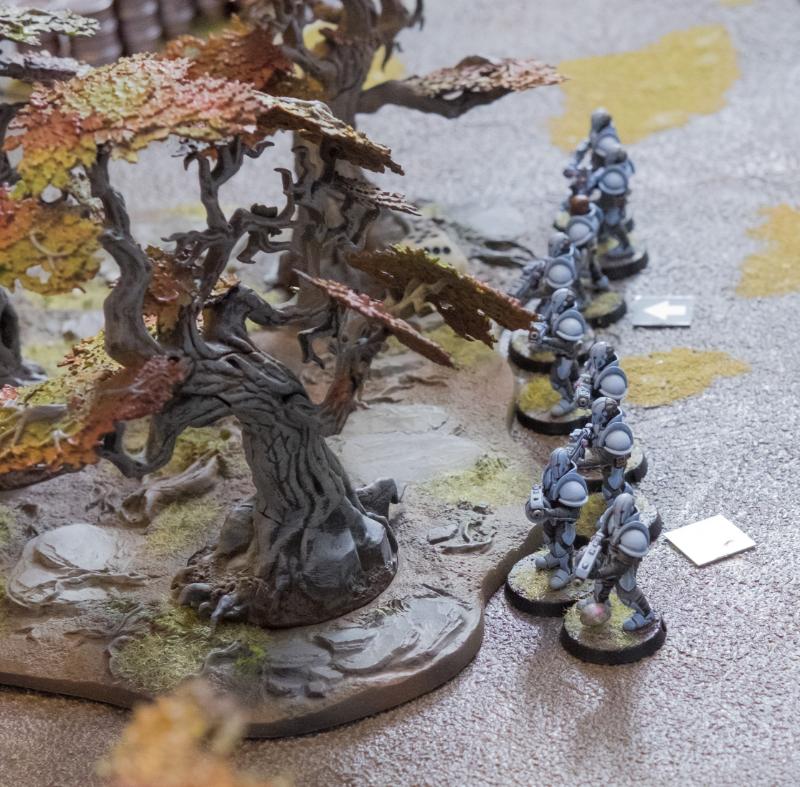
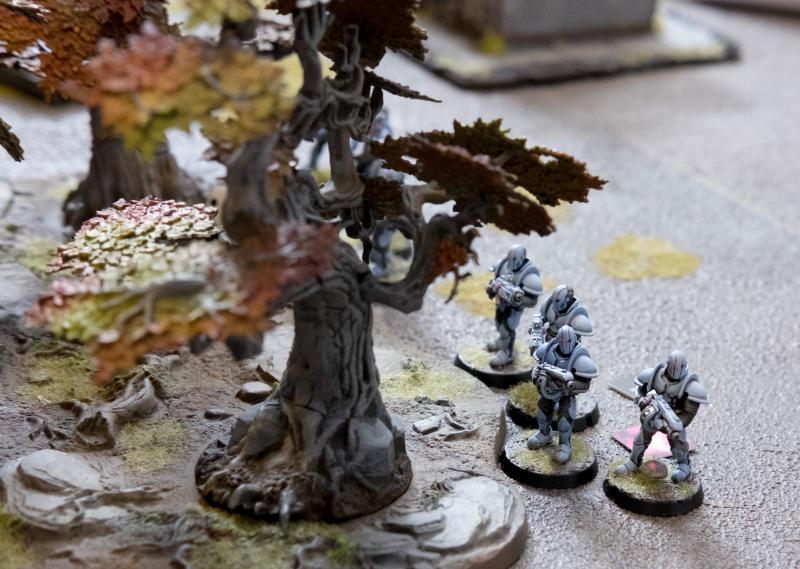
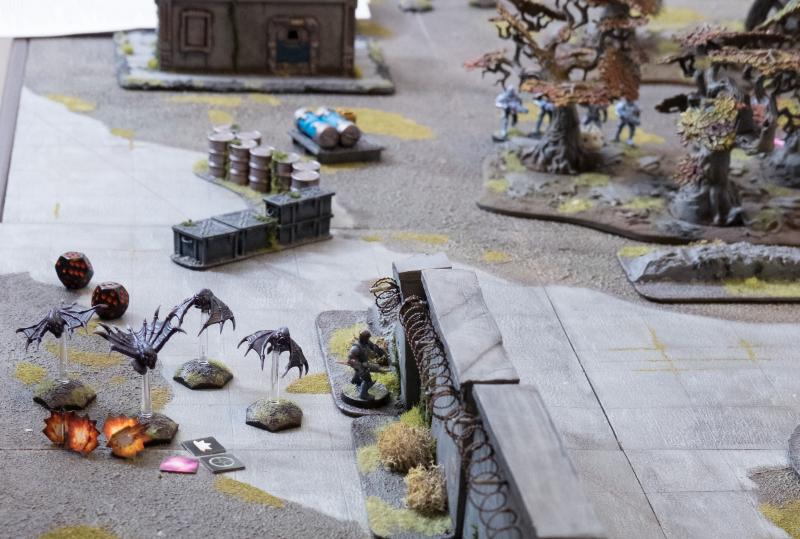
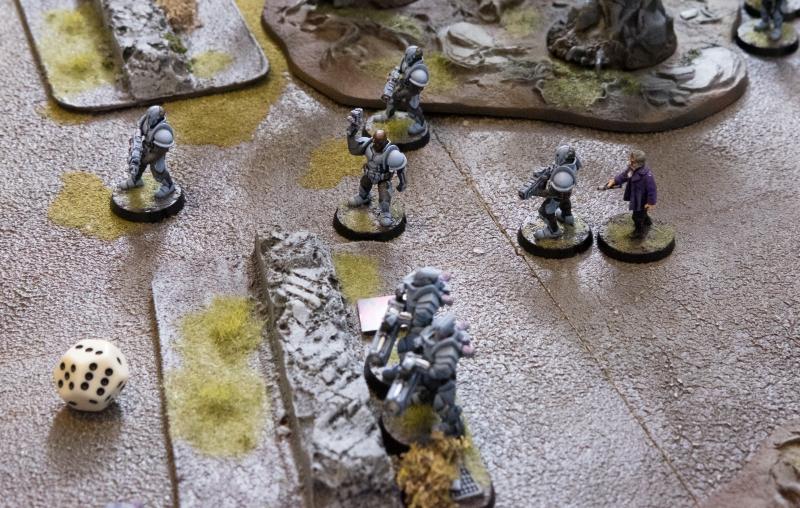
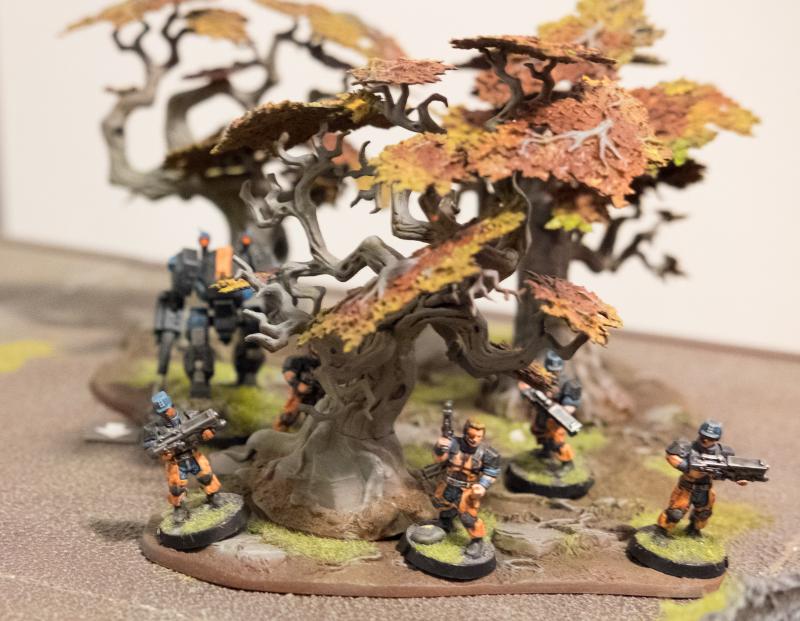
After his successful defence of the Tusculi Compound, Kaddar Nova Myro was tasked with grabbing whatever valuables the surrounding area had to offer. Elyssa, the enigmatic Shadow Walker, had pressed him to venture into this woods and capture some scientists. Myro didn’t see the point of taking home some people who probably did have valuable knowledge, but would just as probably not see the rightness of their cause and just be a general pain in the behind. He did, however, figure that a research centre such as this would harbour some useful supplies. It was with this dual purpose that he now peeked out from behind the treeline and ordered his troops to make a pincer move around the centre and allow no means of escape. They were just in time, from behind the further wall he could see activity of what was doubtless Epirian security forces attempting to beat them to the prize.
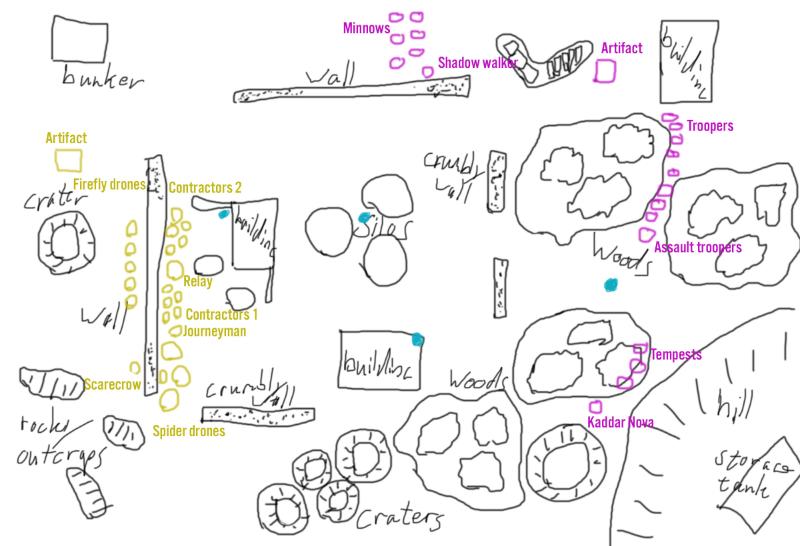
Big flank deployment was rolled for. The Karists bid to be attackers, deploying as shown after the Epirian defenders had turtled around the big rear wall.

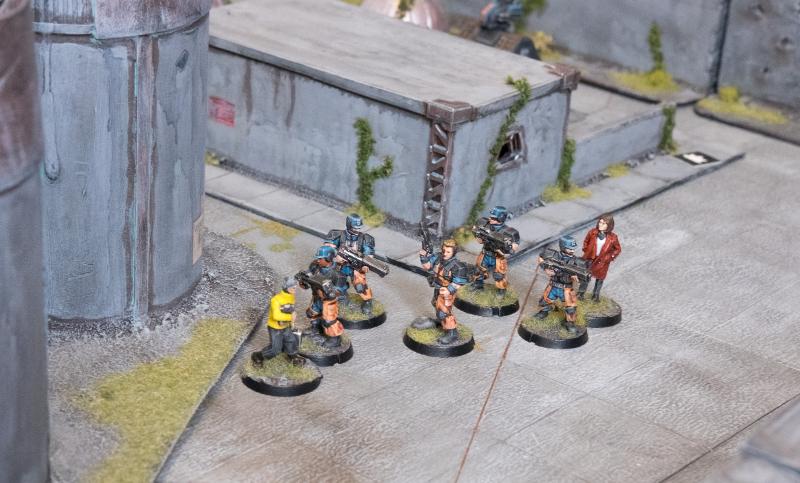
The four VIPs deployed, waiting to be taken.
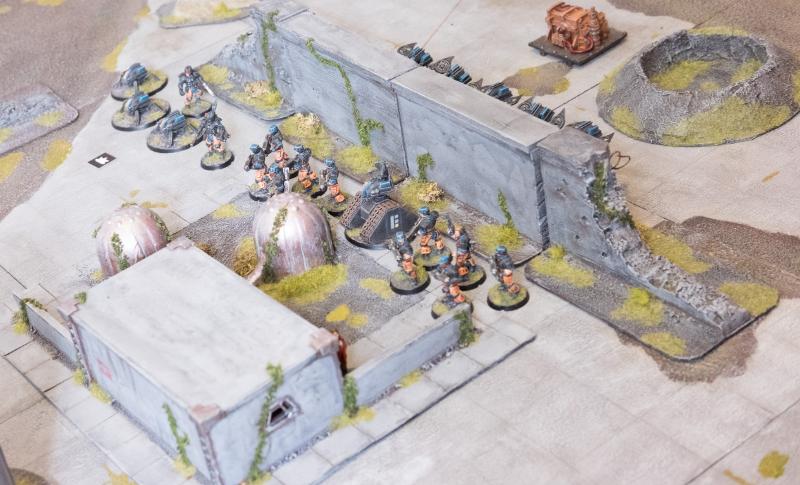
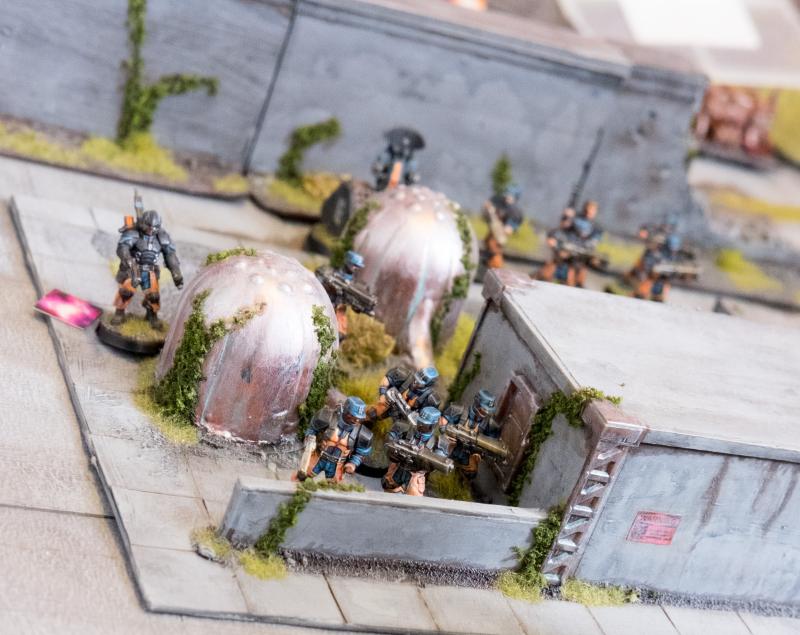
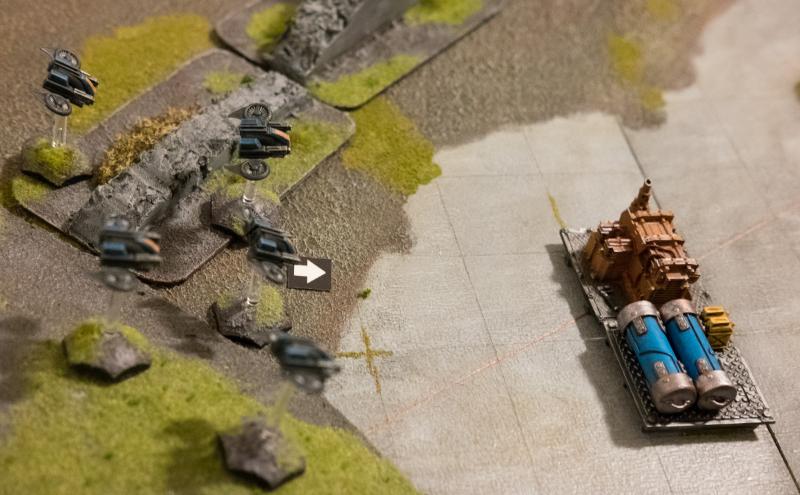
Epirian Deployment. The rusty generator is the Epirian Artifact.
Minnows and Shadow Walker.
Troopers and assault troopers.
The Karist Artifact is the set of blue storage tubes.
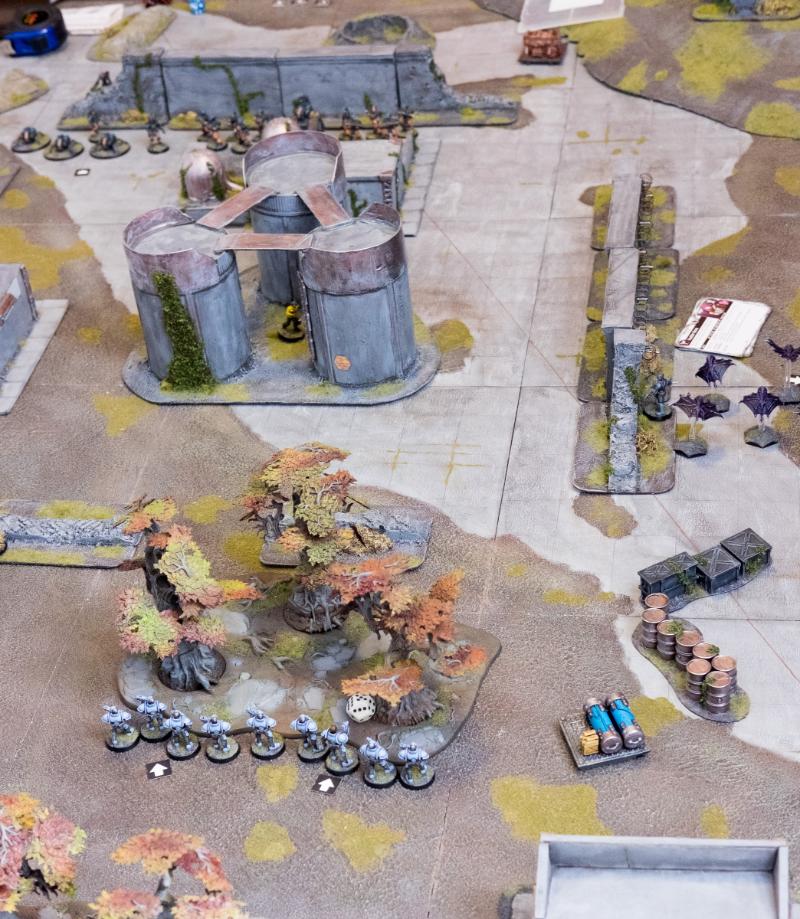
Half board overview.
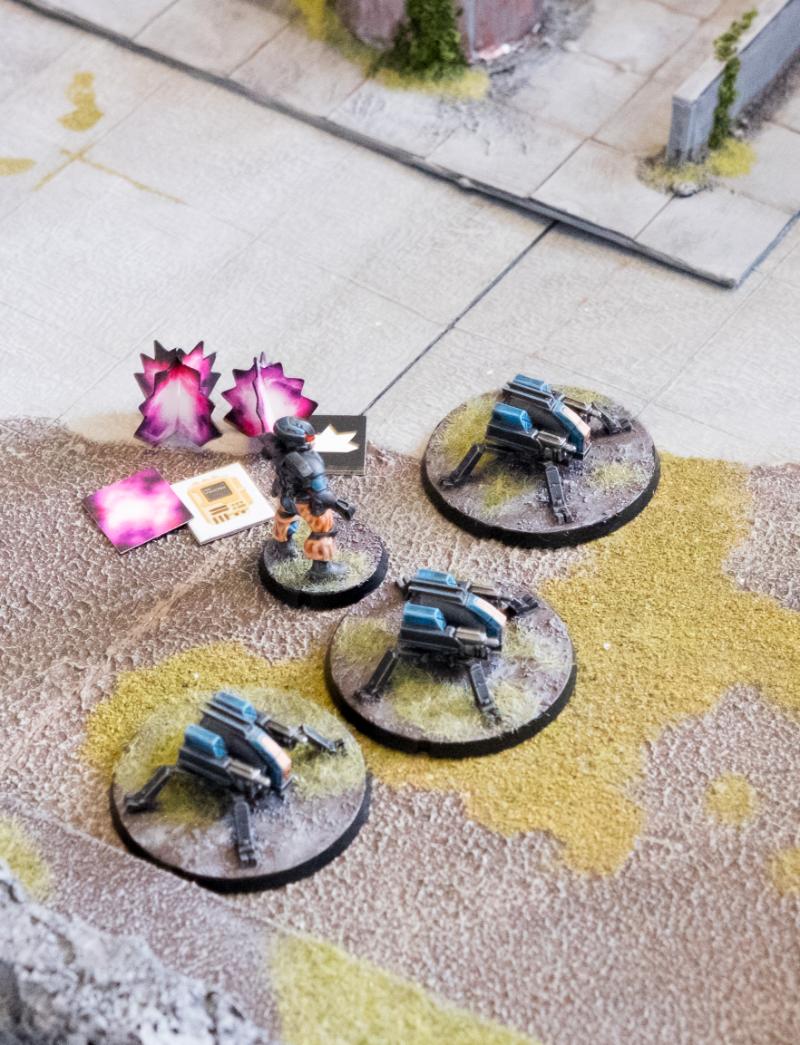
Tempests with deployment STs.

Epirian commander has 3 CPs assigned, the Spiders are deployed pinned.
The Karist commander has two CPs, is on the move and has his reactor in kinetic boost mode (which would normally not be the best idea, but it doesn’t matter in this case as he’ll be the first activation).
Karist force (90 pts)
- Kaddar Nova Myro;
- 4 Troopers with a Radwave Emitter, deployed On the move;
- 5 Assault Troopers with 2 Ripper grenade launchers, deployed On the move;
- 3 Tempest Elites with Ravager Vulcan Pulse Cannons (with 3 deployment STs);
- 6 Angel Minnows, deployed On the move;
- Shadow Walker Elyssa.
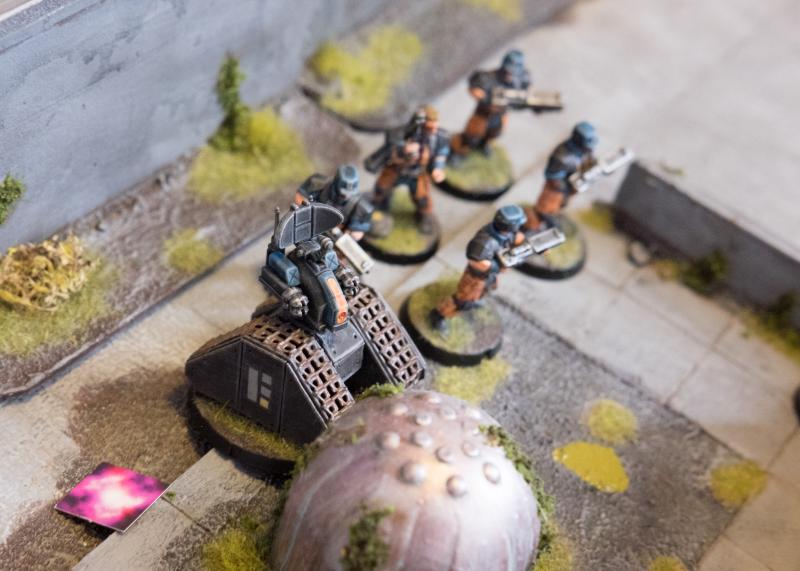
Epirian force (90 pts)
- Journeyman Bot Handler Bacaro with a command micro drone and a grenade launcher;
- 5 Contractors with 2 grenade launchers;
- 5 Firefly Drones;
- 3 Spider Drones with Cutter light machine guns and an apprentice handler;
- 5 Contractors with 2 grenade launchers;
- Scarecrow with Maglock Railrifle and Clingfire sprayer.
Turn 1
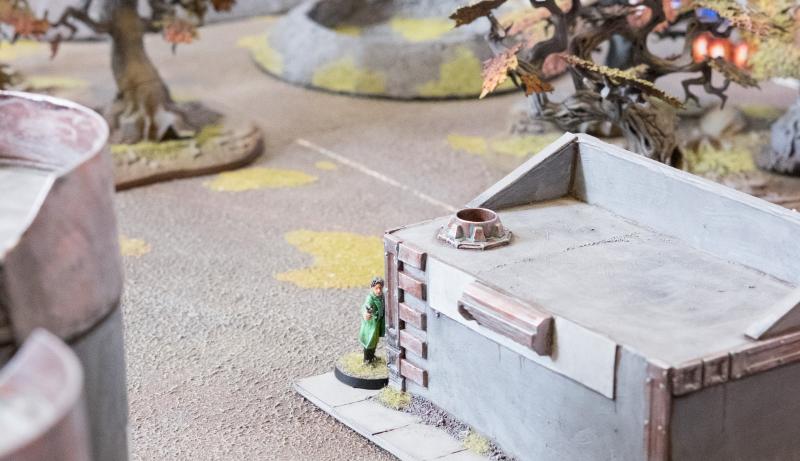
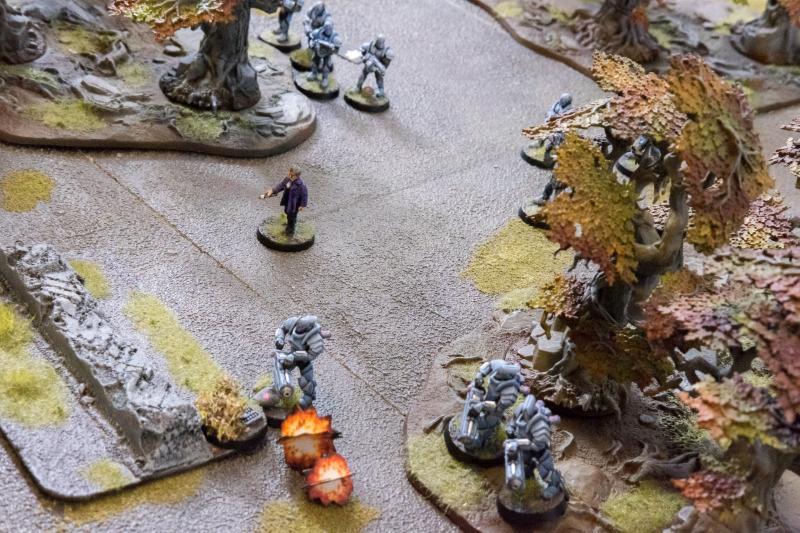
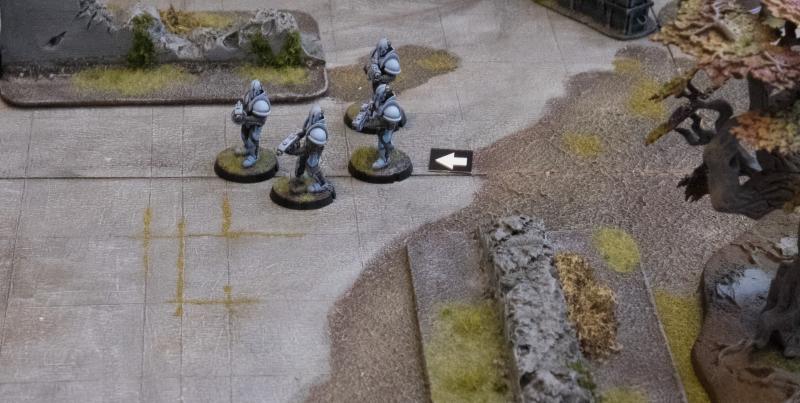
The Epirians had just swarmed into the centre. Time for action. Myro engaged his reactor and dashed ahead to the nearest building, where one of the scientists had just ran out. He stopped dead in his tracks as Myro fixed a piercing stare at him, but he had no time to waste on these people now, a squad of Drones across the centre had just sprang into action and started peppering his troops…
1st activation: Kaddar Nova Dashes ahead into cover near one of the objectives.
Storms! The Karists had beat him to it and were swarming out of the woods just as he entered the compound. Bacaro linked his mind with his trusty Scarecrow and aimed to snipe the first Karist to show his face. The powerful railrifle gave off a deadly burst and a Karist Trooper dropped dead just as he emerged from the treeline.

2nd activation: The Scarecrow gets his bot protocols activated and shoots at the Assault Troopers just visible behind the woods, resulting in a kill and 4 STs.
Again eager to follow his mentor’s lead, Apprentice Bot Handler Kasero quickly typed commands on his bot interface, ordering his Drones to advance, but stay low and follow the Scarecrow’s lead. The small but powerful machine guns let loose at the treeline where the first Karist had fallen.
3rd activation: The Spider Drones Dig-In after having their bot protocols activated and shoot wild at the Assault Troopers. They all miss, but the Troopers suffer another ST.
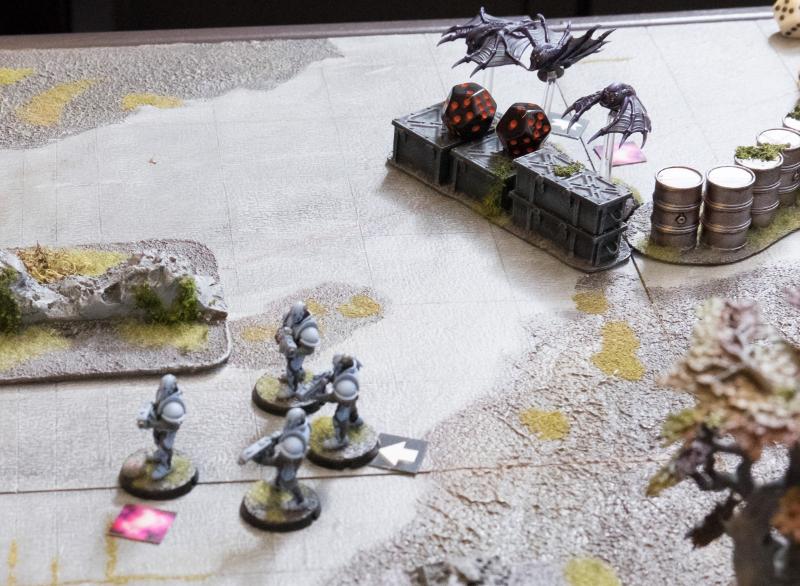
First blood for the Epirians. Myro bit his lip. He couldn’t let the Epirians pick off his followers as they tried to herd the scientists their way. He shouted to his Tempest Tetrarch to secure the hidden supply cache planted here weeks ago by Elyssa and lay down covering fire. The lumbering armoured forms sprung into motion and unleashed their Vulcan cannons at the advancing Epirian Drones.
4th activation: The Tempests Dash to their faction objective and fire at the Spider Drones. The Epirian player avoids losing a Drone by taking the one penetrating hit on the Apprentice Handler whose MAS2 can take the DAM1 hit.
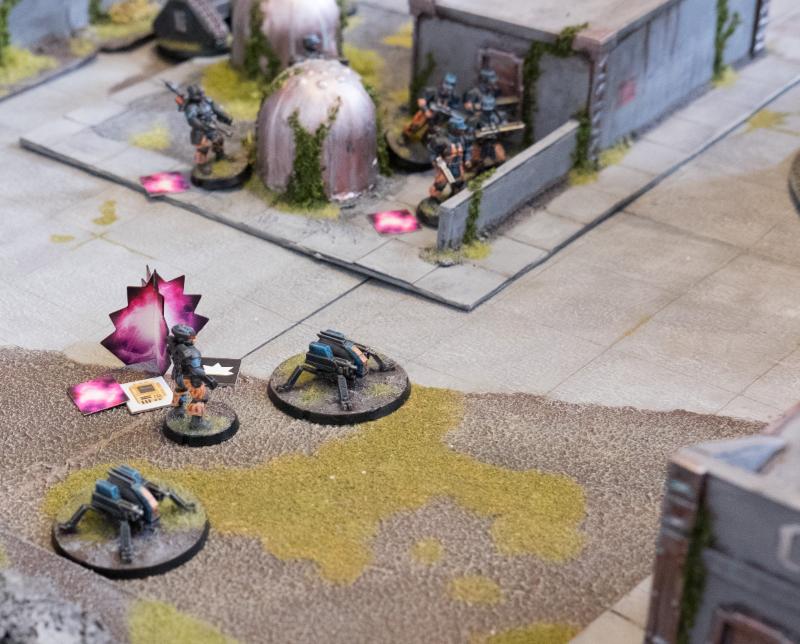
Bacaro watched with satisfaction as the enemy’s dreaded artillery was unable to harm the carefully dug-in Spider Drones, but was then distracted by a report of alien forms appearing on the left flank. Remembering the impact these aliens had at Tusculi, Bacaro wasted no time in calling down an aerial drone strike on the reported area. A cloud of smoke appearing from behind the centre wall and cheers heard across the comm link told Bacaro the strike was a success.
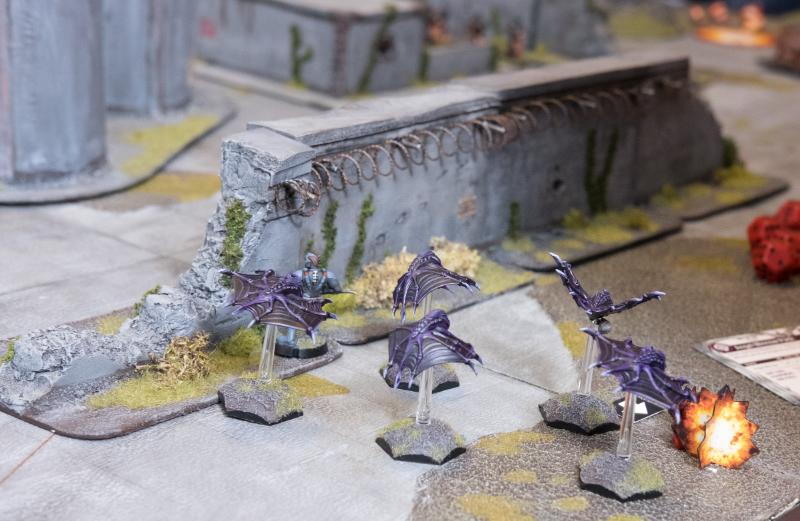
5th activation: The Journeyman Advance & Fires an aerial drone strike at the Minnows. Despite their high Evasion and on the move bonuses, 1 Minnow perishes and the unit takes 7 STs.
Meanwhile his Contractors were taking the enemy artillery under fire. He only hoped the untested engineers would keep their cool this time. The enemy was seen to duck into cover, so he’d chalk that up as a success anyway.
6th activation: One of the Contractor squads advances up to the building wall and fires at the Tempests, who take one damage despite their cover, resulting in 4 STs. The Contractors, however, are now dangerously bunched together. Quintarch Samuel was pained to have lost a brother to one of the enemy’s soulless machines, but rallied his team and ordered them to advance for the cause and avenge themselves upon the machines. The thumps of the Ripper Grenade launchers were followed shortly by an explosion and the sound of metal bits flying.
7th activation: The Assault Troopers fail their activation check and must perform a Shaken action. Firing wild at the Spider Drones, the small blast templates from the grenade launchers generate a lot of shots and, ignoring cover, manage to destroy a Drone and add 5 to the suppression total.
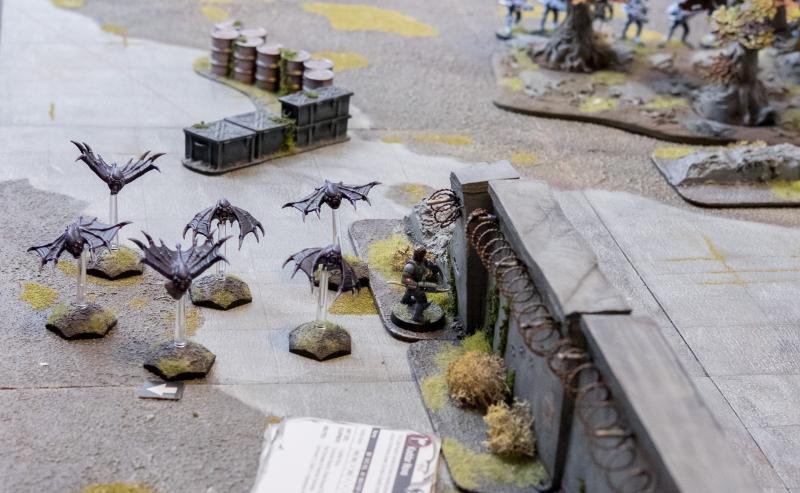
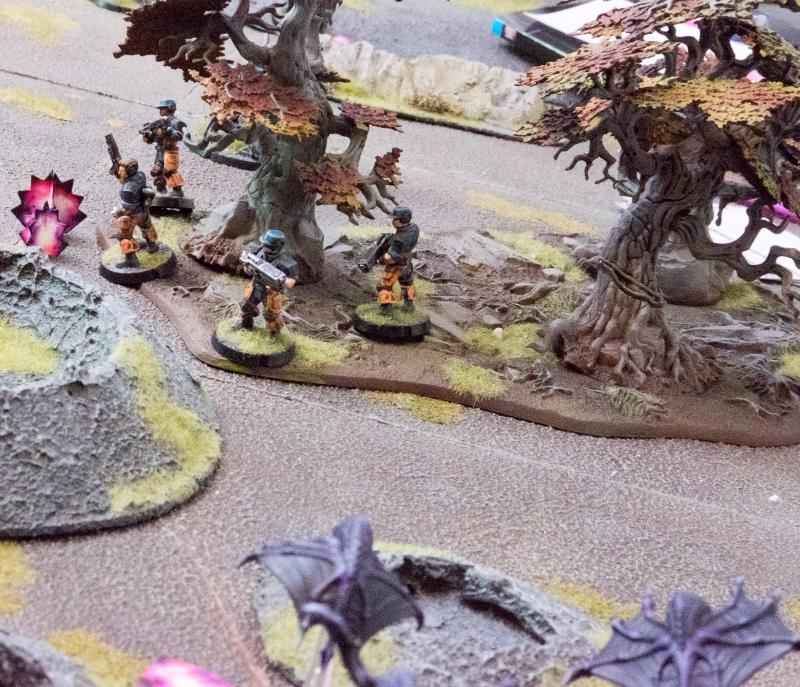
Elyssa, leading the advance on the flank, could only just duck into cover in time as a savage aerial barrage hit the area where she and the Angel Minnows were, she thought, advancing unnoticed around the centre. The remaining Minnows who emerged from the cloud of smoke had understandably lost their nerve and were flapping around in confusion, but then seemed to regain their resolve, luckily. Moments later they were in trouble again as Epirian Drones were appearing on the flank and shooting their lasers at the little angels.

8th activation: The Minnows fail their activation check and must take a Shaken action, but don’t need to retreat and fire wild at the Epirian artifact, but do no damage. They then shake off most of their suppression.
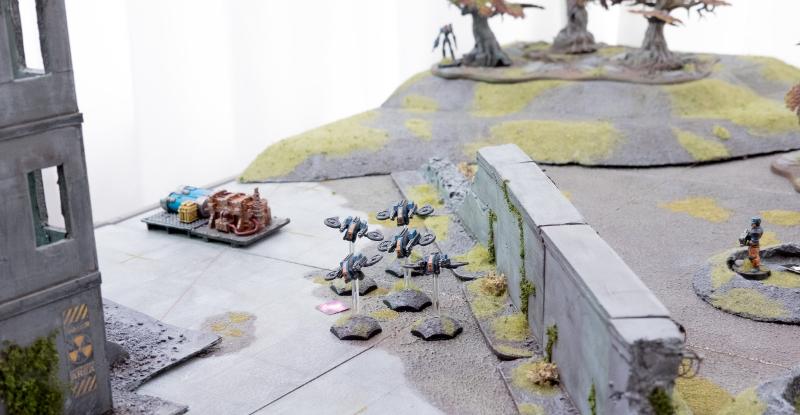
Following up the aerial drone strike on the approaching aliens, the Firefly Drones engaged their engines and took the Minnows under fire as they emerged from the smoke, two more of the horrible creatures dropped to the ground.
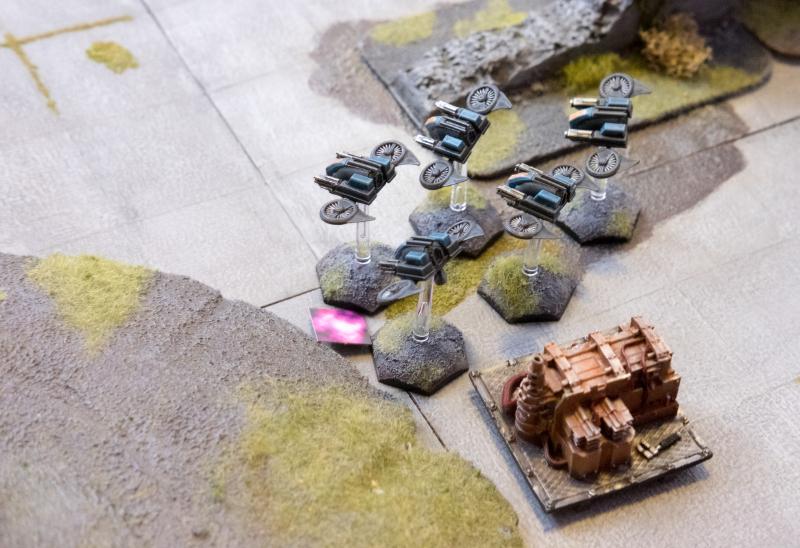
9th activation: The Fireflies Dash over to the Epirian artifact and fire their low power lasers at the Minnows, killing two and adding 3 STs.
10th activation: The automated relay does nothing (generating a victory point)
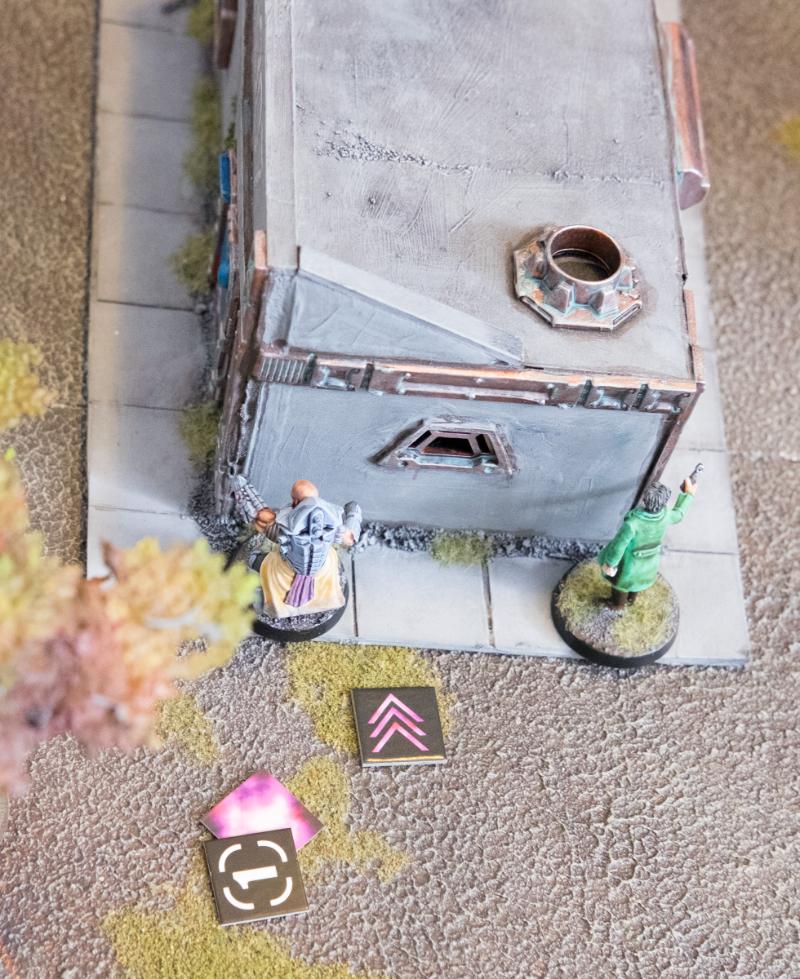
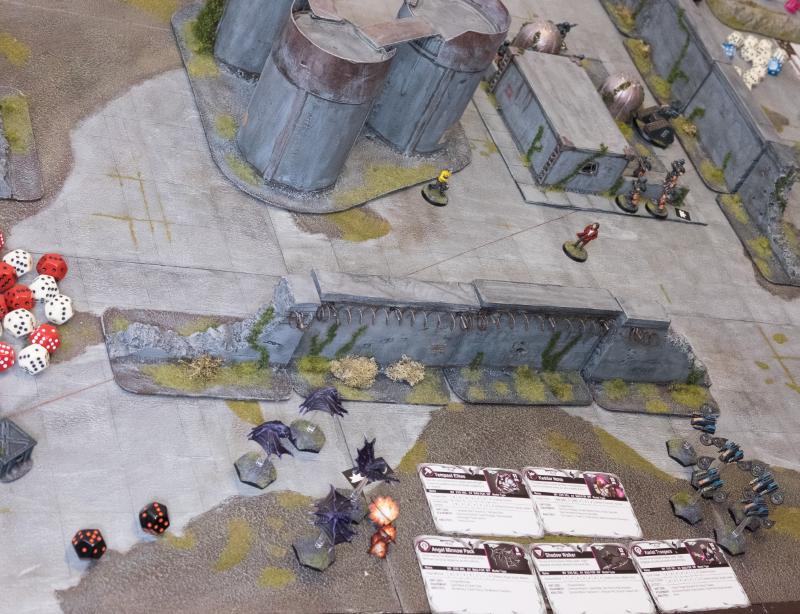
Elyssa decides there is no time to waste. She came here to capture some Epirian scientists known for their work on Cybel energy. If they could be made to see the truth about the Maelstrom, their knowledge would be of great value to the cause. The scientists, still in the midst of their evacuation preparations, were now caught in the crossfire and running around the centre in confusion. Elyssa spotted the research team leader taking cover behind the big silos in the middle of the centre and ran over to bind him.
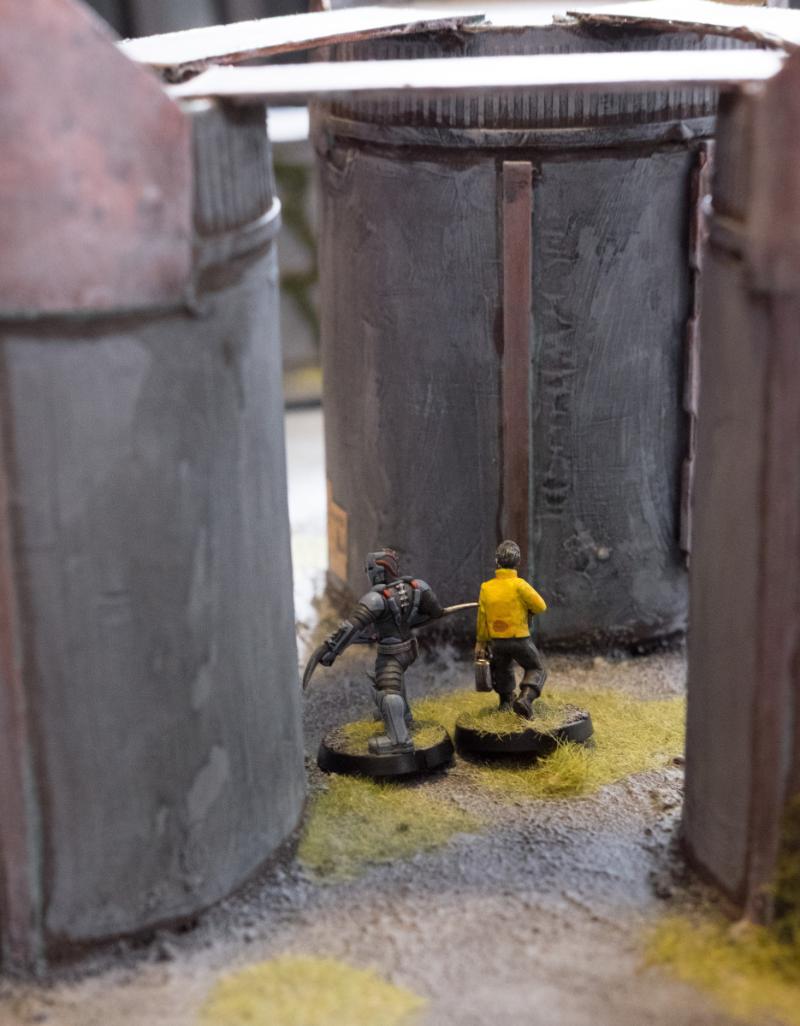
11th activation: The Shadow Walker Dashes, making a dynamic move to the middle of the board to claim one of the objectives.
The Troopers under Elyssa’s charge saw her run over to one of the scientists, and followed her example. Loosing some shots for cover, they jumped across the concrete to where another one of the science crew was frantically trying to avoid getting shot and grabbed him.

12th activation: The Troopers Dash over to a second objective, with shooting adding 2 STs on one of the Contractor units.
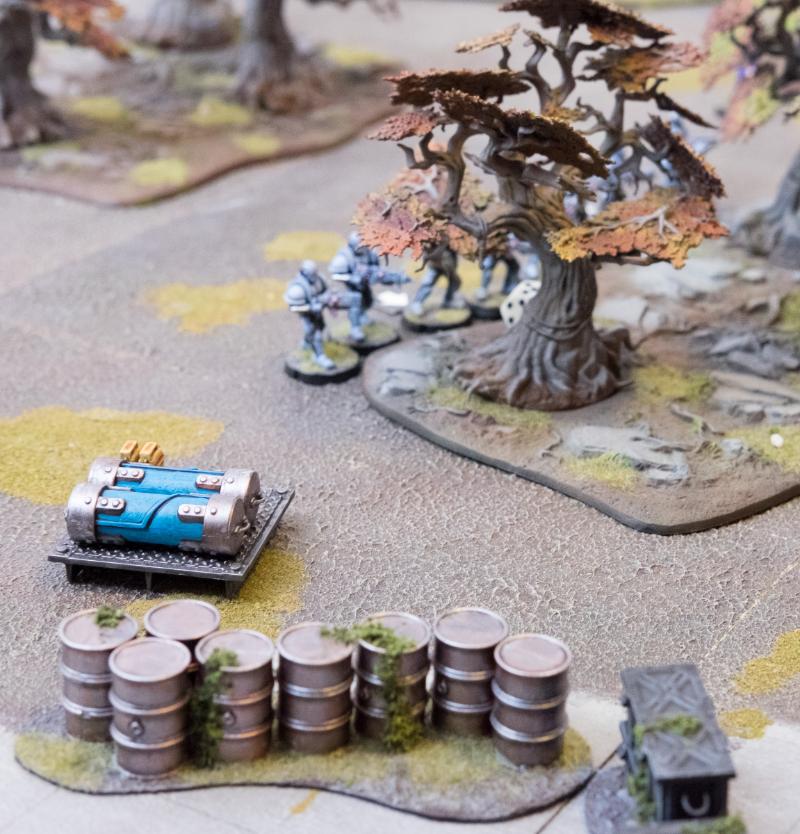
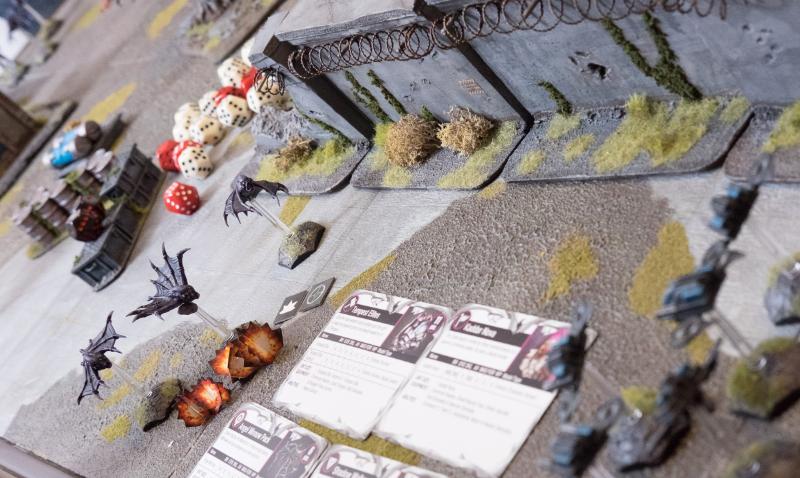
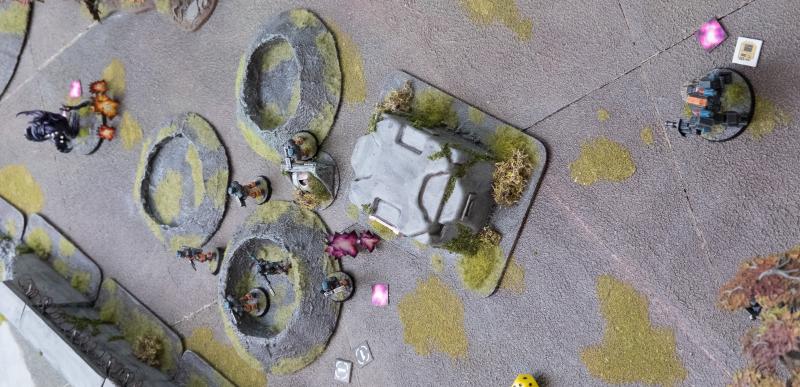
Tromp, the Contractor Team leader on the left flank took a last glance at the photos he’d had pressed into his hands after his boss was tasked with evacuating this centre. He had a specific job: make sure certain storage containers did not fall into enemy hands. Securing them would be nice, but he needn’t waste an opportunity to destroy them instead. Nobody had told him what was in these containers, but he was now sure he saw them stacked at the other end of the centre. Their team had secured one of the scientists who was somehow acting quite hysterically, and now ordered his engineers to lob some grenades the way of the containers. Unfortunately, the range was too great for accurate fire and the pesky containers remained sitting there defiantly.
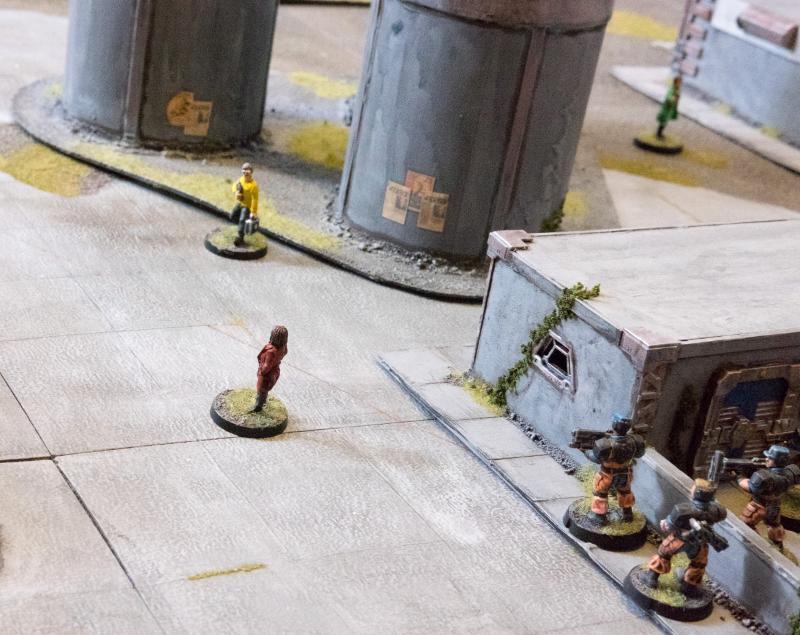
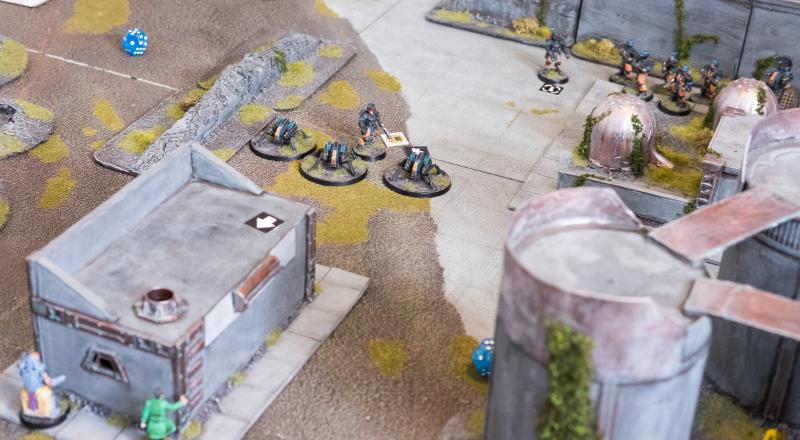
13th activation: The second team of Contractors Digs in, taking positions around the building, and try to damage the Karist artifact, but fail. (Image was taken after VIPs got moved.)
This ends turn 1. The Karists scored 13 VPs: 8 for their artifact being entirely undamaged, four for holding 2 VIPs and another for controlling their faction objective. The Epirians score 11, having one fewer VIP.

The VIPS were then moved 6” and turn 2 commenced.

Turn 1 end map: orange is movement, white is shooting. VIPs haven’t yet been moved.
Turn 2
The Epirians get priority and generate 4 command points, whilst the Karists generate 3 CPs.Focusing all his attention on eliminating the aliens, Bacaro links his mind to the Firefly Drones, powers up their lasers and cuts down another alien, whilst the rest turn their tails under the fusillade of laser fire. With this threat taken care of, Bacaro can now focus on the silly scientists.
1st activation: The Fireflies get their evasive maneuvers protocols activated and Dash ahead, once more shooting at the Minnows, now with high power lasers, killing one and adding 3 more STs.
Myro was quite displeased with his Elites’ cowardly hiding amongst the trees. Frantic shouting saw them advance one more and rain fire on the opposite Epirians, who were horribly slaughtered. This was more like it. Much as he valued every life, Myro had his priorities right and didn’t hesitate to brutally propagate the Karist cause if need be.
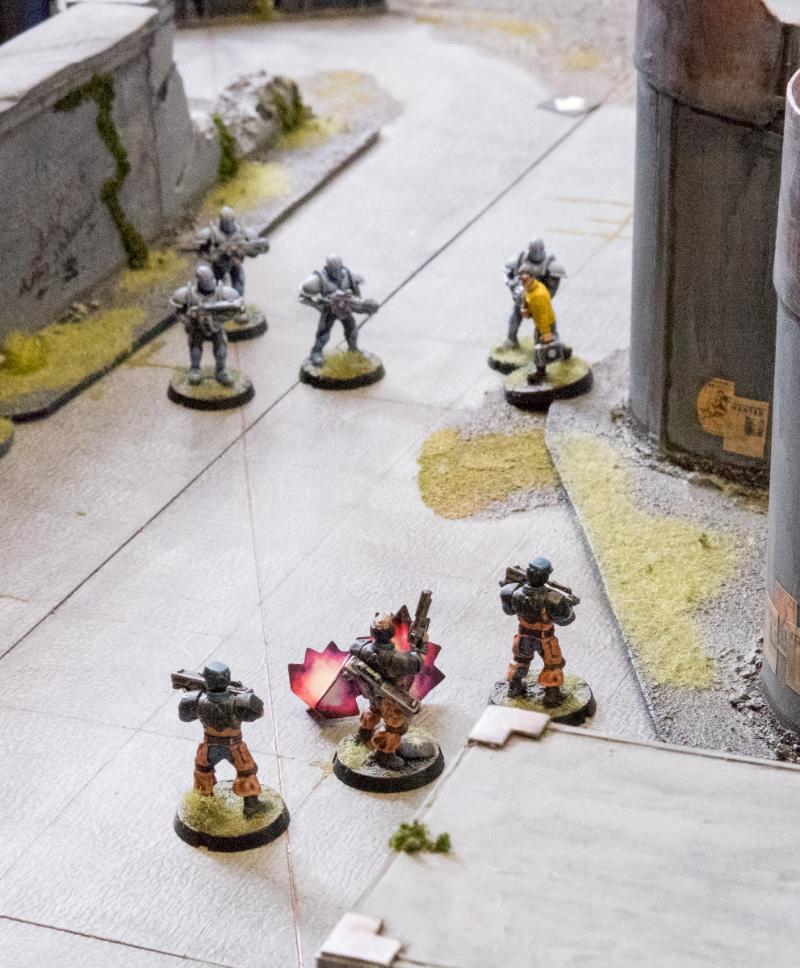
2nd activation: The Tempests advance and fire at the Contractors opposite. Utilising the re-roll granted by their faction objective, 7 hits remain after applying cover, resulting in four penetrating hits of which two are explosive. Three Contractors fall and 6 STs are added.
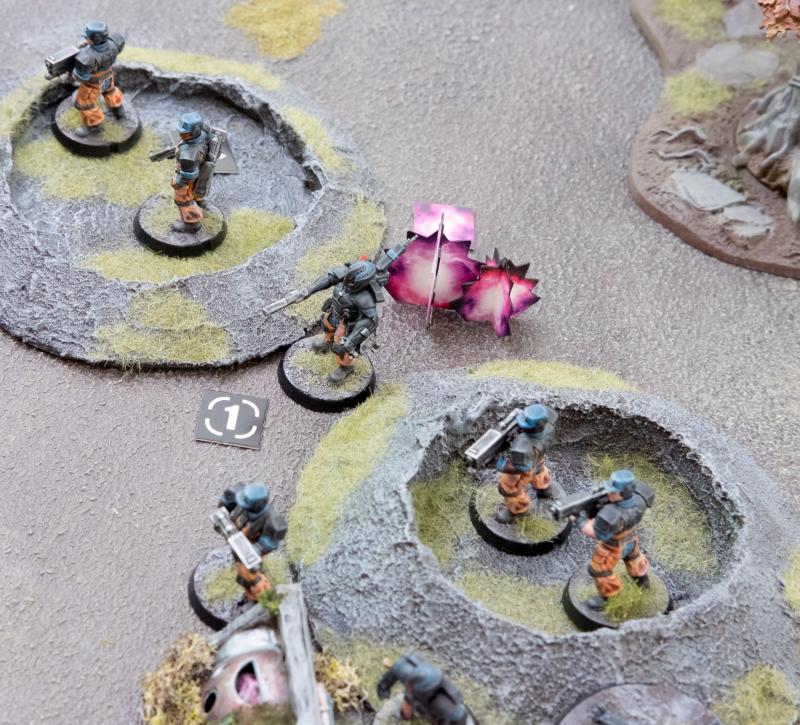
Elyssa, distracted by the advancing Epirians on her flank, temporarily lost sight of her captive, who suddenly jumped and ran out into the crossfire. Moron. Elyssa figured a dead scientist was useless anyway and decided to fall upon the Contractors who were getting mauled by the Tempests’ Ravager cannons. As soon as she perceived the guns going silent, she ran out, drawing her Cybel blade and slipping it into the throat of one of the surprised engineers, then gutting the remaining Contractor before he had time to react.
3rd activation: The Shadow Walker charges the Contractor team and kills the remaining two, then shaking off the STs gained in the process.
Kasero was starting to regret his rash action, he’d already lost a Drone and was in the middle of a hail of fire, whilst to his left a whole team of Contractors was brutally slaughtered by combined fire from the enemy artillery and an assassin appearing out of nowhere. This was no place to stick around. Tapping new orders, he and his remaining drones hoofed it to the cover of a ruined wall behind them.

4th activation: The Spider Drones receive an order and have their protocols activated, but still fail their activation and must retreat. Pinned behind a wall, they shake off 8 STs, but are still left with 3.
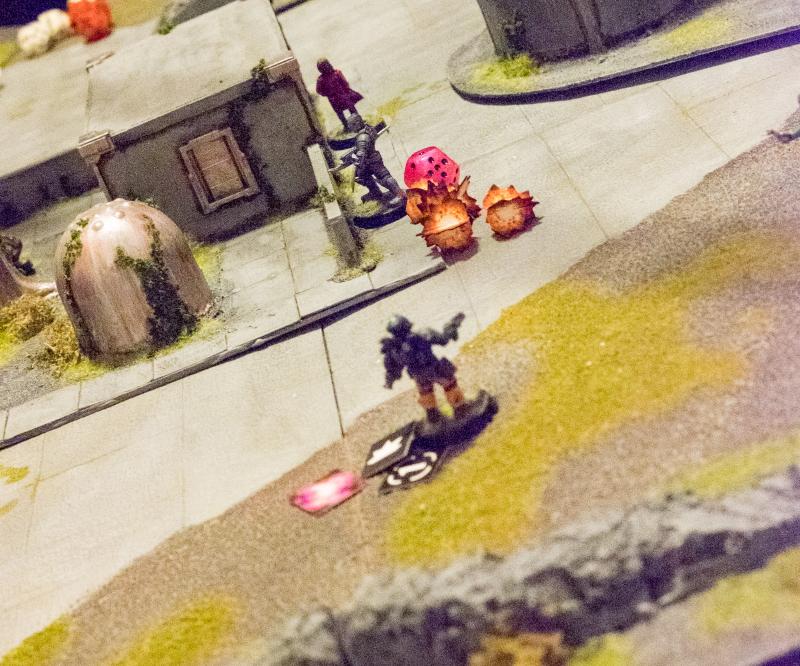
This could not be happening again. Why was he again sent against the Karist offensive with inadequate forces on ridiculous missions? Fired up by his anger, he decided to go after the sinister figure that had come up and killed his engineers, only to then hide behind the low wall. Drawing his Dominator pistol, Bacaro fired at the assassin, but his nimble foe darted out of the way just in time.

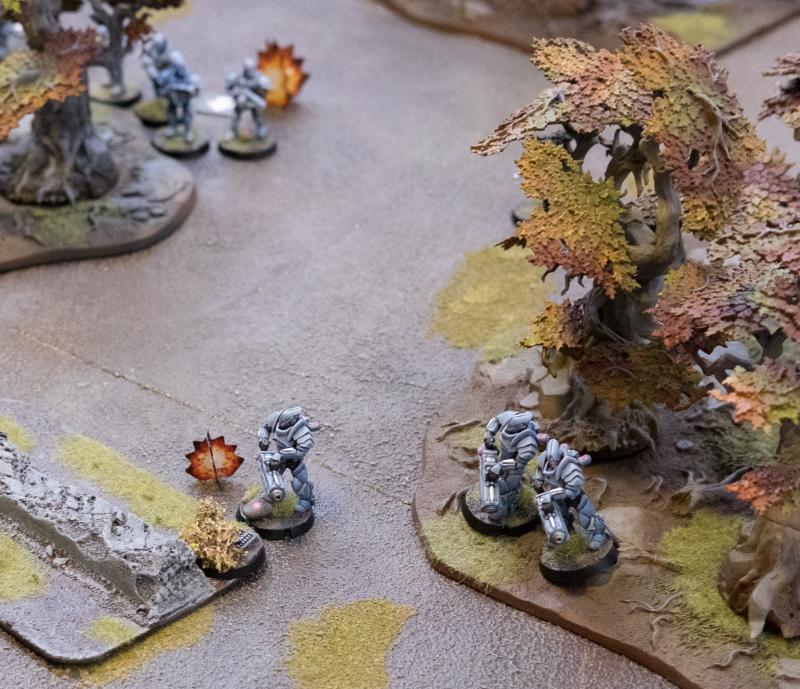
5th activation: The Journeyman advances and fires at the Shadow Walker who isn’t harmed but does get suppressed. (Image taken after Nova’s next activation.)
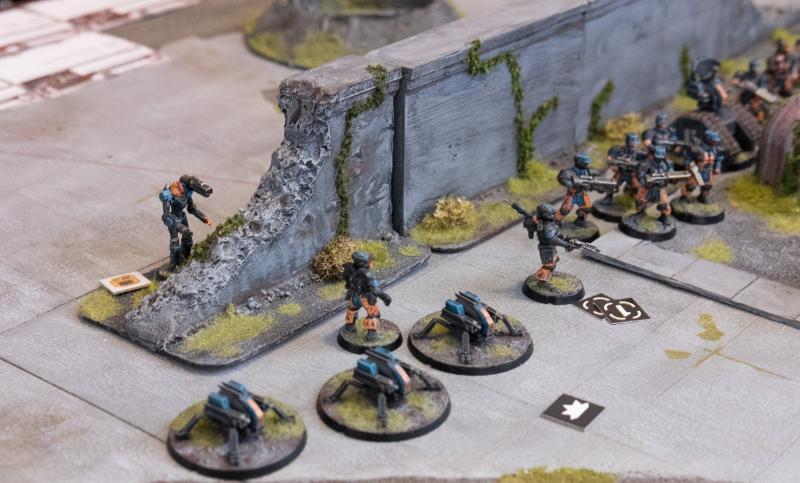
Myro was eager to press his advantage. Elyssa and his Tempests had neatly cleared this flank. Now it was time to go after the supplies the Epirians were so eager to guard. Engaging his reactor, he dashed into the nearby crater with superhuman speed and fired his gauntlet at the Drones attempting to hide from his troops behind a ruined wall. Being attacked from two sides, they had nowhere left to hide.
6th activation: The Kaddar Nova advance and fires, piling more suppression on the Spider drones but failing to destroy any despite denying their cover from this angle.
Samuel and his Troopers dragged their hostage along, pressing up further into the science centre and loosing some shots at the enemy individual who was threatening to corner Elyssa.
7th activation: The troopers Dash forward to keep contact with their objective and fire wild at the Journeyman, missing him, but adding 1 ST.
Bacaro had to think fast. He had to deal with this assassin, but was now himself taken under fire by an enemy squad, and also witnessed his Spider Drones being cornered by what appeared to be the enemy leader, judging by the amount of shouting he was doing. Quickly prioritising, Bacaro linked with his Scarecrow and aimed at the enemy leader. He must not have been his normal calm self, however, as he failed to hit with his Scarecrow’s railrifle.
8th activation: The Scarecrow gets an order to activate his protocols and selects the Hold & Fire action. The robot gets a sniper hit on the Kaddar Nova, but then rolls a 1 to pen.
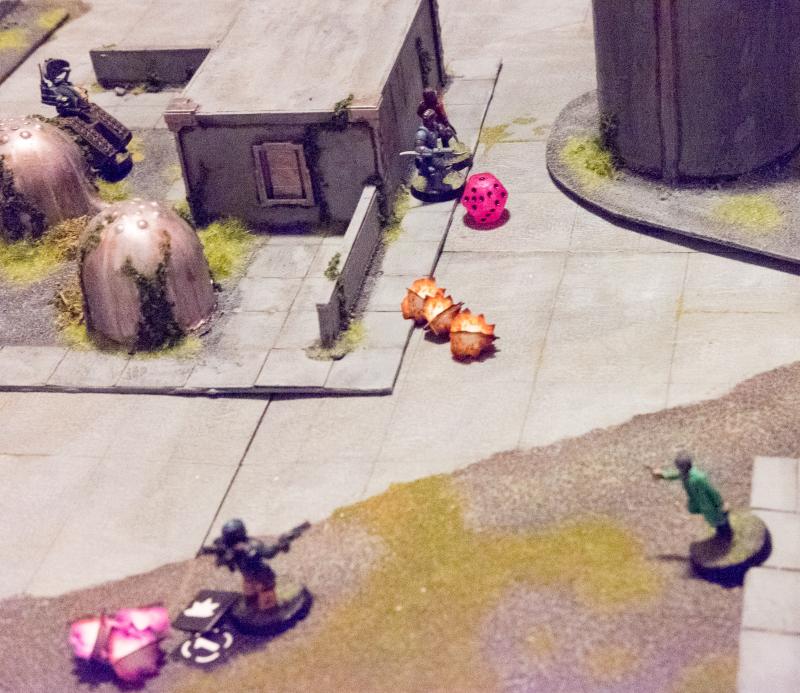
Team leader Tromp couldn’t believe his eyes. Here was one of the scientists awkwardly running out from the cover of the silos into open ground, risking his life for apparently no good reason. Then he saw the reason for the scientist’s silly walk, he was bound at the wrists. A quick shout saw his team emerge from cover to secure this brave man who had seemingly escaped from Karist custody. Cornering their building, Tromp saw the figure of the brutish assassin facing off against his commander. Taking aim, he shot his maglock rifle and grinned triumphantly as the enemy dropped to the ground.
9th activation: The Contractors Dash to claim the yellow VIP. We realised just after this shot that they can’t actually control both VIPs. Wild fire at the Shadow Walker does enough damage to drop her to FOR1.
The Assault Troopers, watching as an enemy team breaks cover and secures one of the scientists, run out themselves and fire their grenade launchers straight at them. Better to lose the scientists than to have their enemy keep them.
10th activation: The Assault Troopers Dash out, electing to be on the move, and fire wild at the Contractors. Again the blast templates cover many guys, resulting in 2 dead Contractors and 4 STs.
Meanwhile, the little angels, having taken so much fire, fly off to the cover of a stack of crates to recover their nerves.
11th activation: The Minnows have to retreat, but do shake off all their STs.
12th activation: The Relay does nothing.
This ends the second turn. The Karists score 10 points against the Epirians’ 11, making the score 23 for the Karists against 22 for the Epirians. Both sides have acquired the minimum number of points to win, so the first to lead his opponent by 3 will win the game. Points really add up fast in this mission as long as the artifacts remain unharmed.
This is after the VIPs have been moved.
Turn 3
The Karists claim priority, the Epirians spend 5 CPs to bring back the unit of Contractors.Seeing their protectors diminished to just three engineers, the nearby scientists disperse and run for cover. The Karist Assault Troopers waste no time in advancing further into the centre, ready to capture their prizes. On their advance they again fire their Rippers and Pulse Carbines into the Contractor team, none survive.
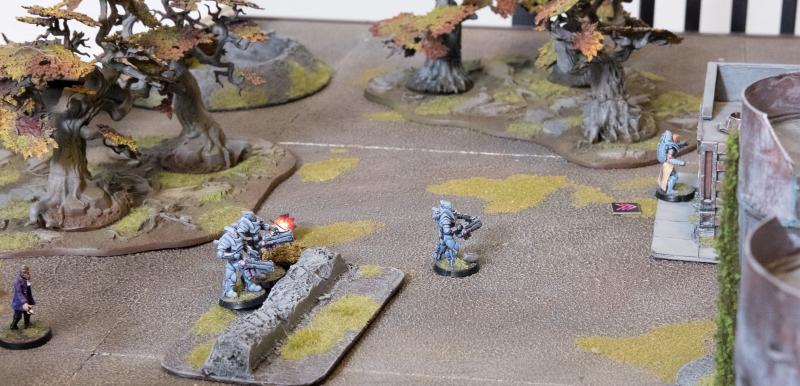
1st activation: The Contractors are not in cover and not on the move (so as to be able to capture an objective) and do no survive the round of fire from the Assault Troopers, who capture an objective on the way.
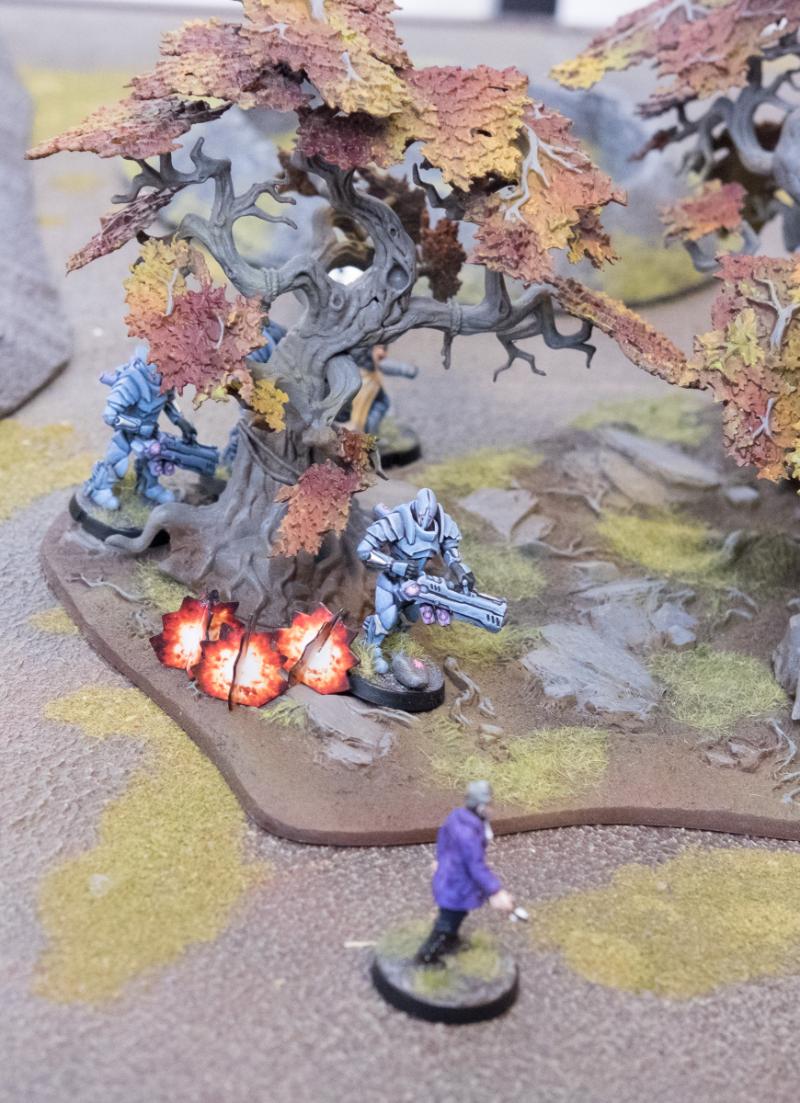
Still determined to destroy the enemy leader, Bacaro again guides his Scarecrow’s fire. His increased focus pays off: the Karist priest drops behind the crater rim. Is he finished?
2nd activation: I have no image here, but the Scarecrow Holds and fires with activated protocols, but in the end only does enough damage to drop the Nova down 1 FOR.
Having braved the chaos around him long enough to shoot down the enemy leader, Bacaro now hunkers down and takes another quick shot at the enemy assassin, but again he misses.

3rd activation: The Journeyman fails its activation check and digs in, his shots put 2 STs on the Shadow Walker.
Elyssa and Myro exchange a quick look, which for these experienced friends is enough to understand each other’s plans and position. Although they are both wounded, they know they must now press on to finish the job. Elyssa turns to capture the scientist who just fled from her failing Epirian protectors. As she turns, she returns fire against the Epirian commander, but her aim suffers from the wound she took and her shots go wild.
4th activation: The Shadow Walker gets an order, removes 4 STs and advances towards an objective whilst firing at the bot handler for 2 STs.
The Tempest Elites, now well in control of their part of the field, loose another salvo at the drones hiding behind the wall, making sure they do not interfere with their wounded commanders’ efforts to seize their prizes.

5th activation: The Tempests Advance & Fire at the Spider Drones, who are not only pinned but make good use of their protocols and discard most hits. They do take 6 STs.
Freshly dropped off at the outskirts of the centre, only half understanding what’s going on, another team of Contractor Engineers arrives to assist Bacaro. They waste no time in laying fire on the Karist Priest hiding amongst the craters, but cannot confirm a definite kill.

6th activation: One unit of Contractors returns as reinforcements, Dashing on to the field and firing wild at the Kaddar Nova, only causing 2 STs due to the priest being in cover.
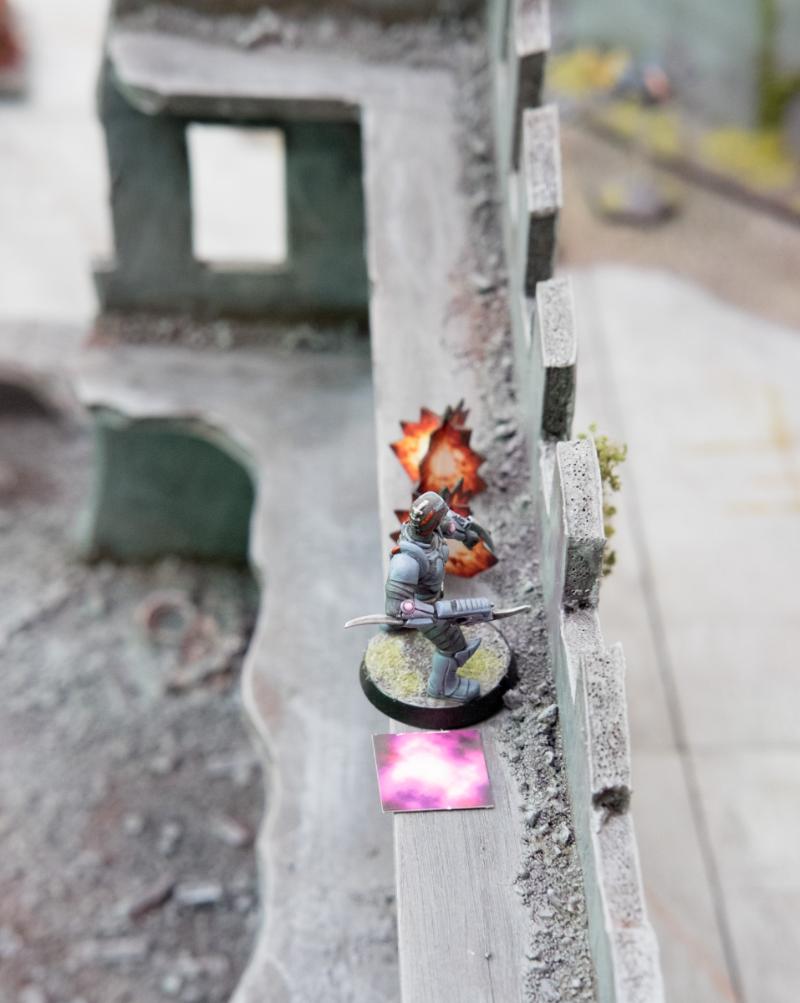
The Firefly Drones’ automated protocols instruct them to secure their flank, having driven off the small aliens. The little machines swoop over the wall and lock on their target: the Shadow Walker assassin. Engaging their high power laser, they bring down their foe and secure this position.

7th activation: The Fireflies Dash over here, in position to contest the objective, but manage to kill the Shadow Walker after taking 2STs from defensive fire.
Meanwhile, the Karist Trooper squad continues to advance into the centre, pinning down the Drone squad with their shooting.
8th activation: Karist Troopers advance and fire, keeping in touch with their objective.
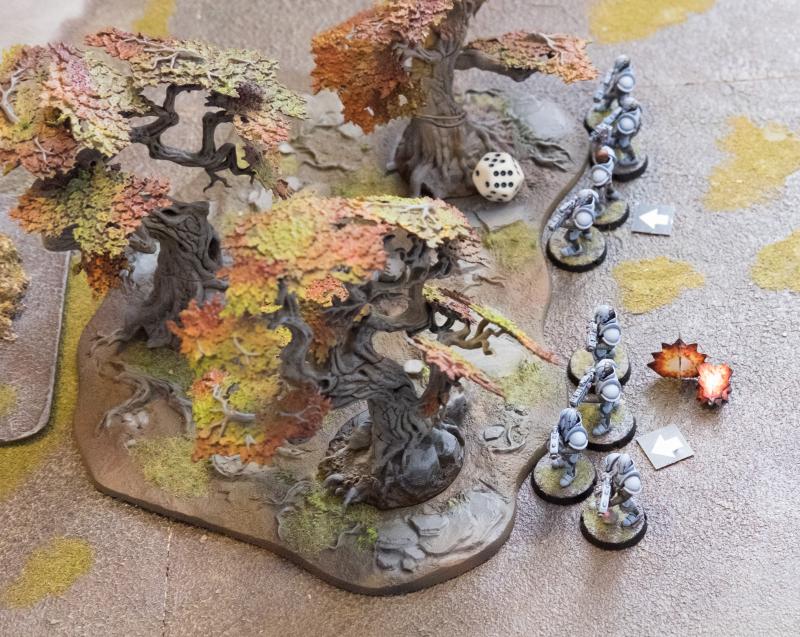
Although the little Minnows were driven back and thought defeated by their foe, it is not in the nature of Angels to turn tail and run. The two surviving beasts, having licked their wounds behind the crates and barrels, again took to the air and made a run at a piece of machinery emitting a faint pink light strangely attractive to these angels…
9th activation: The remaining Minnows Dash and shoot at the Epirian artifact, managing to take it down 1 FOR.
Following the flow of the battle through the Epirian Automated Uplink Relay, sector command is weighing options. On the one hand, Bacaro seems to be able to secure at least some of the Epirian scientists, amongst whom Dasha Kryklyvy, the one command is really concerned about. Do they gamble and hope Bacaro can claim the others as well, or are they content with Dasha and give up both the valued machinery and containers and the other scientists, so that Bacaro’s force may retreat relatively intact and be sent to support the beleaguered forces of Shotan at Asperia? Decisions, decisions…
10th activation: The relay does nothing.
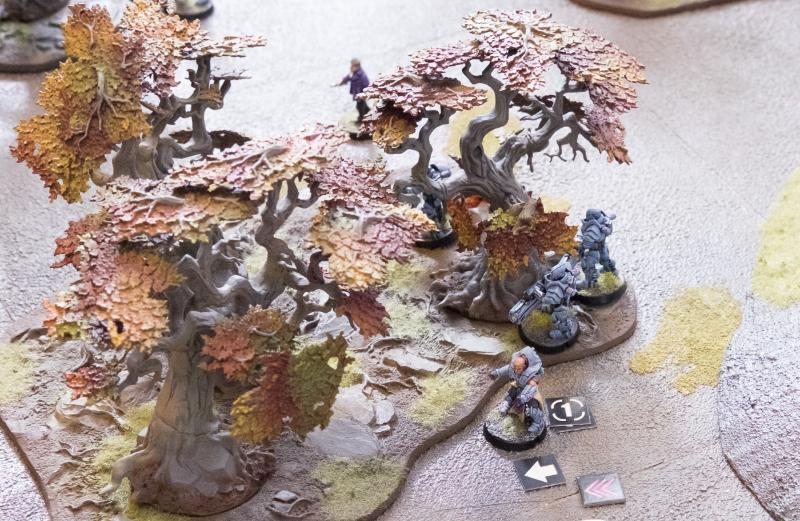
Kasero is relieved to see reinforcements enter the field. Choosing tact over valor, he retreats his Spiders to hook up with the reinforcements and take on the enemy together.
11th activation (no image): Spider Drones have to retreat, and shake off 7 STs.
Kaddar Nova Myro watched in horror as the pack of Fireflies suddenly raced across the wall and doused Elyssa in bright laser fire. She went down, and didn’t rise again. In his heart Myro knew she was done for. Feeling suddenly very weak, Myro clambered out of the crater and sought protection near his Tempests at the edge of the forest.
12th activation: Putting his reactor in Shield mode, the Kaddar Nova is forced to retreat and moves into the woods.
Suddenly, all Epirian forces appear to retreat from the area. What’s going on here? The Epirians were certainly not overpowering his brothers, but neither were they defeated. Well, reflected Myro, this gave them the perfect opportunity to seize whatever resources and scientists were left and, most urgently, see if anything was still to be done for Elyssa…
At the end of turn 3, the Karists score 13 points: an undamaged artifact for 8, two VIPs and the faction objective. The Epirians only score 4: a damaged but undestroyed artifact and the faction objective. This means the Karists take a decisive lead and win the game!
There were some interesting swings in this game, but in the end the Epirian’s failure to damage the Karist artifact and sometimes brutal consequences of forgetting to sufficiently disperse his troops brought defeat. It’s really cool to come to understand the importance of the various rules elements in MEdge that you can’t really get a feel for without playing some games. So far the Epirian player has a little more difficulty making the most of his forces. They lack some of the rock hard firepower of the Tempests and seem to need a little more finesse than we can display in these first two teaching games. As for this mission, the wandering VIPs really keep everyone moving which is neat, and the artifacts really need to be taken care of starting turn 1, considering the amount of points they give out each turn if left undamaged.
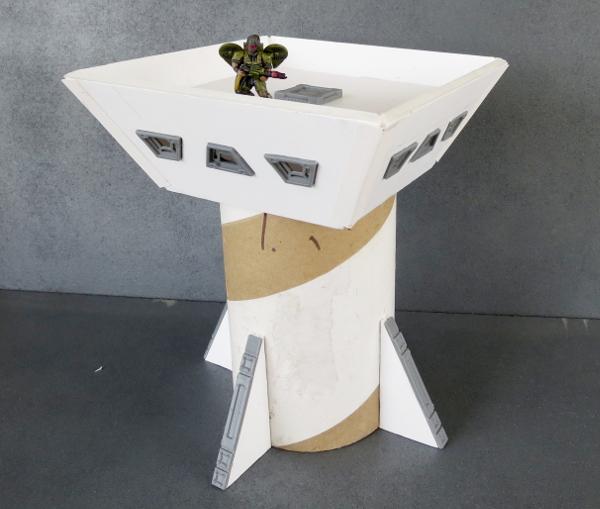
Terrain Spotlight: Watch Tower
Posted on Monday Dec 19, 2016 at 05:00pm in Models
- by Iain Wilson
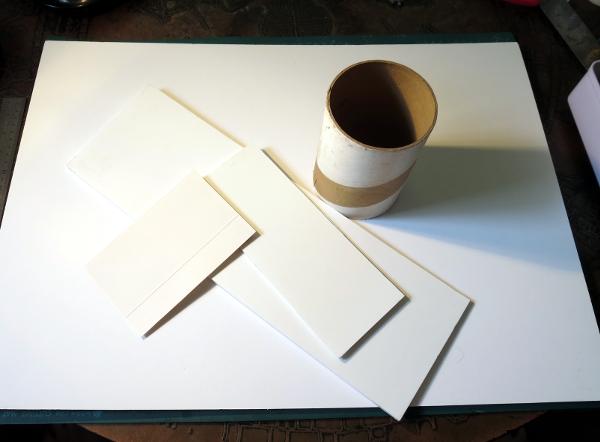
It felt like far too long since I had built any terrain, and so this week I decided to throw something together out of some leftover scraps and odds and ends from some Maelstrom's Edge terrain sprues. And so, a watch tower was born!
I started with just a vague idea of how this was going to turn out, and gathered up a bunch of useful materials: foam core, some thin cardboard, an offcut from an old postage tube, and of course the terrain sprues.
I also made use of a door assembly that I put together for a tutorial a little while ago and hadn't got around to sticking onto anything yet. This was build from one of the small doors off the terrain sprue, with boxing added around the back from a couple of the reinforcing detail strips.
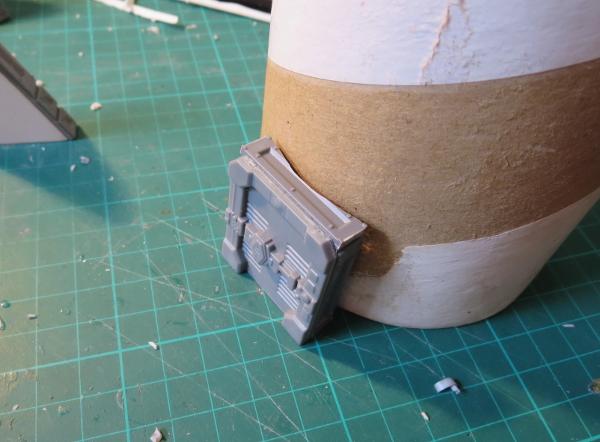
To fit the door to the curve of the tube, I rubed some chalk on the bottom of the tube, pressed the door against the tube with the top panel overhanging the chalked edge, and then rubbed it back and forth a couple of times to transfer the chalk to the inside of the panel. The it's just a matter of cutting away the chalked part of the panel with a sharp knife.
I wanted some buttresses spaced around the bottom of the tube. It's always a good idea when making gaming terrain to consider how the terrain piece will fit into the game. If you want your buildings to be more than just line of sight-blocking cubes, having some small protrusions around them that can be used for partial cover (buttresses, pipes, small balconies, etc) that models can lurk behind on their way across the battlefield is great for making them more useful on the table.
The buttresses were made from some 5mm and 3mm foamcore glued together, with reinforcing strips running up the angled outside edge.
These were then glued in place at 90 degree spacings around the bottom of the tube.
Then it was time to build the watch chamber to go on top.
Taking some 5mm foamcore, I marked out the first wall.
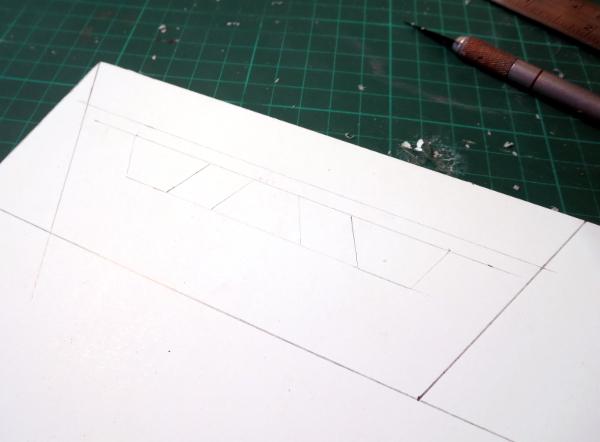
Using a sharp hobby knife, I carefully cut this out, and then used it as a template to make three more.

Trapezoid windows from the terrain sprue were glued into the window cavities, and then I chamfered off the back edges of the walls slightly to help them fit together for gluing. This wasn't particularly exact - that would have required far too much maths for a sunday afternoon, due to the angle of the walls. They'll be held together quite firmly by the glue and some cardboard reinforcing on the corners, so it doesn't matter too much if they don't meet up perfectly flush.
Speaking of cardboard reinforcing - these are just some 2cm-wide strips of thin card, cut with a bit of an angle at the top so that the outside corners don't stick up past the tops of the walls. Once superglued to the outsides of the corners, these add a bit of strength to the wall joints.
A square of foamcore with chamfered edges drops in to form the floor.
A similar but slightly larger square went in just above the windows, to create a roof with a nice little balcony. This comes back to the functionality aspect again - I like to have lots of buildings with game-friendly space on top. A hatch from the terrain sprue adds an access point from within the building.
(Note - if you care about having functional-looking and/or painted interiors in your buildings when they can be seen through the windows, remember to sort out the inside before gluing the roof on! Alternatively, painting the interior black before adding the roof makes it much less visible once everything is sealed up, or you could just glue small pieces of card over the insides of the windows so you can't see through them, and paint them up as opaque glass.)
Then all that remains is to glue the watch chamber to the top of the tube.
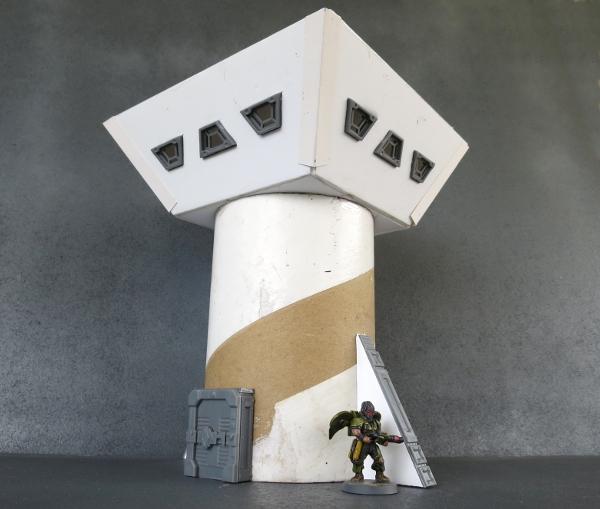
Once all of the glue is set, the watch tower is ready for painting and basing!
If you want to try your hand at building a watch tower of your own, or are feeling inspired to try something different, you can pick up the terrain sprue from the Maelstrom's Edge website here.
Be sure to share your creations on the Comm Guild Facebook page (https://www.facebook.com/groups/MaelstromsEdge)!
Tags: buildings terrain tutorial walkthrough
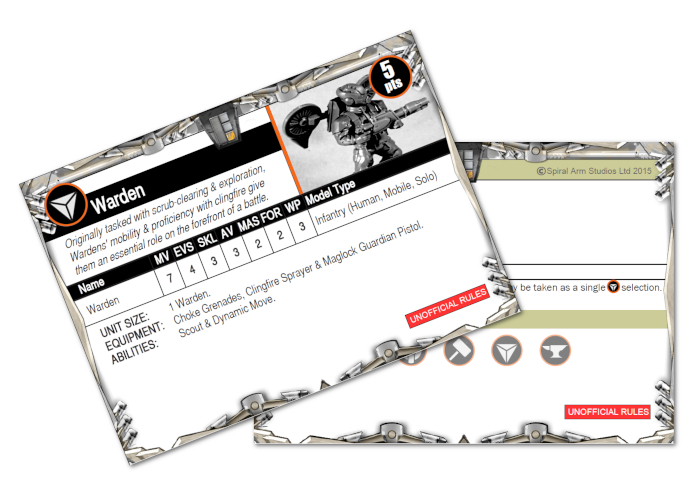
Epirian Warden Conversion Tutorial and Unit Card
Posted on Monday Dec 12, 2016 at 05:00pm in Models
- by Iain Wilson
In amongst my early tinkering with the miniatures released for Maelstrom's Edge, I came up with a concept for an Epirian 'Warden' - a jump-pack-equipped solo character armed with a flame thrower, built rather handily using leftover parts from the Scarecrow and Drone sprues. He proved rather popular, so I've put together a tutorial showing how to build one for yourself.
The original conversion:
Building the Warden
The original version requires a length of guitar string (or similar sized wire) for the flamethrower's fuel line and some pinning to hold the flight rotors in place. In order to keep things easier for beginners, I fine-tuned the design a little, replacing the separate tanks and fuel line with an integrated fuel canister, and slightly changing the way the jump pack goes together.
To build this version yourself, you'll need the following parts:
- A 25mm base
- Contractor or Bot Handler legs
- A Contractor torso and rifle arms (in this tutorial I have used the sleeved arms from the Faction Expansion sprue)
- A Bot Handler helmet
- A Maglock Pistol from the Contractor sprue
- A Clingfire Sprayer from the Scarecrow sprue
- A Choke Grenade (part F) from the Faction Expansion sprue
- Two rotors and the Drone side parts they connect to from the Drone sprue

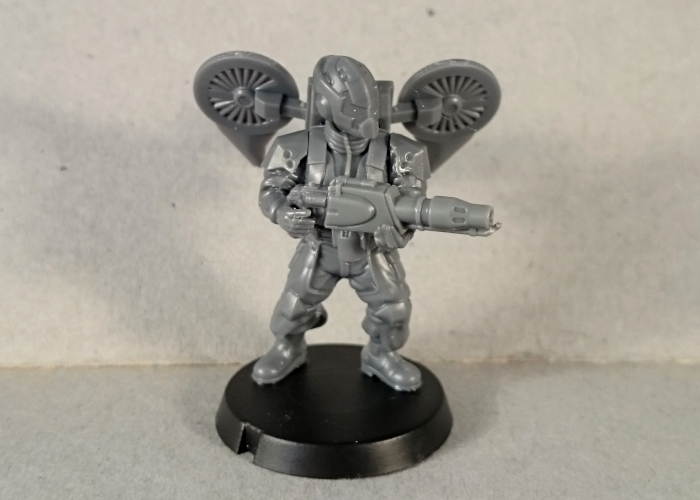
You can pick up the parts you need to build your own Warden from the Maelstrom's Edge online store (www.maelstromsedge.com - You'll need the Epirian Contractor, Handler, Scarecrow, Drone and Faction Expansion Sprues, although if you already have those units (and went with Spider drones instead of Fireflies) you can probably build the Warden from your leftover parts.
Updated 15th Nov 2022 - If you're interested in using the Warden in your games, you can find a rules page in the Maelstrom's Edge V2 Beta Rules section here, or a custom unit card for V1 in the 'Unofficial Cards - All Factions' document found here. This unit isn't an 'official' release for the game from the design studio, just something fun that I put together myself. So if you're planning on using him in your force, be sure to run it past your opponent first.
Tags: conversion epirian tutorial
All Your Base, Tutorial Part 2
Posted on Wednesday Dec 07, 2016 at 05:00pm in Tutorials
- by Iain Wilson
Last week, we looked at a few different ways to pretty up your bases, with industrial, rocky and snowy themes. This time around, I want to share a couple of my favourites - metal decking and ferns.
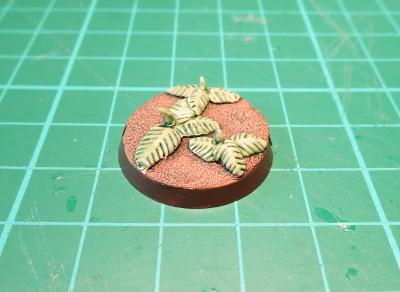
Ferns
I start these off by building up some texture on the base, partly to look pretty and partly because the putty ferns that you're about to make will stick better to the layer of green stuff than to the plastic base.
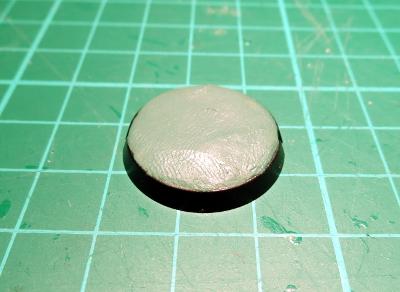
Mix up some green stuff*, and press a 1-2mm thick layer all across the top of the base. Don't worry about fingerprints at this stage - they'll go away at the next step.
*For the uninitiated, 'green stuff' is the common name for a product called 'Kneadatite', which is a 2-part epoxy putty used for sculpting. I'll be putting together some basic green stuff tutorials in the near future.
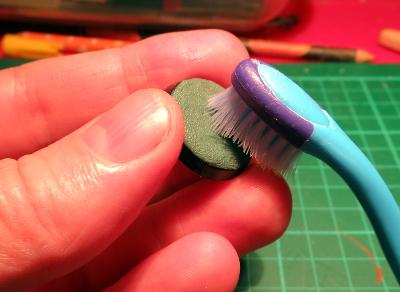
Next up, take an old toothbrush and press the bristles into the green stuff to create a rough, pebbly texture all over the putty.
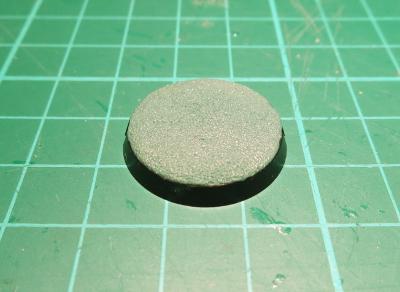
When you're done, it should look something like this:
Once the putty is set, mix up a small amount and break off a 2-3mm ball. Roll this between your fingers into a teardrop shape, and press it onto the base just enough for it to stick there.
Using a round clay shaper, the back end of a hobby knife, or some other smooth, round tool, roll the teardrop out until it is mostly flat. For best effect, it should be flatter and thinner at each end than in the middle - this helps give the leaf some shape and make it look less like it's just laying flat on the ground.
Now take a hobby knife and score a series of parallel lines down each side of the leaf, running from about half a millimetre out from the centre line and angling slightly forwards out to the edges of the leaf.
Repeat for a second leaf, butting the back end of the leaf up against the first and running it off in a different direction. Create other plants around the base using the same technique, remembering to leave room for the model's feet.
Note: If you're a little unsure about getting the placement right to fit a model on there, one easy way to give yourself a guide is to press the model's feet into the ground layer of putty before it sets.
Alternatively, you can draw around the model's feet with a micro pen, or dot with paint wherever the model's feet will go.
Once your first layer of leaves have set, you can build up your plants by adding extra layers on top, leaving each layer to set before moving on to the next.
When you're happy with the buld-up of your ferns, roll out some small spikes of green stuff and press them in upright in the middle of each plant to represent a new, furled, leaf growth.
Leave to set, and then paint in appropriate colours. For the below, I've used Citadel Tallarn Flesh with a layer of Army Painter Strong Tone for the dirt, and Coat D'Arms Putrid Green with a wash of Army Painter Green Tone for the plants.
If you want a little more realism in the plants, add some tinges of brown to the lower leaves, as these are older leaves that will be starting to die off, and scatter some brown, discarded leaves around the base.
Metal Decking
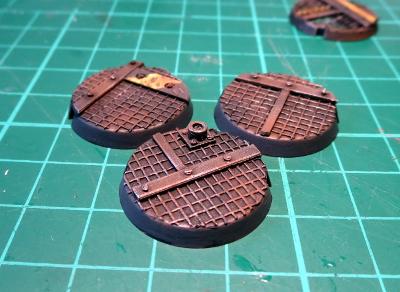
There are all sorts of options out there for buying textured plastic sheeting which can be cut to size and glued to your bases, but this can get expensive. For a cheaper option that still looks effective, I use plastic flyscreen.
Start by applying a thin coat of superglue all over the top of the base, and then glue down a small square of flyscreen.
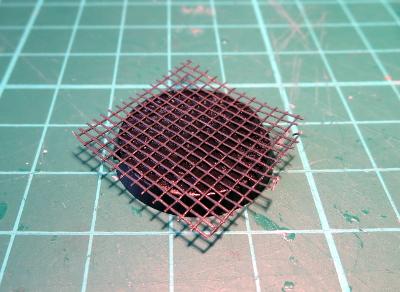
Once the glue has set, cut around the edge of the base with a sharp knife.
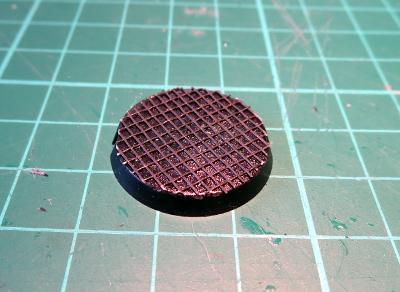
Now we can add some detail. Glue on small strips of plastic sheet or thin card to create panel reinforcing.
You can add rivets by drilling holes in the stripping with a 1mm drill bit (I recommend using a pin vice rather than a motorised tool for this, as it's really easy to gouge the holes out sideways with a motorised drill) and gluing in pieces of 1mm plastic rod, as below - I've shown the undercoated pic here, as it shows the detail better.
You can add whatever other detail seems appropriate. In the above pic, you can see a small pipe fitting or connection port made with a small square of plastic with a short length of tubing glued to it, with rivets added on the corners to hold it down.
Once you're happy with the level of detail on the base (and you generally don't need much) it's time to paint. For the below, I've just used a black spray undercoat, followed by a heavy drybrush of Citadel Boltgun Metal followed by a wash of Army Painter Strong Tone. Once the wash is dry, I finished up with a light drybrush of Coat D'Arms Hairy Brown to dirty things up here and there, and a light highlight of Citadel Mithril Silver on the edges.
You can also add sections of hazard striping, coloured lines or deck numbers for some more colour.
As an alternative, if you're feeling brave, you can go for more of a mesh catwalk look by cutting the top off the base before applying the flyscreen and other detailing.
All of the ideas presented here and in the previous article are, of course, just starting points. You can add to or combine these different effects to create your own style, or look to real-world or movie set inspiration for something completely different.
Feeling inspired? Want to share how you have based your models? Jump into the Comm Guild Facebook page and show us what you have come up with!
Battle report: Claiming the Tusculi compound
Posted on Monday Dec 05, 2016 at 07:00am in Gaming
Originally posted on DakkaDakka by Sgt. Oddball.
[Depicted in the video intro: a Karist expeditionary force has, after long preparations, come out of hiding and started attacks on multiple fronts in an effort to take control of the planet Asper. A small group led by Kaddar Nova Myro was tasked with taking the abandoned Tusculi industrial compound, valuable for the Cybel energy reserves still located in various spots around the compound.]
Fluff bits are in italics, game bits in plain text.
The few Contractors responsible for securing the compound were immediately overrun by the Karist force sent at night to take possession of its Cybel energy reserves. Reinforcements had been radioed, however, and expected to arrive at dawn. Kaddar Nova Myro wasted no time in organising the defence of his newly acquired base, knowing that across the city several other forces such as his would soon be attacking key positions and, hopefully, divert the Epirian defence forces according to plan. It would be key to discover and secure the energy reserves located in the compound whilst at the same time repelling the first Epirian counterstrike…
Having painted up my Maelstrom’s Edge forces and terrain, I figured it was high time to get them to the table. I got my brothers to come over for a teaching game. Instead of starting small, I figured I’d work something out that would show pretty much the full depth of the game and almost all the units. We just worked through a couple of turns to get an idea of what MEdge is all about, and will be following up with some actual small games to really get into it. Hopefully soon.
If you’ve no idea how the game works, the most important bit to know is that MEdge uses alternating activation, which means the attackers starts using one of his units, then the defender uses one or two units, then the attacker uses one or two units, and so on. The other thing you need to know is that suppressing units by placing Suppression Tokens (STs) is as important as actually killing them. For a little more info on the game, look here. I’ve neglected to take very many overview shots, but there’s a couple: pink are the Karist forces, yellow the Epirians. Numbers in front of unit names denote the turn and activation, so ‘2/5’ is the fifth unit activation in the second turn. Orange arrows show movement, white shows shooting.
Terrain and deployment
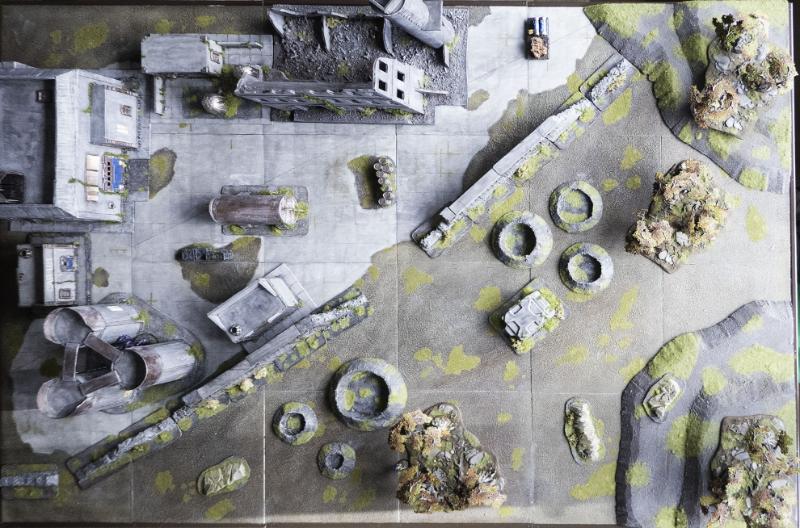
The Tusculi Compound is surrounded by a wall, now mostly crumbled, and borders the Arran woods to the south, where a small bunker guards the T-intersection between two dirt roads, one leg of which leads into the compound. Blast craters line the road, remains of the construction work for this compound. Most buildings are still standing, but the large machine workshop was destroyed in a fire, tragically killing three employees. This was one of the reasons for closing the compound that was already struggling to justify its continued operation.
All terrain was assigned cover value 2. The woods, ruin and craters are all area terrain, the rocky outcrops, buildings and the walls of the ruin are obstacles. We didn’t use the actual building rules, so units couldn’t enter.
As the Compound came into view, Journeyman Bacaro ordered his troops to dismount their prowlers and directed them to their positions. He had advised against moving against the compound with the few troops he had available at such short notice, but Command would have no delay. The amount of movement visible inside the compound on his sat image link was worrying… Nobody knew anything. There had been an attack, yes, a large alien creature had been spotted by one of the guards, for whatever that was worth. At night and with this weather, that was all the info Command had been able to gather. He’d soon find out what was going on.
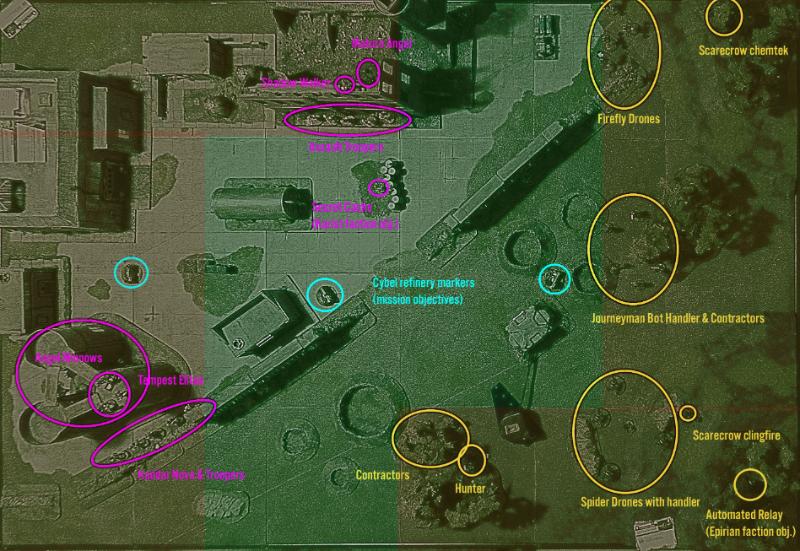
The Karist forces were deployed as shown, using the ‘big flank’ deployment type (which I inverted as it made more sense on this terrain, zones shown in red) [Apparently the text became illegible somewhere in the process... sorry... I'll make clearer images next time], made up as follows (120 pts):
Karist force (120 pts)
Kaddar Nova Myro, accompanied by 4 Troopers with a Radwave Emitter, deployed Pinned;
5 Assault Troopers with 2 Ripper grenade launchers, deployed Pinned;
3 Tempest Elites with Hellstorm energy mortars, deployed Pinned;

6 Angel Minnows;
1 Shadow Walker (upper floor), deployed Pinned;
1 Mature Angel, ‘Voxai’
Epirian force (120 pts)
The Epirians were in the opposite corner, composed of:
Journeyman Bot Handler Bacaro with a command micro drone and a grenade launcher, accompanied by 5 Contractors with 2 grenade launchers (with deployment Suppression Tokens);
5 Firefly Drones, deployed On the move;

4 Spider Drones with Cutter light machine guns and an apprentice handler;
5 Contractors with 2 grenade launchers;
A Scarecrow with Maglock Railrifle and Chemtek sprayer;
A Scarecrow with Maglock Railrifle and Clingfire sprayer (see Spider drone image above);
A Hunter warmech with 2 Strike missile pods, a Maglock chaingun and a Flakk cannon (see Contractor image above).
Mission and objectives
We played the ‘Purple gold’ mission. This means players get points for controlling the three Cybel refinery objective markers, and also for destroying large parts of the enemy force. The game runs for 5 turns or until someone reaches 18 points (and the other has at most 15). The Epirians were the attackers for this game. The Karists therefore got to place the number the Epirians bid to be attacker, being 2, as Suppression Tokens (STs) and did so on the Journeyman’s unit.Turn 1
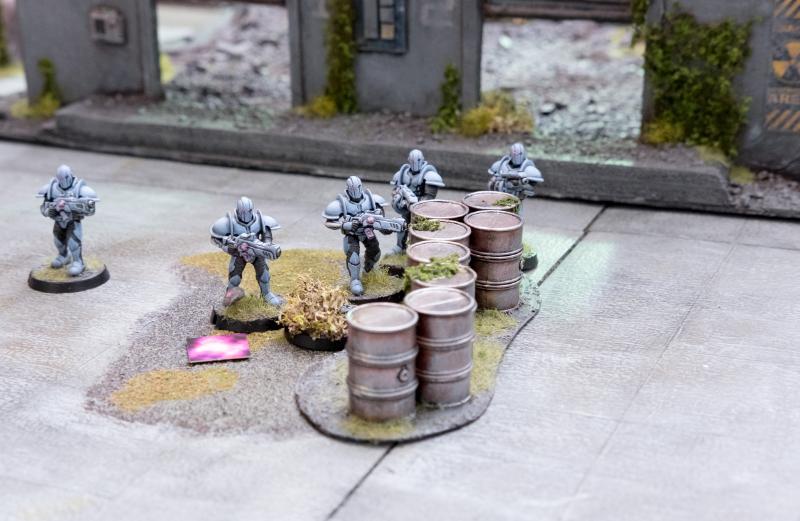
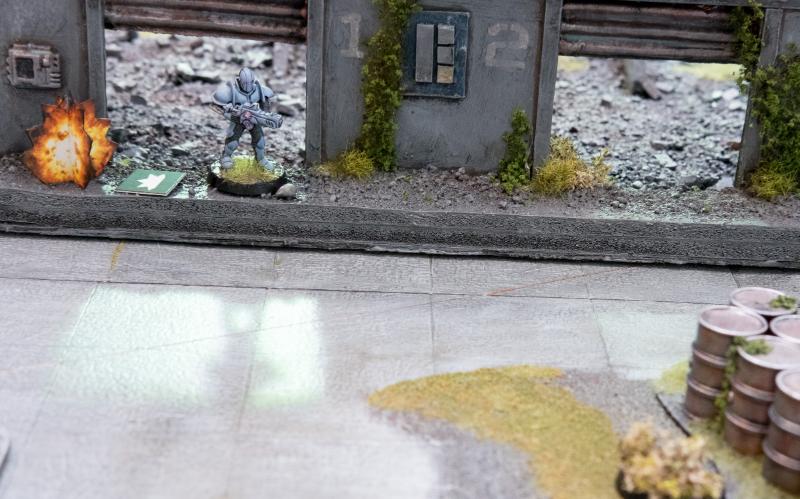
Journeyman Bacaro heard the voice of his commanding officer resonate over the radio “Don’t let them get at the Cybel energy!”. Though the Compound had been cleared ages ago, small stores of energy around the compound were left behind. These stores were accessible through terminals scattered over the compound, one of which was located near the small bunker guarding the road intersection. Bacaro decided to direct his unit to this bunker and secure the terminal. As they approached the small grey death box at a run, Bacaro noticed a group of armoured individuals occupying the parapet on one of the big silos just beyond the compound wall. He immediately signed to his unit to fire their grenade launchers. He could see their target ducking behind the parapet as the choke grenades fell, but when the smoke cleared they stood up again defiantly. This was going to be a rough morning.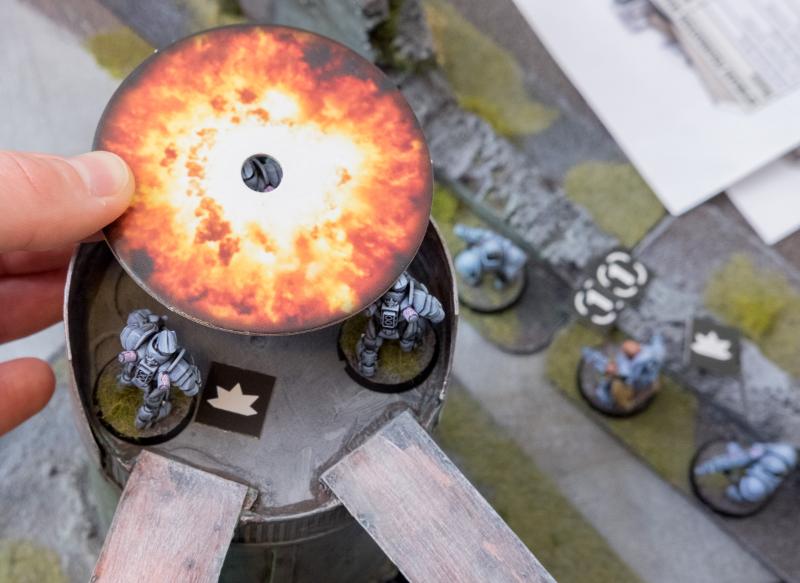
1st activation: Handler’s unit Dashes to objective and fires wild at Tempests. Packed on the silo, the choke grenades cover two Tempests and get a 6 needed to hit, ignoring cover, then a 5 to pen for a damage, resulting in 3STs in total (1 from damage, 1 from being a target, 1 from the suppress ability of the grenade launchers). Not a bad start.
Immediately fire was returned from atop the silo. Their own grenade launchers looked like toys compared to the huge energy balls that erupted from the weapons of their enemy. His troops jumped for cover as the purple balls exploded in their vicinity and Bacaro himself was knocked over by the shock of the explosions. Shrugging off the dust, a quick glance told him his men were alright, though looking scared. Their foe meant business.
2nd activation: The tempests get an order, removing 1 St which lets them pass the activation check on 2+ instead of 3+. They choose Hold & Fire, and ‘focused fire’ back at the Bot Handler. They fail to cause any penetrating hits, but do manage to put 5 STs on them. They shake off all their own remaining STs.
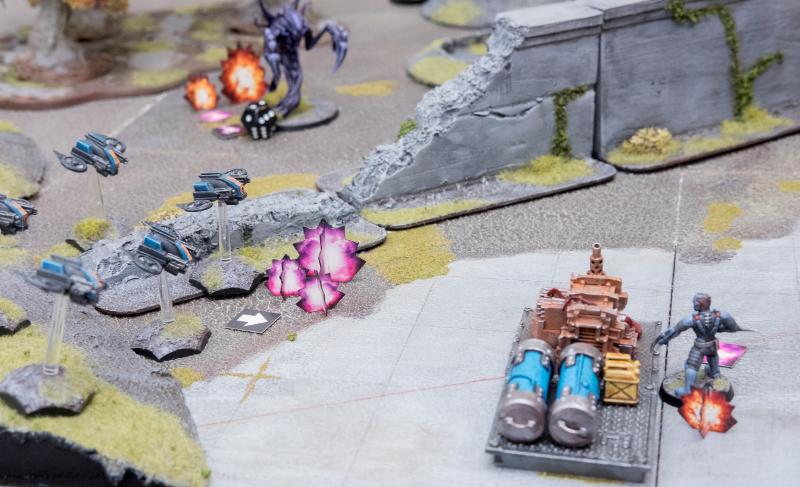
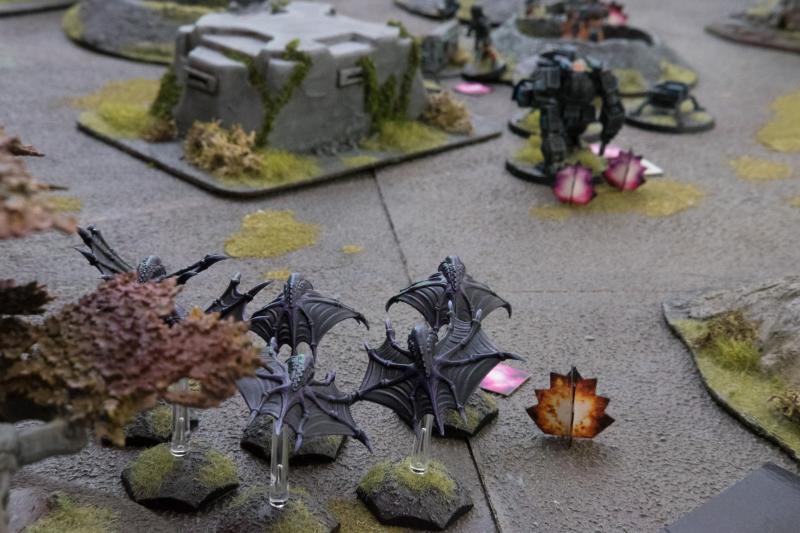
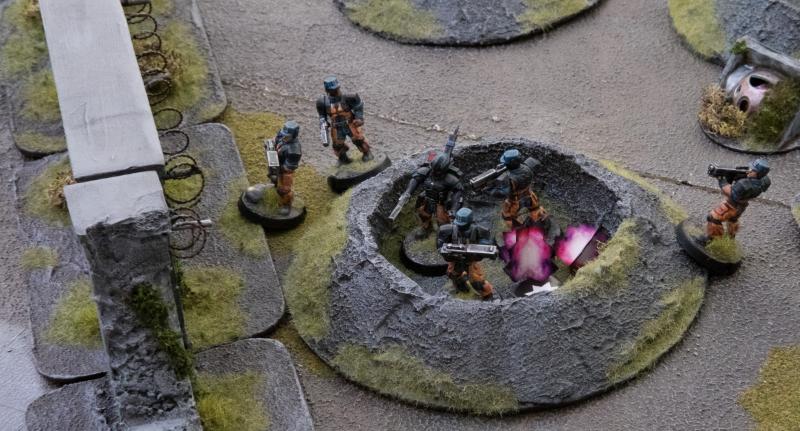
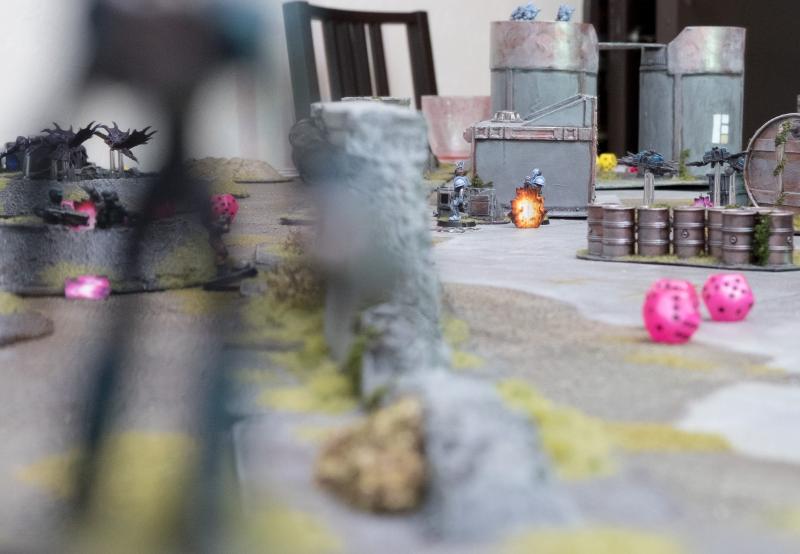
Kaddar Nova Myro surveyed the scene in front of him. The Epirians had arrived and were treated to a welcoming volley from his trusted Tempest Elites. No sooner had he seen the Epirians jump for cover than another blast was felt from behind the walls. Turning his head, he saw his most powerful weapon, Voxai, appear from nowhere in the midst of the advancing Epirian troops. A small swarm of Drones flying in the area was seen darting around to avoid being hit by the mighty Angel’s mysterious tentacles.
3rd activation (no pic here, sorry): The Angel assumes a winged form and teleports in a Dash action amidst the Epirian lines, causing a shockwave that puts STs on the nearby Fireflies and Contractors. It shoots the Fireflies and causes two hits, but the nimble drones dodge both (they are deployed on the move), but do take 3 STs.
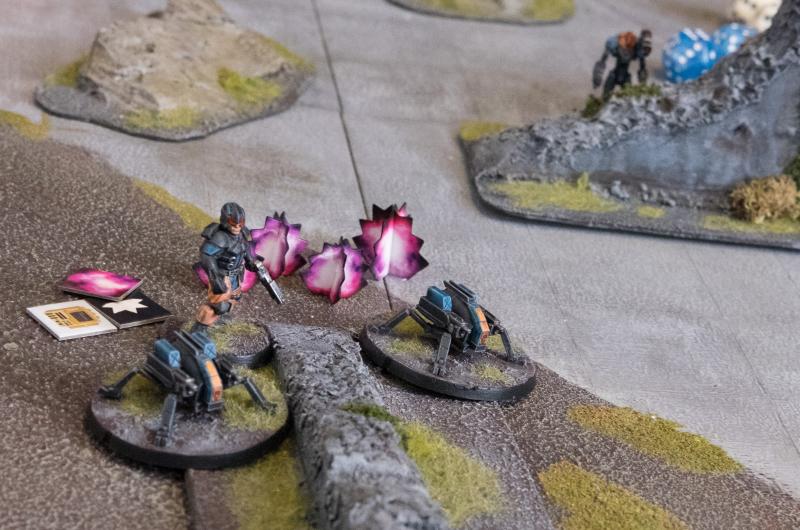
Bacaro had never before seen a beast like this, but here it was in this middle of his lines. It must be one of those Angels he’d heard talk of. Immediately he linked his mind with the most destructive element in his force, the Hunter warmech. The robot emerged from the woods to draw a line of sight to the Angel on the other side of the field. As soon as its large frame emerged from behind the bunker, two missiles swooshed over Bacaro’s head, followed by the huge Maglock Chaingun’s distinctive burst. The Angel flapped its wings to avoid the Hunter’s barrage, but with only limited success. Bacaro watched it plunge to the ground and balled his fist at this accomplishment, only to see the terrible dark form arise again.
4th activation: The Hunter senses an opportunity to get into the rear arc of the Angel. The Handler activates its Lock-on protocol with an order. In an Advance & Fire action, the Hunter makes its 1 allowed pivot, then moves to get a better line of sight behind the bunker. 2 Strike missiles and the Maglock Chaingun let loose at 2+ to hit. 1 missile gets dodged by the winged Angel, but nevertheless 9 damage is caused with some great dice rolling, dropping the Angel to FOR1, and 7STs.
Bacaro had no time to pay further attention to the giant alien. His unit was now under fire from a squad appearing behind a row of barrels inside the compound. Looking round, he could still see all of his squad members, but they were in no position to do anything useful as long as they were kept under fire like this.
5th activation: The Assault Troopers move to claim their faction objective and fire at the well dispersed Contractors, reducing the effectiveness of the Ripper Grenade launchers. Ignoring cover, some hits get through, but none penetrate. The unit suffers 3 more STs and is now heavily suppressed.
Kaddar Myro engaged the boost mode on his reactor pack and led his squad in a dash towards the Cybel energy terminal located near the crew cabin, keeping themselves between the building and the wall. It was imperative that the Epirians not shut down these sources of energy for good. The nearest Epirian troops were already keeping their heads well down after the barrage by the Tempests and the assault troops, but Myro ordered his own squad to fire their way as well. If he could chase off these first Epirian forces now, he’d do the Karist cause so much good.
6th activation: The Kaddar Nova, with reactor in kinetic boost mode, and his unit Dash to a Cybel refinery objective, electing to be on the move. Wild fire from the Carbines puts 3 more STs on the Bot Handler unit.
Here’s an overview of the first 6 activations. Orange is movement, white is shooting (and the Angel’s shockwave). “1/4” means 4th activation on the first turn.
Meanwhile, Apprentice Bot Handler Kasero followed his chief’s lead and directed his squad of Spider Drones to pour their fire into the menacing alien, at the same time keeping low to avoid getting caught in the crossfire that was causing Bacaro so much trouble. Unfortunately, the winged creature didn’t seem much impressed by the Drones’ machine guns.

7th activation: The Spider Drone unit digs in, puts a damage on the Angel with their light machine guns, firing wild, for 3 STs (target, damage, dodge).
Joining the robot attack force, the northern Scarecrow also pointed its precision Railrifle at the Angel, but the unnatural alien flapped its wings in defiance and easily shrugged off the Scarecrow’s shots.
8th activation (no pic): The Scarecrow in the high corner, with Chemtek sprayer, chooses a hold and fire action, and fires a round of suppressive fire. He’s just out of range for Rapid Fire protocols to be enabled, but causes 3STs on the Angel (damage, dodge, target). Choosing Hold & Fire was a mistake because the Angel, being a behemoth, is fearless and doesn’t take suppressive fire discipline checks.
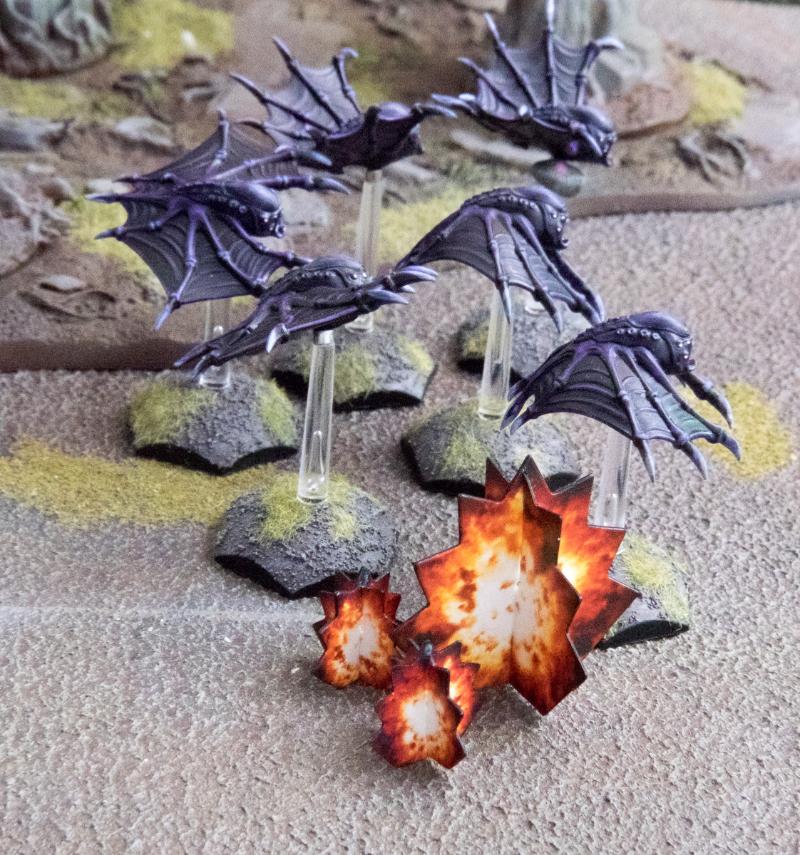
Sensing that their kin was under threat, the Angel Minnow Pack screeched and took off towards the nearest enemy, the team of Contractors in the woods. A mass of Cybel Pulses erupted from their gaping mouths. One of the Contractors fell down and didn’t rise again.
9th activation: The Minnows Dash over to the Contractors in the woods and do enough damage to kill 1.
Up in the hills to the south a second Scarecrow followed its automated combat systems and resolved to join the fray, advancing to gain a clearer field of view into the combat. Its railrifle targeted the Karists near the entrance, but didn’t manage to hit the well concealed troopers.
10th activation: The lower Scarecrow, with clingfire sprayer, Advance and Fires and shoots the Nova unit. With a double 1, not much luck, but he does cause 1 ST.
As the fight over the compound started in earnest, Bacaro shifted his attention to the south, where a second flock of alien creatures had engaged his force. They were coming from all sides. The Contractors advancing on this side of the field had suffered a casualty and were dawdling. Any more of this and the fight would be over before it truly began. He hailed the team leader over the comm link and gave off an order to secure their position and focus on this new group of aliens. Momentarily the distinctive ‘thump’ of grenade launchers sounded from the woods and puffs of smoke emerged around the flock of aliens, which seemed to at least distract them for now.
11th activation: The Contractors in the woods get an order and go from 4 to 2 STs. They still fail the discipline check, but can at least choose to Dig In. They shoot the Angels, who are immune to the Poison ability on the choke grenades. Being mobile they dodge 1 hit and take just 1 damage. 4 STs are caused (target, damage, suppress, dodge), and the Contractors shake off their own STs.
High above the field of battle, the Karist Shadow Walker Elyssa stood assessing the flow of events. The Angels were doing a good job striking at the enemy’s flanks, whilst what seemed to be the Epirian command squad was completely pinned down by fire from the Tempests, the assault troopers and Myro’s squad. To her left, a flock of Drones emerged from the woods. These would be able to circle around the flank and attack the Karists in the rear. Using her rift suit, Elyssa teleported to block their advance. Loosing a few shots at the Drones made them perform evasive action, halting their progress for a second.
12th activation: The Shadow Walker Dashes, utilising open ground bonus movement, to the cover of the crates and generator, taking 2STs for doing so (I think we made a mistake here. Can’t remember for sure, but I think this was a teleport move, which doesn’t allow open ground bonus movement). Its shots put 3 STs on the dodging Fireflies, after which 1 ST is shaken off.
13th activation: The automated relay is activated and does nothing (it will generate a victory point at the end of the turn).
The Firefly Drones were following the course set in advance by Bacaro, but dithered, first as the giant Angel appeared to the south and then as another enemy entity suddenly appeared in front of them, taking them under fire. Without guidance from a Handler, the automated protocols determined it would be best to fly back into the cover of the woods, where they stopped and reassessed the situation, ready to move out again.
14th activation: The Fireflies are shell-shocked due to the Fearsome units around it (specifically the Angel at Fearsome (2)). They take a Shaken action, and must retreat due to nearby enemies. Flying into the woods with a normal (not dynamic) move, they roll well and shake off all STs.
Turn 1 ends with each side taking 3 points (2 for a refinery each, 1 for faction objectives).
Turn 2
Turn 2 sees the Karists win the priority roll, giving it the Epirians. 3 Command Points (CPs) are generated for the Karists, total now 4, and 4 CPs for the Epirians.As the Angel now seemed to have driven off the Firefly Drones, Bacaro was confirmed in his belief that the main priority was to destroy the creature. Once more linking with his Hunter, he guided the robot’s fire. Again, one found its mark and struck the Angel in its core. As suddenly as the Angel had appeared, as suddenly it was now gone entirely. Never before had Bacaro been so relieved at the support of his trusty Hunter.
1st activation (no pic): the Hunter gets a lock on order, Advances to a better position with open ground bonus movement and focused fires at the Angel. 1 Strike missile gets dodged, but the rest hits and penetrates, killing the Angel. Unfortunately, there is no explosion. Spectacular start from the Hunter.
Just after destroying the northern alien threat, the Hunter was now targeted itself by aliens from the south. The flock of smaller Angels that had done for one of his Contractors was now spitting lethal energy at the Hunter, but its bulky frame could easily take it.
2nd activation: the Minnows Dash to avenge their kin, with a 20” dynamic move they get into position behind the Hunter. Unlucky with the penetration rolls, all they manage Is to put 2STs on the Hunter.
Having seen off the Fireflies, only to watch as a giant robot caused the apparent destruction of Voxai, Elyssa ran back into the ruins. Without the big Angel’s support, she wasn’t safe here. Besides, they were here with a more important task than fighting Epirians. The Cybel energy needed to be collected so that they could at least bring a part of it if they were forced to retreat. Elyssa determined to move off towards the terminal they discovered near the silos occupied by the Tempests and see how much was to be gained there.
3rd activation: the Shadow Walker Dashes back up into the ruins with a dynamic move, getting 2 STs and not managing to shake off her total.
With the field now apparently free of threats, the Fireflies again engaged their engines and moved back towards their original goal. Spotting a squad of enemies in their track, they powered their laser system and transmitted information as to this enemy’s position to the force.
4th activation: The Fireflies Dash out and paint the Assault Troopers with low power laser fire, which ends up being pointless as the Bot Handler won’t be getting off his Aerial Drone Strike...
Bacaro, having got rid of the Angel, now ordered his own team to make an orderly retreat out of this deadly crossfire, whilst telling Bard to finish disabling the terminal. “Sir, we need back-up if we’re to take this compound! This is madness!”, his team leader shouted. They hadn’t seen battle before, and it showed…
5th activation: The Bot Handler orders his Contractors so they are no longer shell-shocked, but they’re still forced to retreat slightly, managing to keep control of the objective. They only shake off 3 STs, leaving them very suppressed.
Myro, witnessing the loss of Voxai, determined he needed to press on whilst the enemy was still on the back foot. Engaging his reactor’s shield mode, he led his unit towards the entrance to the compound, at once reaching an energy terminal and taking up a central position behind the wall. His unit opened fire at the leading Epirians again as they were seen to move back into the craters behind the bunker.
6th activation: The Kaddar Nova and his unit Advance and Fire, with the reactor now in shield mode, and the poor Handler again as target. The Gauntlet misses and 3 other hits are discarded due to pinning, but 4 STs are added to the total.
Atop the silos, the Tempest Elites pointed their mortars at the Contractors who were now ready to attack the Minnow pack to the rear. A hail of mortar fire landed in the woods and another Contractor fell.
7th activation: the Tempests Hold and focused fire on the pinned Contractors in the woods, again 3 hits are discarded, but 1 explosive hit does 3 damage and kills a contractor. 6 STs are added (target, 3x cover, 2 from damage).
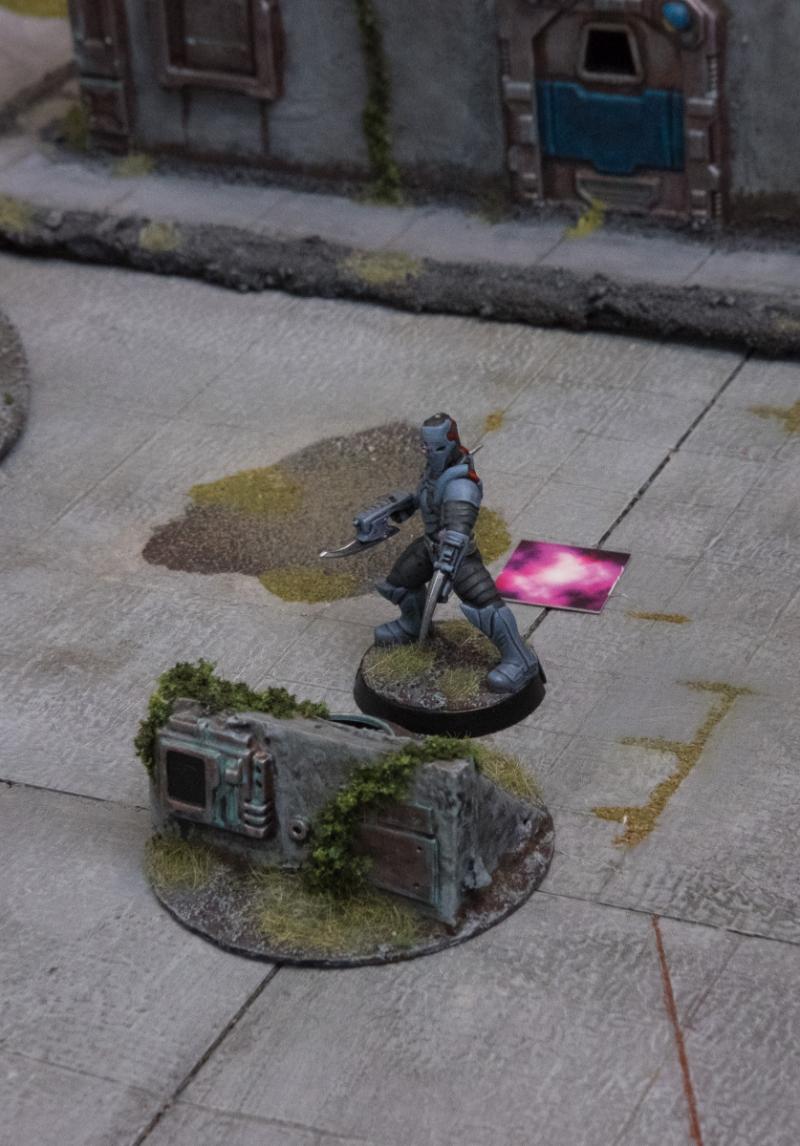
Selecting a new target, the northern Scarecrow shoots the nimble enemy that just appeared and routed his flying robotic comrades. The Shadow Walker was too quick, though, and reached the safety of the ruins unscathed.
8th activation (no pic): The upper Scarecrow elects to Hold and Fire at the Shadow Walker, but the 1 sniper hit gets dodged by the Shadow Walker, who does suffer 2 STs.
Witnessing the pinch his commander was in and longing to prove his mettle, the Apprentice Handler directed his Spiders to support his boss. Resolving to end the crossfire, he made his Drones target the troopers behind the crates. A hail of machine gun fire made them duck behind their cover and it looked like one of them was down. Job well done.

9th activation: The Spider Drones advance and Fire at the Assault Troopers, killing 1 and putting 5 STs on them.
Myro was surprised by the sudden aggression of a group of tiny drones that was now seriously threatening his assault troops, who were ducking behind some barrels whilst they should be pressing on. Roaring at them to return fire, the troopers let loose with their pulse carbines and grenade launchers, making one of the drones explode in a cloud of metallic bits.
10th activation: The Troopers get an order, getting rid of 1 ST, they then pass their activation check, Advance and Fire at the Spiders, and destroy one, adding 4STs with the cover ignoring ripper grenade launchers.
11th activation: The automated relay does nothing.
In the woods to the south, the Contractor team panics. With two dead, aliens to their rear, their leader heavily suppressed in the front lines and a squad of heavily armoured warriors firing mortars at their positions, they determined it would be better to regroup somewhere safer, and hoofed it.
12th activation (no pic): The Contractors are shell-shocked, must retreat and have nowhere to run with the Minnows having flown behind them, so they flee the battle (ie: they’re casualties).
Had they held on for a moment more, the Contractors would be heartened by the sight of the southern Scarecrow advancing to face the Minnows and barbecuing them with his clingfire sprayer.
13th activation: The Karists have no more units, but the Epirians still have 1 Scarecrow to use. He Advances and Fires his clingfire sprayer over the pack of Minnows, doing only 1 damage, but putting 6 STs on them.
That ends turn 2, with again 3 points for each side, making is 6 v 6.
Overview since the previous overview image, so half of turn 1 and all of turn 2.
Turn 3
In turn 3, the Karists again win the priority roll, giving it to the Epirians.Bacaro was at the point of despair, this was not going at all well. How many of them were in that compound? Contacting command, he reported heavy losses and no progress. Recognising the situation their Journeyman was in, Command responded with a change of orders: “Hold until relieved, further support has been mobilized and is on its way to your position.” If only he needn’t rely on humans in these situations… a couple of aliens show their face and the unit that was supposed to have his flank just runs off. That’s one issue you never had with robots.
The Epirians use their automated relay to generate an extra CP, getting 6. The Karists have 5 CP this turn. They try to bring back an Angel as reinforcement, but the Epirians stop that, spending all their CPs.
Poor Bard didn’t have the nerve to stay at disabling the terminal and was running for a crater. Acting on his new orders, Bacaro takes the rest of his shaken squad into the crater as well, orders them to take up positions and then directs their fire to support his Apprentice’s attack on the troopers to the north of the entrance.
1st activation: The Bot Handler’s unit manages to activate on a 6, Dig In, and shoot at the Assault Troopers for 2 STs.
Elyssa sees the threat her brothers below are facing, but keeps her priorities straight and activates her rift suit once again, teleporting down to the Cybel energy terminal.
2nd activation: the Shadow Walker passes its activation check and teleport Dashes to the unclaimed refinery objective in the back of the field, then shakes off her STs.
From the terminal, Elyssa sees the emergence of the Firefly Drones that have apparently re-joined the fray. To her horror, she watches the little Drones fly right over the Assault squad at high speed, dropping a load of fire bombs over her brothers. They never had a chance. She watched three of them burn up whilst the last remaining Trooper runs off in the direction of the ruins.

3rd activation: the Firefly Drones Dash and make a hit and run at the Assault Troopers. Defensive fire generates a lot of pistol shots, but only 1 hit, that gets dodged. The Clingfire Pods on the Drones do 14 hits, causing 7 damage which kills 3 Troopers. A very nasty run!
On the other side of the field a similar scene takes place as the Scarecrow keeps pouring clingfire on the flock of aliens.
4th activation: the clingfire Scarecrow burns the Minnows again for 3 STs.
Screeching at the robotic flamethrower, the Minnows turn tail and fly into a crater.
5th activation: the Minnows perform a Shaken action, retreat into a crater, become pinned, and shake off their STs down to 4.
Unsure of the cause of the giant conflagration from behind the row of barrels hiding his target, the Apprentice Bot Handler leads his Spiders into a crater, whilst he himself undertakes to finish the work Bard started on the terminal.
6th activation: the Spider Drones fail their activation check, perform a Shaken action and retreat, becoming pinned and getting rid of all their STs.
Meanwhile the Hunter, now unguided, takes cover behind the bunker and opens fire at the Troopers protected by a shimmering field. His shots hit their mark, but the field is too powerful.
7th activation: the Hunter also fails to activate and Digs in, firing wild at the Kaddar Nova. Being protected by a field, the unit just takes 2 STs.
The Tempests on top of the silo watch the Epirian leading squad fall back into a crater and sense an opportunity. In their current clumped up position the squad is extremely vulnerable to their mortar fire. Moments after they fire their explosive payloads, the crater erupts in purple fire. It’s a terrible thing, reflects the Tempest leader, but the cause demands it.
8th activation: the Tempests Hold and Fire at the Bot Handler’s unit. Clumped in the crater, they suffer a lot of Hellstorm shots. 3 Contractors are killed, and they take 8 STs.
A true hero, the last remaining member of the Assault squad that got covered in sticky fire reached the ruins and recovers his nerves, standing in resolute defiance, emboldened by his faith.
9th activation: The single remaining Assault Trooper retreats, taking cover in the ruins and shaking off 6 STs.
The Scarecrow in the north has now positioned itself so that its field of view comes around the wall into the compound. It too targets the shimmering field near the entrance, but again, it is too powerful to penetrate.
10th activation: the upper Scarecrow Hold and Fires at the Kaddar Nova and his unit. Their cover is denied as the wall they’re hiding behind doesn’t block line of sight from the Scarecrow, but the Nova’s field allows them to discard all hits, taking 3 STs.
11th activation: the relay does nothing.
Under fire from both corners of the field, the Kaddar Nova blesses his foresight as the field generated by his reactor absorbs hit after hit. Consolidating his position, he orders his brothers to open fire at the largest robot in the field. At least one of their shots must have hit a vulnerable part of the hulking machine, as it’s now emitting a black cloud of smoke.
12th activation (no pic): the Kaddar Nova actually fails his activation check and Digs in, putting 3 damage on the Hunter, dropping its FOR by 1 and putting on 4 STs, then shaking off all their own STs.
With ringing ears, Bacaro is horrified when he sees all but one of his squad either deadly still or moaning on the crater floor. Whatever artillery their foe is carrying is quite too much for his small force. His last hope is for his Fireflies to save the day…
An eventful turn, which really shows how badly the Epirians needed the command tokens they all spent on blocking the return of the Angel. The Epirians score 2 points for the one refinery, whilst the Karists score 4 for two refineries, having been forced off their faction objective.
Turn 4
Contacting headquarters once again, Bacaro relays that the right flank has been secured, but the left is lost and pressure in the centre is mounting. “Hold until relieved”… Looking across, Bacaro sees a second winged form emerge beyond the buildings of the compound. Oh no…In Turn 4 the Epirians win the priority roll and give it to the Karists. Using the relay’s ability, the Epirians generate 7 CPs, the Karists’ total is also 7. They bid 5 for bringing back the angel which the Epirians counter with 0, meaning it will be back this turn.
The Tempest Elites waste no time after cooking the enemy leader. The Firefly Drones that burned three of their brothers are clearly too much of a threat to be left unchallenged. Once more their Hellstorms explode into action and absolutely eradicate the tiny hovering machines.
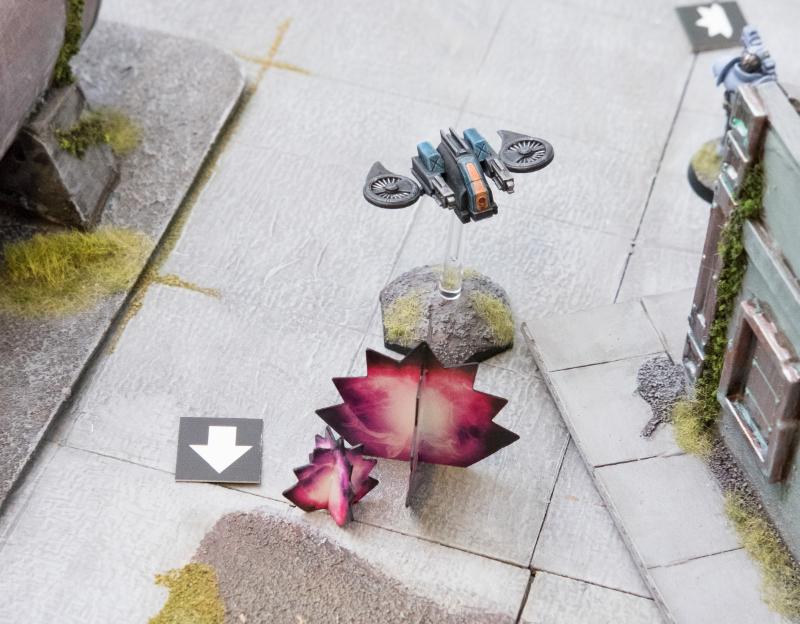
1st activation: the Tempests Hold and Fire at the fireflies, causing 4 pens that destroy 4 drones, and causing a massive 10 STs.
With his final hopes dashed, Bacaro shouts to his unharmed Contractors to help pick up the wounded and fall back into the woods. When Hold until relieved in fact means Hold until destroyed, it’s quite clear where his duties are. Loosing a few covering grenades into the Compound, Bacaro orders his force to retreat.
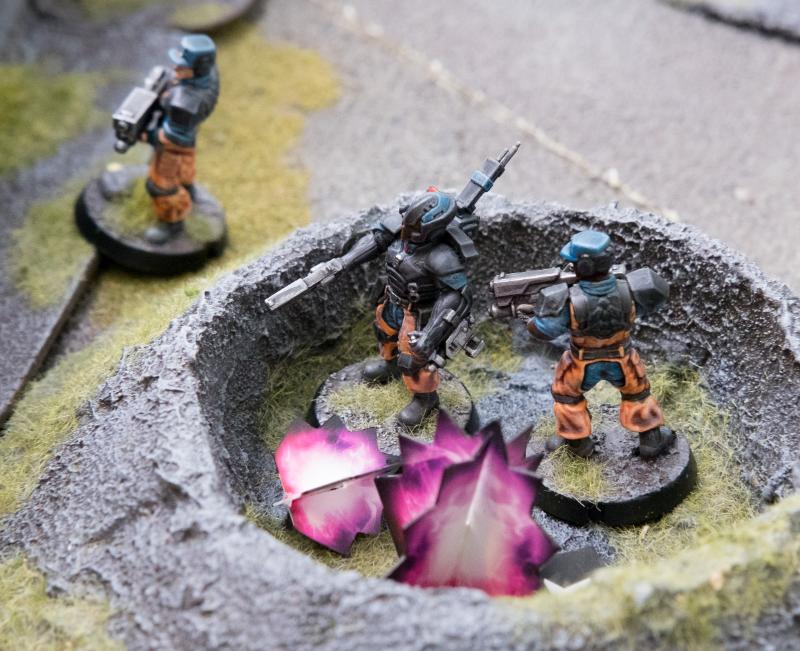
2nd activation: the Bot Handler orders his own unit around and removes 6 STs, but the unit still fails its check, performs a Shaken action and, firing wild at the Nova’s unit, puts 2 grenade hits on them which get discarded by their field.
As Myro switches off his reactor, he cannot but feel proud of his achievement today. No doubt the Epirians will be back in numbers soon, but now at least he has time to collect whatever energy is here and build a united front from which to start the process of enlightenment. Today was a good day. As he turned his head, he saw the familiar form of Voxai gliding towards him over the compound buildings. These creatures never stopped to amaze him. Surely they, if nothing else, were proof of the divine quality of the Maelstrom.
This being a teaching game it had run for quite a while and we ran out of time. Judging the situation, the Epirian player decided to yield at a final score of 10VPs for the Karists and 8 for the Epirians.
With the alternating activations, this game gets really interesting really fast. Command points / orders can really make the difference when you quite need a suppressed unit badly. Putting the commander smack bang in the line of fire was perhaps a poor choice for the Epirians. Losing the big Angel fast was a blow for the Karists, but it did cause a bit of a stir on that flank and distracted the Epirians from the rest of the Karist force. The Firefly bombing run was also quite epic, and the Tempest’s Hellstorms can do frightening amounts of damage. Yeah, really cool first game and looking forward to more!
All Your Base, Tutorial Part 1
Posted on Tuesday Nov 29, 2016 at 05:00pm in Tutorials
- by Iain Wilson
Once upon a time, there was an more-or-less universally accepted standard that gaming miniatures' bases would be either covered in flock (shudder) or covered in sand and painted light green. We've come a long way since then, with the common standard now to have sand painted brown with a couple of tufts of static grass to brighten things up a little.
If that's leaving you less than inspired, then this article might be for you! Over a couple of weeks, I'm going to run through a few different ways to pretty up your bases, ranging from easy to 'might need a little practice' in complexity.
First off the blocks: Industrial Grey
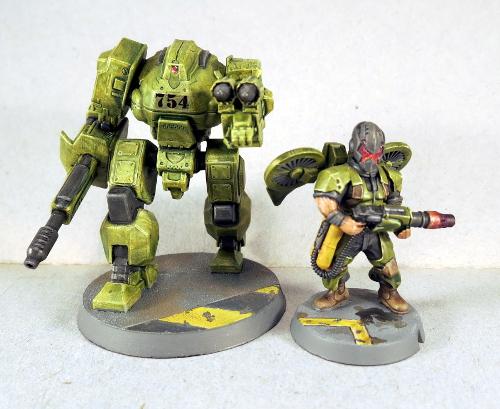
This style is intended to represent industrial or urban cement-paved areas, and can be as simple or as complex as you want it to be (or as your painting skills will allow!)
Start with a medium grey - I've used Vallejo Basalt Grey.
Then drybrush with a lighter grey - in this case, Vallejo Light Grey.
You could leave it there, but where's the fun in that?
You can use a ruler or a cast off piece of sprue to mark out lines on the cement, to represent part of the sorts of markings you might find on cement floors - hazard lines, lane markings, etc.
Paint in between the lines with an appropriate colour. Yellow is a great contrast against the grey, or white is good for a more subdued look.
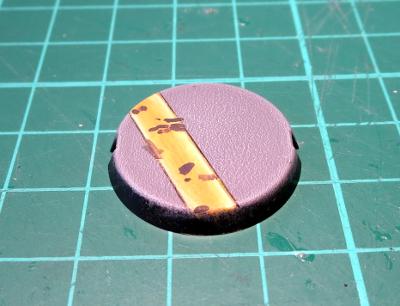
Then you can add weathering, dirt and stains to your heart's content. For the chips, paint small splotches of your original medium grey and highlight around the edges with the light grey. Dirty things up by drybrushing with a little brown, and add drops of ink for oil or chemical stains.
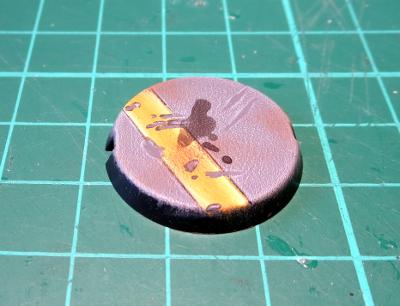
Finally, paint around your base edges.
There are several schools of thought on base edges. Some painters like to go with a colour that complements whatever is on top of the base. Some prefer a contrasting colour, or different colours to denote different units, or even just good old black. There's no right or wrong - just go with whatever you think looks best.
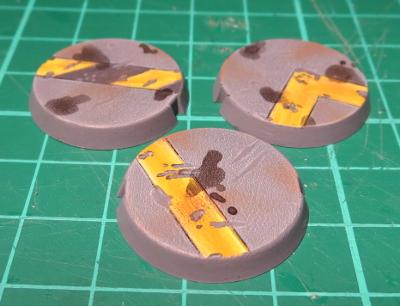
Next: Let it snow!
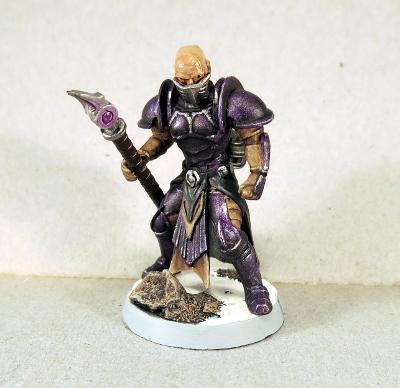
There are various hobby 'snow' products on the market for creating wintery bases or terrain, but to me they never look quite right, as they're too grainy. Instead, I like to go with something like this:
Start by gluing a few small lumps of sand or fine gravel to your bases for a little texture. If you're doing this with the bases separate to the models, make sure you leave space in between the rocky clumps for the model's feet.
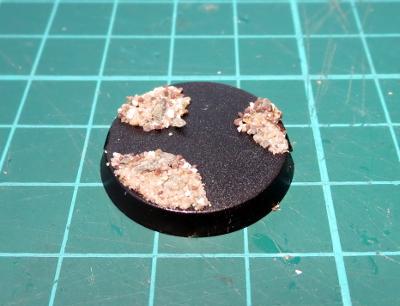
Once your glue has set, paint the rocks up. I've opted for a black wash to start out. This is followed by a heavy drybrush of brown (I used Citadel Tallarn Flesh here) and then a light drybrush of light grey (the Vallejo again). That's not a hard and fast formula - rocks come in all sorts of colours and textures, so use whatever colours will make for the nicest contrast with your miniatures.
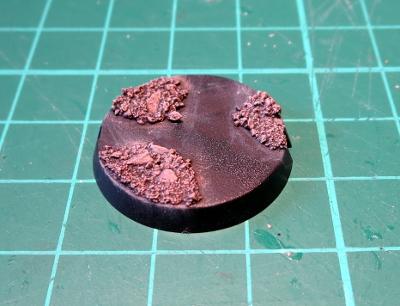
Once that's done, the flat space in between becomes snow. If you want to (and I would recommend it on larger bases), you can break up the flatness by adding smooth bumps with Green Stuff or Milliput, or just leave them flat. Paint with white.
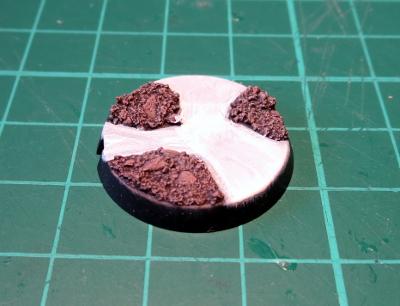
The last step is a little hard to photograph, so you'll have to take my word for it that it looks better in person. To get a nice, shiny snow look, I use a pearlescent paint. You can find a few variations on a similar theme in most craft shops - either a pearl white paint, a pearly gloss sealer, or a pearl medium which you add to your paint. Whichever you wind up with, paint a coat or two over your white, and then finish by painting the base edges.
Moving on: Rocky Wasteland
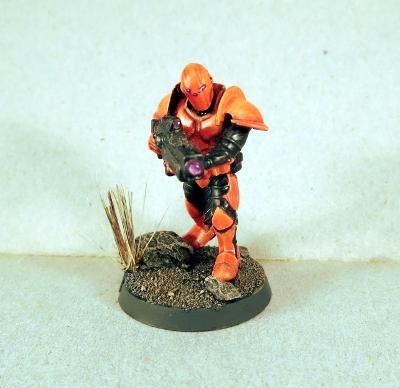
OK, so this one isn't actually too far removed from the standard sand-and-static-grass option, but without the static grass. Start by gluing some fine gravel mix - Mine is a mix of silver sand, regular sand and some crushed up slate. I like to add some bigger pieces of stone scattered around these bases as well to create a little bit of a feature.
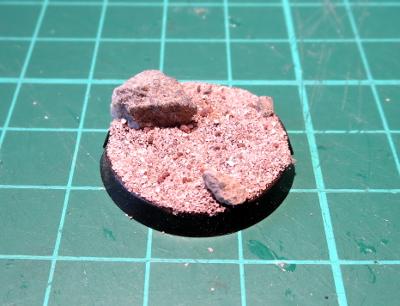
Paint: start with a black or brown wash to get into all the crevices.
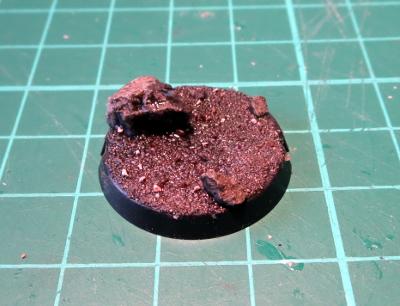
The drybrush with browns and/or greys (or whatever other colours you want your wasteland to be). I've used light grey and Coat D'Arms Hairy Brown here.
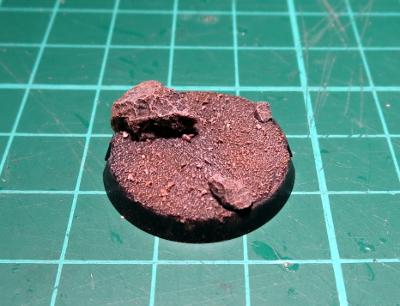
That's the boring part. Now to add some zing! Find yourself an old toothbrush, and pull out one of the clumps of bristles - use pointy pliers if they're reluctant to come out. There will sometimes be a small piece of metal in the fold at the bottom of the bristle that helps hold them in the toothbrush. If there is, discard that.
Before you let go, add a little superglue into the folded bottom of the bristle clump to hold it all together.
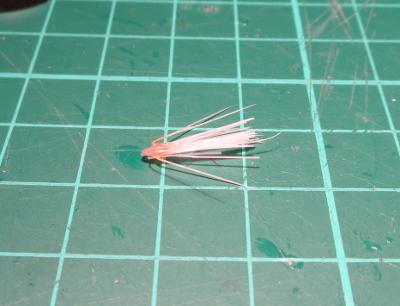
Then apply a small dollop of clear craft glue or superglue to the bottom of the bristles and press them into place on your base.
If you have a nice hollow to glue the bristles into, superglue will work fine. If they're sitting more on top of the gravel, the craft glue is better as it is thicker and will pool around the base of the bristles to give them a little stability.
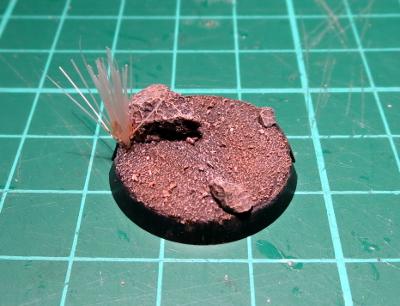
Once your glue is set, paint by washing with brown ink, and then drybrush a little bone or light green over the top to pick out the individual bristles again. Then paint your base edge.
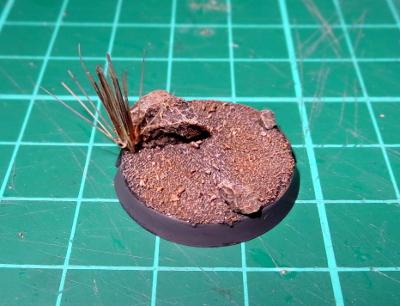
As a final note on this one - If you're making up your base separately to the model, it's a good idea to either leave a couple of spots with no gravel for the model's feet to glue into, or pin the model to the base, as model feet don't tend to glue well to sand or gravel due to the lack of flat surface to grab onto.
In part two, we try to make your bases more riveting, and wander off in search of a shrubbery. Stay tuned!
Feeling inspired? Want to share how you have based your models? Jump into the Comm Guild Facebook page (https://www.facebook.com/groups/MaelstromsEdge)!
Painting Tutorial: Lens Painting
Posted on Tuesday Nov 22, 2016 at 05:00pm in Tutorials
- by Iain Wilson
Time for another painting tutorial! This time around, I'm having a look at lenses.
Epirian bots have a single eye lens which creates a great focal point on the model's 'face' if it's painted in a nicely contrasting colour. Below, we'll go through three different, easy techniques for painting these lenses without losing too much hair in the process.
The Wash Method
This method tends to not look quite as effective as some others, but has the benefit of being quick and easy to do. Start by painting the lens silver.

Then add a wash of the colour you want the lens - in this case, I've used Army Painter Red Tone. This will give you a sightly shimmery, coloured lens. If the lens is convex (as with the drone lenses) you'll also get a lighter point of colour in the middle. For flat lenses, like on the Hunter bot, you can replicate this by adding a small dot of white or pale grey after the ink has dried.
The Specular Method
This is a variation on the common blending method used for lenses and gemstones and the like. Start with the main colour you want the lens to be - the below is Vallejo Bloody Red.

Using a fine brush, apply a small amount of black ink to the top right of the lens. You want enough that it pools against the side, but not so much that it runs over the whole lens. If this gives you a particularly stark transition from the red to the inked area, you can blend the two in a little once the ink has dried by adding a small dot of red back into the middle of the lens, overlapping onto the edge of the inked area.
Finally, using some thinned white paint, apply a tiny dot in the middle of the dark inked area, and highlight the bottom left edge of the lens.
The Glue Method
Start with your chosen base colour - I've gone with red again, because I like red lenses...
Now squeeze out a small amount of superglue onto a pallet or other flat surface. Pick up a tiny drop of glue on the tip of a pin, and apply it to the lens. It may take a little experimenting to get the right amount (You might want to practice on something that doesn't matter first, as it's next to impossible to clean excess glue off again if you use to much). You need enough that it forms a small bubble of glue covering the lens with the surface tension of the glue holding it in place, but not so much that it runs out past the edges of the lens. Leave the model sitting with the lens horizontal to dry.
As the glue dries, it will most likely shrink a little, and will leave a nice, shiny, glass-like coating over the lens.
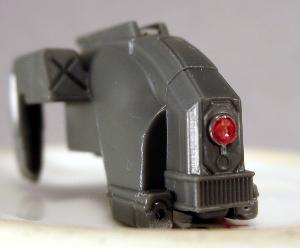
You can also us this technique with clear craft glue, although as that sort of glue tends to be thicker and tackier than superglue it can be tricky to get a small enough amount in the right place. You could probably also use gloss sealer, although depending on the size of the lens and the amount of sealer you apply, it may take longer to set properly.
And there you have it: Three different ways to paint your robots' optic lenses. Go forth and assemble your robot legions, and as always feel free to share your creations on the Comm Guild Facebook page (https://www.facebook.com/groups/MaelstromsEdge)!
Angel Keeper Conversion Tutorial and Rules
Posted on Tuesday Nov 15, 2016 at 05:00pm in Models
- by Iain Wilson
I've previously shown off a couple of conversions built to represent Karist Angel Keepers - a HQ unit that is currently in development and intended to offer a different way of playing Karist forces, by giving them access to an army potentially made entirely (other than the Keeper, of course) out of Angels. The conversions garnered a fair amount of interest, so I thought I should put together a brief run-down on how to do it. Of course, nice conversions are all well and good, but you also need rules to use them. So as an extra bonus, I snuck into the rules development vault and purloined an early playtest version of the Angel Keeper's unit card, which you can download as a PDF here.
Note: This card is now out of date. The current version of the Angel Keeper's rules can be found in the Karist Enclave file here.
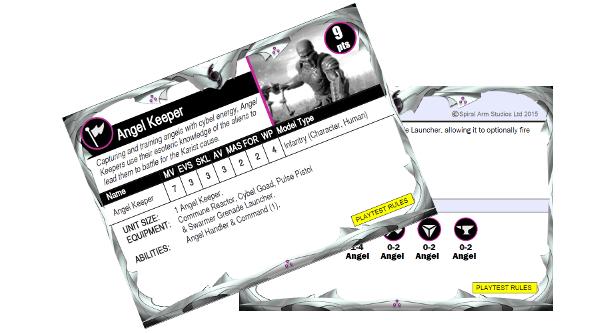
The PDF includes two cards: The Angel Keeper unit card, and a 'companion' card that includes new rules that apply to the Keeper. The rules on both of these cards are 'Playtest Rules', meaning that they're rules that are still being worked on, so you should ok it with your opponent before using the Angel Keeper in your games. Once the development process has been completed, the rules on the companion card will be rolled into the normal rulebooks and a final version of the unit card will be issued.
Obviously, the Keeper's force roster isn't yet as complete as it could be, because there are currently only the two angel kits - Minnows and the Mature Angel. Rest assured there will eventually be more unit options (and the associated model kits) to fill those other slots!
Building the Angel Keeper
My initial idea for the Angel Keeper included a sculpted mask and a flail lifted from a Games Workshop kit. He looked the part, but the sculpting required was going to be a turn-off for some players, so I worked up a second incarnation that used only MEdge parts, which looks like this:
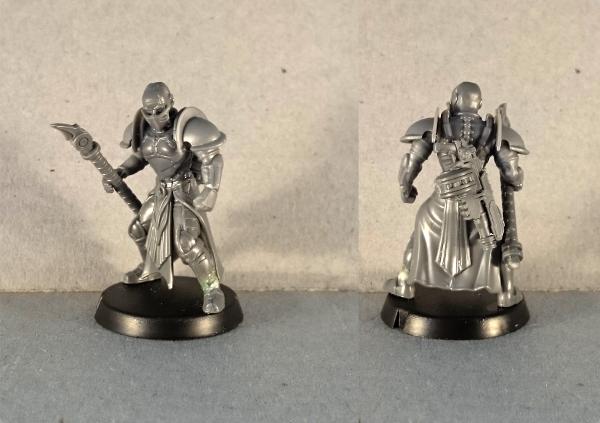
To build this version yourself, you'll need the following parts:
- A 25mm base
- Kaddar Nova legs and crown
- Shadow Walker Torso
- Karist Trooper arms and shoulder pads
- A bare head from the Kaddar Nova, Trooper or Expansion Sprue
- Ripper Grenade Launcher, Cybel Glaive and grabby hand* from the Expansion sprue
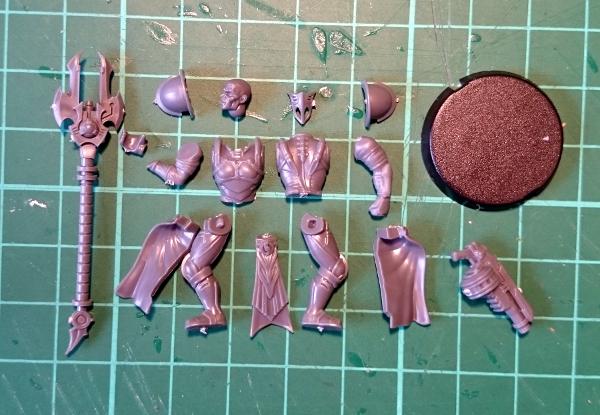
Assembly is mostly fairly straightforward: Build the legs as you normally would for the Kaddar Nova. You can create a slight visual break from the Nova by trimming off the bottom-most layer of the tabard, so it looks slightly less fancy than the Nova's if you like. Assemble and glue on the torso and the head.
One of the main identifiers for the Angel Keeper is the mask that they wear, which aids them in communicating with their angels. This mask covers the keeper's lower face, and is made by taking the Kaddar Nova crown and trimming away its peak, as below:

This is then glued in place with the former peak pointing downwards over the Keeper's nose and mouth. To give it a slightly better fit, slice off the Keeper's nose and if you're using a Kaddar Nova head (which is slightly more gaunt than the Trooper heads) it can help to make the mask a little more curved - hold it upright between your thumb and forefinger and give it a gentle squeeze to bend it very slightly, and then glue it in place.
There is a small hollow in the small of the Nova's back, which is normally filled with the Nova's giant backpack. For the Angel Keeper, it's a handy place to glue the Ripper Grenade Launcher, hanging in reach on the Keeper's back for when it is needed and nicely disguising the hollow. If you're modeling your Keeper with the grenade launcher in hand, you can instead glue a grenade there, like on my first-generation keeper below:
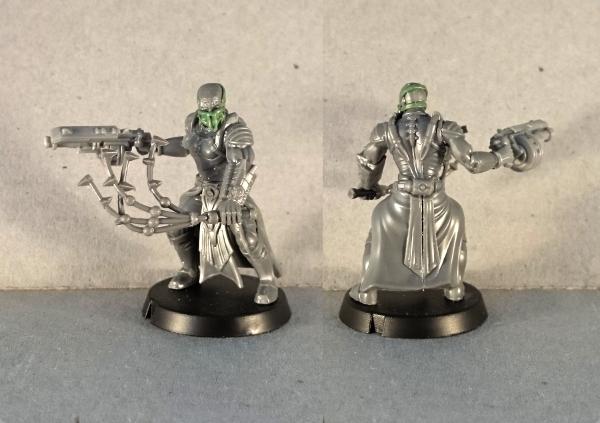
The Angel Keeper is armed with a Cybel Goad, which he uses to encourage the angels in his charge to do as they're told, and also to whallop nearby enemies when the need arises. I envisaged the goad as potentially taking various forms depending on the preferences of the individual keeper - So some may use a staff or prod, others a whip or lash of some kind, or something else entirely. This opens up all sorts of modeling possibilities, but I'll show a couple of relatively easy options that I've come up with so far.
The easiest version of the goad uses just the shaft of the Cybel Glaive. Chop the head off just below the energy unit, along the red line shown below:

I picture this goad having a small cybel cannister in the round part behind the spike, which distributes a tiny jolt off cybel energy along the spike when it comes in contact with something.
Alternatively, you can trim the bottom spike and the blades off the glaive, as below:
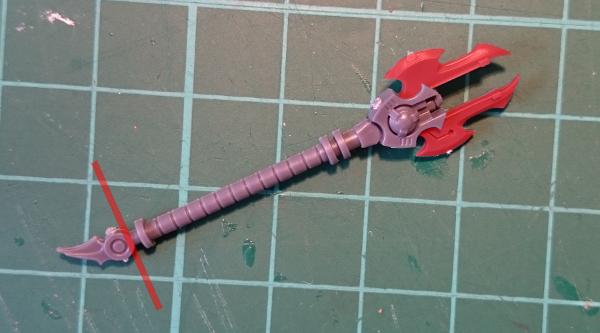
This one is more of a taser-style unit, still requiring contact to use and administering a small cybel charge directly to the target rather than along a blade or spike.
Option number three is a little more complicated, using the handle from a Cybel Blade (from the Expansion sprue), the spike from the bottom of a Cybel Glaive and a short piece of metal guitar string to make a whip, as below:
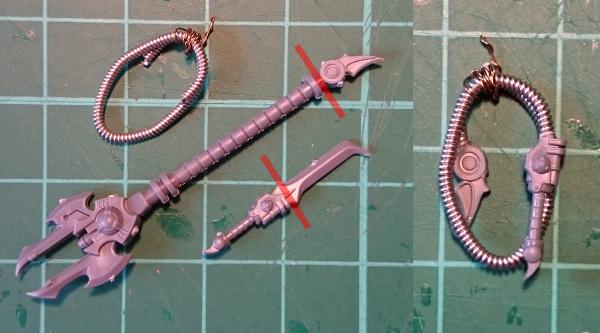
I have this one coiled up to hang on the Keeper's belt. The coiled guitar string is bound with a little fine copper wire to keep it together.
If you want your Keeper to have his grenade launcher in hand instead of his goad, the easiest option is to use the grenade launcher from the Trooper sprue instead of the Expansion sprue version, as it has the firing hand attached. For a single-handed grip, just slice or file off the support hand from the grenade launcher's stock. The pistol arm on the trooper sprue is nicely positioned out to the side for the grenade launcher - just cut off the pistol hand at the wrist, and glue the grenade launcher hand in its place.
For the Keeper below, I have also used Shadow Walker legs with an Expansion sprue loincloth, instead of the Nova legs. This is an easy way to give your Keeper a slightly more dynamic pose or to make him slightly less austentatious.
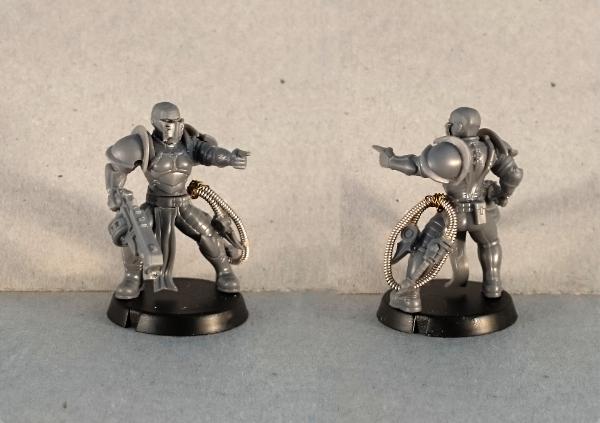
You can pick up the parts you need to build your own Angel Keeper from the Maelstrom's Edge online store (www.maelstromsedge.com - You'll need the Kaddar Nova, Shadow Walker, Karist Trooper and Faction Expansion Sprue, which will build you an Angel Keeper and because of all of the extras on the sprues will still leave enough spare parts to still build a Kaddar Nova, a Shadow Walker and a unit of Karist Troopers or Praetorians.
We would love to hear any feedback you have on the Angel Keeper's rules, and see how everyone is building their own keepers, so please share your creations, questions or comments on the Comm Guild Facebook page (https://www.facebook.com/groups/MaelstromsEdge)!
Tags: conversion karist keeper pdf
Reminder - Tales From The Edge: Emergence
Posted on Sunday Nov 13, 2016 at 05:00pm in General

We just wanted to put out a quick reminder that the short stories collection Tales From The Edge: Emergence is available on Amazon right now! It contains a range of fiction suitable for anyone with even a hint of sci-fi interest. With Christmas approaching, why not pick it up as a gift for a sci-fi loving friend?
Tags: fiction promotion talesfromtheedge
Background Fiction - Epiran MATS numbers
Posted on Saturday Nov 12, 2016 at 05:00pm in Fiction
The Epirian foundation is fragmented into many competing franchises. Each maintains control of multiple worlds, and technology and people must be interchanged frequently. Ensuring security on these worlds requires each adult Epirian citizen to be issued with a MATS number. This unique number allows an Epirian citizen to rise to high status on one world, and have that status recognised throughout the galaxy, granting a galactic mobility that would not otherwise be possible without immense personal wealth.
MATS numbers are controlled at the system level, and as such represent an extremely juicy target for infiltrating agents. Getting some fake individuals in to the MATS system is an easy way to gain unfettered access to key Epirian institutions and facilities, and for those desperate to escape a world, can lead to a significant bump in their position on passenger manifests.
The Comm Guild October Summary and Update
Posted on Monday Nov 07, 2016 at 05:00pm in General
Every month, we like to post a roundup of some of the awesome content posted to the Comm Guild Blog, just in case you missed anything! Below are some of the highlights from October:
This month saw the release of the first volume of the Tales From The Edge series of books, featuring short stories from the Maelstrom's Edge universe.
This book is titled Tales from the Edge: Emergence, and is available in digital format now.
Also released this month are our model bases, now available separately!
Our regular 'Spotlight' articles are intended to show some of the models from our range, and include notes on the design process, colour scheme options and building or conversion guides.
The October Spotlights included a rather sinister-looking Epirian Bot Handler, an even nastier looking dark red Angel, an Epirian Hunter toting some serious firepower, a Firefly drone in our box-art colour scheme, and a ruined hab block from our studio terrain collection.

We had a bit of a look at some great MEdge buildings made by Dakka Dakka user Panic, using plastic electrical boxes.

While we're talking about terrain, there was a tutorial by Iain Wilson (insaniak from Dakka Dakka) showing how you can create quick and easy buildings using the Maelstrom's Edge terrain sprue and cardboard gift boxes!
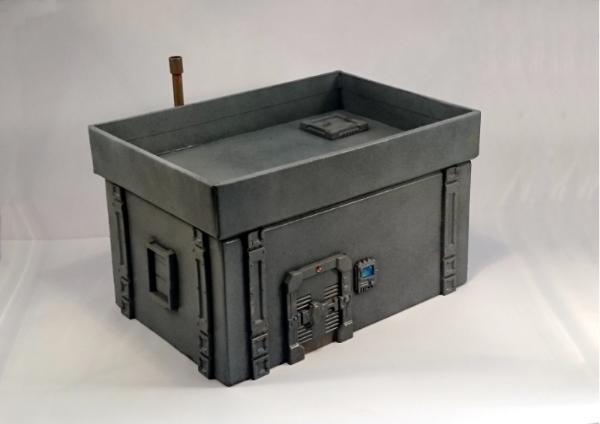
Iain also shared a tutorial on painting with washes; a valuable technique for getting a new force on the table as fast as possible.
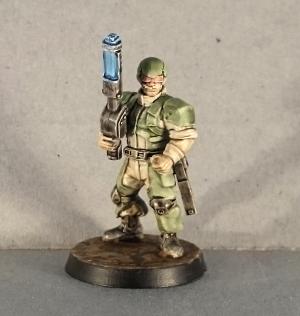
Our rapidly expanding range of artwork and background features this month included the very first completed art piece for our Karists, the mature angel, an interstellar hydrogen harvester, some scout ship artwork, some fiction on terraforming, metalloceramic production, the Kasmenai, the birth of the Karist movement, a second and third weapon preview for the upcoming Broken faction, a better look at the artwork featured on the cover of Emergence, and a look at the digital rulebook.
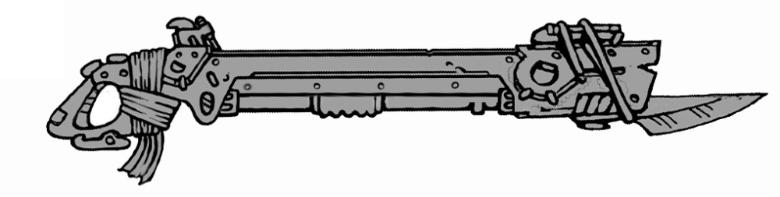
On the community front, Sgt Oddball over on Dakka Dakka shared a fantastic kit-bashed Epirian objective marker:
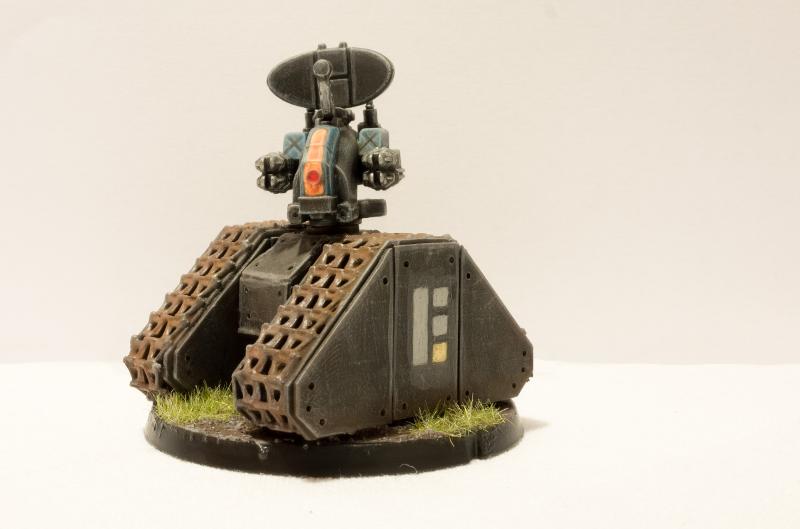
Amongst the other great contributions by MEdge fans were Panic's Epirian Doom Marines, TP^DC Deputy Manager's Angel Minnow, and a desert-themed Hunter bot by Zambro.
If you like what you see here, or have questions about the game or the Maelstrom's Edge universe, head on over to the Comm Guild Facebook Group page and and join in the discussion.
Starting after this post, we'll be reducing our posting frequency from daily updates to a more sporadic output. The constant flow of content is now being penalised by social media algorithms and we actually get a much higher readership for less frequent posting. We've got a lot of great hobby articles in the pipeline, as well as more of the usual content. In addition, the more detailed articles will not be pushed off our homepage as quickly as they have been due to our frequency of posting model photos!
Tags: compilation news roundup
Forward Guidance: The First Full Broken Model Artwork
Posted on Sunday Nov 06, 2016 at 05:00pm in The Broken
Here we are! Our first ever shared image of one of the concepts that is being sculpted for the Broken.
An infantry heavy army, the Broken are made up of desparate individuals who do everything they can to survive. Our initial range will be focused on those who have survived as members of the broken for a generation, with heavily recycled clothing, ragged yet trusty equipment, and a wide variety of poses, weapons and components.
