Entries tagged [objective]
Karist Secret Cache Objective Marker Kitbash
Posted on Monday Jan 18, 2021 at 05:00pm in Tutorials
In games of Maelstrom's Edge, along with whatever objectives apply to the mission being played, each faction has an additional themed objective of their own. For the factions in the Battle for Zycanthus box, there are cardboard counters to use as faction objective markers, but it's always nice to have physical models to represent them instead. I shared a conversion some time ago for a kitbash of the Epirian's Automated Uplink Relay Drone (with a new, all-plastic version of this build coming up in a future article very soon!), and this seemed like a good time to balance things out with a Secret Cache marker for the Karist Enclave!
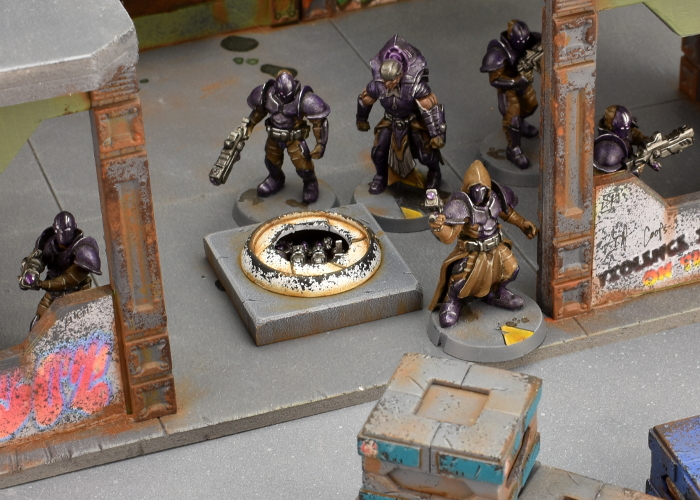
I was looking at the Maelstrom's Edge terrain sprue for a completely different project when it occurred to me that the iris hatch was a nearly perfect size for the Karist objective. The Secret Cache is a small objective, which means a model to represent it goes on a 25mm base, and as it happens, the iris is 25mm in diameter. So as an incredibly quick and easy option, you could just use the iris portal as-is. To keep things accurate, you can measure to the iris, ignoring the surround, or if your opponent agrees you could just measure to the outer edge of the portal, making it a 30mm objective marker instead of 25.
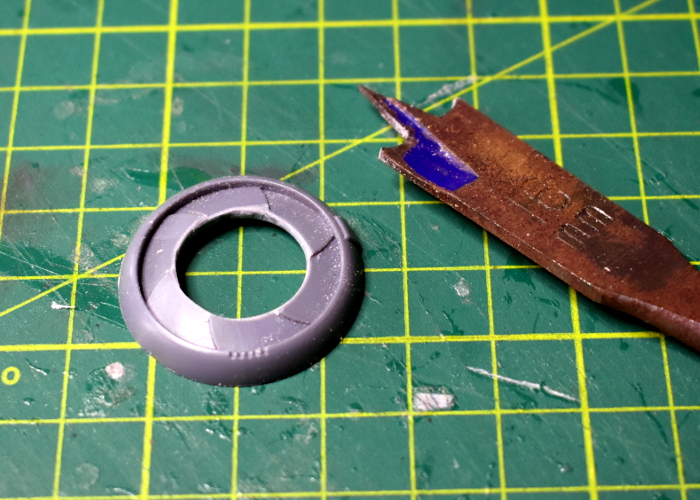
For a slightly more elaborate version, I took a portal and used a 16mm spade bit to drill out the middle of the iris.
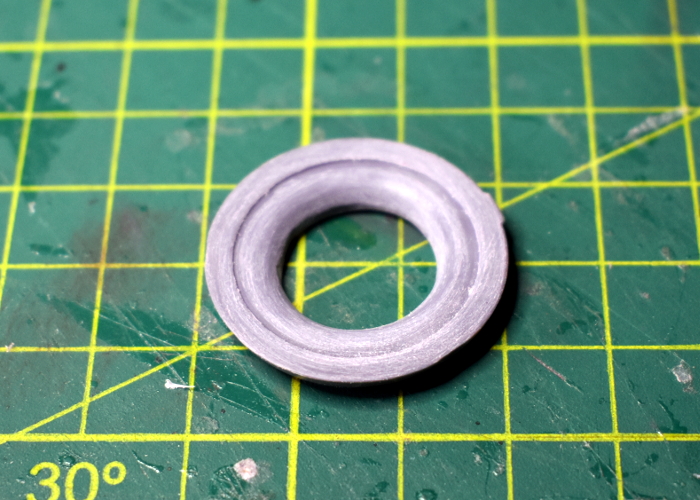
Wrapping a small piece of sandpaper around my index finger, I flipped the portal over and sanded around the underside to make it concave.
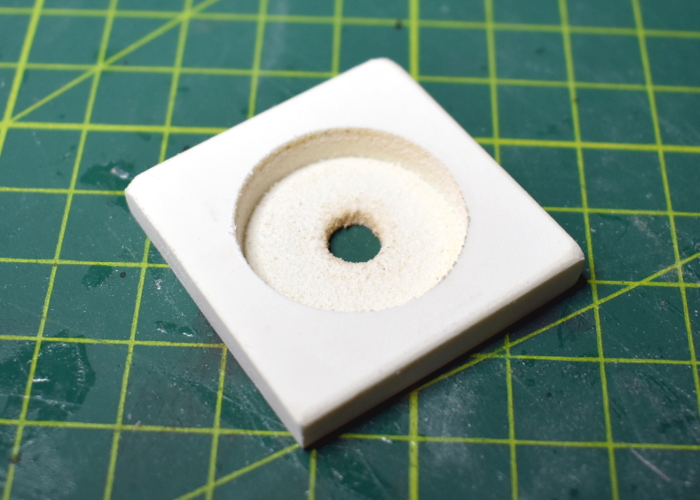
To make the base of the cache piece, I cut a small square of 6mm foamed PVC, and then drilled most of the way through the middle of it with a 25mm spade bit, before giving it a light sand.
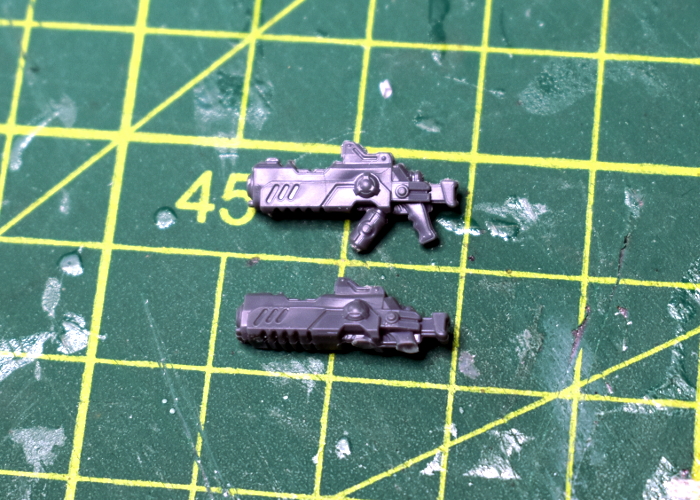
To fill the cache, I took a bunch of assorted Karist weapons from the Faction Expansion Sprue. I trimmed the bottom of the rifles down flat, sanding the bottom so that they fit neatly inside the cache cavity. If you don't have the expansion sprue handy, you could also just use spare weapons from the Karist Trooper sprue, cutting the hands off the bottom - either way, the bottoms of the weapons won't be visible once the cache is sealed up, so either way works just fine.
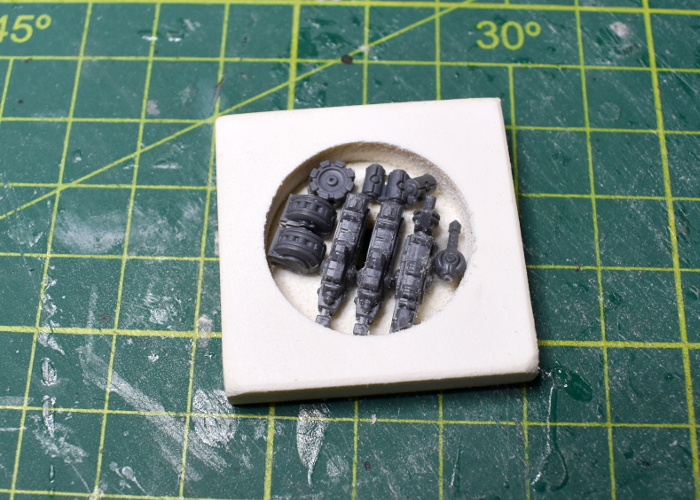
I glued the rifles in place, and then filled the space around them with grenades and a couple of ammo drums cut from grenade launchers. I also glued a small circle of plasticard into the drill bit guide hole in the bottom of the cache.
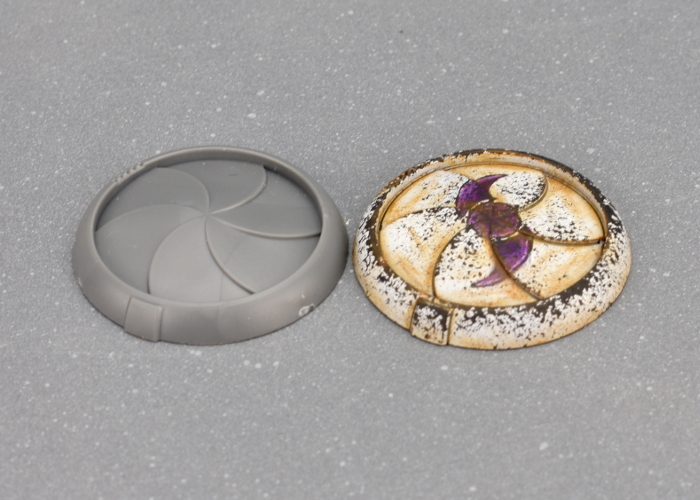
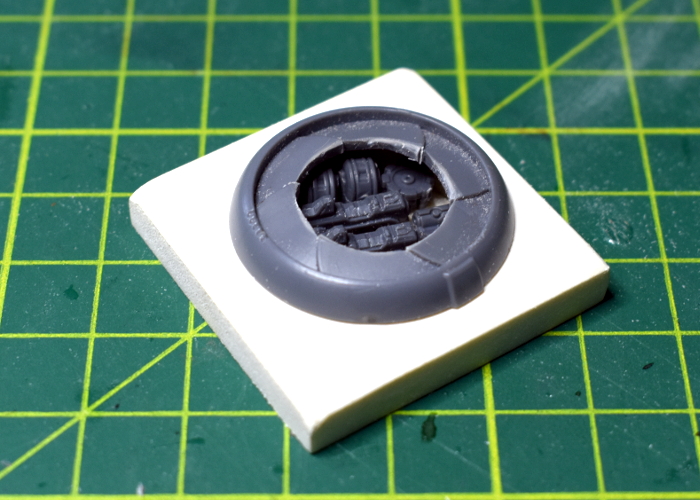
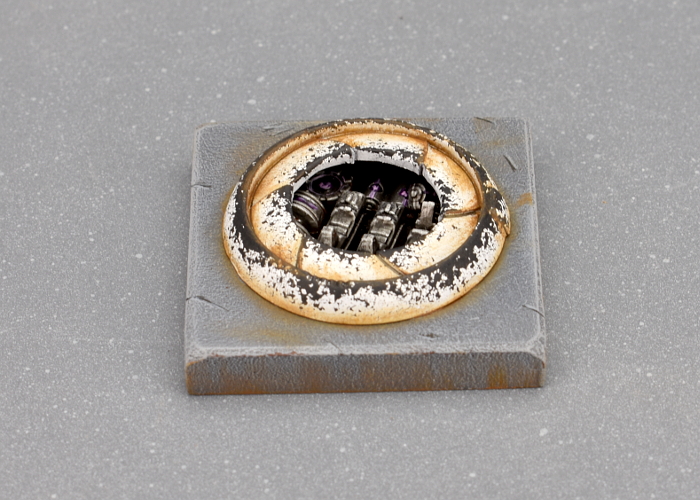
The final step before painted was to check that the portal fit neatly on top. At this point, I also used a hobby knife to cut some vertical lines into the inside of the hole in the iris, to delineate the tips of each petal. I left the portal separate for painting, gluing it in place at the end.
And speaking of painting, with some colour on the portal wound up looking like this:
Put together your own secret cache of pre-prepared doom by picking up the plastic terrain sprue, along with the rest of the Maelstrom's Edge range from the webstore here.
Then pop on over to the Comm Guild Facebook group to show us what you're working on!
For other building ideas, modeling tutorials, army spotlights and conversion walkthroughs, check out the Hobby section of the Maelstrom's Edge website here.
Tags: conversion karist modeling objective terrain terrainsprue tutorial walkthrough
Conversion Spotlight: Epirian Automated Uplink Relay
Posted on Monday Mar 20, 2017 at 05:00pm in Models
 - by Iain Wilson
The dependence on robotic units and information warfare means that the Epirian Foundation relies on
electronic communication to function as an effective fighting force. When pursuing conflicts outside of its zone of control, the Foundation uses portable uplinks that link to orbital satellites and airborne recon, providing battlefield intelligence about enemy positions and weaknesses and allowing Bot Handlers to remotely interface with Epirian drones on the ground.
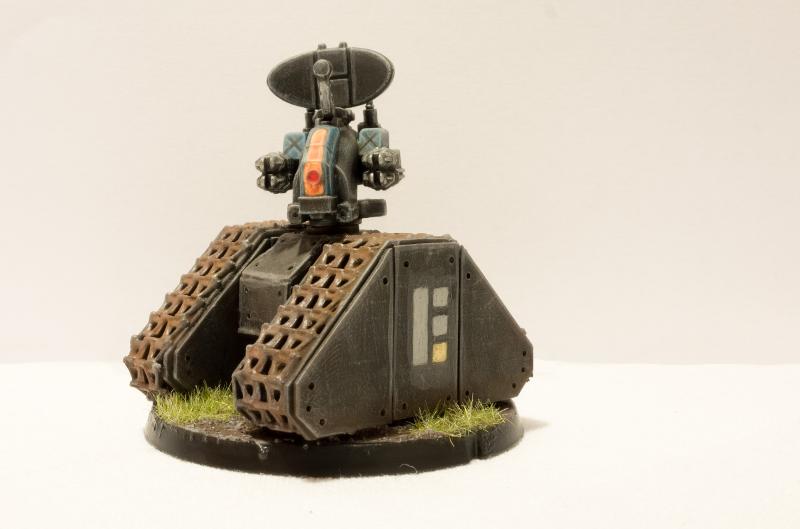
The Maelstrom's Edge rules include an automated uplink relay as a faction-specific objective for the Epirian forces. The uplink itself is represented with a cardboard standee, as it represents a physical object that moves around the board, but I thought it might be nice to have an actual model to represent it. And so, I came up with this:
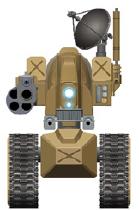 My kitbash differs a bit from the artwork on the card - the artwork was done while the game was still in its early design stages, before the models were finalised. As a result, the drone chassis that forms the basis of the upper body of the uplink is really too small for the job. The card version also wound up with only a single gun, while the finished version of the uplink, ruleswise, is supposed to have two flakk batteries.
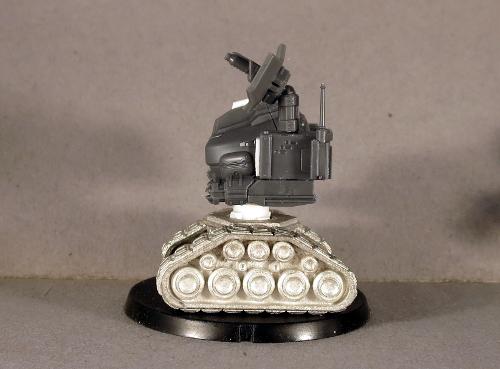
So after initially looking at various ideas using a drone chassis, I went with a Hunter torso instead.
The track unit was purloined from a Counterblast Mekkus Defender robot. Quick and easy to assemble - just two track units and a central hub to which they both attach.

I then took a Hunter torso and cut it off at the waist joint.
A new waist joint was constructed from plastic tubing, to slot neatly into the waiting cavity in the top of the track unit's central hub.

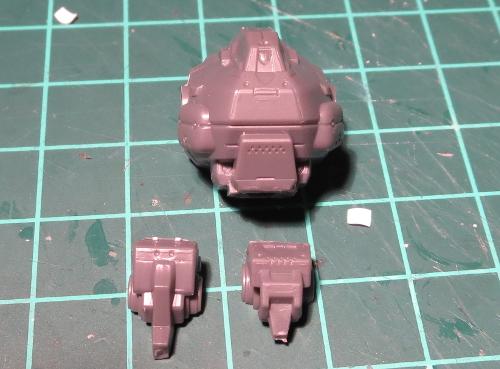
The flakk batteries were constructed from the flakk guns on the drone sprue. I took the two weapon mount parts and joined them together, glued a flakk gun onto each mount and added a third flakk gun, slightly shaved down on either side, inset between the other two. These were then attached to the forearm magazine piece from the hunter to create something reminiscent of the boxy 'shoulders' of the drone chassis from the original uplink artwork.
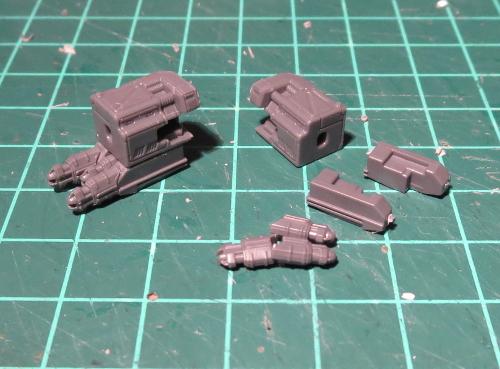
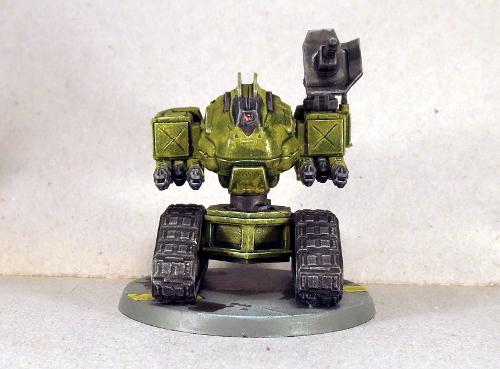
One of the big, obvious details in the artwork is the big satellite dish mounted on the uplink's left shoulder. I didn't have anything suitably rounded to hand, but in a flash of inspiration grabbed the flakk cannon from the Hunter sprue and chopped through the exposed parts of the cannon barrels. The shield section was then attached at a jaunty angle to the muzzle end of the cannon, and an antenna made from the coaxial barrel from the Hunter's chaingun.

The shoulder sockets were trimmed at an angle so that the weapon arms would sit horizontal. The weapon arms were then glued in place, and the satellite dish and an auxiliary antenna made from the 'spare' weapon on the drone sprue attached to the left shoulder. I also added a square of plasticard to the front of each shoulder to cover over the original weapon attachment sockets. These have an 'X' shape scribed into them to once again tie back to the drone shoulder design. As a final nod to the drone chassis (although this is a detail on the final drone model that is absent from the uplink illustration) I added a pair of rails running along the top of the head, cut from thin plasticard.


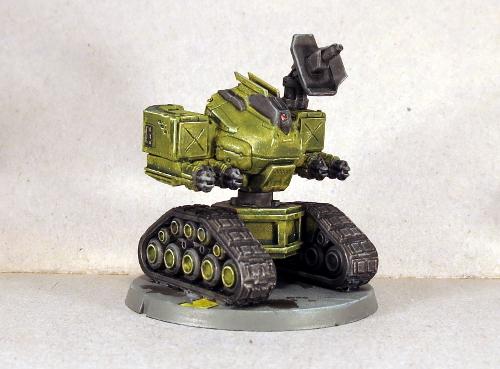
I decided to paint this one up to match my original Epirian colour scheme, using Vallejo Yellow Green with a wash of Army Painter Green Tone, and the metal parts painted Vallejo Basalt Grey with a couple of coats of Army Painter Dark Tone.
The tracks were given a light drybrush with Citadel Boltgun Metal (aka Leadbelcher) and then another wash, this time with Army Painter Strong Tone.
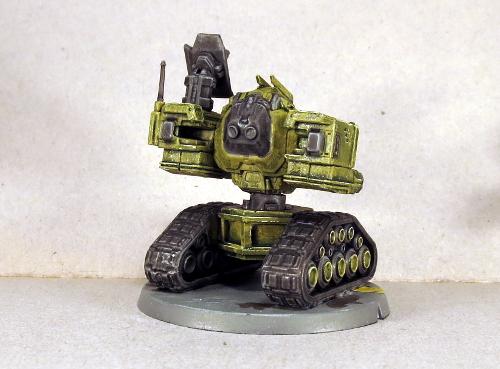
The base was urban-ised with a basecoat of Vallejo Neutral Grey and a drybrush of Vallejo Light Grey. Some oil stains splotched on with Army Painter Strong Tone, some chipping, and some yellow line markings complete the scene.
And so there it is: One Automated Uplink Relay. Size-wise, it comes in as a perfect match height=wise for the card version. A little more sideways bulk, but that suits it with the size of the base anyway.
It's not a perfect match for the artwork, but I think it's close enough to be recognisable for what it's supposed to be, and is a really easy conversion.
If you would like to have a go at this yourself, you'll need the track unit from Counterblast (or something else like it - there are a fair few options out there for small, tracked weapon units), and a Maelstrom's Edge Hunter (which will also give you the base for the uplink) and two Drone sprues - You'll have enough parts left over to still build complete drones from those sprues with the other weapon options. You can find the Maelstrom's Edge sprues in the online store here.
Be sure to share your version of the completed uplink relay on the Comm Guild Facebook page!
Community Spotlight: Epirian Objective
Posted on Wednesday Oct 05, 2016 at 05:00pm in The Epirian Foundation
The Maelstrom's Edge box set comes with two cardboard objectives for the Karist and Epirian forces. The above shows a lovely physical model based on the Epirian Objective by Sgt Oddball over at Dakka.
The Comm Guild's community spotlight focuses on sharing something from the Maelstrom's Edge community each week, if you have anything you'd like to get in to the queue, please get in touch with us via the Maelstrom's Edge website