Karist Secret Cache Objective Marker Kitbash
Posted on Monday Jan 18, 2021 at 05:00pm in Tutorials
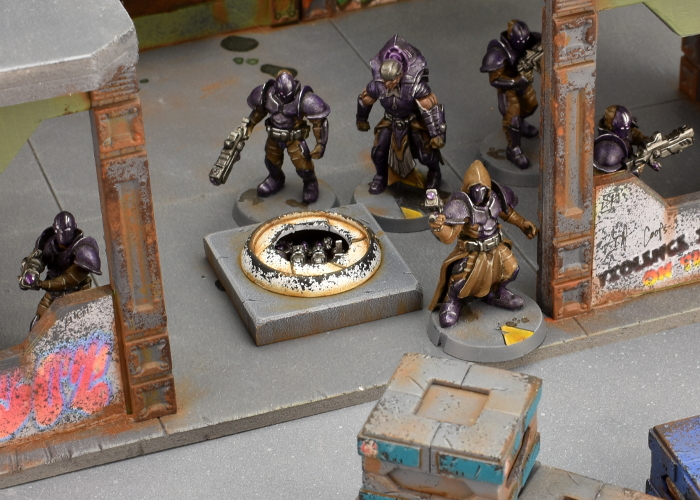
In games of Maelstrom's Edge, along with whatever objectives apply to the mission being played, each faction has an additional themed objective of their own. For the factions in the Battle for Zycanthus box, there are cardboard counters to use as faction objective markers, but it's always nice to have physical models to represent them instead. I shared a conversion some time ago for a kitbash of the Epirian's Automated Uplink Relay Drone (with a new, all-plastic version of this build coming up in a future article very soon!), and this seemed like a good time to balance things out with a Secret Cache marker for the Karist Enclave!
I was looking at the Maelstrom's Edge terrain sprue for a completely different project when it occurred to me that the iris hatch was a nearly perfect size for the Karist objective. The Secret Cache is a small objective, which means a model to represent it goes on a 25mm base, and as it happens, the iris is 25mm in diameter. So as an incredibly quick and easy option, you could just use the iris portal as-is. To keep things accurate, you can measure to the iris, ignoring the surround, or if your opponent agrees you could just measure to the outer edge of the portal, making it a 30mm objective marker instead of 25.
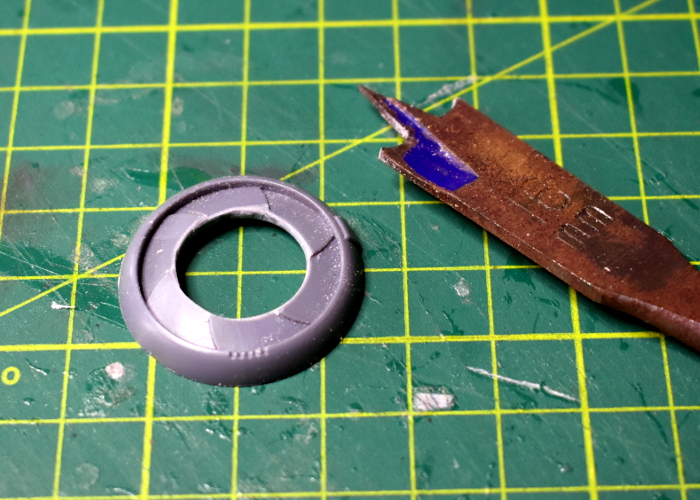
For a slightly more elaborate version, I took a portal and used a 16mm spade bit to drill out the middle of the iris.
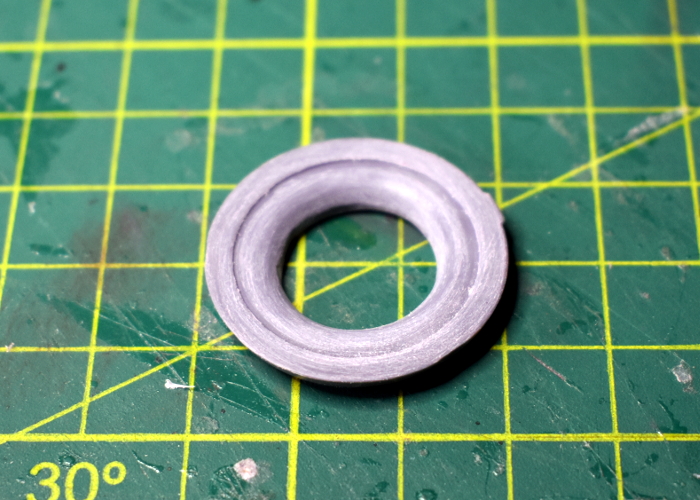
Wrapping a small piece of sandpaper around my index finger, I flipped the portal over and sanded around the underside to make it concave.
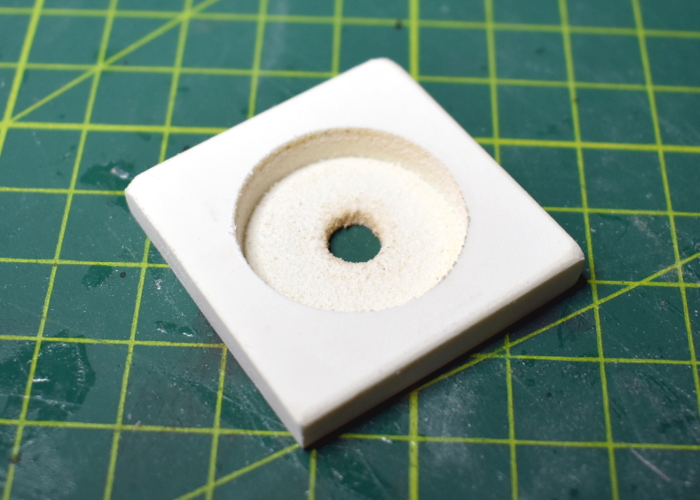
To make the base of the cache piece, I cut a small square of 6mm foamed PVC, and then drilled most of the way through the middle of it with a 25mm spade bit, before giving it a light sand.
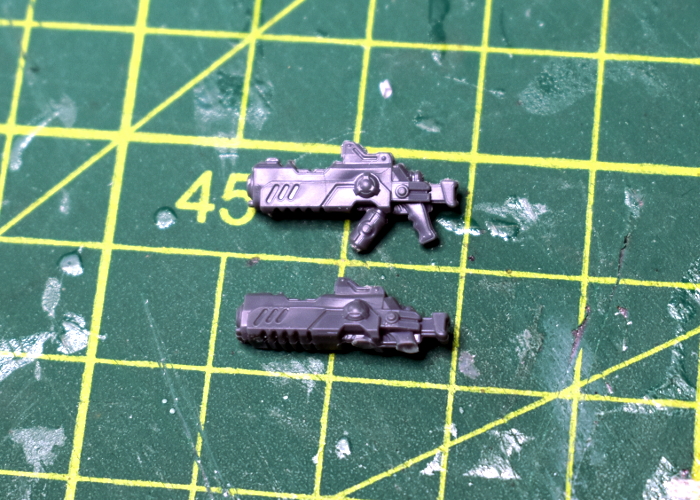
To fill the cache, I took a bunch of assorted Karist weapons from the Faction Expansion Sprue. I trimmed the bottom of the rifles down flat, sanding the bottom so that they fit neatly inside the cache cavity. If you don't have the expansion sprue handy, you could also just use spare weapons from the Karist Trooper sprue, cutting the hands off the bottom - either way, the bottoms of the weapons won't be visible once the cache is sealed up, so either way works just fine.
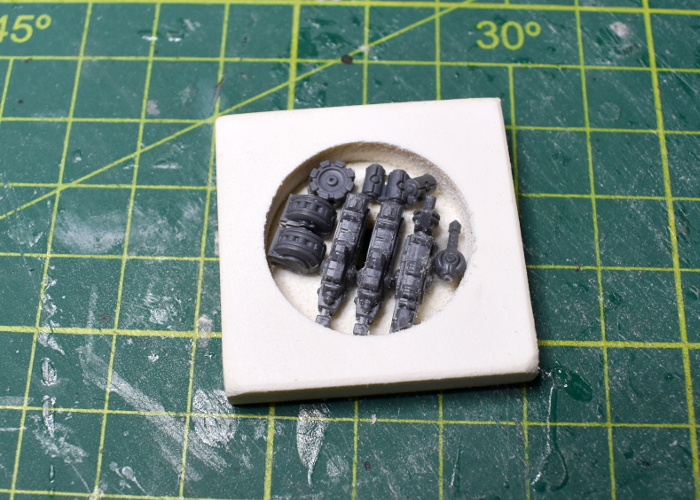
I glued the rifles in place, and then filled the space around them with grenades and a couple of ammo drums cut from grenade launchers. I also glued a small circle of plasticard into the drill bit guide hole in the bottom of the cache.
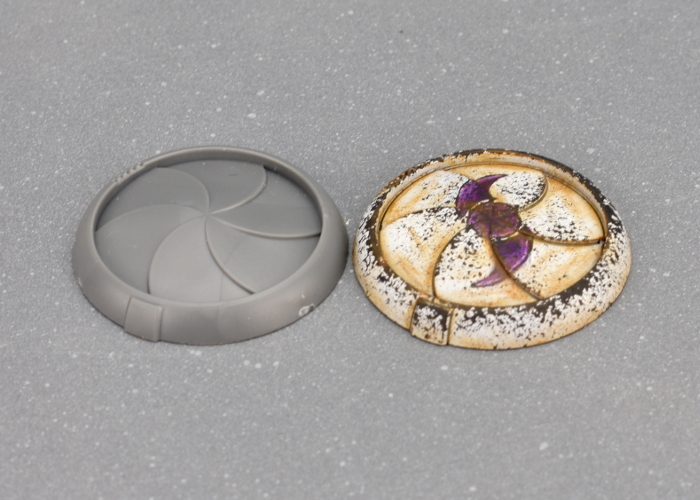
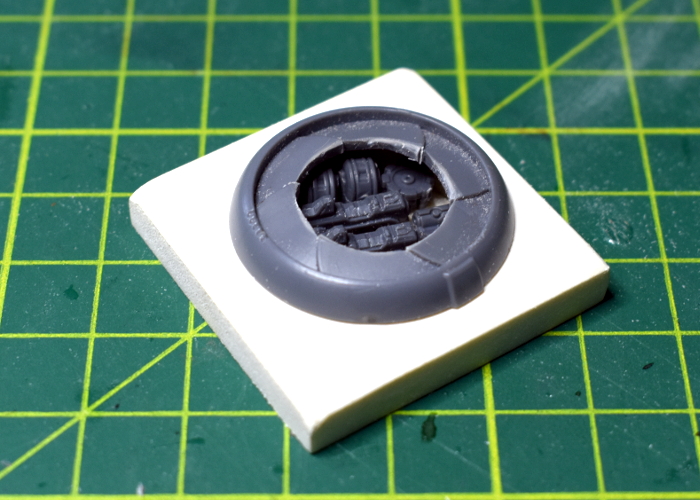
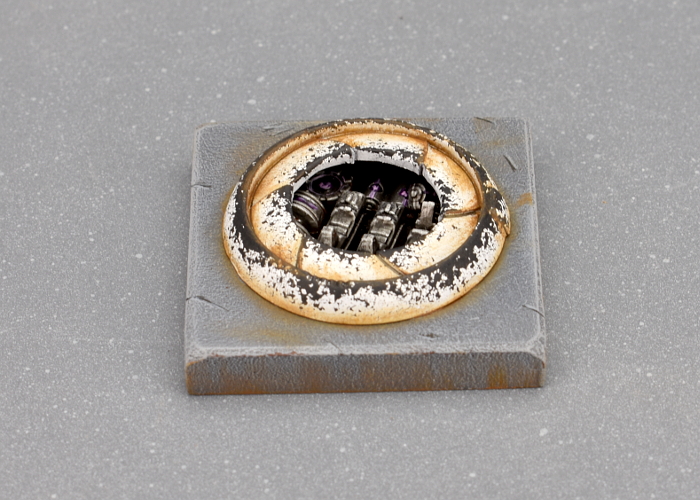
The final step before painted was to check that the portal fit neatly on top. At this point, I also used a hobby knife to cut some vertical lines into the inside of the hole in the iris, to delineate the tips of each petal. I left the portal separate for painting, gluing it in place at the end.
And speaking of painting, with some colour on the portal wound up looking like this:
Put together your own secret cache of pre-prepared doom by picking up the plastic terrain sprue, along with the rest of the Maelstrom's Edge range from the webstore here.
Then pop on over to the Comm Guild Facebook group to show us what you're working on!
For other building ideas, modeling tutorials, army spotlights and conversion walkthroughs, check out the Hobby section of the Maelstrom's Edge website here.
Tags: conversion karist modeling objective terrain terrainsprue tutorial walkthrough

Like this? Like us on facebook to see more...