Artwork: Sabotage Ship
Posted on Tuesday Nov 01, 2016 at 05:00pm in Artwork
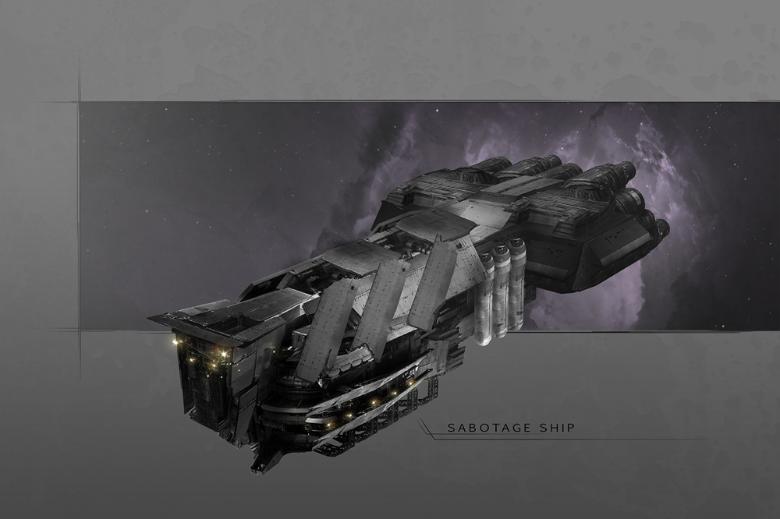
With powerful shields, protective armour and effective weapons, taking out a defensive installation or enemy craft in space is not a trivial undertaking. For those like The Broken who have limited structural capacity, the sabotage ship is a dangerous and powerful tool. Stripping a ship bare, and filling it with explosives and cybel containers, and either a remote pilot, or a skeletal crew who have nothing to lose, sabotage ships are frequently used to gain access to restricted cybel gates, or as leverage in negotiations for resources, people and craft.
Tags: artwork sabotageship spaceship
Spotlight: Epirian Contractors
Posted on Monday Oct 31, 2016 at 05:00pm in The Epirian Foundation
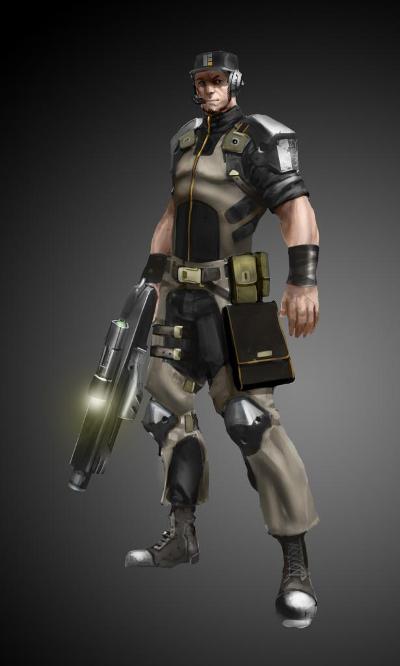
It feels like an eternity since we first released images of the Epirian Contractors. Our first sculpt with a new sculptor and manufacturer, getting the scale right took a number of back-and-forth attempts but after a few revisions we were able to create a model that was in scale with our Karist range and served as the starting point for the full Epirian range.
The Epirian sprue has a nice crisp level of detail and managed to cram a lot more on than we thought possible, which is why there are two pistols on each sprue. 5 heads and 5 pairs of arms opens up a lot of nice options for posing. Our Epirian models have a slight lean to them which makes them very difficult to photograph effectively but this is something we think we have continued to improve at. The lean does mean that the models look very nice when they are posed with a slightly raised leg, standing on a rock or similar.
The Epirian hats proved to be a dividing aesthetic. Some people love them, some people hate them. Fortunately, we were able to provide helmets as an alternative option for those who prefer to avoid the more casual hat look. A marmite feature!
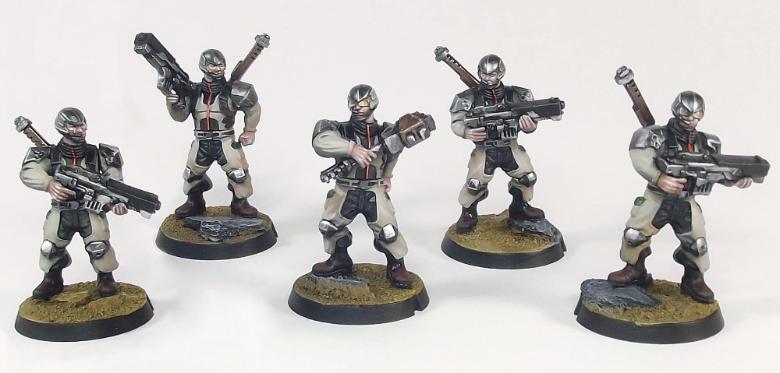
The Epirian Contractors are our second best selling models, and are available in sets of 6 from the Maelstrom's Edge website.
Tags: contractor epirian model spotlight
Forward Guidance: Individual Bases Now on Sale!
Posted on Sunday Oct 30, 2016 at 05:00pm in Models
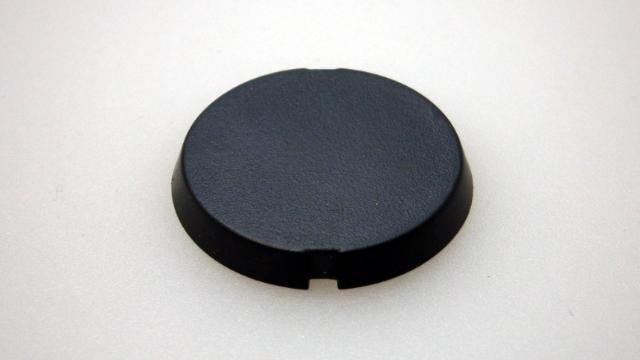
We are now selling bases individually for $0.50/£0.50 each, in packs of 5. Head over to the Maelstrom's Edge store to check them out. Please pass on the word to our friends in the Warmahordes community who might be interested in them too!
Background Fiction - Metalloceramic Production
Posted on Saturday Oct 29, 2016 at 05:00pm in Fiction
The Karist Enclave are unable to take huge manufacturing facilities with them when they secret themselves away upon a remote world and capturing large facilities is immediately noticeable as well. As a result, more than any other faction, the Karists use complex refineries and nanoforges. A nanoforge is a molecular level assembly system, which allows almost all Karist equipment to be assembled at a near-molecular level. While organics remain too complex to replicate, armour, weaponry, furniture, electronics and extremely basic foodstuffs can all be produced from a wide array of input resources.
The most common output material is Metalloceramic - the material from which Karist plate armour, spacecraft and day to day tools are built from. As the name implies, the material mixes properties from input metals with the benefits of a ceramic, giving the best of both worlds in terms of conductivity, protection and strength.
Nanoforges are not exclusive to the Karist Enclave, but the energy requirements for operating them are immense, and only the Karists are content enough to sit on top of such large volumes of cybel energy. Most other groups in the galaxy appreciate that human power is a lot cheaper than cybel energy, so tend to vie away from such high levels of automated production for all but the most complex and critical equipment.
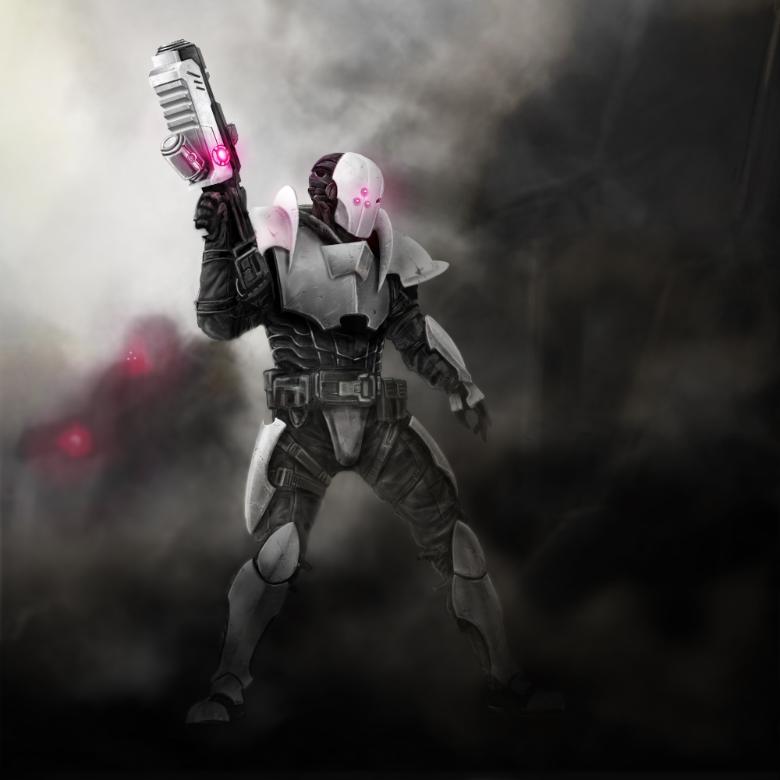
Friday Photo - Official Epirian Firefly Drone Colourscheme
Posted on Friday Oct 28, 2016 at 05:00pm in Models
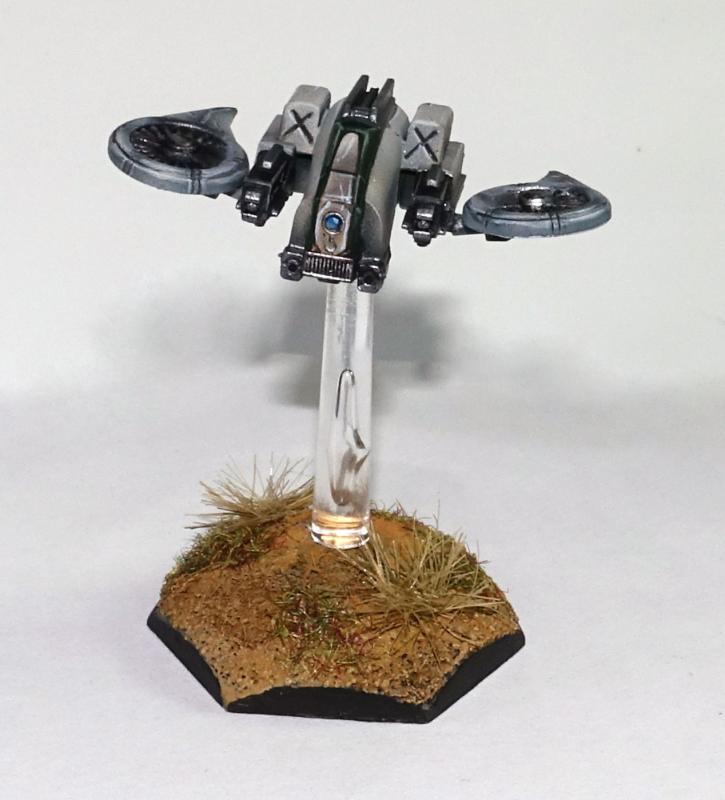
This firefly shows our box art colourscheme in crisp, clear colour. Equipped with dual DCLS weapons, a squadron of firefly drones can really add some major tactical flexibility to your Epirian force.
Terrain Thursday - Ruined Hab Block
Posted on Thursday Oct 27, 2016 at 05:00pm in General

From our studio collection is this nice piece which shows a building that has been destroyed and is being reclaimed by the ground. Similar to our other hab block buildings, this building serves as a nice reminder that ruins work very nicely in wargames, and not every building needs to have four walls and a roof!
Tags: buildings ruins terrain terrainsprue
Community Spotlight: Panic's Doom Marines
Posted on Wednesday Oct 26, 2016 at 05:00pm in The Epirian Foundation
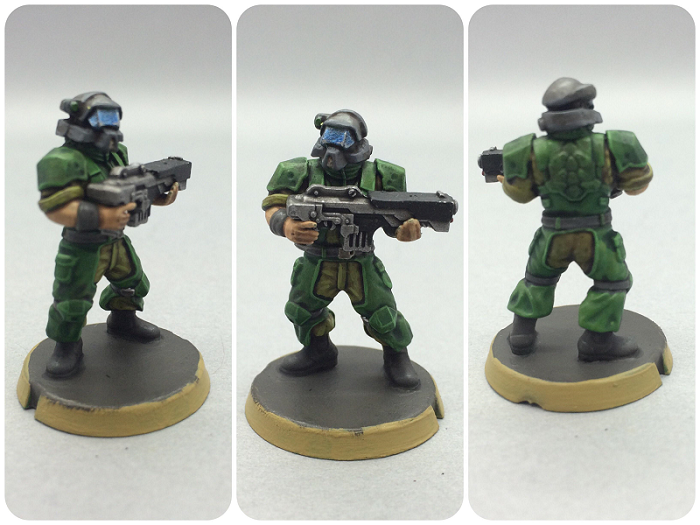
The flexibility of having a plastic model range is really shown with the ease of head-swaps that can be done. This excellent example by Panic is part of his Doom force, which is a valid Epirian army, themed around the classic first person shooter videogame 'Doom'. The right colourscheme and a simple head swap really changes the feel of the model. We'll be sharing a lot more of Panic's amazing work in the future!
The Comm Guild's community spotlight focuses on sharing something from the Maelstrom's Edge community each week, if you have anything you'd like to get in to the queue, please get in touch with us via the Maelstrom's Edge website
Tags: conversion doom epirian modeling painted
Artwork: Interstellar Hydrogen Harvester - Alternate
Posted on Tuesday Oct 25, 2016 at 05:00pm in Artwork
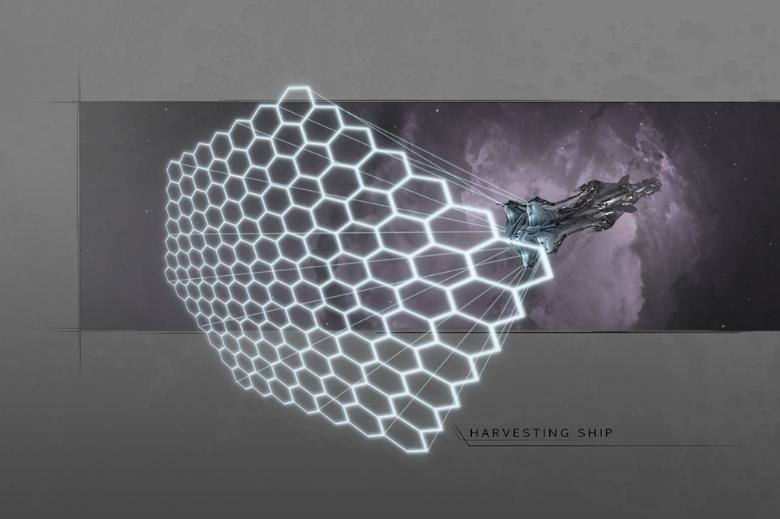
We previously shared the Interstellar Hydrogen Harvester, in the form of a film-based harvesting device. That is far from the only way interstellar hydrogen is harvested, and the above craft shows an alternate method in which hexagonal magnetic fields are used to trap interstellar resources. While this is more energy intensive than the film-based harvesting of the other IHH craft, it has the advantage in that debris does not risk damaging the harvester, passing harmlessly through the rings. The downside is that the energy required to operate the craft dramatically reduces its potential yield.
As mentioned before, a handful of IHH ships can massively extend the practical range and viable capacity of an evacuation fleet, and are therefore extremely valuable to all of mankind. Countless fleets have been destroyed in combat over the smallest rumour of IHH possession.
Tags: artwork harvestingship spaceship
Spotlight: The Mature Angel
Posted on Monday Oct 24, 2016 at 05:00pm in The Karist Enclave
The Karist Angel was the final sculpt which we completed from the Battle for Zycanthus set. While the core of the model was completed quite early on, one of our first sculpts in fact, the limbs and details were quite a challenge to create. Here are some early pieces of concept art for the mature angel...
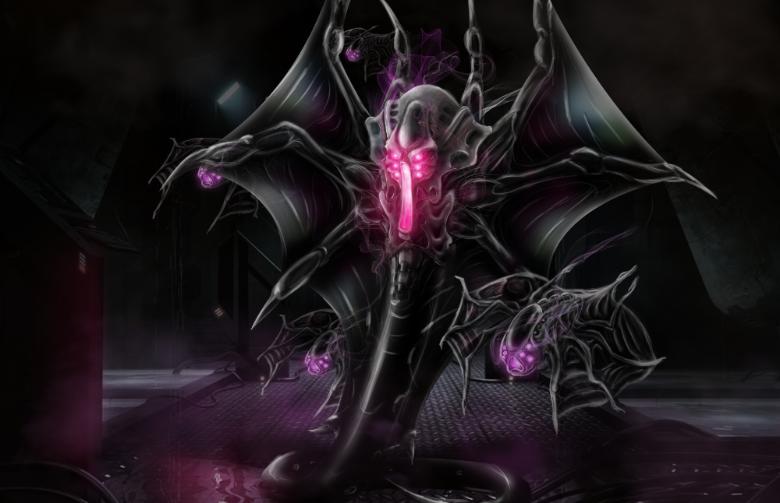

We wanted the Karist centrepiece model to be visually striking and much taller than anything else in the box set, which meant we had quite a lot of limitations with regards to sprue size and cost restrictions which stopped us from doing plastic wings. Each angel has three different morphing modes of which wings is just one option, so not getting wings in to the set was not a big issue for us. Trying to come up with some limbs that did not look comical and still showed the model capable of flowing and reforming took a lot of design iterations though.
Ultimately the mature Angel ended up as a fairly static pose for such a dynamic creature, with two alternate sets of claws that had little major difference between them, but with the benefit that the model is very easy to convert. Between the shapes being the easiest thing to sculpt (sausages of putty!), and the existing model being very easy to repose, we've seen a great range of conversions, and the model being so forgiving allows all manner of experimentation. Even boiling the plastic allows it to soften and be reposed in any shape without the obvious distortion you'd see from a model with sharp edges and lines.
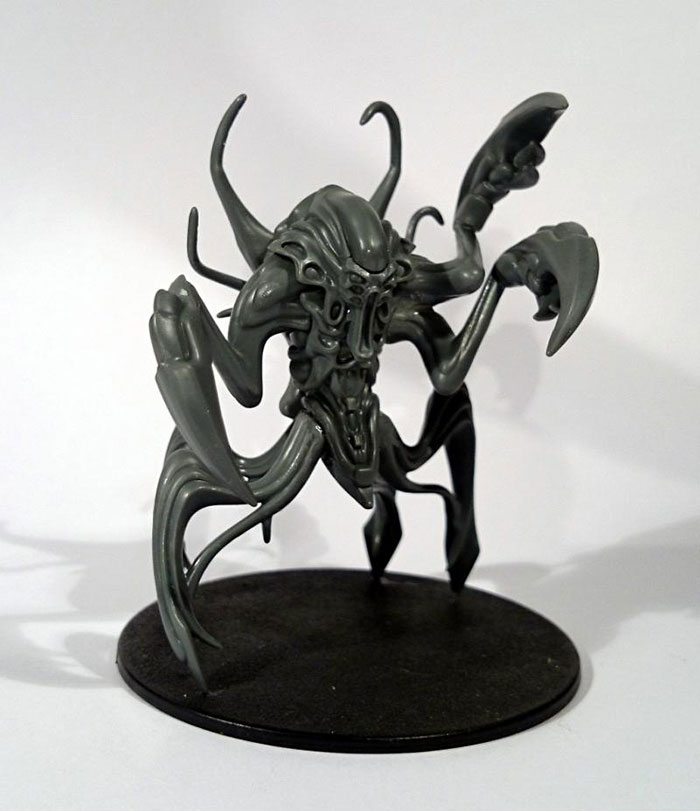
The sprue is a sliding core sprue which makes such a large model have practically no visible seams, despite being completely made of plastic.
The legspan of the model is huge as well, and led to the creation of our huge bases. This was possible thanks to success in our kickstarter project allowing us to fund the tooling.
Forward Guidance: The Broken Shotgun
Posted on Sunday Oct 23, 2016 at 05:00pm in The Broken
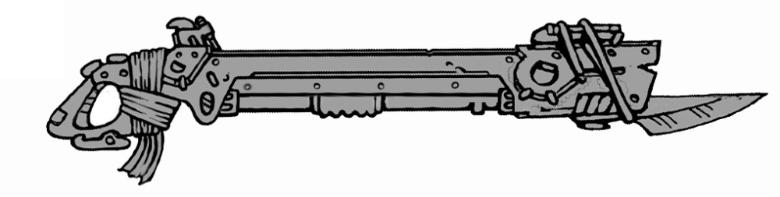
Here we have the main weapon of the basic Broken infantry unit. A hastily assembled, durable shotgun-type weapon. Sculpting of this is already complete, and production of the Broken continues to march towards release at a good pace.
Background Fiction - The Kariman's Breath
Posted on Saturday Oct 22, 2016 at 05:00pm in Fiction
The origin of the Karist Enclave dates back to the eruption of the Maelstrom itself. When the disturbance first exploded into being near the galactic core, hundreds of worlds in the dense centre of the galaxy were quickly wiped out, before many knew what was happening. Few escaped that initial violent expansion, as cybel tunnels ruptured and sublight craft were overtaken by the Maelstrom’s first wave.
A fraction ahead of the event horizon, a small spacecraft named Kariman's Breath succeeded in escaping from the galactic core worlds. Carrying a few hundred people, the ship was in transit through one of the cybel tunnels at the edge of the core when the Maelstrom erupted. Although they were just outside the destroyed region, the tunnel they were in ruptured, throwing the ship into deep space between worlds. Their shields were overloaded by the energy storm, flooding the decks with a strange energy.
Exposure to the energy of the cybel tunnels ordinarily causes burns and ultimately death, but the Fourteen survivors of the Kariman’s Breath didn't die when this energy washed over them. Instead the surviving crew and passengers reported a religious, transcendent experience. Some say that there was a difference of opinion between the ship’s inhabitants, that the experience was just a hallucination and that the early Enclave members killed those who disagreed with their interpretation. Whatever occurred in that moment, upon the re-emergence of the Kariman’s Breath into civilisation, all aboard had converted to the idea that becoming one with the Maelstrom would lead to their ascension to a higher plane of existence.
Isolated and unable to contact the rest of humanity, and suffering from their exposure to the energy, the ship’s inhabitants struggled to keep the ship going. Determined to pass on their revelations to others, they kept the ship limping through the tattered remains of the near-core. Desperate for supplies, they happened upon a small planet far from the plane of the galaxy - Schar's World. Because of the vast quantities of precious metals in the star system, it had been settled despite its distance from the main cybel trade routes, but the scattered population of the mining world was poor and downtrodden, kept under the control of a corporate dictatorship terrified by the Maelstrom's destruction of their superiors.
A few hundred million souls lived on the planet, fearful of the future and grief stricken at leaving their old lives in the past. When they realised the source of the small spacecraft, all were eager to talk to the survivors about their experience in an attempt to calm their own fears. The fourteen survivors of the Kariman incident were unified by their experience, both in the moment the Kariman's Breath was tossed on the crest of the Maelstrom and their long months of isolation afterward. The Fourteen came out with a fervent belief that the Maelstrom was a tool for ascendance rather than destruction. They committed their lives to promoting their miraculous discovery, and showing people how they too could reach enlightenment. As their new religion spread on Schar's World, the Fourteen grew to become the revered leaders of the movement. As the believers shared their philosophy throughout the planet they gained a name - The Karist Enclave.
Friday Photo - Crazy Hunter Firepower
Posted on Friday Oct 21, 2016 at 05:00pm in Models

When you really need to put down some large Broken infantry units, few things are more effective than a Hunter equipped with two sets of suppressor dual machine guns and two cluster missile pods.
Tags: dualmachineguns epirian hunter painted
Giftbox Terrain Video
Posted on Thursday Oct 20, 2016 at 05:00pm in General
We thought today we'd highlight the timelapse video above which shows the construction of a building from scratch using the Maelstrom's Edge terrain sprue, previously covered in step by step photos in a previous blog post here at The Comm Guild.
Tags: buildings terrain terrainsprue video
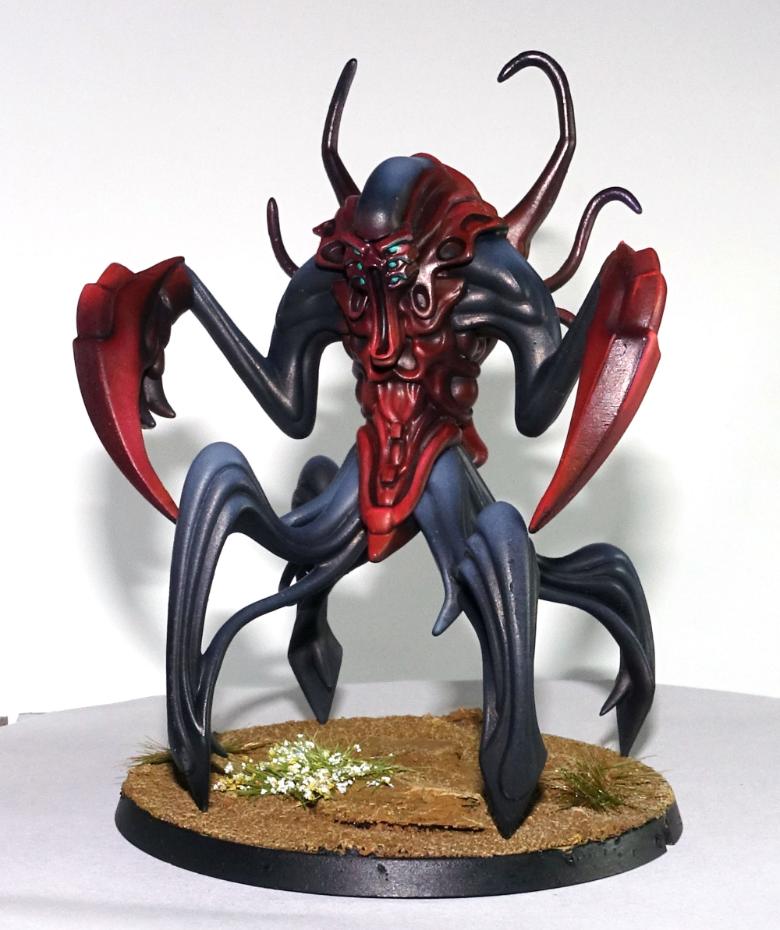
Community Spotlight: TP^DC Deputy Manager's Angel Minnow
Posted on Wednesday Oct 19, 2016 at 05:00pm in The Karist Enclave
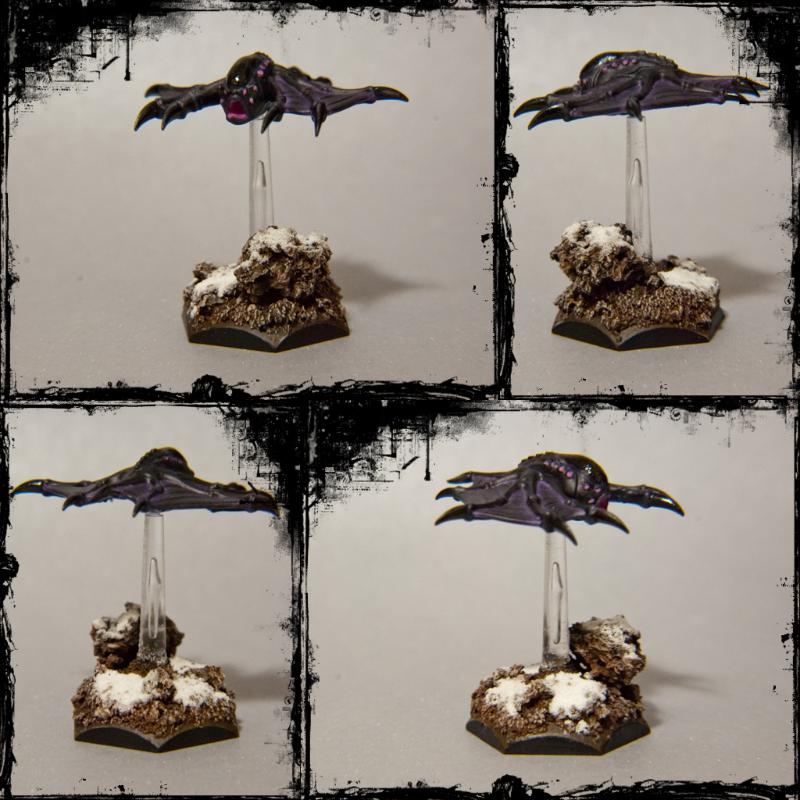
We've previously covered TP^DC Deputy Manager's excellent mature Angel, and this minnow complements it very well, with a similar basing scheme and colourscheme. The monochromatic base really helps draw the eye to the purple and pink in the minnow.
The Comm Guild's community spotlight focuses on sharing something from the Maelstrom's Edge community each week, if you have anything you'd like to get in to the queue, please get in touch with us via the Maelstrom's Edge website
Artwork: The First Karist
Posted on Tuesday Oct 18, 2016 at 05:00pm in Artwork
This piece of artwork is very important to us, as it was our first completed piece. It also served as the initial concept and reference for sculpting the Karist troopers. You'll spot a few small differences as we made the model in plastic, notably on the chestplate. This pose has popped up quite a few times in our conversions when we've played around with the sprue as tribute to this original piece of artwork which launched the rest of the range.
