Entries tagged [praetorians]
Assembly Guide - Karist Praetorians
Posted on Monday Aug 14, 2017 at 05:00pm in Tutorials
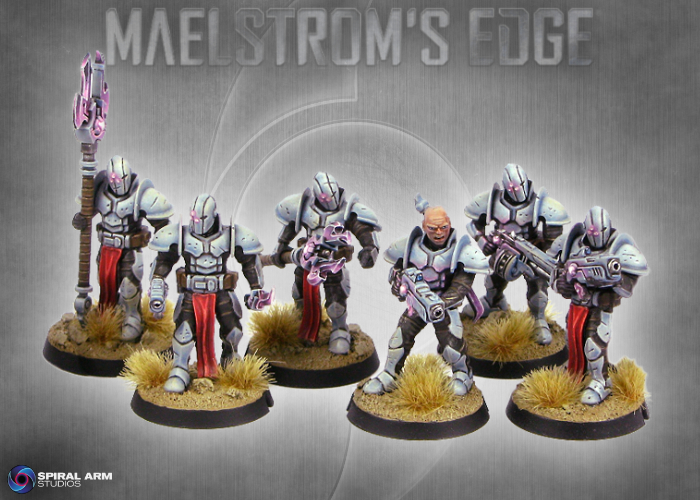
The assembly guides on the Maelstrom's Edge website are missing the new units added by the Faction Expansion Sprue. Last week, we went over the assembly of the Epirian Suppression Team, and so this time around we'll look at the other unit created from the sprue, the Karist Praetorians.
Karist Praetorian Assembly Guide

General Notes
Polystyrene cement - only use superglue if you want to go insane! All of our models are designed to be assembled with polystyrene cement as it gives some time to re-pose while gluing, fuses the models together and prevents brittle joins like other glues do. Make sure you have polystyrene cement in your toolkit before you begin!
We want you to experiment! We've broken our models up into lots of parts and given a fair few spare parts so that you can push yourself out of your comfort zone, learn new skills and create some really unique models. We've tried to price things so that it won't break the bank if you make a mistake, so please cut stuff up and have some fun. Start simple with a slice here and a re-pose there, and watch your confidence and skills increase until you are a master modeler!
Basing - Always make sure you glue your model to its base with an eye on the arc markers on the sides of the base. The arc marker indents should be at the halfway point between the front and back of the model to show the front and back halves of the model when gaming. See the Maelstrom's Edge rulebook for more detailed notes on this.
Dry fit before gluing! - There are lots of pose options possible, but that means there is also the freedom to screw up and make some bad poses! Sticking the parts together and seeing how things look will usually lead to a model that is fairly static and repetitive. You should consider knee, hip, torso, and arm positions when gluing and ensure that you have a pose in mind before you start gluing things together. If in doubt or insecure about your talents in the posing area, we recommend you try to copy the poses from some of our studio models found here in the gallery.
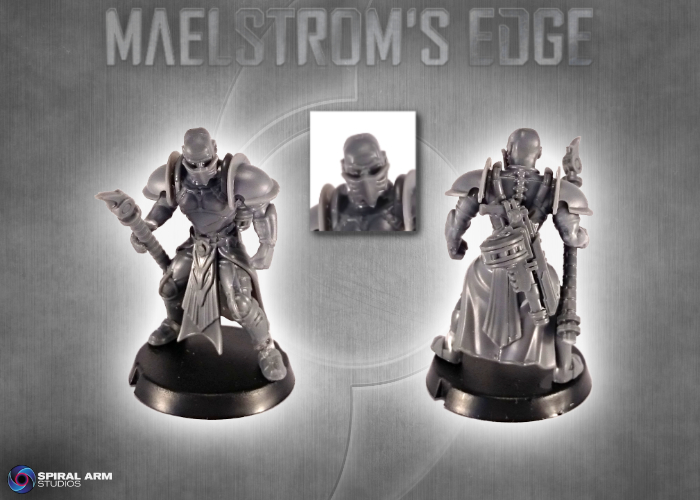
Karist Praetorian Assembly Notes
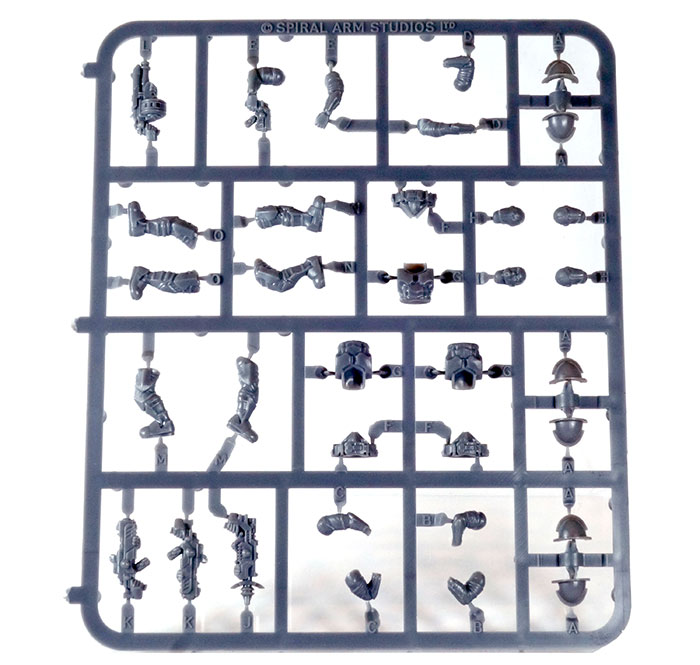
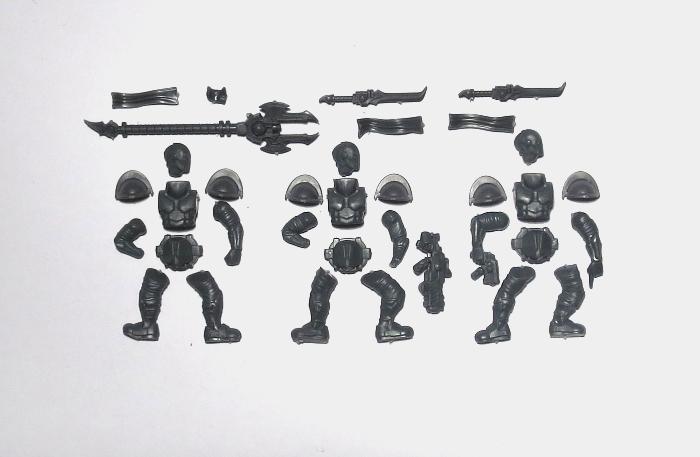
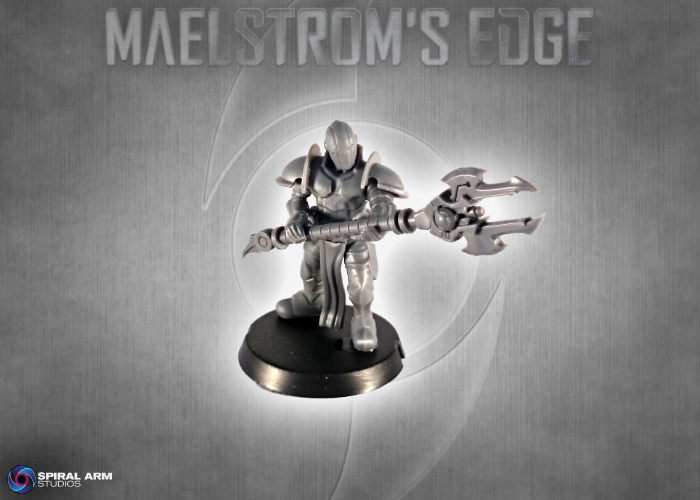
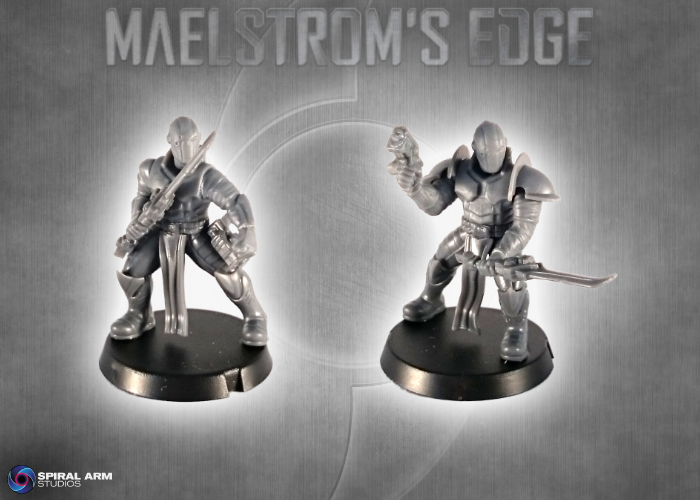
Karist Praetorians are fairly straightforward to assemble, being just a modification of the basic Karist Trooper. Three models can be assembled using the following sprues:
Karist Trooper Sprue:
Faction Expansion Sprue
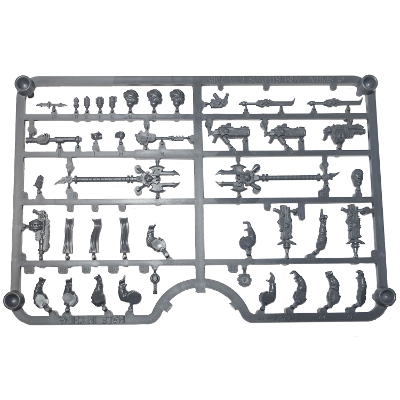
You will need the below parts from those sprue. We've used one rifle and one pistol just to show how they go together, but you could of course choose to use all rifles or all pistols when you assemble your own unit.
One design decision that might seem a little odd is the splitting of the legs from the lower torso/crotch piece. This had to be done because the upper leg armour is not possible to mould in injection moulded plastic without having to make some ugly tweaks to it that would have really reduced sharpness beyond what we were willing to tolerate. We decided to split the legs at the top instead, allowing ease of conversions and sustaining the crisp armour plates.
All three lower torsos (part F) are identical, as are all three torsos (G). Legs are paired with the same letter (eg; part M is both the left and right leg of the same pose). We recommend the first step in your Karist Trooper assembly should be sticking the legs on the lower torsos.
Add the loincloths next, as this is easiest before there are other parts to get in the way. There is a recess on the inside top of each loincloth that fits neatly over the groin armour. All three loincloths work with all three leg poses, but as usual it's a good idea to do a quick dry-fit before gluing to check that they look how you want them.

The most complex part of the build is the arm / weapon assembly. This is because three points need to be glued at the same time - the arms to the torso and the hands to the arms. If you are using polystyrene cement, you'll get a minute or two of re-posing time which can make this a lot easier. Arms are paired by code as well (eg; part C is both a left and right arm that go together). Mixing up your paired arms will mean some odd posing!
The shoulderpads (part A) are designed to be optional if you are so inclined - underarm detail is sculpted on the upper arms. We've not made any models without them though as we enjoy the distinctive profile the shoulderpads gives to the Karists. If you postion the arms so that the shoulders are just below the top of the armour, the shoulder pads will butt up neatly against the sides of the torso.

From the Karist Trooper sprue, Part K is the Karist Pulse Carbine. Part J is the Radwave Emitter and part L is the Grenade Launcher.
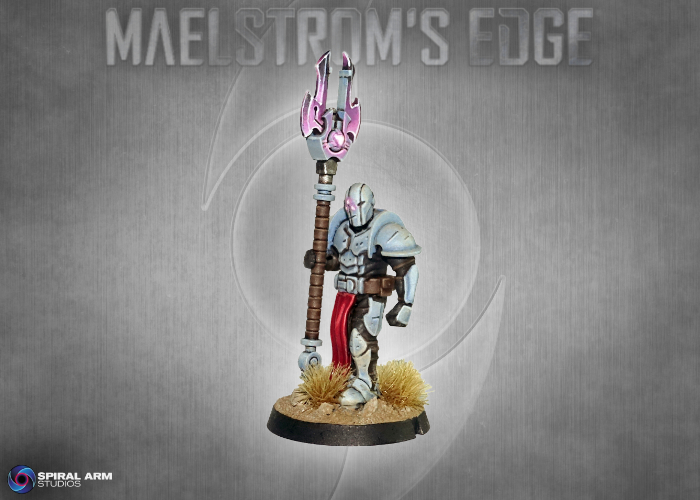
There is no Karist hand that holds the cybel blade neatly, although with a little conversion you can make the closed fist work. The easiest approach though is to glue the sword to the model's back, where it would presumably be held in place with a magnetic lock.

The cybel glaive does have a hand on the expansion sprue to hold it. You can use any of the right arms from the Karist Trooper sprue for this. Some of the rifle arms have a small wedge of wrist attached to angle the rifle correctly across the body. While not essential, it will look a little better if you cut this wedge off along the front edge of the forearm armour.

Once the hand is attached, you can glue the arm onto the torso, and then the glaive into the hand.
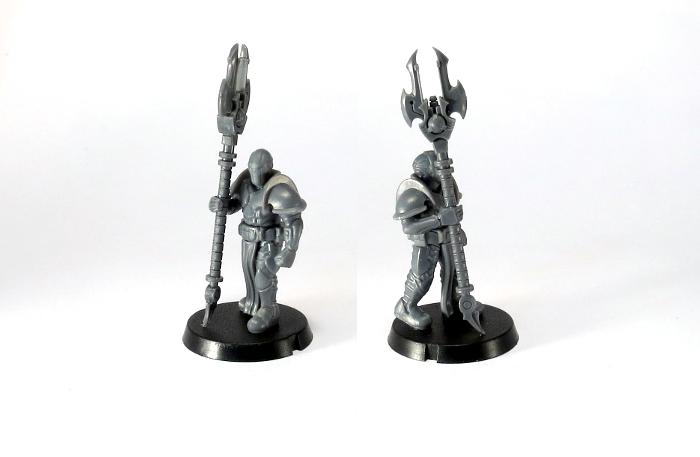
As with most models with poseable heads, we recommend building the whole model and then putting the head in place last of all.

For some more ideas for building or converting your models, check out the Karist Praetorian Spotlight article here.
You can pick up your Contractor and Expansion sprues from the Maelstrom's Edge webstore here. As always, feel free to share your creations on the Comm Guild Facebook page!
For other Maelstrom's Edge modeling articles, including tutorials and walkthroughs of a wide range of different building and miniature projects, check out the article roundup here.
Tags: karist modeling praetorians tutorial
Spotlight: Karist Praetorians
Posted on Monday Sept 26, 2016 at 05:00pm in The Karist Enclave
- by Iain Wilson
The new Faction Expansion Sprue saw the addition of new units to the game for both the Karist and Epirian factions, with extra components to add to the original plastic kits. This seemed like a great chance to expore the versatility of these kits, by looking at different ways to build the new units.
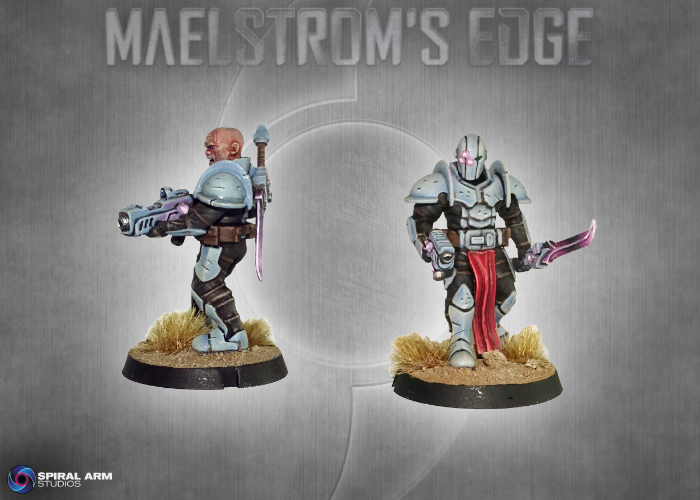
We've already had a look at the Epirian Suppression Team, so this time around I'm having a play with the Karist Praetorians. These veteran warriors are immediately recognisable with their massive Cybel Glaives, or the smaller but deadly Cybel Blade.
The sprue comes with an open hand for holding the Cybel Glaive in a single-handed grip. For the other arm, you can use the arm with clenched fist from the Karist trooper sprue, or the pointing arm from the Expansion sprue, as in the studio images above and below.
With a little cutting and gluing, though, you can use the rifle support hand from the Epirian Contractor sprue on one of the Karist left arms to create a two-handed grip like this:
The left hand will look slightly different to the right, as the Karists have a flat plate on the backs of their gloves which the Epirian hand will lack, but painted up like the other glove it won't be particularly noticable.
Both the Cybel Glaive and the Cyble Blade can be glued to the models' backs, to leave hands free for ranged weapons. For Cybel Blade-equipped models, you can instead use the clenched fists which can be found on the Karist Trooper sprue or the Expansion Sprue to hold the sword, by cutting the hand grip off the sword and gluing to the top of the fist, and gluing the bottom of the hand grip to the bottom of the fist. You need to trim off a little of the grip to correspond to the part that would be in the model's hand, otherwise you wind up with a very long handle. You may find it sits better if you sand or file down the top of the fist a little to make sure you have a flat surface to glue the sword onto.
You can achieve some slightly more dynamic posing and make your Praetorians stand out a little more from regular Troopers by using Shadow Walker legs, as below:
It's possible to equip a Praetorian with both a rifle (including a Ripper Grenade Launcher or Radwave Emitter) and a Cybel Blade. If you would like to avoid having to sling one of the weapons on the model's back, you can always combine them both into a single pole-arm:
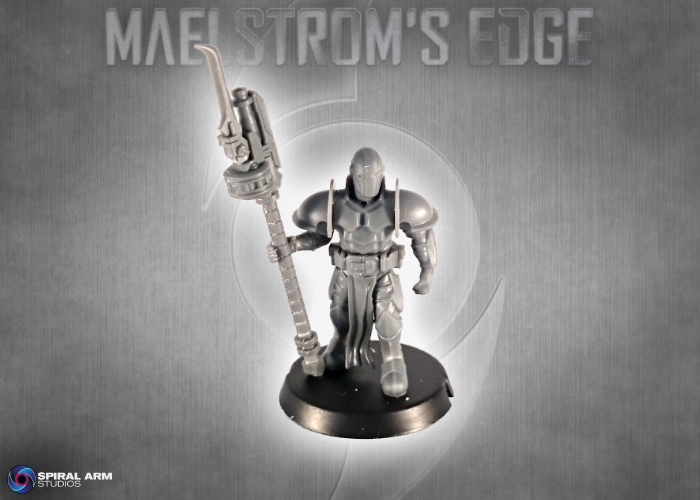
This was made by cutting away part of the fore-grip on the grenade launcher, trimming the handle off a Cybel Blade and gluing it in place. I then sliced off the back of the grenade launcher directly behind the drum magazine, and attached the shaft of a Cybel Glaive.
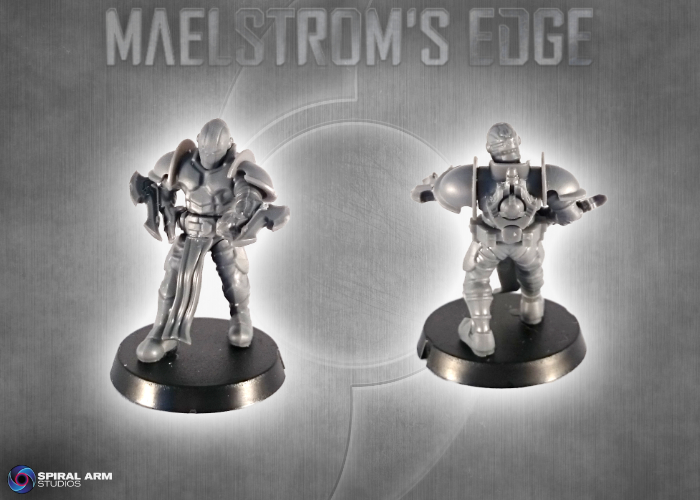
For an alternate take on the iconic Cybel Glaive, I tried going the other way and removing the shaft. The blades were attached to the model's forearms, and the power unit glued onto the model's back:
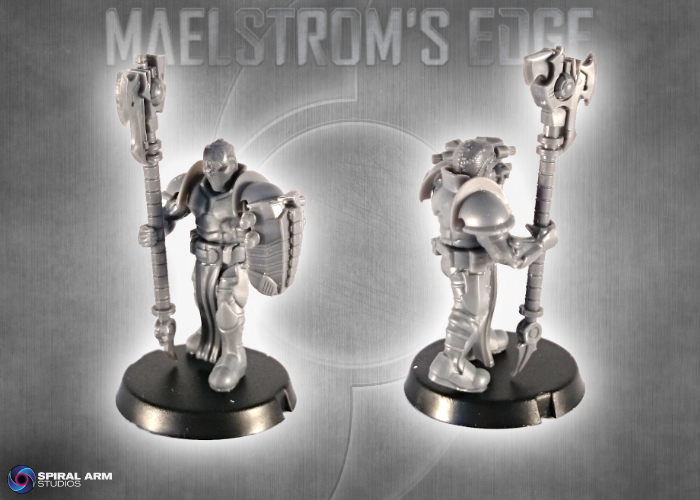
There are plenty of other possibilities for personalising your units from this sprue, or for creating new unit options for your own home-brew rules, like this model armed with a Cybel Halberd, made by flipping the Glaive's blade upside down, and Energy Shield taken from a Kaddar Nova's backpack:
...or this Angel Keeper, built from Kaddar Nova legs, a Shadow Walker torso, Karist Trooper arms and the shaft of a Cybel Glaive, with a mask made by trimming down a Kaddar Nova's crown.
(We'll be looking at Angel Keepers in a little more depth, and sharing a tutorial for building your own, in an upcoming article very soon...)
And finally, if overkill is your thing, here's a Kaddar Nova who clearly favours getting in close and personal with his enemies:

Why not have a try and see what you can come up with yourself? You can pick up the Faction Expansion Sprue in a handy 3-pack in the Maelstrom's Edge Online Store here.
You'll also need the Karist Trooper Sprue (here) for the standard Praetorian builds, or the Shadow Walker (here) or Kaddar Nova (here) sprues for the more adventurous conversions.
Feel free to share your creations on the Comm Guild Facebook page (https://www.facebook.com/groups/MaelstromsEdge) - We would love to see what you do with your Praetorian units!