Entries tagged [suppressionteam]
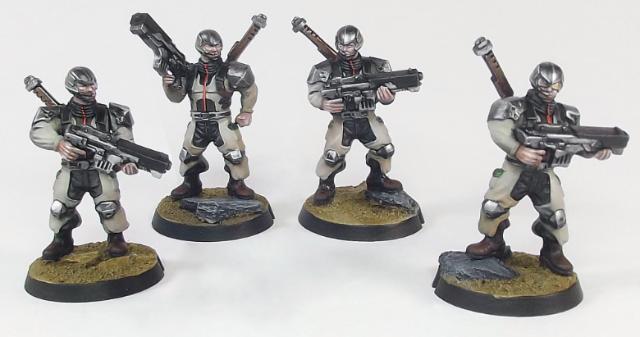
Assembly Guide - Epirian Suppression Team
Posted on Monday Aug 07, 2017 at 05:00pm in Tutorials
The assembly guides on the Maelstrom's Edge website are missing the new units added by the Faction Expansion Sprue. So this week, we're going back to basics and running through assembly of the Epirian Suppression Team.
Assembling Epirian Contractor Suppression Teams
General Notes
Polystyrene cement - only use superglue if you want to go insane! All of our models are designed to be assembled with polystyrene cement as it gives some time to re-pose while gluing, fuses the models together and prevents brittle joins like other glues do. Make sure you have polystyrene cement in your toolkit before you begin!
We want you to experiment! We've broken our models up into lots of parts and given a fair few spare parts so that you can push yourself out of your comfort zone, learn new skills and create some really unique models. We've tried to price things so that it won't break the bank if you make a mistake, so please cut stuff up and have some fun. Start simple with a slice here and a re-pose there, and watch your confidence and skills increase until you are a master modeler!
Basing - Always make sure you glue your model to its base with an eye on the arc markers on the sides of the base. The arc marker indents should be at the halfway point between the front and back of the model to show the front and back halves of the model when gaming. See the Maelstrom's Edge rulebook for more detailed notes on this.
Dry fit before gluing! - There are lots of pose options possible, but that means there is also the freedom to screw up and make some bad poses! Sticking the parts together and seeing how things look will usually lead to a model that is fairly static and repetitive. You should consider knee, hip, torso, and arm positions when gluing and ensure that you have a pose in mind before you start gluing things together. If in doubt or insecure about your talents in the posing area, we recommend you try to copy the poses from some of our studio models found here in the gallery.
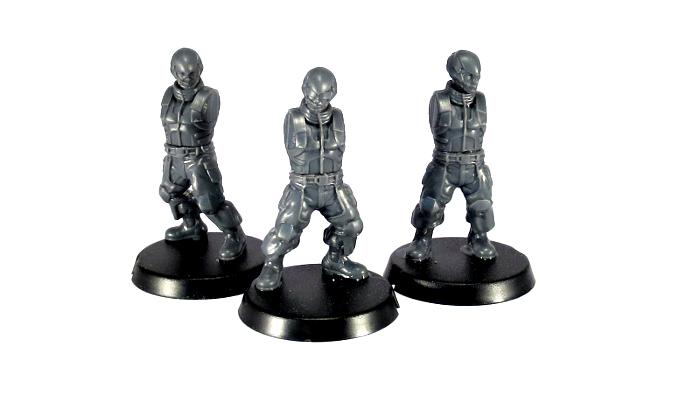
Epirian Contractor Suppression Team Assembly Notes
Three Epirian Suppression Team Contractors can be made from the following sprues:
Epirian Contractor Engineer Sprue
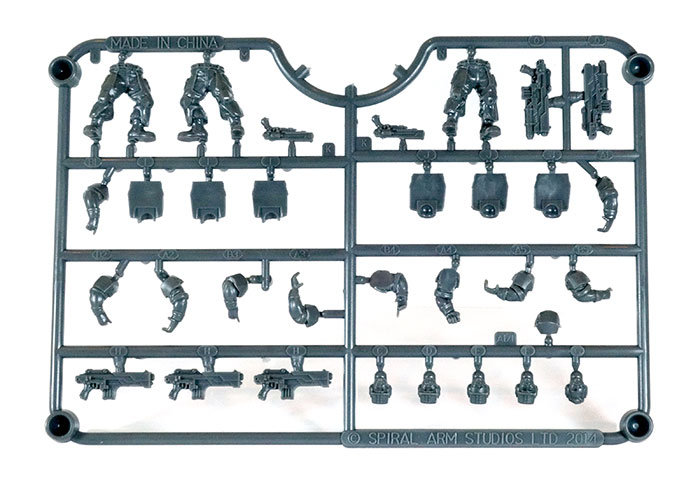
Faction Expansion Sprue
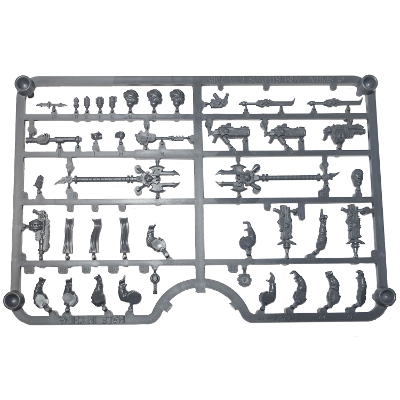
Assembly is straightforward and the two above sprues will make up three models with the following parts. Please note that arms are paired, so do not mix them up or you'll have a really hard time putting them in pairs again! Pairing is done by number, so A1/B1 are a pair, as are A5/B5, etc. You can choose between the rolled-sleeve versions on the Contractor sprue, or the sleeves-down arms on the Expansion sprue.
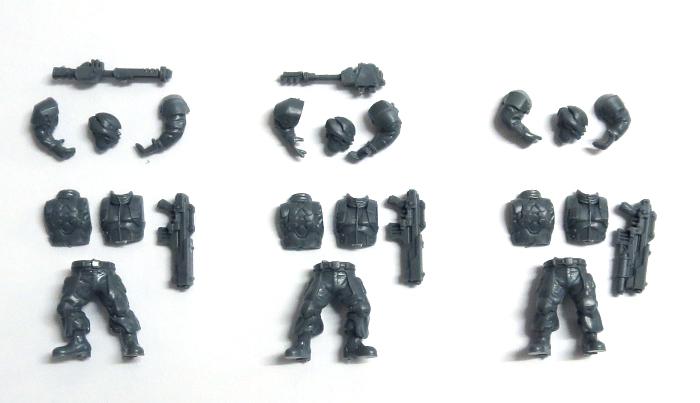
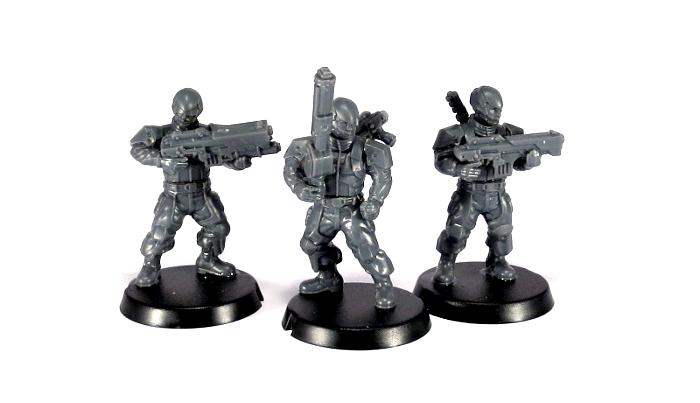
The main build considerations with the Epirian Contractors are that some of the arm poses do not work well with some of the leg poses due to the angles involved, so as always, be certain you dry fit things first. If in doubt, try to copy our studio assemblies for good effect.
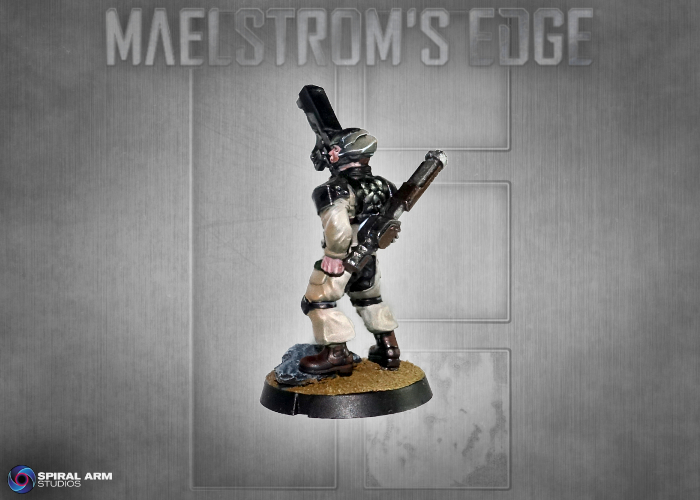
As with our Epirian Handler model, the torso has a slight lean to it, and because of that, if you place one foot higher than the other when basing your models, you'll open up much more posing flexibility. This can be done easily by bulking up your basing texture underfoot, adding a pebble or slope to the base, or a multitude of other options.
Cleanup and assembly is fairly easy with the Epirians, with everything going where it should. One point of note is this little mould line on the kneepad strapping:
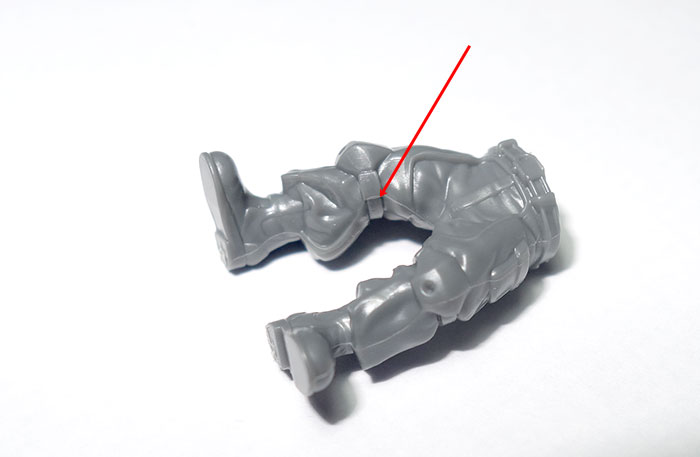
That raised mould line between the front and rear halves of the part looks a lot better if it is shaved down but as it is a little bit deeper than our usual near non-existent mould lines, it can be missed when trimming. Please note that in the photo above we've used a pre-production prototype piece with mould lines that are much worse than our finished products so that you can see more clearly.
Legs, torso and heads go together as you would expect.
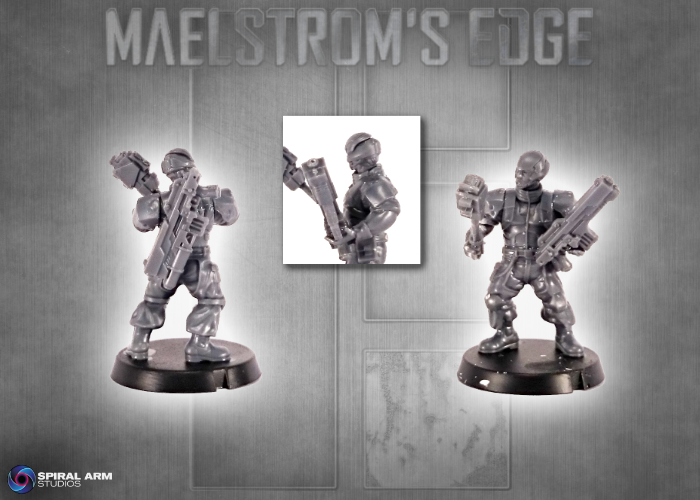
Suppression Team members magnetically lock their 'spare' weapon to their backplate when not in use. So if you choose to have rifles in hand, you can glue the shock weapons to the model's back. Alternatively, you can glue the rifle to their back or sling a pistol off their belt, and put the shock weapon in hand. Use the rifle arms that have the index finger on the trigger, rather than the extended-finger hands - the fingers are close enough together that they still look fairly natural gripping a handle instead of a pistol-grip. The Shock Baton does have a chunkier grip than the Maul, so if you're having trouble getting it to fit, you can shave down the sides of the grip a little.
For some more ideas for building your Suppression Team models, check out the Epirian Suppression Team Spotlight article here.
You can pick up your Contractor and Expansion sprues from the Maelstrom's Edge webstore here. As always, feel free to share your creations on the Comm Guild Facebook page!
For other Maelstrom's Edge modeling articles, including tutorials and walkthroughs of a wide range of different building and miniature projects, check out the article roundup here.
Spotlight: Epirian Suppression Team
Posted on Monday Sept 19, 2016 at 05:00pm in Models
- by Iain Wilson
The new Faction Expansion Sprue saw the addition of new units to the game for both the Karist and Epirian factions, with additional components to add to the original plastic kits. This seemed like a great opportunity to expore the versatility of these kits, by looking at different ways to build the new units.
So to kick things off, we'll be looking at the Epirian Suppression Team. These doughty warriors take the field armed with the standard Epirian Maglock weapons, but also have the option to replace either pistol or rifle with a Shock Baton or Shock Maul.
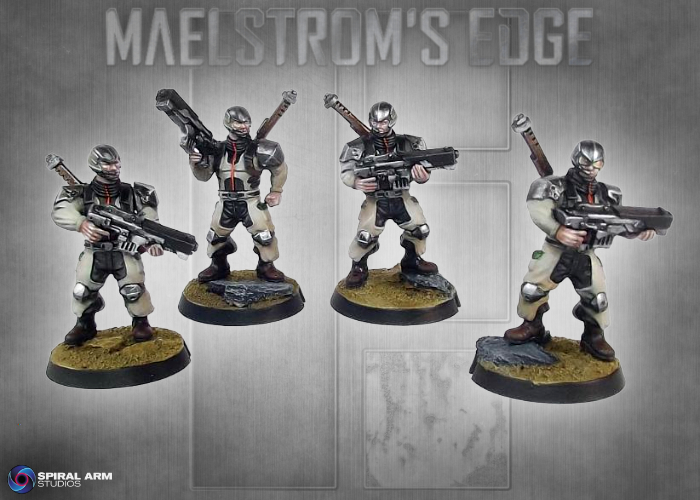
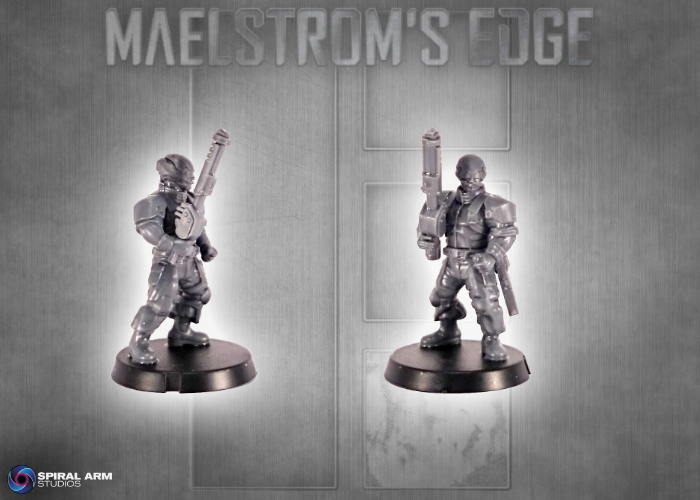
The studio models shown above were assembled with the Shock weapons slung on the models' backs, which is the easiest and quickest way to assemble them, particularly if you want to arm them with their rifles. This is simply a matter of gluing the Baton or Maul straight to the Contractors' back plates. We would assume that they're held there with a magnetic latch system, or some similar thing.
An easy alternative is to use one of the Contractor rifle arms to hold the Shock weapon. Several of the rifle arms have the trigger finger fairly close to the other fingers, and so they don't look too out of place holding the Shock weapon handle. You can also gently bend the trigger finger in to reduce the gap even further (The Shock Baton does have a chunkier grip than the Maul, so if you're having trouble getting it to fit, you can shave down the sides of the grip a little).
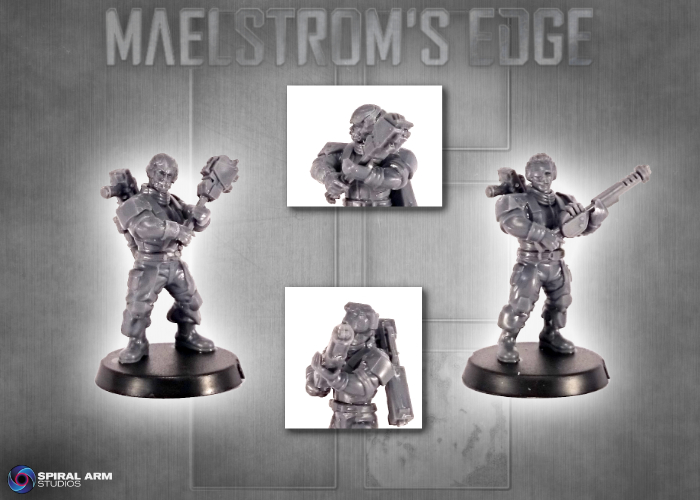
You can slice the arms at the wrist and/or just under the rolled sleeves on the upper arm and reposition to give some more interesting poses. On the Maul-equipped model below, the right arm has been swivelled just under the rolled sleeve to move the hand outwards from the body, and on the other model one of the rifle support arms has been used with the hand rolled at the wrist to give him an 'at-rest' pose with the baton resting on the ground.

You can also use the open Karist hand on the Expansion sprue to replace one of the rifle hands. On the model below, I've used that hand for the Shock Baton, and swapped the pointing hand off the Karist arm on the sprue onto one of the Epirian rifle arms. The end result is a model wearing Karist gloves, but with the Epirian arms they still look quite distinct from the Karist models.
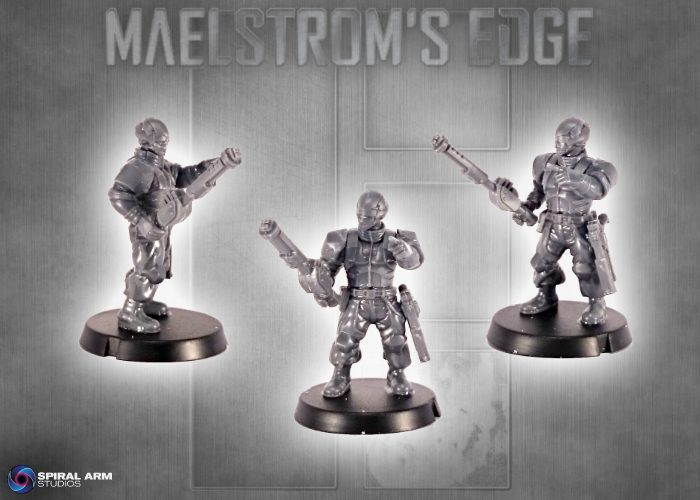
The team members' ranged weapons can be dealt with several different ways. For models equipped with pistols, you can use the pistols and weapon arms from the Contractor sprue, of course. However, if you've used the right arm for the Shock weapon, an easy alternative is to glue the pistol onto the model's belt, or to use the legs from the Bot Handler sprue and hang the pistol off the strapped pouch on the thigh. For either of these, it's a good idea to cut off the revolver drum on the side of the pistol that will attach to the model, to allow it to sit more flush against the leg.
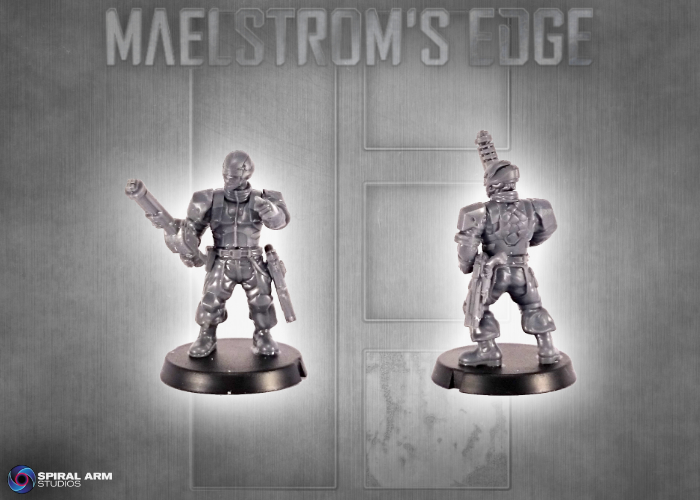
For rifle-equipped models, you can reverse the idea from the studio models, and mag-lock the rifle to the model's back. Or you can use the rifle support arms to balance the rifle against the model's hip, as below.
With the rifle safely stowed on the model's back, you can use the rifle arms to create a two-handed grip on the Shock weapons, as below. Depending on the specific arm pairing you go for, a little wrist-repositioning can be necessary to get these sitting just right.
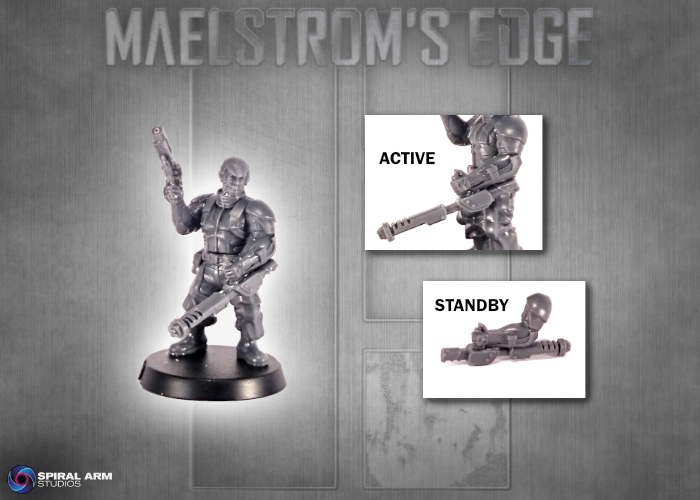
For a slightly more out-of-the-box alternative, the below model was assembled using the arms from the Bot Handler sprue, instead of Contractor arms. For the Shock Baton, I cut off the Handler's underslung grenade launcher, chopped the heatsink part off the back of the Baton, and glued it in place running along the forearm. This can be positioned pointing forwards for an 'Active' pose, or reversed for a 'Standby' or 'At-Rest' pose.
You can pick up the Faction Expansion Sprue in the Maelstrom's Edge Online Store here.
You'll also need the Epirian Contractor Sprue (here) or for the arm-mounted conversion, the Bot Handler Sprue (here)
As you can see, there are a lot of possibilities with these models, thanks to the ease of assembly and conversion with the plastic models. I've only just scratched the surface with the builds shown here. Feel free to share what you come up with on the Comm Guild Facebook page (https://www.facebook.com/groups/MaelstromsEdge) - it's always great to see how others put their own spin on the model range!
Next up, I'll be taking a look at the Cybel Glaive-equipped Karist Praetorians. Stay tuned!
Tags: epirian modeling suppressionteam