The Brutus Battlesuit thunders onto the field!
Posted on Monday Jun 01, 2026 at 05:00pm in Models
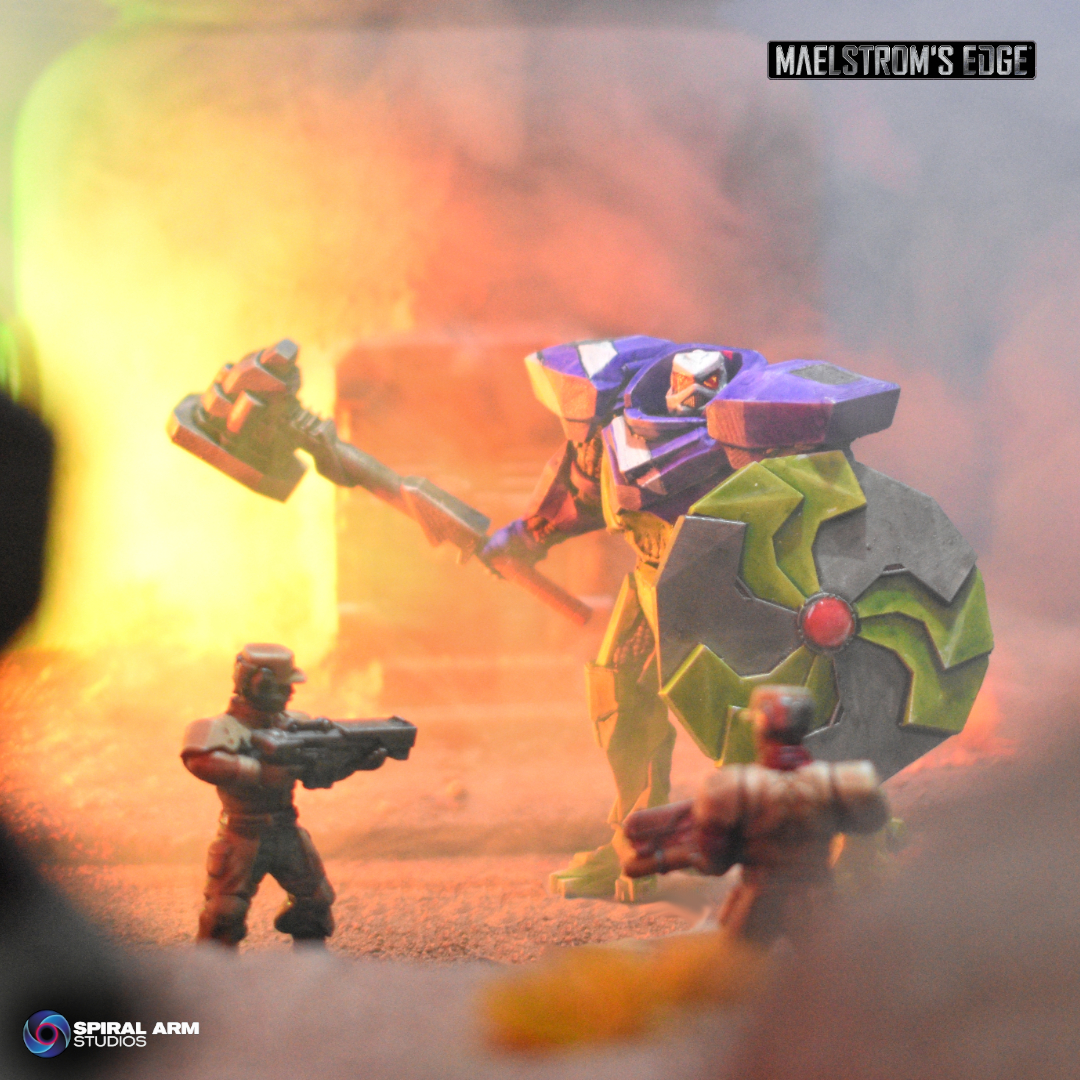
This digital model pack contains STL files to print a Brutus Battlesuit with multiple weapon and backpack options, and a 54mm base. All options unique to the Brutus are included - other weapon and gear options can be used from the plastic Militus Battlesuit kit. Available now through the Maelstrom's Edge webstore here.
Biomass Nodules make their gooey way onto the battlefields of the Edge!
Posted on Monday Apr 27, 2026 at 05:00pm in Models
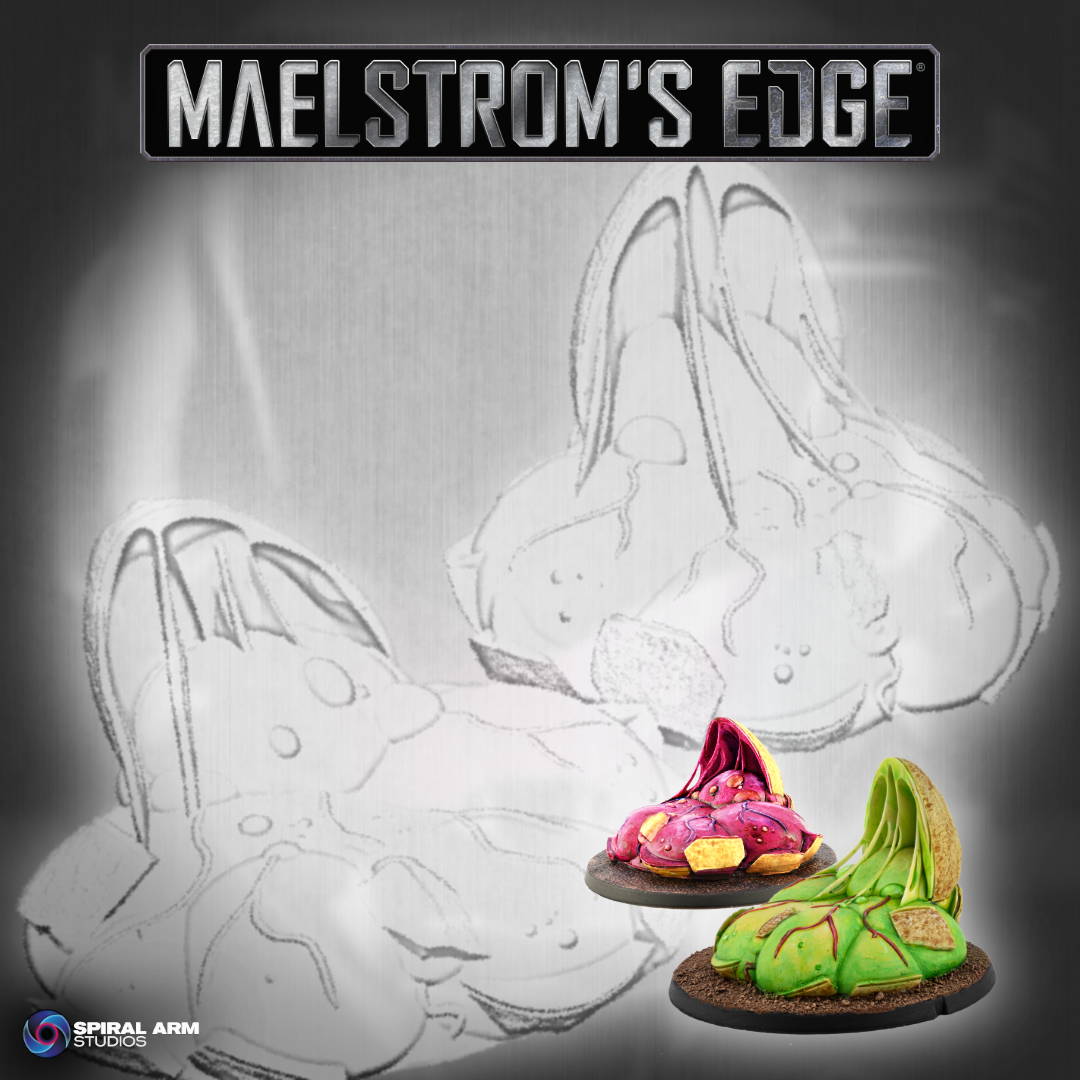
This digital model pack contains STL files to print Kaigus Pact Biomass Nodules. Includes two different models plus vented versions that can be printed directly on the build plate with no supports. Also includes files for 65mm bases. This digital pack is available now through the Maelstrom's Edge webstore here.
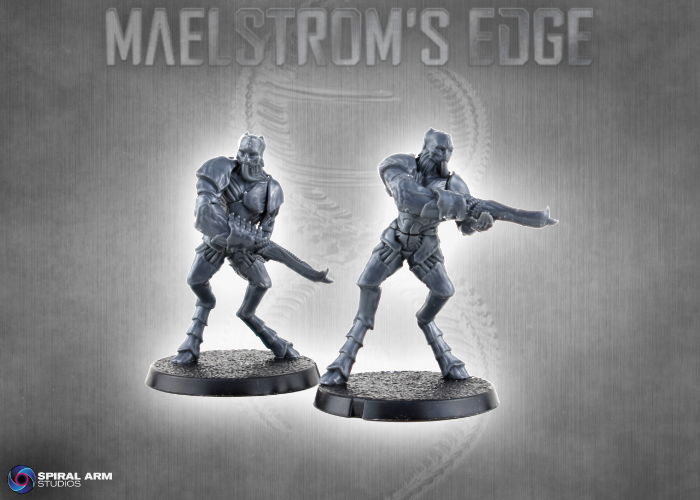
The Muharis Alpha is here to lead his troops to war!
Posted on Monday Mar 30, 2026 at 05:00pm in Models
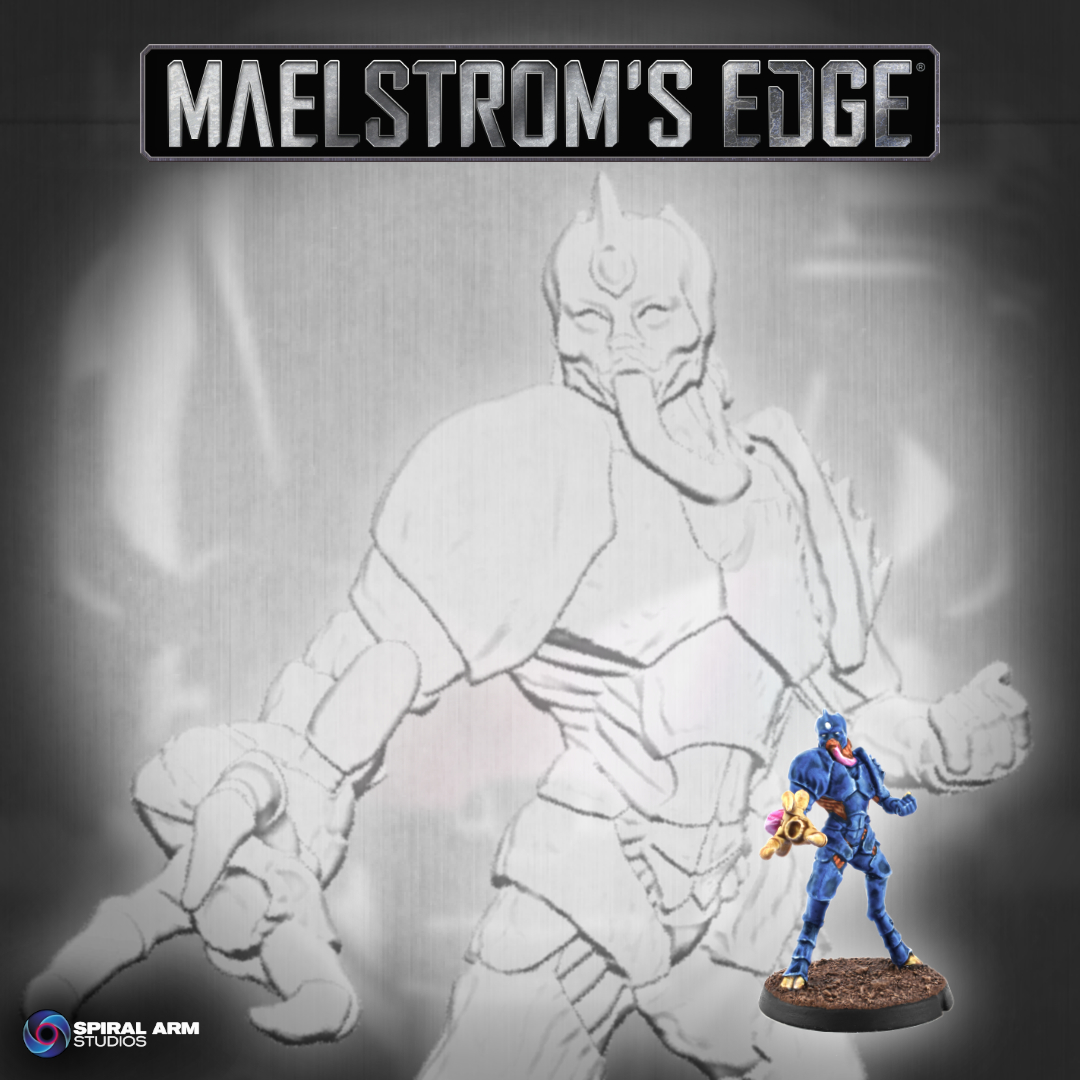
This STL model release includes a Muharis Alpha model with three different weapon options and a base. Available now through the Maelstrom's Edge webstore here.
A new digital reinforcement for the Broken - the Skoti Streamweaver!
Posted on Monday Mar 02, 2026 at 05:00pm in Models
A physical model for the Skoti Streamweaver is in the development queue for release when we can, but in the meantime you can grab the 3D printable STL file from the Maelstrom's Edge webstore here!
Broken STL Updates - and some free tokens!
Posted on Monday Feb 23, 2026 at 05:00pm in Models
This update adds EMP Gauntlet arms to the existing Gnolti STL file, a Voltcaster to the Pa'ku and a Network Spike to the Sig Jammer, all available now through the Maelstrom's Edge webstore here. If you have previously purchased the STL files for these models, you can access the additional parts through the downloads section of your user account page on the Maelstrom's Edge website.
Also in this week's updates, we have added a free STL file to the downloads section with 3D printable tokens for Maelstrom's Edge V2. These feature the same designs as the paper versions in the rulebook, and are perfect for those who would like a more solid option than paper cutouts.
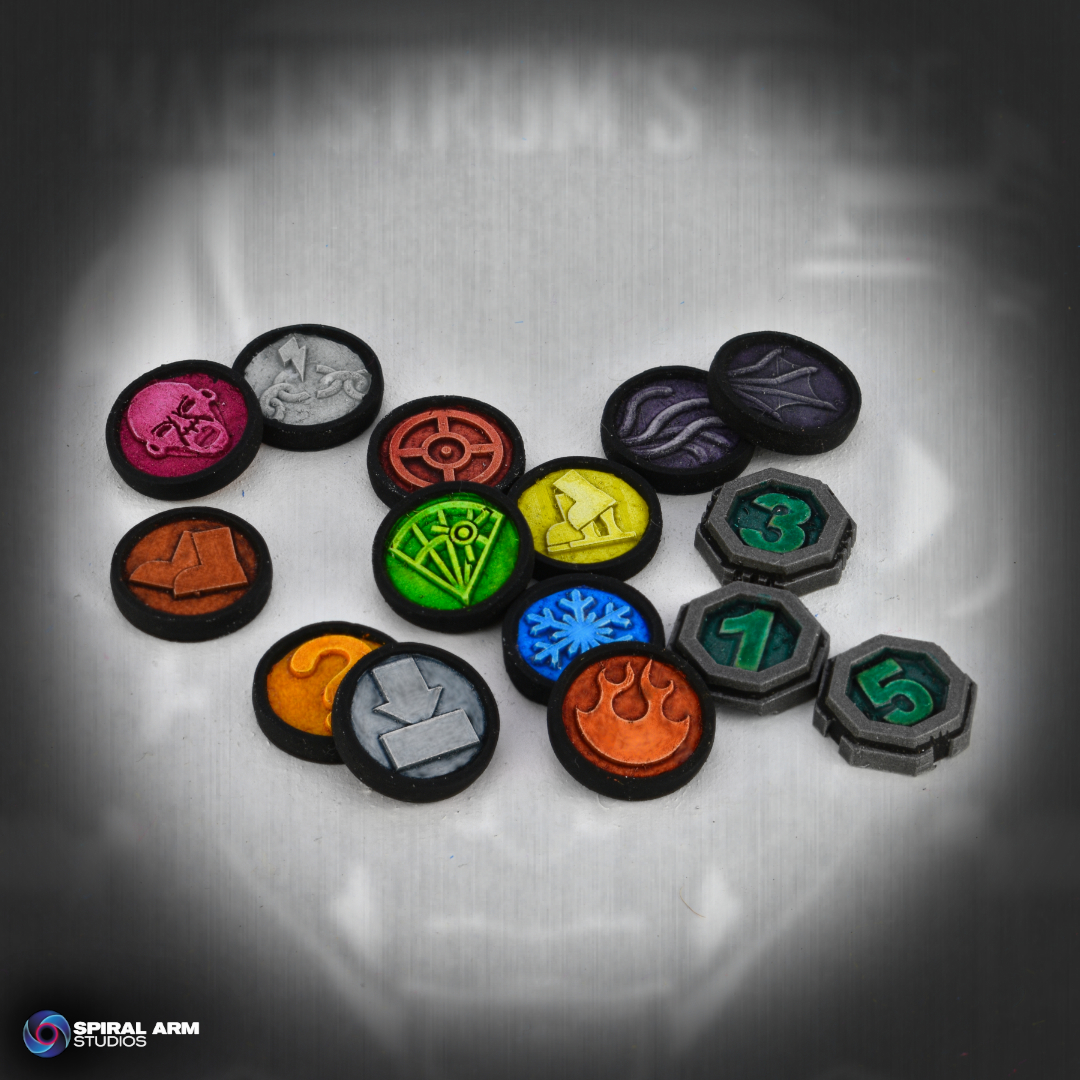
The file includes both single and double sided versions of the tokens, and supported versions of the double sided tokens - the single sided tokens can be printed flat on your build plate. Find them now in the downloads section of the Maelstrom's Edge website here!
Updated Imperial Marine Homebrew rules for V2
Posted on Wednesday Jan 14, 2026 at 05:00pm in Gaming
 - by Iain Wilson
As promised, I've finished dusting off my Imperial Marine homebrew rules and added in some new bells and whistles so you can bring your forces of power-armored supersoldiers to the battlefields of Maelstrom's Edge V2!
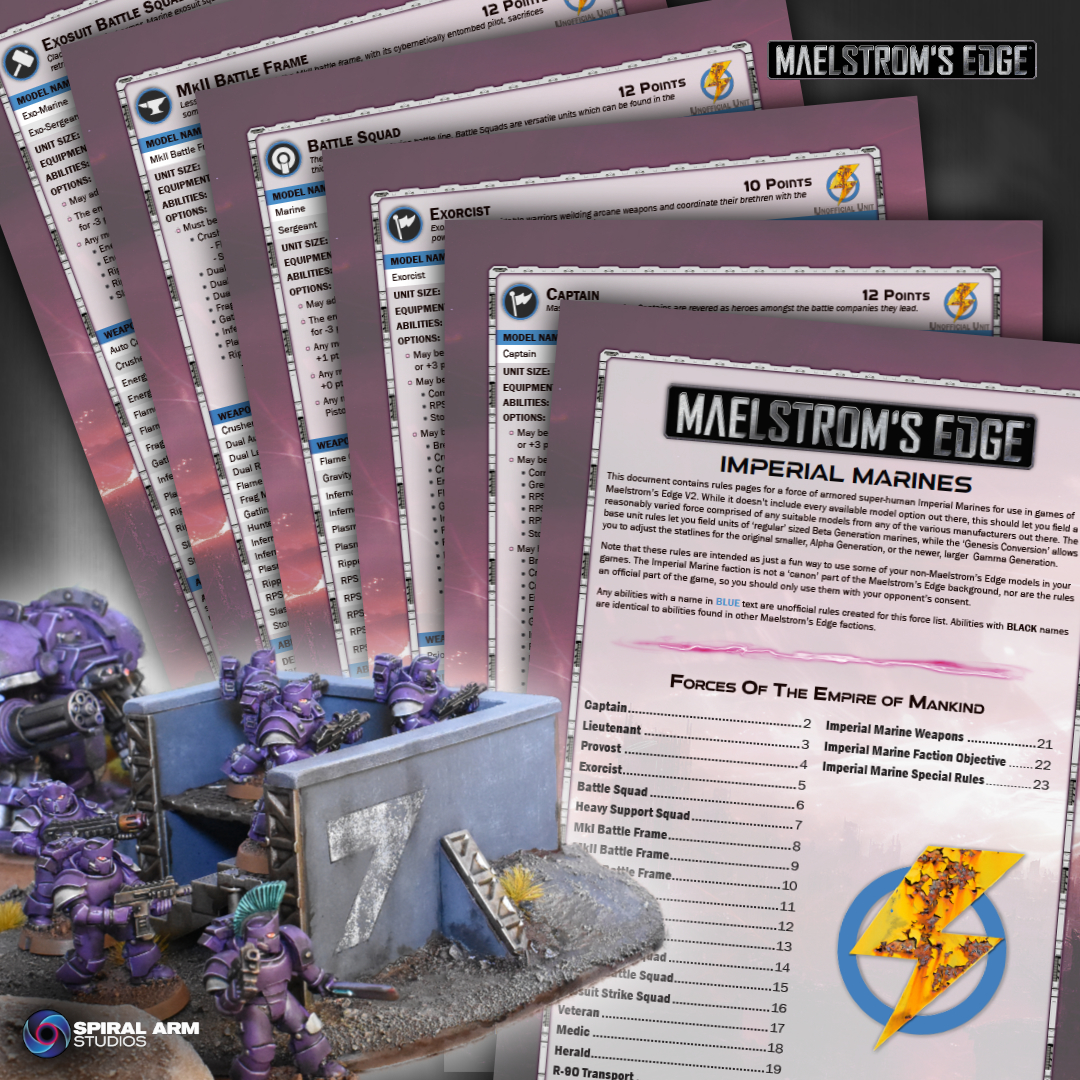
I did release an initial V2 draft of these rules back during the rulebook's early Beta phase. With the changes to the rules from the Beta to the final print rulebook, that first draft needed some revision to be work properly, so I've tweaked some statlines and rules a bit, and also taken the opportunity to add in some more units and options, so that you can add a bit more variety to your forces. There are now more character options, three different types of Battle Frame to represent the evolution of certain walking battle machine models over the years. I have also given them a transport vehicle, and the Gamma Upgrade has been replaced with Genesis Conversion, giving you the option to field Alpha, Beta or Gamma Generation marines.
The rules pages are a little different to the other factions. Due to the sheer number of options available to most Imperial Marine units, including all of the weapons stats and ability entries isn't feasible, so I have included base gear and abilities where possible, with a summary at the end of the document giving a full list of weapons and abilities.
These are still marked as Beta rules, as I haven't had as much time as I would like to test them. I'd love to see some players kick the tyres on them, though - and if you do, feel free to post some feedback in the Comm Guild Facebook group!
Grab the new V2 Imperial Marine rules from the Maelstrom's Edge website here and get gaming!
For other building ideas, modeling tutorials, army spotlights and conversion walkthroughs, check out the Hobby section of the Maelstrom's Edge website here.
Tags: v2
Iain's Unofficial Rules Updates!
Posted on Monday Dec 15, 2025 at 05:00pm in Gaming
- by Iain Wilson
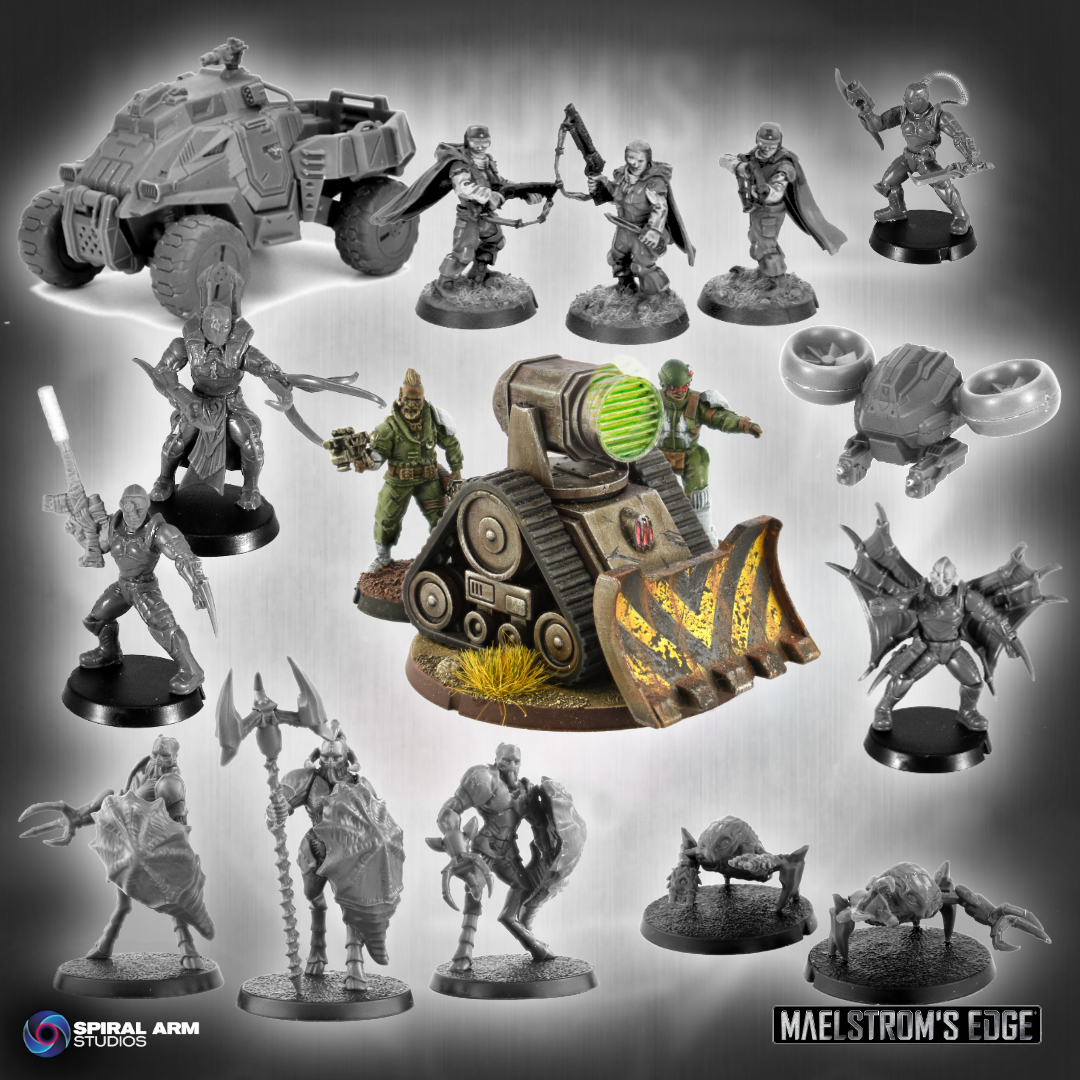
One of my side-projects lately has been slowly working through updating our old online assembly instructions to a more functional PDF format with proper step-by-step illustrations, and adding instruction documents for those that didn't previously have them, which included the plastic PDG Gaming Gun Carriage - you can find that document on the Assembly Guides page of the website here. Working on those instructions reminded me that I had always intended to add a rules page for the gun carriage to be looted by Broken forces, and so this week I took some time to throw something together, and add in a few other 'missing' models at the same time!
So, on the V2 Rules Downloads page of the Maelstrom's Edge website, you can find a section down the bottom with the current versions of my various homebrew rules docs for each faction. These rules cover various conversions or kitbashes I have assembled over the years using miniatures from the Maelstrom's Edge and/or other miniature ranges, and are intended as a fun way of getting these onto the table, rather than being an 'official' part of the game. If you want to build your own versions of these models to use in your games, by all means do so, but make sure your opponent is ok with you using them!
Most of these were rules previously available, but I have made the following changes:
The Broken
- Gnolti Longhorn - added the Forsaken designator so that he fits into the subfaction command structure.
- Broken Thunderbolt Team added - a unit added to use the PDC Gun Carriage. While the Epirian version is a self-piloting drone, the Broken strip out the drone core and use it as a manned artillery unit with different weapon options!
The Epirian Foundation
- Hornet Drone added - heavy add-on for Firefly units.
- Contractor Pathfinders added - a unit of stealthy Contractor scouts.
- Aurochs Automated Transport added - drone-controlled transport vehicle built from the Mantic Mule.
The Karist Enclave
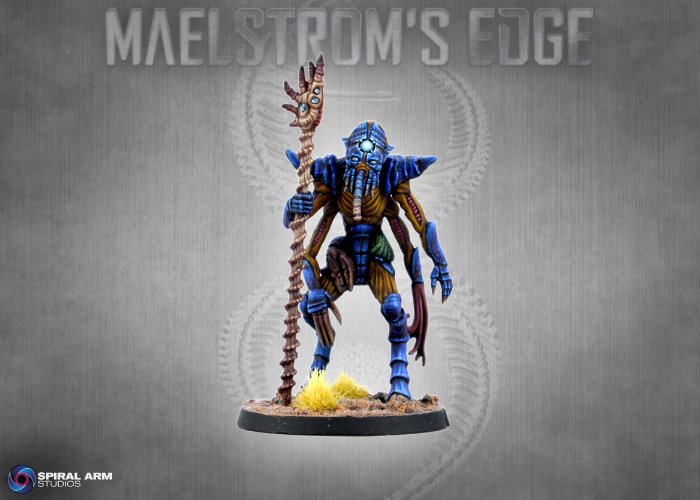
- Kaddar Noctis added - a new priest unit, fusing Karist tech with Angel DNA.
- New Shadow Walker variants added - the Shadow Stalker, Shadow Dancer and Shadow Weaver.
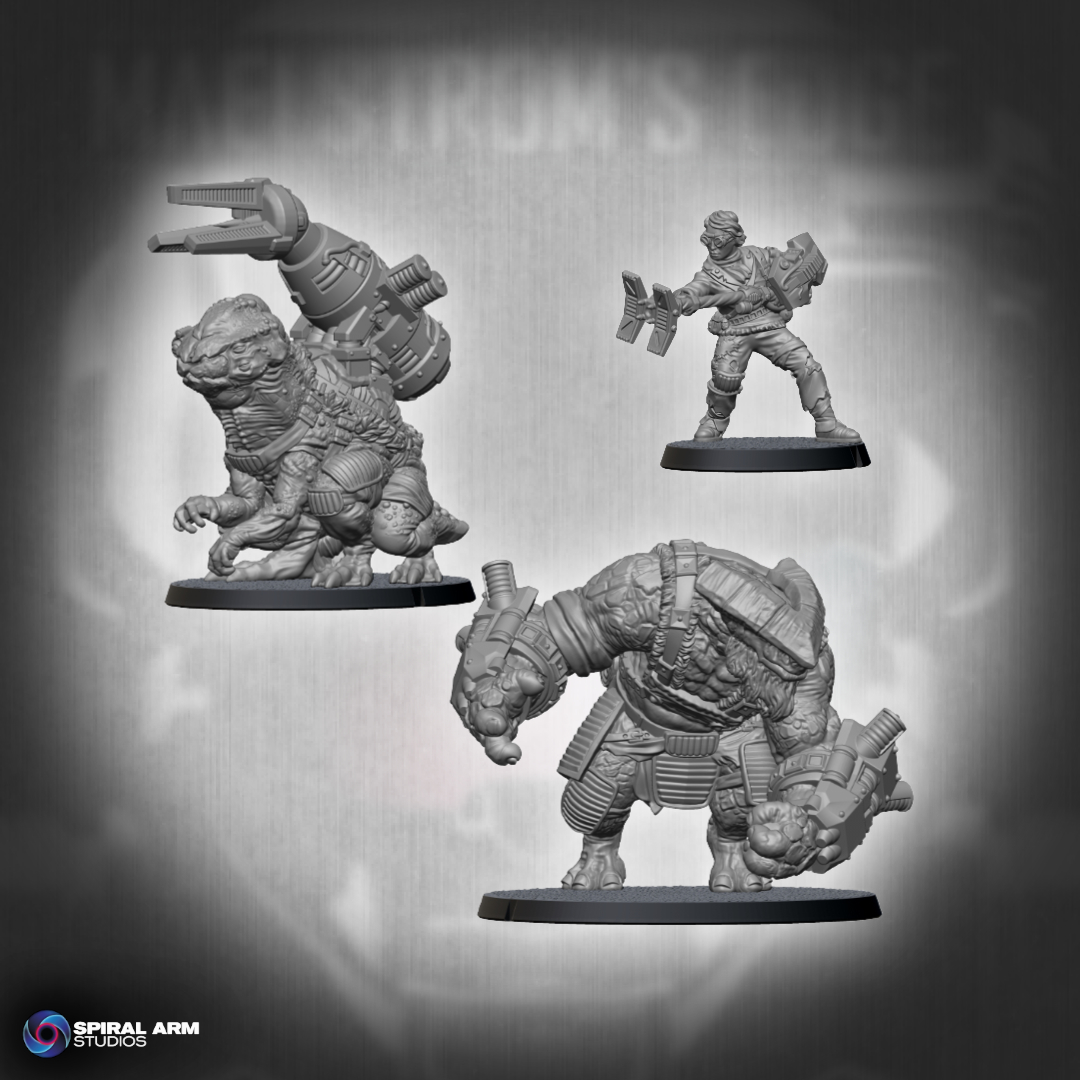
The Kaigus Pact
A new addition to my unofficial rules collection, that I couldn't resist because the models are so fun to build! I previously shared a Muharis Sentinel conversion, equipped with shields taken from the Orakan Shield Thrall kit and an Alpha staff made from a Proctat Genostaff and Orakan legs, that looked like this:
Muharis Sentinel Bulwark (Previously known as a Sentinel Spearhead)
Obviously, this left me with a few Orakan models with missing shells, and so I threw together some oversized combat thralls using Muharis Ripper Claws and Proctat Genostaff heads!

Dromakin Combat Thralls
Rules for both of these units are now available in the new Kaigus Pact document, which can be found along with all of the other rules PDFs in the V2 Rules Downloads section here!.
Coming up next: Updated Imperial Marine rules! And more updated instruction sheets coming soon...
Grab yourself some conversion fodder or the new V2 rules from the Maelstrom's Edge webstore here!
What are you working on? We would love to see your models and terrain in the Comm Guild Facebook group!
For other building ideas, modeling tutorials, army spotlights and conversion walkthroughs, check out the Hobby section of the Maelstrom's Edge website here.
Tags: rules unofficial v2
Print on Demand Mission Cards now available!
Posted on Wednesday Dec 03, 2025 at 05:00pm in Gaming
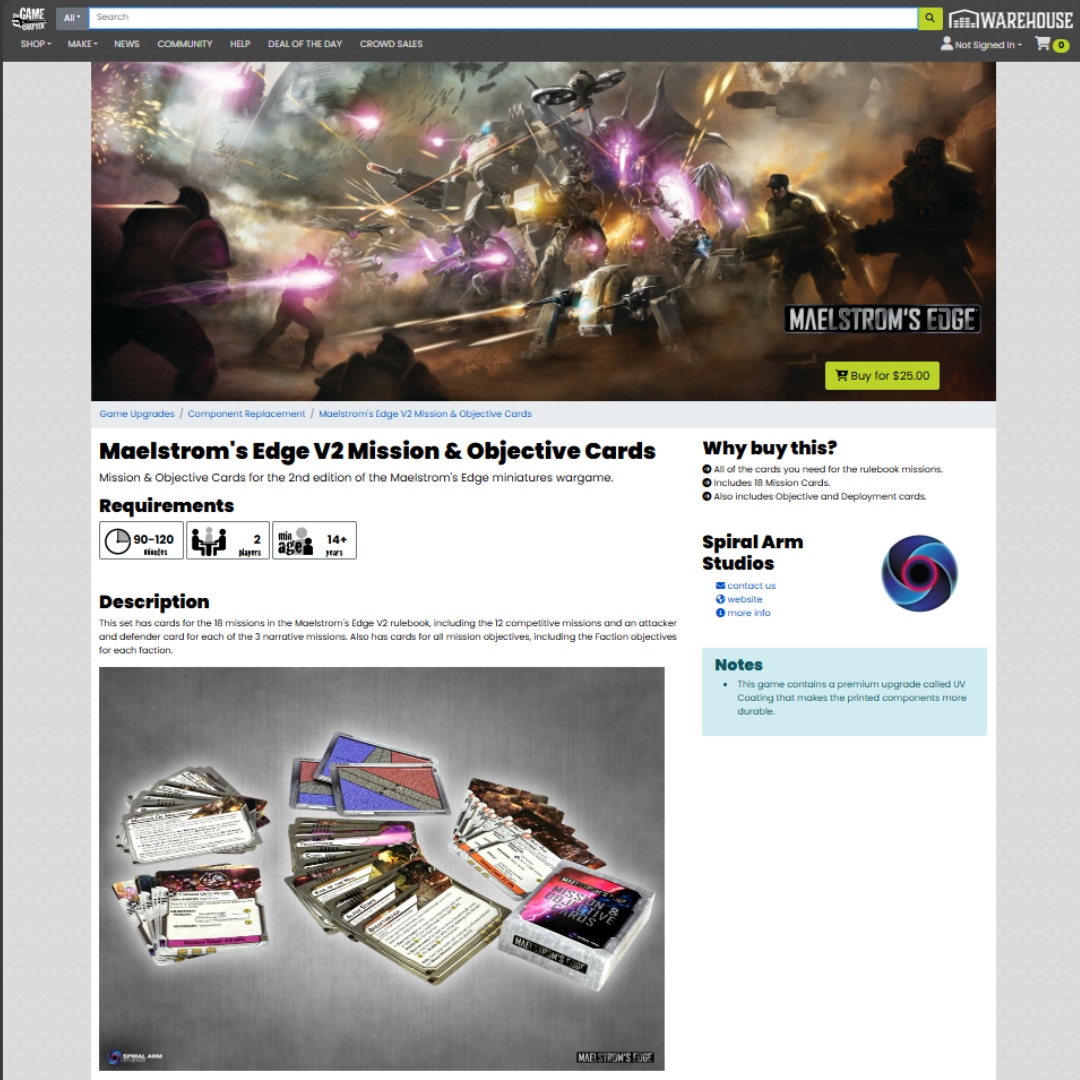
The pack comes in a handy storage box, and is comprised of 54 cards including:
- all of the Competitive and Narrative missions from the V2 rulebook,
- a full set of Objective cards covering all of the various mission objectives from the rulebook,
- cards for all current Faction Objectives,
- and three double-sided Deployment Map reference cards.
Grab yours now from the Game Crafter website here!
Get the rules now!
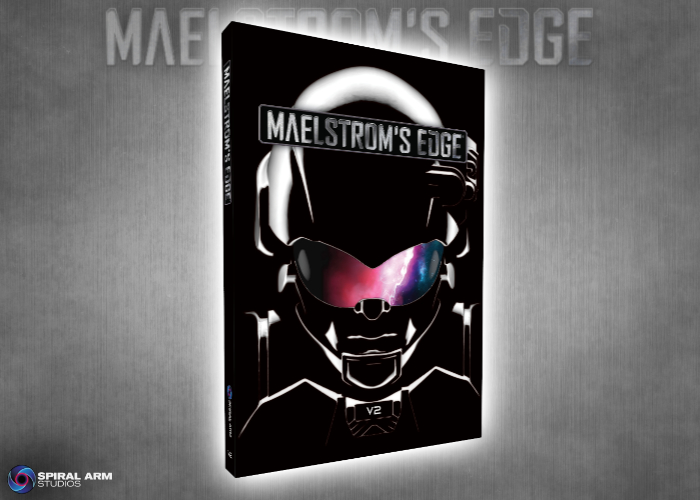
The new V2 rulebook is available in the Maelstrom's Edge webstore now. You can also check out the V2 Rules Downloads section for PDF rules downloads, and the V2 Rules Articles section for some insights into the Maelstrom's Edge rules.
Stay Tuned for more!
Force Spotlight - 50 point Karist Enclave Starter Force
Posted on Friday Nov 28, 2025 at 05:00pm in Models
Force Spotlight - 50 point Kaigus Pact Starter Force
Posted on Thursday Nov 20, 2025 at 05:00pm in The Kaigus Pact
First Encounter - a 50pt Starter Force Battle Report.
Posted on Wednesday Nov 12, 2025 at 05:00pm in Gaming
A new Maelstrom's Edge V2 battle report, using the Kaigus Pact and Karist Enclave Faction Starter Sets in a 50 point Forward Unto Victory mission! Check it out here!
New Kaigus Pact Kits Arrive!
Posted on Monday Nov 03, 2025 at 05:00pm in Models
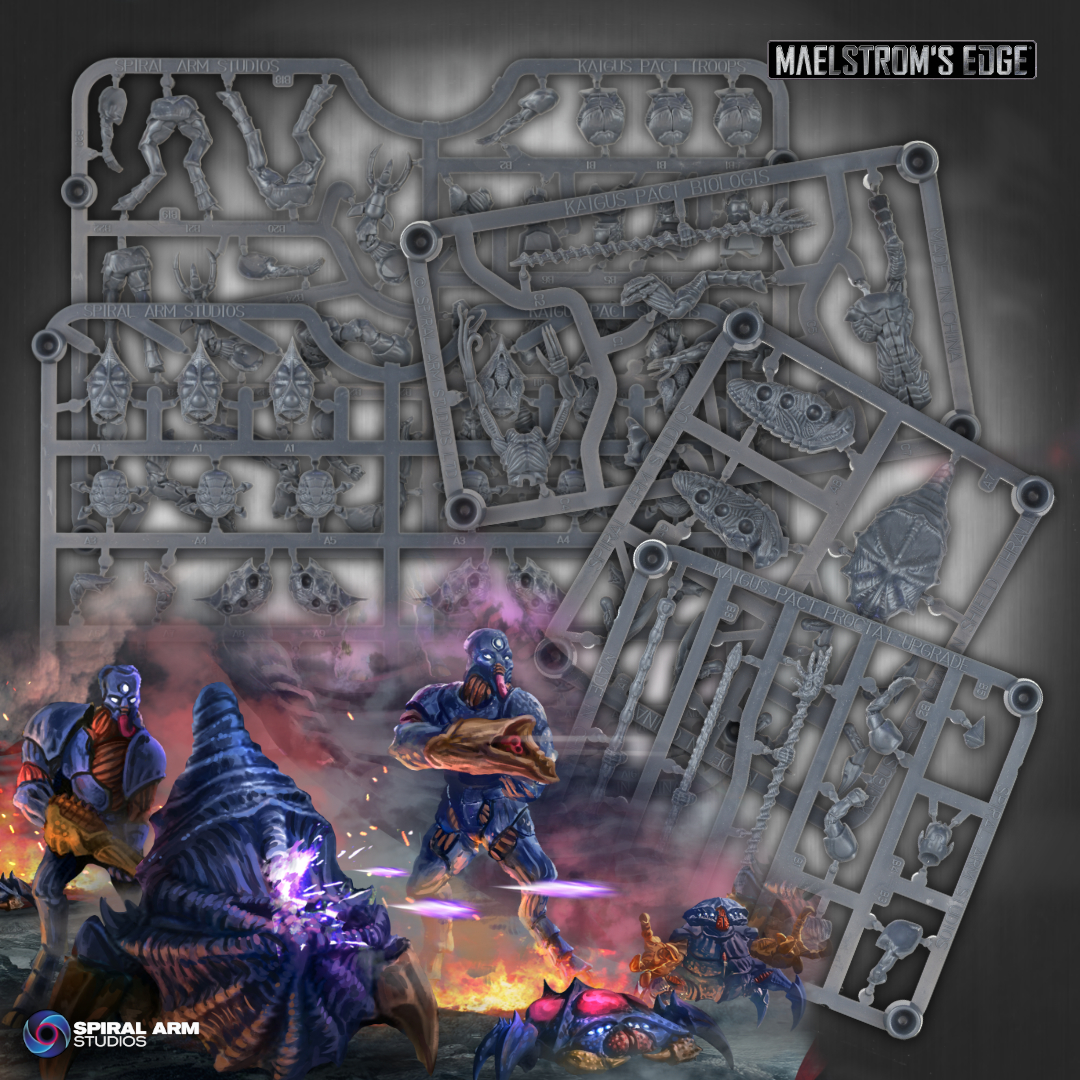
You can find five new plastic kits now available in the Maelstrom's Edge store, including:
Biologis Curator- 1 Commander model.
Biologis Attendants - 3 models along with the Proctat upgrade sprue.
Kaigus Pact Troops - 6 models that can be built as either Muharis or Attendants.
Kaigus Pact Thrall Swarm - building four Tamakin, and two each of Krii Vapor Thralls and Krii Shatter Thralls.
And the new arrival, as featured in the 'Enter, The Pact' battle report (which you can read here!):
Orakan Shield Thralls - 2 thrall models.
Get the rules now!
The new V2 rulebook is available in the Maelstrom's Edge webstore now. You can also check out the V2 Rules Downloads section for PDF rules downloads, and the V2 Rules Articles section for some insights into the Maelstrom's Edge rules.
Stay Tuned for more!
Tags: curator kaigus krii muharis orakan pact tamakin thralls v2
Force Spotlight - 120 point Koritanii
Posted on Thursday Oct 30, 2025 at 06:54am in The Kaigus Pact
Model Spotlight - The Kaigus Pact Troops Sprue!
Posted on Wednesday Oct 15, 2025 at 05:00pm in The Kaigus Pact
- by Iain Wilson
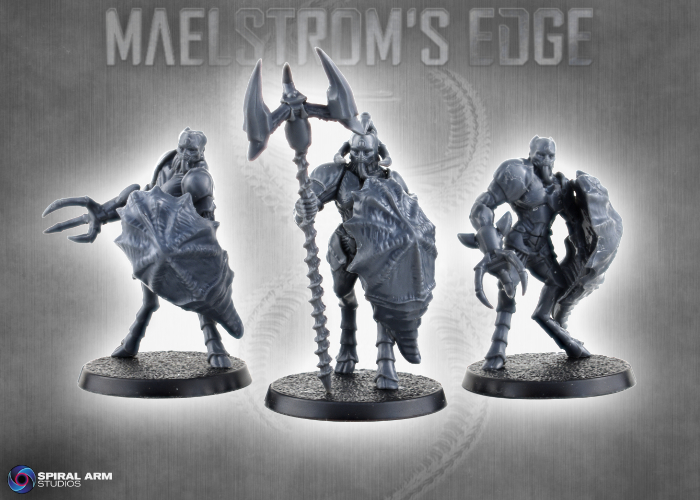
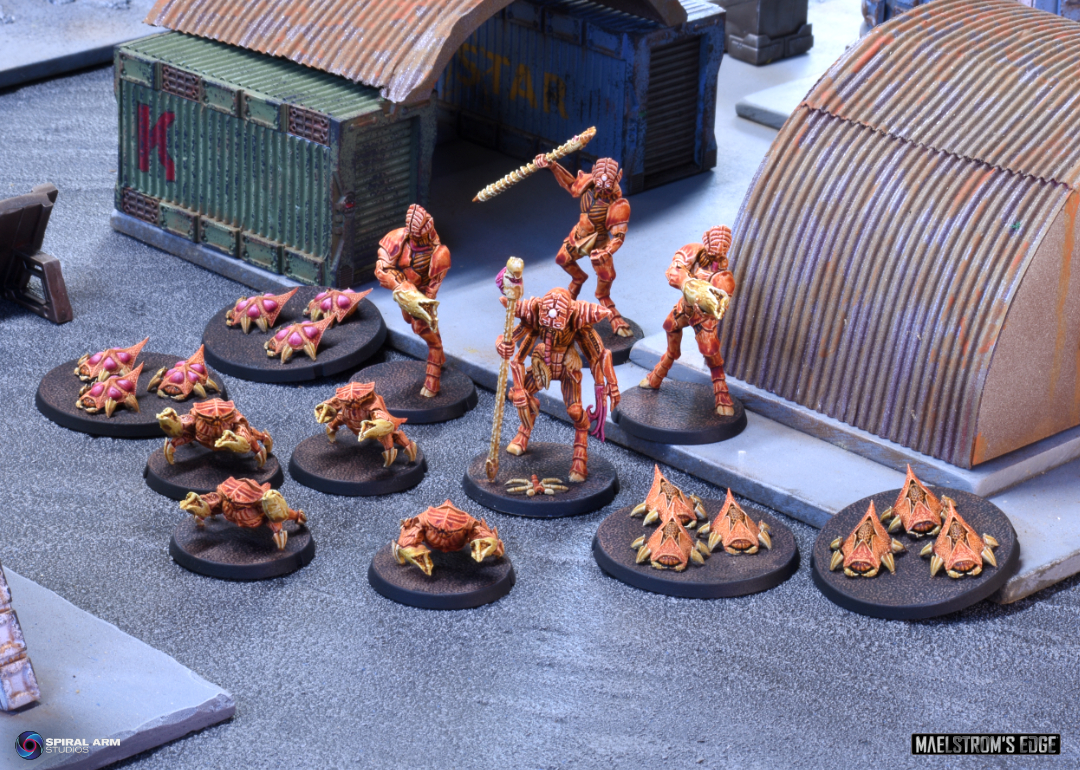
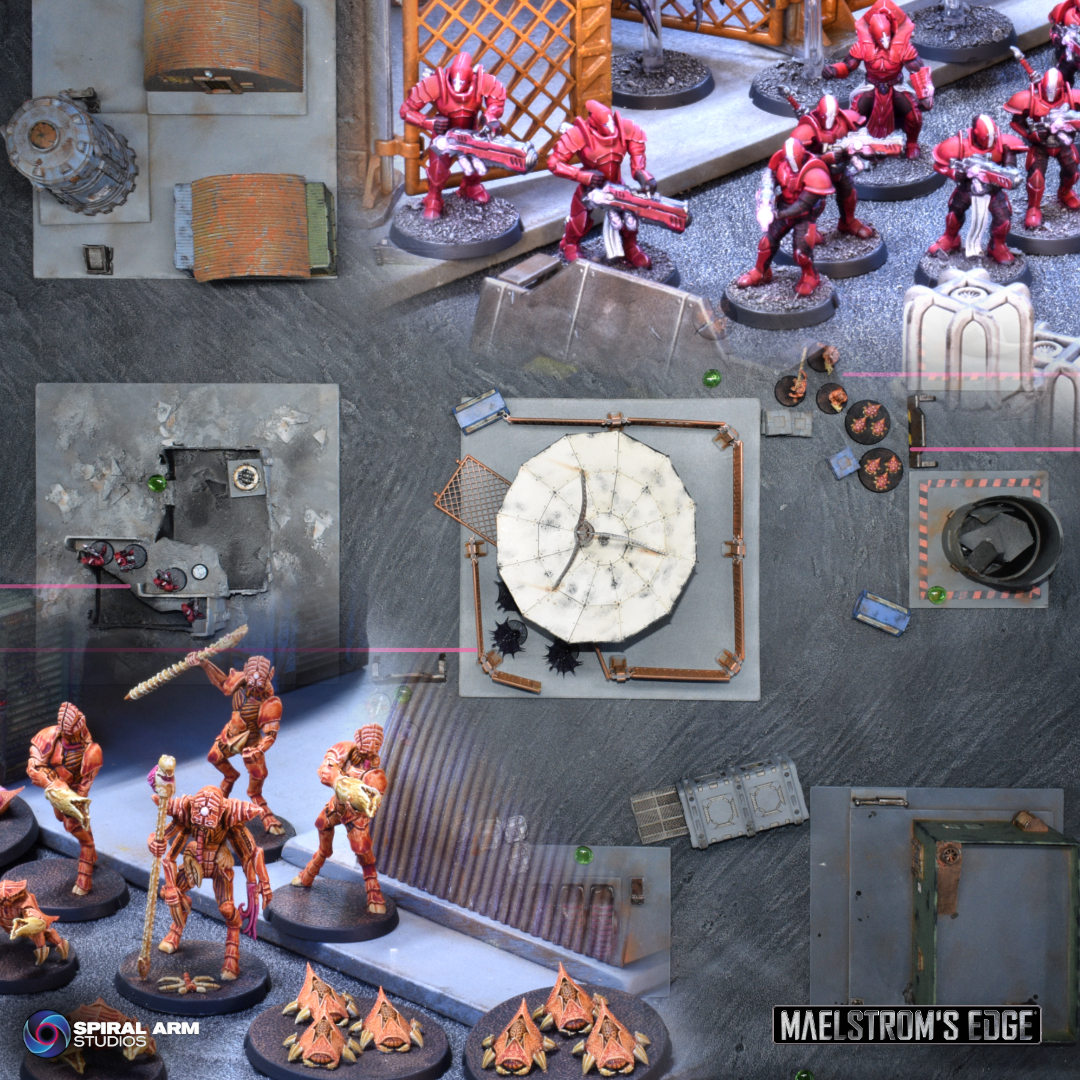
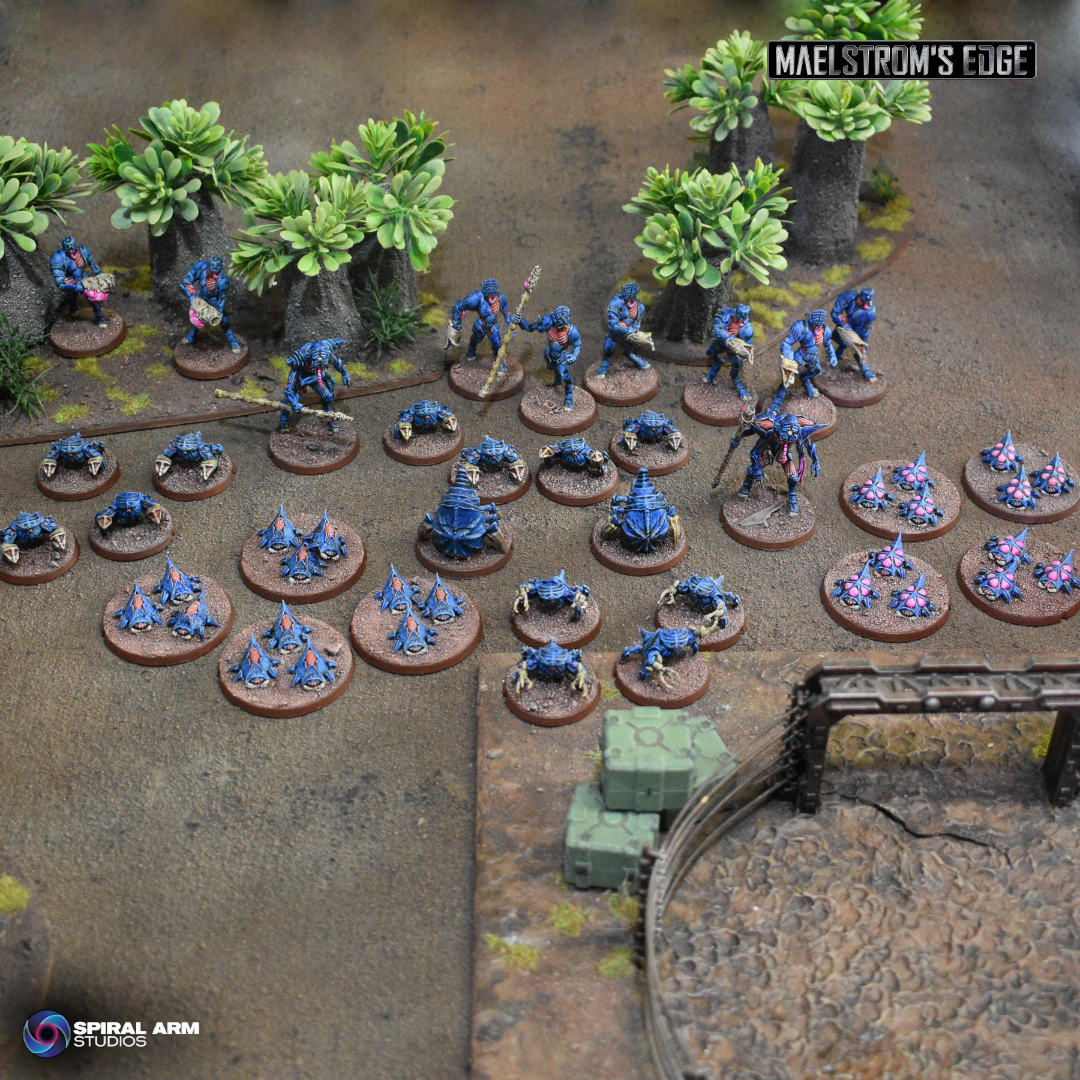
The arrival of the Maelstrom's Edge V2 rulebook was accompanied by the addition of an all new faction to the game - the Kaigus Pact! We're all very excited about them as the Kaigus Pact are very different to the other models we've released so far, with their alien appearance and organic approach to technology. This week, I thought I'd take a closer look at one of the new plastic kits - the Kaigus Pact Troops sprue.
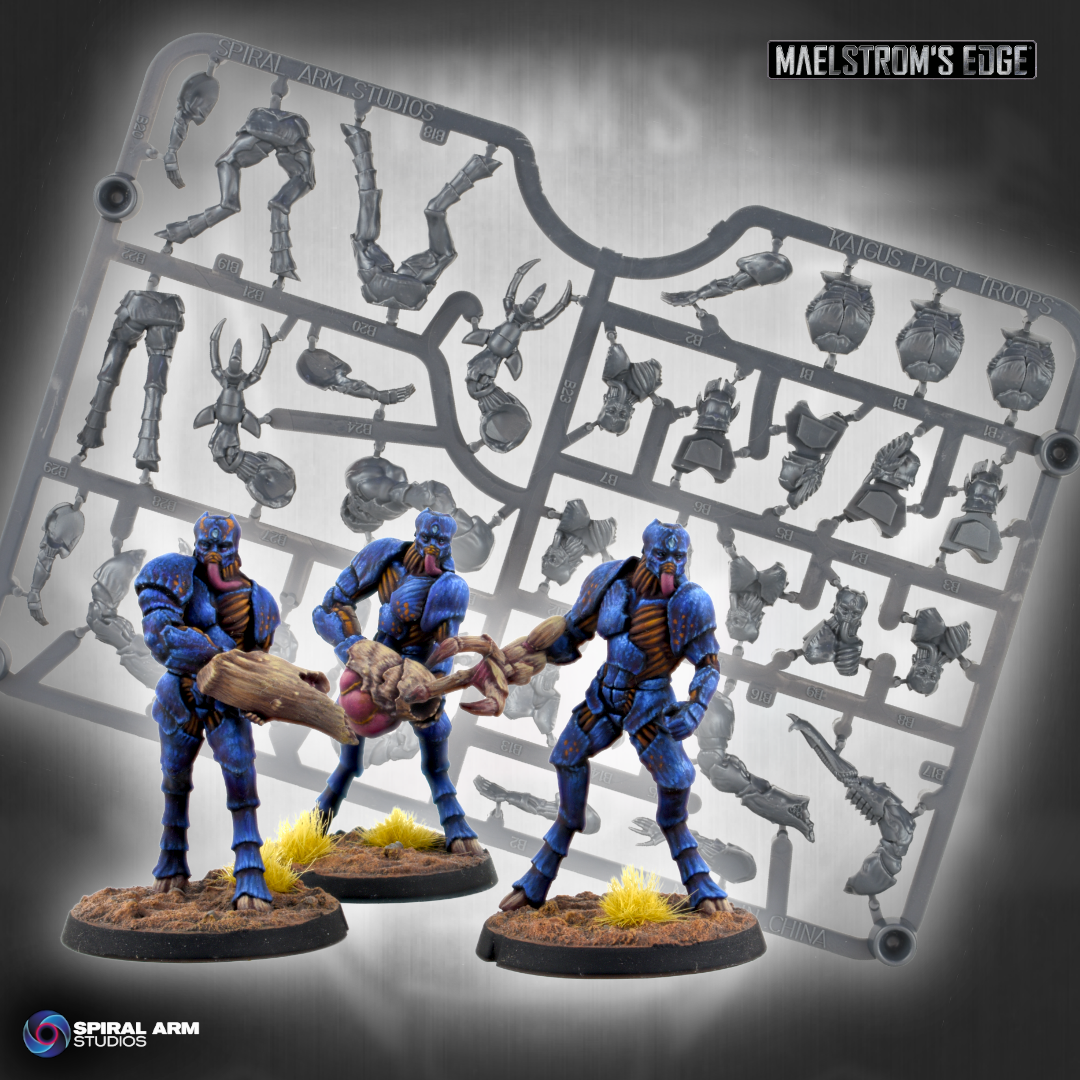
The troops sprue is one of a number of plastic sprues that we created for the Kaigus Pact launch, building three bioengineered warriors.

The Kaigus Pact Troops sprue, sculpted by Kevin Johnson.
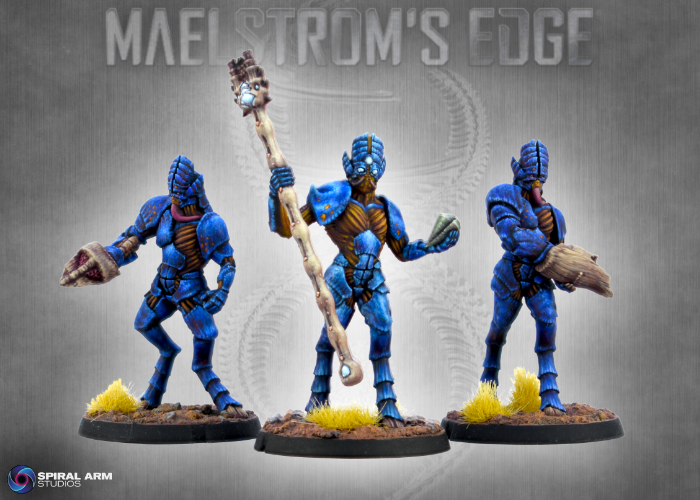
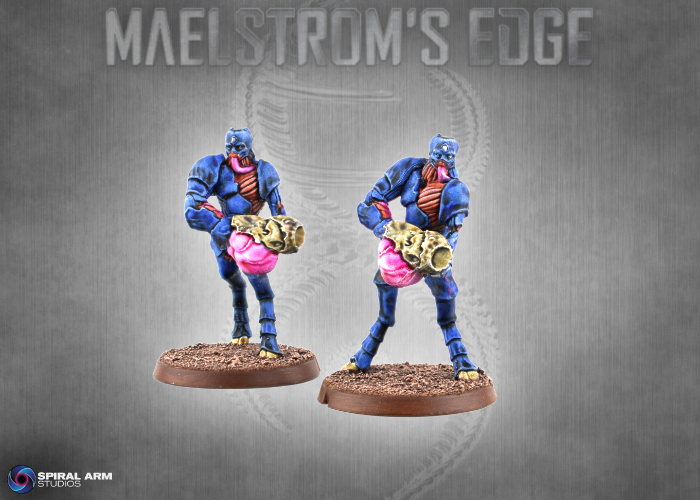
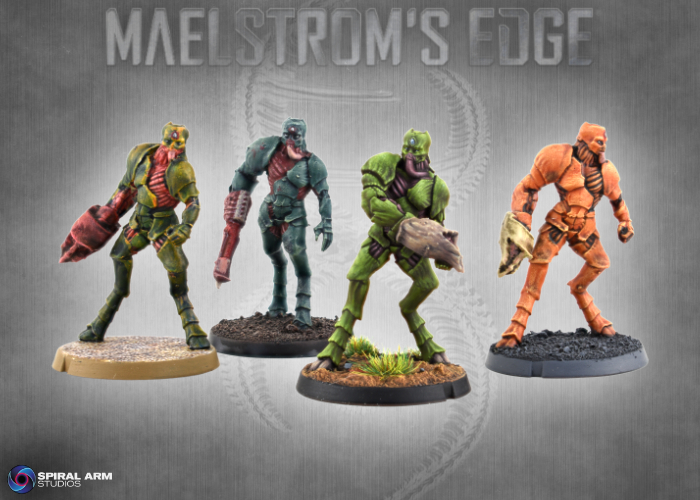
Kaigus Pact soldiers, known as Muharis, generally take to the field armed with organic weapons called Dart Hosts. These are bioengineered crustacean-like organisms that clamp over the Muharis' weapon arm and, as their name suggests, spit lethal darts with the same force as a more normal firearm. More at home in space, the massive forms of the Muharis are gangly and awkward looking on the ground, their asymmetrical torsos and giant, carapace-clad forms a stark contrast from their human forbears.
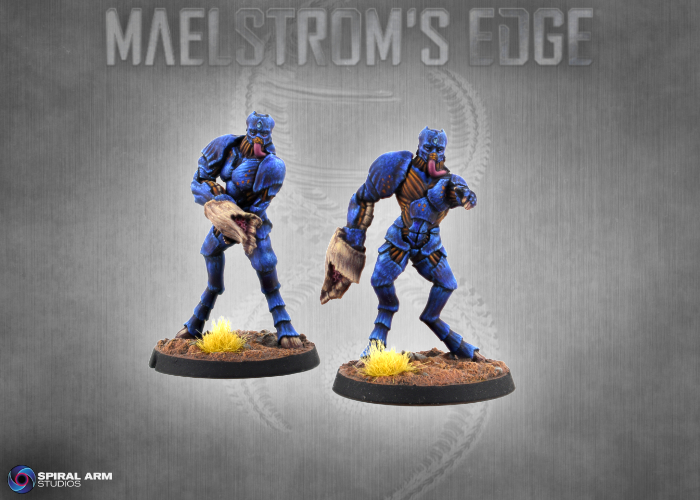
Kaigus Pact Muharis with Dart Hosts, painted by Todd McNeal.
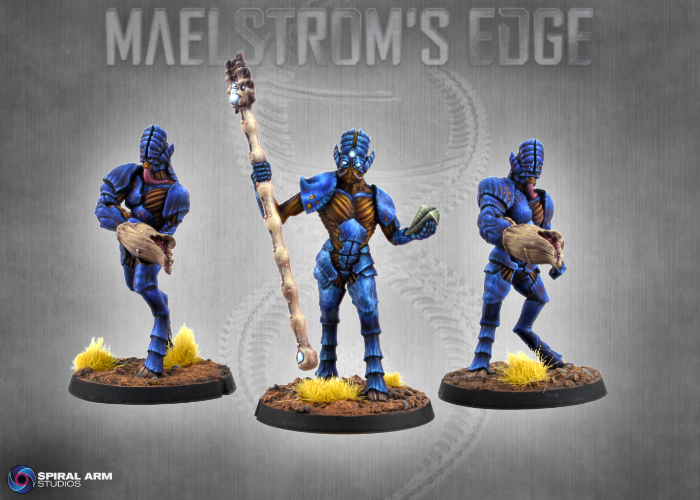
Muharis have access to a number of other lethal weapon symbiotes, including a heavier version of the standard Dart Host, the armor-piercing Spike Rifle and explosive-lobbing Brood Host. When more close-range assaults are called for, Muharis make use of the giant taloned Ripper Claw.
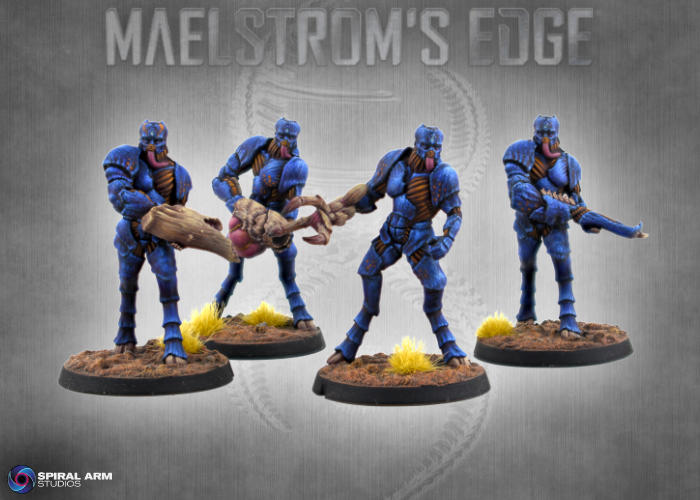
(Left to right) Heavy Dart Host, Brood Launcher, Ripper Claw & Spike Rifle, painted by Todd McNeal.
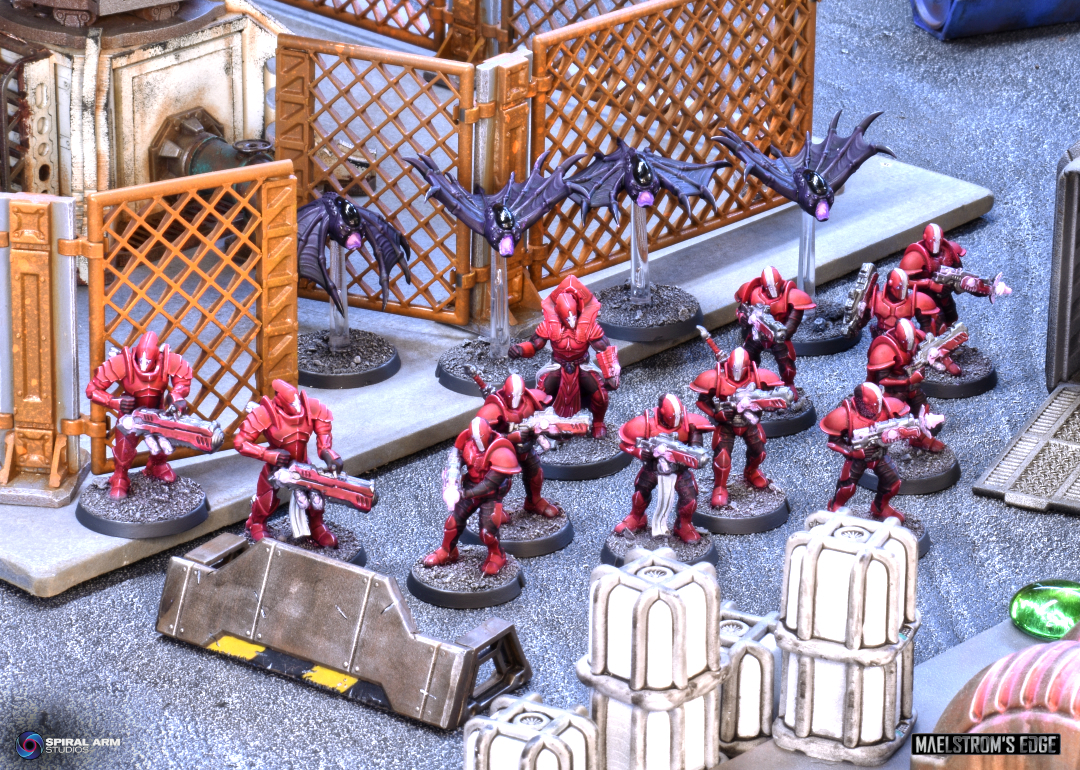
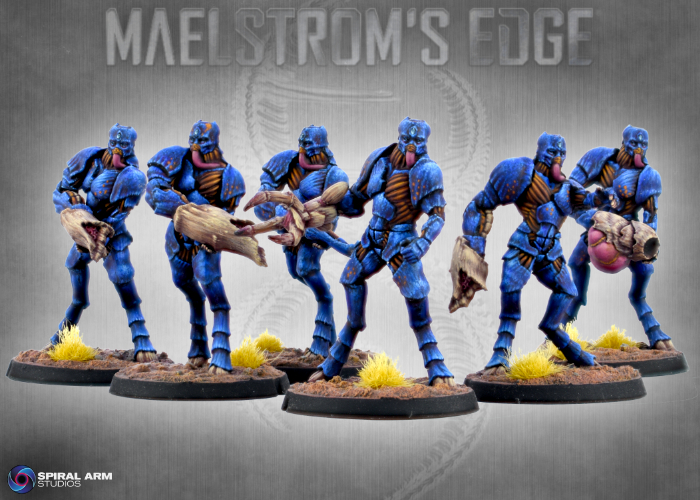
Regular Muharis Sentinel units have more limited access to these, while Sentinel Strongpoint units provide battlefield support with access to multiple heavier weapons.
Sentinel Strongpoint unit with Brood Launchers, painted by Iain Wilson.
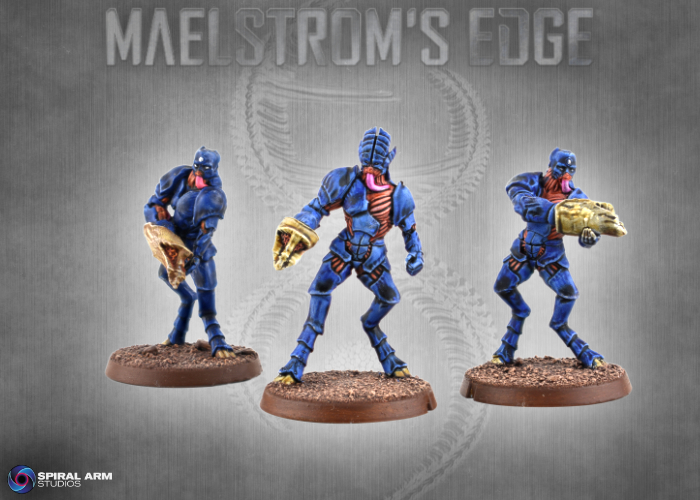
The troops sprue also allows you to build Biologis troops. more specialised than the Muharis soldiers, Biologis Attendants carry a shorter ranged but poisoned version of the Dart Host. The parts from the troops sprue can also be combined with the Proctat Upgrade sprue to build a Biologis Proctat, a Genostaff-equipped squad leader upgrade for Attendant units.
A Biologis Attendant unit, painted by Todd McNeal.
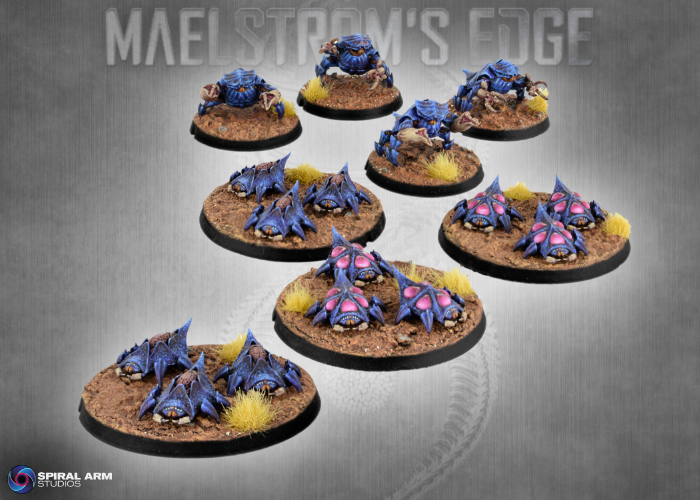
Biologis Adepts also serve as leaders in some Muharis Sentinel units, providing them the ability to spawn Thrall units on the battlefield.
A Muharis Sentinel unit with attached Biologis Adept, painted by Iain Wilson.
Because of the unique design of their armour and equipment, the Kaigus Pact troops are not quite as modular as some of our other plastic kits. The most notable difference is in the heads, which we couldn't separate at the neck as we usually do. Instead, the sprue provides a number of different torso fronts, so you still get a wide range of posing options by combining different legs and torso fronts.
Muharis with Ripper Claws.
Being plastic, the models are of course easy to chop and change to suit yourself! While weapons are fixes to the arms, again due to their unique design structure and the limitations of plastic tooling, it's easy enough to slice weapons off and switch arms to give yourself some different posing options.
Muharis with Spike Rifles. the model on the left is the standard arm configuration, while the model on the right has had the weapon switched to a different arm, and a left arm from the Proctat Upgrade sprue.
And, of course, if you're like me and enjoy wandering outside the bounds of the 'official' game units, there's nothing stopping you from going to town with these kits and creating your own units!
A unit I'm calling a 'Sentinel Bulwark', equipped with shields taken from the soon-to-be-released Orakan Shield Thrall, and a polearm made from a Proctat staff and Orakan legs!
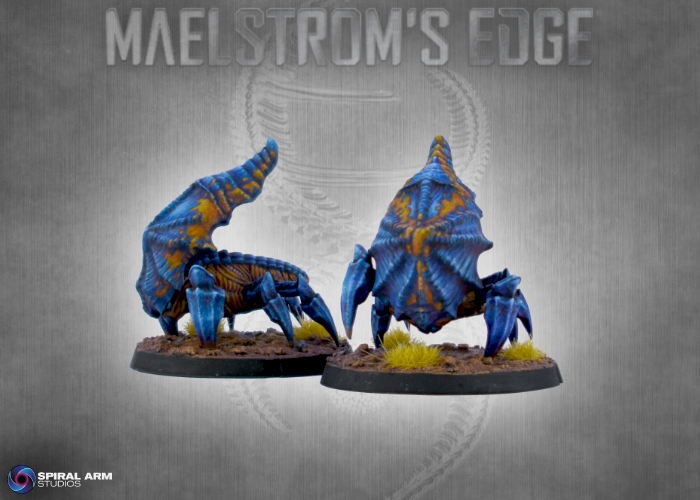
The painted models shown here (both Todd's fantastic studio models and my more table-level versions) are representative of the Koritanii moot, found active in Zycanthus space. The Kaigus Pact models lend themselves to a wide range of organic color-schemes - we recommend looking to sea-dwelling crustaceans for inspiration!
Some alternate Kaigus Pact color schemes.
The Kaigus Pact Troops box is available to buy soon, but in the meantime you can nab the sprue in the Kaigus Pact Starter Force box available now from the Maelstrom's Edge webstore here!
What are you working on? We would love to see your models and terrain in the Comm Guild Facebook group!
For other building ideas, modeling tutorials, army spotlights and conversion walkthroughs, check out the Hobby section of the Maelstrom's Edge website here. And while you're there, grab a copy of the Maelstrom's Edge V2 Beta rules!
Enter, The Pact - 120 point Battle Report
Posted on Tuesday Oct 07, 2025 at 05:00pm in Gaming
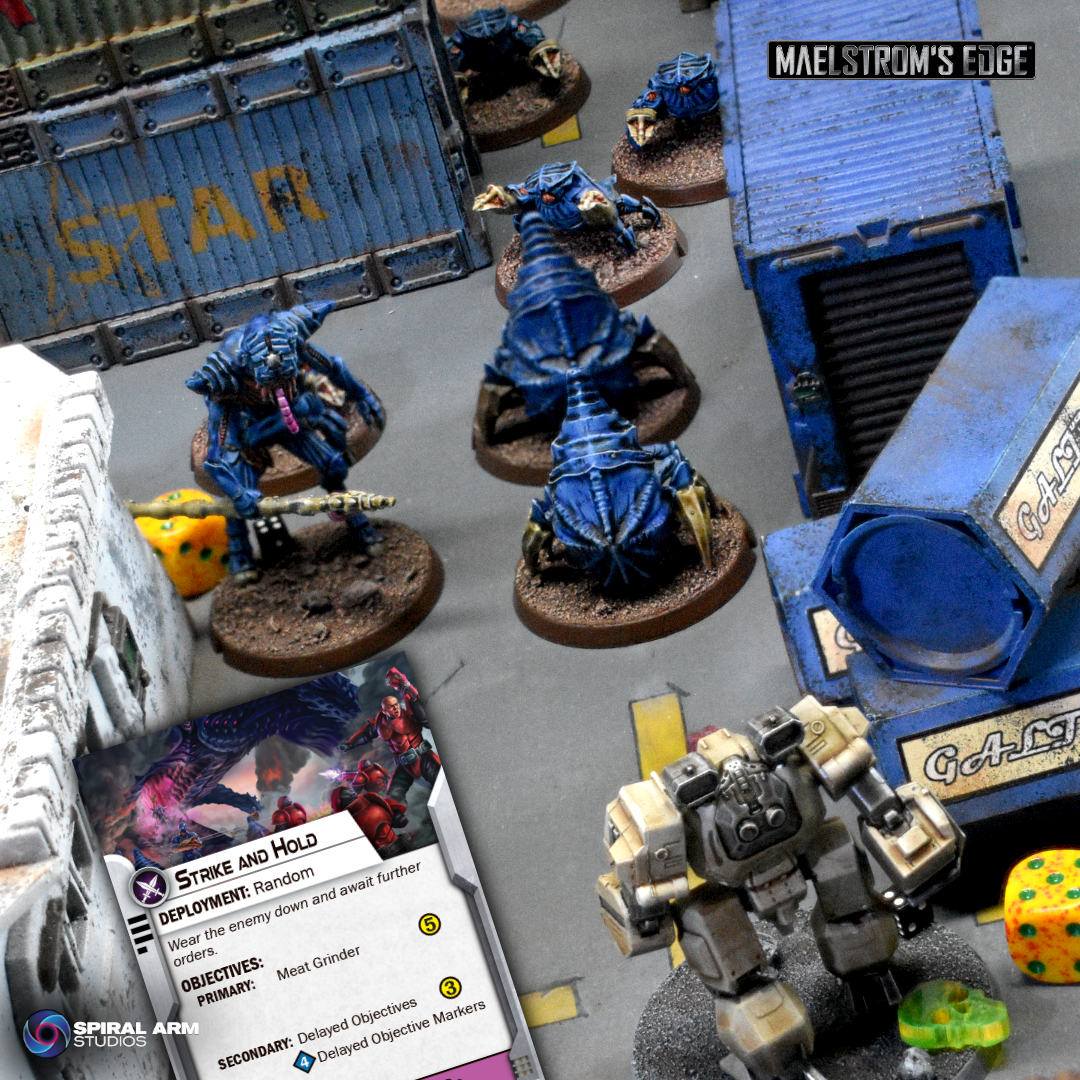
A new Maelstrom's Edge V2 battle report, featuring 120 points of Epirian Foundation militia taking on a Kaigus Pact assault in a Strike & Hold mission! Check it out here!
