Conversion Spotlight: Automated Uplink Relay, MkII
Posted on Monday Mar 08, 2021 at 05:00pm in Tutorials
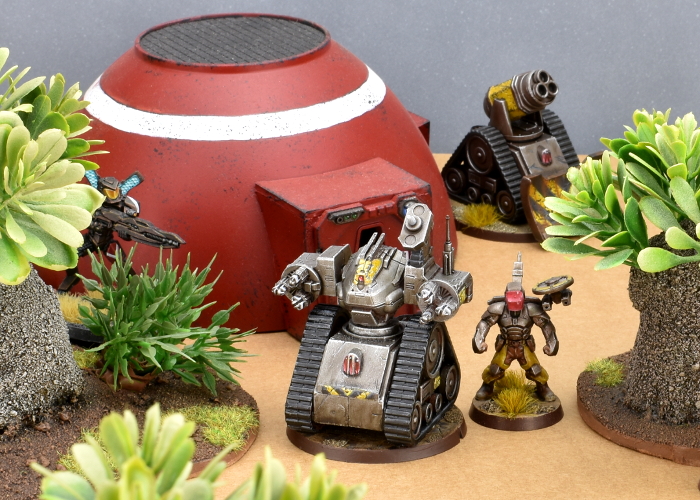
When pursuing conflicts outside of its zone of control, the Epirian Foundation makes use of portable uplink drones that link to orbital satelites and airborne recon to provide battlefield intelligence and allow Bot Handlers to remotely interface with Epirian assets on the ground. The Battle for Zycanthus box includes a cardboard marker for the Automated Uplink Relay, but for those wanting a more 'solid' version, I shared a kitbash idea some time ago using parts from various Epirian plastic kits and metal tracks from a Bombshell Miniatures model. The arrival of the PDC Gun Carriage gave me an idea for an alternative, all-plastic version!
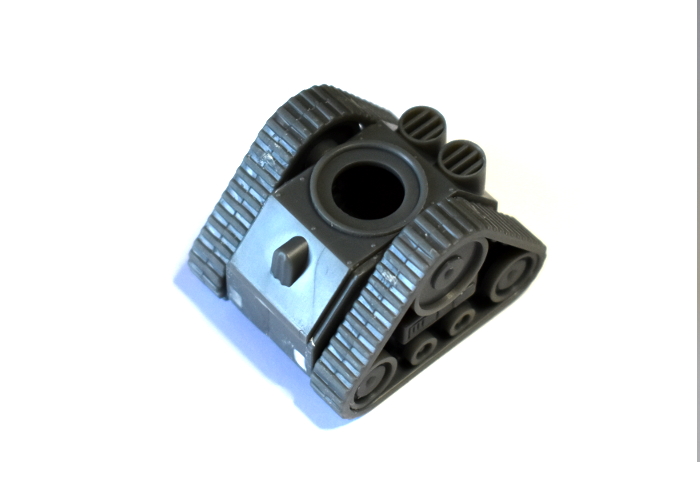
I made a few changes to the drone design this time around, with the most obvious one being the tracks. I built the track unit from the gun carriage as normal, although I trimmed off the lugs on the front that hold the dozer blade.
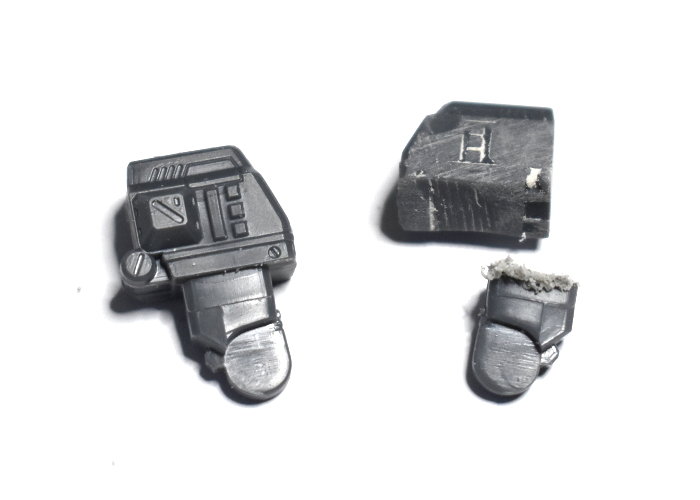
As with the original version, I used the body of an Epirian Hunter war mech, cutting apart at the waist with a razor saw.
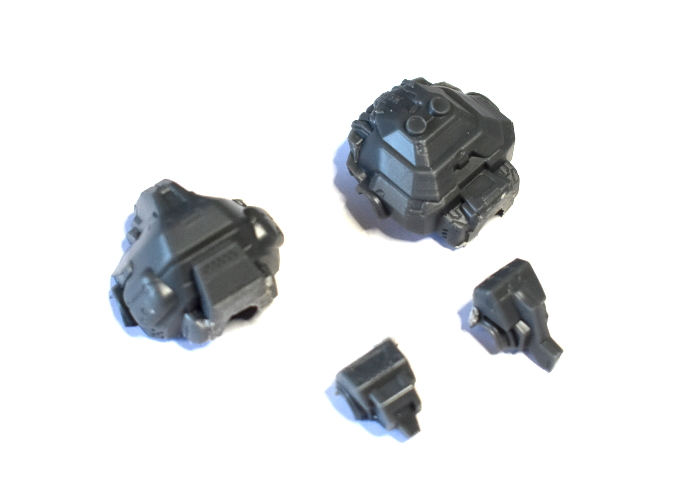
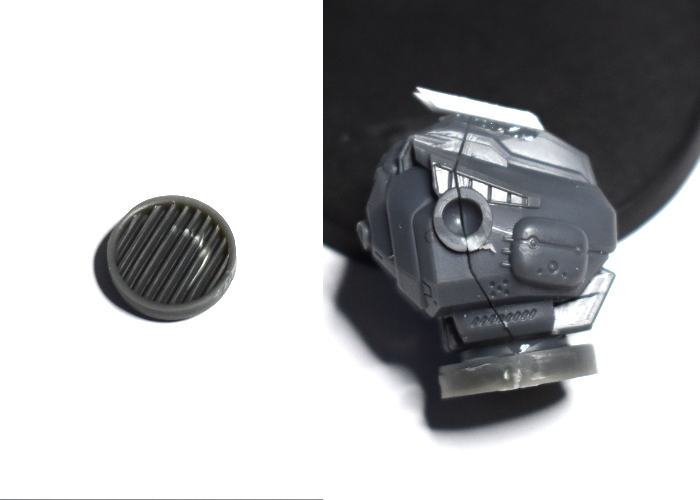
I gave the waist a rotating cuff by gluing on the round grill piece from the gun carriage, and added vanes on the head trimmed from a piece of thin plasticard.
For the arms, I used the shoulders from the Hunter, with the upper arms trimmed off. I needed to glue a new piece for the weapon assembly onto the outer surface of the shoulder, so I sanded this down flat.
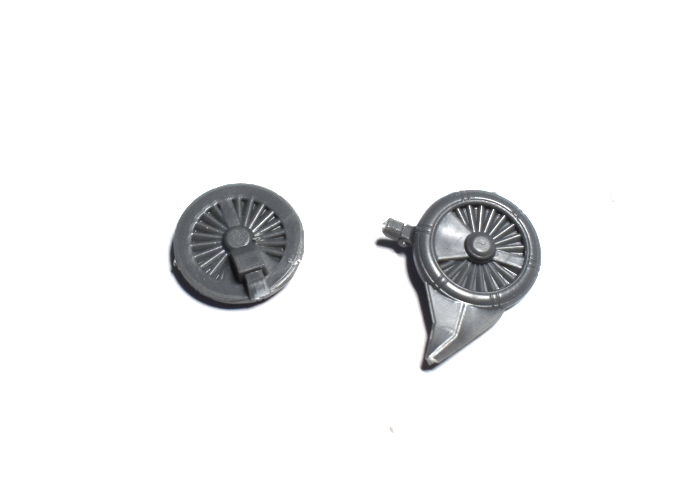
To make rotating cylinders for the tri-barreled Flakk Defense Battery, I used a couple of turbines leftover from the Epirian Spider/Firefly Drone kit. Because the kit makes either drone variant, if you have built any spiders, you'll have some of these laying around. I trimmed off the attachment peg and the wing.
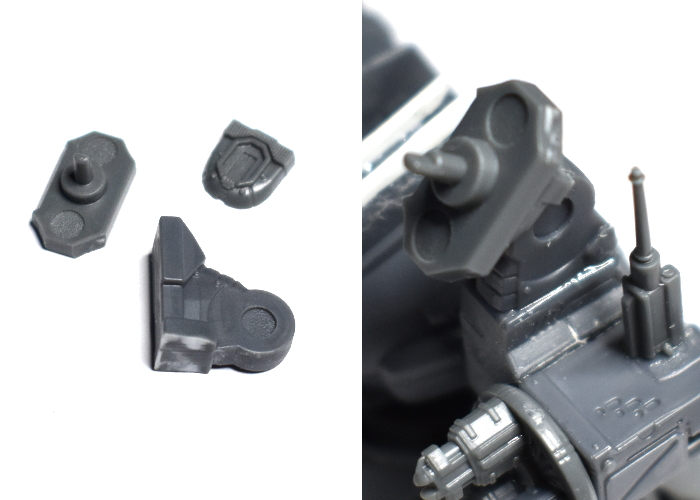
I used the Hunter's weapon casing forearms for the bulk of the flakk weapon casing, drilling out the attachment hole a little larger to accommodate the central hub on the drone turbine.
From there, I glued the weapon casings onto the outside of the shoulders, and the turbines onto the front of the casings. The barrells of the flakk weapon came from the drone kit, with the rear surface trimmed down flat and glued to the front of the turbine.
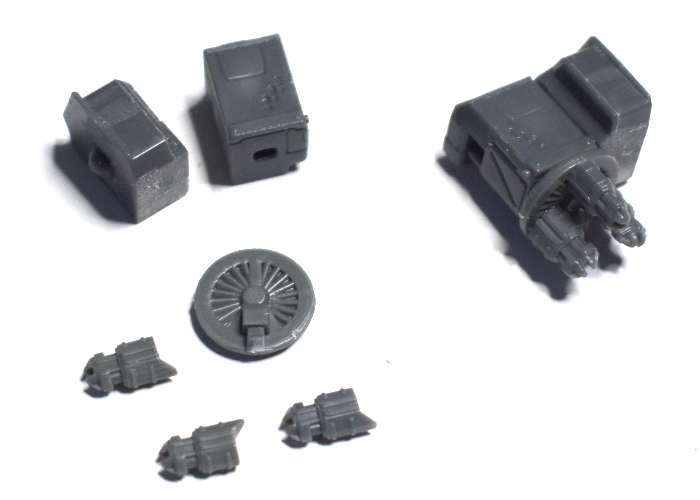
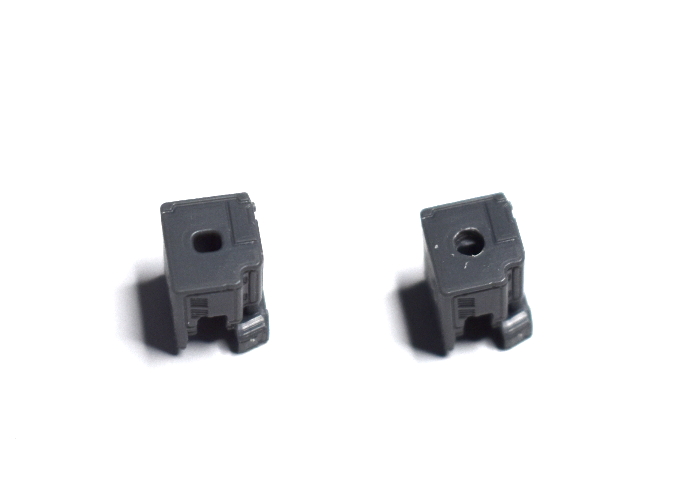
The last thing the Uplink Relay needed was the communications array. I used the 'spare' piece from the drone kit as a fixed arial, glued onto the top of the weapon casing on the left arm. I also assembled a signal dish using a trimmed Hunter foot and the back chassis piece from the drone kit. For the dish itself, I used the leg piece from the drone kit, with the legs themselves removed at the 'hip' pivot.
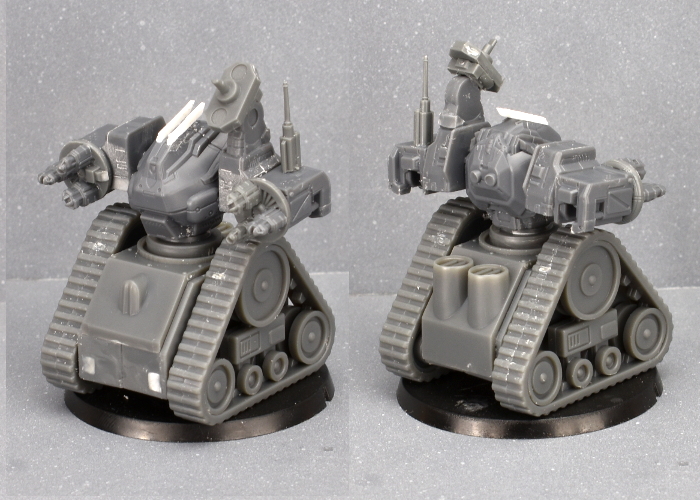
The assembled Automated Uplink Relay, ready for paint:
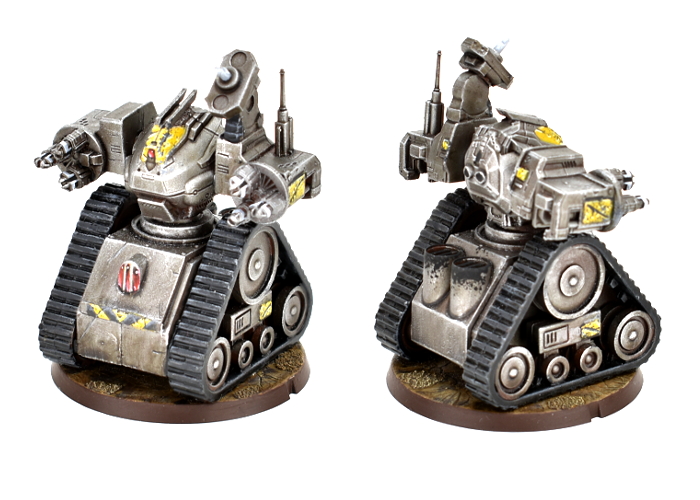
And the finished Relay, ready for the table:
Put together your own Automated Relay of Uplinky doom by picking up the plastic Hunter, Drone and Gun Carriage kits, along with the rest of the Maelstrom's Edge range from the webstore here.
Then pop on over to the Comm Guild Facebook group to show us what you're working on!
For a host of building ideas, modeling tutorials, army spotlights and conversion walkthroughs, check out the Hobby section of the Maelstrom's Edge website here.
Tags: conversion epirian kitbash modeling spotlight tutorial

Like this? Like us on facebook to see more...