Turning the corner - time's running out!
Posted on Monday May 03, 2021 at 03:42am in StackaRack

We're still some way off unlocking this stretch goal, and time is rapidly running out. It would be a shame to miss it, as the corner adds so much extra versatility to the kit but physically can't happen without the second sprue being unlocked. So if you've been considering upgrading your pledge, or undecided about sticking a toe in to start with, now would be a great time to do so! We need more backers to get behind the physical sprue pack pledges to hit the Stretch Goal in the limited time remaining.
Find StackaRack on Kickstarter now: https://www.kickstarter.com/projects/spiralarmstudios/stackarack
You can also find StackaRack on Facebook here. Like the page for news and updates as they happen, and share it far and wide to help us bring StackaRack to your painting desk!
StackaRack has funded - Help us reach the first Stretch Goal!
Posted on Saturday May 01, 2021 at 11:30pm in StackaRack
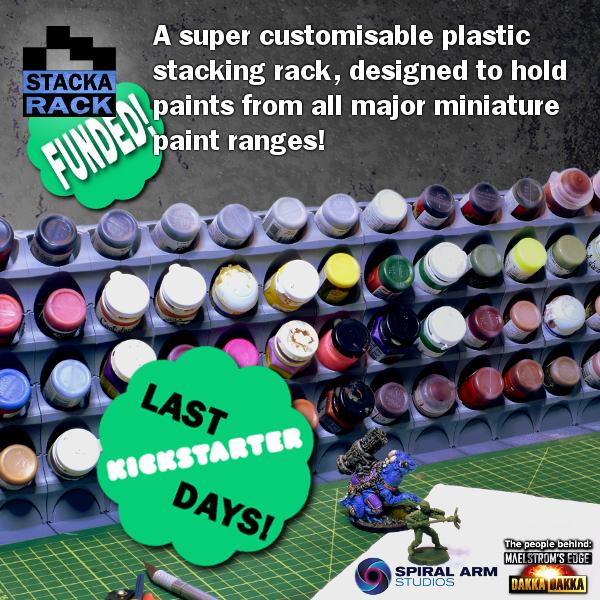
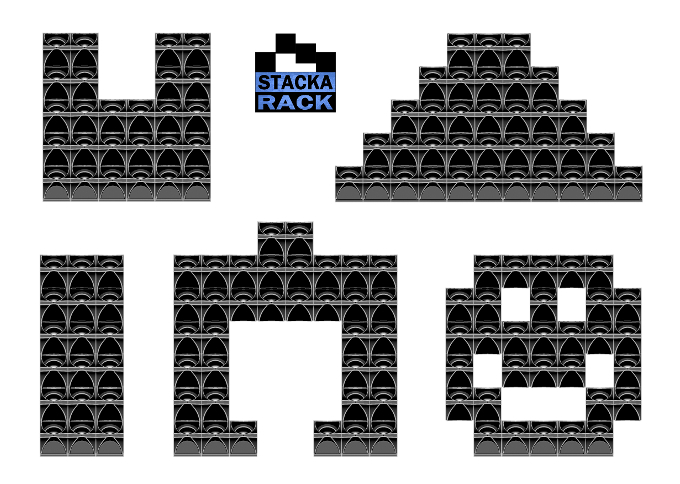
The initial funding goal covers the amount we needed to produce the basic StackaRack components, but they're only the start of the story. The rack gets exponentially better if we can fund two sprues worth of components instead of one, with a better distribution of parts and the addition of the corner piece. The jump up to the first Stretch Goal is higher than the original funding target, though. This is because we used what funds we could to put towards the initial development, which meant that we could keep the initial goal much lower than it would otherwise have been. For the second sprue, though, we need to cover the full cost of producing that new tool.
We would obviously love to see that second sprue happen, and we hope that you do too. Help StackaRack turn the corner by backing the project now!
Find StackaRack on Kickstarter now: https://www.kickstarter.com/projects/spiralarmstudios/stackarack
You can also find StackaRack on Facebook here. Like the page for news and updates as they happen, and share it far and wide to help us bring StackaRack to your painting desk!
Fit StackaRack to your workspace!
Posted on Saturday Apr 24, 2021 at 04:23am in StackaRack
But even (maybe even especially!) if you don't have much space, being able to configure the rack to suit yourself means that you can make the best use of that space. For example, if you're the kind of painter who tends to work on a single project at a time, rather than using up a whole lot of desk space for paints that you're not using right now, you can use StackaRack to build some storage just the right size to hold the paints that you are actively using right now.
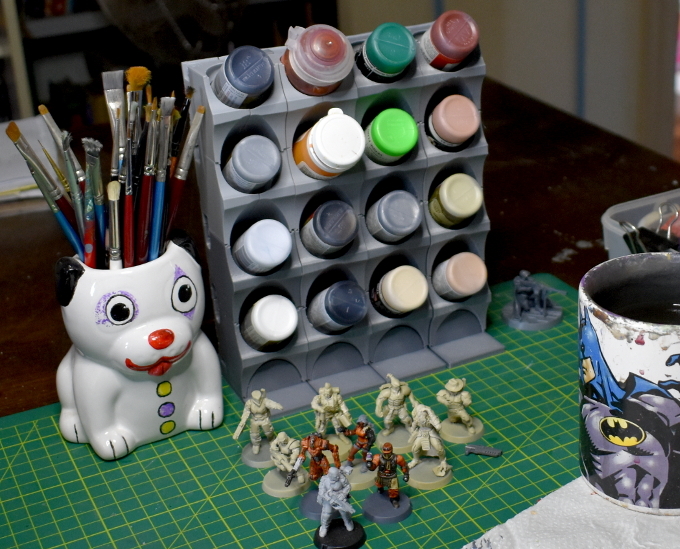
The rest of the horde can be safely packed away, or held in a larger rack somewhere more suitable, where you don't have that pot of fluorescent orange staring at you accusingly the whole time you work ("Why did you buy me all those years ago, just to leave me here, still unopened? Why? Whyyyyy???")
Ahem.
This can also be a handy way to ease into your storage. Don't have the funds to rack all of your paint right now? Just grab enough StackaRack sprues to hold the paint for a single project, and then add to it as you go!
Find StackaRack on Kickstarter now: https://www.kickstarter.com/projects/spiralarmstudios/stackarack
You can also find StackaRack on Facebook here. Like the page for news and updates as they happen, and share it far and wide to help us bring StackaRack to your painting desk!
One day down!
Posted on Wednesday Apr 21, 2021 at 08:05pm in StackaRack

Obviously, there is still a way to go, so be sure to spread the word! StackaRack needs as many people to get on board as possible to make it the best system it can be!
Find the StackaRack on Facebook here. Like the page for news and updates as they happen, and share it far and wide to help us bring StackaRack to your painting desk.
https://www.kickstarter.com/projects/spiralarmstudios/stackarack
StackaRack Kickstarter launches tomorrow!
Posted on Monday Apr 19, 2021 at 05:00pm in StackaRack
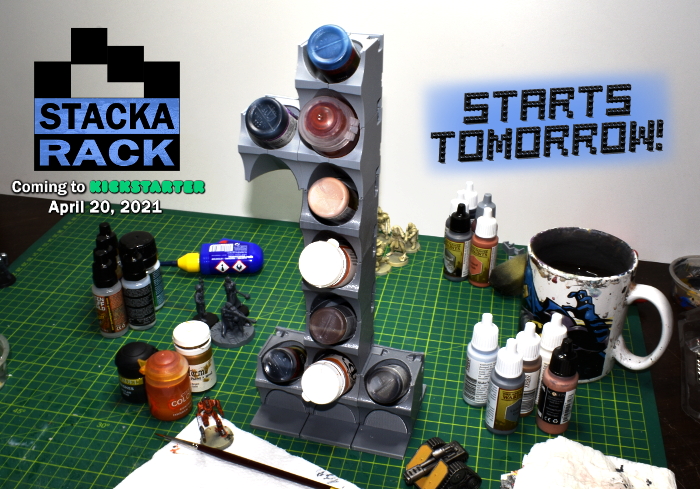
You can find the prelaunch page here. Click the 'Notify me on launch' button for a reminder when the project goes live.
You can also find the StackaRack on Facebook here. Like the page for news and updates as they happen!
StackaRack - Not Long Now!
Posted on Tuesday Apr 13, 2021 at 05:00pm in StackaRack

Hop on over the the prelaunch page here and click the 'Notify me on launch' button for a reminder when the project goes live.
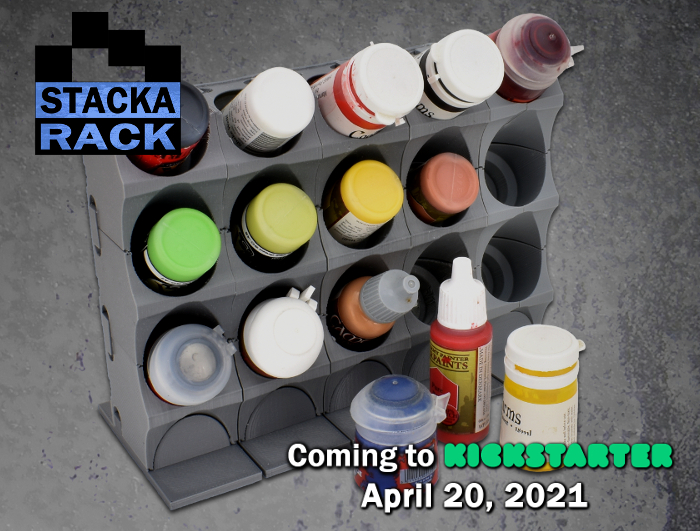
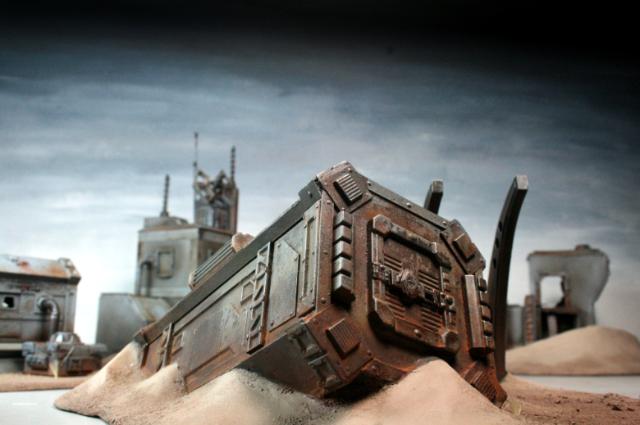
While that's going on, Maelstrom's Edge hasn't been forgotten. The next few releases are currently with the painter getting some colour in their lives. We're looking forward to getting these out to you. While you're waiting, here's a teaser of some things to come for the Broken!
To stay abreast of releases and other news, visit our pages on Facebook and hit the 'Like' button!
StackaRack - Counting down to the Kickstarter
Posted on Monday Apr 05, 2021 at 05:00pm in StackaRack
You can find the prelaunch page here. Click the 'Notify me on launch' button for a reminder when the project goes live.
You can also find the StackaRack on Facebook here. Like the page for news and updates as they happen!
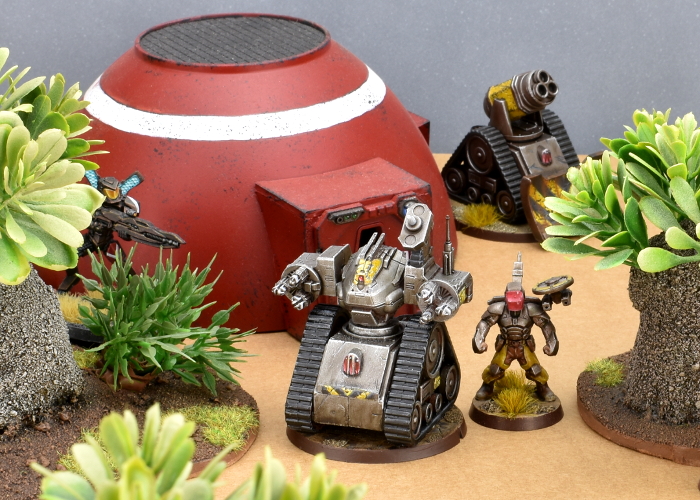
New Release: Epirian Contractor Support Drone
Posted on Monday Mar 29, 2021 at 05:00pm in Models
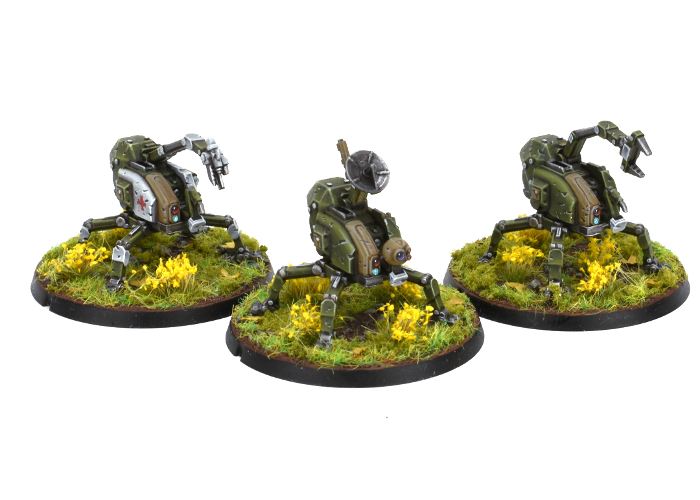
This resin kit is comprised of a Support Drone chassis, and optional parts to equip it to join any of three different Contractor unit types. The Recon Package is the standard gear for support drones utilised by Contractor Scout units. Contractor Engineers make use of tool-equipped drones to effect repairs on other damaged bots, while medical drones in Contractor Medic units patch up the force's less hardy human elements.
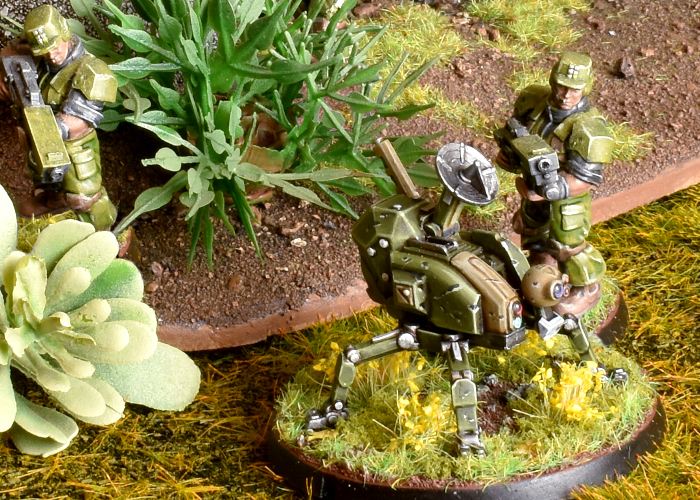
A recon drone surveys the battlefield for ongoing threats
The support drone is available now from the Maelstrom's Edge Webstore!
Also, don't forget to check out our upcoming StackaRack paint rack Kickstarter - You can find the details here.
New Kickstarter from Spiral Arm Studios!
Posted on Monday Mar 22, 2021 at 05:00pm in StackaRack
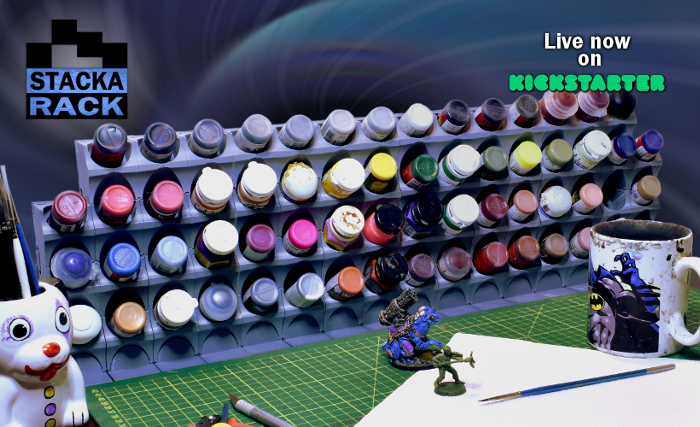
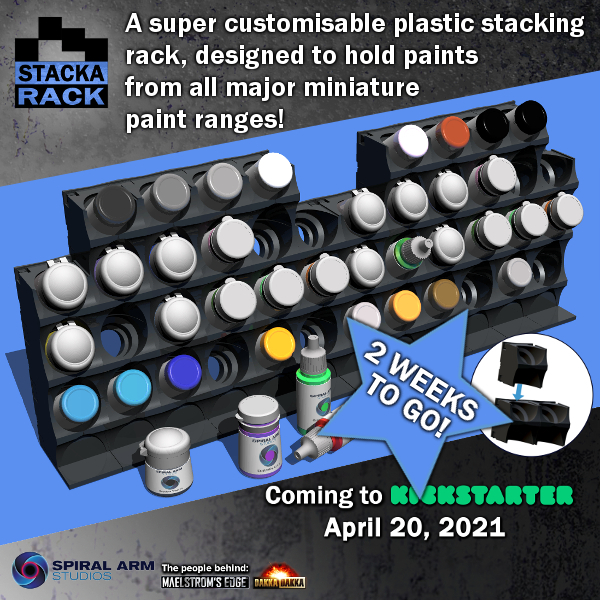
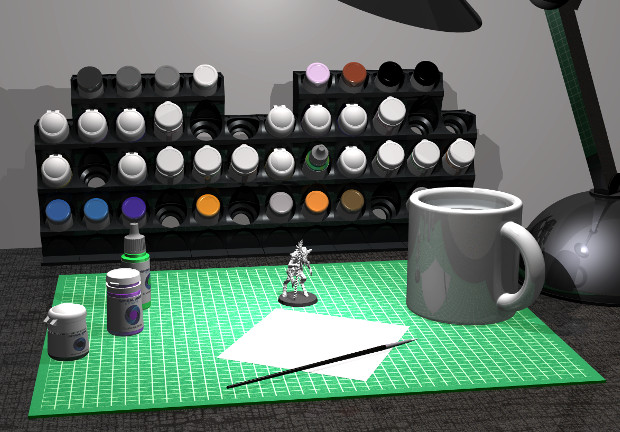
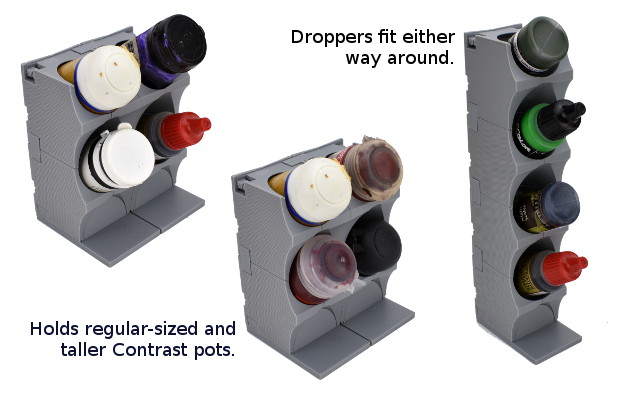
We are currently working on a Kickstarter for a customisable plastic paint rack designed to hold any of the major miniature paint ranges - from the dropper bottles used by Vallejo and Army Painter, to the tall pots from the likes of Privateer and Reaper (and GW's old range), and the current stubby Citadel pots.

3D rendered serving suggestion
Paint collections have a way of growing organically, and most of the current paint rack solutions out there are fixed to specific configurations, and made for a specific type of paint pot. If you're like me, and collect multiple brands of paint, that can make organising them a little frustrating, and so we thought we would try to fix that.
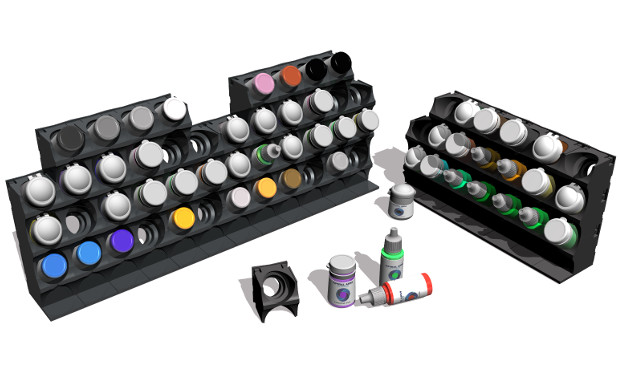
Rendered for your convenience
The StackaRack was designed to hold any of the above mentioned pots comfortably, and allows for dropper bottles to slot in either way up, to suit your preference. Made from injection moulded plastic, it will fit together with locking clips, allowing you to build it how you like, and disassemble and reconfigure it as needed.
3D printed prototypes
The Kickstarter is scheduled to go live on the 20th of April. You can find the prelaunch page here. Click the 'Notify me on launch' button for a reminder when the project goes live.
You can also find the StackaRack on Facebook here. Like the page for news and updates as they happen!
Conversion Spotlight: Automated Uplink Relay, MkII
Posted on Monday Mar 08, 2021 at 05:00pm in Tutorials
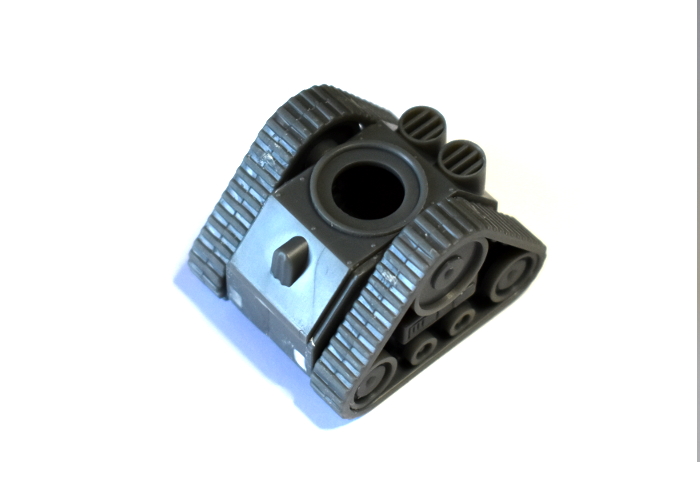
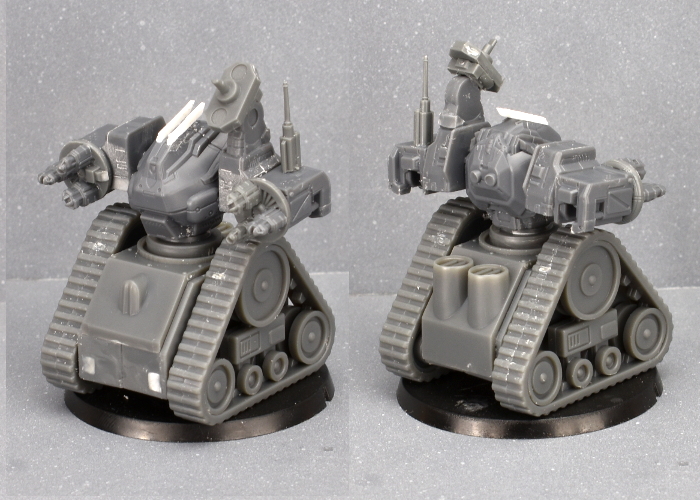
When pursuing conflicts outside of its zone of control, the Epirian Foundation makes use of portable uplink drones that link to orbital satelites and airborne recon to provide battlefield intelligence and allow Bot Handlers to remotely interface with Epirian assets on the ground. The Battle for Zycanthus box includes a cardboard marker for the Automated Uplink Relay, but for those wanting a more 'solid' version, I shared a kitbash idea some time ago using parts from various Epirian plastic kits and metal tracks from a Bombshell Miniatures model. The arrival of the PDC Gun Carriage gave me an idea for an alternative, all-plastic version!
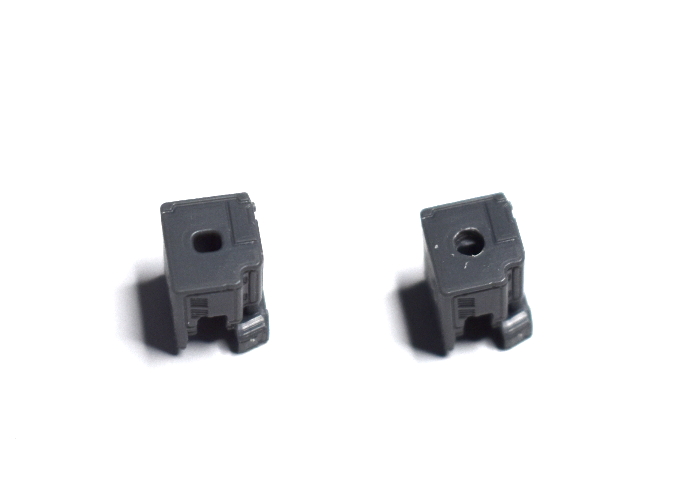
I made a few changes to the drone design this time around, with the most obvious one being the tracks. I built the track unit from the gun carriage as normal, although I trimmed off the lugs on the front that hold the dozer blade.
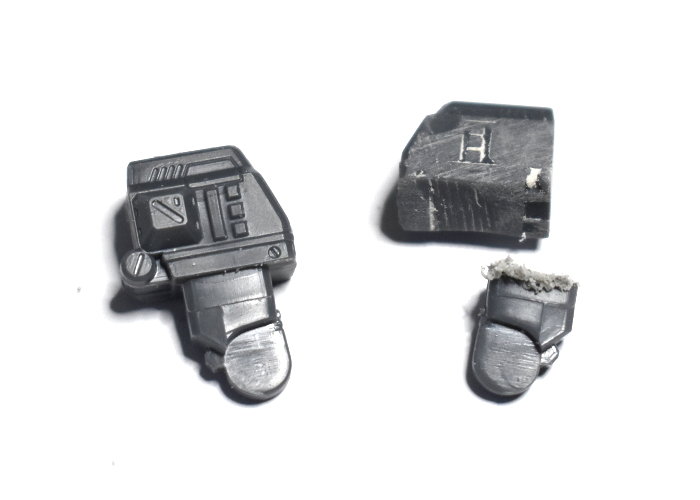
As with the original version, I used the body of an Epirian Hunter war mech, cutting apart at the waist with a razor saw.
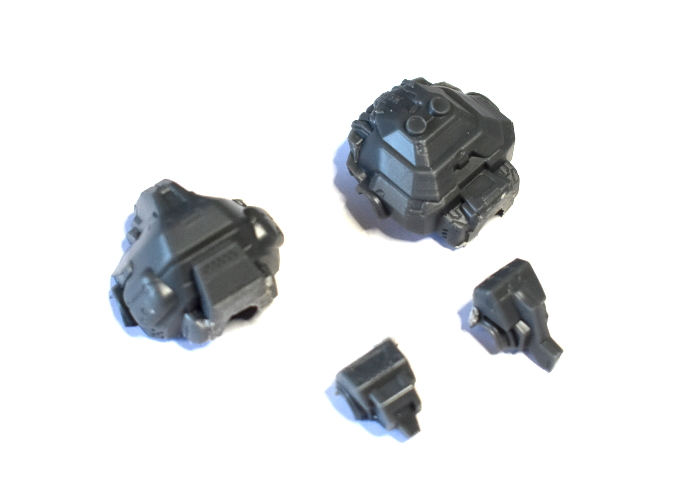
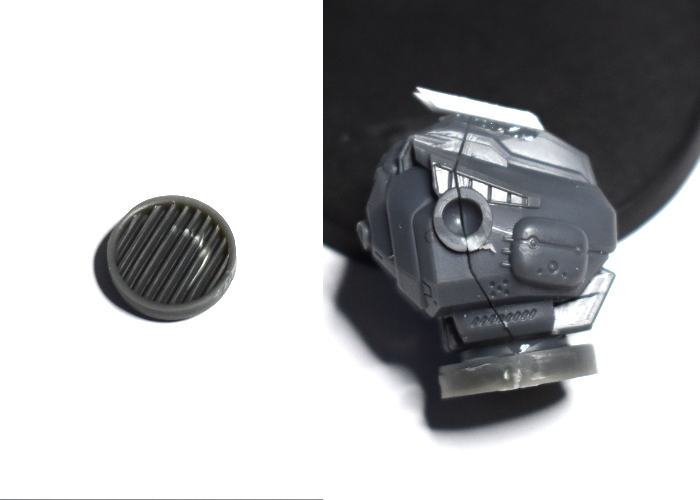
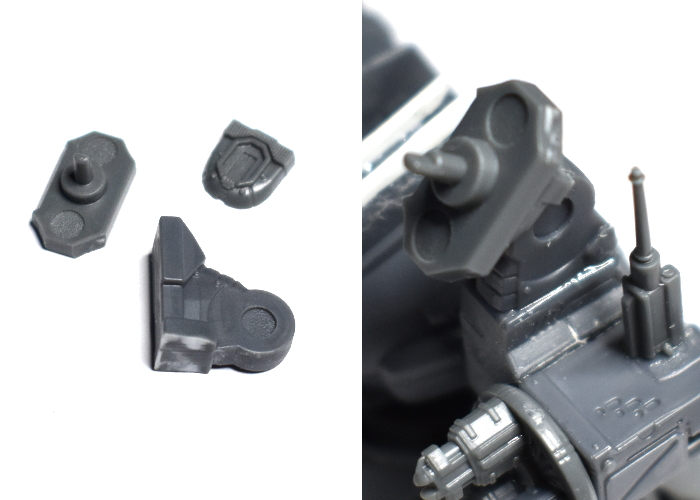
I gave the waist a rotating cuff by gluing on the round grill piece from the gun carriage, and added vanes on the head trimmed from a piece of thin plasticard.
For the arms, I used the shoulders from the Hunter, with the upper arms trimmed off. I needed to glue a new piece for the weapon assembly onto the outer surface of the shoulder, so I sanded this down flat.
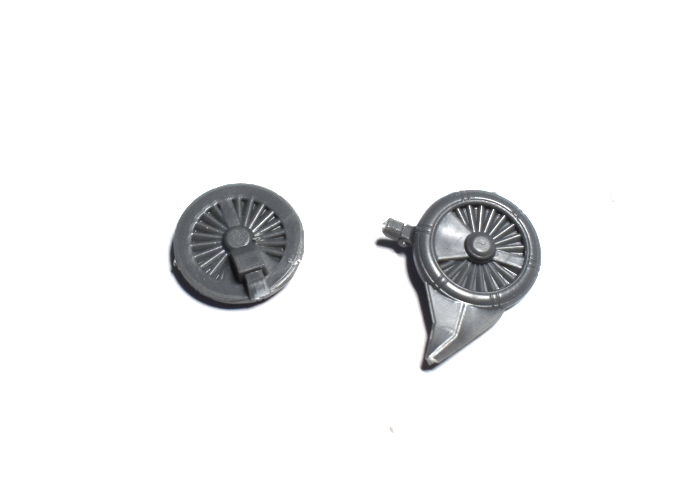
To make rotating cylinders for the tri-barreled Flakk Defense Battery, I used a couple of turbines leftover from the Epirian Spider/Firefly Drone kit. Because the kit makes either drone variant, if you have built any spiders, you'll have some of these laying around. I trimmed off the attachment peg and the wing.
I used the Hunter's weapon casing forearms for the bulk of the flakk weapon casing, drilling out the attachment hole a little larger to accommodate the central hub on the drone turbine.
From there, I glued the weapon casings onto the outside of the shoulders, and the turbines onto the front of the casings. The barrells of the flakk weapon came from the drone kit, with the rear surface trimmed down flat and glued to the front of the turbine.
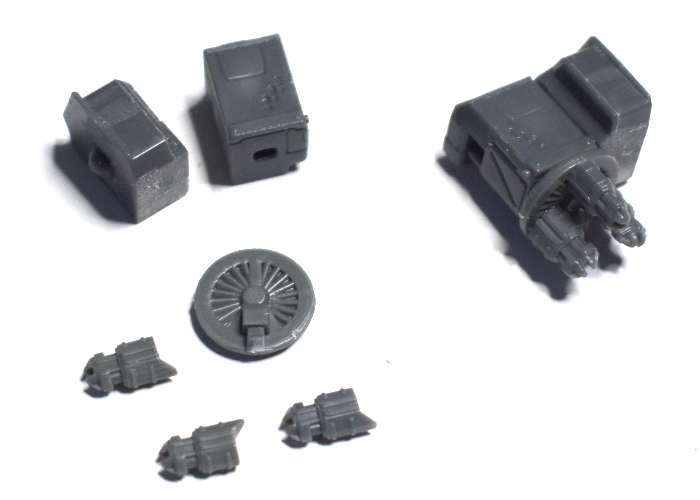
The last thing the Uplink Relay needed was the communications array. I used the 'spare' piece from the drone kit as a fixed arial, glued onto the top of the weapon casing on the left arm. I also assembled a signal dish using a trimmed Hunter foot and the back chassis piece from the drone kit. For the dish itself, I used the leg piece from the drone kit, with the legs themselves removed at the 'hip' pivot.
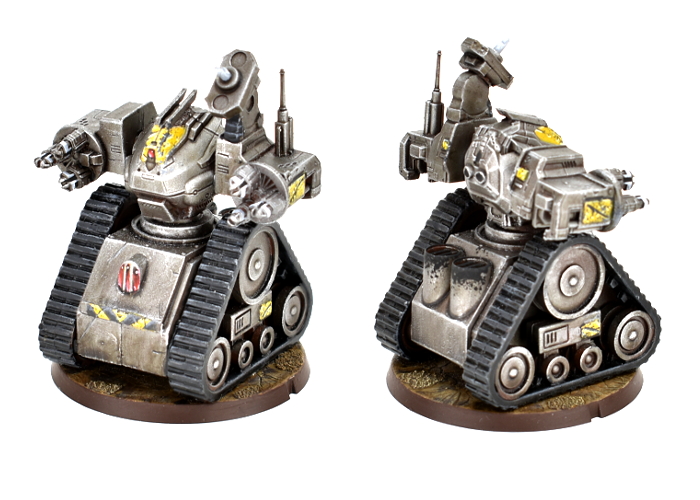
The assembled Automated Uplink Relay, ready for paint:
And the finished Relay, ready for the table:
Put together your own Automated Relay of Uplinky doom by picking up the plastic Hunter, Drone and Gun Carriage kits, along with the rest of the Maelstrom's Edge range from the webstore here.
Then pop on over to the Comm Guild Facebook group to show us what you're working on!
For a host of building ideas, modeling tutorials, army spotlights and conversion walkthroughs, check out the Hobby section of the Maelstrom's Edge website here.
Tags: conversion epirian kitbash modeling spotlight tutorial
Model Release - The PDC Gaming Gun Carriage!
Posted on Monday Mar 01, 2021 at 05:00pm in Models
This fantastic gun carriage model was made by PDC Gaming for a Kickstarter campaign some years ago. It's a multipart plastic kit, that comes with options for a turreted or fixed-mount weapon, and a range of different weapons that slot into place on either variant.
Although not being sold as a part of the core Maelstrom's Edge range, this kit is useful for those looking for a plastic track unit for conversions, or wanting to add some heavier firepower to their games. For the latter, you can find an unofficial rules card for the Epirian 'Thunderbolt' sentry drone in our Force Lists section here, or included in the PDF download in the Rules section here.
The gun carriage is available from the Maelstrom's Edge webstore now!
And stay tuned for an upcoming conversion article from Iain, using one of these carriages and parts from the Epirian Hunter war mech to build an all-plastic Epirian Automated Uplink Relay.
Tags: conversion models releases
Restocks in progress!
Posted on Monday Feb 22, 2021 at 05:00pm in Models
With London going through several lockdowns, keeping stock levels maintained in our warehouse has proven somewhat challenging, and as a result several products over the last few months have either run out or sunk dangerously low. The good news is that with things gradually easing up locally, we're now getting this all caught up again! Everything on the webstore aside from the largest of our base sizes is now back in stock!
Bases will return once we receive a currently in-progress production run, which will also include some new base sizes - part of our set-up for the new models on the release schedule for this year!

Stay tuned for new release models, coming very soon! In the meantime, you can pick up the entire Maelstrom's Edge range (aside from those pesky large bases) from the online store here!
Thanks for reading!
Edgepieces - Preview (also) Feb 2021
Posted on Monday Feb 15, 2021 at 05:00pm in Models
While the ongoing disruptions to everything all over the place continue to wreak havoc with our release schedule, we're still plugging away at a number of projects in the background. New models are on the way for every existing faction, and a new danger is stirring on the Edge. We're also working on a separate, hobby-related project that we're very excited to share with you all as soon as we can...
Our current priority is to get the current out-of-stock products on the webstore replenished as soon as possible (hopefully later this week!) and the we should be in a position to start rolling out some new models once again. In the meantime, here's another sneak peek at some of the things coming down the pipeline!
Stay tuned!
Hobby Basics: Applying Static Grass
Posted on Monday Feb 08, 2021 at 05:00pm in Tutorials
Time for some more hobby basics! Last time around, we ran through how to apply a basic sand texture to your bases. Now it's time to finish them off, with an article covering how to apply static grass. Find it here!
Stay tuned for more!
