Maelstrom's Edge V2 - Suppression
Posted on Thursday Sept 04, 2025 at 05:00pm in Gaming
In Maelstrom's Edge V2, a unit’s suppression level starts at level 0, and can be raised to a maximum of 6. Various in-game effects cause a unit's suppression level to increase, but the most common is enemy units shooting at them - being hit by incoming fire will raise the unit's suppression level by one point, and if the unit suffers any casualties from that attack their suppression level goes up an additional point. Many units also have abilities that will either raise an enemy units' suppression level, or will raise their own suppression level in exchange for some benefit - Artarian Remnant battlesuits, for example, have an Overcharge ability that allows them to perform extra actions while building up waste heat in their systems, represented as an increase in their suppression level.
In V1, suppression was marked with cardboard 'blast' tokens, as there was no specific upper limit to how many a unit could wind up carrying around. In V2, with the change to 6 suppression levels, the easiest way to keep track is with dice - you just have to make sure you can tell your suppression dice apart from the dice you're rolling for attacks! For some other alternatives, Iain put together an article a while back showing some different suppression marker ideas, which you can find here.
While a unit is suppressed, their ability to function effectively on the battlefield is degraded. The unit's SKL (Skill, used for making attacks) is reduced by -1 for each suppression level it currently has, and if this lowers their SKL far enough they also start to reduce the number of shots they can make. The suppressed unit's ability to make use of available cover is also impacted, with the value of their cover reduced by -1 for each suppression level, meaning it will block fewer incoming shots. Units can attempt to 'shake off' a level of suppression at the end of their activation by testing against their WP (Willpower). Alternatively, if they are in cover and did not shoot during their activation they can instead 'regroup' to lower their suppression back down to 0.
A wise commander should always keep their units' suppression under control. Along with the reduction in their shooting and cover, once they reach the maximum level (6), things get worse! Anytime a unit which is at suppression level 6 is required to further raise its suppression level, a model in the unit instead suffers an automatic injury. So even if you have a tough time inflicting direct damage on an enemy, you can eventually whittle them down if you can throw enough bullets at them! To assist in this, attacking units can opt for a Suppressive Fire action instead of regular shooting. Suppressive Fire represents your troops hosing an area with firepower rather precise, well-aimed attacks. It doesn't cause any direct damage but has the potential to raise the target's suppression level much faster than regular shooting, although some weapons are better at suppressive fire than others.
The Maelstrom's Edge V2 rulebook is now available! Grab your copy from the Maelstrom's Edge webstore now!
If you have any thoughts on the new rules, pop on over to the Comm Guild Facebook group, or start up a thread in the Maelstrom's Edge section on the Dakka Dakka forums. We welcome any feedback, and would love to hear how everyone's forces stack up in the new rules!
Faction Focus - The Karist Enclave
Posted on Wednesday Sept 03, 2025 at 05:00pm in The Karist Enclave
The Enclave’s roots trace back to an event soon after the Capital Worlds were lost to the Maelstrom. A small passenger liner, the Kariman’s Breath, was caught on the very fringe of the Maelstrom’s shock wave as it entered a cybel tunnel. While most of the crew and passengers on board died, fourteen men and women emerged from their brush with annihilation having shared a glimpse of a completely different state of being. In the belief that it was possible for the Maelstrom transfer the consciousness of a deserving soul to another plane, these 14 went on to create an organisation that eventually grew into the Karist Enclave of today.
Believing their teachings too important to keep to themselves, the Enclave sent forth missionaries to help others on the Maelstrom's Edge to find ascension.
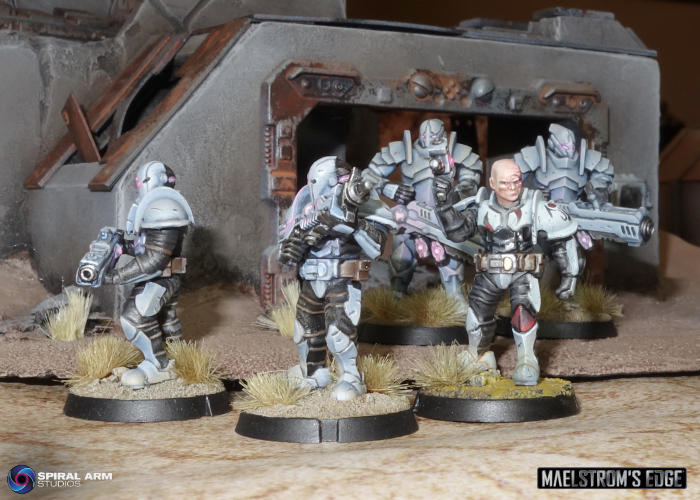
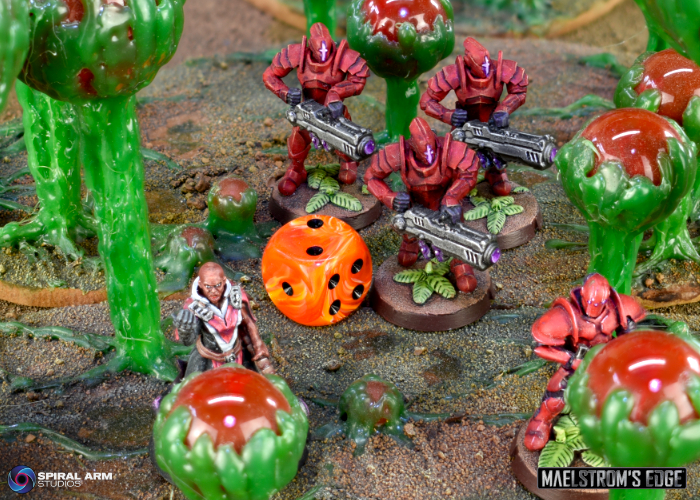
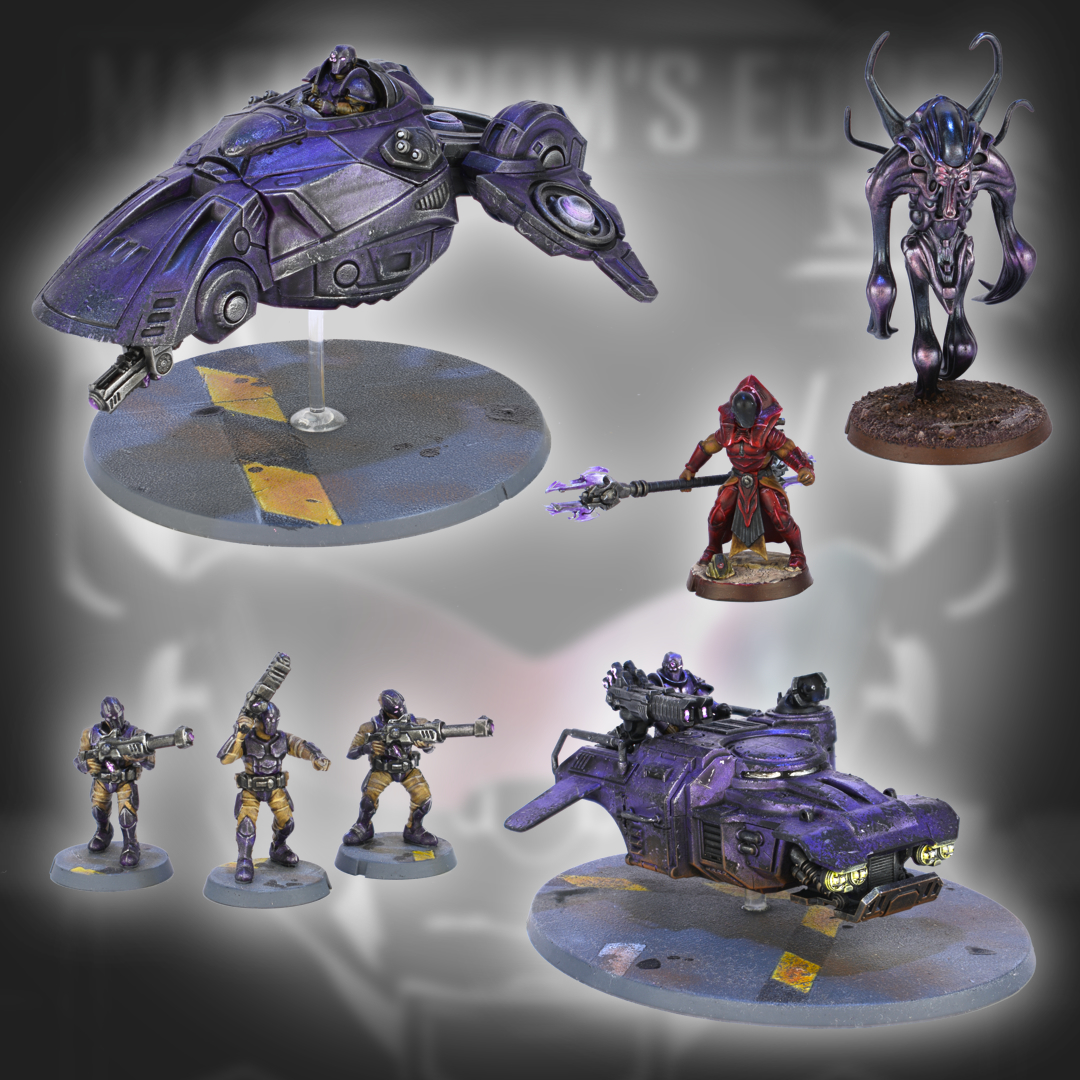
The masked troops of the Enclave’s military are the enforcers of the message of communal ascension. Clad in plate armor and wielding powerful weaponry charged with radiant cybel energy, Karist troops cut a distinctive profile on the battlefield. From the newest troopers, their specialised assault and support squads, to elite Praetorians and Tempests, Karist troops are tough, adaptable and utterly dedicated to their cause.
In Maelstrom's Edge games, Karist troops form a solid battle line, taking advantage of their heavy armor as they advance into range for their high powered weaponry. Their Commune Reactors allow them to temporarily lower their suppression level, allowing a canny commander to make the most of their devastating firepower.
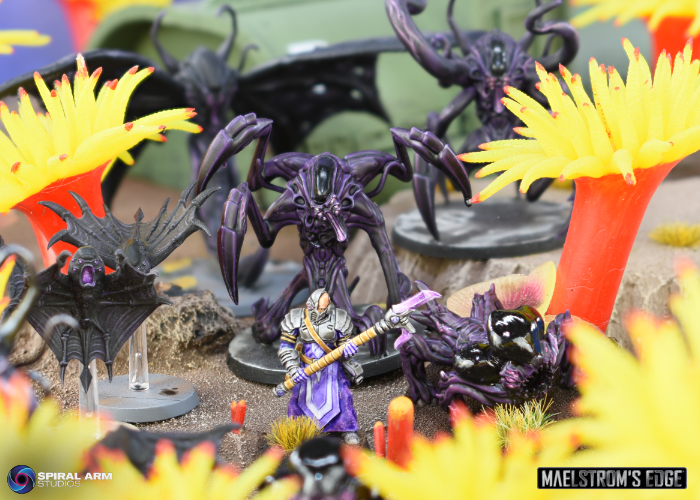
Dwelling in the depths of interstellar space, the eerie alien life-forms known colloquially as Angels were rarely seen before the coming of the Maelstrom. Adopted by the Enclave as a physical representation of the Maelstrom's devine energy, Angels are found in many Karist forces under the care of specially trained and equipped priests known as Angel Keepers. Minnows, infant form of the fearsome creature, swarm the battlefield in winged packs. Juvenile Hellblasters lob packets of concentrated cybel energy into enemy lines. More mature adult angels, massive in stature, loom above their smaller kin, their void gel forms adopting different configurations at the behest of their keepers - giant wings to soar above the enemy lines, ripping claws or entangling tentacles to harass and mangle opposing troops.
On the table, Angels fill a number of specialised roles. Minnows are fast-moving harassment troops, good for dislodging enemies from an objective. Hellblasters are living cannon, while mature Angels are nigh-unstoppable killing machines, morphing to the most useful shape for the job at hand.
Find out more about the secretive Karist Enclave on the Maelstrom's Edge website here.
The Maelstrom's Edge V2 rulebook is available to order from the 15th of September. Watch this space for more news!
Let us know your thoughts on the Comm Guild Facebook group!
Maelstrom's Edge V2 - Unit Activation
Posted on Tuesday Sept 02, 2025 at 05:00pm in Gaming
When a unit activates it can choose up to three actions from Movement, Status and Shooting categories. Some of these were already present in the V1 rules, but were a little more spread out and more difficult to keep track of. By consolidating and classifying the various actions, it's easier for players to remember what they can and can't do in a turn.
Movement actions dictate how fast the unit moves.
MOVEMENT ACTIONS
- MOVE: The unit moves up to its MV characteristic in inches.
- DASH: The unit moves up to double its MV characteristic in inches, but at the cost of degrading the accuracy of any shooting action it performs.
- CHARGE: The unit moves up to double its MV characteristic in inches, but must move into contact with an enemy unit, who then gets to perform Defensive Fire against the charging unit.
Status actions allow you to focus a unit towards specific goals.
STATUS ACTIONS
- ON THE MOVE: A unit on the move immediately gets to make bonus movement. In addition, a unit that is on the move is both less accurate when shooting and harder to hit when being fired upon.
- TAKE COVER: A unit taking cover gains protection from the terrain it is touching when the enemy shoots at it, and even gets a small amount of protection if it is in open ground. A unit which is taking cover cannot also be on the move, and vice versa.
- AIM: A unit that aims is more accurate when shooting during its activation.
Finally, Shooting actions cover the different options for attacking other units.
SHOOTING ACTIONS
- FIRE: The unit fires a standard round of shooting, which can cause both damage and suppression on the target.
- SUPPRESSIVE FIRE: A special round of shooting, which utilizes a weapon’s Suppression characteristic. No damage can be inflicted, but more suppression can be caused than with a standard round of shooting.
- CQ FIGHTING: A special attack against enemies in base contact with the firing unit, using melee weapons or pistols.
By selecting actions from each category in turn, a unit steps through its activation. For example, a unit can Move, then Take Aim in order to gain a boost to their shooting attacks, and then Fire on an enemy target.
While a unit can only select a single action each from Movement or Shooting, multiple Status actions can be combined so long as you stay within the maximum of three actions in total. So you could, for example, have a unit Take Cover and Aim, and then Fire upon enemy units from their more protected position.
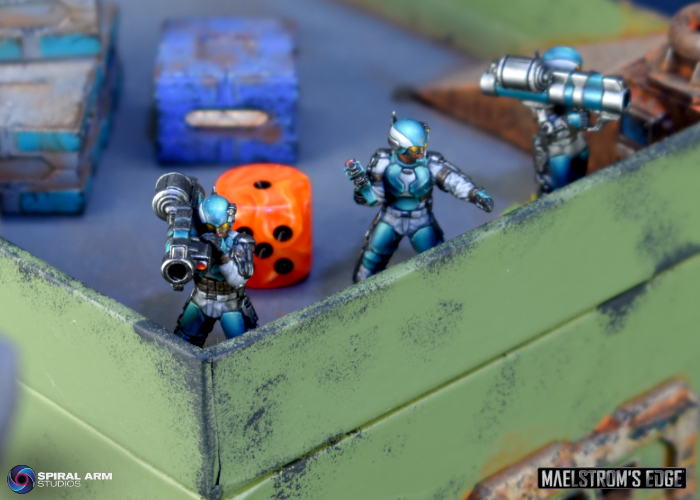
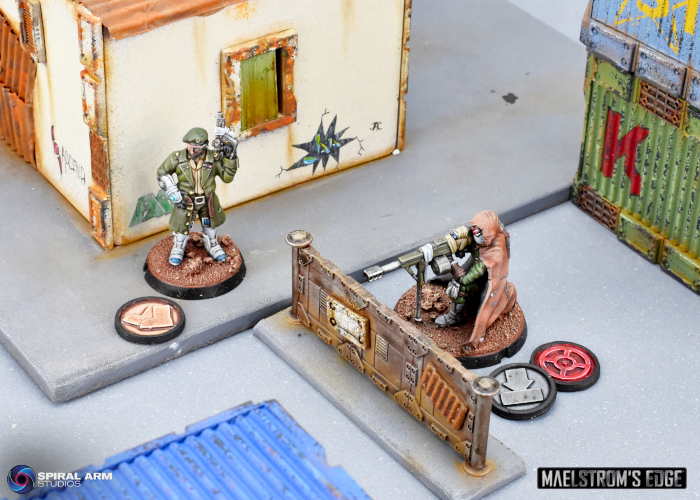
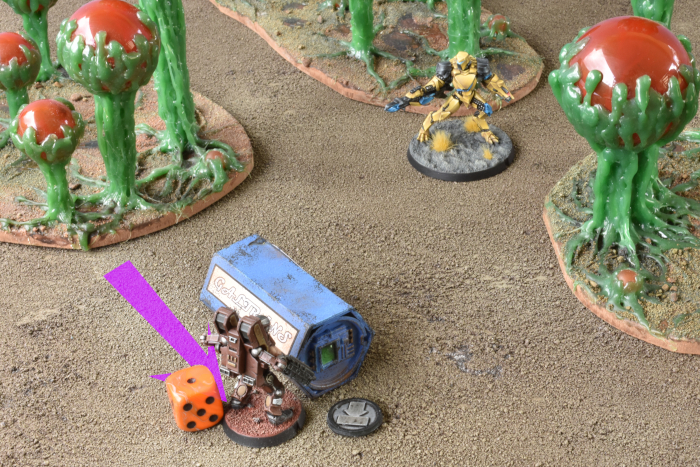
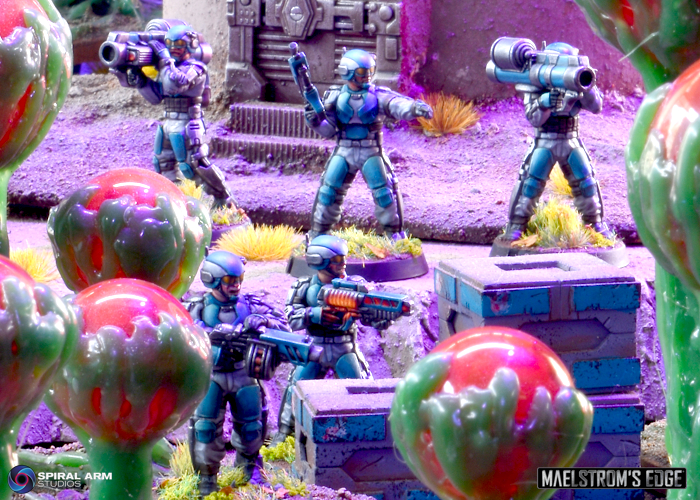
To show how this all works, here's an Epirian SecDef Field Commander facing off against an Artarian Remnant Pathfinder. In the midst of battle, they have just caught sight of each other through the ...err ... trees? and shenanigans ensue.
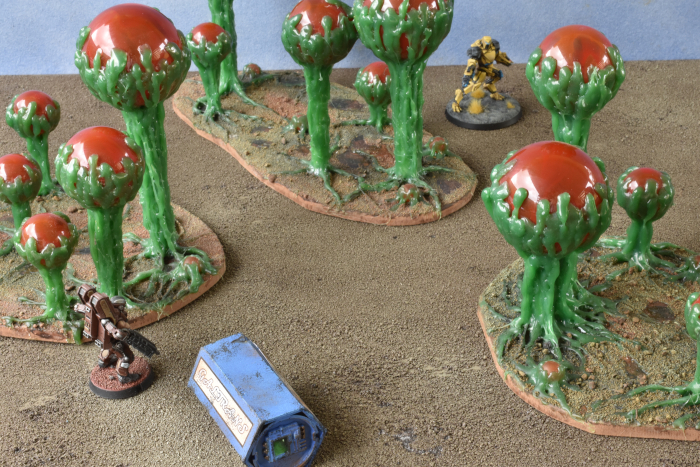
The Remnant player has Priority (meaning they activate a unit first this turn) and chooses to use a Move action to advance the Pathfinder through the trees to bring the Field Commander into short range (6"). They then use their Status action to Aim, applying a +2 bonus to the Pathfinder's SKL (Skill) stat.

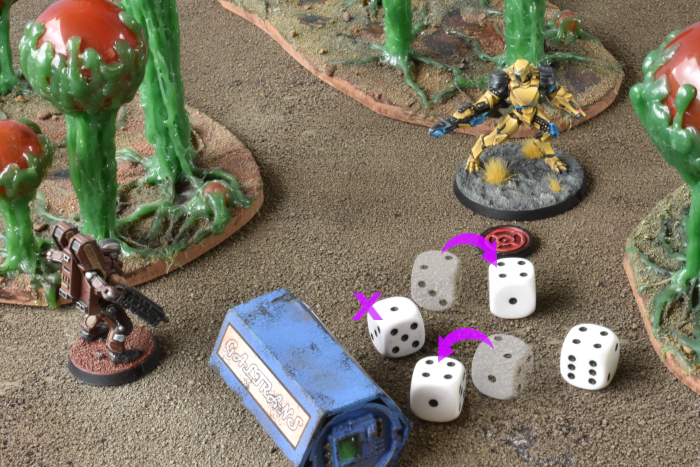
The Pathfinder's arc splitter has SHO 4, which means it normally rolls four dice to shoot, and as an SR (short ranged) weapon it receives an additional shot for being within 6" of the target. Rolling five dice, the Remnant player needs to equal or beat the Field Commander's EVS of 4. They roll two 1s, two 2s and a 4.
The Pathfinder has SKL 4, with the +2 from aiming increasing it to 6. This allows the Remnant player to adjust the rolls by up to 6 points in total. They flip the 2s up to 4s, but don't have enough points remaining to get either of the 1s up to a 4, so these remains missed shots.
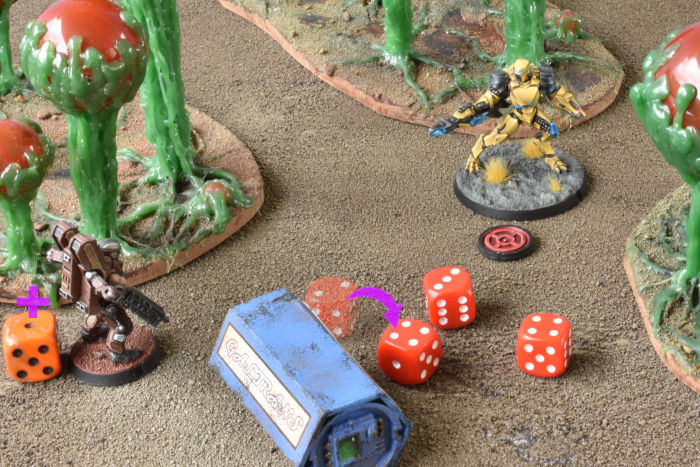
The Epirian player now needs to roll to see if their armor blocks the three successful hits. They need to equal or beat the PEN (penetration) of the arc splitter, which is 3. Rolling three dice, they roll a 2, a 3 and a 4. The Field Commander's AV (Armor Value) of 4 allows them to flip the failing 2 up to a successful roll, which means all three shots are blocked.
While the Field Commander doesn't take any damage, being hit by enemy fire raises his Suppression Level, putting him on Level 1 (Marked in the picture below with the orange die).
It's now the Epirian player's turn to activate a unit. They use a Move action to shuffle the Field Commander over behind the shipping crate, and a Take Cover action, which will give him some extra defense against any further enemy shooting until he activates next.
Regular models can normally only fire a single weapon per activation, but the Field Commander's Advanced Machine Assistance ability allows him to cut loose with all of his weapons at once. His two LM14 machine guns each have SHO 3, while his cluster missile launcher is an area of effect weapon, so has SHO 2 against the single model enemy unit. Grabbing two black dice for the missiles and six white dice for the machine guns, the Epirian player rolls five 2s, two 5s and a 6, needing to equal or exceed the Pathfinder's EVS of 4 to hit. The Field Commander has SKL 4 but is on Suppression Level 1, reducing his SKL by 1 point. The Epirian player chooses to use the remaining SKL 3 to flip the 3 and one of the 2s up to 4s.
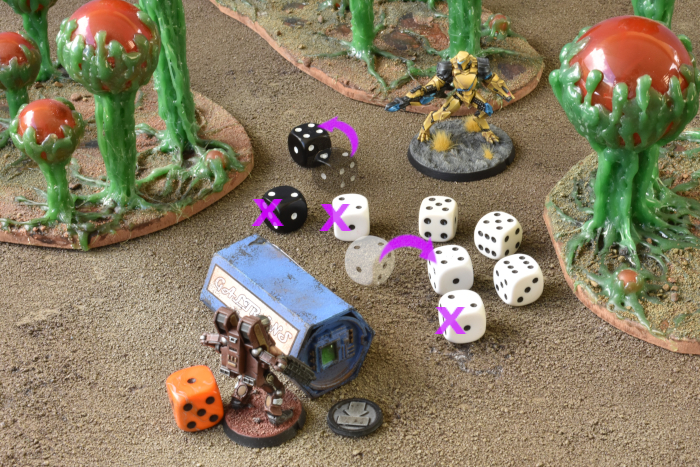
Both Epirian weapons have the same PEN 4, but the 6 is a Critical Hit, requiring a roll of 6 to block. Rolling the dice from the successful hits, the Remnant player gets a 2, a 3, a 4 and a 5, and a 2 on the Critical hit. They use the Pathfinder's AV 4 to flip the regular 2 and the 3 up to 4s, but don't have enough points left to block the Critical Hit.
This means the Pathfinder suffers a single injury, which would be enough to kill a lesser warrior. Remnant Champions are made of tougher stuff though, capable of shrugging off significant damage, and even the comparatively light armored Pathfinder has a FOR (fortitude) of 5, meaning it needs to suffer 5 injuries to be removed as a casualty. It does however raise its Suppression Level by 2 (1 for the successful hits, and another because it suffered an injury).
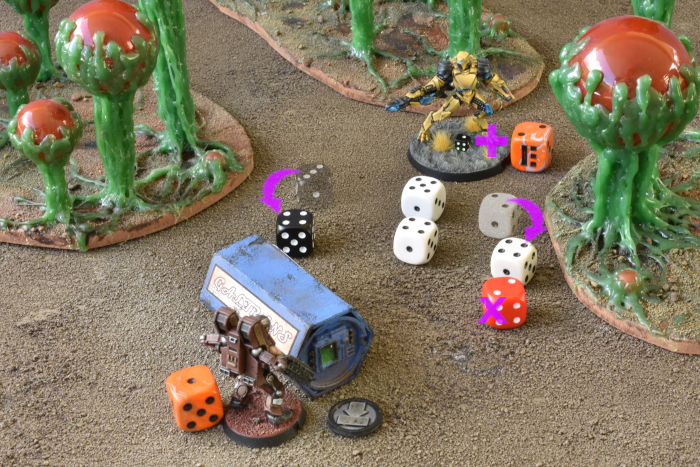
The final step in a model's activation is Recovery, allowing them to attempt to Shake Off suppression. The Epirian player rolls a D6, scoring a 4. This beats the Field Commander's WP of 3+, and so their suppression level is lowered by 1, back to 0. Play would then continue on to the next unit, if there is one, otherwise the players would move on to the next turn.
The Maelstrom's Edge V2 rulebook is now available! Grab your copy from the Maelstrom's Edge webstore now!
If you have any thoughts on the new rules, pop on over to the Comm Guild Facebook group, or start up a thread in the Maelstrom's Edge section on the Dakka Dakka forums. We welcome any feedback, and would love to hear how everyone's forces stack up in the new rules!
New Plastic Contractor Drones for the Epirian Foundation!
Posted on Monday Sept 01, 2025 at 05:00pm in The Epirian Foundation
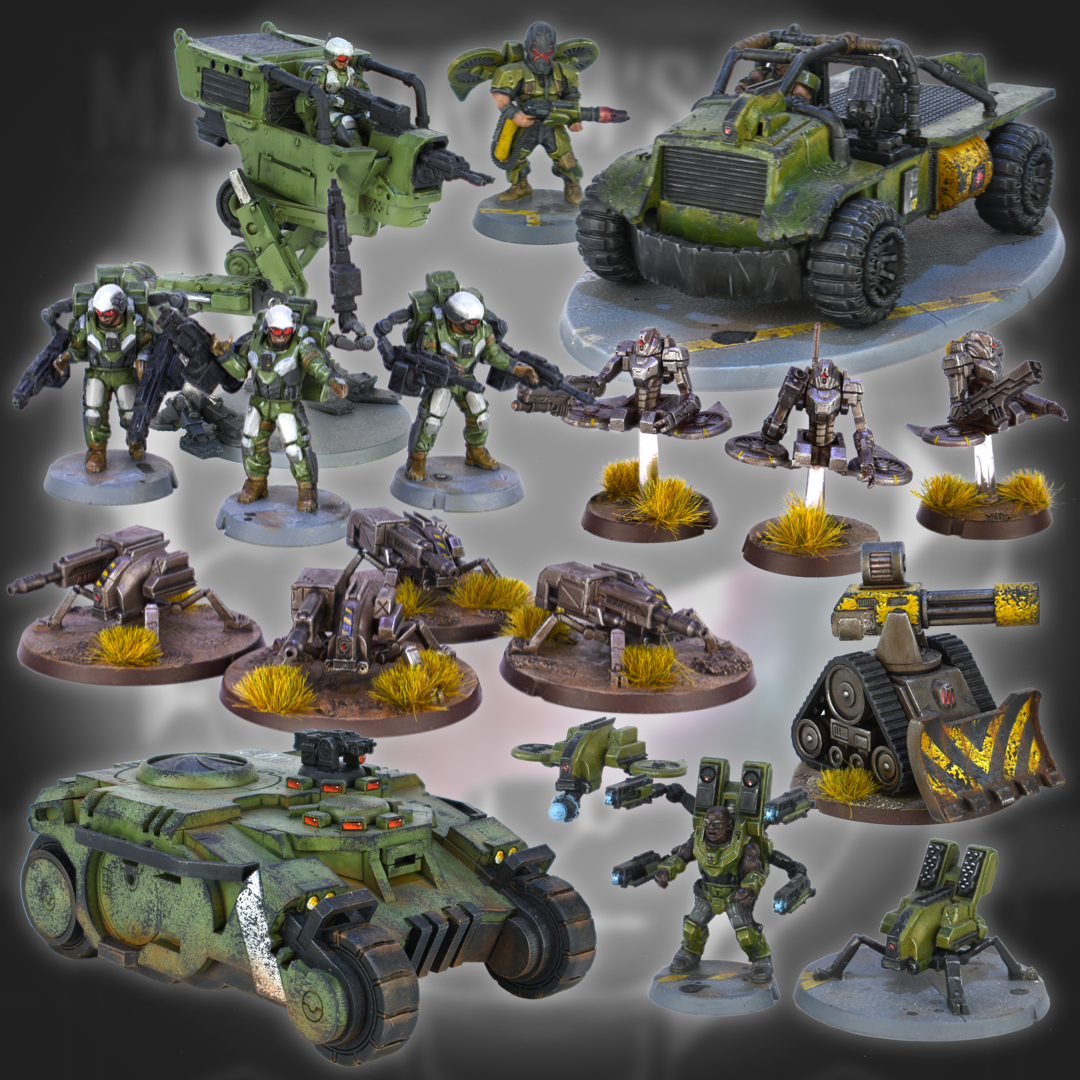
Contractor Drones fill an essential role within militia units, allowing Contractors to focus on their objectives without the need to lug around heavy gear and weaponry on their own. More specialized drones even assist Engineer and Medical units, improving their odds of patching up their respective mechanical and biological patients.
We originally released a gun drone kits in resin way back in 2018, and followed it up with a support drone kit (also resin) in 2021. Along the way, though, we decided that this original design didn't quite fit the brief - from a gameplay perspective, they were too low to the ground, and looked too much like a spider drone with a weapon stuck on. So we've taken this opportunity to redesign the drones a little. The main difference is their height - with taller, bulkier legs, the weapon variants now hold their aim at around the same level as if the weapon was being held by a Contractor, which we felt was important to the unit's profile on the table.
We've also made it a little more modular - the support options slot into the same body piece as the guns now, rather than needing a completely separate model, and the guns can all be left unglued so that you can switch them out between battles. And, finally, we've included two more weapon options - the dual strike missile launcher that was an option that wasn't modeled in the first run, and a dual machine gun option that's new for V2!
Get to work reinforcing your Epirian forces by grabbing the Contractor Drone kit, including two drone sprues, from the Maelstrom's Edge webstore here!

Our studio drones were painted by the very talented Todd McNeal at Toad Painting!
Tags: contractor drones epirian foundation
Colors of the Artarian Remnant
Posted on Monday Aug 25, 2025 at 05:00pm in The Remnant
The Remnant has no planets to protect and no loyalties beyond their vast Fleets. They are singularly focused on fleeing the Maelstrom, but travel slowly. Due to their extreme size, Fleetships lack gate drives of their own, and can not use any but the largest cybel gates. A network of smaller scout ships takes teams of Champions to search out the route ahead and identify sources of new materials, safe travel routes and potential trading ports. Recruiting from amongst the best and brightest on worlds they come across, the Remnant offers a way to flee the Maelstrom in return for knowledge, skills and culture. Where necessary, they will also take by force any resources they require from a world before moving on.

Click for larger image
Get started on your own Remnant Fire Team - Grab the plastic, multipart Remnant Militus kit from the Maelstrom's Edge webstore here.
Special Issue - New weapons for Epirian SecDef!
Posted on Wednesday Aug 13, 2025 at 05:00pm in Models
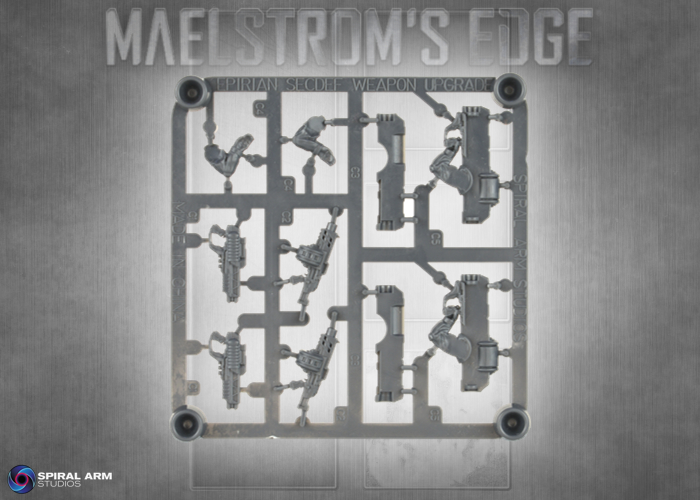
Along with the original SecDef sprues, SecDef Infantry boxes now include an additional plastic sprue that includes 2 each of the new weapons options - GL2 Grenade Launcher, LC42 Laser Carbine and ML9 Assault Launcher, giving you plenty of options for building .
Get started on your elite force by grabbing the SecDef Infantry kit from the Maelstrom's Edge webstore here!
Maelstrom's Edge V2 is coming...
Posted on Wednesday Aug 06, 2025 at 05:00pm in General
V2 Rulebook inbound - Releasing September 15, 2025!
Stay tuned for more!
Maelstrom's Edge Range Refresh and V2 Starter Sets
Posted on Wednesday Jul 30, 2025 at 05:00pm in Models
Most of the range is unchanged, but we have consolidated a few things to make life easier. Amongst these changes:
- Epirian Firefly and Spider drones (which use the same sprues) are now packaged as a single 'Epirian Drones' set to reduce confusion.
- Remnant Militus suits are now sold as a box of two.
- Resin Holista and Prime upgrades are now packaged together along with Militus sprues, rather than as separate packs.
- The Remnant Upgrade sprue is now included with all of the suits that can make use of it.
- The Faction Upgrade Sprue, wihch includes useful bits for both Epirian and Karist units, is now packaged with Epirian Contractors and Karist Praetorians sets.
- Resin Epirian Boostpack Infantry are now sold as a set of four, including a mix of assault rifles and upgrade weapons.
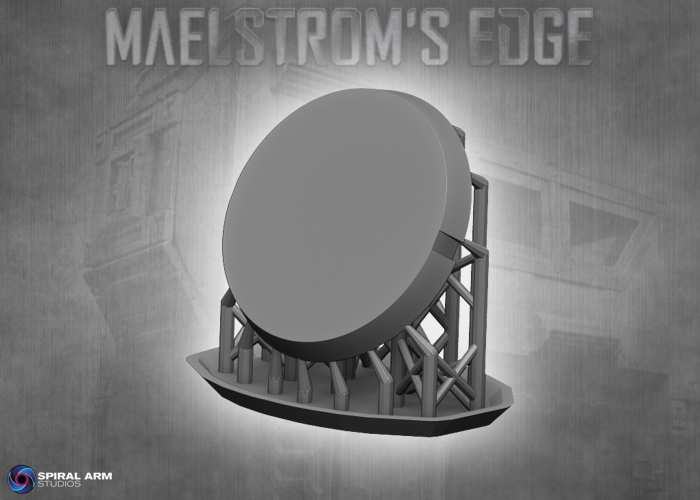
- PDC Gun Carriages are now sold as a set of 2, and include 54mm bases.
- And last, but not least, the faction starter bundles have been updated into new V2 Starter Sets.
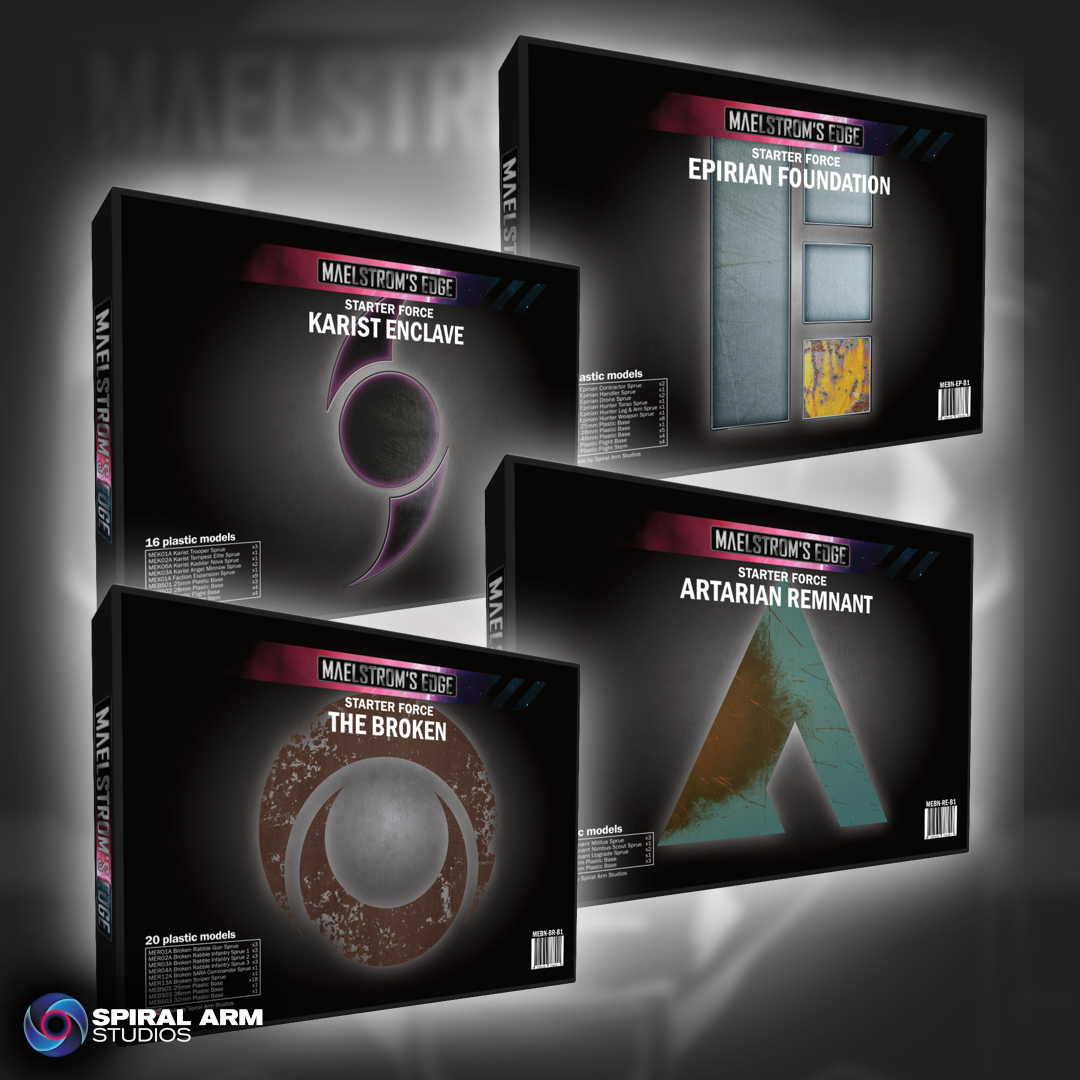
These new bundles each include a mix of plastic models that allow you to assemble a 50 point force, which gives you a good head start on a full V2 force, or a handy boost for an existing one. Grab yours now from the Maelstrom's Edge webstore here!
Base Size Updates
Posted on Monday Jul 28, 2025 at 05:00pm in Models
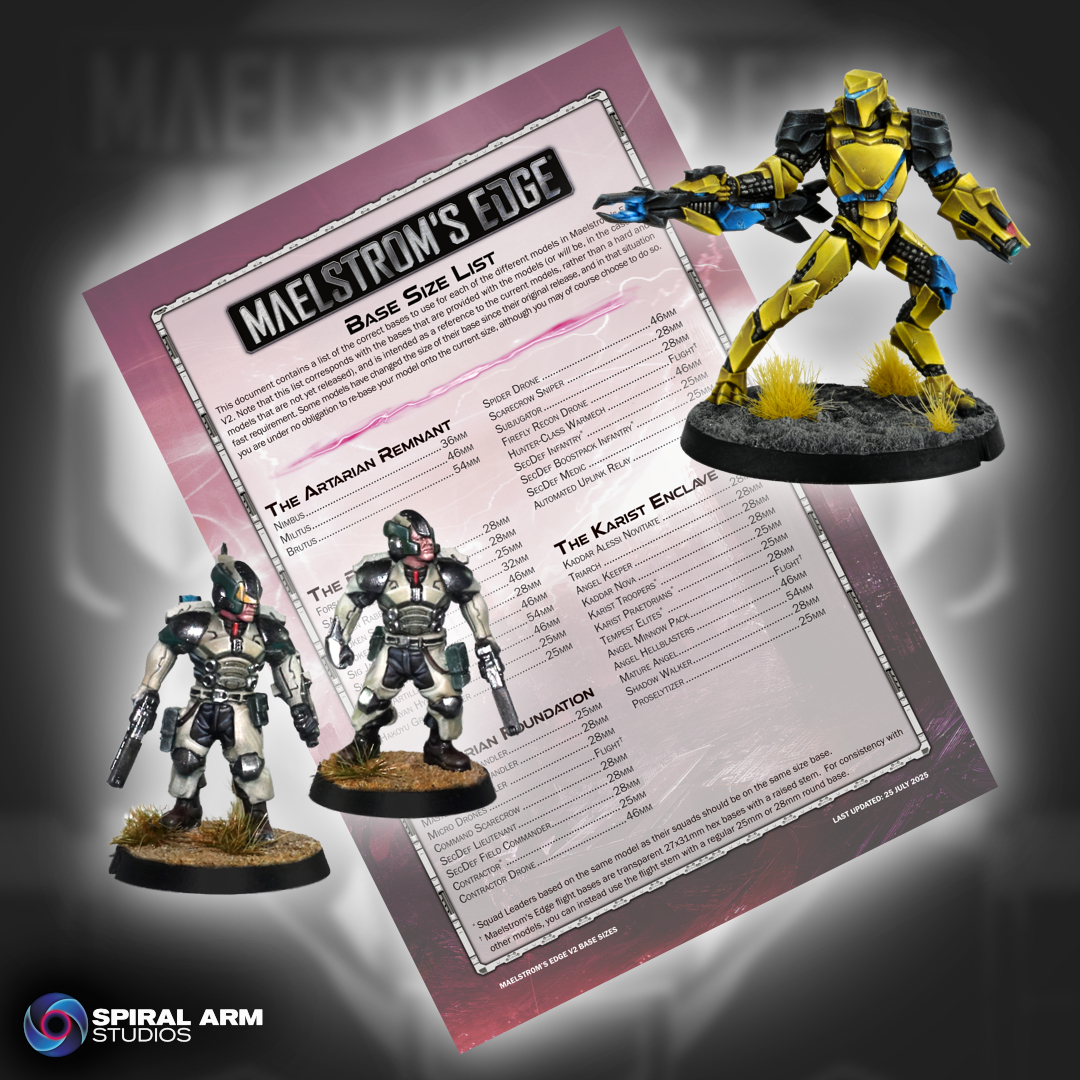
The majority of models are staying on their original bases, but some elite units and human-sized character models have had a slight bump up to make them stand out better on the table or to make them less cramped on the base. Remnant Nimbus suits, which were originally on a 46mm base as that was the only base we had to fit them, will now be on a 36mm base to properly differentiate them from their larger brethren. You can find the full base list on the Maelstrom's Edge website here.
Note that if a model in your collection has changed its official base size for V2, there is no need for you to re-base your already assembled models unless you want to, as these changes have minimal effect on gameplay. If you would like to grab some extra bases to swap, though, we have added a complete STL base bundle to the webstore which includes the 3D-printable files for 25, 28, 32, 36, 40, 46, 54, and 65mm Maelstrom's Edge bases. Grab this pack from the Maelstrom's Edge webstore here!
STL Bundle Changes - Bases!
Posted on Tuesday Jul 22, 2025 at 05:00pm in Models
Each base is supplied with a smooth top and textured top version, and also with and without print supports. These have been added into the existing STL bundles, which can be redownloaded from your profile page on the Maelstrom's Edge website, and will come automatically with any new STL bundles you purchase.
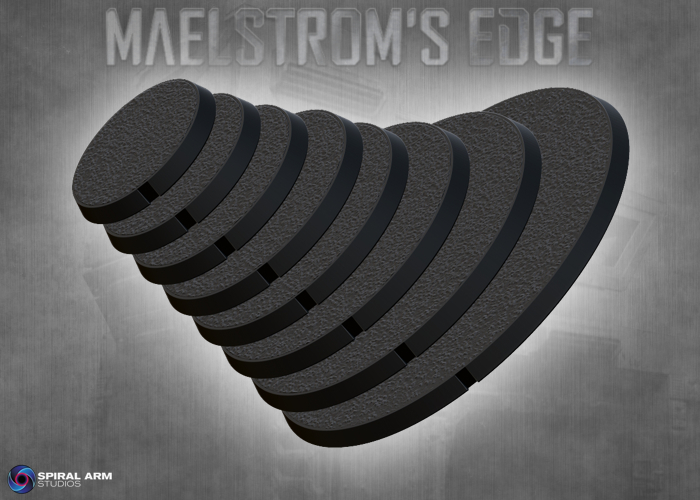
For those looking for additional bases, we have also added a complete STL base bundle which includes the files for 25, 28, 32, 36, 40, 46, 54, and 65mm Maelstrom's Edge bases. Grab this pack from the Maelstrom's Edge webstore here!
Tags: stl
Karist Enclave - Kaddar Alessi Novitiate
Posted on Tuesday Feb 04, 2025 at 09:20am in The Karist Enclave
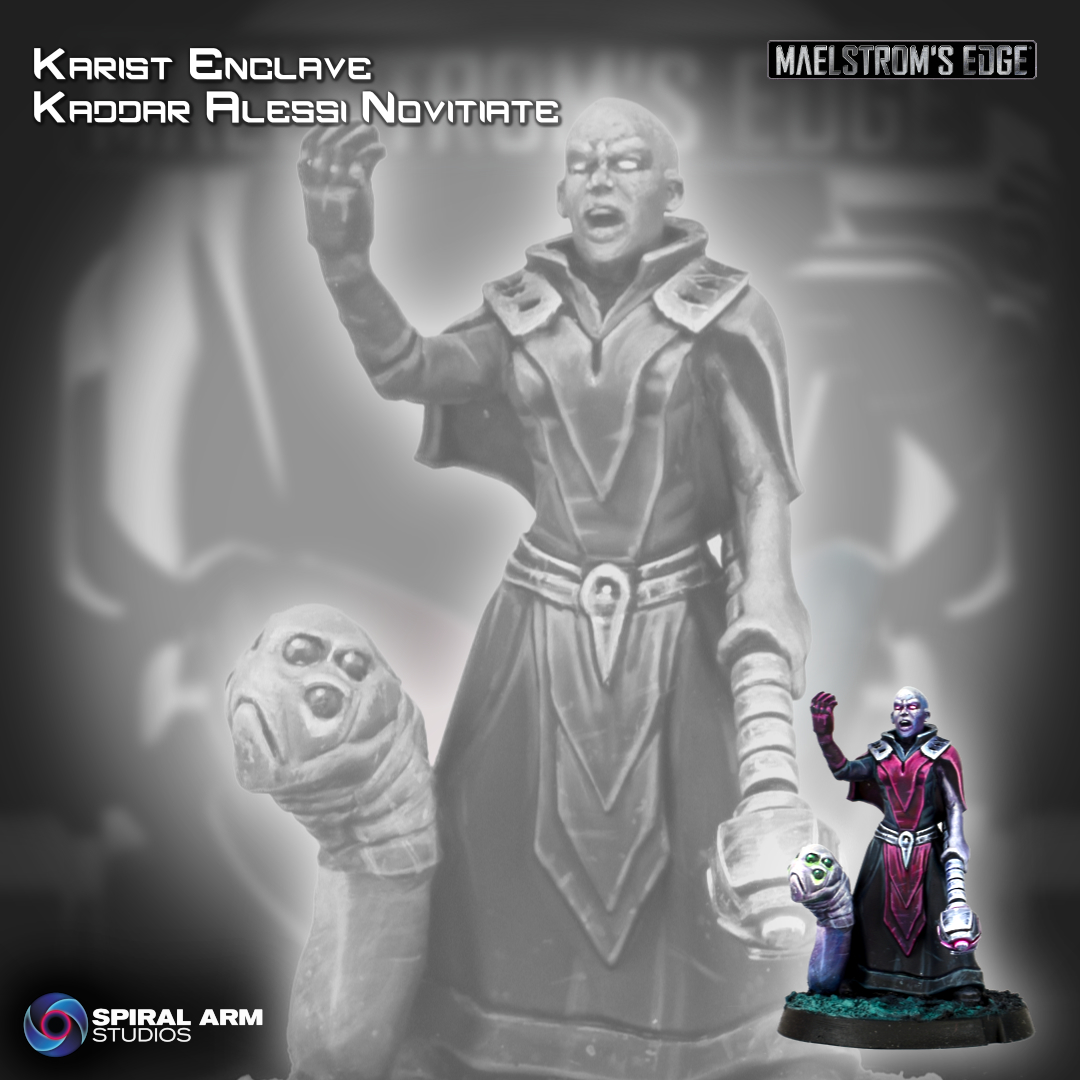
Click for larger image
Multipart, plastic model, sculpted by Dave Whitaker and painted by Angel Giraldez.
Grab one for yourself from the webstore here.
Revised Homebrew Broken Unit rules!
Posted on Thursday Oct 10, 2024 at 05:00pm in Gaming
 - by Iain Wilson
Continuing my homebrew unit updates, I have now revised my Broken units from V1!

As with the Epirian and Karist units, these units are converted from assorted Maelstrom's Edge parts, or modified models from other games. To duplicate them, you can find the original modeling articles by following the links below, or you can choose to use whichever other appropriate models you have to hand. Note that as these are unofficial rules, you should ensure that you discuss it with your opponent before using them, to make sure they're familiar with and ok with them!
Download the rules PDF from the V2 Trial Rules page here, and check the links below for the original modeling articles for each unit!
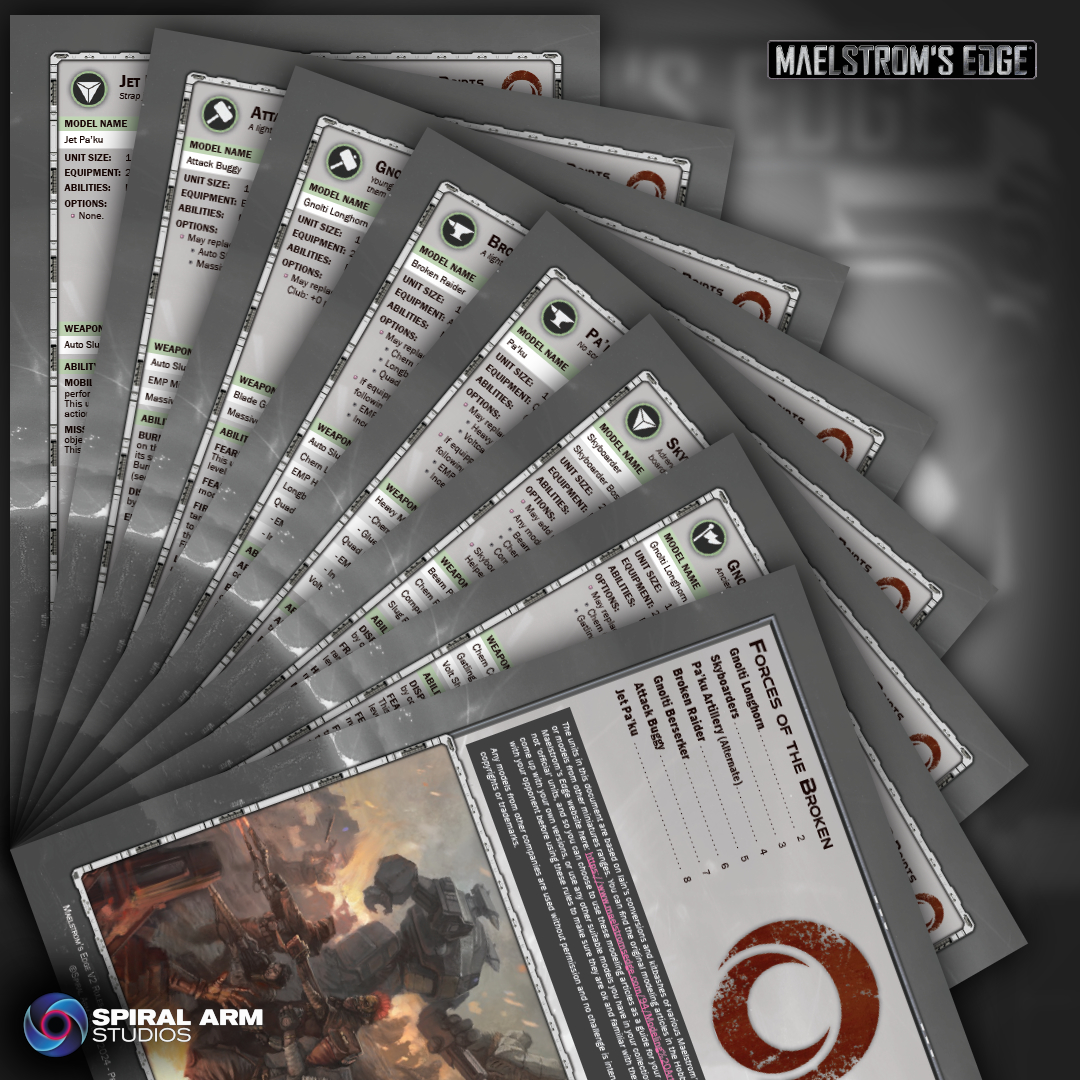
Gnolti Longhorn - an older, wiser Gnolti in a command role.
Gnolti Berserker - a rampaging Gnolti driven into a frenzy by the madness of war.
Pa'ku Heavy Mortar - an alternate rules page for the Pa'ku Artillery unit, adding a heavy mortar option.
Skyboarders - Rabble troops equipped with hoverboards.
Jet Pa'ku - A gun-toting, boostpack-wearing Pa'ku, originally just built for the fun of it, but I couldn't resist giving it rules!
Attack Buggy - a light assault vehicle made from a Mantic Marauder vehicle.
Broken Raider - This one I don't have a conversion built for - these rules were originally put together for the V1 Trial Transport rules article. Feel free to use whatever light truck or buggy models seem like a good fit!
To build your own force of ramshackle, kit-bashed doom, grab some Broken models or STL files from the Maelstrom's Edge webstore here!
What are you working on? We would love to see your models and terrain in the Comm Guild Facebook group!
For other building ideas, modeling tutorials, army spotlights and conversion walkthroughs, check out the Hobby section of the Maelstrom's Edge website here. And while you're there, grab a copy of the Maelstrom's Edge V2 Beta rules!
The final resin-to-digital conversion release arrives - Karist Angel Keepers!
Posted on Thursday Oct 03, 2024 at 09:18pm in Models
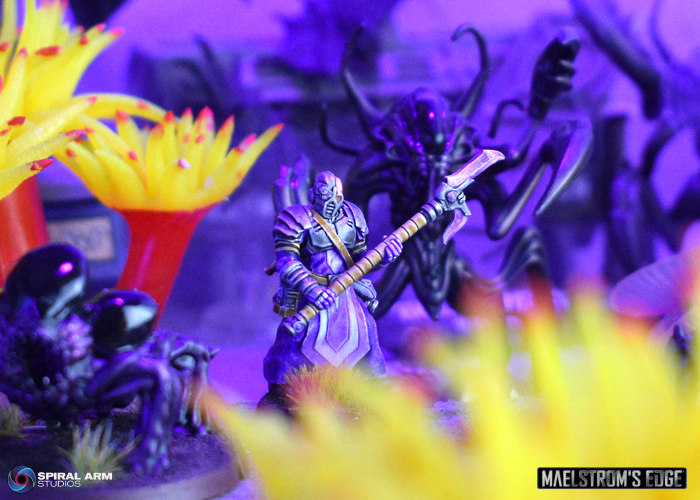
An Angel Keeper leads their alien charges into battle.
A strange and isolated offshoot of the Karist priesthood, Angel Keepers train enslaved Angels using regimented doses of cybel energy, and marshal these alien creatures on the battlefield.
This release required a bit of resculpting as the original model sculpt was lost, and so it had to be reconstructed from a partial sculpt. The resin original was also only designed to have one of the Keeper's two main weapons, with separate hand options holding the cybel goad and grenade launcher. The STL version now has the cybel goad in hand and the grenade launcher slung and ready when the Keeper needs it. The model also comes with two pose variants, an optional holstered pistol, and a male and female head - although the differences in appearance are minor due to the Keeper's mask!
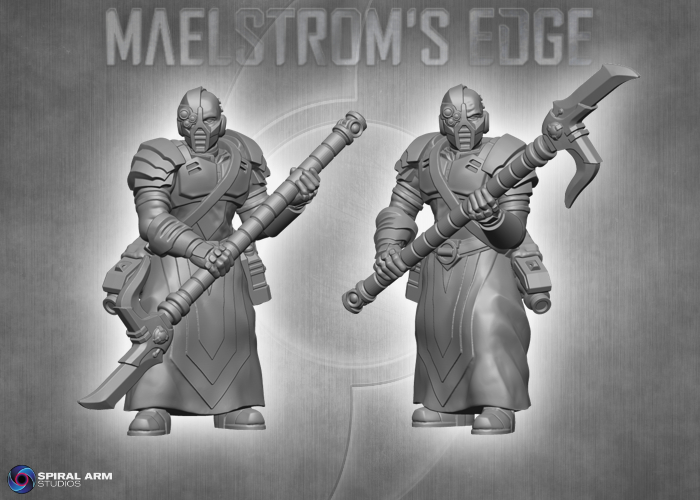
The digital file includes supported and unsupported versions of the Angel Keeper.
You can find the rules for using Angel Keepers in your Karist Enclave force in the downloads section of the Maelstrom's Edge website here.
Start building your elite army of shapeshifting doom by grabbing your Angel Keeper from the webstore here!
Revised Homebrew Karist Unit rules - and some Epirian Tweaks!
Posted on Thursday Sept 19, 2024 at 05:00pm in Gaming
- by Iain Wilson
Following on from my Epirian Foundation update last week, I have now also revised my homebrew Karists from V1. This was a much smaller job, as I hadn't actually created as many Karist units, and that's clearly a terrible oversight that needs to be rectified! As such, along with updating the existing units, I have also added in a couple of extras from conversions that I had made that I hadn't created rules for yet.
As with the Epirians, these units are all converted from assorted Maelstrom's Edge parts, or modified models from other games. To duplicate them, you can find the original modeling articles by following the links below, or you can choose to use whichever other appropriate models you have to hand. Note that as these are unofficial rules, you should ensure that you discuss it with your opponent before using them, to make sure they're familiar with and ok with them!
Kaddar Militant - a variation on the usual Kaddar Nova, with a more warlike focus.
Reaper Cadre - stealthy Karist Troopers equipped with a longrifle variant of the pulse carbine.
Predator Attack Vehicle - an anti-grav support vehicle based on a Warhammer 40K Genestealer cult buggy.
Raptor Assault Skimmer - a transport vehicle based on a Gates of Antares Freeborn skimmer.
Angel Gloomstalker - a Juvenile Angel variant converted from the plastic Mature Angel kit.
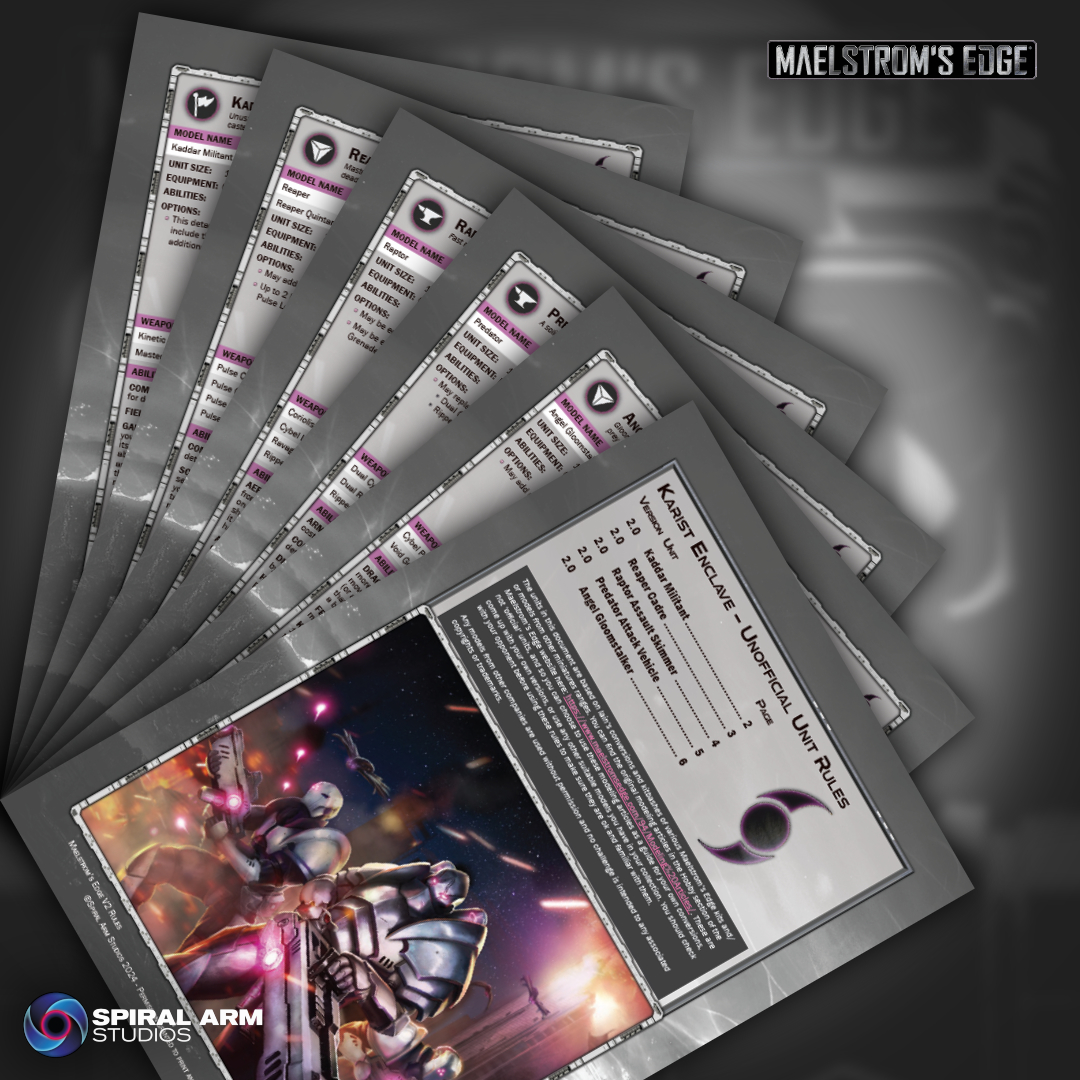
Download the rules PDF from the V2 Trial Rules page here!
I've also made a couple of tweaks to the Epirian rules posted last week. The SecDef Ironhide has had its Inorganic designator swapped to Armored, Sentinel bots can now all take Shock weapons, and I realised as I was working on the Karists that I already had a unit named 'Reapers', so the newly christened 'SecDef Reaper Team' has now been re-re-named the 'SecDef Wrecker Team'. You can grab the revised rules pages on the V2 Trial Rules page linked above.
To build your own force of over-zealous, kit-bashed doom, grab some Karist models from the Maelstrom's Edge webstore here!
What are you working on? We would love to see your models and terrain in the Comm Guild Facebook group!
For other building ideas, modeling tutorials, army spotlights and conversion walkthroughs, check out the Hobby section of the Maelstrom's Edge website here. And while you're there, grab a copy of the Maelstrom's Edge V2 Beta rules!
Updated Homebrew Epirian Unit Rules
Posted on Thursday Sept 12, 2024 at 05:00pm in Gaming
- by Iain Wilson
With the release of the updated Beta seeing the V2 rules in their more or less final state, this seemed like a good time to get caught up with my assorted homebrew units created originally for the V1 ruleset. To begin with, I have worked through my Epirian creations, compiling them into a PDF for easy reference.
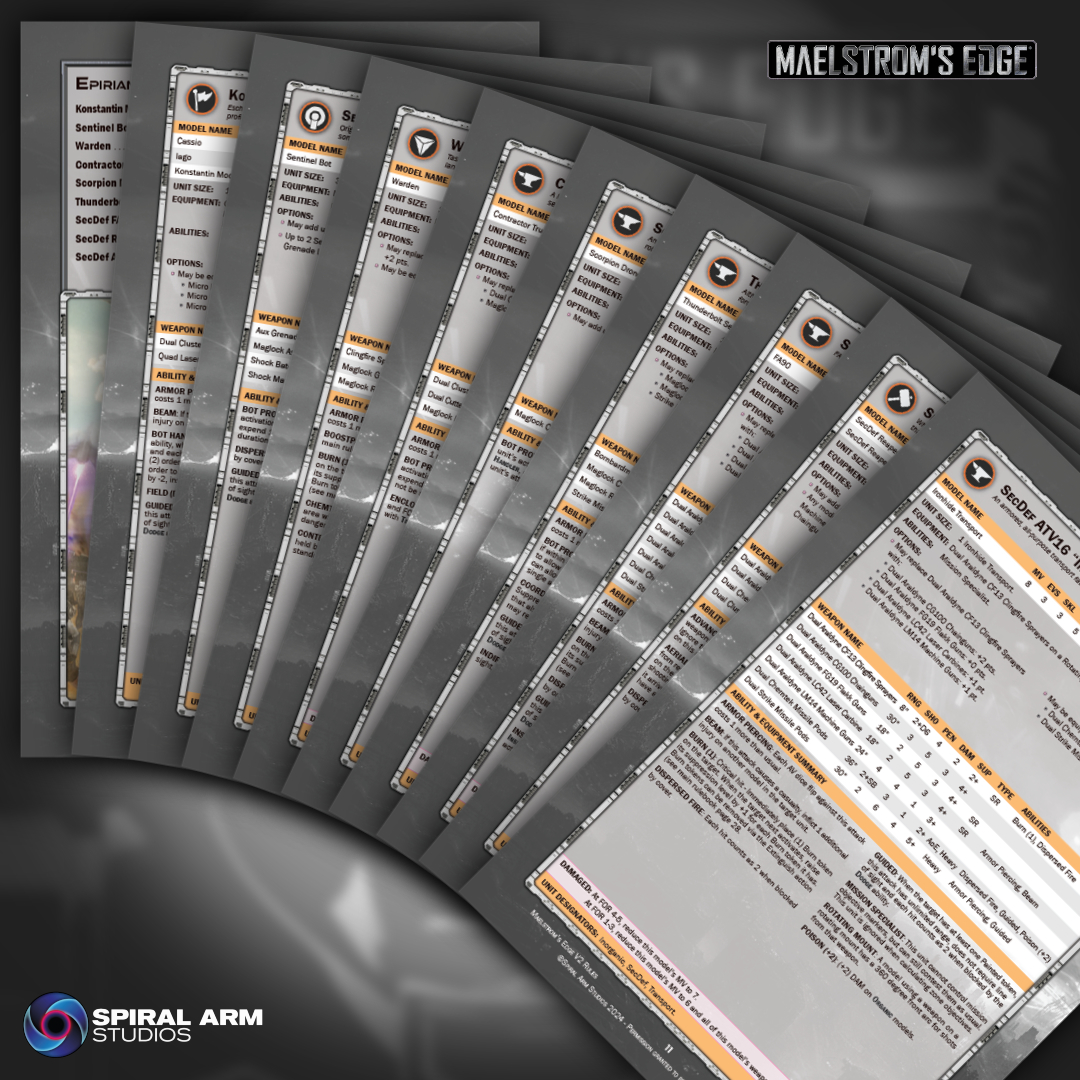
These units are all converted from assorted Maelstrom's Edge parts, or modified models from other games. To duplicate them, you can find the original modeling articles by following the links below, or you can choose to use whichever other appropriate models you have to hand. Note that as these are unofficial rules, you should ensure that you discuss it with your opponent before using them, to make sure they're familiar with and ok with them!
Konstantin Moor, Veteran Bot Handler - a unique Commander accompanied by two custom drones.
Sentinel Bot Unit - a robotic replacement for the standard Contractor unit.
Warden - a boostpack-equipped Epirian solo character.
Contractor Truck - a light transport vehicle for moving your Contractors about.
Scorpion Drone - a modified Spider Drone with a nastier bite.
Thunderbolt Sentry Drone - an automated weapon drone built from the PDC Gaming gun carriage model.
SecDef FA90 Reconnaissance Walker - a scout vehicle adding firepower and advance intel for SecDef forces.
SecDef Reaper Team - Originally just called the SecDef Heavy Team, updated with a better name and more options.
SecDef ATV16 “Ironhide” Transport - an armored SecDef transport converted from a Miniature Scenery Tactical Response Vehicle.
The Thunderbolt Sentry Drone and Warden already had V2 Beta rules published. This document updates them to V2.1, adding a Micro Drone equipment option to the Warden and including the rules entry for the Thunderbolt's Rotating Mount, which was left off the original page.
Download the PDF here!
To build your own force of kit-bashed doom, grab some Epirian models from the Maelstrom's Edge webstore here!
What are you working on? We would love to see your models and terrain in the Comm Guild Facebook group!
For other building ideas, modeling tutorials, army spotlights and conversion walkthroughs, check out the Hobby section of the Maelstrom's Edge website here. And while you're there, grab a copy of the Maelstrom's Edge V2 Beta rules!
