Terrain Template & Tutorial - Minehead
Posted on Monday Apr 24, 2017 at 05:00pm in Tutorials
 - by Iain Wilson
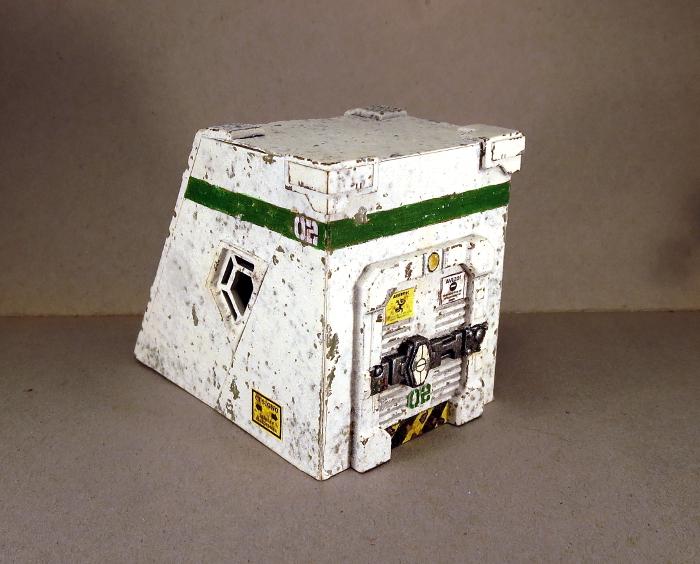
This week, we're sharing an easy building tutorial that would be perfect for those looking to dip a toe into the terrain scratch-building pool for the first time. The project is a small outbuilding, which I think of as an access to some sort of underground facility, although it could also double as a small utility or detention building.
 You will need some 5mm or 6mm foamcore (either will work, although the roof piece will overhang the sides slightly with the thinner foamcore), some thin cardboard - around .5mm thick, PVA glue, and the Maelstrom's Edge terrain sprue. A sharp pencil, a steel ruler and a sharp craft knife will get you by for tools.
You will also need the building template, which can be downloaded from here: Minehead.pdf
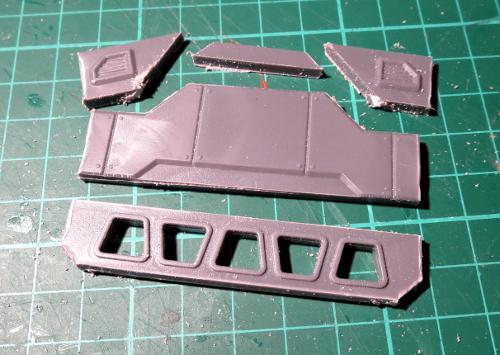
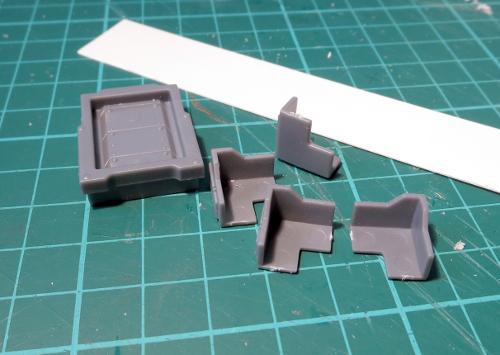
From the terrain sprue, the following components are used: one of the small doors (either will do), two trapezoid windows, two corner braces and two of the long support struts.

Print out the building template, and cut out the panels using steel ruler and knife.
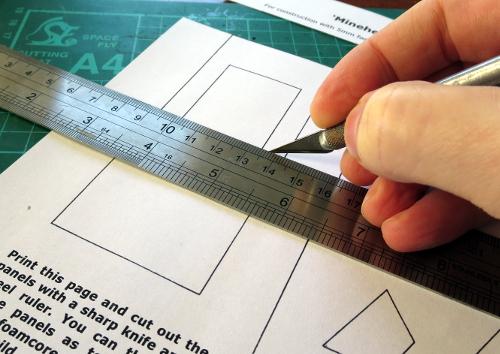
You can then lay the panels on top of the foamcore and card (the parts are labelled for which material they need) and draw around them with the pencil to transfer the outlines.
Once you have traced all of the parts onto the appropriate material, use the ruler and knife to cut them all out. If you have never cut foamcore before, don't try to cut through in one go. Lay the ruler along the line you want to cut, and then make several passes with the knife, working deeper as you go and being careful to keep the knife blade vertical so you don't wind up with a bevelled edge.
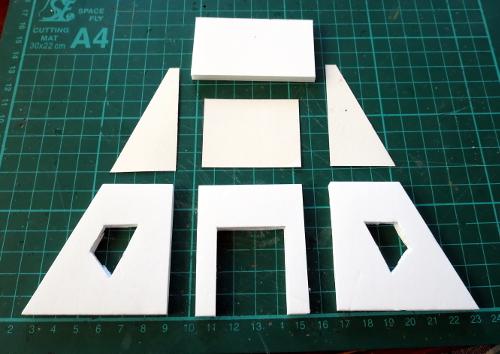
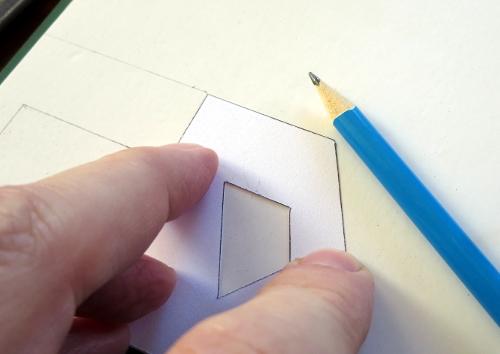
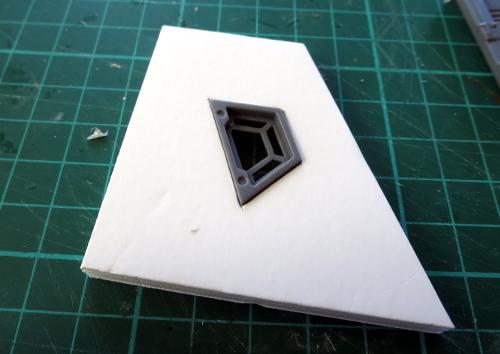
Check the fit on the holes for the trapezoid windows by pushing the windows into place. You can trim around the edges where necessary to make them fit nice and snug. If you have cut the window holes too large, you can pad them back out by gluing a strip of cardboard onto whichever cut edge has a gap. Once you're happy with the fit, run some glue around the edge of the window hole and then push the window into place.
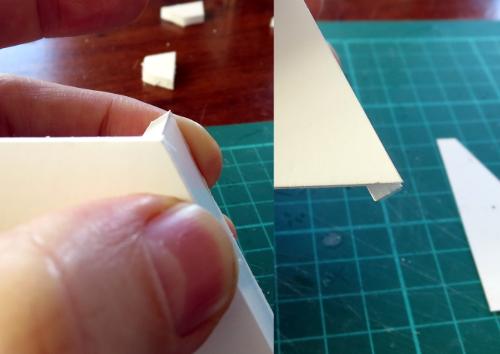
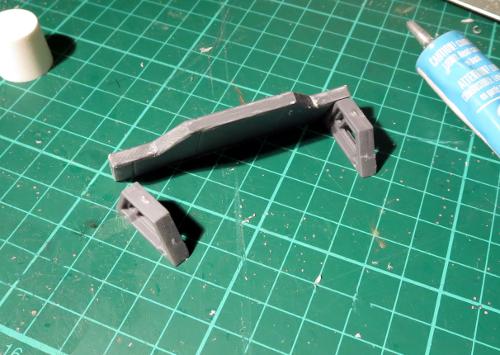
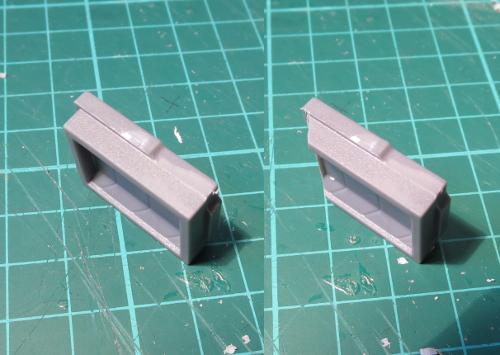
Next up we need to glue the walls together. Because of the angle on the back wall, the bottom of the wall will protrude past the bottom of the building, so will need a little trimming. If you hold the back wall against the side as below, so that the top edge of the back wall sits level with the top of the side wall (left-hand image) you can see the triangular part that needs trimming off (right-hand image) - trim this off with the knife, or sand it down, so that the bottom of the back wall sits flat on the table.
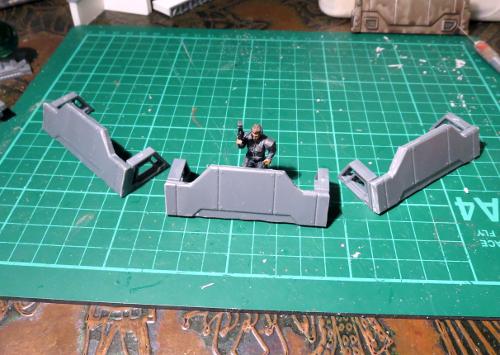
From there, glue the side walls to the rear side of the front wall. The run a little glue down either side of the back wall section. Spread the side walls out slightly, hold the back wall in place, and squeeze the side walls back in against it. Give the glue 30 seconds or so to start to grab, and then sit the building down on the table. You can look down from above here and nudge the walls around as necessary to square everything up. A cutting mat with a printed grid is a big help for this step, as you can line the walls up with the grid.
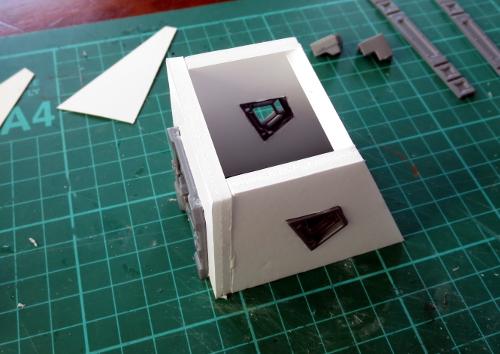
The cardboard side panels can then be glued one onto the front of each of the side walls, so that they cover over the exposed polystyrene edges of the front wall. The roof panel goes (surprisingly...) on top - run a little glue around the top edges of each wall, and sit the roof on top.

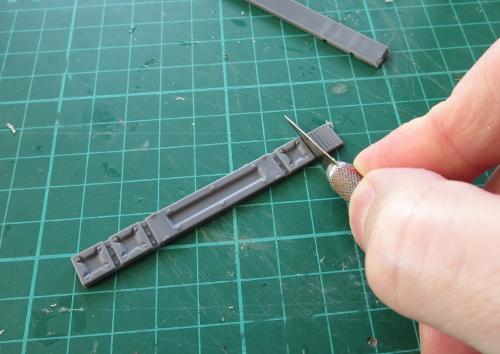
Take the two support struts and slice off the grill piece as below, leaving the recessed rivet strip attached to the grill.
The grills are glued onto the back edge of the roof, one at each corner with the rivet strip to the edge. The remaining sections of the support struts are then glued running up the sides of the back wall, covering over the exposed polystyrene edges of the side walls. Check for fit first - if they protrude past the bottom of the building when lined up with the roof at the top, bevel off the bottom of the strut with your knife before gluing in place.

Finally, take the two corner pieces and glue them to the front corners of the roof. What you wind up with should look something like this:
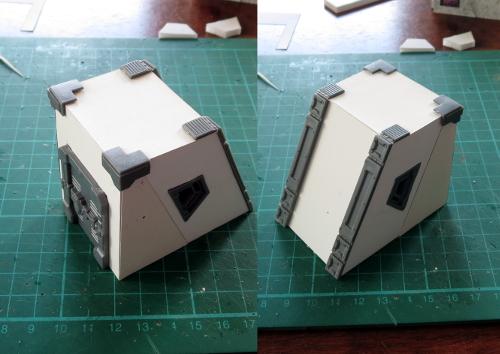
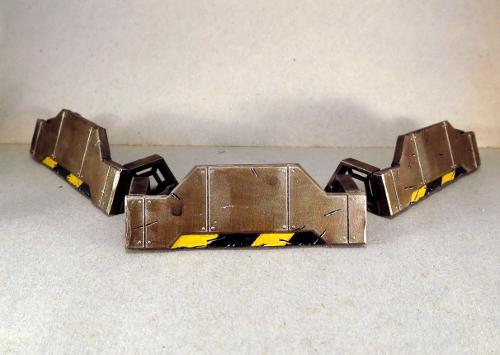
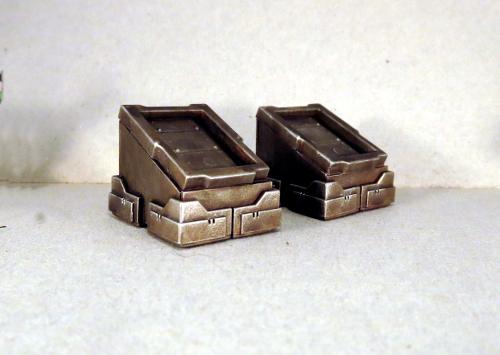
All that remains is painting, once the glue has set. Paint the building up in whatever colours suit your table or preferences. I like to weather my buildings, but it's not necessary - a simple spray with grey, white or a muted (not pastel, but not too bright) primary colour with the details picked out where appropriate works quite well with these as well.
Here's my prototype version painted up, with some added salt weathering and some paper signs created in Gimp and printed out on paper for gluing on wherever they seem appropriate.
The graffiti on the back wall was made in an online graffiti creator (google it, you'll turn up a few different ones with different functions and fonts), printed and glued in place. You can see the edges of the paper if you look closely, but from game-playing distance it does the job. The numbers on the green strips and door were done the same way.
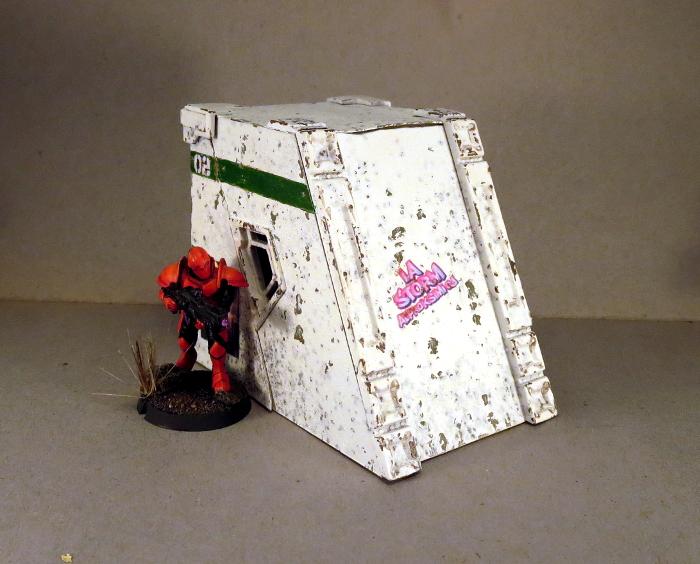
(Note that the windows in the painted example above are in a slightly different position to the template. This was a design change between the prototype and the template creation, as I think it looks better with the slight gap between the window and the raised side panel.)
And there you have it - one mine access/detention cell/utility closet/bike garage/whatever else you can think of to use it for.
If you want to try it for yourself, you can grab the template from here and the Maelstrom's Edge terrain sprue from the webstore here. I'd love to see what others can come up with to do with the design, so as always please feel free to share your creations on the Comm Guild Facebook page!
For other Maelstrom's Edge modeling articles, including tutorials and walkthroughs of a wide range of different building and miniature projects, check out the article roundup here.
Tutorial and Spotlight Article Roundup
Posted on Monday Apr 17, 2017 at 05:00pm in Tutorials

The full list of articles is getting a little unwieldy for a single page, so rather than keep updating an increasingly confusing list here, you can find the full collection of articles broken down by sections in the Hobby area of the Maelstrom's Edge website here!
If you've seen anything here that has lit that modeling flame, you can pick up the various plastic kits currently available in the Maelstrom's Edge range from the webstore here.
Maelstrom's Edge also has a Facebook group, known as 'the Comm Guild', where you can post any questions you have about the rules, the models, or upcoming releases, or share your modeling projects. The group can be found here. We love to see what people are working on, so whether you're a modeling veteran or a complete newcomer to the world of miniature wargaming, feel free to join in.
And in the meantime, stay tuned for the plethora of modeling content that we have still coming down the pipeline!
Tags: buildings conversion models painting terrainsprue tutorial
Terrain Tutorial: Blast Craters
Posted on Monday Apr 10, 2017 at 05:00pm in Tutorials
- by Iain Wilson
Last week, I went through some options for building a few different types of scatter terrain from components on the Maelstrom's Edge terrain sprue (if you missed it, you can find the article here). There is one other essential piece of scatter terrain that wasn't covered in that article, though: the humble blast crater.
Craters are a ubiquitous component of gaming tables from just about any genre (or at least any that deal with firearms of any kind) and along with those other staples of sci fi gaming - the soup-can storage tank and the spikey-polystyrene-ball cactus - you'll never be gifted the location of the secret lounge of the Terrain Builder's Guild if you don't have at least two or three in your terrain collection.
To get started, you'll want something round and flat to use as a base. Old CDs are perfect, as they're a good size without being too thick, and it saves them from going into landfill.
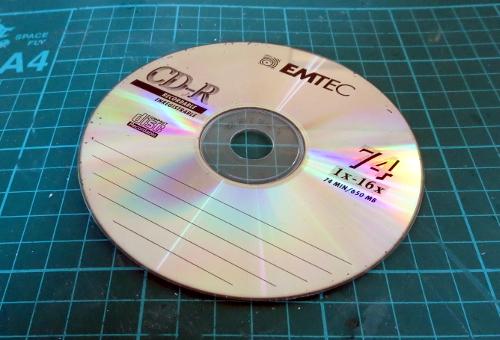
If you don't have any old CDs or DVDs kicking around, craftboard, cardboard or foamcore will also do the job, although cardboard or foamcore may bow slightly.
Take some air-drying clay (I'm using Jovi Air Dry Modeling Clay) and make a ring that's a little smaller in diameter than the base.
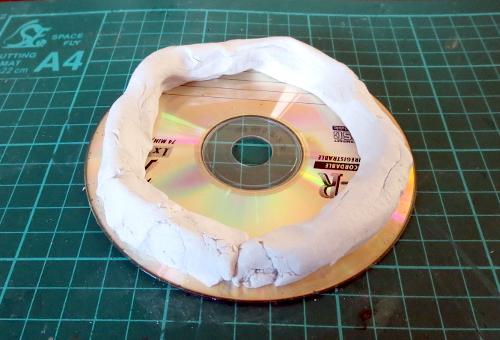
Smooth the clay down onto the base by pressing or rubbing it with your fingers, working around the ring on both the inside and outside and leaving a raised ridge. Don't make it too neat - you want a certain amount of irregularity to avoid the crater looking like a neatly-dug hole. There should be a steeper slope on the outside of the ridge than inside.
While the clay is still soft, add some chunky features. I'm using some leftover scraps from other terrain projects, from the Maelstrom's Edge terrain sprue. Just push them into the clay wherever seems appropriate. Longer pieces should be angled towards the outer edge, as if they've been pushed there by the explosion.
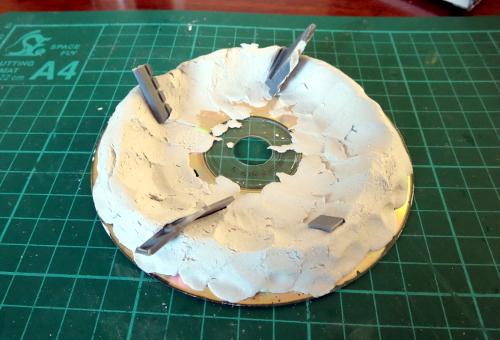
Air-drying clays aren't generally particularly adhesive, so the parts won't be held in there very firmly. The next step with stick them in place fairly comprehensively, but if you're concerned about them getting knocked around while you're working, you can add a little superglue on the part before pushing it into place.
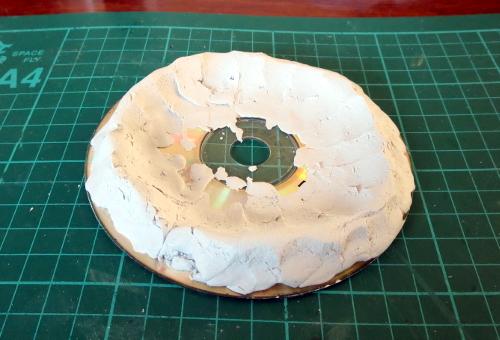
When the clay dries, it may contract a little and lift up around the edges. You can avoid that by pressing it back down periodically as it dries, but it's not really a big problem - Once the clay has set, you can just chip off any bits that are sticking up more than a couple of millimetres and ignore the rest. The edge will be obscured by the texturing that happens next.
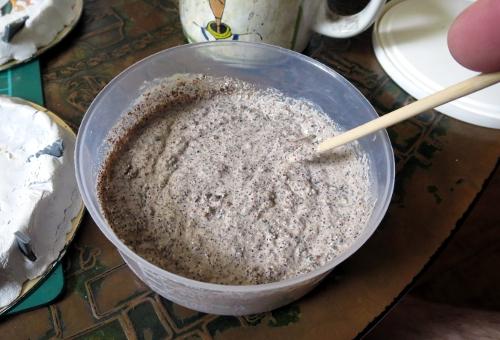
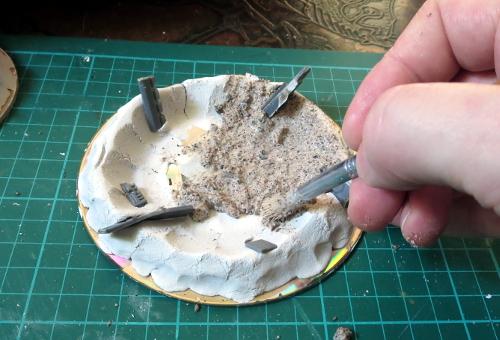
Take some coarse sand/fine gravel mix. I have a pot that has a mix of silversand, sandpit sand, small chips of slate, fine gravel and a little model railway ballast for good measure. You want a bit if a mix of textures for best effect, but if you don't have access to all of that just some regular sand with a little railway ballast or fine gravel mixed in will do just fine.
Into this, mix a generous dollop of PVA glue (also known as Elmer's glue or wood glue) and a little water. You want the mix to be thoroughly wet through, but not runny.
Using a large paintbrush that you're not emotionally attached to (because it's probably not coming back from this) spread a coat of the sand mix over the crater, starting from the middle and working up and over the ridge. That will naturally give you some radial detail running outwards from the blast area. You can accentuate that a little if you want by dragging a toothpick or wooden skewer gently outwards through the sand mix layer.
(If you haven't covered over the hole in the middle of the CD with clay, sticking on a small piece of masking tape before you apply the sand will take care of that.)
Don't worry if the detail looks a little soft at this point. As the glue dries, it will sink in and leave some nice, gritty texture.
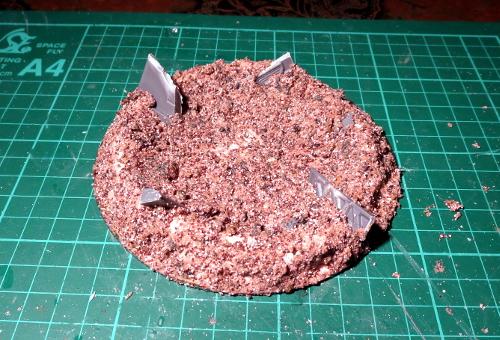
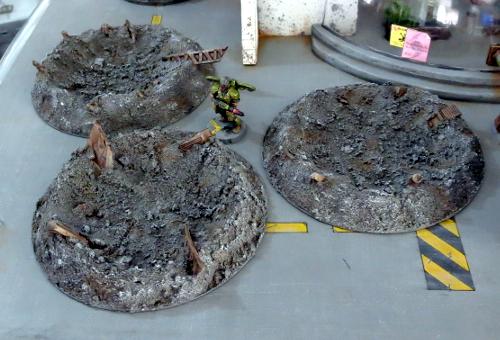
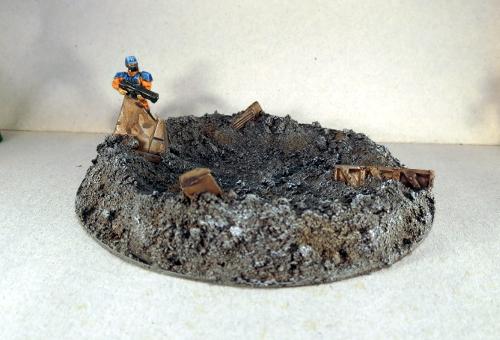
Once the sand layer has completely dried, paint up in some suitable colours to match your table. Here, I've used a grey spray undercoat, a coat of Army Painter Strong Tone, and then a drybrush of Vallejo Basalt Grey, Light Grey and white, to match my urban terrain. A little brown drybrushed around in patches helps dirty things up a little, and the terrain sprue parts are painted with Vallejo Beasty Brown, drybrushed with Citadel Boltgun and then washed with Army Painter Strong Tone.
For some variety, use a mix of different base sizes to create different craters.
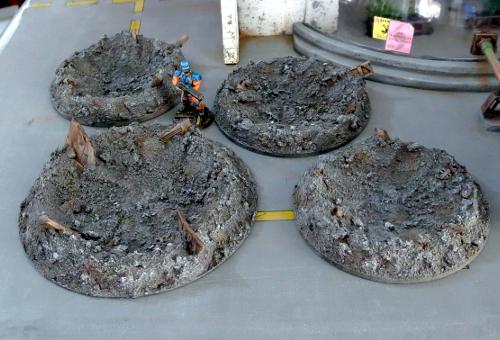
You can easily customise this basic design through using different sized bases, linking multiple craters together, or using larger or smaller rubble and terrain parts for detail.
And that's all there is to it! If you're feeling inspired, you can check out a bunch of other terrain-building articles by clicking here, or you can pick up the Maelstrom's Edge terrain sprue (in a handy 2-pack!) from the Maelstrom's Edge webstore here.
And as always, feel free to share your creations on the Comm Guild Facebook page!
Tags: terrain terrainsprue tutorial
Terrain Tutorial: Scatter Terrain
Posted on Monday Apr 03, 2017 at 05:00pm in Tutorials
- by Iain Wilson
The Maelstrom's Edge terrain sprue is a fantastic resource for detailing scifi buildings made from all sorts of things - You can find a bunch of different ideas and tutorials here. The terrain sprue components are also handy though for making smaller detail pieces to scatter around your gaming tables for a little extra cover. I have previously shared a tutorial for building small shipping containers from a couple of doors, some ladders and a little foamcore (you can find that tutorial here), and this week I thought I would run through a few more small scatter terrain ideas.
First up: Barricades
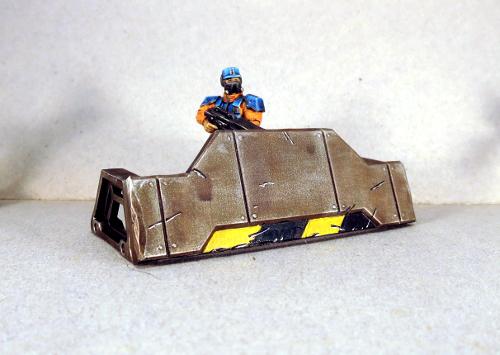
For this, you'll need one garage door, and two trapezoid windows.
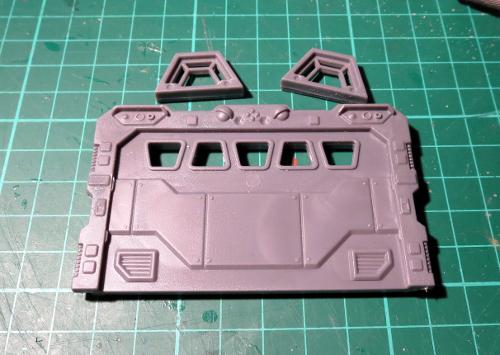
Start by removing the door from the door frame. You can do this with a jeweller's saw or razor saw, or by running around the inside of the frame with a sharp hobby knife from both sides until the door pops out.
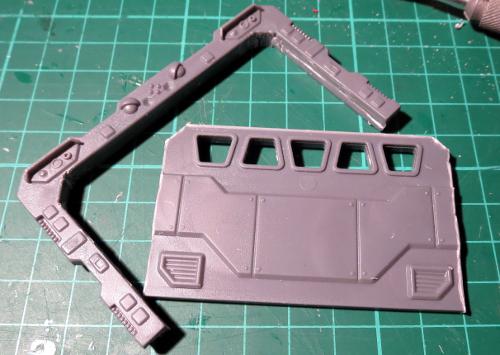
This gives you an open door frame that you can use on a building or ruin, and a handy detailed panel that can be cut up as below:
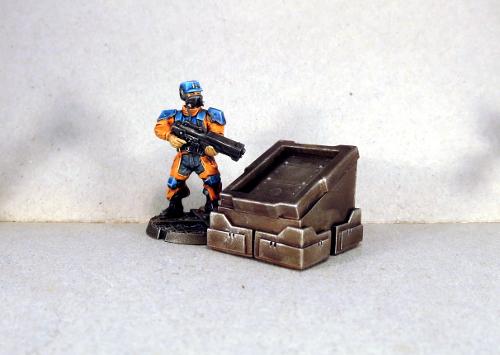
Throw the off-cuts into your bits box (they'll come in handy for a ruin or scrapheap down the track, and the strip of small windows is a nifty bit of detail for a building or other wall feature) and glue the trapezoid windows to the back of the lower section of the door.
Once the glue has set, you have some barriers just perfect for huddling behind and feeling all suppressed.
I've painted these up fairly plain, so that they will fit with whatever sort of table I throw them on. You can easily paint them to match your buildings, or paint on mis-matched panels for more of a ramshackle look.
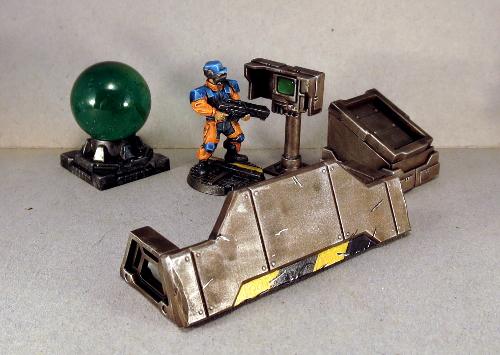
Next: The Orb!

I picture this device as a 3d map tank, so the ball on top would represent either a hologram or a glass ball with a projection inside.
You will need a square hatch, a large pipe fitting, and a suitable-size marble (the one I've used is around 25mm (1") diameter).
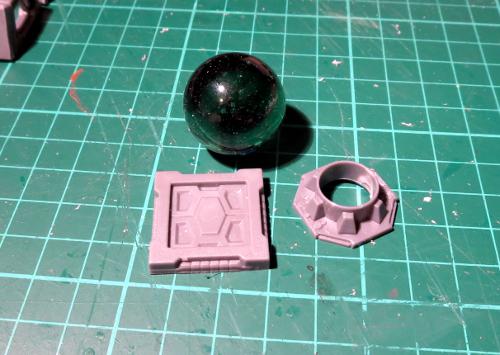
No cutting required on this one - Simply glue the pipe fitting to the top of the square hatch, and put the marble on top. If you hold off on gluing the marble in place until you have painted the base unit, you won't need to worry about cleaning stray paint splatters off the glass.
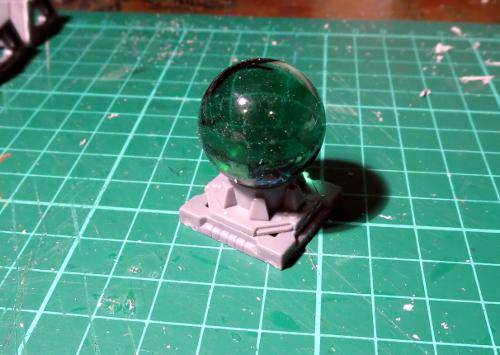
You could also paint the marble, or use a ball bearing or small plastic ball, to make it into a planetary globe sculpture or some other artistic installation.

Next: Public Comm Unit
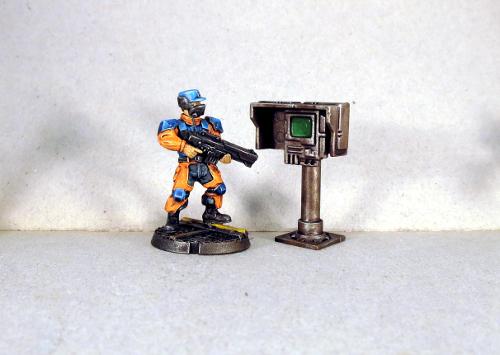
The little computer screen on the terrain sprue shows up all over the place on my terrain pieces. I picture it as a generic, multi-purpose unit that can be configured to display whatever information or controls are required for any given application. In this case, as a public access comm unit or data terminal.
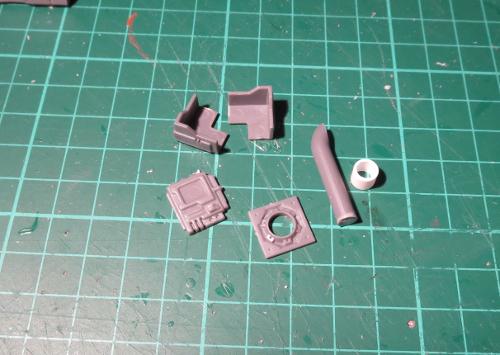
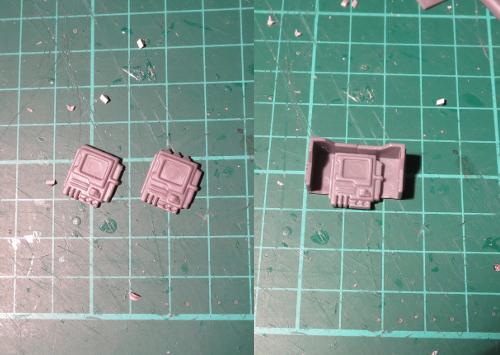
To build this, you need the small pipe fitting, two corner braces, a computer screen, and a 5mm-long piece of 6mm (1/4") plastic tube. You also need a piece of sprue from the terrain sprue - The sprue has a thicker half and a thinner half. From the thinner sprue, cut a piece around 25mm (1") from a corner, with the corner cut off flush with the length of the sprue piece. The end result is a length of plastic rod with a rounded end that has one flat face, as pictured below.
Take the screen and cut off the wedge-shaped protuberances running along the top. Then glue the corner braces together and the screen into the middle, inside the corners and butting up against the top, so that the corner braces form a shade around the screen.
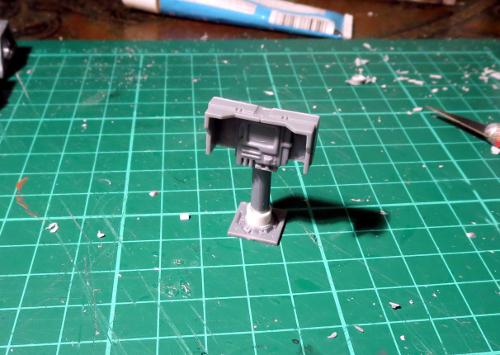
Then glue the plastic tube into the pipe fitting, and the sprue piece inside that, with the rounded end at the top. Make sure the flat face is parallel to one of the edge of the pipe fitting. Then glue the back of the screen to the flat face of the sprue piece.
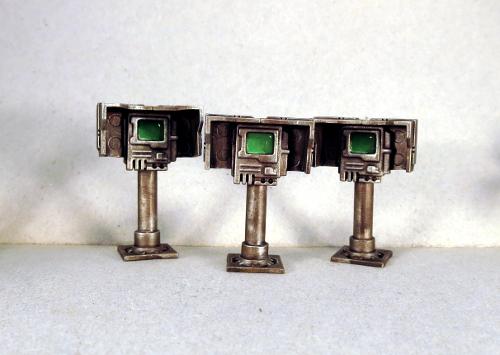
Once painted up, these can be glued onto your terrain pieces for a little extra detail. They also stand quite well on their own, or you could glue them to a base for a little extra stability, and then they can be scattered around as needed - they would make handy objective markers.
And finally: Thermal Vents
No self-respecting, quasi-military terraforming base is complete without some sort of underground installation. The problem with underground installations, though, is that they need some sort of ventilation shaft, otherwise nobody has any way to sneak in!
To build some suitable clandestine access, (or just some nice, blocky, solid cover for your solo models, depending on your point of view and the specific game objectives at hand) you will need a shutter window, four corner braces and some thin plasticard - I've used .5mm sheet here.
Take the shutter window and on the rear frame, cut or file down the top edge at around a 45-degree angle, as below, leaving the raised frame at the front intact.
Cut sections of plastcard to run around the window frame. The measurements I've used are below:
Rear section - 21mm wide x 20mm tall
Front section - 21mm wide x 9mm tall
Sides - 23mm wide x 20mm/9mm, to match the front and rear sections.
If you're using thicker or thinner plasticard, you will need to tweak the width of the front and rear sections by a matching amount. You can also change the angle of the window frame by making the side pieces longer or shorter.

Check your plasticard sections for fit, and then glue them in place around the window frame.

The corner braces are then glued around the base.

As with the barricades back at the start, you can paint these up to match whatever buildings you have, or put them in more generic colours to scatter around multiple tables.
That's the lot for this week - although it's just scratching the surface of what you can do with the terrain sprue components. If you like what you have seen here and want to try building some scatter pieces of your own, you can pick up the terrain sprue in a pack of two from the Maelstrom's Edge webstore here.
We love seeing what people create with the sprues, so as always, please feel free to share your work on the Comm Guild Facebook page!
