Entries tagged [spotlight]
Modeling Spotlight: Epirian Secdef
Posted on Monday Jul 09, 2018 at 05:00pm in Tutorials
- by Iain Wilson
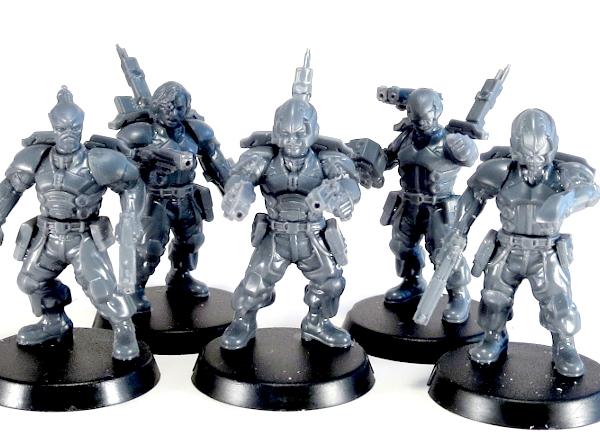
Last week saw the release of the awesome new plastic Secdef to bolster the Epirian battleline with some elite military muscle. If you missed it, you can see the release article here: https://www.facebook.com/maelstromsedge/posts/2244261785589396, and you can also find an assembly guide here: http://www.thecommguild.com/roller/thecommguild/entry/assembly-guide-epirian-secdef.
This week, I'd like to go through some quick and easy modeling ideas to tweak your models. Novice modelers, fear not - nothing here requires extensive conversion experience or special tools!
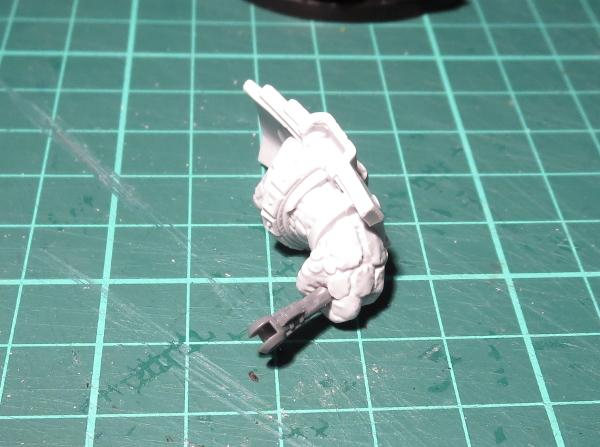
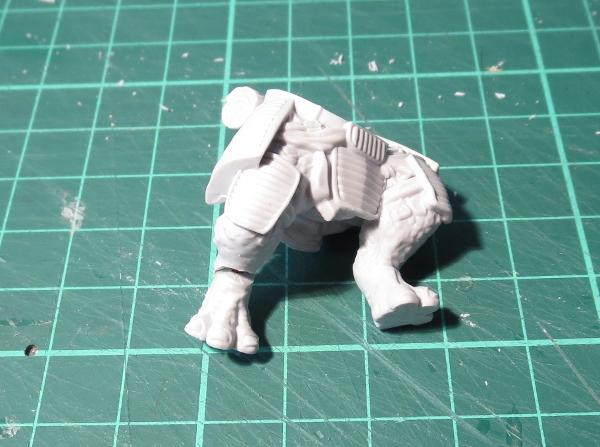
To (ahem) kick things off, you may have noticed in the assembly guide that the sprue comes with 3 sets of legs - one in a walking pose, and two slightly different standing poses.
The left and right legs from each pair have matching locator pins to help them go together neatly, and these are different sizes for each pair to help you keep them sorted during assembly. You can easily mix-and-match the pairs to create some variation in the posing, though - the smaller pins will fit into the larger locator slots, and for pairings where the locator pins don't fit in you can just cut them off with a sharp hobby knife and glue the hips together without them.
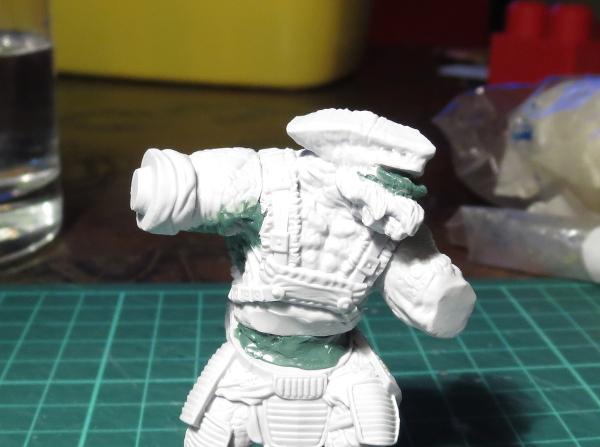
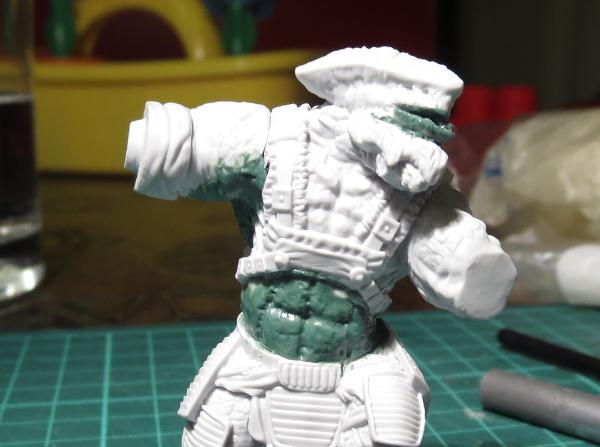
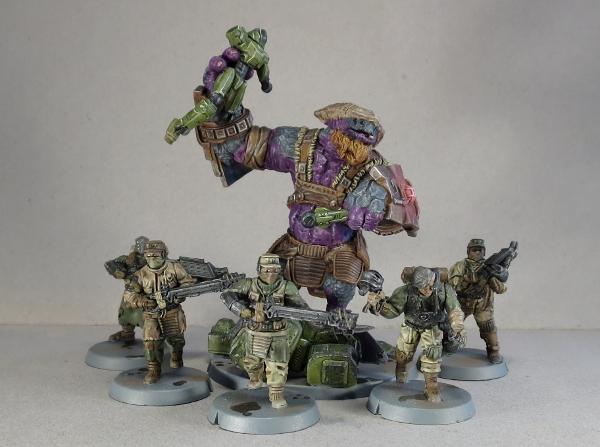
One of the ongoing design goals for the Maelstrom's Edge range has been for the various kits to be compatible wherever possible to enable parts swaps. This is particularly useful for increasing the pool of available heads for any unit, and the open-hand design that has been adopted for weapon arms likewise adds extra options for switching gear around. On the below models, some slightly more hi-tech than usual Contractors have been made by using Contractor heads and weapons on the Secdef bodies.
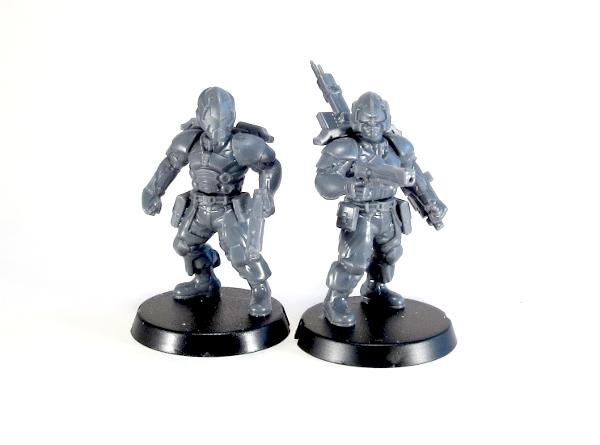
You can also use heads from the Broken Infantry sprue to add unhelmeted human heads or aliens to your Secdef's ranks.
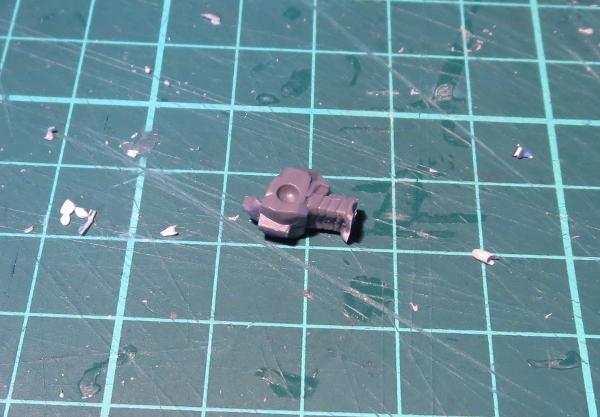
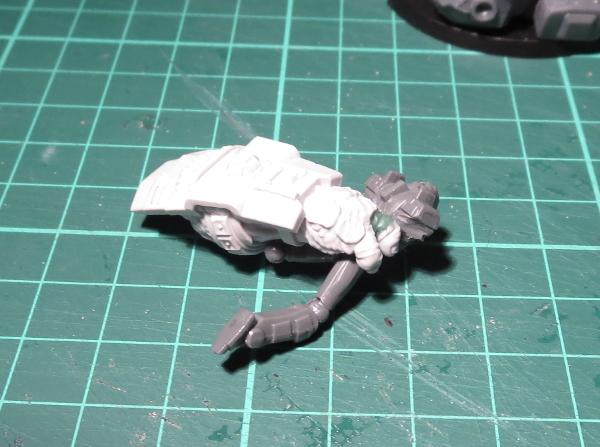
For an enclosed helmet option, you can use a spare head from the Epirian Bot Handler sprue.
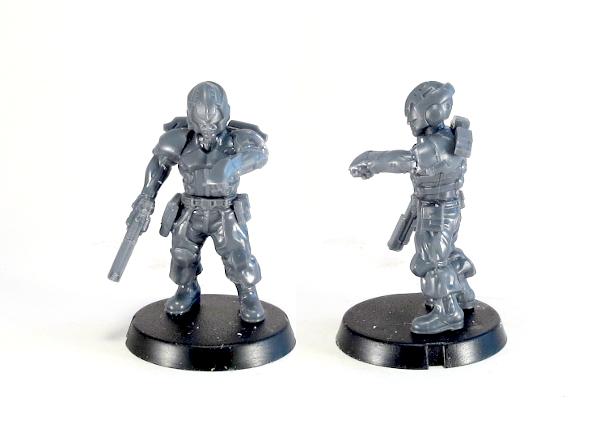
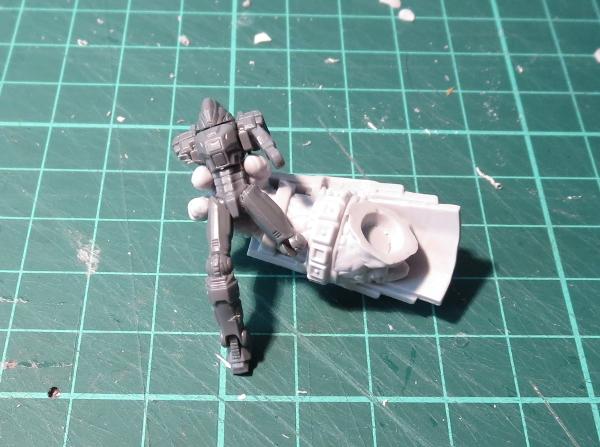
The left arm on the above model has also been modified, removing the pointing hand at the wrist and replacing it with one of the open-palm left hands that normally hold the Secdef heavy guns. The heavy weapon arms are also useful for putting on Sergeants to show tactical hand signals.
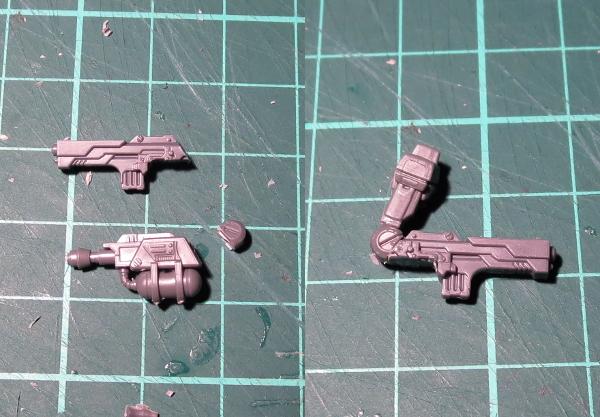
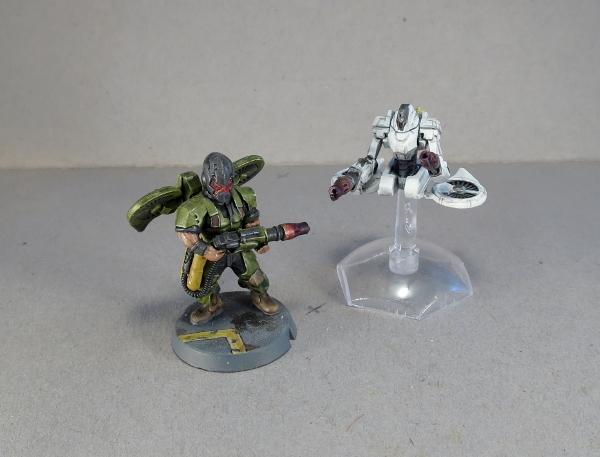
Secdef troopers are equipped with a G20 pistol along with their assault rifles, although this isn't included on the sprue. As with other pistol and grenade options that come as standard on various units, there's no specific need, rules-wise, to show these. If you do want to show the pistol, though, the G20 is a variant of the standard Epirian Guardian pistol, so you can use the pistols included on the Contractor sprue to represent them, as has been done on the 'Lieutenant' model below.
(Lieutenants aren't an official unit option currently, although a HQ unit for the Secdef is in the pipeline. I'll be working up an unofficial rules card for this guy to go in the Online Force Builder for those who might want to try out an all-Secdef force.)
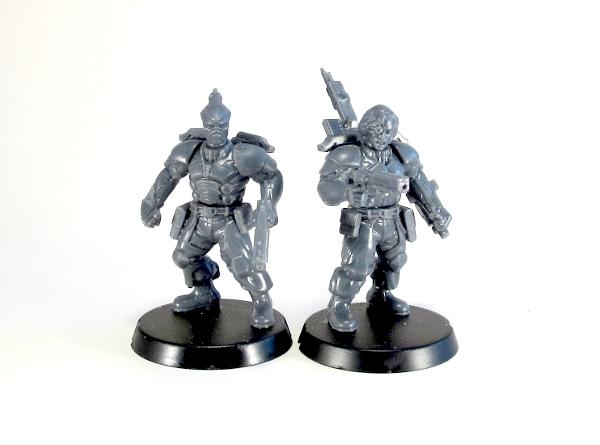
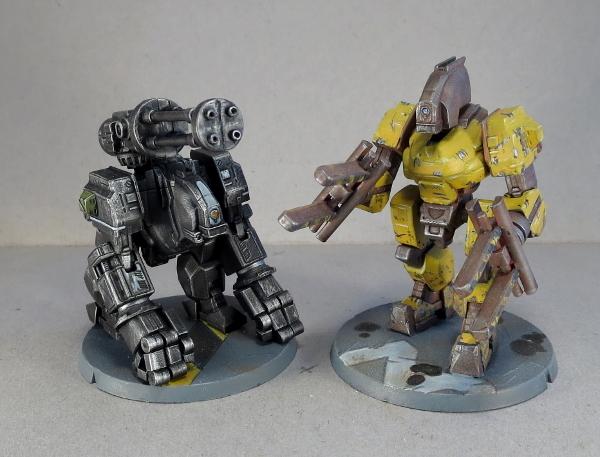
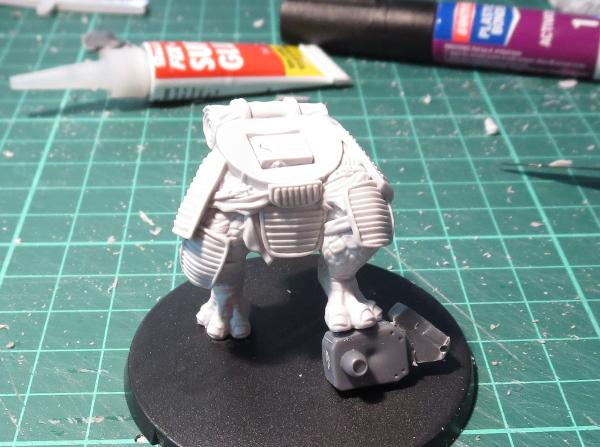
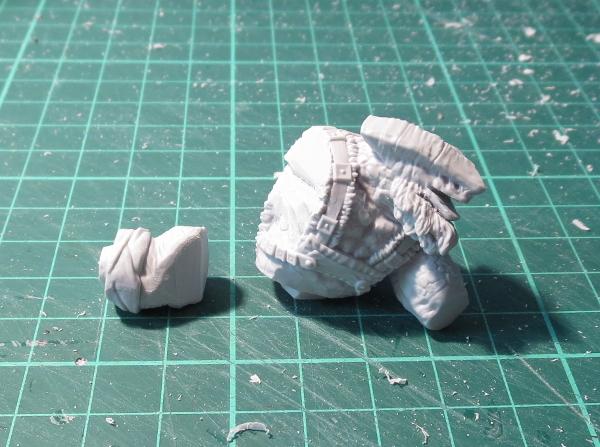
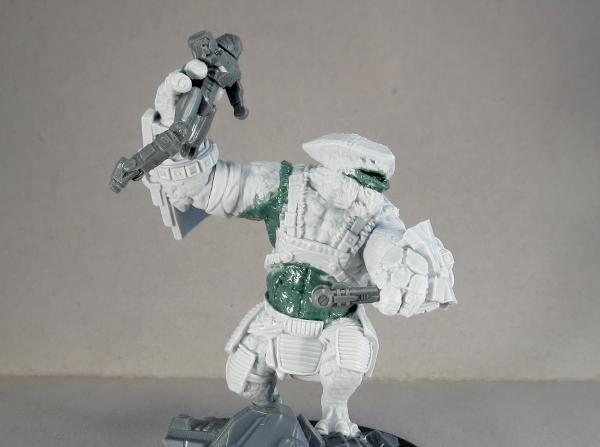
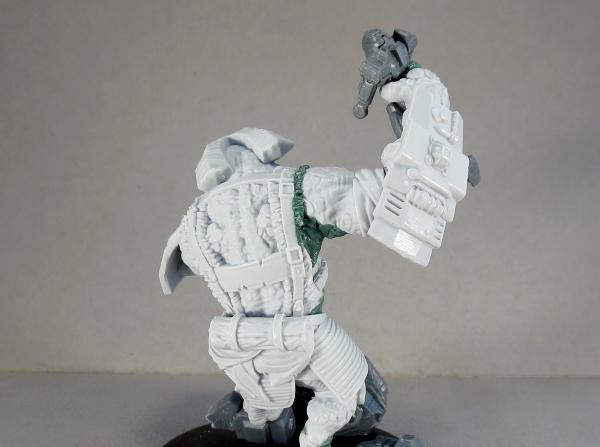
Finally for this week - While the designs are slightly different, the strength-boosting exoskeleton makes Secdef legs similar enough to the legs of the Master Bot Handler that you can make a walking Master Handler by simply swapping in the Secdef legs for the normal Master Handler legs, as below. I couldn't resist also taking the opportunity to replace this Master Handler's usual weapons with a modified pair of CG100 Chainguns taken from the Secdef sprue.
What have you done with your Secdef troopers? We would love to see your creations on the Comm Guild Facebook page!
To pick up the Secdef sprue, or any of the rest of the Maelstrom's Edge model range, visit the webstore here.
For other Maelstrom's Edge modeling articles, including tutorials and walkthroughs of a wide range of different building and miniature projects, check out the article roundup here.
Tags: conversion epirian modeling secdef spotlight
Terrain Spotlight: Sci-Fi Temple
Posted on Monday Jun 18, 2018 at 03:05pm in Tutorials
- by Iain Wilson
This week, I'm showcasing another terrain build, but for a change of pace I thought it would be fun to build something in a more unusual style.
I've been eyeing off the Japanese building range from Plast Craft Games for some time, and in particular a three-level temple that was just screaming to be turned into a table centrepiece. So I grabbed the temple from one of my regular go-to online stores, broke out some Maelstrom's Edge terrain sprues, and set to work!
The Plast Craft Games buildings are flat-packed, assemble-yourself-style constructs in a similar vein to the various MDF offerings out there, except that instead of MDF they're made from sheets of die-cut, foamed PVC. This material is somewhere in between styrofoam and plasticard in density, and is nice and easy to work with and surprisingly sturdy once assembled.
My plan was to not get too crazy with modifying the building, as I love the general design of it. It just needed some sci-fi-ing up to fit on my table. So with that in mind, I discarded the resin screen doors that come with the kit in favour of the single doors from the Maelstrom's Edge terrain sprue. The existing doorways on the temple were exactly the right height for the plastic doorframe, but a little wider, so I filled in the gaps on either side with strips of scrap sheet cut to size. Other than that, the bottom level was assembled as per the instructions.
Similar treatment was given to the second level, although this level only has doors in two walls instead of all four.
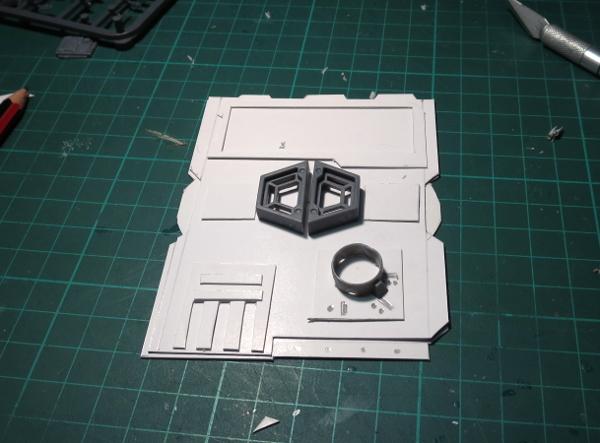
The top level has a smaller doorway in a single wall. Rather than cut out the door hole to fit another full-sized doorframe in there, I filled in the doorway with some leftover sheet bits and glued on the square hatch from the terrain sprue. I also replaced the spire on the roof peak with another square hatch.
The railings that came with the temple were a little low, and a little low-tech for my liking, so I replaced them with ladders from the terrain sprue. This required some fudging to make it work, as I discovered when I started gathering ladders that I had run out. Luckily, I was able to cobble together a few discarded cut sections to fill the last of the railing on the second level. It's a little rough if you look too closely, but I can always pass it off as a rushed repair job (those lowest-bid contractors at work!).
I wanted to do the bulk of the painting before adding the roof sections, as I figured that would be easier than trying to work around them. So the building was given a basecoat with black spray, and then a top-down spray with grey, leaving the black in the lower recesses for natural shading.
I then picked out all the metal parts with Citadel Leadbelcher, before giving them a wash with Army Painter Dark Tone.
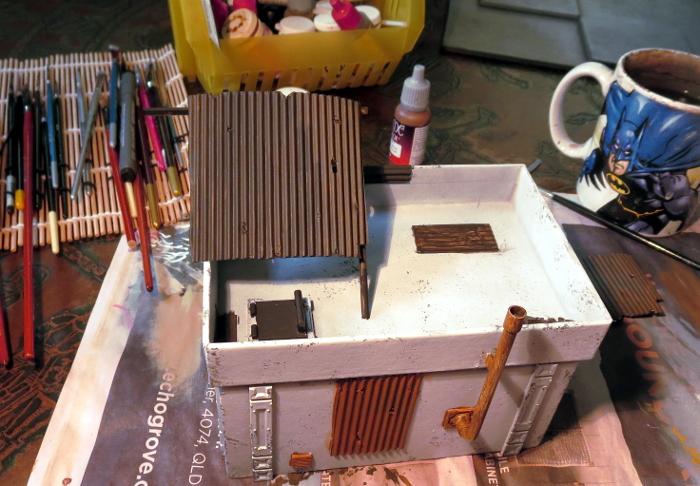
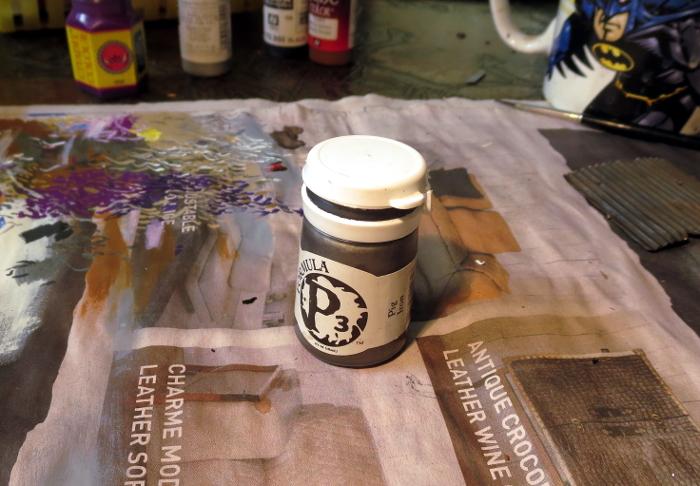
The balcony levels were painted with Vallejo Neutral Grey and drybrushed with Vallejo Light Grey, and the wall panels were basecoated with Vallejo Heavy Brown and drybrushed with P3 Jack Bone. At which point, it was time to add the roof sections.
I'm not sure if it was my slightly rushed assembly, or a flaw in the temple kit, but I found that the roof sections for the two lower levels were actually too short to reach the corner beams. Luckily, I had some corrugated cardboard that matched the card used for the roof almost exactly. Cut to size and with tile-grooves added by 'scoring' across the corrugations lightly with a sculpting tool, they were a close enough match to hold up to all but the closest scrutiny.
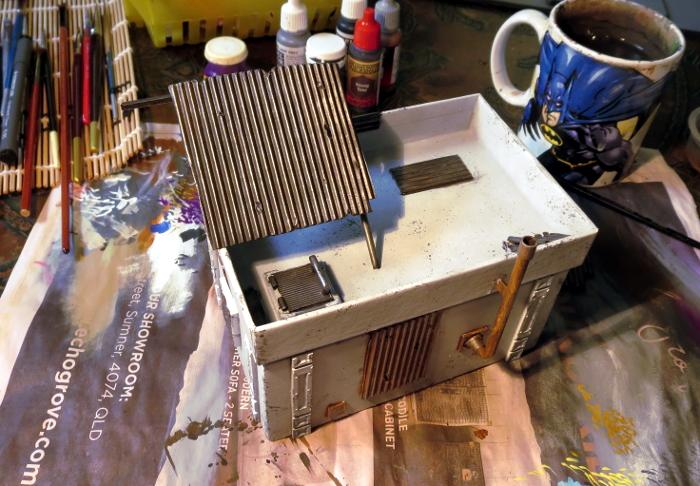
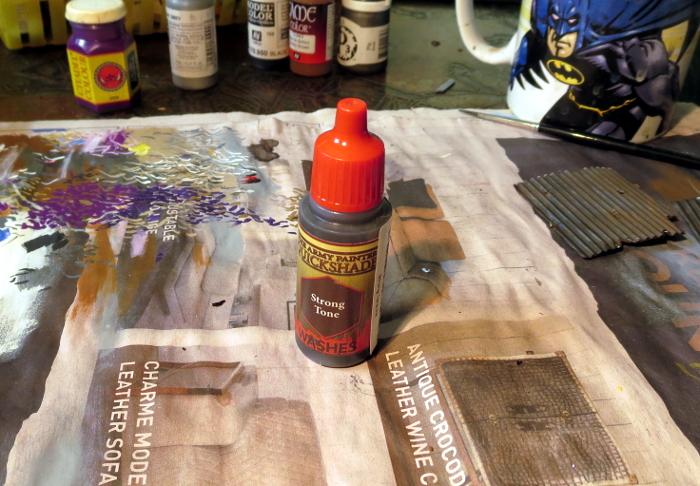
My improvised roof sections were painted black before gluing in place, and then all of the roof pieces were drybrushed with Leadbelcher and washed with Dark Tone. Finally, I picked out the lights above the doors with a drybrush of Citadel Ultramarine Blue, Ice Blue and then white, and added a masonite base sprayed with grey and white for a quick concrete effect. If I have time later, I may go back and replace this with a tiled slab to pretty things up some more.
The finished building:
To pick up the Maelstrom's Edge terrain sprue, or any of the rest of the Maelstrom's Edge model range, visit the webstore here.
For other Maelstrom's Edge modeling articles, including tutorials and walkthroughs of a wide range of different building and miniature projects, check out the article roundup here, or for help or advice, or just to share your work, feel free to visit the Comm Guild Facebook page!
Tags: buildings modeling spotlight terrain terrainsprue walkthrough
Terrain Spotlight: Cardboard Gift Box Ruin
Posted on Monday Jun 11, 2018 at 05:00pm in Tutorials
- by Iain Wilson
If you've been following my hobby articles for any length of time, you may have noticed that I'm rather fond of using cardboard gift boxes to make buildings (If you're new here, you can see examples here, here, or here). But while intact buildings are all well and good, a balanced battlefield should include a mix of line of sight blocking terrain and area terrain, and so this week I'm breaking out the old gift boxes and the Maelstrom's Edge terrain sprue for some good, old-fashioned ruins.
The structure for this build comes from two cardboard gift boxes, bought from a local discount store.
The lids were flipped over to create a walled roof, and I removed a corner of the smaller box with a sharp hobby knife so that it nestled in neatly against the larger box.
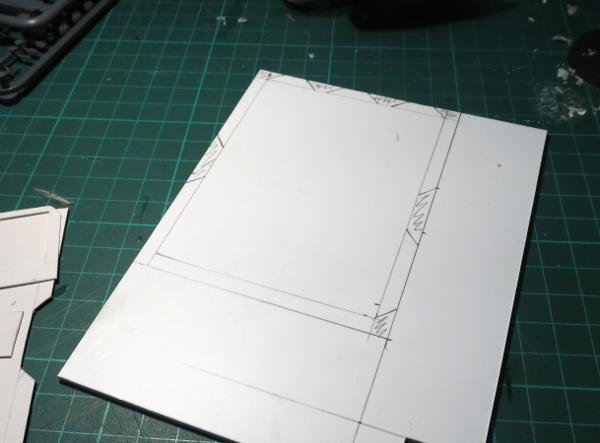
I used a door and a shutter window from the terrain sprue to mark out positions for doors and windows, by sitting them in place and tracing around them with a pencil.
Then I used the hobby knife to cut the door and window holes out, and marked out a rough plan for the building damage - the line around the building shows where the walls would be cut down, leaving more raised areas on corners, where the structure would be stronger.
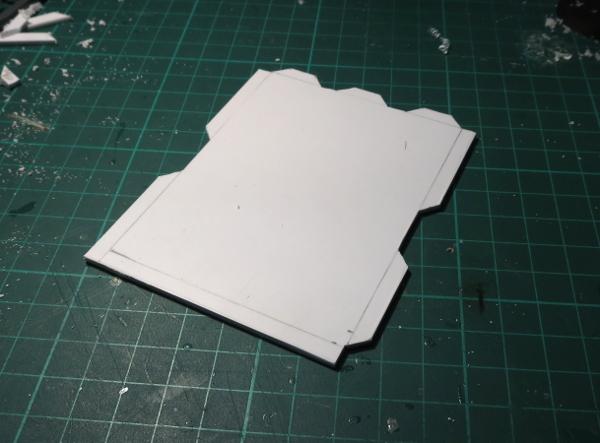
The hobby knife was put to use again, as I cut along the ruin line all the way around the building.
Once done, the cardboard structure went together like this:
As a handy side-effect, the pieces removed from the tops of the walls can be saved and used to create other ruins later...
Because the ruin line wound up around the bottom of all of the window frames, I just left them bare. For the doorways, though, I chopped the door panel out from the surrounding doorframe, and cut the frame into shorter pieces to match the height of the ruined walls.
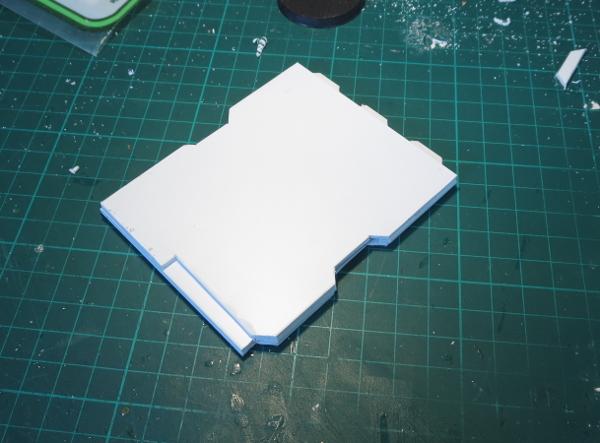
The doorframe pieces were then glued in place, and I also added some support struts on the corners of the walls, also suitably cut down to height and with the cut ends messed up a little with some clippers to simulate explosive damage. With these all in place, I glued the whole building structure to a base board of masonite.
If you're just after a quick and easy ruin, this is the point where you can call the job a good'un and go and slap some paint onto it. For some extra detailing, though, I chose to glue some chopped up card from the gift boxes and some leftovers from the cut terrain sprue bits around the building, and then using a generous amount of PVA glue added some gravel and sand.
After leaving the glue to dry, it was time for paint!
I started with a basecoat of grey spray, and then a light spray with white around the walls and the bigger rubble patches.
The exposed sections of the baseboard and the building floors was then re-based in Vallejo Neutral Grey, and then drybrushed with Vallejo Light Grey.
Everything was then dirtied up with some Neutral Grey sponge-weathering and spots of drybrushed Vallejo Beasty Brown.
I added a couple of extra details for colour - the number on the roof railing by dabbing through a number stencil with a large brush and some red paint, and a little graffiti on the back wall painted with yellow and some blue ink straight over the grey wall to give it a faded appearance.
The final step was a quick blast of black spray into the interior of the building to create some contrast.
And that's it - one ruin, ready for the table!
If you're keen to try this for yourself, you can pick up the giftboxes from gift stores all over the place, or online with a quick Google search, and the Maelstrom's Edge terrain sprue along with the rest of the Maelstrom's Edge model range from the webstore here.
For other Maelstrom's Edge modeling articles, including tutorials and walkthroughs of a wide range of different building and miniature projects, check out the article roundup here, or for help or advice, or just to share your work, feel free to visit the Comm Guild Facebook page!
Tags: building modeling spotlight terrain terrainsprue tutorial walkthrough
Modeling Spotlight: Converted Gnolti Longhorn
Posted on Monday Jun 04, 2018 at 05:00pm in Tutorials
- by Iain Wilson
Slow to anger, but difficult to put down once roused, Gnolti form an implacable, craggy backbone of the Broken forces. As awesome as a regular Gnotli is, I thought it might be interesting to explore the different ways that being forced into warfare might affect different Gnolti. I thought it might be likely that younger, more headstrong Gnolti would be more ready to turn to anger, while older, experienced veterans would be more prone to careful consideration and strategy. With the seeds planted, I grabbed some putty and a few extra bits and pieces, and the Gnolti Longhorn was born!
Obviously, the core of this model is the fantastic, resin Gnolti model.
To make him stand out a little, I wanted some suitably scavenged-looking armour, although this would be more for decoration than anything, given the Gnolti's craggy hide. So I grabbed the front half of an Epirian Hunter Mech torso and removed the lower section.
With some battle damage and careful trimming added with a hobby knife, the torso front fit nicely on over the right shoulder.
To create the eponymous 'longhorns', I drilled into the ends of the horns, and glued in some curled lengths of steel wire.
I reshaped the locator pin on the bottom of the torso a little so that I could twist the torso slightly to the side. Then I heated the right leg in hot water and bent back slightly, allowing the legs to be posed on a low piece of rubble.
The Longhorn was going to lack the shield generators worn by regular Gnolti, but removing the forearm shields completely would have required considerable resculpting of the arms, so instead I removed all of the tech details and added a bunch of battle damage, turning them into ordinary, garden variety bracers.
To allow the left arm to be angled closer in to the torso to rest it on the left knee, I hollowed out the elbow joint with a hobby knife, and slightly reshaped the elbow end of the upper arm.
At this point, it was time to break out the putty. The horns received an initial bulking-out layer.
Once this was set, I added additional putty and smoothed it into the horn shape, and then added striations to match the existing horn sections using a silicon clay shaper.
Rather than worrying too much about getting the horns identical lengths, I made one shorter and squared off the end, to make it look like it had been broken off.
The right hand needed repositioning to hold the gun properly, so I sliced through the wrist with a razor saw, and reattached it at a better angle. The gun itself was borrowed from a Mantic Veer-min Nightmare, with some grips added from plastic tube. I'm picturing this as a Chem Cannon, but haven't fully settled on rules yet.
After final assembly and some minor gap-filling here and there, the Longhorn looked something like this:
Painting was very similar to my previous Gnolti conversion, although I went for a slightly more stark highlight on the scales and a white/grey beard to help convey his veteran status.
The skin is Citadel Liche Purple, drybrushed with P3 Jack Bone and then washed with Army Painter Purple Tone. Scales were painted with Vallejo Neutral Grey, washed with Army Painter Dark Tone and then given a careful drybrush of white.
The harness, cloth and leather armour plates were painted with various shades of brown and washed with Army Painter Strong Tone, and the metal armour was painted with Vallejo Beasty Brown, drybrushed with P3 Pig Iron, washed with Strong Tone and then given a drybrush of Army Painter silver. The darker tone on the weapon was from a black basecoat, a heavy drybrush of Pig Iron and then two coats of Dark Tone.
With basing in my standard Urban theme, Grampa Gnolti was ready for the table.
The other end of the spectrum is, of course, the young, impetuous (relatively speaking) Gnolti. Stay tuned!
What have you done with your Gnolti? We would love to see your creations on the Comm Guild Facebook page!
To pick up the Gnolti kit, or any of the rest of the Maelstrom's Edge model range, visit the webstore here.
For other Maelstrom's Edge modeling articles, including tutorials and walkthroughs of a wide range of different building and miniature projects, check out the article roundup here.
Tags: broken conversion gnolti modeling spotlight tutorial walkthrough
Terrain Spotlight: Knights of Dice Desert Residence meets the Maelstrom's Edge Terrain Sprue!
Posted on Monday May 28, 2018 at 05:00pm in Tutorials
- by Iain Wilson
A few weeks ago, I showcased a dice tower made from a Knights of Dice MDF blank and some bits from the Maelstrom's Edge terrain sprue. This week, I'm giving a similar treatment to a desert building from the KoD 'Tabula Rasa' range.
The Tabula Rasa terrain range is specifically designed to be fairly basic, both as a cost-effective way of filling your table and to serve as a base for people to add their own detail... which obviously makes these buildings a perfect match for the Maelstrom's Edge terrain sprue!
The building I've started with is the 'Desert Residence 1', which when assembled straight out of the pack looks something like this:
Before gluing the building together, there were a few modifications to make. To begins with, the doorways are a little small for the Maelstrom's Edge doors to fit in. So I sat the door over the doorway, traced around it with a pencil and then carefully cut the resultant enlarged doorway out with a sharp exacto knife. MDF cuts fairly easily, so this isn't too onerous, but if you would rather avoid it you could alternatively build a boxwork around the door, as I did on my watch tower) and just glue it over the existing doorway.
There are two differently-sized windows scattered around the building. The larger of them, like the doorways, is a little small for the shuttered windows from the terrain sprue, so I repeated the door process, using the top corner of the window hole to line up the plastic part, and then tracing and cutting a larger hole. Again, if you would prefer to avoid cutting MDF, the shutter windows work quite well just glued straight to the wall.
For the smaller window holes, I covered over two of them using the cast-off MDF pieces from the larger windows, and to this I attached part of the energy fence pylon from the terrain sprue to make some sort of mechanical gubbin (I have to admit, it looks a little like a high-tech toilet cystern to me).
For the third small window, I took the large pipe fitting from the terrain sprue, and glued a small circle of plastic mesh into the back of it. This was then glued over the window hole to make a covered vent.
As a nice little touch, all of the Knights of Dice kits come with a little crowbar-sort-of-thing in the top corner of the MDF sheet, which can be used for prying parts out for assembly, or pulling removable roofs off. With a little bit of trimming up, they also serve quite well as upright bars for attaching ladders. I trimmed the ladder from the terrain sprue off so that it was short enough to work on either of the two building sections - the hooks on the top allow it to be hung from any free stretch of roof railing without needing to glue it in place.
With the leftover piece of ladder and a couple of MDF cast-offs, I made a smaller access ladder to hang between the roof sections.
The final touch was to add some support strut sections from the terrain sprue to cover over the joint holes where the roof supports attach to the walls. I could also have removed the other joint gaps by filling with some filling plaster or putty and sanding it down smooth, but I actually like the wall joints for creating a pre-fabricated slab-assembly look.
With some paint and weathering, the final building winds up looking like this:
Some Karist troopers, taking up station:
To tech up some buildings of your own, you can pick up the Maelstrom's Edge terrain sprue, or any of the rest of the Maelstrom's Edge model range, from the webstore here. As always, be sure to share to see your creations, or pop in with any hobby questions to the Comm Guild Facebook page!
For other Maelstrom's Edge modeling articles, including tutorials and walkthroughs of a wide range of different building and miniature projects, check out the article roundup here.
Tags: building modeling spotlight terrain terrainsprue tutorial walkthrough
Modeling Spotlight: Epirian Bot Handlers
Posted on Monday Apr 23, 2018 at 05:00pm in Models
- by Iain Wilson
Bot Handlers serve as unit and force commanders amongst many Epirian forces, with their neural interfaces allowing them unparalleled access to tactical information and the ability to control bots at a distance. The Maelstrom's Edge Bot Handler sprue comes with parts to build two Bot Handlers, and this week we're having a bit of a look at just what you can do with them.
There are two different types of Bot Handlers in the game at the moment - The Apprentice Bot Handler, and the Journeyman Bot Handler. Apprentice Handlers lead units of Spider Drones in battle, while the more experienced Journeyman Handlers serve as low-level army commanders. These serve below the Master Handler, who will be added to the range soon with a new model and rules card.
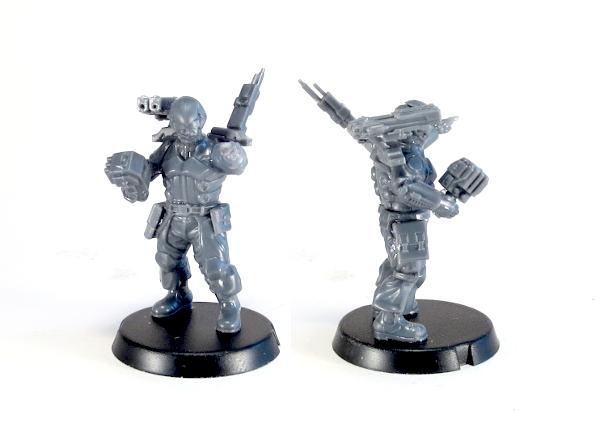
Apprentice Handler (left) and Journeyman Handler (right).
The Apprentice Handler is equipped with a Maglock Dominator Pistol (a more powerful version of the Maglock Guardian Pistol used by Epirian Contractors) and uses a Tactile Bot Interface on one arm to interface with the bots under his direct control.
Apprentice Handler. The left arm has been slightly converted to look like he is motioning with the tactile interface gauntlet.
The Journeyman replaces the tactile interface with a more sofisticated Neural Interface, which frees up his hand to take a second pistol, or a forearm mounted grenade launcher.

Journeyman Bot Handlers (right).
Thanks to the modular nature of the Maelstrom's Edge kits, making small modifications to your models to personalise them a little is extremely easy. The standard Handler helmets can be swapped out for heads from other Epirian kits, or even from other factions.
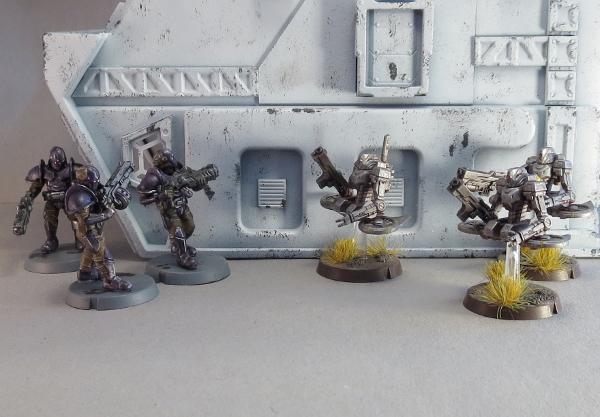
Bot Handlers with heads from the Broken Infantry Pack.
Journeyman Handler with arms taken from the Broken Infantry Pack and the more streamlined helmet from the Faction Expansion Sprue.
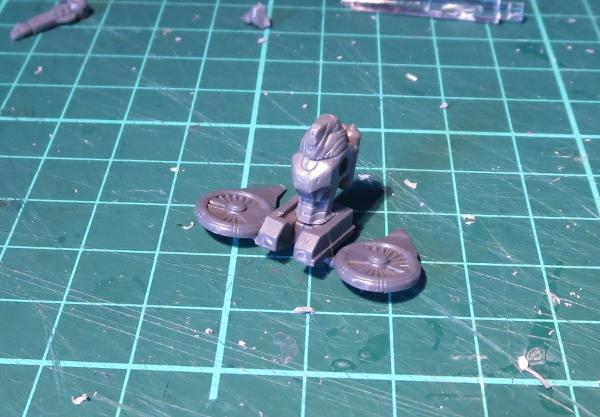
Getting slightly more advanced, the below model was given a new pose by cutting two sets of legs apart at the groin and swapping halves to create a wide-legged, braced stance. A visor was added over a regular Contractor head with 'green stuff' putty, and the dual pistols were built onto a mini-drone made from a Firefly Drone turbine.

Converted Journeyman Bot Handler.
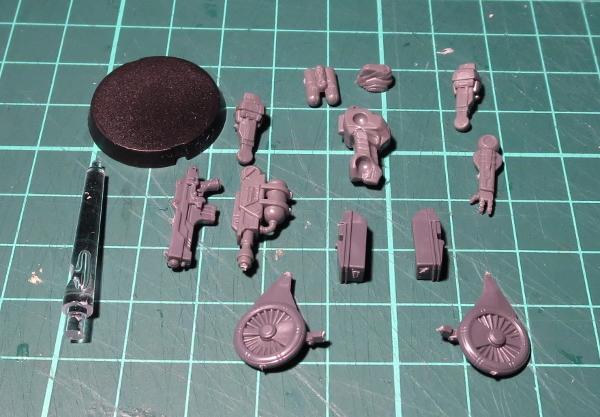
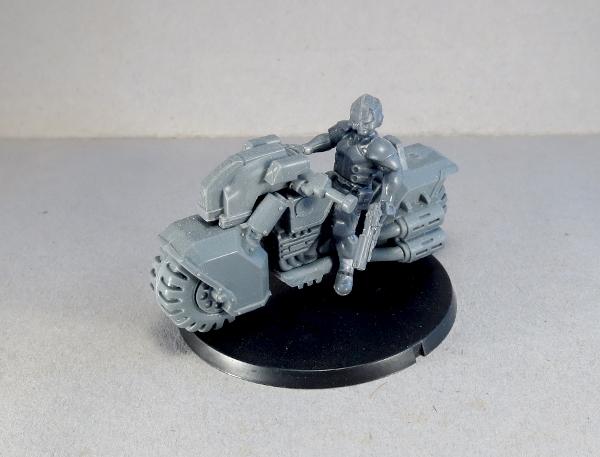
Or for something more outside the box, this Handler was reposed slightly by bending the legs outwards and replacing the right hand with an open Karist hand from the Faction Expansion Sprue, and was given a Drone Bike made from an Epirian Drone chassis and a Games Workshop bike.
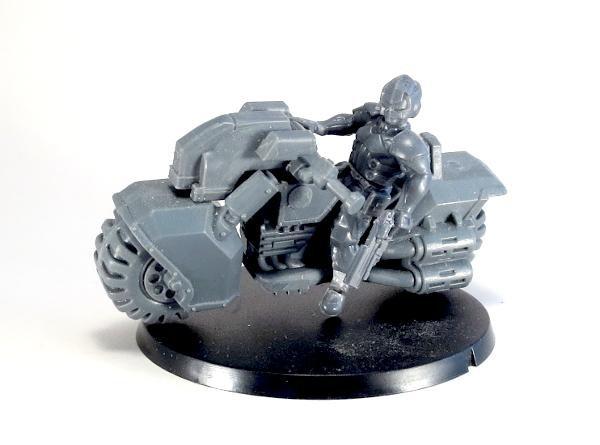
Born to ride.
To pick up the Epirian Bot Handler kit, or any of the rest of the Maelstrom's Edge model range, visit the webstore here. As always, we would love to see your creations on the Comm Guild Facebook page!
For other Maelstrom's Edge modeling articles, including tutorials and walkthroughs of a wide range of different building and miniature projects, check out the article roundup here.
Epirian Sentinel Bot Conversion Tutorial & Unit Card
Posted on Monday Apr 09, 2018 at 05:00pm in Tutorials
- by Iain Wilson
The Epirian faction in Maelstrom's Edge includes a number of fantastic robot options, and with some careful planning it's even possible to field an all-robot force. I went for an almost all-robot force with my starter force, including a lone Journeyman to lead them. I thought it might be fun to add some robot 'not-contractors' to the army for some extra firepower, and so turned to a conversion that I put together for a spotlight on the Scarecrow kit some time ago, which I dubbed a Sentinel bot.
The Sentinel uses parts from the Scarecrow, Drone and Contractor kits.
From the Scarecrow:
- Head
- Torso
- Left Arm
- Left Shoulder
- Right Shoulder
- Fuel Tanks
- Chemtech Sprayer
- Base
From the Drone kit:
- Turbines
- Turbine-mount side pieces
- Flight Stem
From the Contractor kit:
- Maglock Assault Rifle
Start by gluing the two Drone side pieces together and attaching the turbines, as below. There is a small ridge of plastic on the inside faces of the side pieces that needs to be shaved or filed down so that they sit flat against each other. A couple of pieces of spare sprue serve nicely to hold the turbines in place while the glue sets.

Take the Scarecrow torso and cut through it just below the top of the hips.
The torso then glues neatly into the middle cavity created by the two side pieces.
The left arm is assembled as normal. For the right, cut the pistol grip off the maglock rifle, and also cut the back of the rifle at an angle matching the ridge along the top, as shown below. The take the chemtech sprayer and cut the elbow joint off the back. This is glued onto the back of the maglock rifle, and then the weapon be glued to the upper arm.
To keep the unit with a similar silhouette to the contractors they are replacing, take the flight stem and cut it a little above halfway up.
This is then glued to the middle of the base. You will need to drill a corresponding hole in the bottom of the turbine assembly for the peg on the top of the flight stem.
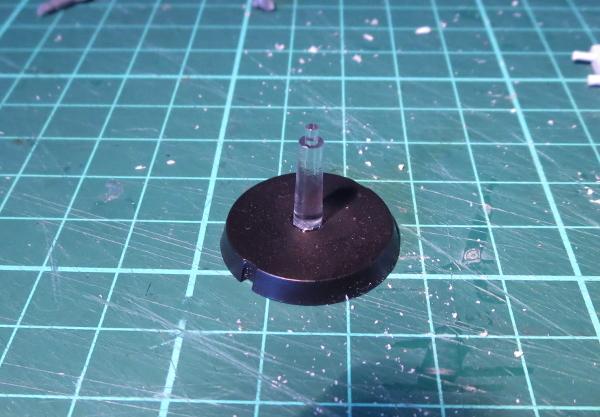
With head, tanks and arms glued in place, the bot can be glued onto the flight stem (or left separate if you're planning on spraying a basecoat, or just if you're a messy painter!) ready for paint.

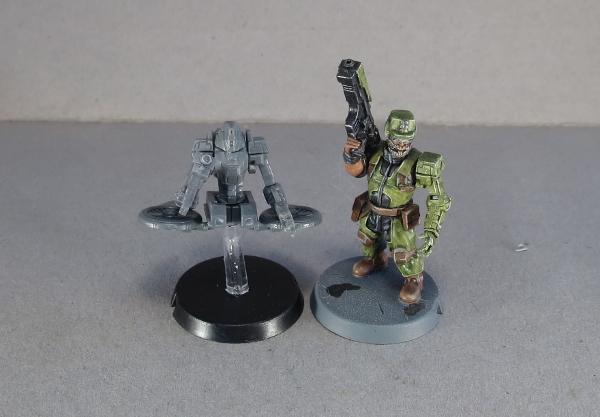
Scale shot with a Contractor:
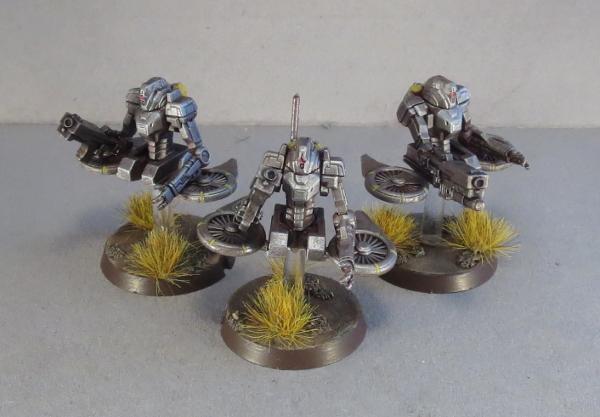
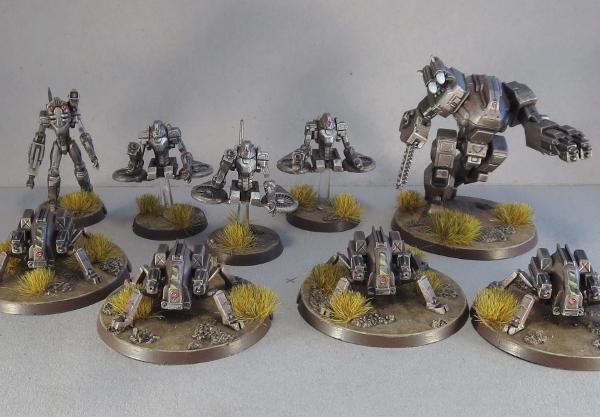
Painted up, the Sentinels are ready to take to the field. I have added a command unit to one model to create a unit leader, and equipped the third with the auxilliary grenade launcher version of the Maglock Rifle.
You can find an (unofficial) rules card for fielding Sentinel units in the Force Builder section of the Maelstrom's Edge website here. Alternatively, you could just field them as Contractors.
To pick up kits you'll need to create your own Sentinel unit, visit the Maelstrom's Edge webstore here.
We love to see what people are doing with their models, so be sure to also visit the Comm Guild Facebook page!
For other Maelstrom's Edge modeling articles, including tutorials and walkthroughs of a wide range of different building and miniature projects, check out the article roundup here.
Modeling Spotlight: Epirian Light Carrier Drone
Posted on Monday Mar 12, 2018 at 05:00pm in Tutorials
- by Iain Wilson
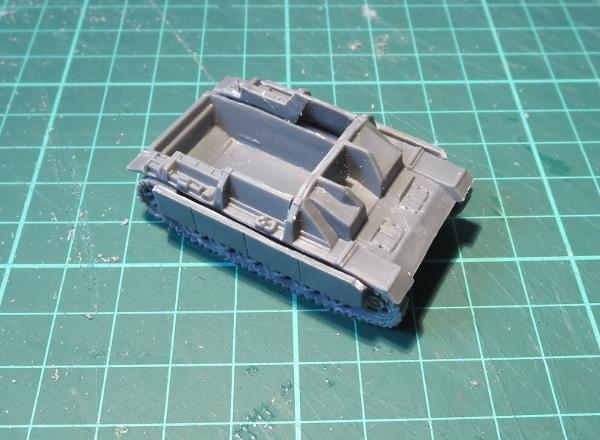
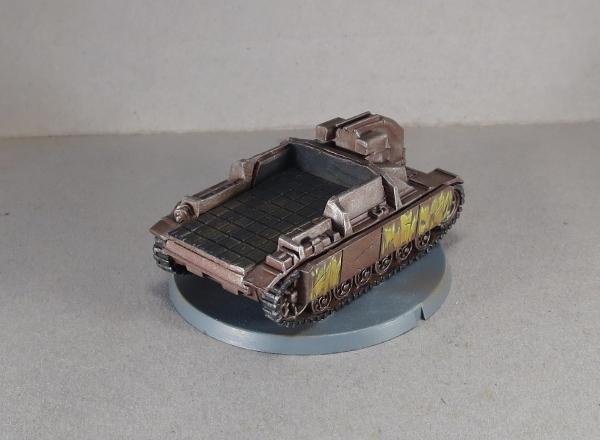
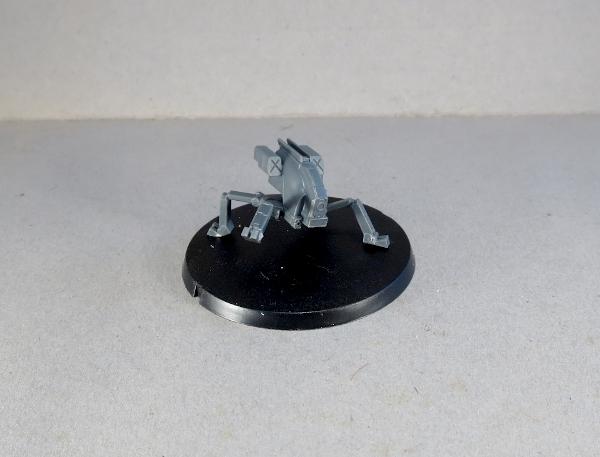
A few weeks ago, I published a spotlight article on the Epirian Drone, showing a few different ways the kit can be assembled or converted. One of the conversions shown was a Light Carrier Drone, made up from a drone chassis and the hull of a 15mm plastic tank from Flames of War, that I think came out of an Adepticon swag bag. This week, I'm going to run through how it was made, using the tank (I think it's some kind of Stug, but I'm no tank expert and so it didn't really matter beyond looking perfect for what I wanted to do) and the chassis piece from an Epirian Drone.
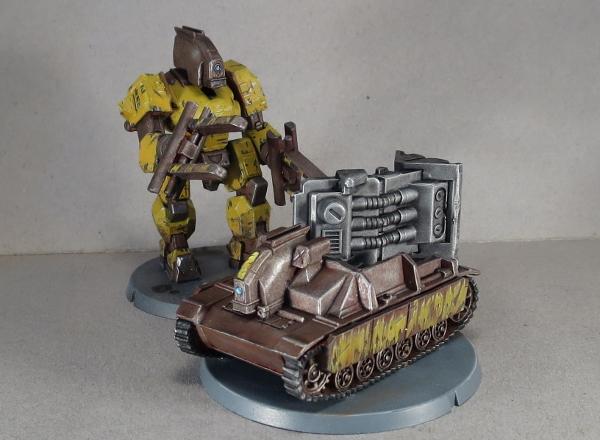
Like the bipedal 'Mule' cargo drone shown above (for which you can find an assembly article here) there are no rules for using this drone in the game - it will most likely just be used to add some flavour to the table. But I find that sometimes venturing off the beaten track and building something different just for the fun of it can really help to keep the creative juices churning over.
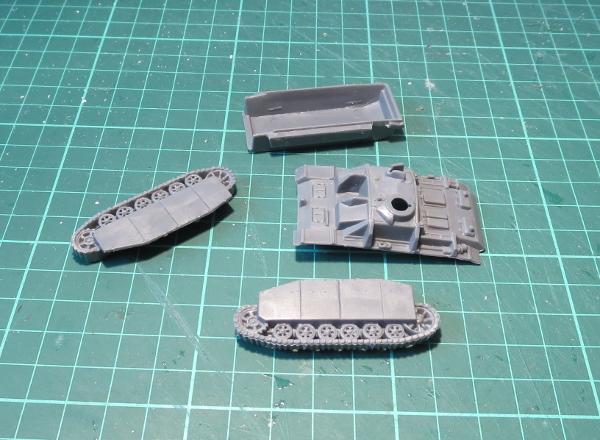
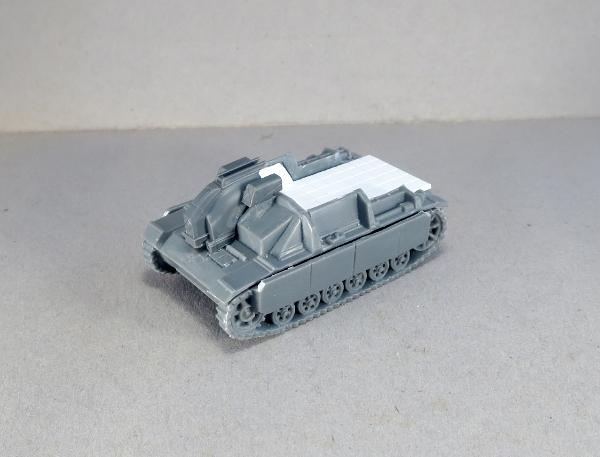
SO, I started by grabbing the main assembly parts of the tank - top and bottom of the hull, and the two track pieces.
I used a razor saw to cut most of the top of the hull away, leaving just the gun mount and the front armour.
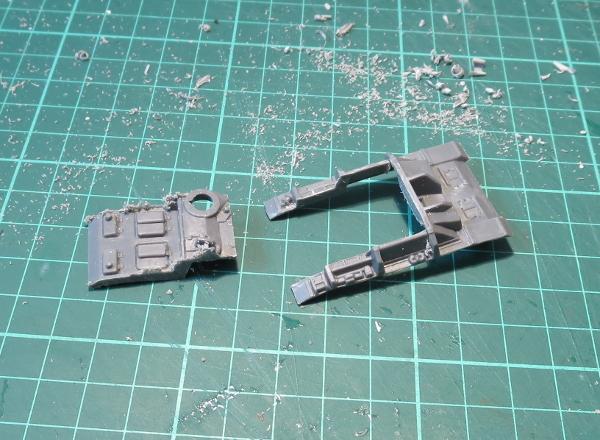
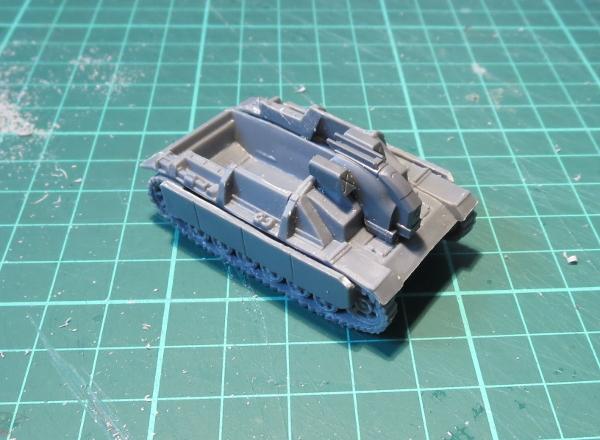
The tracks had some armour plating that extended up over the sides of the tank. I wanted these to be a little more low-profile, so I sawed them off level with the track guards.
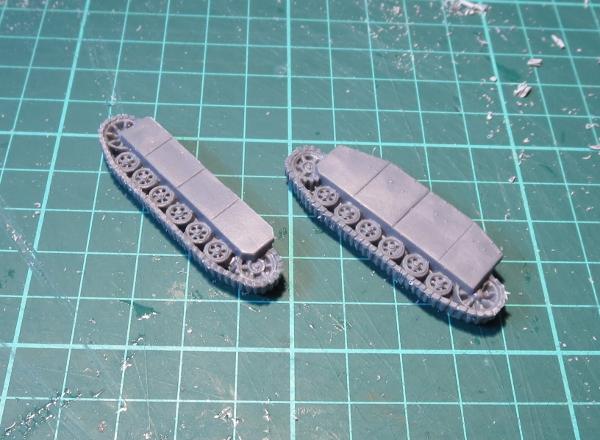
Then I assembled the hull and tracks as per normal, just with a newly-formed great, gaping hole in the rear.
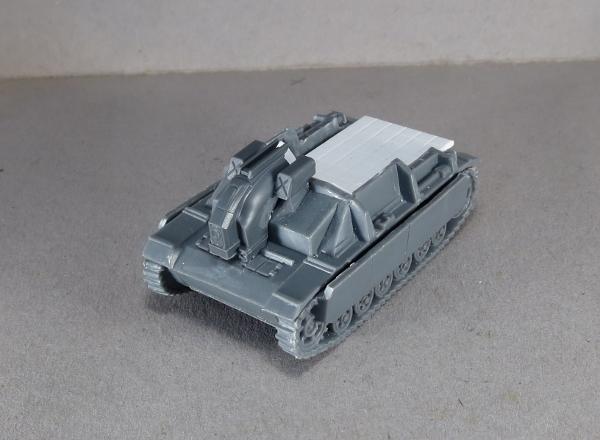
With a slight bevel added to the underside, the drone chassis slotted nicely into the gun mount.
Finally, I filled in the back with some plasticard to create a cargo deck.
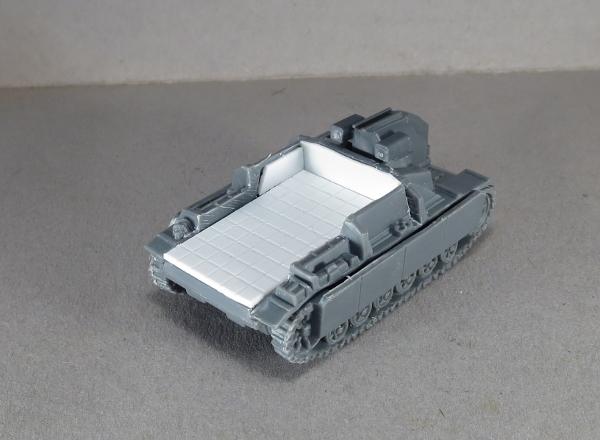
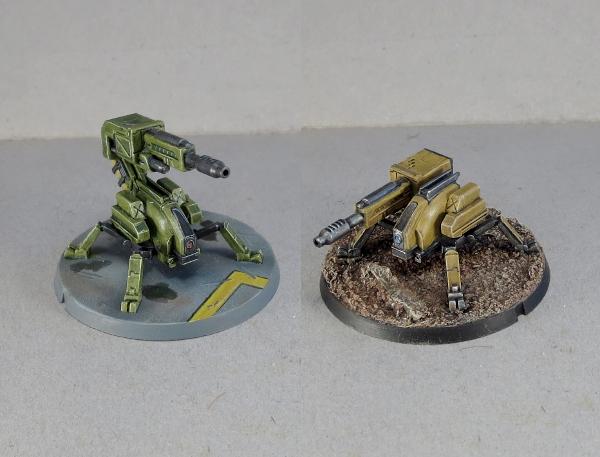
To paint it up, I turned once more to the technique shown in my weathered metal tutorial. I kept the palette fairly limited, to emphasise the bare-bones industrial nature of this machine, and made the yellow panels on the sides worn and battered to show a history of hard use.

What have you done with your Drones? We would love to see your creations on the Comm Guild Facebook page!
To pick up the Drone kit, or any of the rest of the Maelstrom's Edge model range, visit the webstore here.
For other Maelstrom's Edge modeling articles, including tutorials and walkthroughs of a wide range of different building and miniature projects, check out the article roundup here.
Tags: conversion drone epirian modeling robot spotlight tutorial walkthrough
Model Spotlight: Epirian Drones
Posted on Monday Feb 19, 2018 at 05:00pm in Models
- by Iain Wilson
Drones - the ubiquitous workhorse of the Epirian Foundation. Built around a standardised chassis that can be bolted onto a wide array of different locotion and weapon options, the humble drone can be found all over Foundation-settled worlds performing a wide range of tasks. Particularly valued by Contractor military units, the Drone's various weaponised configurations are found at the forefront of any engagement harrassing enemy units and getting into those hard to reach places. Here, we'll take a closer look at the options available on the plastic Drone sprue.
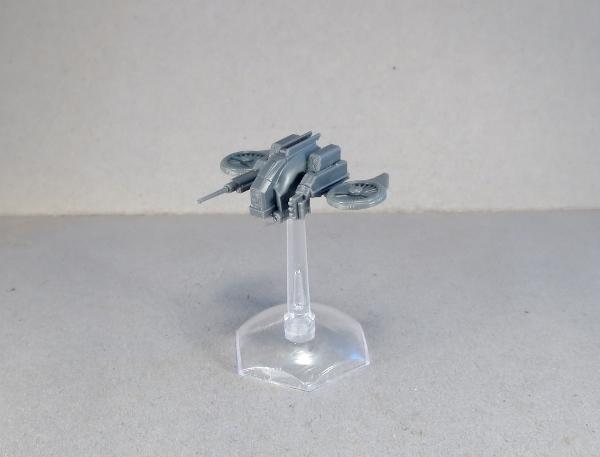
The Drone kit comes with parts to build either of two variants: the flying Firefly drone, or the agile, ground-hugging Spider drone.
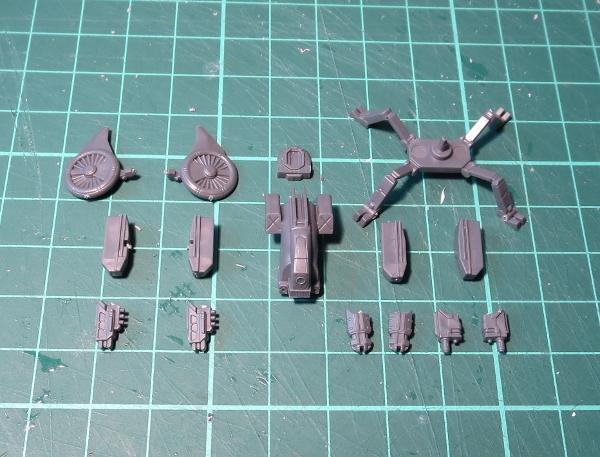
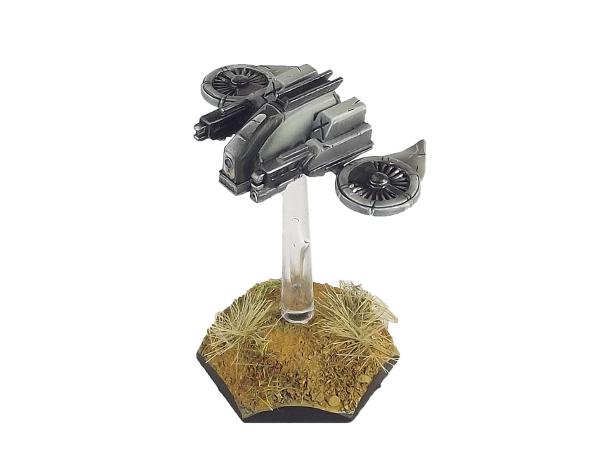
The Firefly is the fastest drone in the Foundation's arsenal, and the lightest armed. Held in the air by two dorsally mounted rotors, the Firefly is capable of vertical takeoff and landing (VTOL) and can travel up to 150 km/hr. Its primary purpose is as a forward scout, using its advanced sensor and communications suite to send information back about enemy positions. Its armour and weaponry is minimal and the Firefly can be easily taken out by even small arms fire - providing the shooter can hit its rapidly-moving frame. The Firefly is equipped with a Drone Class Laser System.
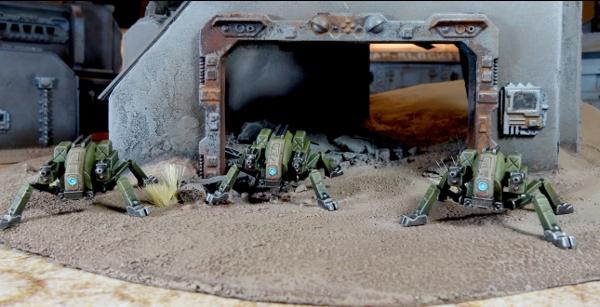
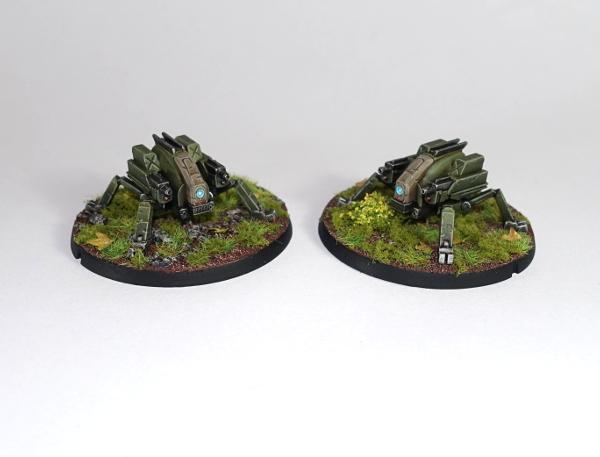
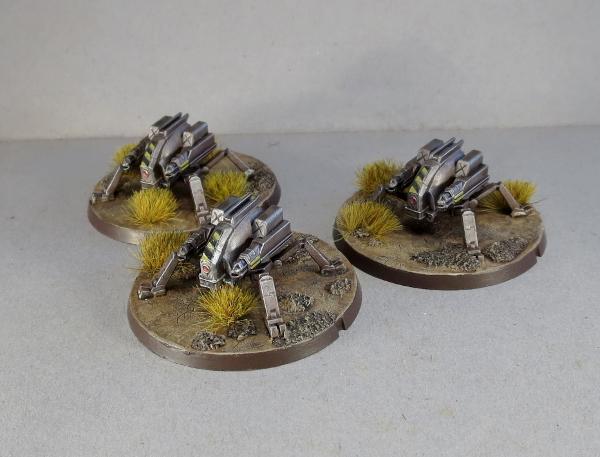
Slower than some of its drone counterparts but fitted with heavier weaponry, the Spider Drone is a popular choice for automated defences inside buildings where a Scarecrow's range is limited. Originally designed to operate within the rough terrain of mining tunnels, the Spider moves on multiple armoured legs, allowing it to keep its balance on the most unsteady of terrain.
The steadiness of its body allows more powerful guns with higher recoil to be added, and most combat Spider variants forgo the sensor suite used in Firefly, Rover and Stalker drones to accommodate more ammunition and heavier armour. Spiders can be equipped with Cutter Light Machine Guns or Flakk Guns.
Because the sprue was developed before the rules were finalised, there wound up being a couple of extra parts on the sprue that were originally intended to be another weapon option, but which also serve nicely as antenae for identifying 'leader' models, or for converting your own different drone classes, like this Sensor Drone:
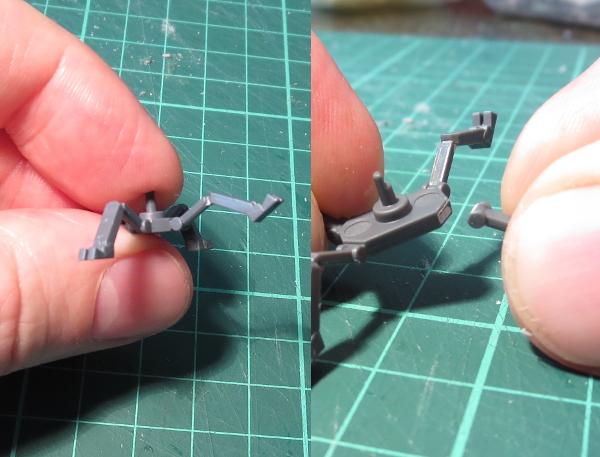
If you would like your drones to look a little more mobile, the thin legs of the Spider lend themselves well to conversions. You can easily repose them by either carefully bending at the joints, or by slicing through the joint and reattaching at a different angle.
For those wanting the Drones to pack a bit of punch on the battlefield, you could try out the reasonably simple Scorpion Drone conversion detailed here, which takes the Spider Drone and equips it with a Maglock Chaingun from the Hunter Mech kit.
Getting a little more adventurous with the converting, I like to think that the Drone chassis would find its way into all sorts of different applications where having some robotic assist might make a task easier or more efficient. Like this Light Carrier Drone, converted from a Drone chassis and a Battlefront 15mm plastic tank kit, with a little plasticard.
Or this (work-in-progress) Journeyman Patrol Bike, converted from a Games Workshop bike and an Epirian Bot Handler, with the Drone chassis up front for steer assist and targeting.
You can also use the Drone chassis as a head for larger bot constructs, like these 'Silverback' and 'Mule' Hunter Mech conversions.
All of that can, of course, leave you with a bunch of leftover flight turbines, which can be used to build a jump pack-equipped Epirian Warden, or some floating 'Sentinel' Drones, using the turbines and the top of a Scarecrow - tutorial coming soon for that one!
What have you done with your Drones? We would love to see your creations on the Comm Guild Facebook page!
To pick up the Drone kit, or any of the rest of the Maelstrom's Edge model range, visit the webstore here.
For other Maelstrom's Edge modeling articles, including tutorials and walkthroughs of a wide range of different building and miniature projects, check out the article roundup here.
Modeling Spotlight: Converted Broken Gnolti
Posted on Tuesday Jan 30, 2018 at 07:06am in Tutorials
- by Iain Wilson
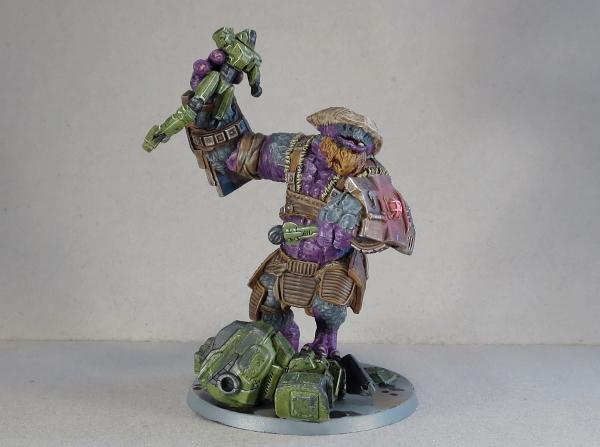
This week saw the arrival of the biggest model yet for Maelstrom's Edge: The Gnolti!
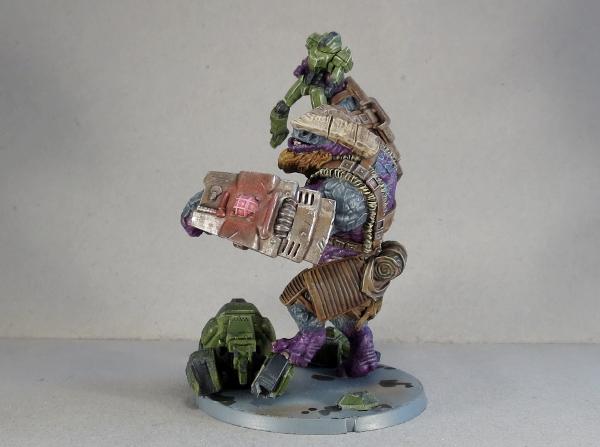
A gigantic chunk of brawn and armoured hide, the Gnolti is slow to anger, but unstoppable when roused. So as impressive as the model is, I decided I wanted to build one that showed a Gnolti really letting it all out. This was the end result:

The Gnolti is a multi-part resin kit, with a little posability in the forearms due to the circular connections. One of his hands is open, and this seemed like it was just asking to be holding something breakable. So, I sliced off the forefinger so that I could close in his grip a little, and reattached it with some green stuff, and gave him a little friend to play with, courtesy of the Epirian Scarecrow kit.

The left hand is in a closed fist, and is designed to sit knuckles-down on the base. I reshaped the flattened bottom surface of the fingers to make them more rounded, and then pinned the scarecrow's left forearm into the Gnolti's grip.
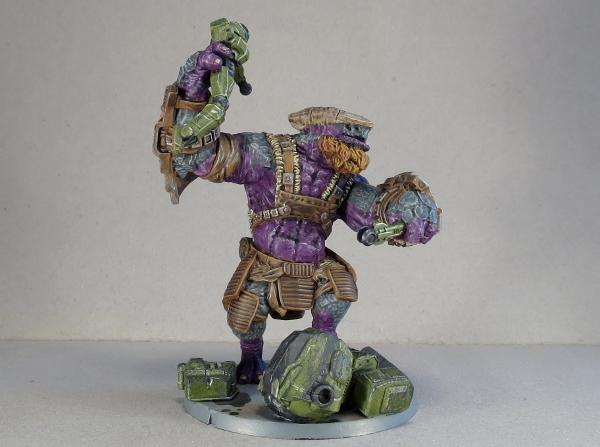
To create a more upright stance, I ran the legs under some hot water and carefully bent the lower right leg out and back. Apparently, I wasn't careful enough, as I managed to snap it off through the shin, but with a little drilling and pinning, I wound up with legs positioned how I wanted them.
Adding a Hunter mech's leg for the Gnolti to stand on, I glued the legs in place on the base, and added a piece of sprue to fill in the slot for the torso's locator peg.
Taking the torso piece, I used a razor saw to slice off the right arm at the shoulder, cutting out a wedge on the top so that it could be reattached in a more raised position. I also cut a thin wedge out from his chin at the top of his beard, and then added a cut between his lips so that I could bend his lower lip down into a mouth-open position.
The torso was then glued in place, with the sprue in the waist-hole allowing the torso to sit upright.

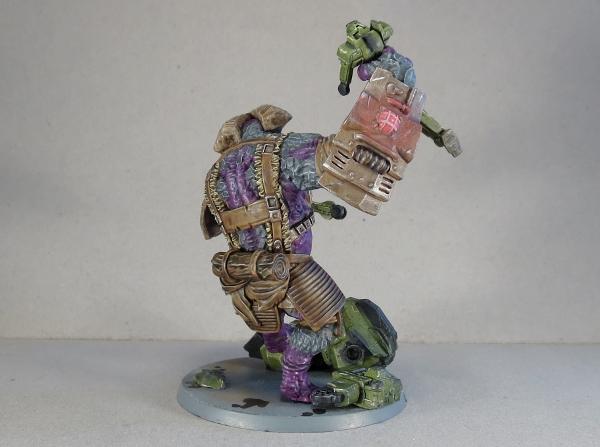
The lower lip was padded out with some green stuff to repair the minor damage from sawing it open. I also filled in the cavity in his waist, and started added detail back in under the right arm.
Another layer of green stuff gave him some abdominal muscles, a tongue, and a single flat tusk in his lower jaw.
Finally, the forearms were glued on, and a last run of green stuff added to replace the fur trim on his right shoulder strap.
With that, it was time to paint!
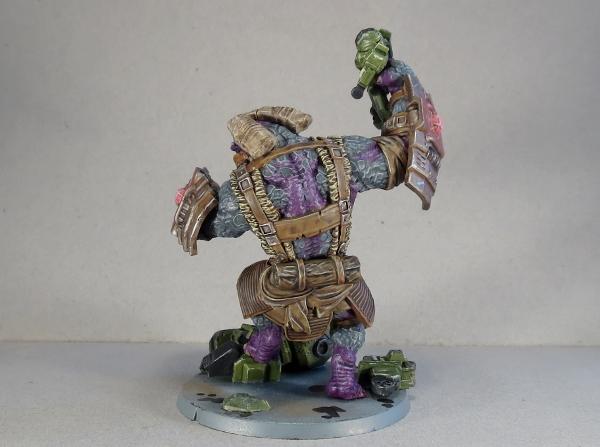
I went with a colour scheme that was reminiscent of that used on the studio model shown here, but with slightly more muted colours to fit in with my quick, wash-painted Broken colour scheme.
Ready for action!
To pick up your own wee beasty of broken doom, or any of the rest of the Maelstrom's Edge model range, visit the webstore here. As always, be sure to show off your work on the Comm Guild Facebook page!
For other Maelstrom's Edge modeling articles, including tutorials and walkthroughs of a wide range of different building and miniature projects, check out the article roundup here.
Tags: broken conversion gnolti model modeling spotlight tutorial walkthrough
Modeling Spotlight: Epirian Victory Point Tracker
Posted on Tuesday Jan 23, 2018 at 11:19am in General
- by Iain Wilson
Victory. The elusive mistress that haunts our gaming hours. How do we capture her? Well, in Maelstrom's Edge, we do it by counting up Victory Points, and hopefully winding up with more of them than our opponents. The Battle for Zycanthus box includes Victory Point trackers along with the plethora of tokens and markers found within, but I decided that I wanted something with a little more spectacle, and so I built myself a VP tracker for my Epirian force.
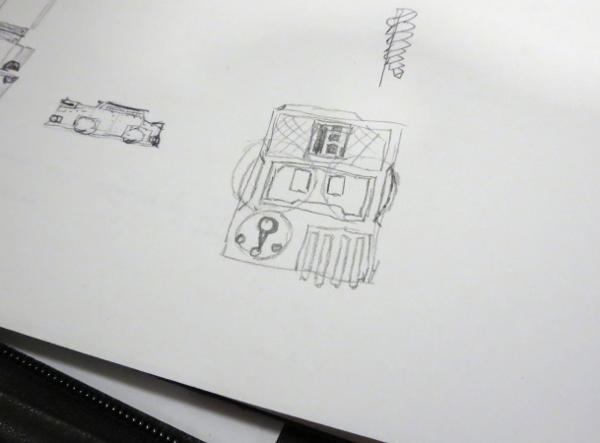
This all started with a rough concept sketch, to get an idea of how things should fit together.
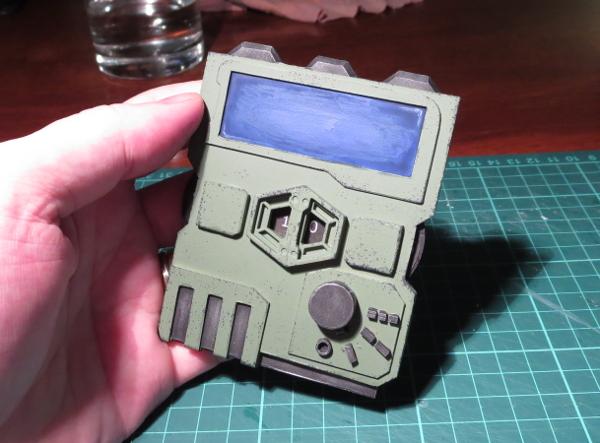
I then made a quick mockup in cardboard, as a sort of proof of concept, and to get a better feel for the size it needed to be.
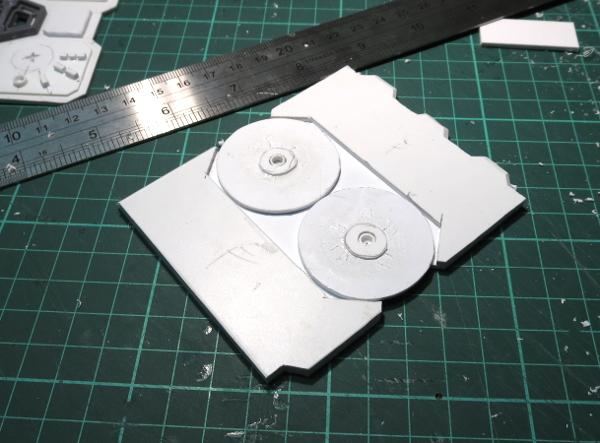
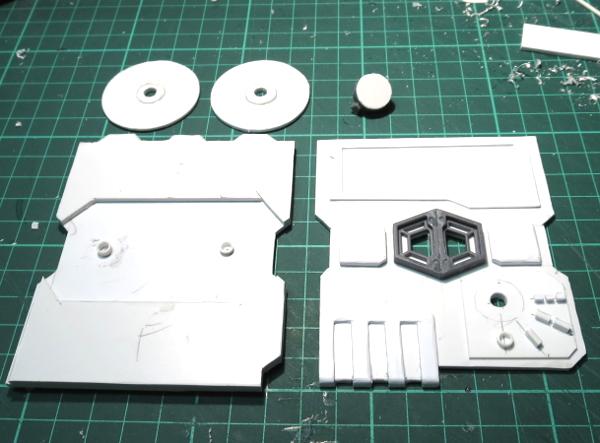
The main body of the tracker is made from layers of 2mm thick plasticard. Each layer was marked out in pencil and then cut out and the edges smoothed down.

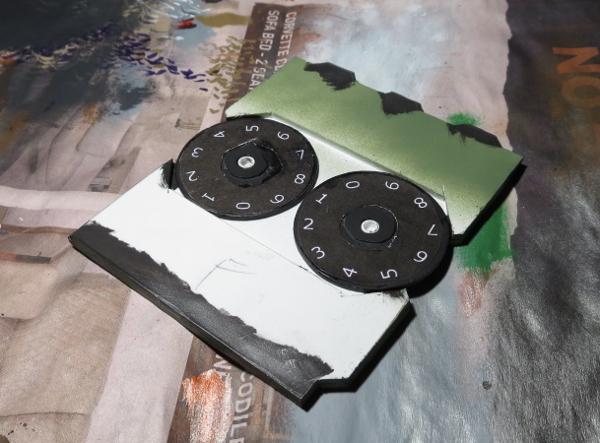
To show the current VP total, there are two dials with the numbers 0-9 marked around the edge. These are cut from thinner plasticard, with a spacer added on the top surface so that the face with the numbers on it doesn't rub against the inside of the tracker's front.
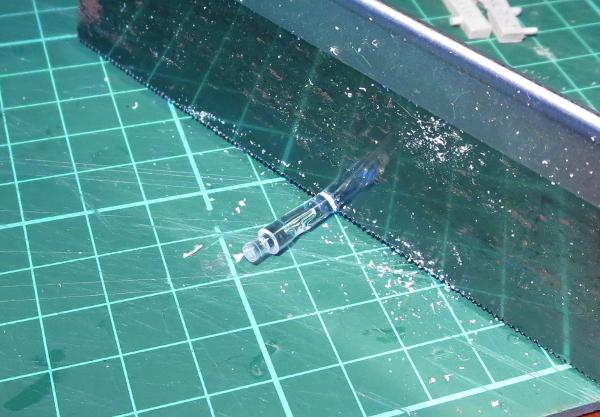
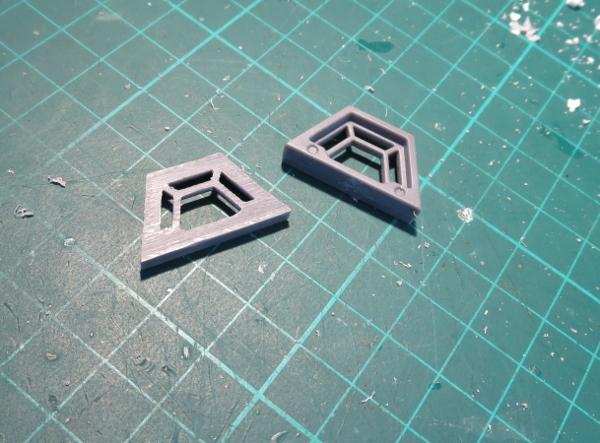
The windows for the VP display are made from a couple of trapezoid windows from the Maelstrom's Edge terrain sprue. I used a razor saw to slice through the windows just behind the interior bracing, to make them a little thinner and so that the bracing would sit flush against the front plate of the tracker.
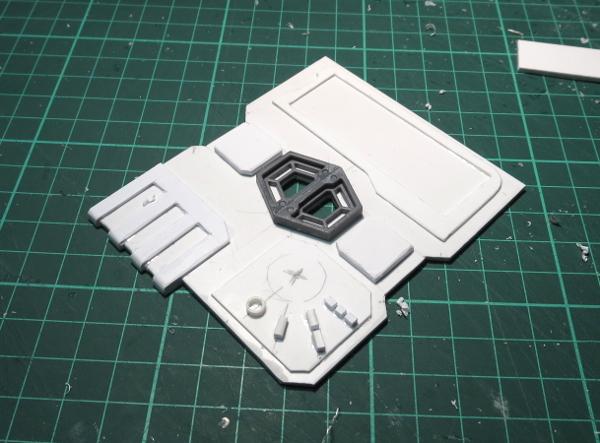
From there, I cut a couple of trapezoid holes in the front plate to match up to the large openings in the windows, and then added a bunch of detail with various pieces of plasticard.
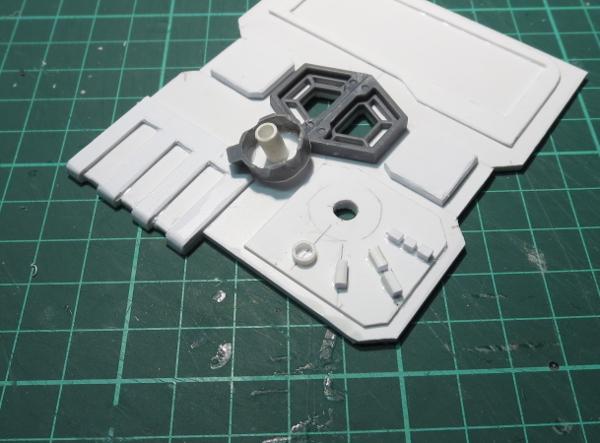
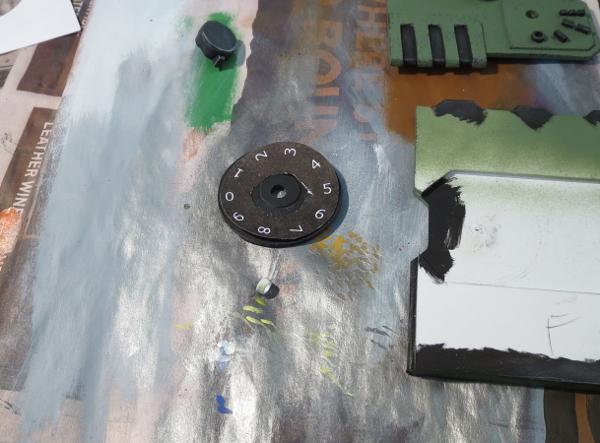
In the bottom corner, I added a rotary switch for tracking how many times the special faction objective has been tapped.
With detailing complete, it was time to paint!
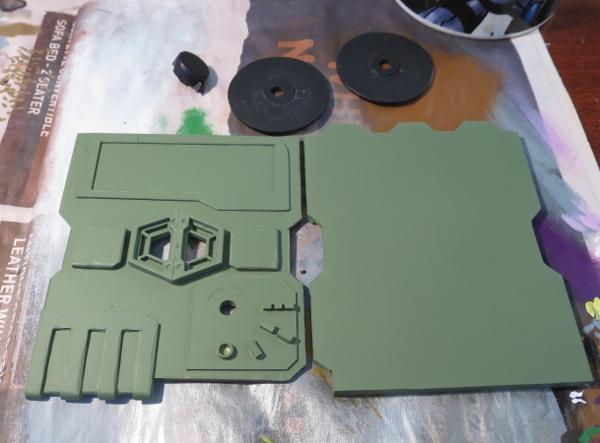
I basecoated the tracker with Army Painter Army Green spray, and used some flat black spray on the VP dials and the rotary switch.
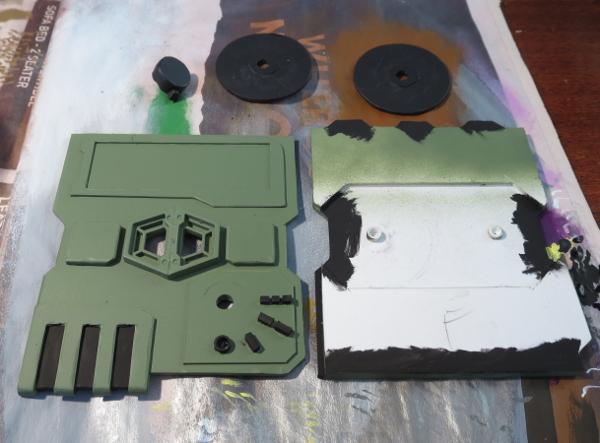
I wanted some metal detail on the tracker to break up the colour a little, so re-basecoated some appropriate spots with some black. I also added a little black inside the side openings for the dials, just to avoid having the white plastic showing through when it was assembled.
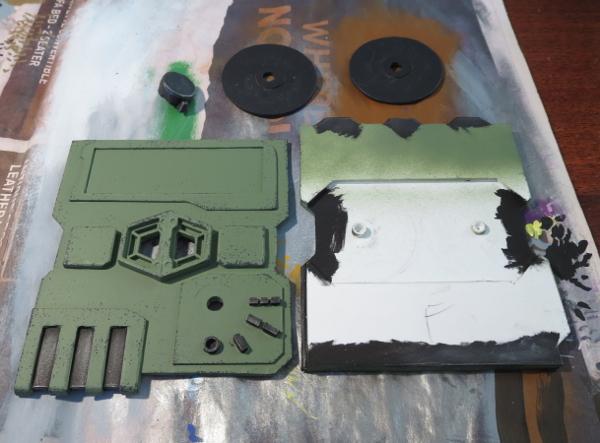
The metal parts then received a drybrush of P3 Pig Iron, and some weathering added with Vallejo Heavy Charcoal applied lightly with a sponge.

The numbers for the VP dials were drawn up on black circles in Gimp and then printed out, cut to shape and glued onto the plastic dials.
Finally, the front plate was glued in place, and the screen painted with some Ultramarine Blue and shaded with Army Painter Blue Tone.
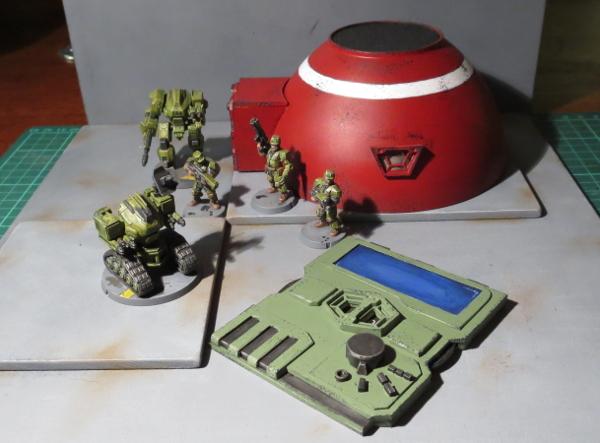
My plan is to make up some smaller versions of the mission cards to sit in the screen cavity.
And then, of course, the next step will be to make some similarly themed trackers for my Karists and Broken!
Have you built anything unusual for your Maelstrom's Edge games? We would love to see your creations on the Comm Guild Facebook page!
You can find the entire Maelstrom's Edge range in the webstore here.
For other Maelstrom's Edge modeling articles, including tutorials and walkthroughs of a wide range of different building and miniature projects, check out the article roundup here.
Tags: conversion epirian gaming modeling scratchbuilding spotlight tutorial walkthrough
Terrain Spotlight: Mini Hab Domes from plastic bowls!
Posted on Monday Jan 15, 2018 at 05:00pm in Tutorials
- by Iain Wilson
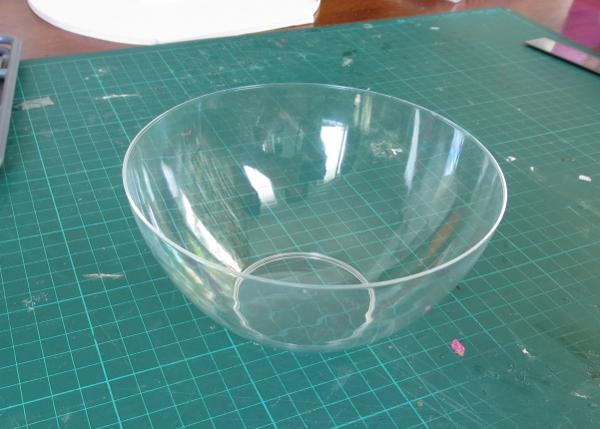
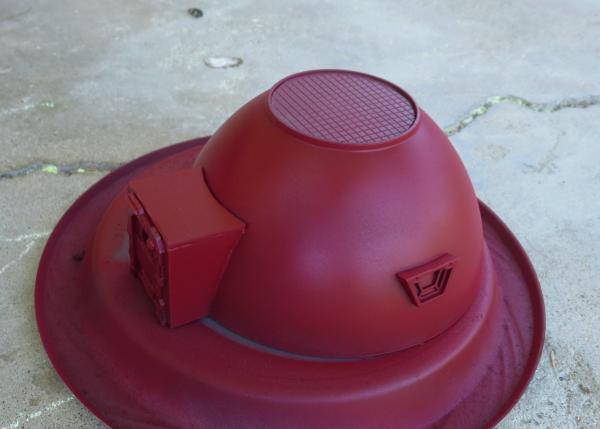
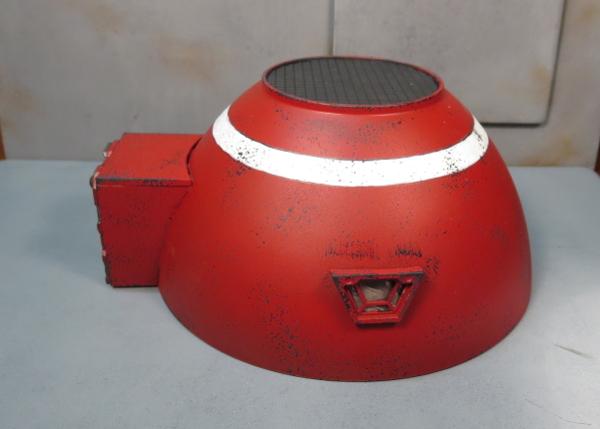
Throughout the galaxy, few structures hold up as well in hostile environmental conditions as the humble dome. They're durable, efficient, and as a bonus look nice and distinctive in a universe filled largely with pre-fabricated, angular structures. So here's a simple way to make yourself some small dome structures for your gaming table, using components from the Maelstrom's Edge terrain sprue, a little foam core board, some plasticard, and a plastic bowl.
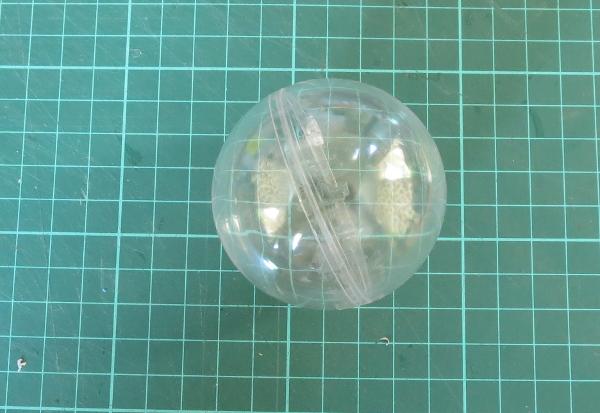
As with the larger plantation dome that I made a while back, the basis for this building is a plastic bowl, in this case picked up in a pack of 8 from a local discount store for a couple of dollars.
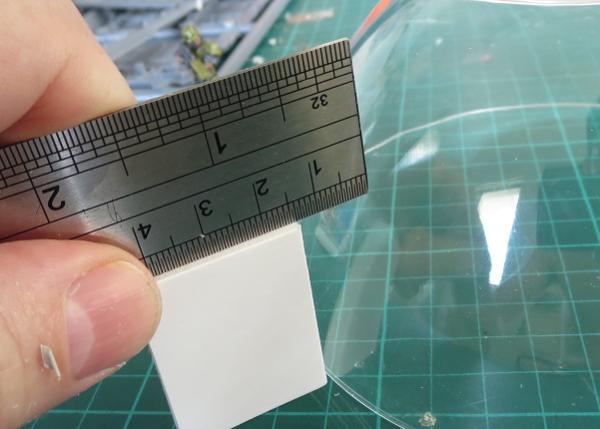
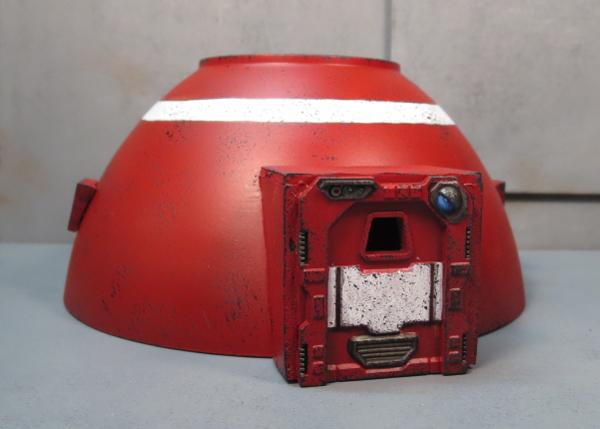
I cut two rectangles of 5mm foam core board, about 30mm wide and the same height as the inside frame of one of the small doors from the terrain sprue. These formed the sides of the building's entrance, and so would need to be curved on the back sides in order to sit flush with the side of the dome.
Sitting one of the rectangles against the bottom rim of the dome, I measured the distance between the top corner and the dome, and marked that distance along the short edge of the foam core.
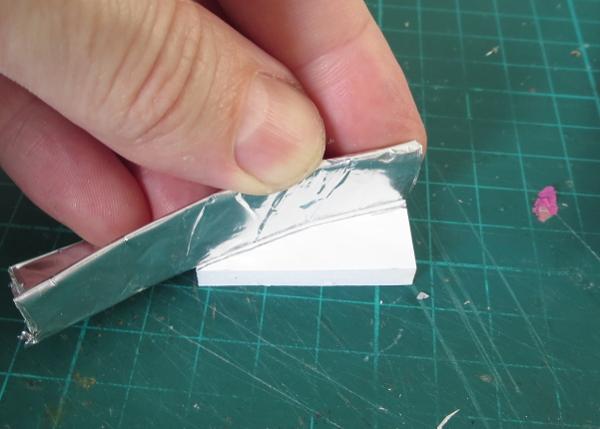
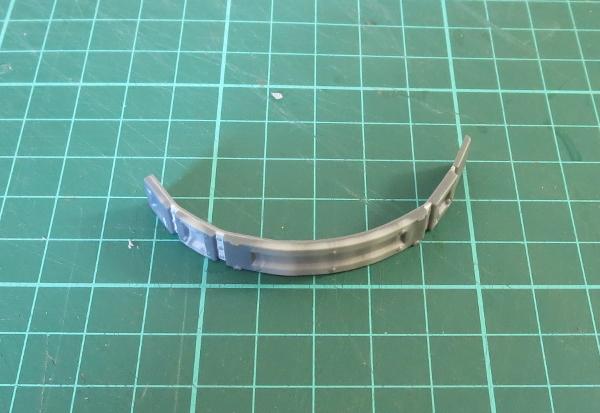
I then folded a piece of aluminium foil to made a long L-beam shape. With a pair of clippers, I made a series of cuts along one edge.
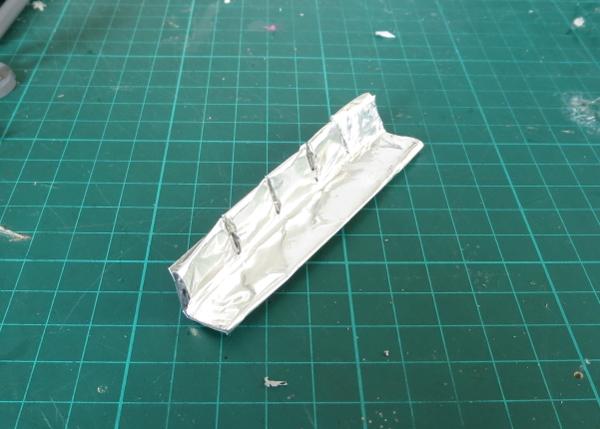
The uncut surface of the beam was then pressed against the side of the dome, with the cuts allowing it to bend to match the shape while the L-beam shape gave it enough rigidity to keep the curve when removed from the dome.
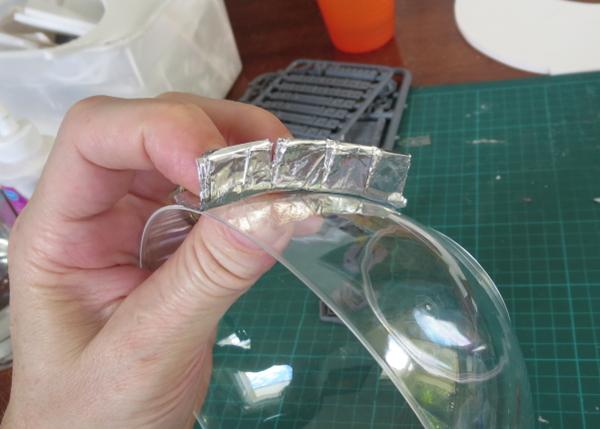
I then used the resultant curve to transfer the shape of the dome to the foam core, matching the foil beam up to the measured mark and the corresponding bottom corner of the entrance wall.
An exacto knife was used to cut along the drawn curve, angling the cut to account for the horizontal ci
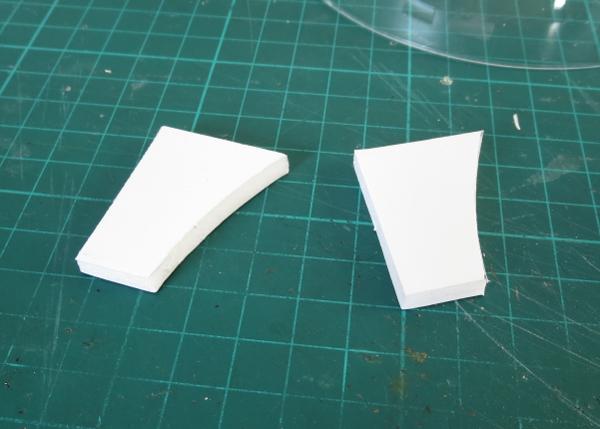
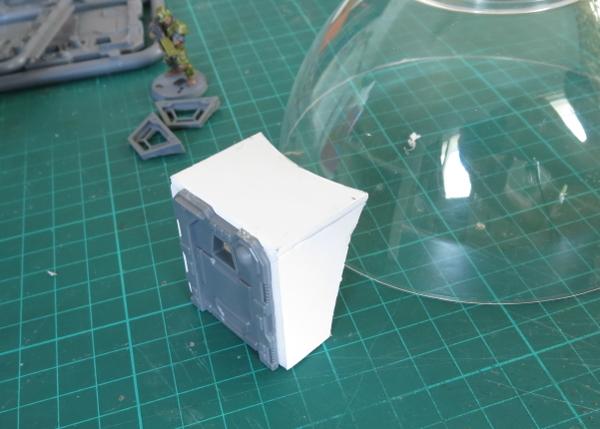
With the addition of a piece of 1.5mm plasticard, cut to shape for the roof, the entrance tunnel was glued together and test fitted against the dome, with a little fine-tuning of the curve with the exacto knife allowing it to sit flush.
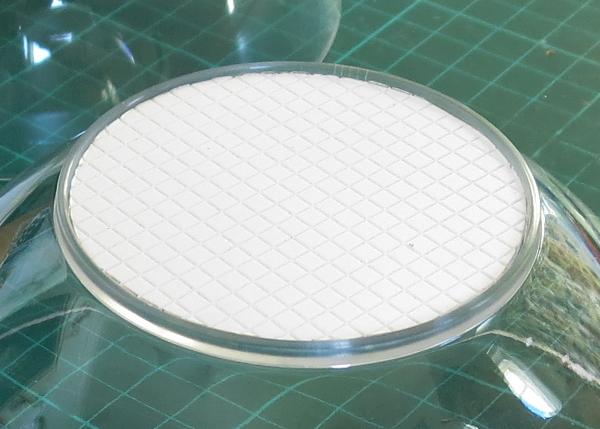
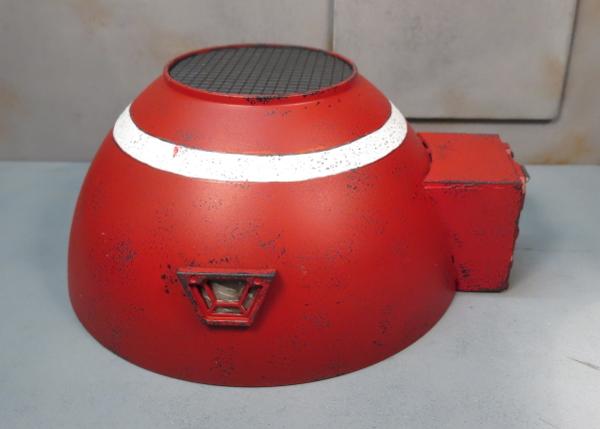
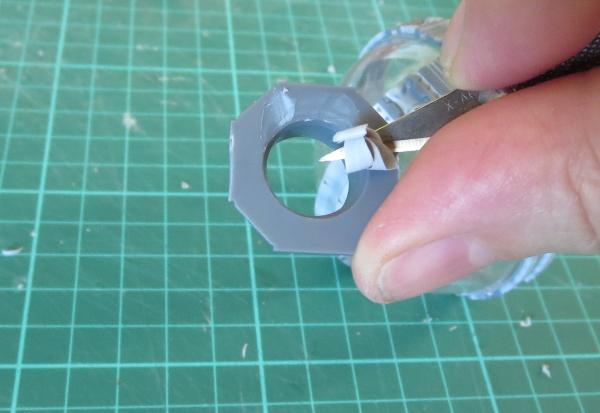
I wanted a little texture on the flat top of the dome, so I decided to use some grid-patterned plasticard. Not having a compass handy, I found a small drinking glass that fit neatly into the circular base of the bowl, and used this as a template to draw a circle on the plasticard. Once cut out, this circle was glued neatly into the recess.
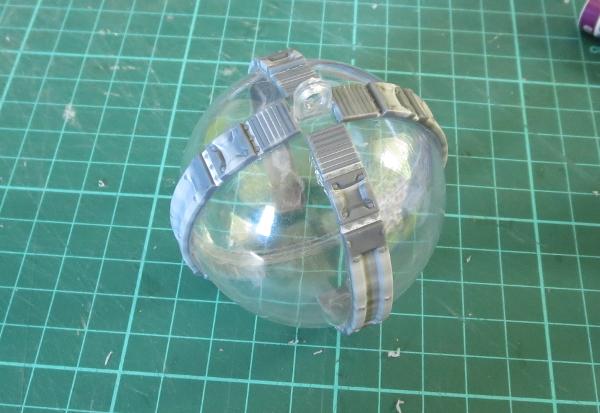
For the windows, I took the trapezoid windows from the terrain sprue and trimmed down one side to help them sit almost vertically on the side of the dome.

To glue the windows in place, I grabbed a small offcut of foam core to use as a spacer, to ensure that the windows on either side of the building sat at the same height.
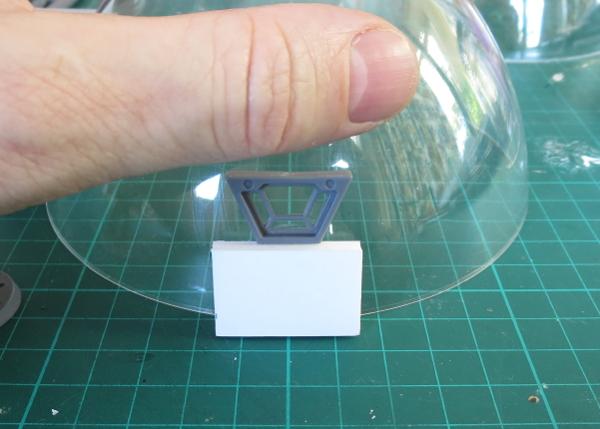
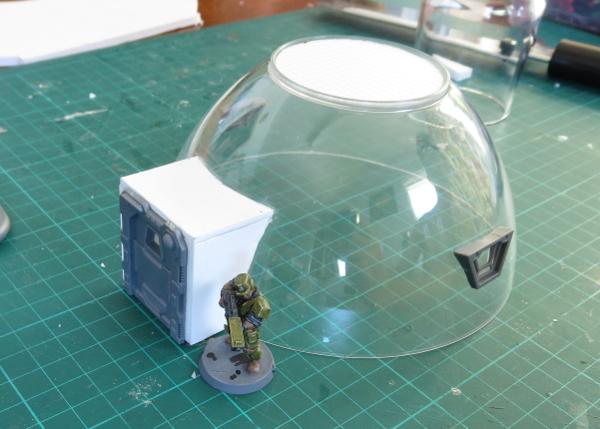
With everything glued in place, the building looked like this:
So, on to painting!
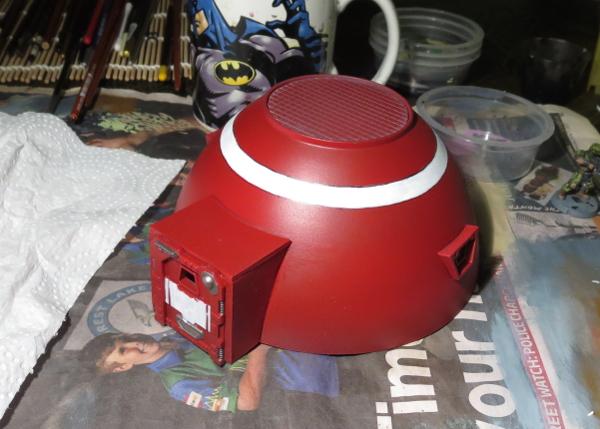
Because the dome is transparent, I sprayed a coat of primer inside to begin with. That way, if the outside of the dome gets a little scratched up from gaming use, it would show grey instead of clear.
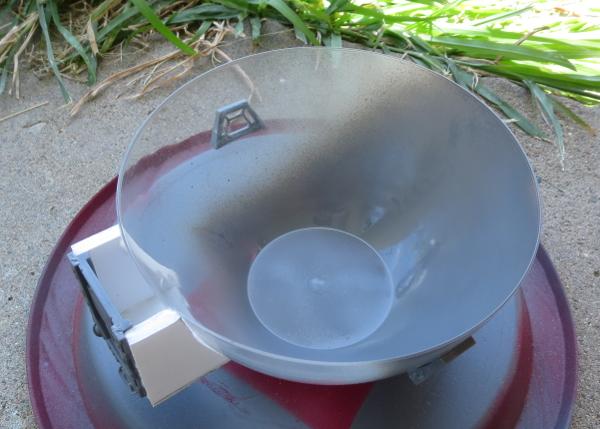
The outside was then also primed grey.
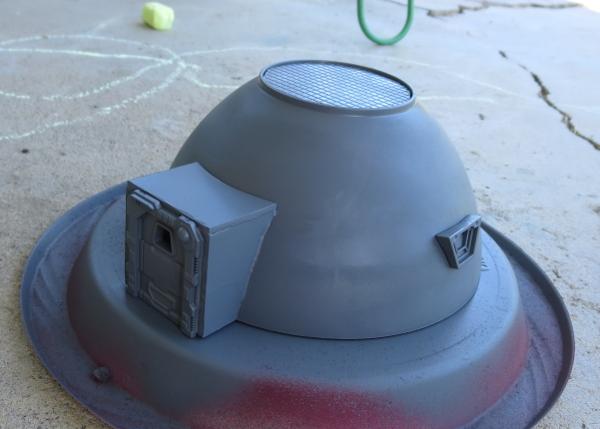
The primer was followed with a coat of Army Painter Dragon Red.
I added a white stripe to break up the red a little, and painted some metal detail with P3 Pig Iron.
Finally, some sponge weathering and the roof tiles painted with Vallejo Heavy Charcoal, a quick wash with Army Painter Dark Tone for the metal parts and the roof, and some colour on the lights above the door, and the minidome was finished!

To build your own mini hab domes, you can pick up the Maelstrom's Edge terrain sprue along with the rest of the Maelstrom's Edge model range from the webstore here. As always, feel free to share your creations on the Comm Guild Facebook page!
For other Maelstrom's Edge modeling articles, including tutorials and walkthroughs of a wide range of different building and miniature projects, check out the article roundup here.
Tags: buildings spotlight terrain terrainsprue tutorial walkthough
Modeling Spotlight: Karist Angel Keepers
Posted on Sunday Jan 07, 2018 at 05:00pm in Tutorials
- by Iain Wilson
The Karist Angel Keeper has added his goad-wielding distinctiveness to the Karist Enclave model collection, and so this seemed a good opportunity to grab a few and have at them with the exacto knife and superglue.

An addition to the new resin range for Maelstrom's Edge, the Angel Keeper comes supplied with his angel goad and grenade launcher.

Assembly is really simple: Glue feet to base, glue head to neck, glue hands to arms. The goad also has a separate piece for the blade end, which sockets onto a convenient pointy end on the shaft.

The more eagle-eyed rules watchers may have noticed that both weapons are held in hand, but the Keeper actually comes with both by default. This allowed for players to choose which would be held in hand while still keeping the parts count down for practical purposes, and rules-wise isn't an issue since we can assume that all default gear exists whether it is specifically shown or not. If, like me, you do prefer to have all of your models' gear modeled, this isn't a difficult task.
If you have modeled your Keeper with goad in hand, just grab a spare grenade launcher from the Faction Expansion Sprue and glue it onto his back beside his pouch.
If you prefer to have the grenade launcher at the ready, you can use a piece of 1.6 mm diameter plastic rod to replace the shaft. Here, I've also removed the detail piece from the bottom, to be reattached onto the new shaft.


You can also use a shaft from the Cybel Glaive on the Faction Expansion Sprue.

OK, but what if you want both weapons in hand, you say?
Luckily, resin cuts really easily, so the easy option here is to carefully remove the left hand from the stock of the grenade launcher - just trim it down to a flat surface and file it smooth if necessary.
For the goad, cut through the shaft either side of the right hand, and then reattach the bottom of the shaft to the top.


For a slightly more complex (but more hardcore!) alternative, why not combine the two weapons into one?
Take a grenade launcher from the Faction Expansion sprue, cut off the pistol grip and trim down the stock so that it is level with the bottom of the ring around the muzzle.
Trim down the back side of the goad blade so that it is flat, and cut a small, flat inset into the end of the goad shaft where the blade normally attaches.

Then glue the back end of the grenade launcher to the goad shaft, and the goad blade to the stock of the grenade launcher.
The Keeper's head has the same ball joint neck as most of the rest of the Karist range, so you can easily swap in different heads to either customise your Keeper a little, or use the model as a specialist in a Karist Trooper or Praetorian unit. The below model has a head from a Karist Heavy Trooper.
You can also create unit champions by swapping out or modifying the weapons. Below, I've filed down the shoulder pads and added Karist Trooper pads over the top, and used a head and cybel blades from the Faction Expansion sprue to create a Praetorian Tetrarch.

What have you done with your Angel Keepers? We would love to see your creations on the Comm Guild Facebook page!
To pick up the Angel Keeper, or any of the rest of the Maelstrom's Edge model range, visit the webstore here.
For other Maelstrom's Edge modeling articles, including tutorials and walkthroughs of a wide range of different building and miniature projects, check out the article roundup here
Spotlight: Maelstrom's Edge Terrain Sprue Tree Decorations!
Posted on Monday Dec 25, 2017 at 12:00am in Tutorials
- by Iain Wilson
With Christmas upon us, I wanted to add a bit of a holiday theme to this week's article, and so the only sensible option was to take the Maelstrom's Edge terrain sprue and build Christmas decorations from it!

Around this time of year you can usually find various DIY bauble kits that have plastic baubles that you can stick photos or other momentos inside, or that you can paint or otherwise decorate. This particular one I think came with some rubber stamps inside for making Christmas cards and the like.
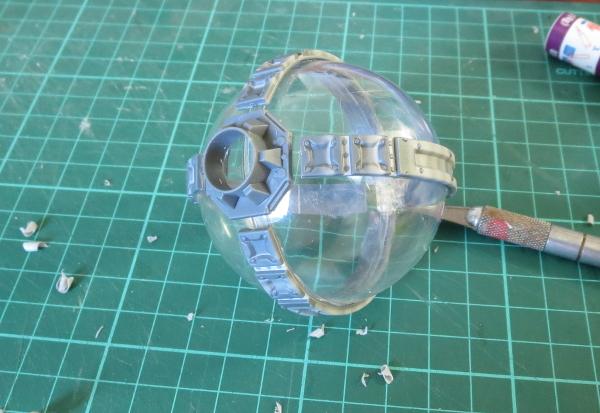
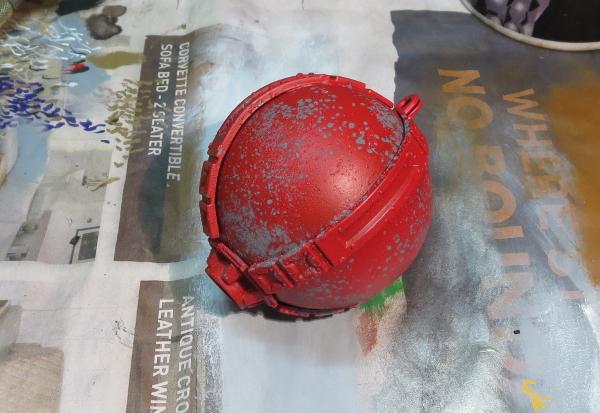
I took four of the long reinforcing struts from the terrain sprue and gently bent them into a curve over a metal tube.

These were then glued around the bauble with all-plastic glue. I used a UHU glue that turned out to be not great for gluing these struts onto flat surfaces as it contracts when it dries, which bends the struts and pops them right off the surface they're glued onto. That very property makes it a perfect glue for attaching the struts to a curved surface, though, as it will make them fit more tightly to the bauble.
The struts don't run all the way down to the bottom of the bauble, so I took the large pipe fitting from the sprue, and used a hobby knife to carve the bottom surface out to make it concave.
This was then glued onto the bottom of the bauble.
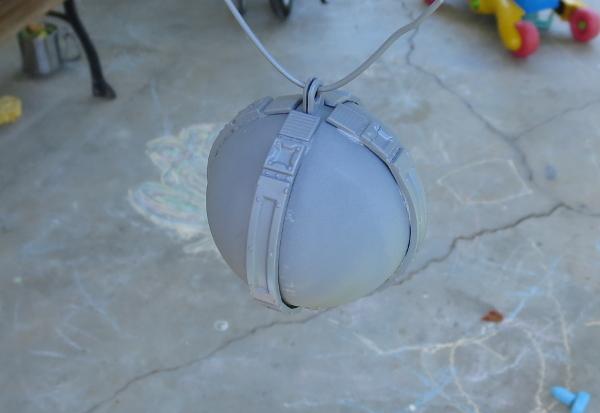
Time to paint! A quick spray of grey primer:
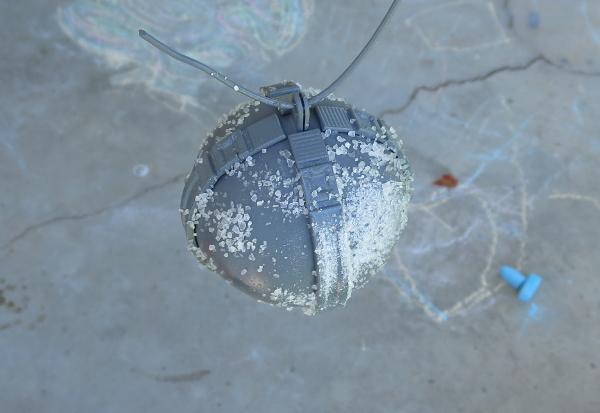
Season lightly with some crushed rocksalt:
Spray with Army Painter Dragon Red:
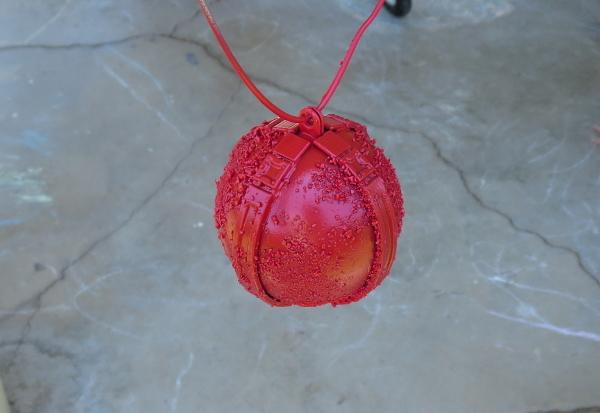
Once the spray was dry, I scrubbed away the salt under running water:
The detail pieces were then painted with P3 Pig Iron:
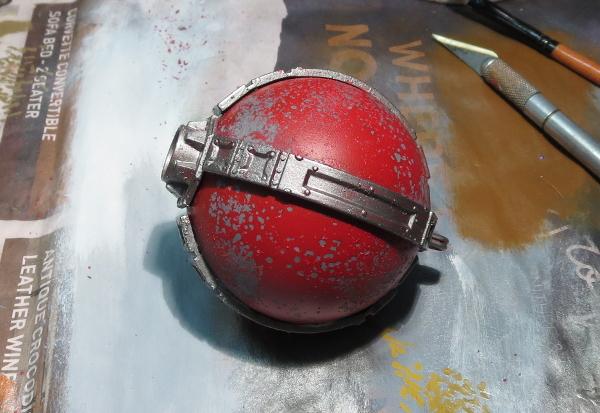
I followed this up with a generous coat of my old favourite, Army Painter Strong Tone ink.
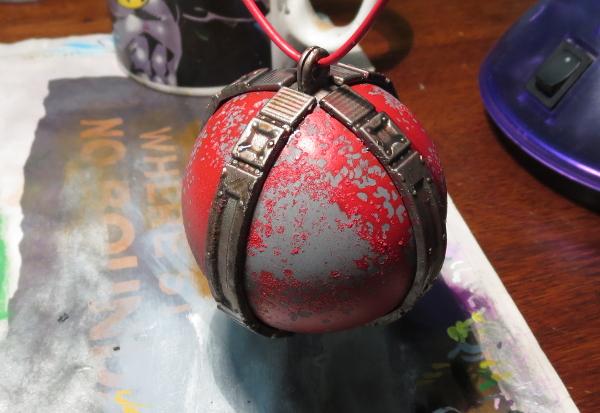
After sitting overnight for the ink to dry, a quick drybrush of Pig Iron and a little silver, and up it goes on the tree!
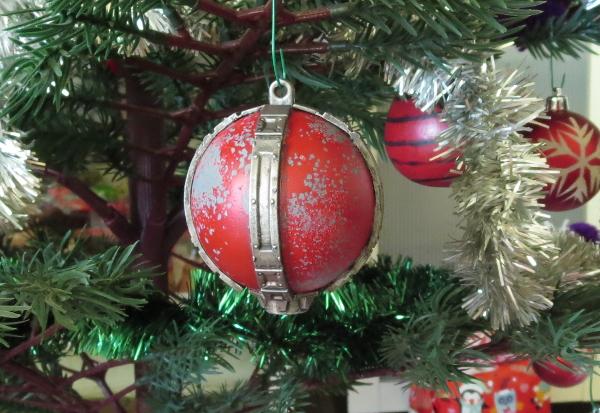
To build your own collection of mechanical... er... decorativeness, you can pick up the Maelstrom's Edge terrain kit along with the rest of the Maelstrom's Edge model range from the webstore here. As always, we would love to see your creations on the Comm Guild Facebook page!
Here's wishing everyone a safe and happy holiday season!
For other Maelstrom's Edge modeling articles, including tutorials and walkthroughs of a wide range of different building and miniature projects, check out the article roundup here.
Tags: conversion modeling spotlight terrain terrainsprue walkthrough
Terrain Spotlight: Broken Settlement, part 2
Posted on Monday Nov 20, 2017 at 05:00pm in Tutorials
- by Iain Wilson
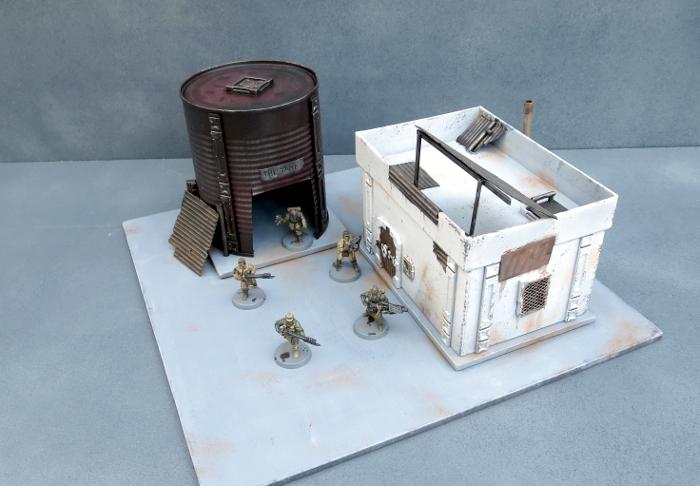
This week, I'm continuing on with the construction of the Broken settlement that I started a few weeks back, which you can find round about here, by adding in another 'renovated' building and a converted water tank shelter.
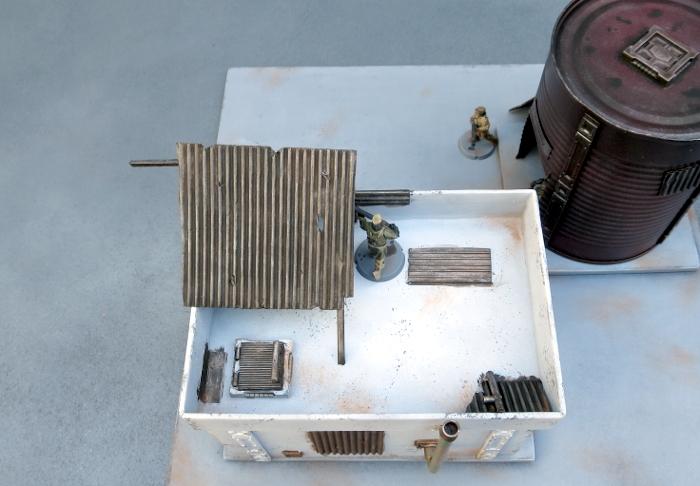
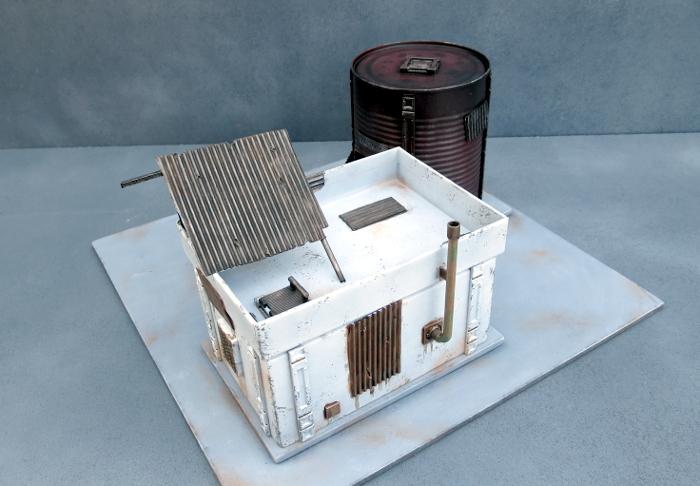
I fast-forwarded a little on construction by grabbing a small building that I made some time ago for a video showing how to make a building from a cardboard gift box and the Maelstrom's Edge terrain sprue (which you can find on Youtube here). This was partly painted as a test run for the sponge-weathering that I used on the first building for this settlement.
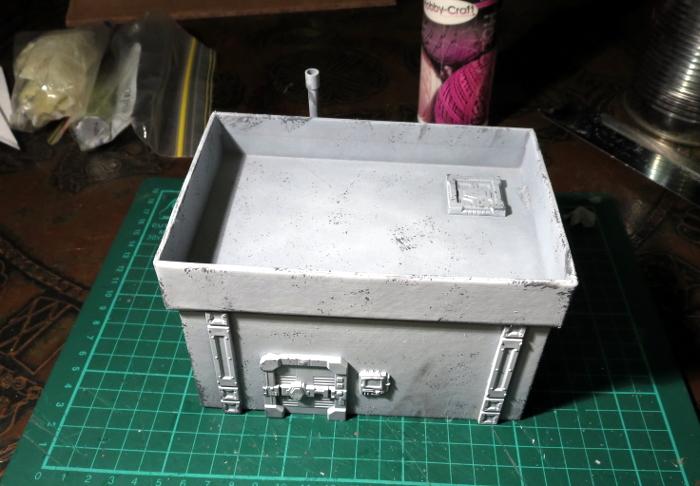
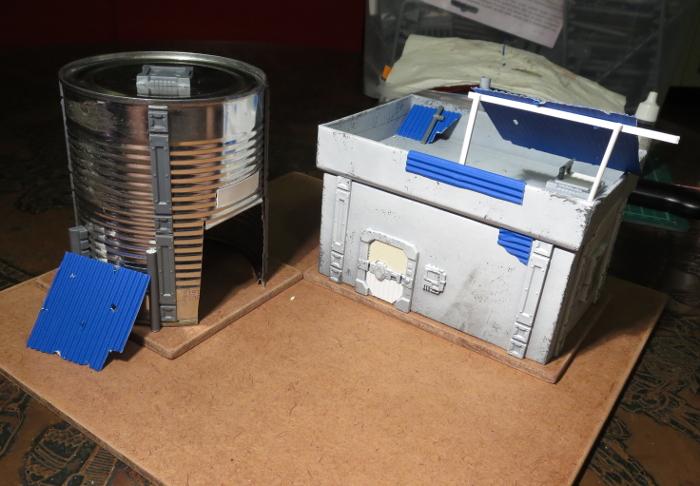
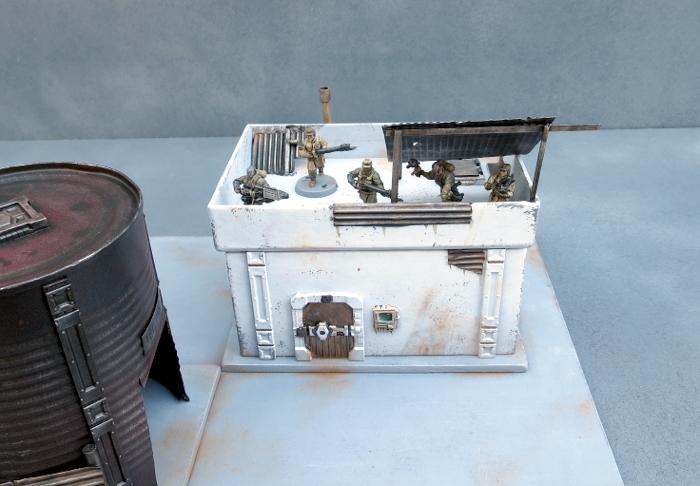
Clearly, this building was still far too pretty looking to fit into a Broken settlement, so I added a bunch of patch-plating using plasticard and corrugated cardboard, and added some mesh over the windows on the sides. I also built a framework on the roof to create a makeshift shelter or sentry point.

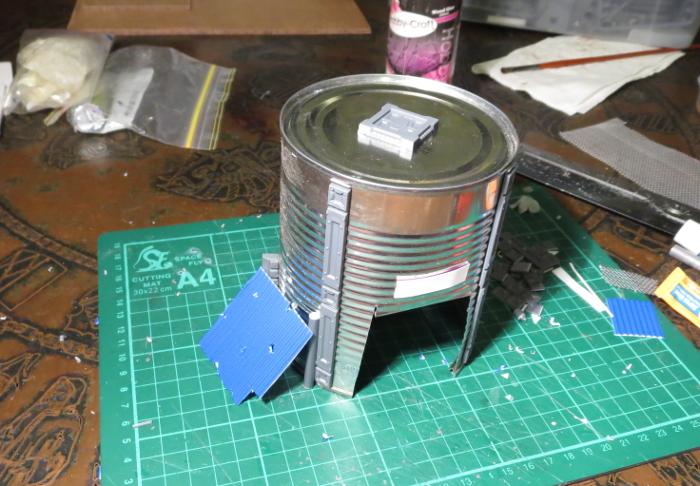
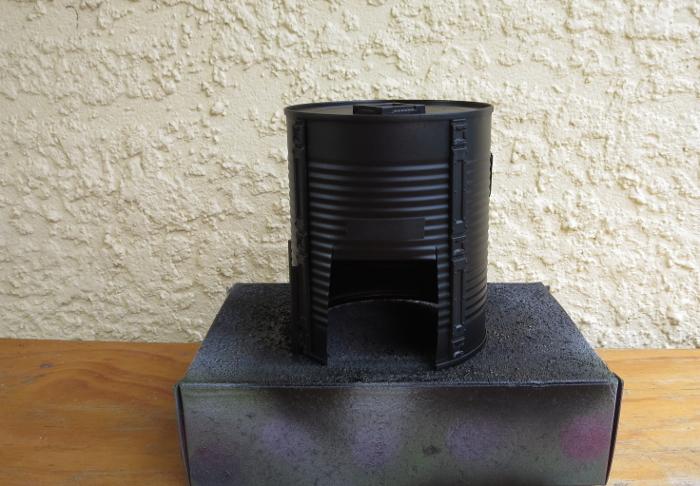
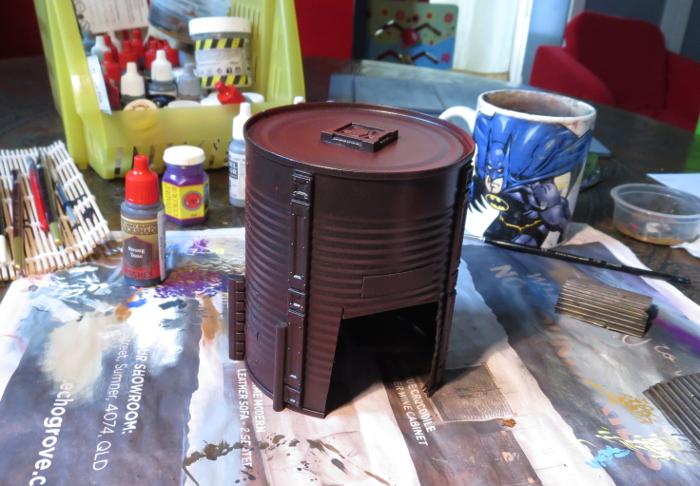
The companion building for the gift box one is made from an old fruit tin. This received a good wash and had the label removed, and then I cut a squarish hole in the side to serve as a doorway.
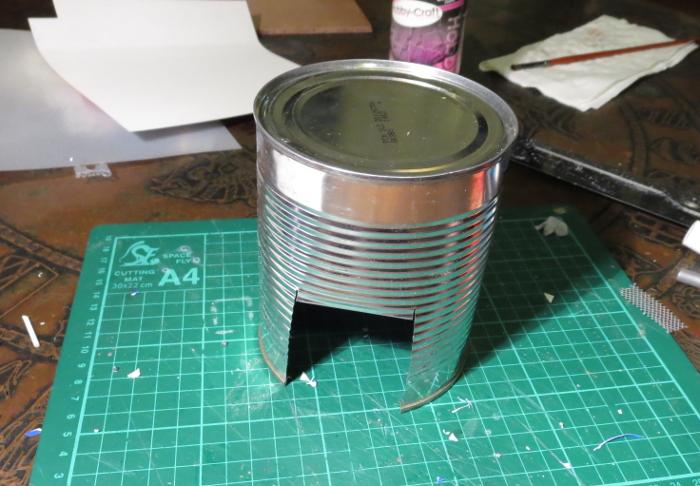
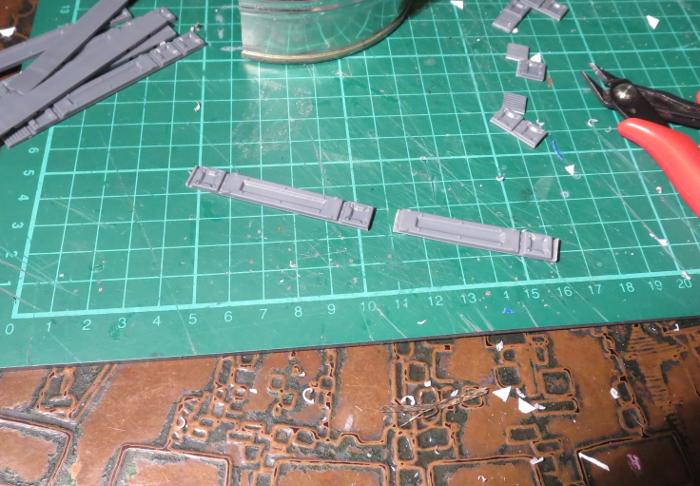
I cut a bunch of reinforcing struts from the terrain sprue to fit neatly down the sides of the tin.
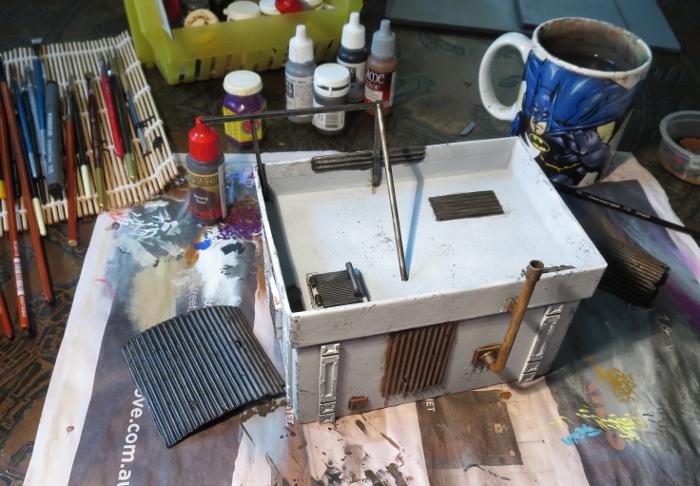
With the addition of some patches, a hatch on the roof and a lean-to on the side, the old tank was ready for painting.
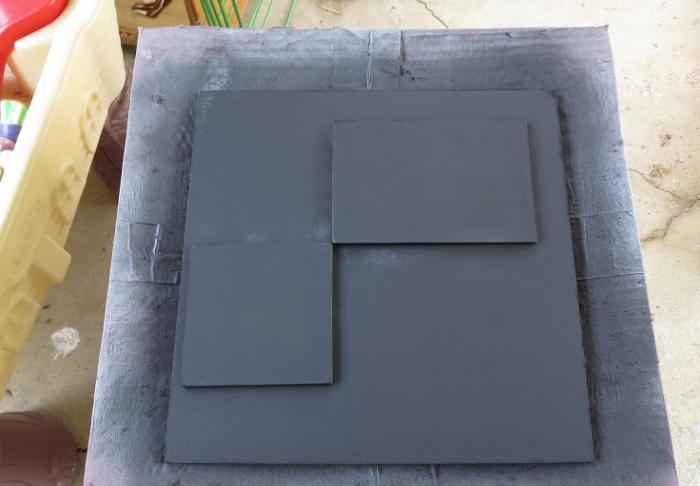
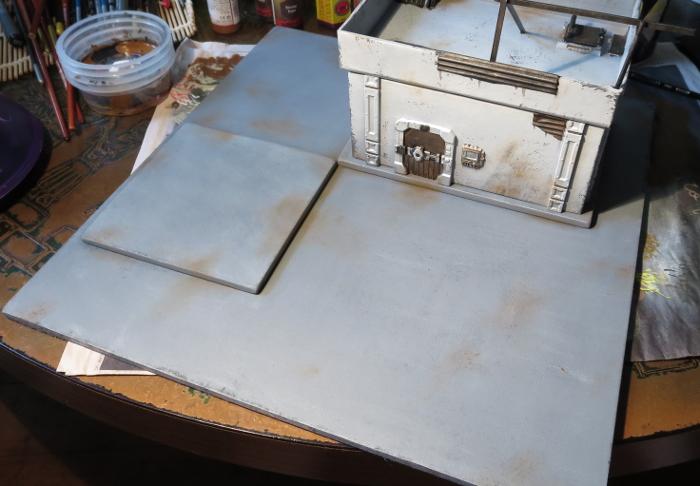
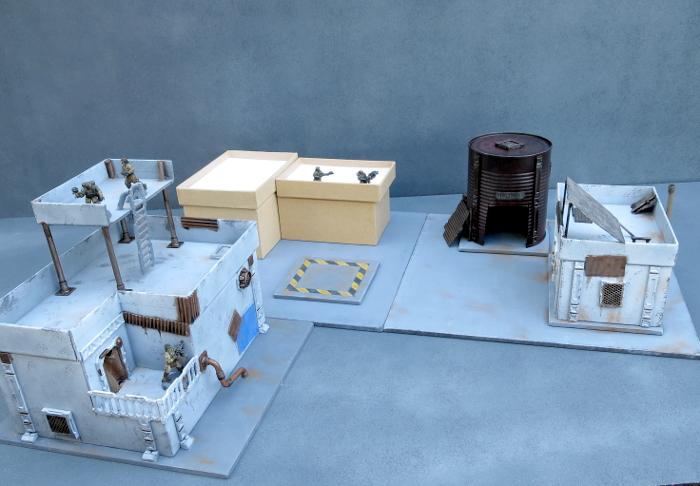
To sit the buildings on, I cut a 12" square of masonite, with a couple of smaller pieces glued on top - a rectangle for the gift box building and a square for the tank. These were cut to size and then sanded around the edges to smooth down the burrs. I then gave the top surface a light sand to break up the shine and give it some texture for drybrushing later, and then glued the building foundation pads on with PVA glue.
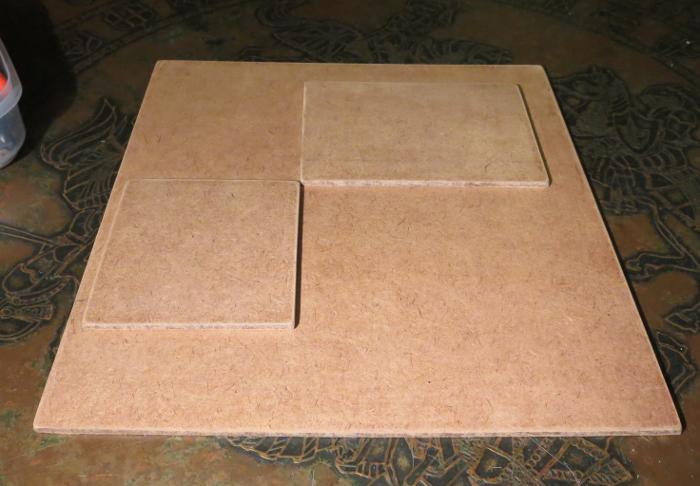
Everything in place, ready for painting:
Because the gift box building was already mostly painted, I could skip straight to the detail work. To check how the main bit was done, check out the first article linked back up at the start of this one.
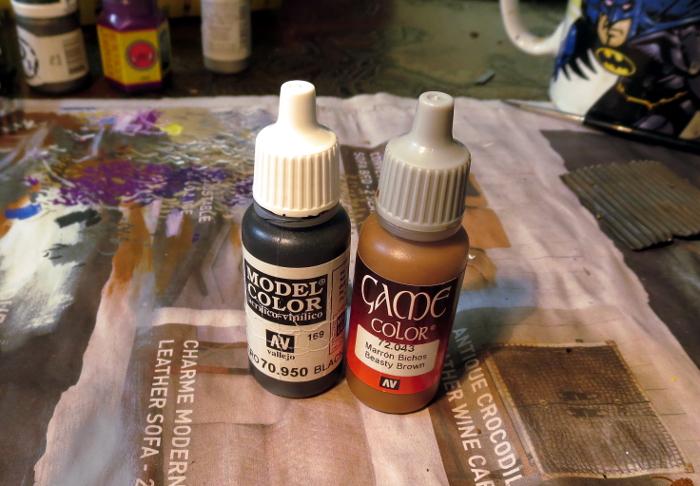
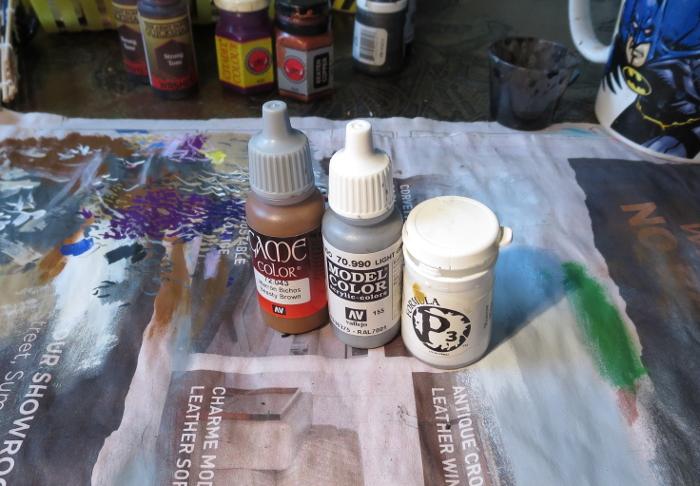
The various metal patches were given a coat of a rough mix of Vallejo Beasty Brown and black.
Over this went a light drybrush of P3 Pig Iron.
This was followed by a generous coat of Army Painter Strong Tone.
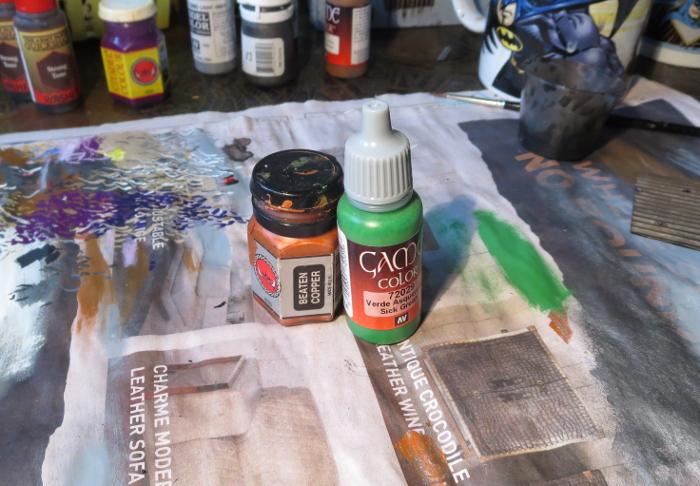
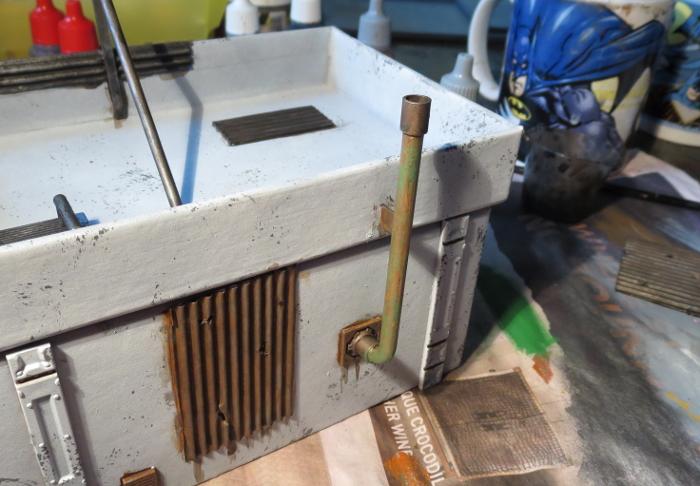
The pipe on the back wall was painted with a coat of Citadel Beaten Copper, and then given a light drybrush of Vallejo Sick Green.
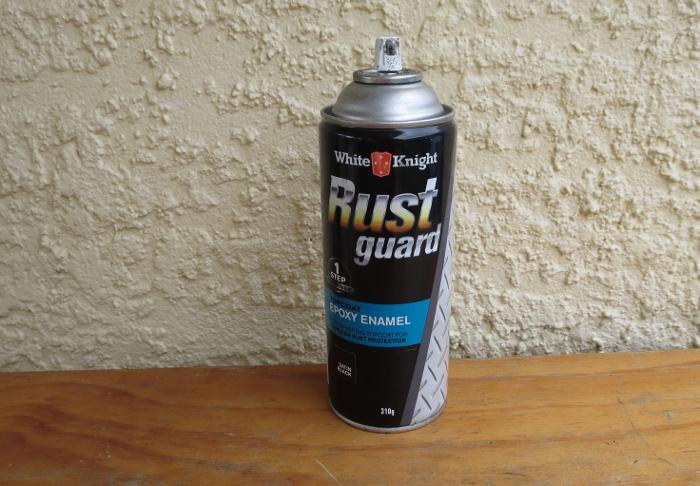
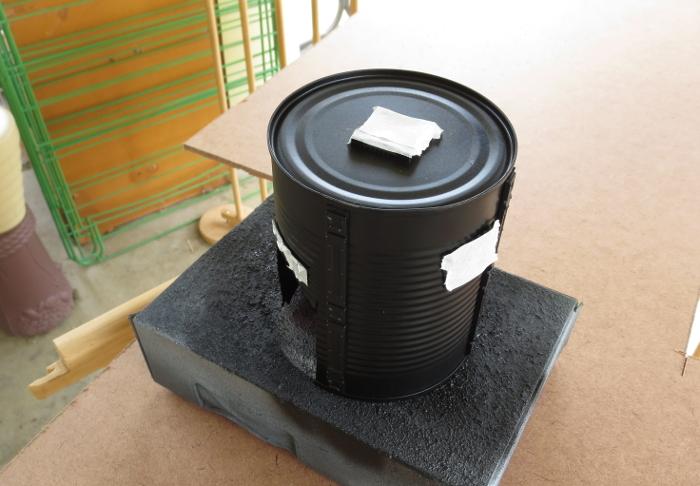
Meanwhile, the tank was given a spray inside and out with black Rustguard, to prevent it from rusting through the paint down the track.
I then masked off the detail parts of the tank building with some masking tape.
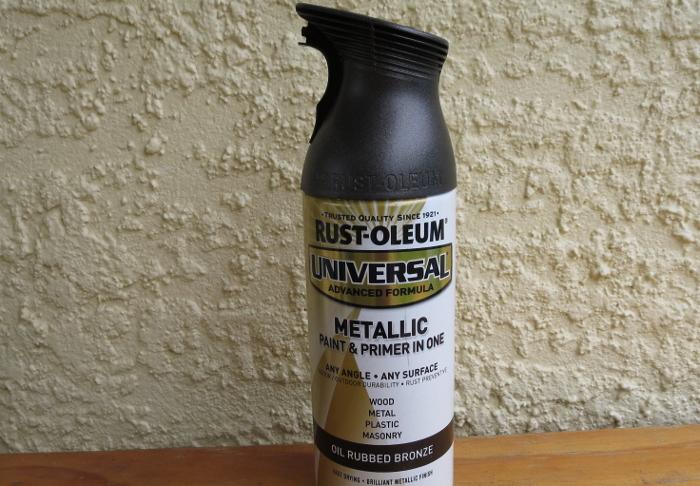
The came a coat of Rust-oleum Oil Washed Bronze. This is a rust-preventing primer like the black, so could have actually gone straight over the bare tin without the layer of black, but I wanted to make sure it was good and dark. The black base helps this without having to spray the bronze on too heavy, as it gets a bit goopy and rough.
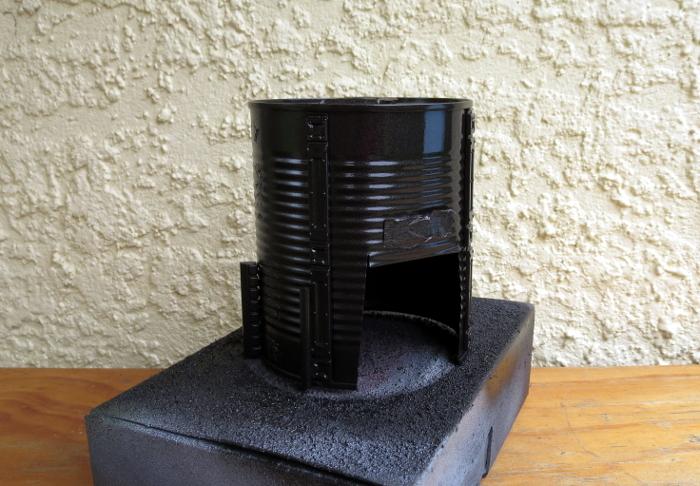
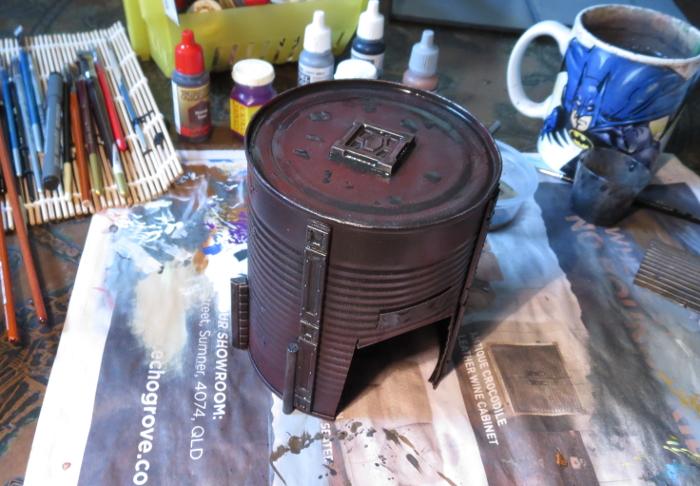
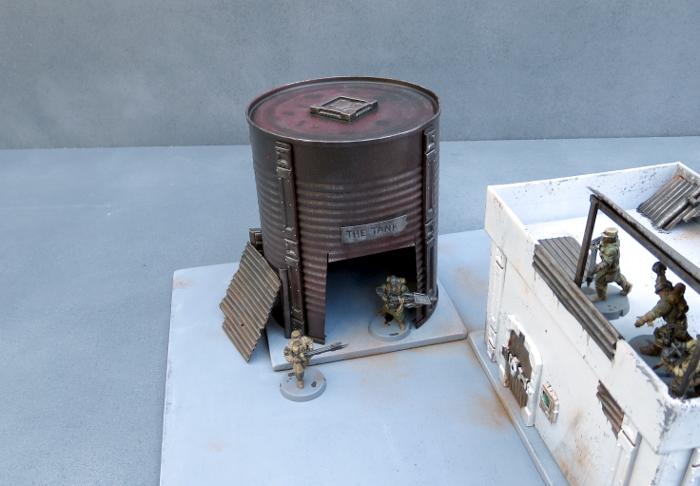
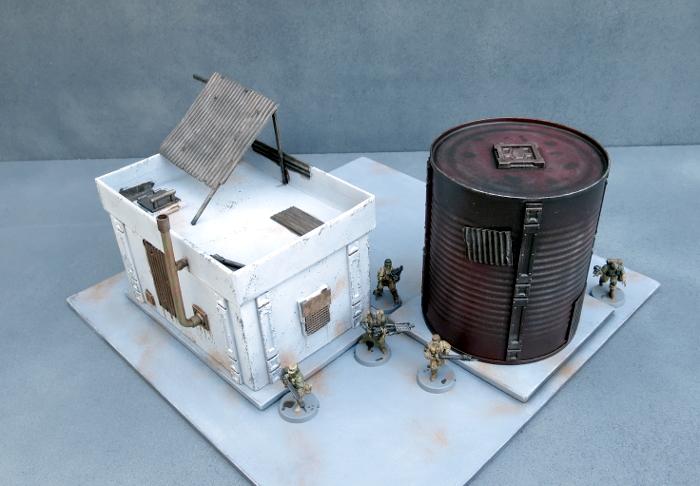
When the bronze was dry, I sprayed lightly over the top surface of the tank with some Army Painter Dragon Red, and then flipped the tank upside down and sprayed lightly around it so that the red caught in the undersides of the tin's corrugations without coating the whole thing in red.
I then drybrushed the whole thing lightly with Pig Iron, going a little heavier on the detail parts to make them stand out a little from the darker tank. The detail parts were then washed with some Strong Tone, and a few puddles of Strong Tone scattered around on the top surface.
While all of this was going on, I undercoated the based board with some flat black, and then gave it a coat of a flat medium grey. I deliberately use a range of different greys to basecoat my 'concrete' terrain bases, to help reduce the uniformity of the vast expanse of concrete on the table. If you look around in a city that has a lot of concrete structures, the colours vary considerably depending on the age of the concrete and the specific mix used, so it creates a better sense of realism on the gaming table if you carry this across in your painting.
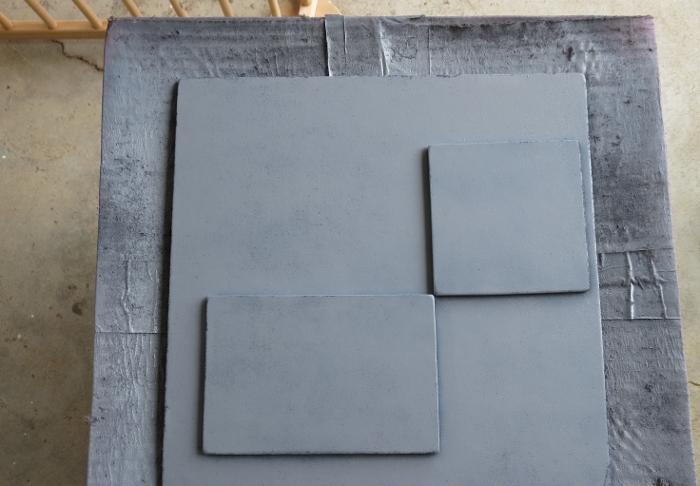
To finish off the base, it was given a drybrush of Vallejo Light Grey mixed roughly with white, and then some patches of worn grime were added with a light drybrush of Beasty Brown, on both the base and the gift box building.
With the addition of a couple of final details (some lettering above the tank's doorway, the light above the door and the comm panel screen), this little building cluster is about done for now.
The tank still needs a blanket door covering, which I'll be going through in an upcoming tutorial, and I will go back over all of the buildings in the settlement to add some more characterful detailing once I have some more of the bulking out done, but it's at a point where it's not going to look out of place on the table as-is.

So what's next?
Aside from the door covering for the tank, I'll be moving on to another building section that will have some challenges in the roofing department and some sort of interesting detail in the courtyard.
Stay tuned for more!
To build your own stellar refugee settlement, you can pick up the Maelstrom's Edge terrain sprue from the webstore here. As always, feel free to share your creations on the Comm Guild Facebook page!
For other Maelstrom's Edge modeling articles, including tutorials and walkthroughs of a wide range of different building and miniature projects, check out the article roundup here.
Tags: broken buildings modeling models spotlight terrain terrainsprue walkthrough