Entries tagged [models]
New Broken unit release: Pa'ku Artillery
Posted on Wednesday Oct 31, 2018 at 05:00pm in The Broken
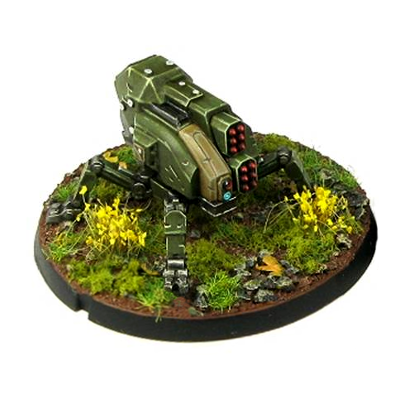
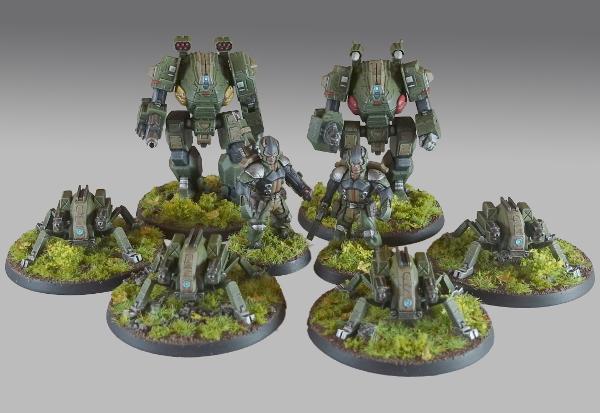
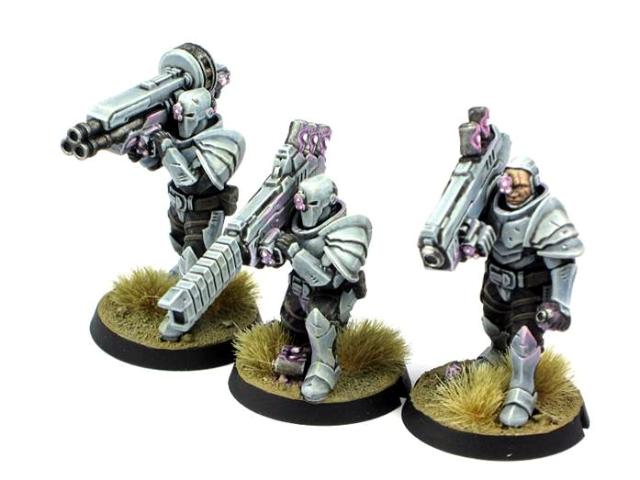
This month sees the release of a new support unit for the Broken: Pa'ku Artillery, available now from the webstore here!
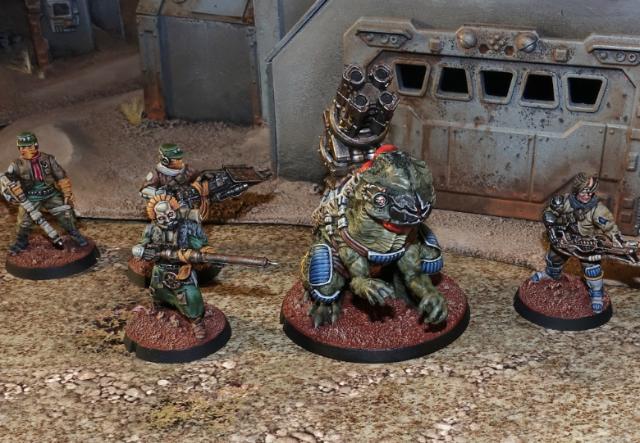
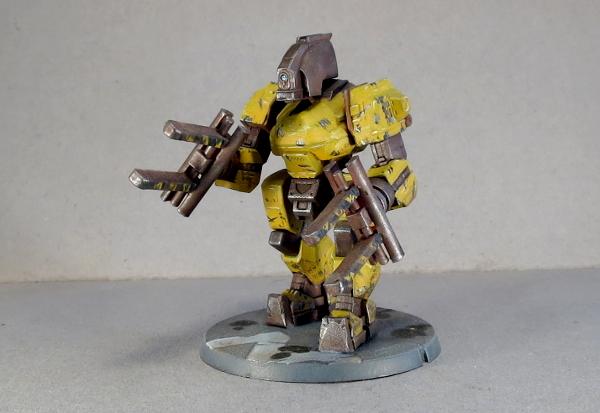
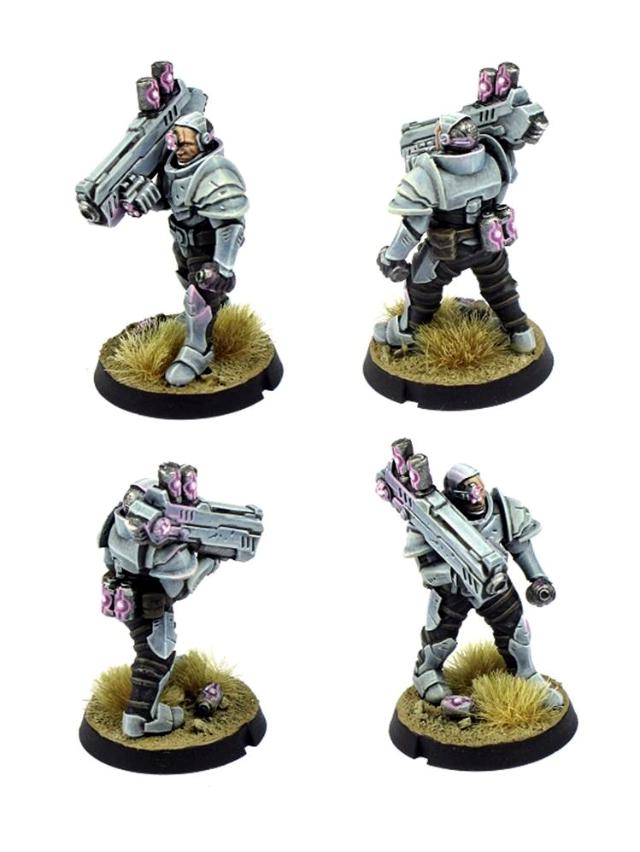
Behind the implacable visage of the Pa'ku resides a powerful, if often misunderstood intellect. Extremely logical creatures, when the Pa'ku are convinced a certain course of action will do more good than wrong, they will take lives without scruples if that is what it takes. Pa'ku artillery has been known to mercilessly bombard hospitals or civilian refugee groups when they have concluded that this was the most logical course of action. They do not make any decision lightly nor do they act carelessly. In fact, the Pa'ku sometimes drive their commanders crazy as they sit pondering the pros and cons of a proposed course of action and all the alternatives, and where the situation is particularly complex have been known to gather for private war councils with their own kind before they will consider responding to a call to arms. Despite their reputation for ruthlessness, when Pa'ku take lives it is because they believe there is no viable alternative. This does not however mean they are saints - all of a Pa'ku's deliberations are still ultimately guided by self-interest and a desire to survive the chaos of the Edge.

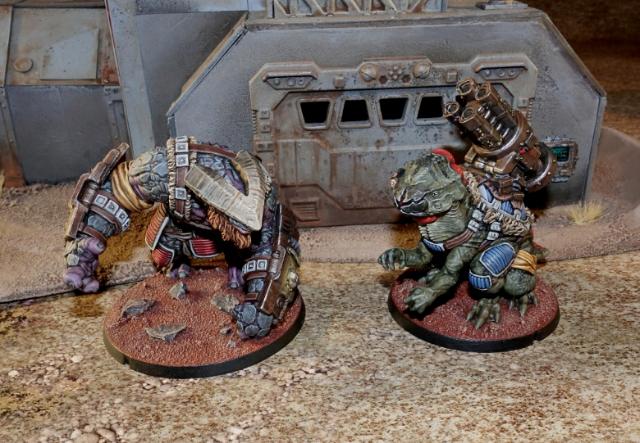
Despite their peculiarities, Pa'ku are especially desirable to the Broken. Their solid physiques make them extremely suited to carrying heavy loads, including the biggest artillery the Broken manage to cobble together. At close range, the Pa'ku can extend their very long tongue with enough force to cave in a man's skull. Pa'ku only speak to other species when necessary, and their language is difficult for most races to translate or speak. Combined with their large size, this generally results in them being overlooked by evacuation efforts, and so as with the even larger Gnolti, joining the Broken is often the only reasonable chance for a Pa'ku to escape the edge and find a new home.
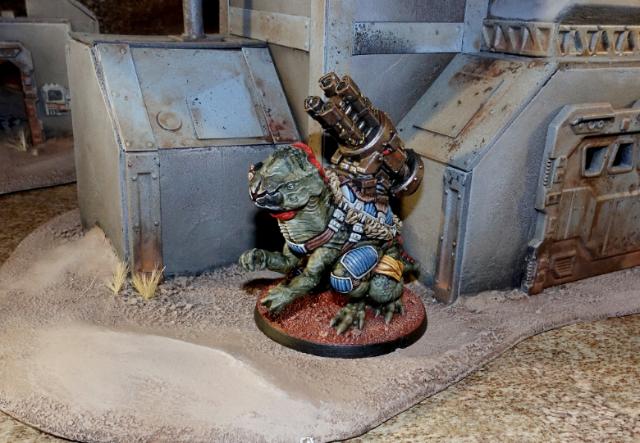
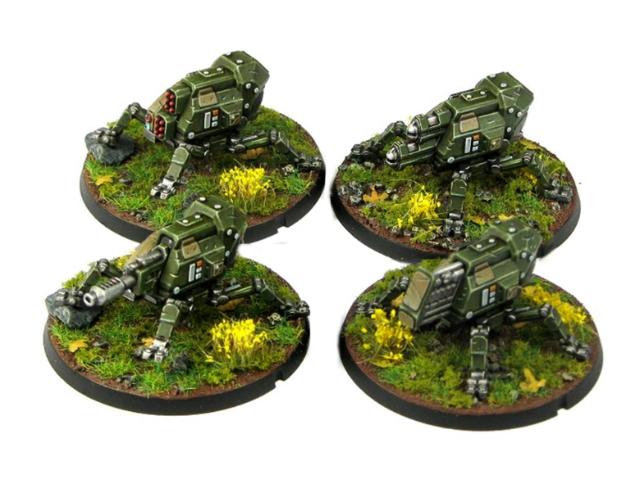
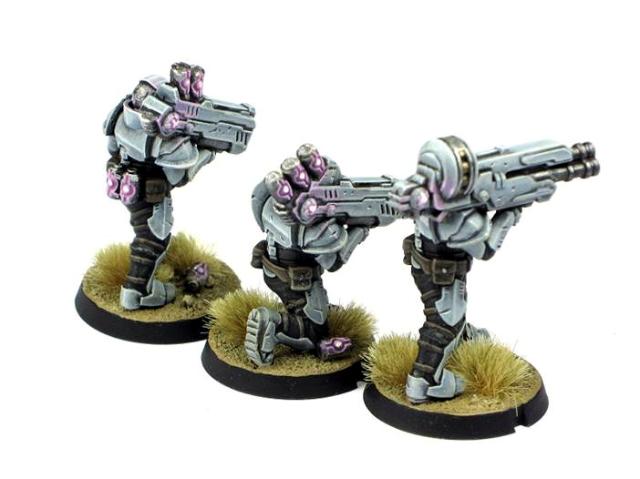
Pa'ku are often found in the support lines of Broken forces with giant cannon and other esoteric weapons strapped to their broad shoulders. Linked with electronic targeting systems, these weapons can be slaved together to unleash devastating barrages of firepower onto enemy lines. Their favoured weapon is a multi-barrelled EMP mortar, which carpets the battlefield with explosive energy packets that can fry electronic systems and incinerate softer targets. You can find the rules for the Pa'ku Artillery unit in the Force Builder section of the Maelstrom's Edge website here.
This high detail, multi-part resin kit contains one Pa'ku armed with a Quad EMP Mortar, and is available now from the webstore here!
New resin release for the Broken: The Hakoyu Grand Master!
Posted on Friday Sept 28, 2018 at 06:00pm in The Broken
![]()
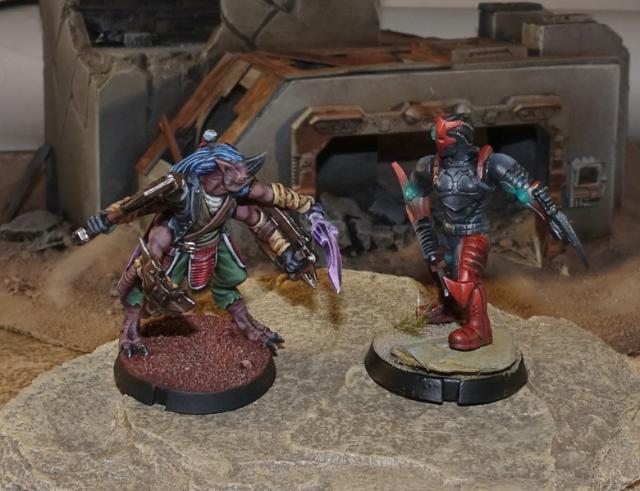
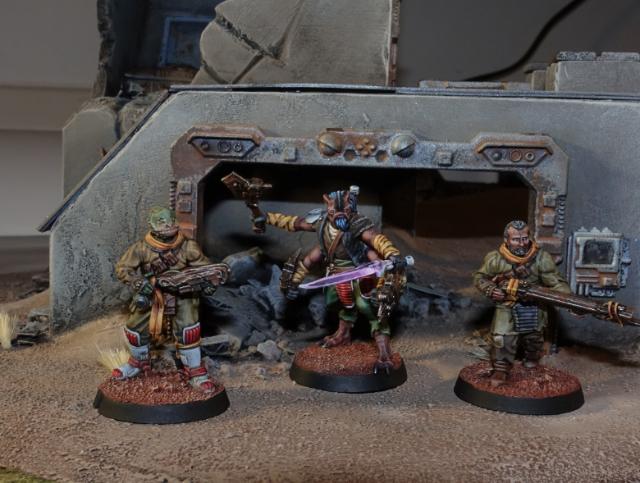
The Broken receive a bit of a boost to their melee capabilities this month, with the release of the resin Hakoyu Grand Master - available now from the Maelstrom's Edge webstore!.
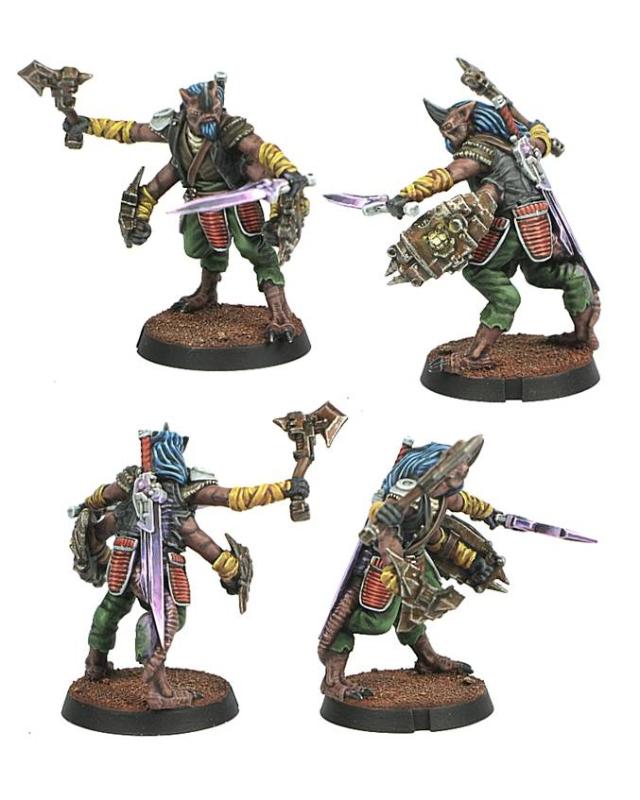
The Hakoyu Grand Master is an optional add-on for Broken Assault units. Equipped with powerful close combat weapons and defensive shields, he can help to defend the unit from incoming close quarter attacks while also possessing the fighting prowess to stand toe-to-toe with a Karist Shadow Walker!
With four arms and a horn-like protrusion from their foreheads, Hakoyu can seem menacing at first glance, especially as most have trained for decades in various martial arts and tend to carry at least one large melee weapon with them at all times, despite the fact that they are quite passive by nature. When a Hakoyu does feel forced to fight, their lightning quick reflexes and zealous training means they can usually end the contest before their opponent even knows what has happened.
The Hakoyu hail from the remote Yedo system. Their society is governed by a strict code of honour that can be difficult for non-Hakoyu to decipher. They believe the needs of the group are paramount, with the desires and wants of any individual considered trivial. This means Hakoyu prefer to live their lives in their home system, which makes them one of the more rare alien species in the Spiral Arm, with most humans never encountering a Hakoyu in their lifetime. All is not perfect on Yedo however, as the Hakoyu have been locked in a centuries-old war with their neighboring species, the Cera, over territorial rites and a perceived slight to the Hakoyu peoples' honor that cannot forgive. The war has steadily sapped the resources of Yedo, with the Cera using their technological advantages to blockade Yedo from receiving much needed relief supplies for its civilians. This dire situation has forced increasing numbers of Hakoyu to flee Yedo in an attempt to earn a living selling their services throughout the spiral arm, usually as a bodyguard or enforcer, even though such work is in direct conflict with their morale code and likely means they would not be welcomed back to Yedo should they ever wish to return.
When the Maelstrom threatens a world, misplaced distrust in Hakoyu sell-swords means they're often discarded at the last second by their former employers and denied a place on escape craft, leaving them ripe to join the ranks of the Broken. The Broken offer the Hakoyu a way out and a collective where most everyone is an outcast to some extent, in which many Hakoyu have found a second home even as they long to someday find their way back to Yedo. The Broken, on their part, value the Hakoyu's fighting skills and their unselfish character. The most sought after Hakoyu are their pinnacle warriors: a Grand Master, as they tend to give any squad the upper hand in any close quarter fighting. The calm demeanor of a Grand Master under fire is enough to convince their Broken squad mates to charge into the teeth of enemy fire rather than to run away. Grand Masters wield deadly Hakoyu phase weaponry, a technology first seen on Yedo and whose methods of construction are a closely guarded secret. These weapons pass effortlessly through energy fields and can cause electronic circuitry to explode upon contact, both highly sought after abilities in the Hakoyu's fight against the Cera. Hakoyu are also renown for their exquisite skill with forearm deflectors, and Grand Masters in particular are able to use these to prevent an opponent from ever striking them, no matter what type of deadly melee weapon they might face.
The Hakoyu Grand Master is available now - You can find it in the Maelstrom's Edge webstore here!
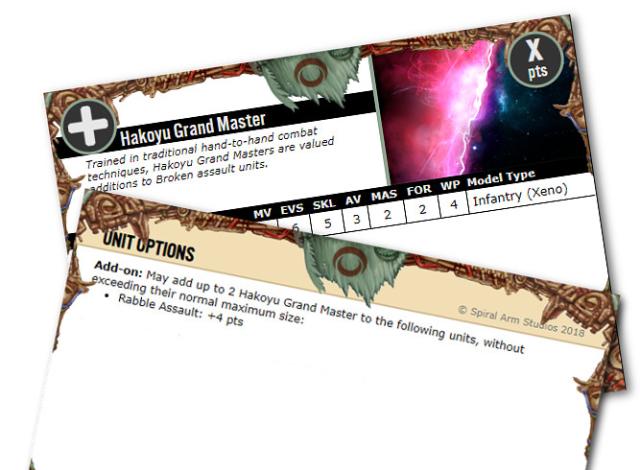
The unit card will be up in the Force Builder section of the Maelstrom's Edge website in the next couple of days - but here's a sneak peek!
New Epirian Resin Release: Contractor Drones!
Posted on Sunday Sept 02, 2018 at 11:19am in The Epirian Foundation
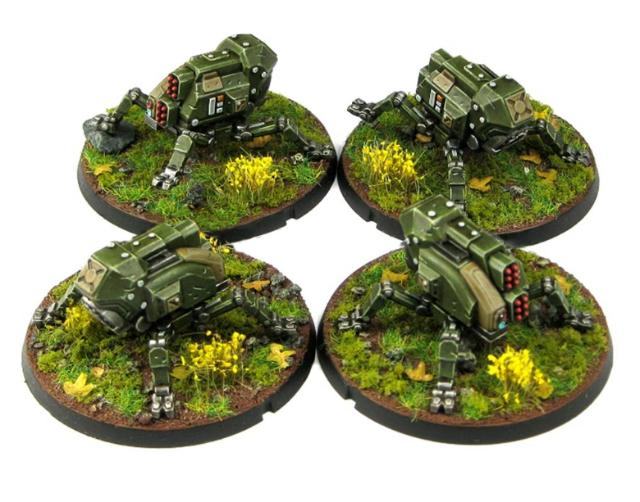
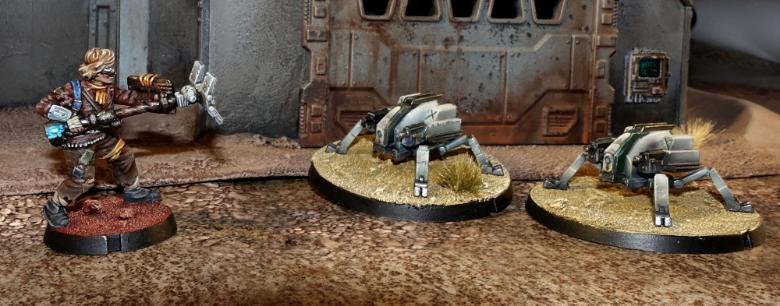
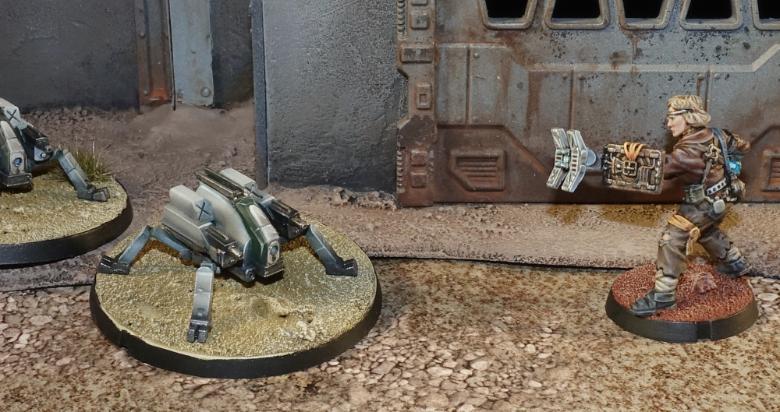
A reinforcement for the Epirian Foundation crawls into the online store this month, with the release of the Epirian Contractor Drone. Providing a more stable and reliable platform than human troops, Contractor Drones are used in Epirian forces to add heavy firepower or specialised tactical options to Contractor units.
The Contractor Drone changes the way Contractor units are structured. Instead of having a single Contractor Unit, we're introducing 4 different types of Contractor squads which are differentiated by the type of drone that accompanies them. This current Drone has parts to use it with the new Contractor Defender unit and Contractor Scout unit, with more drone variants and associated Contractor unit types to follow later on.
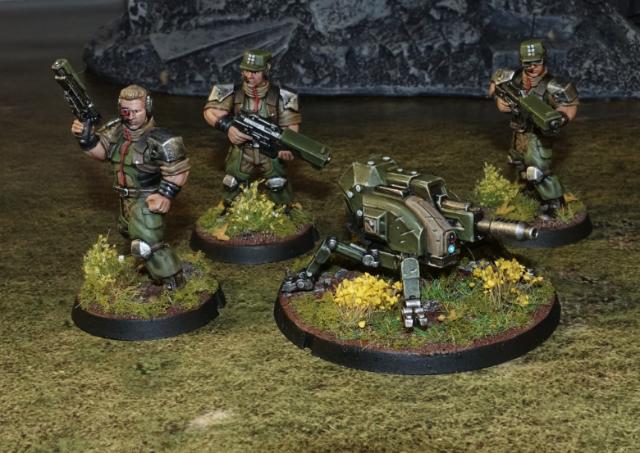
This resin kit is comprised of a Contractor Drone chassis, and optional parts to equip it with a Maglock Chaingun, linked Cluster Missile Pods or linked Flakk Guns, for inclusion in a Contractor Defender unit, or a Resupply Package to supplement a Contractor Scout unit. You can find it in the Maelstrom's Edge webstore here!
The rules cards for these units will be online very soon, but in the meantime, here's a look at the rules for the new units:
CONTRACTOR DEFENDERS
FACTION:Epirian Foundation
UNIT TYPE:Core Unit
POINTS:6 pts
Full Unit Profile:
Contractor:MV 7, EVS 4, SKL 3, AV 3, MAS 2, FOR 1, WP 2, Type: Infantry (Human)
Contractor Team Leader:MV 7, EVS 4, SKL 3, AV 3, MAS 2, FOR 1, WP 3, Type: Infantry (Human, Squad Leader)
Contractor Drone:MV 7, EVS 4, SKL 3, AV 3, MAS 2, FOR 1, WP 1, Type: Infantry (Robot, Slaved)
UNIT SIZE: 1 Contractor Team Leader & 2 Contractors.
EQUIPMENT: Maglock Assault Rifle & Maglock Guardian Pistol.
Contractor Drone: 2 linked Flakk Guns.
ABILITIES: None.
OPTIONS:
• May add up to 2 more Contractors: +2 pts each.
• May replace up to 2 Contractors with Contractor Drone: +2 pts each.
• Up to 2 models may replace Maglock Assault Rifle with Maglock Assault Rifle & Aux Grenade Launcher (Choke & Emp Rounds): +2 pts each.
• Contractor Team Leader may replace Maglock Assault Rifle with:
- Shock Baton: +0 pts.
- Shock Maul: + 1 pt.
• Contractor Drone may replace 2 linked Flakk Guns:
- 2 linked Cluster Missile Pods: +1 pt.
- 2 linked Strike Missile Pods: +1 pt.
- Maglock Chaingun: +1 pt.
Heavy Defenders: A Contractor Defender unit with 2 Contractor Drones is an [Anvil] selection.
Unique Abilities:
None.
Unique Equipment:
None.
CONTRACTOR SCOUTS
FACTION:Epirian Foundation
UNIT TYPE:Vanguard Unit
POINTS:7 pts
Full Unit Profile:
Contractor:MV 7, EVS 4, SKL 3, AV 3, MAS 2, FOR 1, WP 2, Type: Infantry (Human)
Contractor Team Leader:MV 7, EVS 4, SKL 3, AV 3, MAS 2, FOR 1, WP 3, Type: Infantry (Human, Squad Leader)
Contractor Drone:MV 7, EVS 4, SKL 3, AV 3, MAS 2, FOR 1, WP 1, Type: Infantry (Robot, Slaved)
UNIT SIZE: 1 Contractor Team Leader, 1 Contractor & 1 Contractor Drone.
EQUIPMENT: Maglock Assault Rifle & Maglock Guardian Pistol.
Contractor Drone: None.
ABILITIES: Scout.
Contractor Drone: Resupply Package, Scout.
OPTIONS: • May add up to 2 more Contractors: +2 pts each.
• Up to 2 models may replace Maglock Assault Rifle with Maglock Assault Rifle & Aux Grenade Launcher (Choke & Emp Rounds): +2 pts each.
• Contractor Team Leader may replace Maglock Assault Rifle with:
- Shock Baton: +0 pts.
- Shock Maul: + 1 pt.
• Contractor Drone may replace Resupply Package with Recon Package: +0 pts.
Unique Abilities:
Resupply Package: (squad ability) Friendly units within 6" of this unit (including itself) may re-roll one failed roll to hit during a round of shooting.
Recon Package: (squad ability) All of this unit's attacks have the [b]Paint (4+)[/b] ability, not including CQ attacks.
Unique Equipment:
None.
As you can see, the Contractor Defender unit basically replaces the existing Contractor unit type, with the optional addition of one or two heavy weapon drones. Note that this includes the option to equip the drones with Strike missiles, which aren't included in this release - there will be a conversion article for this option coming very soon!
The Scouts are the first new unit type, adding another Vanguard option to the Epirian line-up. With the new and planned units, you will soon have the ability to field an entire force of Contractors, although you can obviously still mix these new units with the existing bot units as well!
The new Contractor Drone is available now - You can find it in the Maelstrom's Edge webstore here!
Modeling Spotlight: Karist Shadow Walkers
Posted on Monday Aug 20, 2018 at 06:00pm in Tutorials
- by Iain Wilson
I'm taking a little break from new releases this week to have a look back at another of the original release units - The Karist Shadow Walker!
The Shadow Walker sprue contains two different torsos (twisted in different directions from the front) and two of each arm in different poses. This allows you to create two very different, dynamically posed models from those parts. You can find the general assembly guide on the Maelstrom's Edge website here.
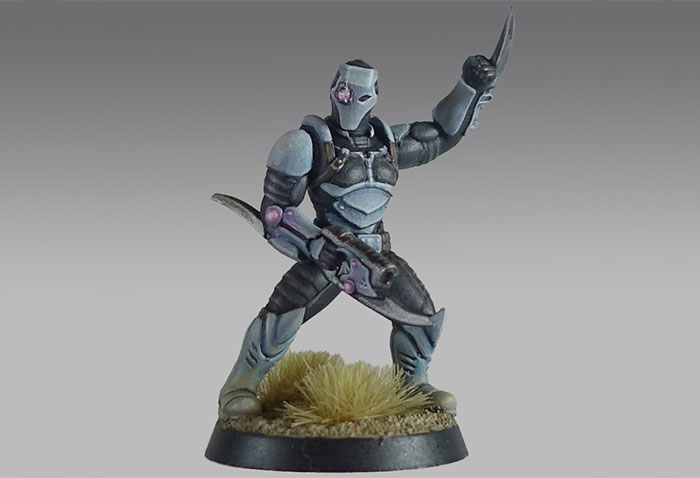
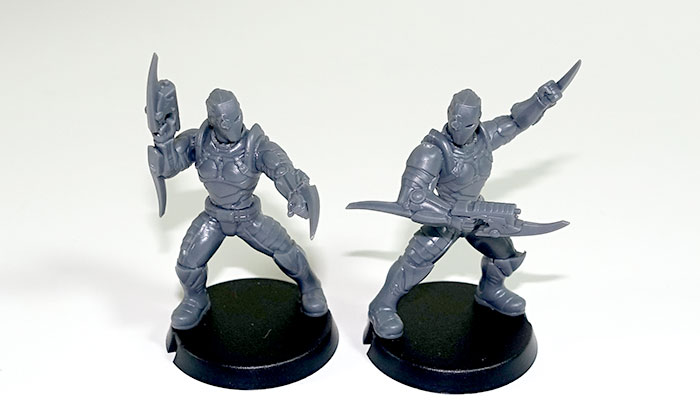
Somewhere along the design process, the sprue went from being intended to create a single model to including parts for two full models with the lack of only a second head. Luckily, several other Karist kits come with extra heads, so it's not too difficult to purloin a leftover in order to build that second Walker. The right hand model below uses the bare head from the Karist Trooper sprue, and there's another bare head available on the Faction Expansion Sprue.
Alternatively, the resin Karist Heavy Weapons set comes with two troopers and three heads - two helmeted, and one bare. The helmeted heads are very similar in style to the Shadow Walker's, with a couple of extra eye lenses. The model below has also been reposed slightly, with the right arm extended and filled with 'green stuff' putty, and the right shin repositioned so that his front foot matches his line of fire.
While we're reposing our models, it is really easy to add a little more motion to the pose by cutting off the bent leg just below the knee and reattaching it at a sharper angle and off the ground, to create a 'lunging' pose. The below Shadow Walker has clearly just Rifted in and is charging into the action:
Borrowing parts from different kits does, of course, work both ways. The Karist Praetorians below were given Shadow Walker legs to help them stand out a little from regular troopers and to create a more dynamic pose than is possible from the Trooper legs. The added loincloths are from the Faction Expansion sprue.
As I was working through these models, I found myself wondering what it would look like if Shadow Walkers had their own specialised mini-factions. From there, I wound up with the 'Shadow Dancer', carrying a regular cybel blade on place of the usual Shadow Walker's wrist-mounted version, and with an added prehensile, mechanical topknot which, I expect, would whip around as the Dancer flips and whirls about his opponents, and shoot out toxic darts or hallucinogenic gas from the emitter on its tip. The cybel blade was taken from the faction expansion sprue, and the topknot made from a piece of guitar string and the muzzle from a Karist radwave emitter.
By contrast, the 'Shadow Stalker' eschews close range combat where possible, opting instead to carry out his work from afar with his nox rifle. This model has an assault rifle arm taken from the new Broken Forsaken Tech Chieftain model with the bayonet and muzzle removed and a silencer made from a length of plastic tube attached. The head is the bare head option from the Karist Heavy Weapons pack.
I don't have a name for this next one yet (feel free to leave suggestions in the comments!) but how about a Shadow Walker sect that has found an alternative to teleporting? Using arcane science to fuse Angel DNA to the human form, this Shadow Walker variant is equipped with void-gel wings!
Of course, if you're going to have bizarre sub-sects of the Karist Walker breed, it wouldn't be too surprising to have a clandestine offshoot of the regular Kaddar priesthood overseeing them. And so the Kaddar Noctis was born - like the flying Walker above, this model fuses Human and Angel DNA, with the traditional Shadow Walker cybel blade replaced with an Angel's void-gel tentacles. The legs and torso are from the Kaddar Nova sprue, with most of the Cybel reactor removed and replaced with a modified cybel glaive head from the Faction Expansion sprue. Arms and head are from the Shadow Walker sprue, with the small tentacle parts taken from a pair of Mature Angel models.
To add some sneaky, pointed 'negotiation' to your own Karist Force, you can pick up the Shadow Walker along with the rest of the Maelstrom's Edge model range from the webstore here.
As always, feel free to pop along and share your work, or ask any Maelstrom's Edge- or hobby-related questions on the Comm Guild Facebook page!
For other Maelstrom's Edge modeling articles, including tutorials and walkthroughs of a wide range of different building and miniature projects, check out the article roundup here.
Tags: conversion converting karist modeling models spotlight
Modeling Spotlight: Converting Broken Chieftains
Posted on Monday Aug 06, 2018 at 06:00pm in Models
- by Iain Wilson
This week we released the second of our resin Forsaken Chieftain models for the Broken faction. These two models allow Chieftains to take a few extra options that weren't available from the plastic kit, and are a wonderfully characterful pair of models. However, since I find it physically painful* to assemble models the way they were intended to be built, I thought I would take this opportunity to slice a few of them into pieces and see what interesting conversion possibilities they opened up.
*May not be an actual medical condition, but why take the chance?
Built straight out of the package, the two models each come with a pair of weapon options. The 'regular' chieftain has a xeno spotter perched on his/her (it's deliberately ambiguous) raised right hand, and also has a two separate left forearms, one with a poisoned blade and the other with a trophy melee weapon. The 'tech' chieftain has two separate right arms, with a custom beam blastgun and a custom slug rifle.
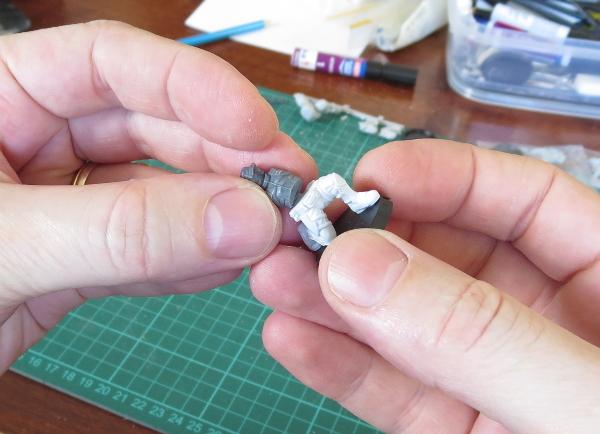
You can easily double-up your command options by using the leftover weapons on plastic Broken Rabble bodies. On the below models, I equipped one with the leftover slug rifle by slicing off the locator peg and gluing it on in place of a regular plastic arm. The other has the leftover trophy weapon in place of the plastic forearm, which just requires cutting the lower arm off just below the elbow and gluing the weapon arm piece in its place.
Parts can also be mix-and-matched onto the resin Chieftain models to switch around the available options a little. On the below tech Chieftain model, I left off the resin right arm and equipped him with a plastic arm and beam pistol from the Rabble sprue, and cut off his left arm at the elbow and attached a trophy weapon from the other Chieftain model.
On the regular Chieftain below, I replaced the right forearm with a plastic one, and added a regular blastgun from the Rabble weapon sprue. I also cut off a plastic left forearm and added a grenade.
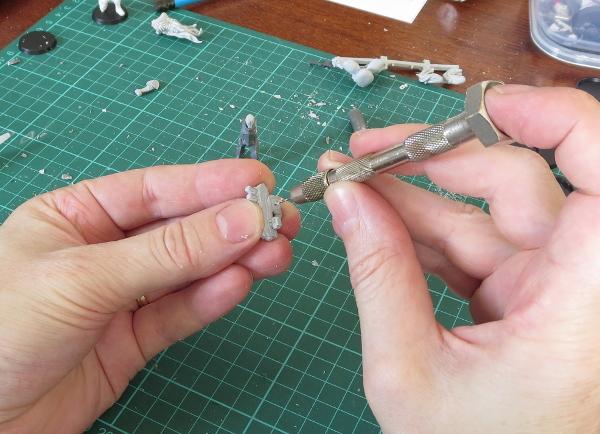
For a more action-posed Chieftain, I cut the legs off this one at the waist, using a razor saw. Then I glued on a pair of running legs from the Rabble sprue, added a slightly modified slug pistol hanging off the belt, and glued the xeno spotter on tilted just a little bit forwards.
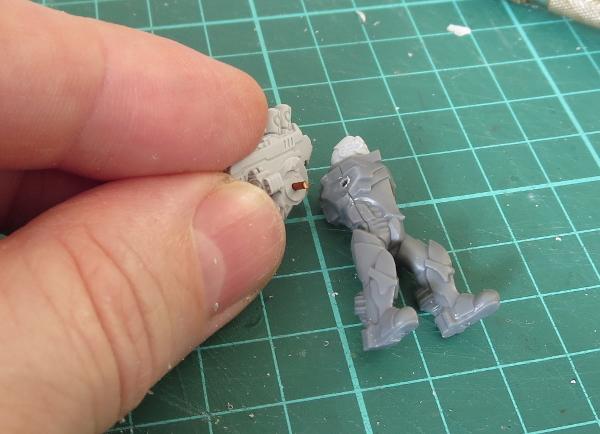
Since I now had a pair of leftover Chieftain legs, I did the obvious thing and glued them to a Karist heavy weapon trooper torso I had left over from a previous conversion. This Chieftain has the right arm with custom beam blastgun from the tech Chieftain, and a left arm and alien head from the Rabble sprue.
Mixing things up a little more, I added a xeno spotter and trophy weapon to a Broken Sig Jammer body, to create a less ostentatious Chieftain model. A head and left hand from the Rabble sprue finished the conversion off nicely.
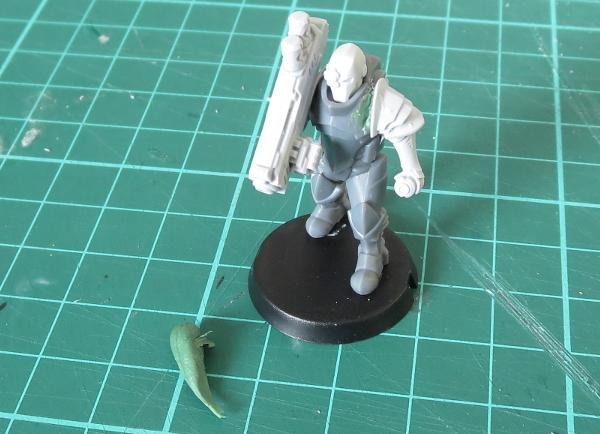
And finally, a Chieftain equipped with a trophy weapon from a more civilised age, which is apparently less clumsy and random than a blaster. The laser sword is made from an overcharged powercell from the Rabble sprue, with a cut-down blade stolen from a Star Wars figurine. I also cut the left arm off, carefully cutting around the cape so that a plastic arm would fit in neatly underneath it. This Chieftain will no doubt take to the battlefield and display his displeasure at the lack of faith shown by his underlings...
Hopefully, that's inspired you to have some fun with your own Chieftains. You can pick up the resin Chieftain models, the plastic Broken Rabble sprues, or any of the rest of the Maelstrom's Edge model range, from the webstore here.
As always, feel free to pop along and share your work, or ask any Maelstrom's Edge- or hobby-related questions on the Comm Guild Facebook page!
For other Maelstrom's Edge modeling articles, including tutorials and walkthroughs of a wide range of different building and miniature projects, check out the article roundup here.
Tags: broken chieftains conversion modeling models spotlight
Modeling Tutorial - Konstantin Moor, Veteran Bot Handler
Posted on Monday May 14, 2018 at 05:00pm in Tutorials
- by Iain Wilson
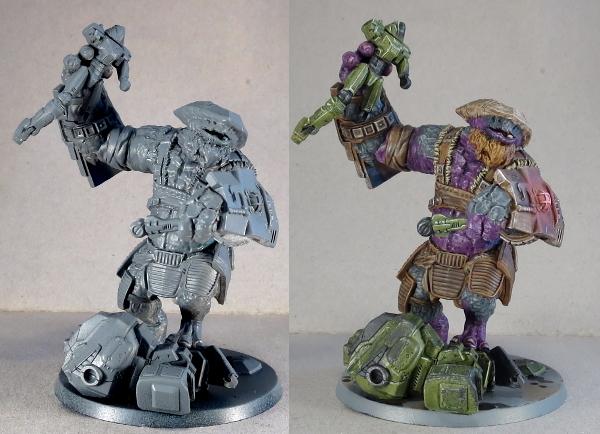
I've been having an awful lot of fun playing with the new Epirian Master Bot Handler kit (as evidenced in the Modeling Spotlight article from last week. Amongst all of the other conversion ideas that popped up when I started looking at the sprue, I had one that I thought warranted a conversion article all of its own. And so, let me present Konstantin Moor, Veteran Bot Handler, along with his companion drones: Iago and Cassio!
The main things that set Konstantin apart from his brethren are the additional pair of weapon arms, and the independent movement of the weapon arms, as opposed to the normal direct control rig that links to the forearm. To replicate this build, you will need two Epirian Master Bot Handler sprues and the Faction Expansion Sprue. You will also need a Drone sprue to build Iago and Cassio.
I built the body as normal, using the bent legs and the matching torso. In place of the normal helmeted head, I used the bare head from the Faction Expansion Sprue, although there would be nothing stopping you from just using the normal head if you prefer the armoured look. Note that the head from the expansion sprue is designed to go with the Karist Trooper torso, and so has a slightly thicker neck than the various Epirian and Broken heads. As a result, the neck needed a little shaving down with a hobby knife before being glued in place.
The arms were largely left alone, with the only modification required being to chop off the mounting peg for the weapons.
Now for the fun part. I took the backpack, and underneath the existing weapon arm socket, I smoothed down the corner of the pack and drilled a small guide hole with the tip of my hobby knife. Then I found a drill bit that matched the diameter of the arm socket (11/64", although a 4mm bit would do the job for the metric-inclined) and drilled out a new arm socket. I did this with the drill bit held in my fingers and twirling it - you could use a dremel or similar rotary tool, but plastic is soft so there's not really any need when the drill bit is large enough to grip it securely with your fingers, and this helps to reduce the risk of accidentally over-drilling the hole by drilling too fast.
Next up I assembled the two sets of weapon arms and glued them with a bit more than a 90 degree bend in the elbow.
These were glued in place on the backpack, and the backpack and arms glued onto the body. I also glued the Neural Nodes in place on the backpack weapon ports.
Time for some weapons!
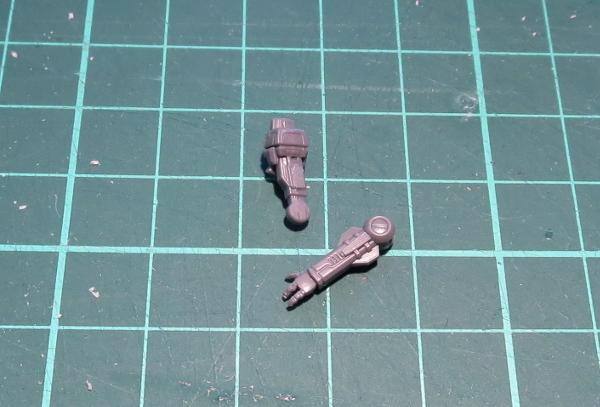
Konstantin is armed with two linked sets of Drone Class Laser Systems. Without these being joined to the forearms, I wanted to change how they mounted onto the weapon arms a little, to give them a more open range of movement. Using a hobby knife, I cut through the rear half of the mounting ring off the back of the weapons. The cutoff piece was also cut in half.
The weapons were then glued onto the ends of the weapon arms, pointing directly forwards with the remaining half of the mounting ring socketing over the ball joint. I attached one half of the cutoff ring section on the outside, to reinforce the joint a little.
After one final tweak (repositioning the right arm to be extended forwards instead of down) Konstantin was assembled and ready for paint!
Moving on - Iago!
Iago was assembled as a concept for the Master Handler modeling spotlight article, and I liked the idea too much to not get him onto the table. To put him together, I used a Spider Drone and a Master Handler backpack with Cluster Missile pods.
The bottom protrusions were sliced off the backpack with a razor saw, and the back of the drone chassis was similarly cut down flat.
I then glued the backpack onto the back of the drone chassis. The chassis sidepods needs shortening a little - I cut them down so that they butted up flush against the backpack.
With the addition of a set of Spider Drone legs, Iago was all set.
And finally: Cassio!
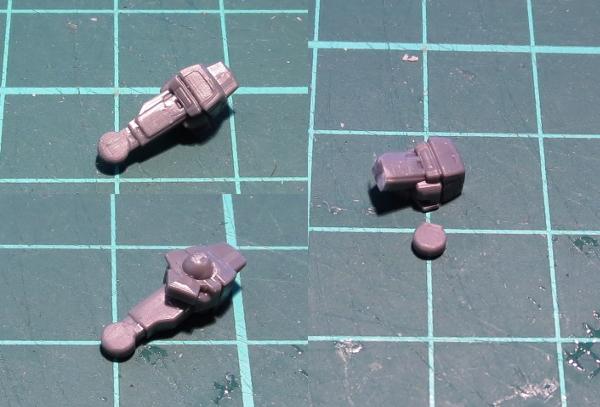
Cassio is based on a Firefly Drone, with the normal laser system replaced with an energy field projector. To create the projector, I used a flakk gun from the drone sprue, cut as below, and the muzzle of a radwave emitter and a cybel mine from the Faction Expansion sprue.
I assembled the drone as normal (sans weapons) and then glued the projector in place underneath, using the cut-down flakk gun as the mount, gluing the cybel mine to the front of the gun, and then the reversed radwave emitter muzzle to the front of the mine.
With turbines glued on and a flight base added, Cassio was ready for action.
The unit all assembled:
Next: painting and rules card - Click here!
What have you done with your Master Bot Handlers? We would love to see your creations on the Comm Guild Facebook page!
To pick up this or any of the rest of the Maelstrom's Edge model range, visit the webstore here.
For other Maelstrom's Edge modeling articles, including tutorials and walkthroughs of a wide range of different building and miniature projects, check out the article roundup here.
New Broken alien - The Marsayan Hypnotist is available now!
Posted on Saturday Mar 31, 2018 at 04:58am in The Broken
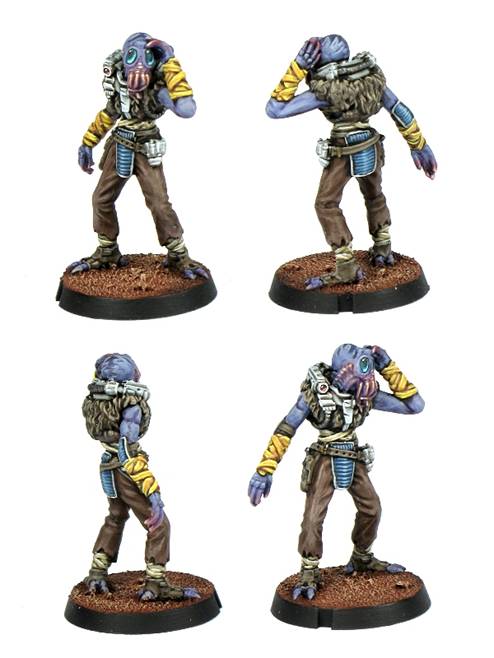
The Marsayan Hypnotist is the next resin release for the Broken faction in Maelstrom's Edge. The first 'Add-On' unit type available for the Broken, the Marsayan Hypnotist can be added to different Broken squads to help protect them from enemy fire, as detailed on the model's profile card in the online unit card section of the Maelstrom's Edge website.
Marsays are not naturally gifted fighters, nor are they a particularly good shot. With their long limbs, clumsy gait and large bulbous eyes, Marsays don't seem a threat. Disguised behind those eyes, however, is their remarkable ability to influence the mind of others. This is a slumbering ability that most Marsay cannot consciously steer, only presenting itself when the Marsay is angry or fearful. There are some, however, who can exercise this power at will, giving them frightening control over those around them. At a distance, a Marsay can subtly suggest to the enemy to perhaps choose a different target to fire at. Up close, they can create much more intense hallucinations or make an opponent become violently ill.
There are rumours that a great Marsayan empire existed, comprising dozens of worlds, stretched across multiple systems. Driven by the most influential telepaths, the Marsayan Empire was thought to be deeply unequal and aggressive towards other cultures. Neighbouring human worlds, either threatened or jealous of the Marsayan abilities, banded together to attack, and most of the Empire was exterminated. The surviving Marsays fled their home worlds and learned to hide amongst human populations. All official records of the Marsayan civilization were wiped out by the arrival of the Maelstrom. Today, Marsays are mostly black market merchants by trade. Common sights in bazaars across the Arm, they are respected for their business acumen and the quality of their wares. Marsayan Ranja is an especially popular liqueur. Equally well known, however, is the Marsayan Swindle. Many an unsuspecting buyer at a Marsay market stall has suddenly felt a little nauseous and returned home with a purchase they can't quite explain.
Marsays still hold a deep fear of being imprisoned or killed for their gifts, and deny or downplay their telepathic potency. This fear of human government drives them to hide amongst the shadows of society, and even with the approach of the Maelstrom few are willing to risk being caught influencing their way onto an evacuation ship. Marsays are naturally drawn to Broken Freeports, where humans and xenos peacefully intermingle away from the sight of authoritarian government. Marsays often join Broken fighting forces to procure plundered goods they can later trade on the black market, and it is on the battlefield that their hidden talent for manipulation is often revealed. Marsayan hypnotists are valued on Broken patrols, as they can silently neutralize threats and do not care for even the thickest armour. Whilst these slight, frail creatures are not physically imposing, when they delve into the minds of their enemies, they can make the most hardened warrior flee in terror.
Pick up your Marsayan Hypnotist from the Maelstrom's Edge webstore here!
The Broken's first Elite - The Sig Jammer available now!
Posted on Friday Feb 23, 2018 at 11:15am in The Broken
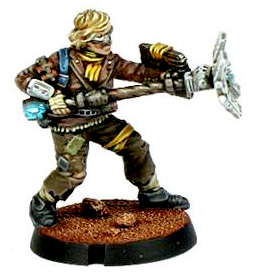
The Sig Jammer is the latest resin release for Maelstrom's Edge and helps the Broken counter the technological superiority of their adversaries. As usual, the unit's rules can be found in the online unit card section of the Maelstrom's Edge website, where you are able to learn about the specific rules of the Tech Disruptor (pile on those Suppression Tokens!) and the other equipped weapons of the Sig Jammer.
The ramshackle fleets of the Broken don't possess extensive R&D departments or mass production facilities, but what they lack in investment, they make up for in unregulated ingenuity and daring invention. The Broken is a haven for technological savants and rebellious hackers, rulebreakers ostracised and hunted by a society scared of their technological prowess. Whether driven to the Broken by the Maelstrom or the authorities, these maverick inventors are encouraged to experiment and tinker. These 'Jammers' soon thrive among the Broken ranks, using their skills to break into computer networks, disrupt signals, and generally set technology against their users. It is a rare mercurial talent to be able to invent the kind of disruptive equipment the Jammers carry, and sending a Jammer Savant deep into enemy territory is not a viable strategy. Instead, Broken leadership encourages anyone with a natural aptitude for technology to become an apprentice, or 'Sig Jammer'. In peacetime, these neophytes are a mixture of servant and apprentice, taking care of a Savant's every need, or searching for the particular parts needed to complete the Savant's latest technological masterpiece.

Once the Broken go to war, Sig Jammers are given disruption tech and thrust towards the enemy to cause havoc. A Sig Jammer's average lifespan doesn't tend to be terribly long, yet there is never a shortage of souls looking to become one. In fact, in some Broken societies, a lottery has to be held to select new Sig Jammers from amongst all the hopefuls. This is easier to understand when the alternative is being drafted into a Broken Rabble unit, which is roughly akin to being thrown into a meat grinder. In battle, Sig Jammers sneak near enemy lines and wage short-ranged technological warfare on the enemy, degrading their weapon systems and disrupting their broadcast frequencies. Sig Jammers project a localised disruptive field from their Tech Disruptor beam weapons to hamper electronic devices, disorienting or shutting down enemy targeting and support systems. Sig Jammers also use their arm-mounted targeting scrambler for protection, sending out dozens of false positives to enemy targeting computers, causing additional confusion and pandemonium amongst their adversaries.
Modeling 101 - Working with resin models
Posted on Monday Feb 05, 2018 at 05:00pm in Tutorials
- by Iain Wilson
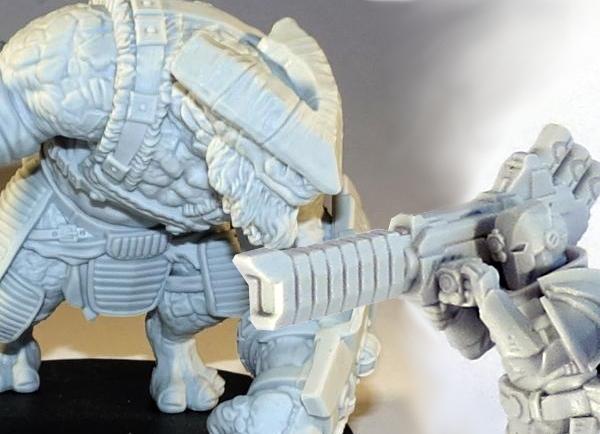
The addition of resin models to the previously all-plastic Maelstrom's Edge collection has allowed for factions to receive some new and characterful unit options to their ranges. Working with resin is a little different to plastic, though, and so I thought it might be helpful to run through some basic pointers on how to build and assemble these fantastic new models.
So, er... what's this, then?
Resin looks a lot like plastic. With good reason: It is plastic!
In the miniature modeling world, though, we tend to use the term 'plastic' to apply specifically to High Impact Polystyrene, which is a particular type of plastic used in injection moulds. The raw plastic is melted and then injected at high pressure into a metal mould. This sort of casting is fast, but the moulds are expensive and require specialised machinery. 'Resin' instead refers to polyurethane, which is a two-part compound that is mixed together and then poured into rubber or silicone moulds. Resin produces crisper detail than polystyrene and the moulds are cheaper and easier to create, but is more labour-intensive to cast and the moulds wear out with use. As a result, resin tends to be used for smaller runs of miniatures, while polystyrene is used for models that are cast in high volume.
So, where to start?
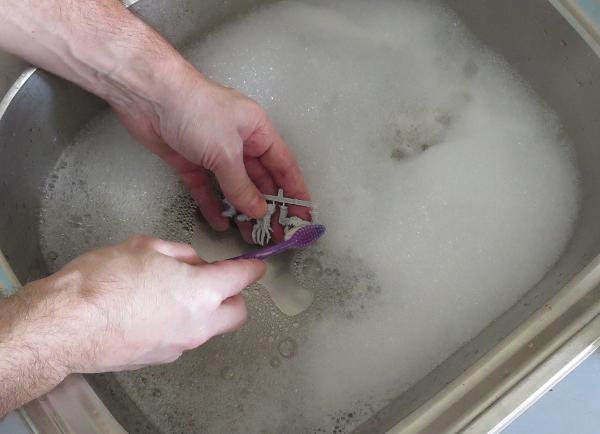
Clean ALL the things
Resin models can sometimes have a bit of an oily residue on them from the casting process. This can affect how well the paint adheres to the model, so it's a good idea to remove it before you start painting. The easiest way to do this is to just wash the model in soapy water, lightly scrubbing with an old toothbrush to clean out the creases.
Flash! Ah Aaaaaahhh!
Flash may be the saviour of the universe (if just a man), but it's also a side effect of the casting process that can spoil an otherwise great paintjob. The moulds used for Maelstrom's Edge's resin models are replaced regularly, and so mould lines are minimal and are often minimised even further by running along edge detail rather than flat surfaces, but you should always go over the model before undercoating to catch any that might get in the way later. As with plastic or metal models, you can use a small file or emery board for this, but I find a sharp exacto-style knife blade does the best job, and works well for getting into creases and following detail. Just scrape gently along the mould line to flatten it out.
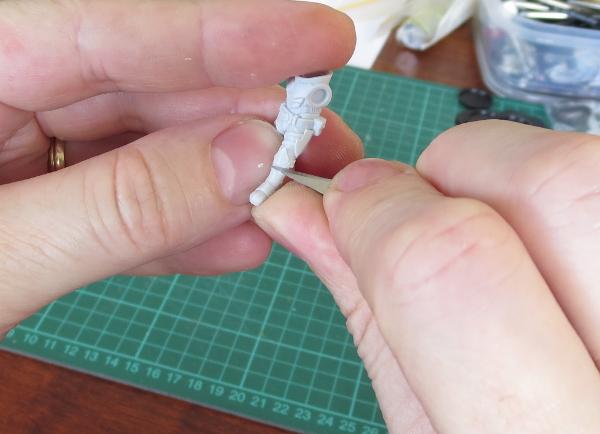
Nothing to get bent out of shape about...
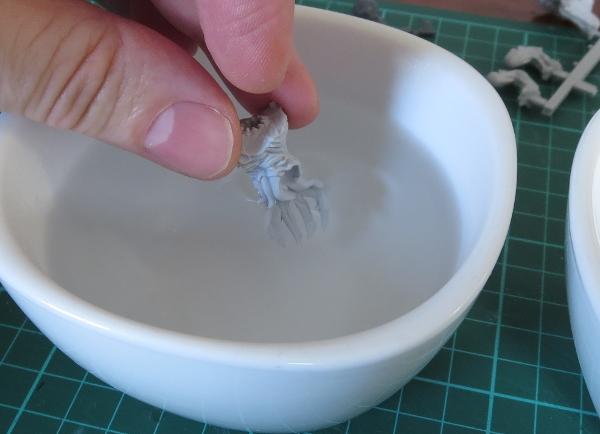
During the casting process, resin will shrink slightly as it cures. This can cause thinner parts to develop a slight bend if one side cools faster then the other. With plastic or metal, you can often fix warped parts by just carefully bending them back into shape, but resin needs a little extra preparation to avoid having the part snap. Luckily, resin softens with heat, so the easiest approach is to dip the part in some hot water until it is warmed through, and then carefuly shape it to how you want it. Then dunk it into some cold water to 'set' the part again - resin has some 'memory', so will try to revert to its original shape while it's still soft. Cooling it quickly helps to avoid this.
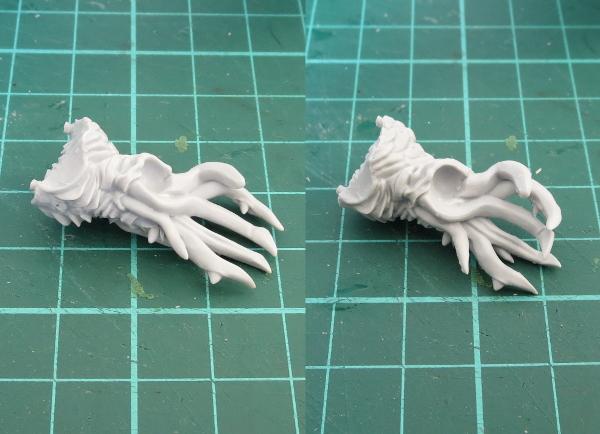
Note that you can also use this method to reshape models to change their pose. It's particularly useful for organic shapes, like the tentacles on Karist Angels.
He's half the man he used to be...
Maelstrom's Edge resin is a little harder than plastic, but is still quite easy to cut with a hobby knife or clippers. For larger parts, or to get a nice, clean cut, I recommend a razor saw. This has a super-thin, flat blade that is just perfect for slicing through models while minimising the loss of detail from the cut.

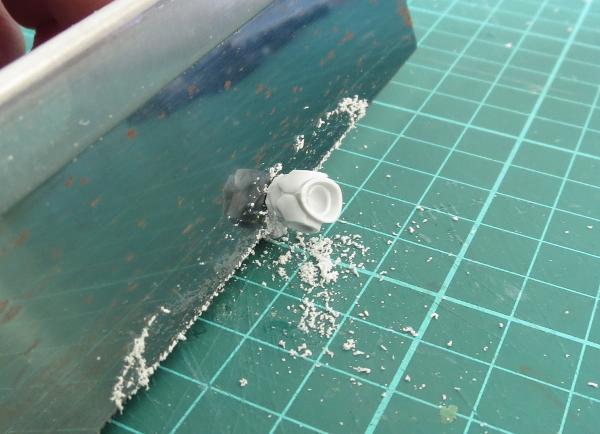
It's worth pointing out that if you're doing a lot of sawing, sanding or filing, it's best to do it in a well-ventilated area. That's not really specific to resin models - it's always a good idea to not fill your lungs up with rubbish!
Stick with me, kid!
Plastic glue, also sometimes called poly (or polystyrene) cement, doesn't work on resin models, as it's specifically designed for polystyrene. You will need superglue or a quick-setting epoxy glue for the best bond. Epoxy, even the quick-setting kind, can be a bit of a pain to work with due to needing to mix it and having a longer 'grab' time, so I prefer to use a superglue with a plastic primer. The primer is used to prepare the surfaces to be glued, and helps the superglue to grab tightly to plastics that superglue on its own doesn't adhere to as successfully.
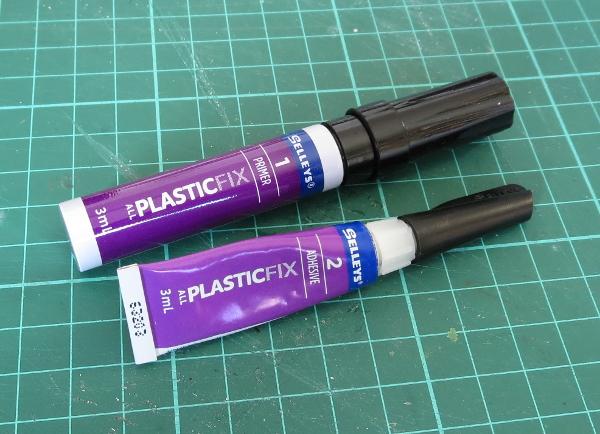
Use the same glue for sticking resin parts to plastic or metal. Wherever possible, make sure that the surfaces being glued are smooth and flat. There's a common misconception that scoring or roughing up the surfaces gives a better bond, but superglue actually works better the thinner it is. Having surfaces as close to flat as possible ensures that the glue spreads out super thin between them - thicker glue just creates a brittle bond.
You're not pinning that on me!
If you are concerned about larger parts going astray with use, you can use thin wire to pin them into place for some extra durability. Use a pin vice to drill matching holes into the parts to be glued, add a piece of wire that fits snugly into the drill holes and glue in place.
Some people like to use paperclips as a source of wire for pinning. I wouldn't recommend this, as superglue tends to stick rather poorly to stainless steel. Thin copper or galvanised wire, or brass rod are the best options for a secure bond.
Mind the gap!
With well-maintained moulds and some clever part break-ups, the resin models for Maelstrom's Edge go together with no real need for gap filling. If you're converting models, though, you can sometimes wind up with the odd gap or slip of the saw that needs some filling in. Kneadatite (usually referred to simply as 'Green Stuff') is your friend here. This is a two-part modeling putty than comes with a blue part and a yellow part. You mix together equal parts of each colour and then use the resultant green goo to fill in holes or sculpt extra detail. This is all a little more involved than will fit into this article, but I'll put together a 'Green Stuff Basics' article in the near future.
All the pretty colours...
There is no particularly special treatment required for painting resin models. Normal acrylic model paints will do just fine. A light spray coat of primer will help the paint adhere, and gives you a flat base colour to work with, which is particularly important when you have a mix of resin and plastic models (or converted models with mixed components or green stuff involved) and want to keep your army colours consistent. You may also want to finish with a coat of sealer to protect your paintjob, although resin tends to hold the paint about as well as plastics, and so isn't as prone to the edge wear from handling that tends to be a feature of well-used metal models.
OK... so now what?
Hopefully, all of that has been of some use in demystifying resin models. There are some great resin models in the Maelstrom's Edge range already, with plenty more still to come, so why not dive on in and have a play? You can pick up the Maelstrom's Edge range from the webstore here, and as always, be sure to share your creations on the Comm Guild Facebook page!
For other Maelstrom's Edge modeling articles, including tutorials and walkthroughs of a wide range of different building and miniature projects, check out the article roundup here.
Modeling Tutorial - Scarecrow-arm Bionics
Posted on Monday Dec 18, 2017 at 05:00pm in Tutorials
- by Iain Wilson
Amongst the veterans of the savage and bloody conflicts that rage along the Maelstrom's Edge, bionic limbs are commonplace. Many (at least those who can afford it) choose high-tech limb augmetics that are practically indistinguishable from the original. The less fortunate, or perhaps just the less vain, often wind up with more obvious mechanical assistance. You can find various examples of this amongst the plastic broken models, but here I'm going to share an easy bionic arm made from the left arm of an Epirian Scarecrow bot.
The arm comes in two pieces. Start by trimming or filing off any mould lines.
Take the upper arm piece and remove the round lug from the inside of the shoulder and the flange from the top of the shoulder with a sharp knife or razor saw, and cut off the arm just above the elbow pivot and just below the reinforcing struts.
On the lower arm piece, cut the hand off just above the wrist, and the forearm just below the reinforcing struts, and then also remove the struts - leaving them on makes the forearm a little too bulky.
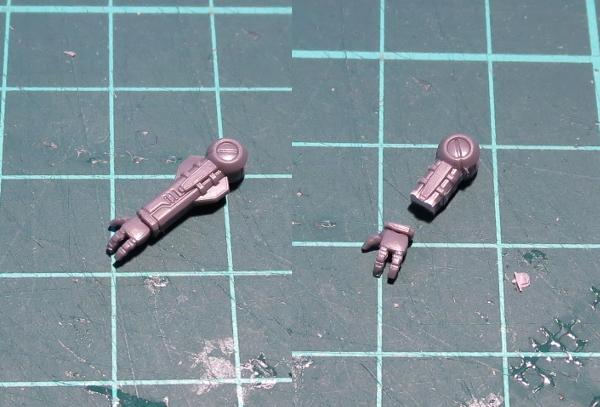
Assemble the arm by gluing the hand back onto the truncated lower arm, the elbow pivot onto the upper arm, and then gluing the elbow joint together.
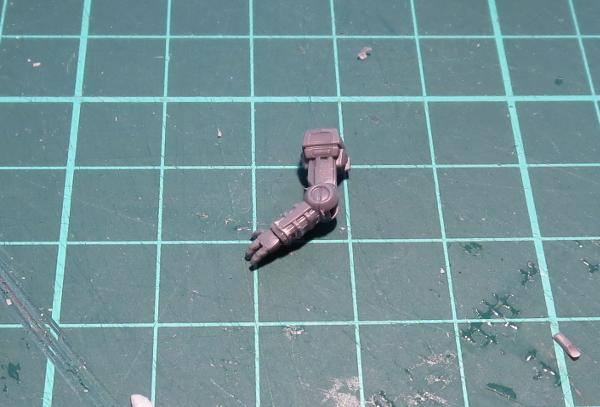
Glue onto your model of choice, and you're ready to paint and send them off to battle!
To rebuild your own warriors into an augmented force of renewed usefulness, you can pick up the Scarecrow bot along with the rest of the Maelstrom's Edge model range from the webstore here. As always, we would love to see your creations on the Comm Guild Facebook page!
For other Maelstrom's Edge modeling articles, including tutorials and walkthroughs of a wide range of different building and miniature projects, check out the article roundup here.
Model Spotlight: Epirian Hunter Warmech
Posted on Monday Dec 11, 2017 at 05:00pm in Models
- by Iain Wilson
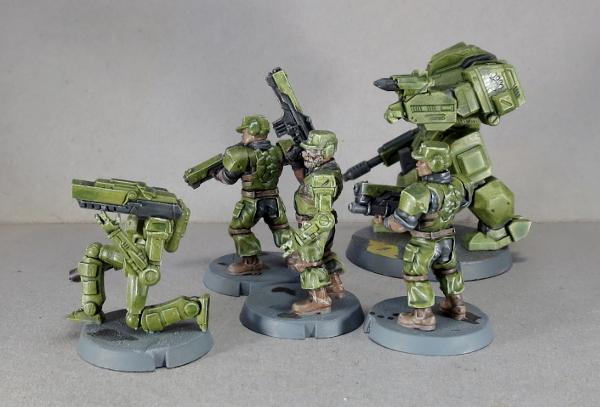
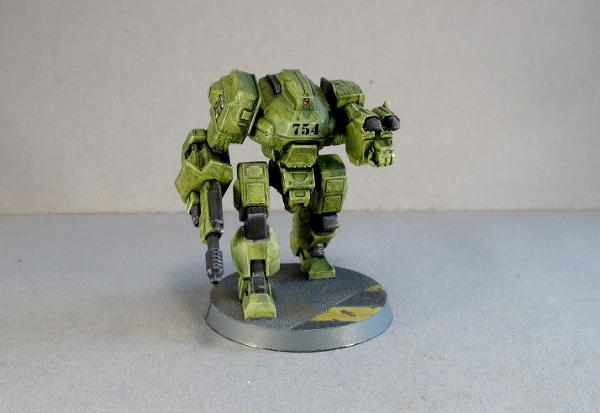
For this week's article, I thought it might be fun to pause and take a closer look back at one of the models from the initial Maelstrom's Edge release - the Epirian Hunter Warmech!
Designed through an arcane mix of clever sculpting, sliding-core moulding and witch-craft, the Hunter kit is beautifully detailed while going together with surprisingly few parts. Arms and legs are solid parts, removing the need for unsightly seams, while boasting articulated shoulders, elbows, ankles and hips to give enough poseability to keep things interesting.
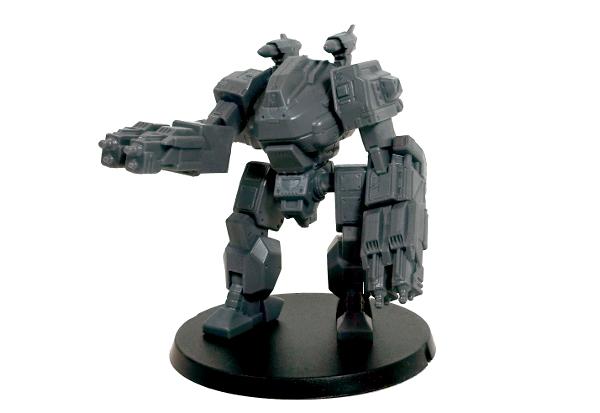
Towering above mere human soldiers, the Hunter is the second-largest model currently on the Maelstrom's Edge battlefield, beaten in size only by the Karist Angel (for now!)
The kit comes with a nice array of weapons - a maglock chain gun, a flakk cannon, two suppressor twin machine guns, two each of the different rocket pods, and a hydraulic fist.
Being plastic, 'borrowing' a second weapon from another kit and modifying it to go on the opposite arm is a breeze. Below, the shield for the flakk cannon has been flipped over to go on the right arm, with the top and bottom beveled parts reshaped slightly to keep the symmetry between the left and right.
The rocket pods are designed to mount behind the head, but it's too much fun to not play around with them and find other places to fit them!
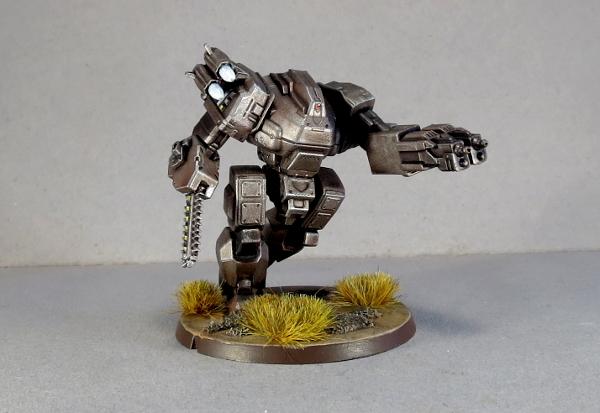
The legs have a slight bend in the knee, which allows for a surprising range of motion combined with the pivoting ankle joints. For a little more speed, the knee joint can be sliced through and reattached into more of a running pose.

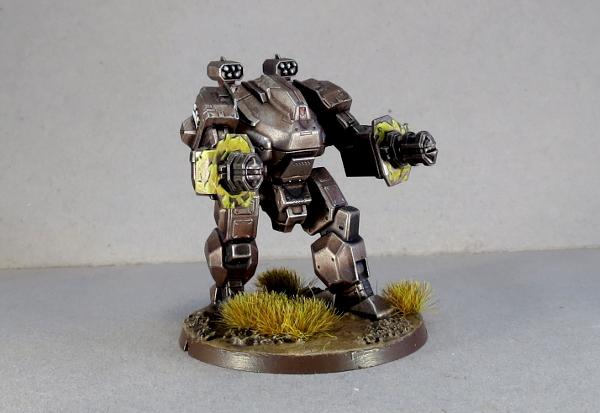
If pounding away with a big, metal fist isn't your thing, the hydraulic fist can be easily replaced with a chainsaw blade or other suitably brutal melee weapon of your choosing. The Hunter below has a chainsaw taken from a Games Workshop plastic kit for some extra rippy fun.
If converting is more your thing, let your imagination run wild! Below is an Epirian Uplink Drone, built from a Hunter torso, some bits from the Spider drone kit, and some tracks from a Counterblast robot model. You can see how it was built in the article here.
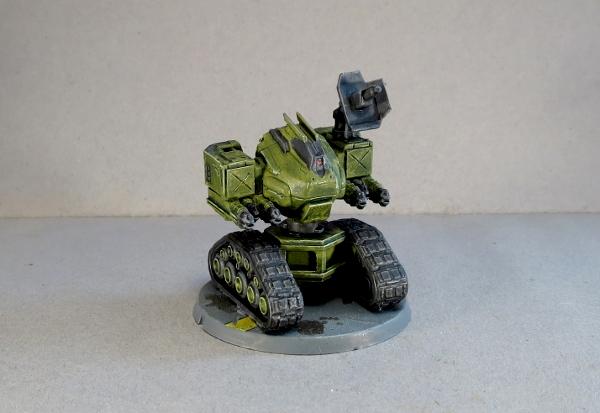
Venturing a little further off the beaten track, this 'Mule' cargo drone was built from a Hunter chassis with a head made from a Spider drone and some lifter hands scratch-built from plasticard. You can check it out in the build article here.
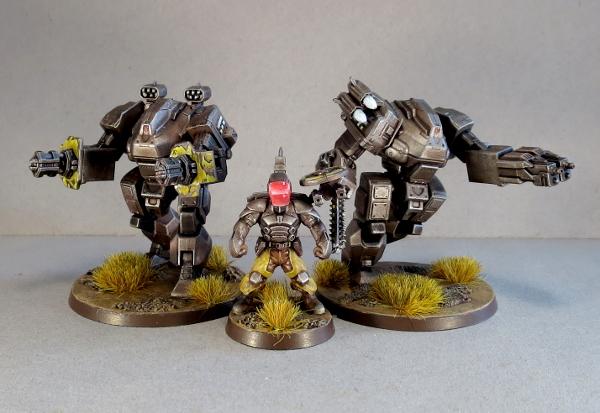
If big guns are more your thing, then the 'Silverback' fire support mech is going to be right up your alley. This was built from a reposed Hunter with hands made from drone parts and sprue, a drone chassis head, and a gun taken from a Games Workshop Tau kit. To find out how to build your own, check out the article here.

To build your own robot army of mechanical Doom, you can pick up the Hunter kit, along with the rest of the Maelstrom's Edge model range, from the webstore here. As always, we would love to see your creations on the Comm Guild Facebook page!
For other Maelstrom's Edge modeling articles, including tutorials and walkthroughs of a wide range of different building and miniature projects, check out the article roundup here.hun
Karist Heavy Weapons - Available Now
Posted on Thursday Nov 30, 2017 at 10:00am in The Karist Enclave
Spiral Arm Studios are proud to present our latest release in our continuing one release per month cycle - Karist Heavy Weapons.
These weapons are resin, with slightly up-armoured Karist troopers carrying and operating them. One of the weapons can now be added to your basic Karist Trooper squads for +1 to +2 points, or you can build an entirely new Anvil unit with two heavy weapons - the Karist Trooper Heavy Squad.
Weapon and unit rules are available on the Karist online unit cards section of the Maelstrom's Edge website.
The models are available for purchase right now at the Maelstrom's Edge store.
You'll also notice that the kit comes with a Karist trooper head which has the mask removed, revealing the human underneath.
The above model is also demonstrating the alternate arm option, holding a cybel ammo cannister. Parts are broadly interchangeable with the rest of the Karist range, opening up further options and conversion possibilities!
Tags: heavyweapons karist models resin
Terrain Spotlight: Broken Settlement, part 2
Posted on Monday Nov 20, 2017 at 05:00pm in Tutorials
- by Iain Wilson
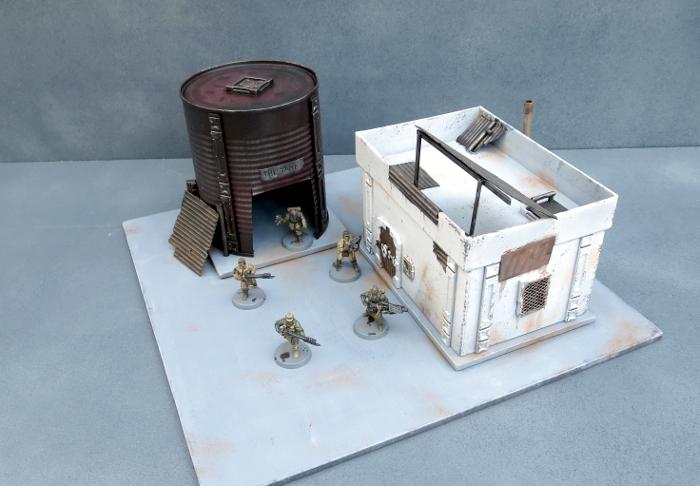
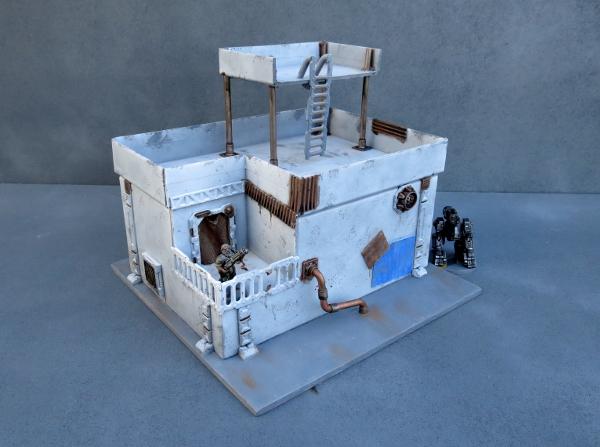
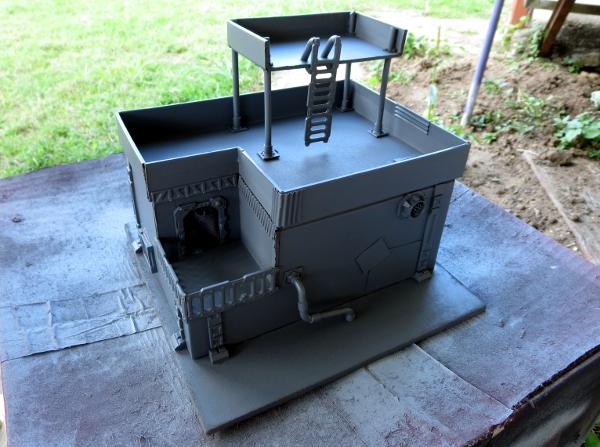
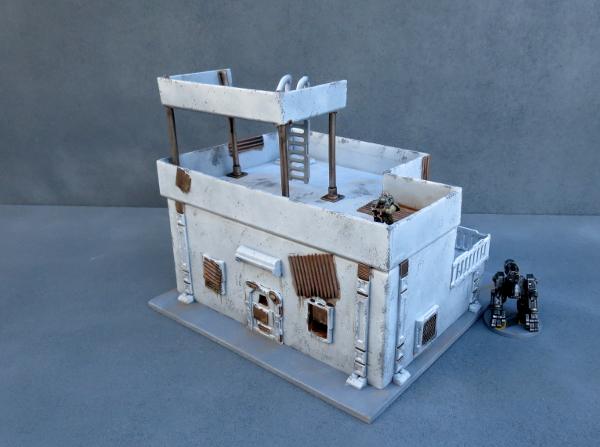
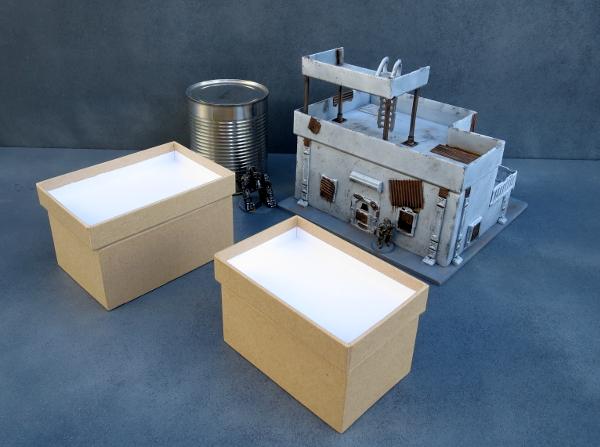
This week, I'm continuing on with the construction of the Broken settlement that I started a few weeks back, which you can find round about here, by adding in another 'renovated' building and a converted water tank shelter.
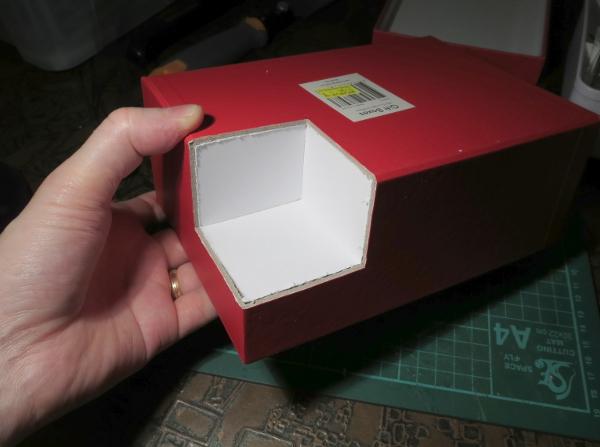
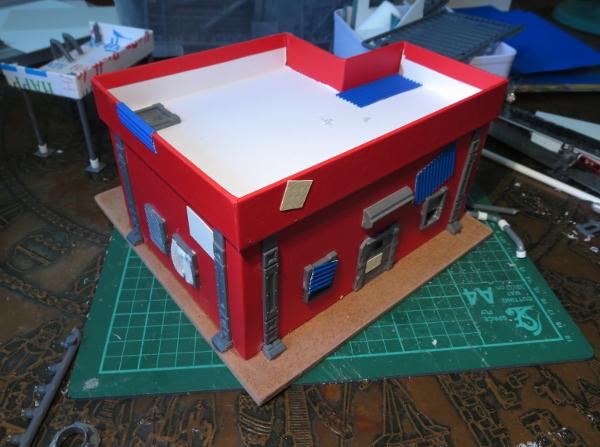
I fast-forwarded a little on construction by grabbing a small building that I made some time ago for a video showing how to make a building from a cardboard gift box and the Maelstrom's Edge terrain sprue (which you can find on Youtube here). This was partly painted as a test run for the sponge-weathering that I used on the first building for this settlement.
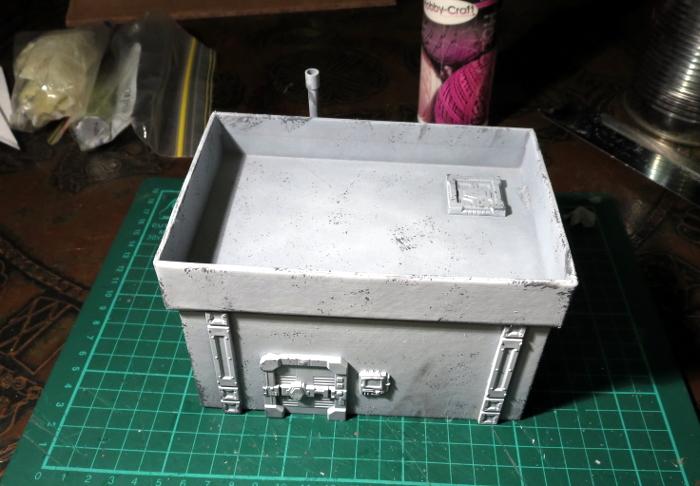
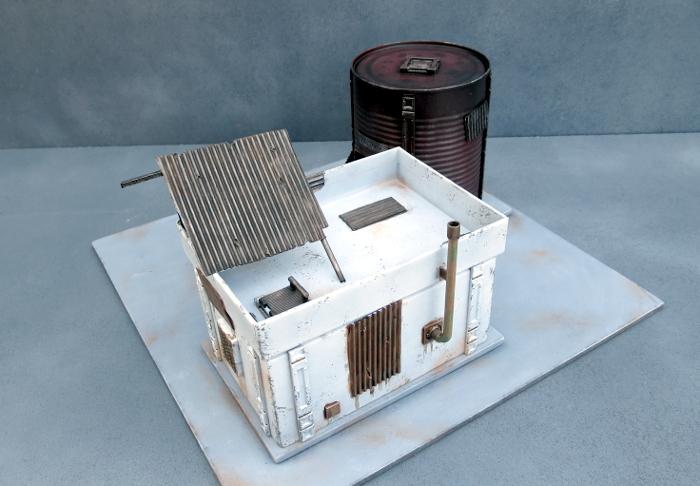
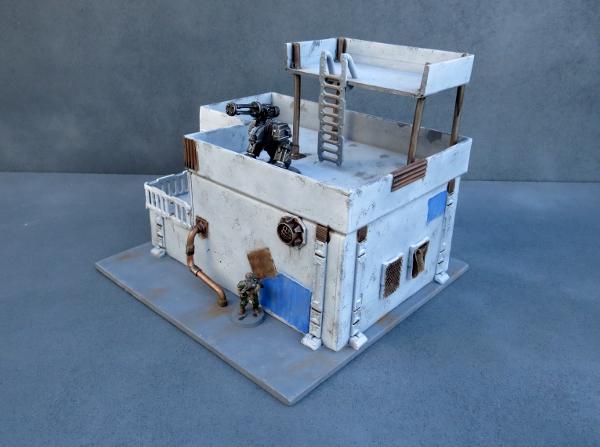
Clearly, this building was still far too pretty looking to fit into a Broken settlement, so I added a bunch of patch-plating using plasticard and corrugated cardboard, and added some mesh over the windows on the sides. I also built a framework on the roof to create a makeshift shelter or sentry point.

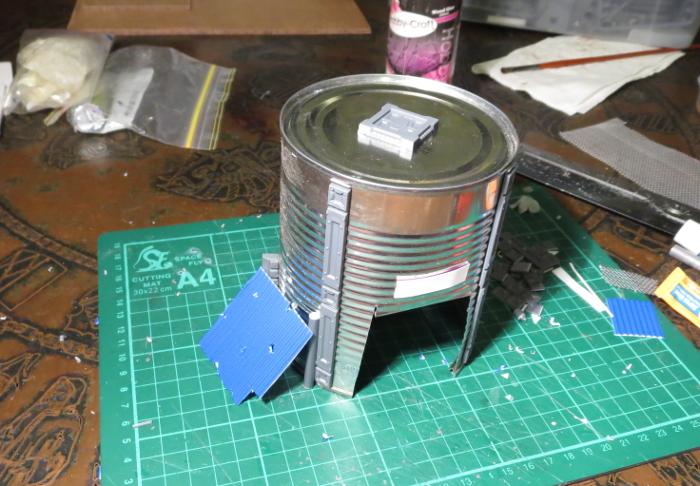
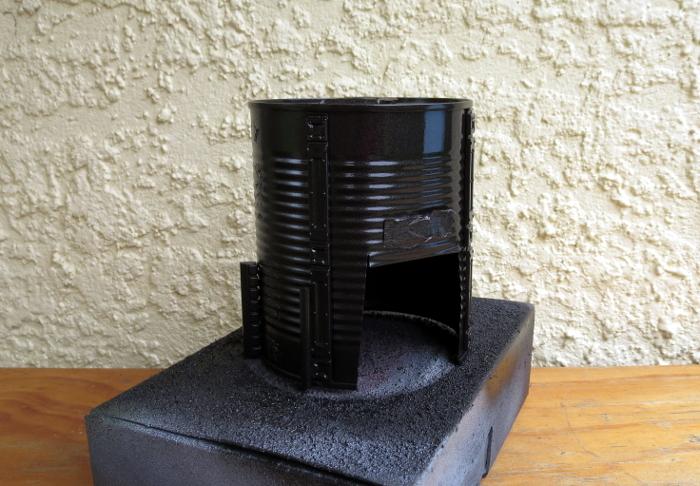
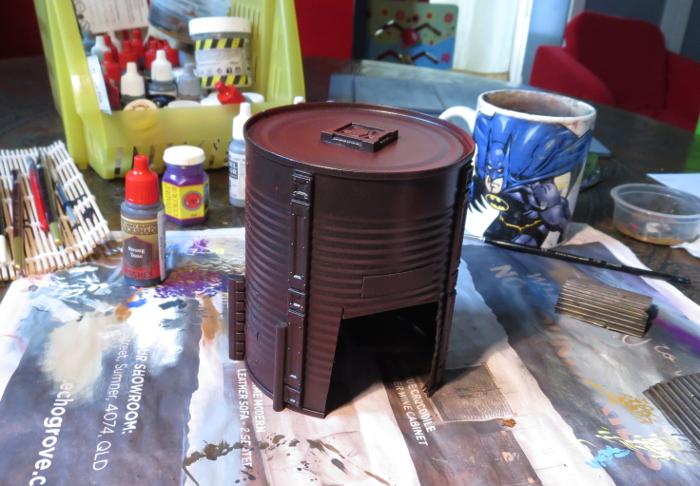
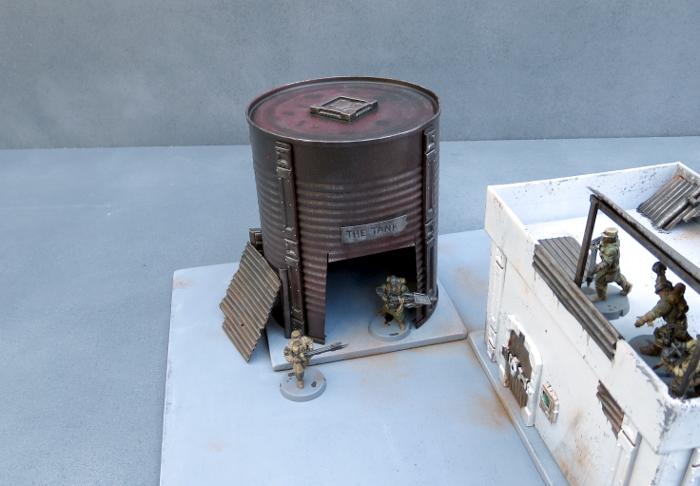
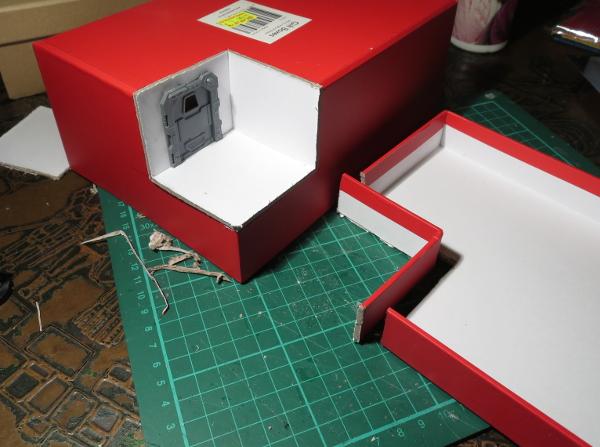
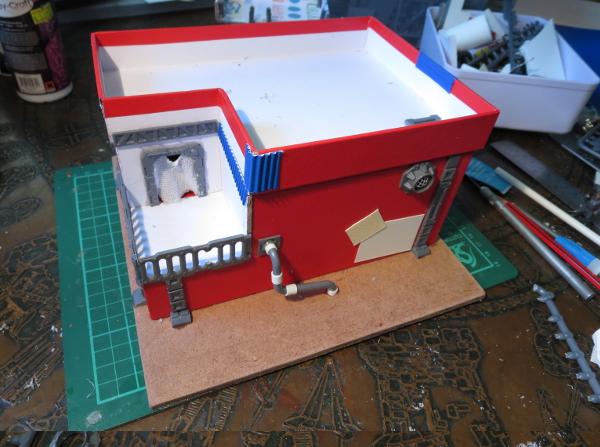
The companion building for the gift box one is made from an old fruit tin. This received a good wash and had the label removed, and then I cut a squarish hole in the side to serve as a doorway.
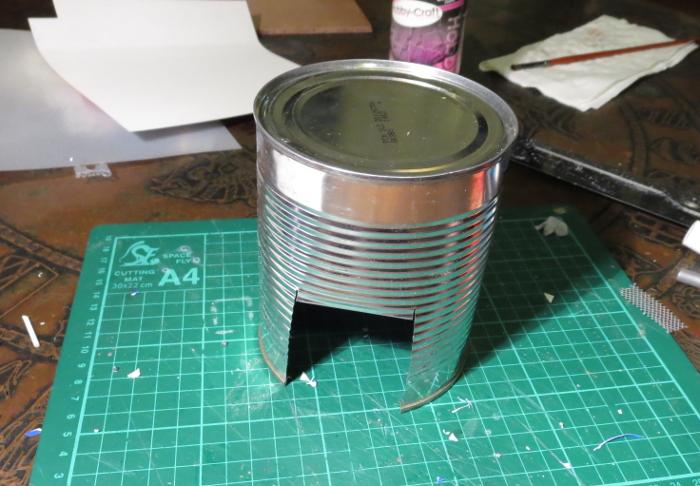
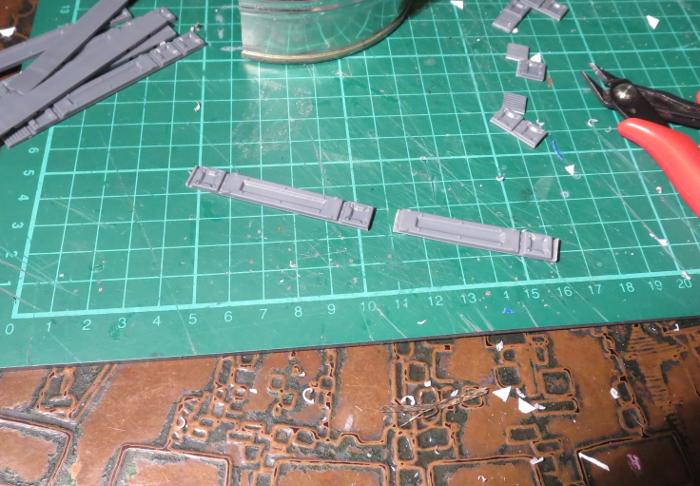
I cut a bunch of reinforcing struts from the terrain sprue to fit neatly down the sides of the tin.
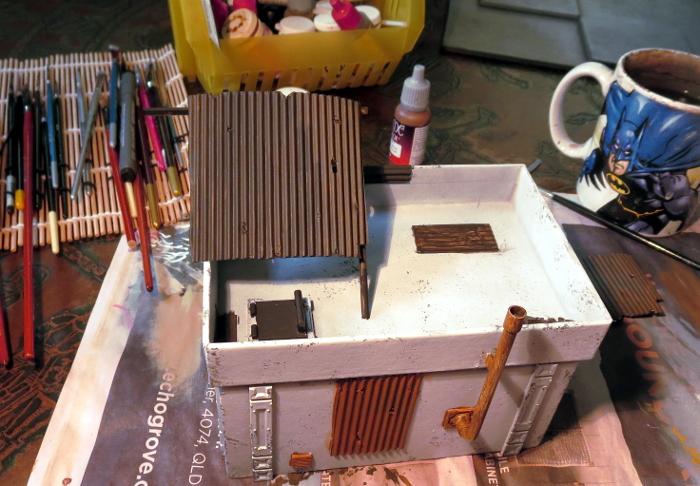
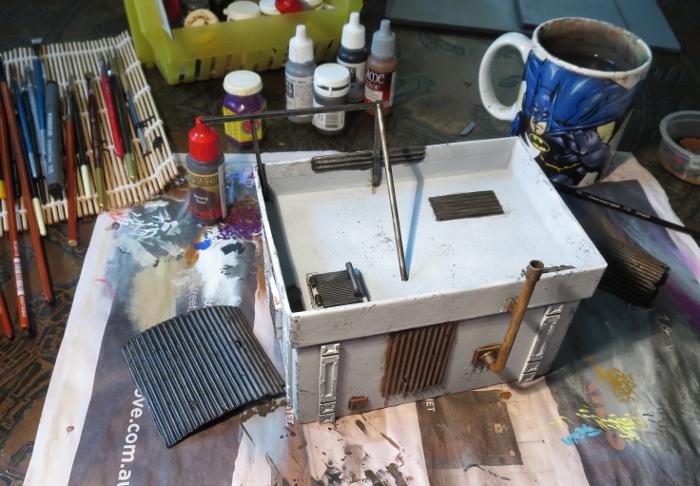
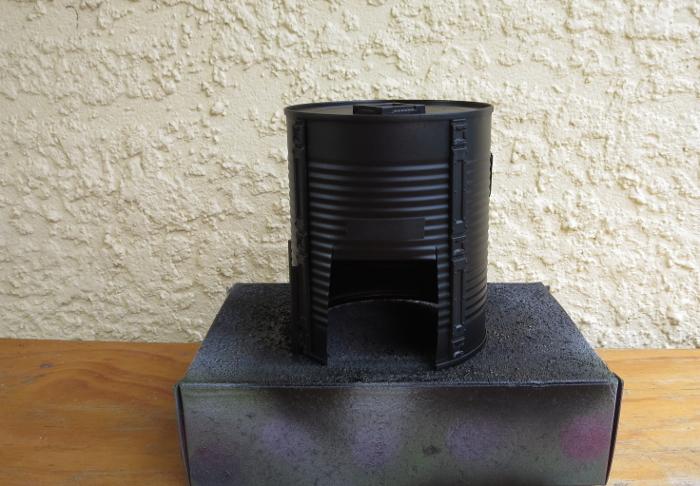
With the addition of some patches, a hatch on the roof and a lean-to on the side, the old tank was ready for painting.
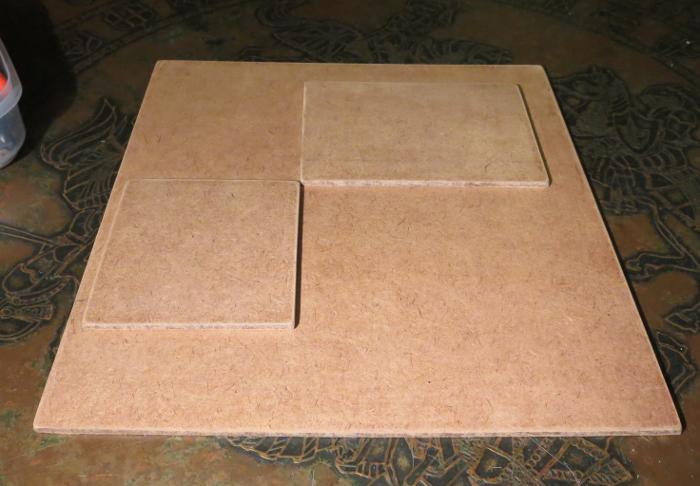
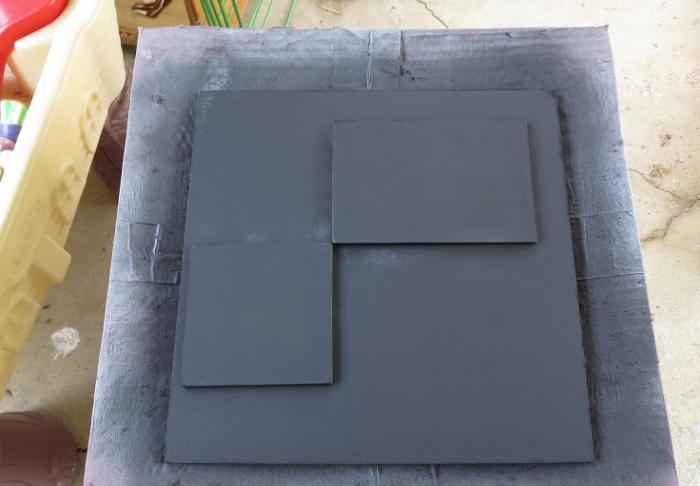
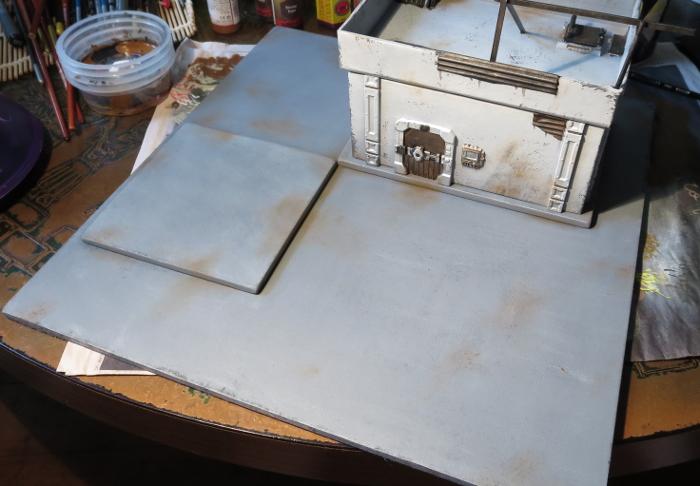
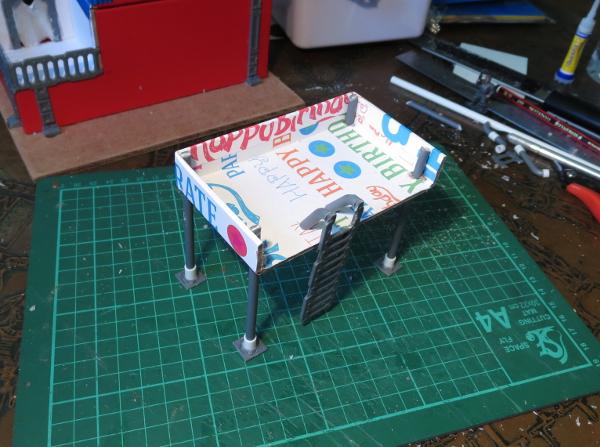
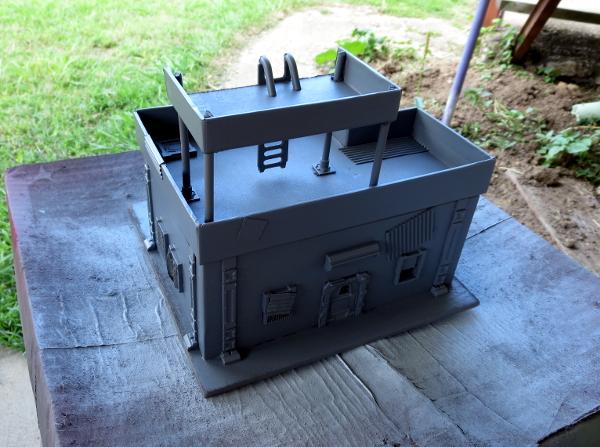
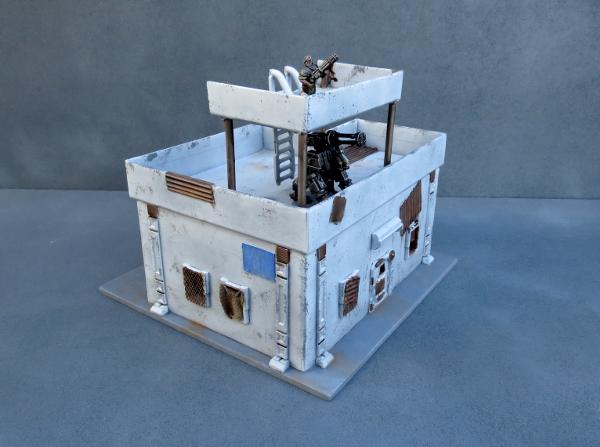
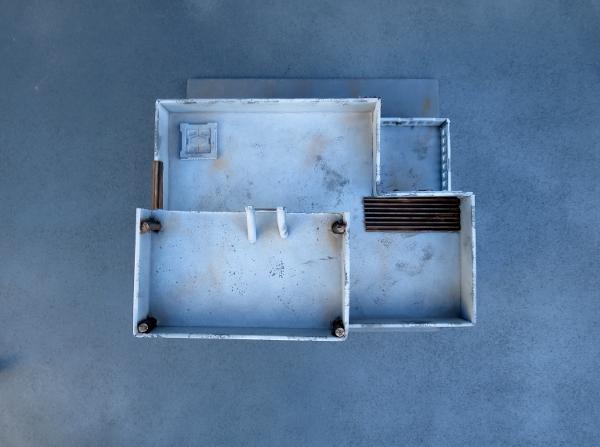
To sit the buildings on, I cut a 12" square of masonite, with a couple of smaller pieces glued on top - a rectangle for the gift box building and a square for the tank. These were cut to size and then sanded around the edges to smooth down the burrs. I then gave the top surface a light sand to break up the shine and give it some texture for drybrushing later, and then glued the building foundation pads on with PVA glue.
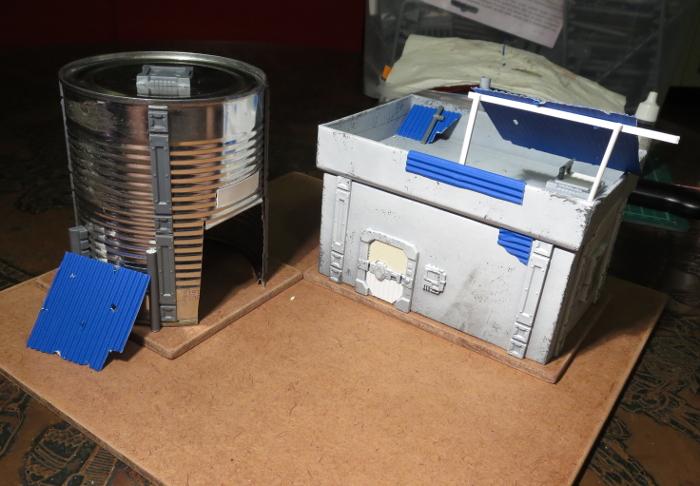
Everything in place, ready for painting:
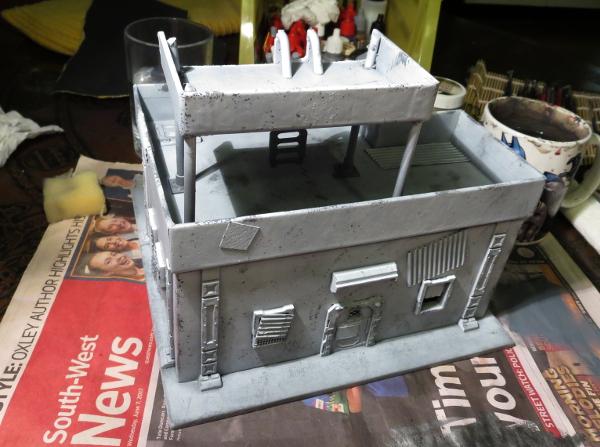
Because the gift box building was already mostly painted, I could skip straight to the detail work. To check how the main bit was done, check out the first article linked back up at the start of this one.
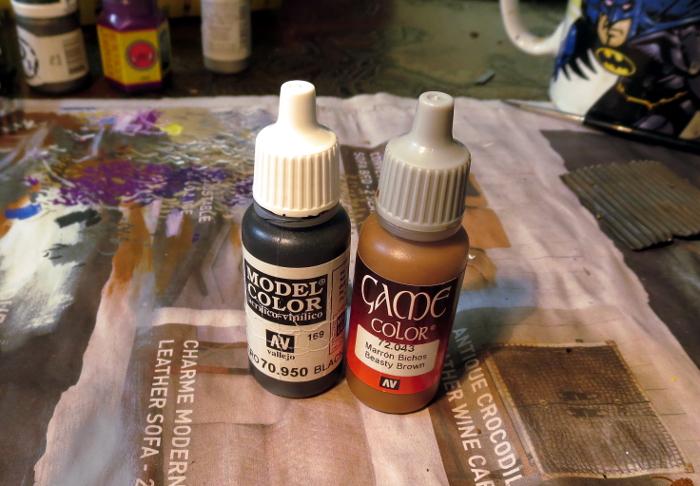
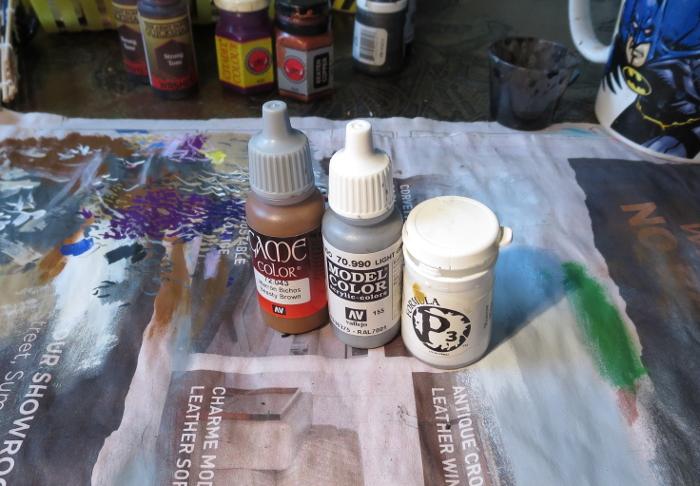
The various metal patches were given a coat of a rough mix of Vallejo Beasty Brown and black.
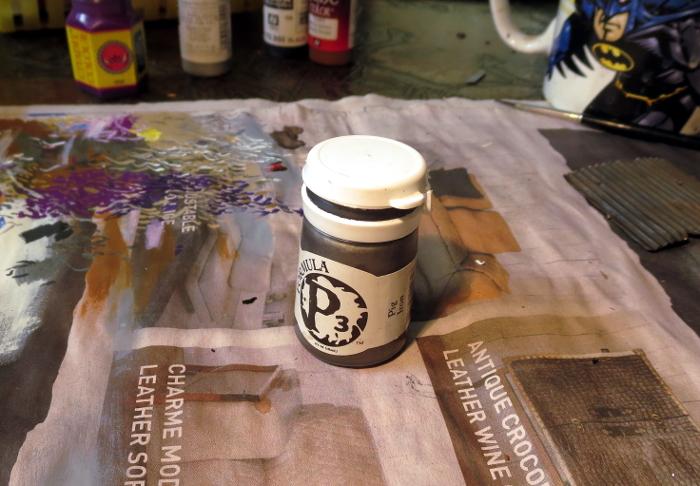
Over this went a light drybrush of P3 Pig Iron.
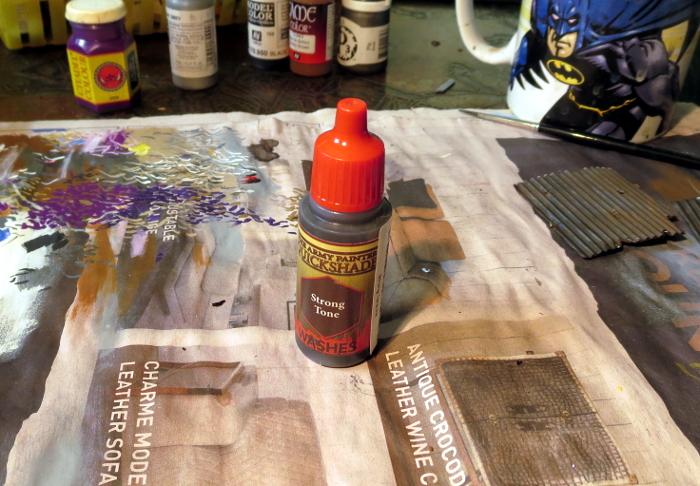
This was followed by a generous coat of Army Painter Strong Tone.
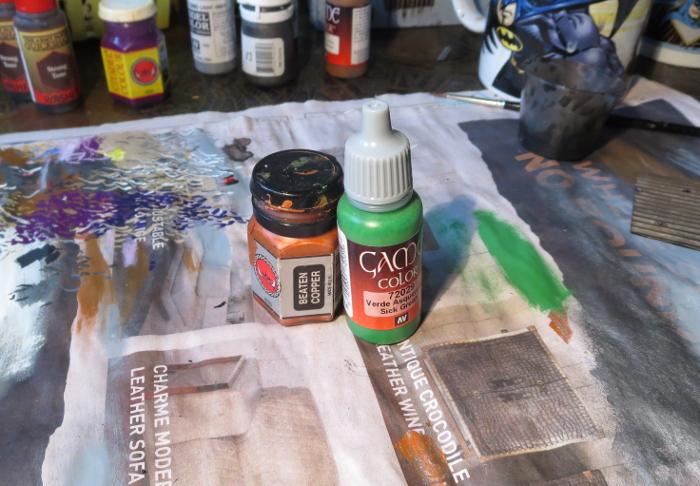
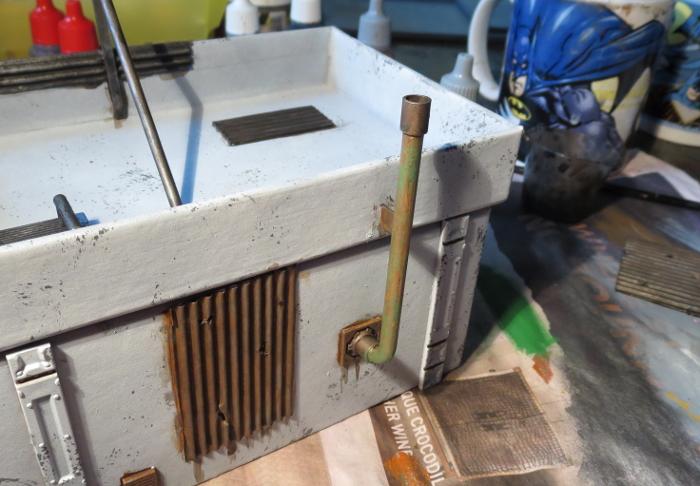
The pipe on the back wall was painted with a coat of Citadel Beaten Copper, and then given a light drybrush of Vallejo Sick Green.
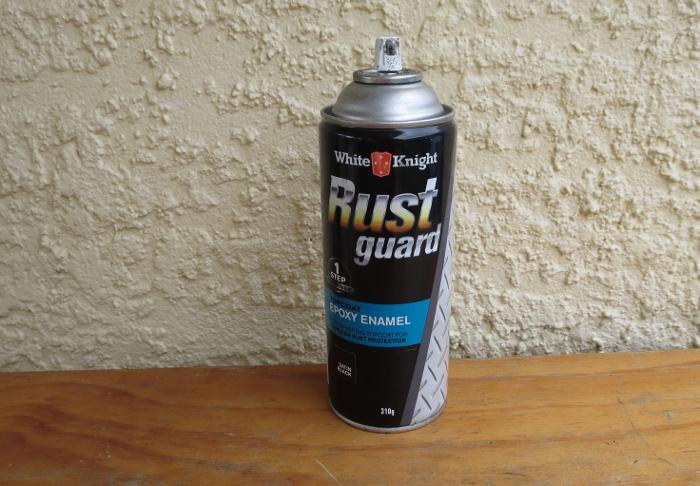
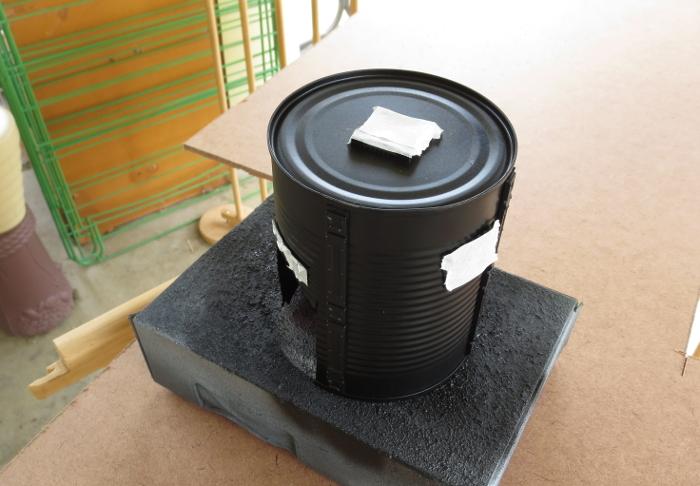
Meanwhile, the tank was given a spray inside and out with black Rustguard, to prevent it from rusting through the paint down the track.
I then masked off the detail parts of the tank building with some masking tape.
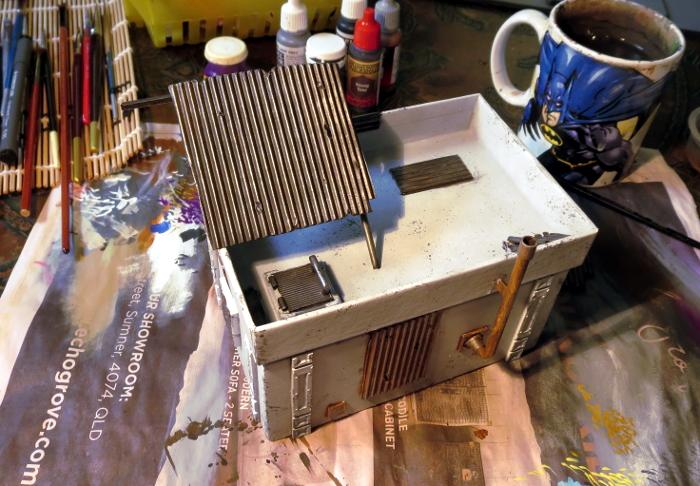
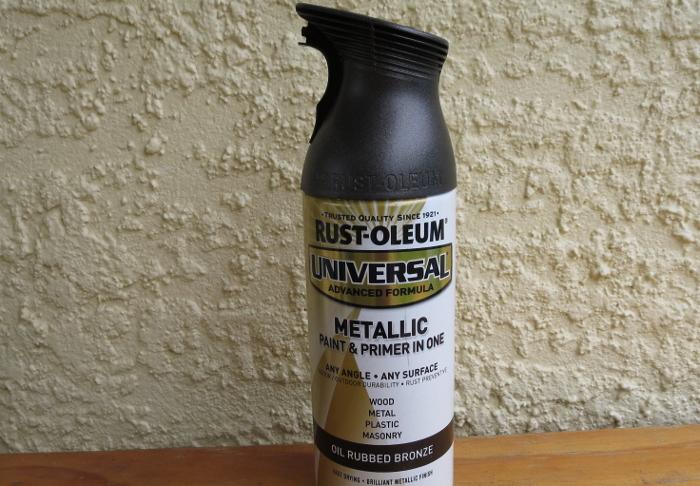
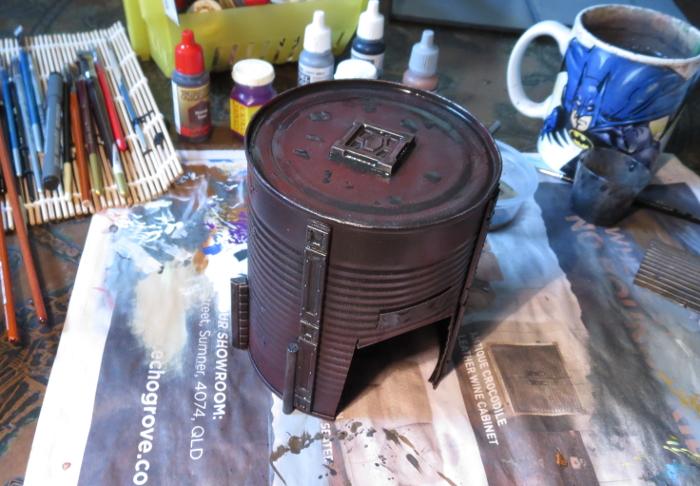
The came a coat of Rust-oleum Oil Washed Bronze. This is a rust-preventing primer like the black, so could have actually gone straight over the bare tin without the layer of black, but I wanted to make sure it was good and dark. The black base helps this without having to spray the bronze on too heavy, as it gets a bit goopy and rough.
When the bronze was dry, I sprayed lightly over the top surface of the tank with some Army Painter Dragon Red, and then flipped the tank upside down and sprayed lightly around it so that the red caught in the undersides of the tin's corrugations without coating the whole thing in red.
I then drybrushed the whole thing lightly with Pig Iron, going a little heavier on the detail parts to make them stand out a little from the darker tank. The detail parts were then washed with some Strong Tone, and a few puddles of Strong Tone scattered around on the top surface.
While all of this was going on, I undercoated the based board with some flat black, and then gave it a coat of a flat medium grey. I deliberately use a range of different greys to basecoat my 'concrete' terrain bases, to help reduce the uniformity of the vast expanse of concrete on the table. If you look around in a city that has a lot of concrete structures, the colours vary considerably depending on the age of the concrete and the specific mix used, so it creates a better sense of realism on the gaming table if you carry this across in your painting.
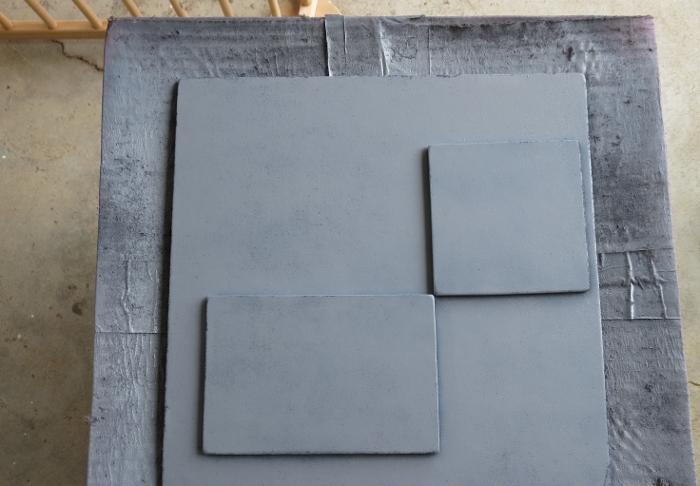
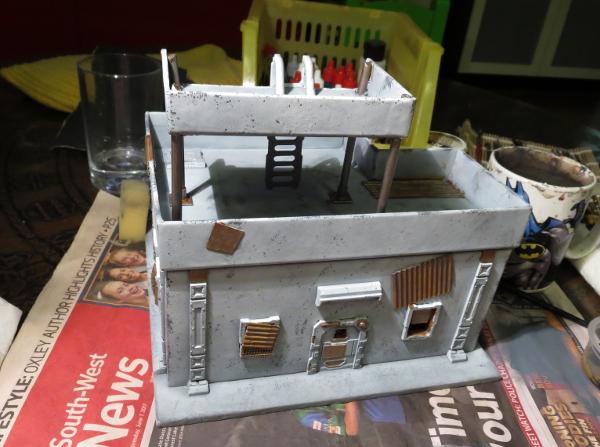
To finish off the base, it was given a drybrush of Vallejo Light Grey mixed roughly with white, and then some patches of worn grime were added with a light drybrush of Beasty Brown, on both the base and the gift box building.
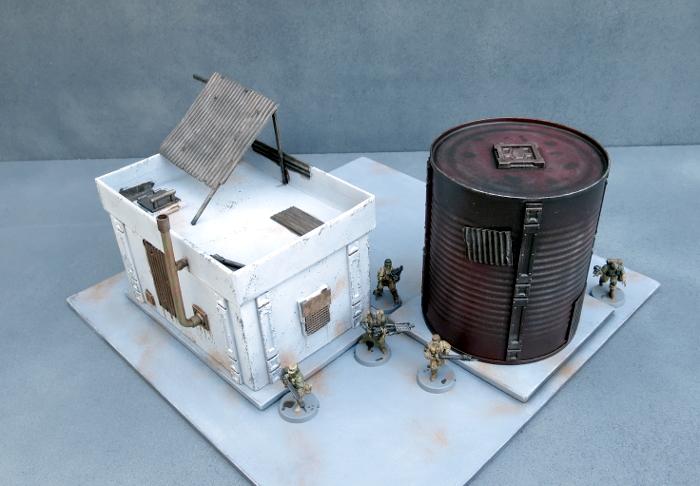
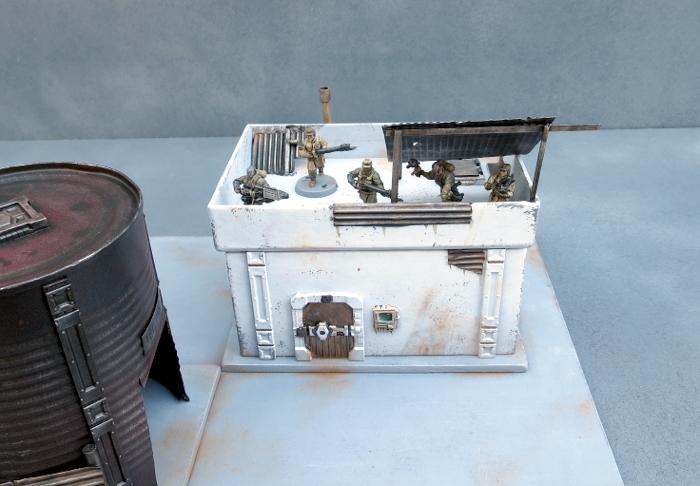
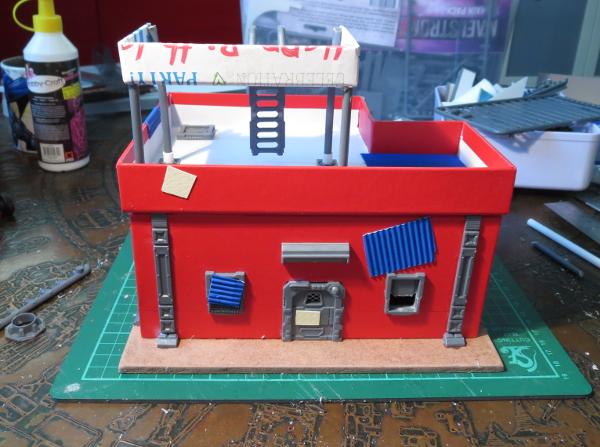
With the addition of a couple of final details (some lettering above the tank's doorway, the light above the door and the comm panel screen), this little building cluster is about done for now.
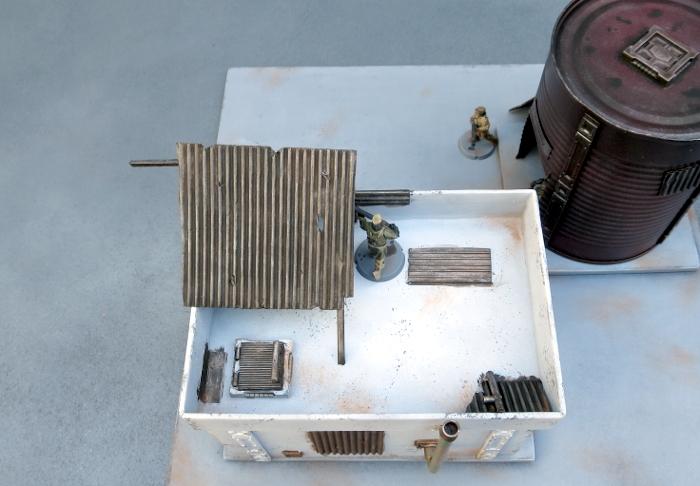
The tank still needs a blanket door covering, which I'll be going through in an upcoming tutorial, and I will go back over all of the buildings in the settlement to add some more characterful detailing once I have some more of the bulking out done, but it's at a point where it's not going to look out of place on the table as-is.

So what's next?
Aside from the door covering for the tank, I'll be moving on to another building section that will have some challenges in the roofing department and some sort of interesting detail in the courtyard.
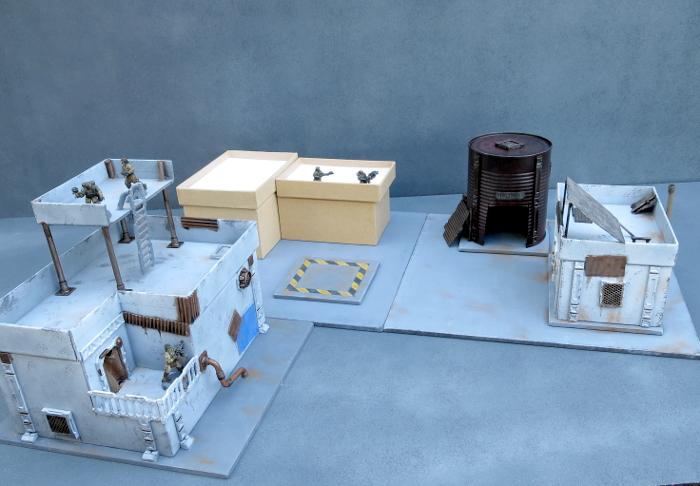
Stay tuned for more!
To build your own stellar refugee settlement, you can pick up the Maelstrom's Edge terrain sprue from the webstore here. As always, feel free to share your creations on the Comm Guild Facebook page!
For other Maelstrom's Edge modeling articles, including tutorials and walkthroughs of a wide range of different building and miniature projects, check out the article roundup here.
Tags: broken buildings modeling models spotlight terrain terrainsprue walkthrough
Quick-painting the Broken
Posted on Monday Nov 06, 2017 at 05:00pm in Tutorials
- by Iain Wilson
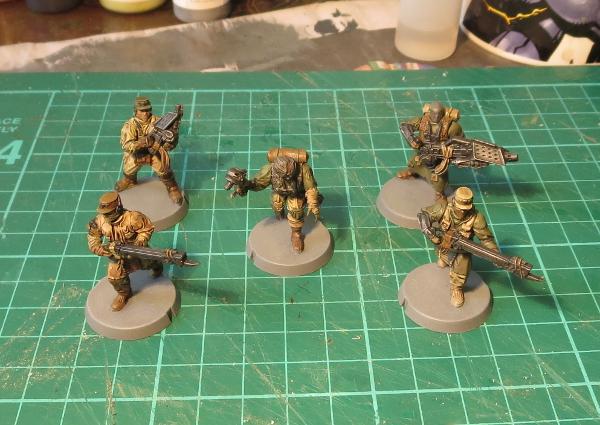
The arrival of the Broken into Maelstrom's Edge adds a new element to the game: Vast, raggedy hordes of cheap troops swarming all over the battlefield shooting stuff and stealing all the good boots. Which, of course, means lots of shiny new models to paint! You might be happy taking your time with this, but for those a little more time-poor, or who just want to get their new models on the table as quickly as possible, here's a guide to quick-painting your Broken recruits.
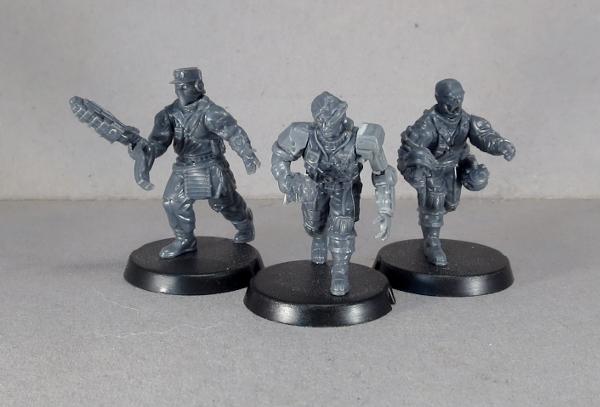
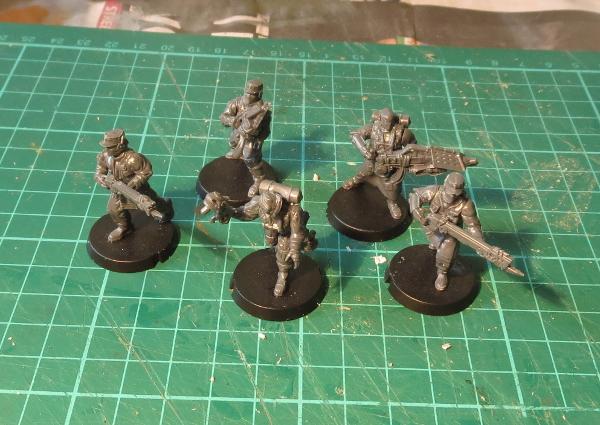
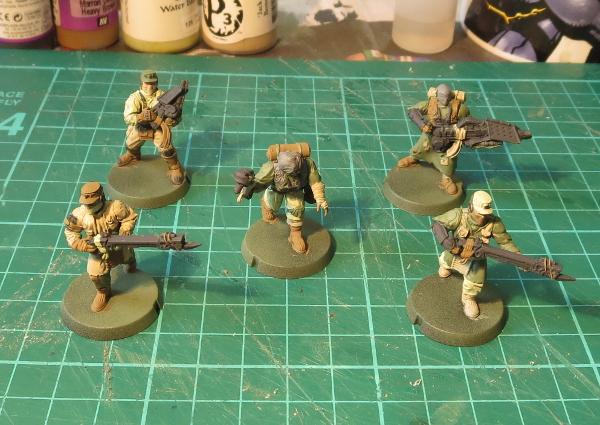
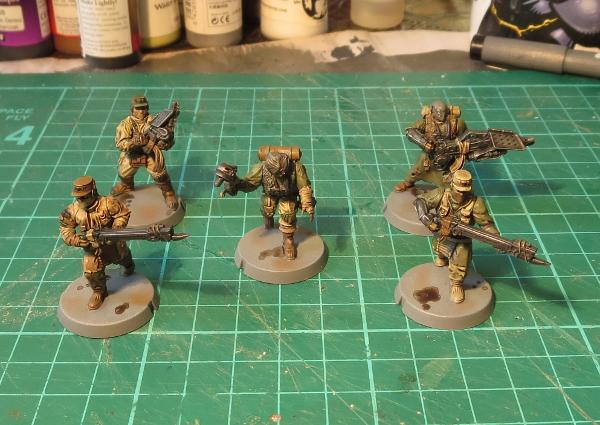
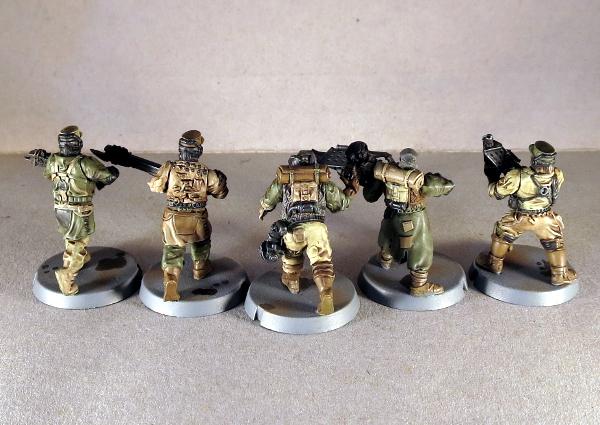
I'm painting up an Assault squad that I have assembled and ready to go, but obviously this could just as easily work for any of the Broken units.
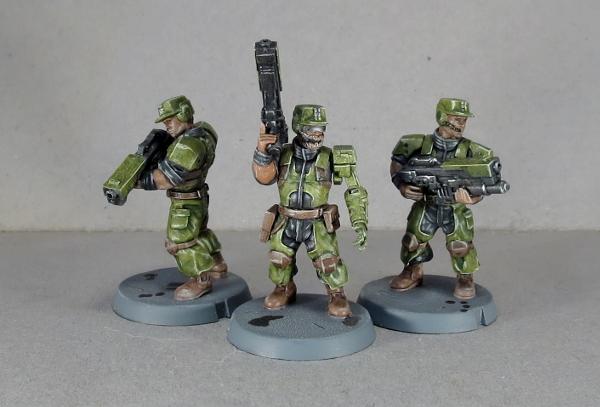
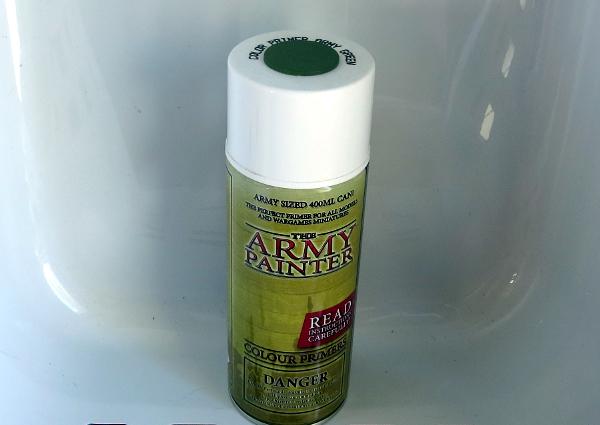
I started out with a basecoat of Army Painter Army Green primer.
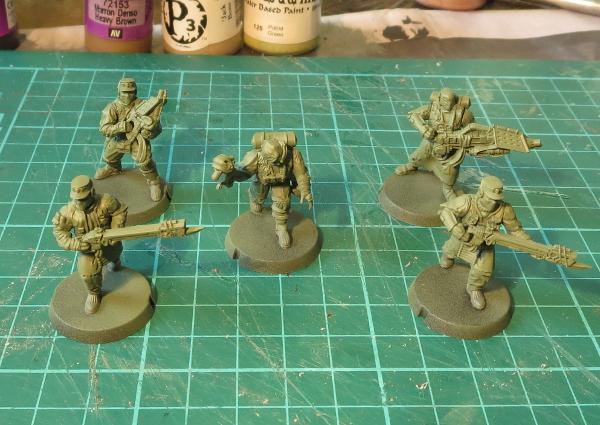
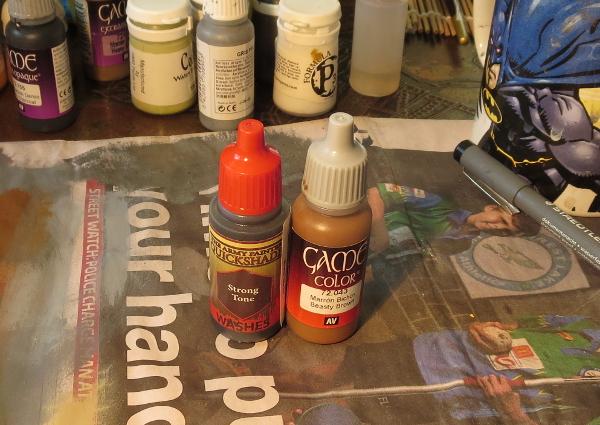
To get a suitably rag-tag look, I used a range of brown and grey tones, but the specific colours you choose aren't particularly important. The idea is to create a random distribution of different coloured clothing, while keeping to a limited colour palette to maintain some cohesiveness throughout the force. Weapons were painted with Vallejo Heavy Charcoal, and skin with Citadel Tallarn Flesh.
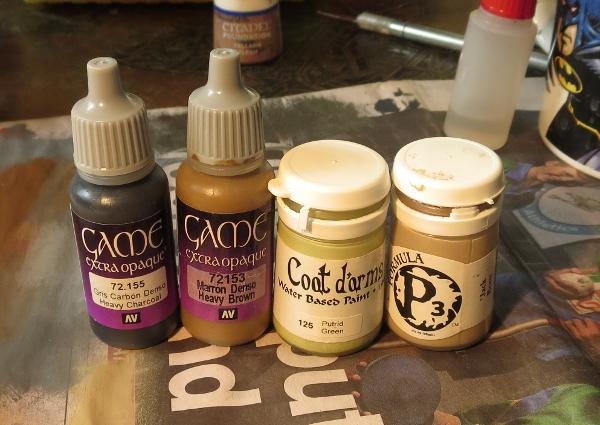
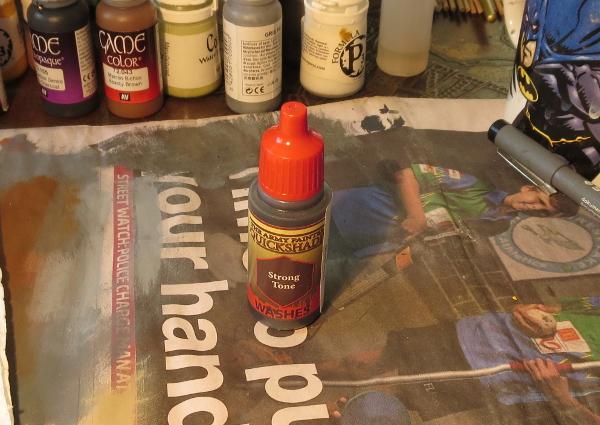
Everybody then got a wash coat of Army Painter Strong Tone. This settles nicely into the creases to add shading, and 'dirties' everything up a little.
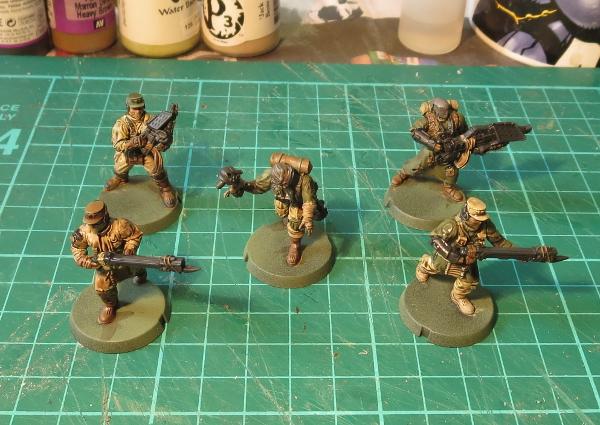
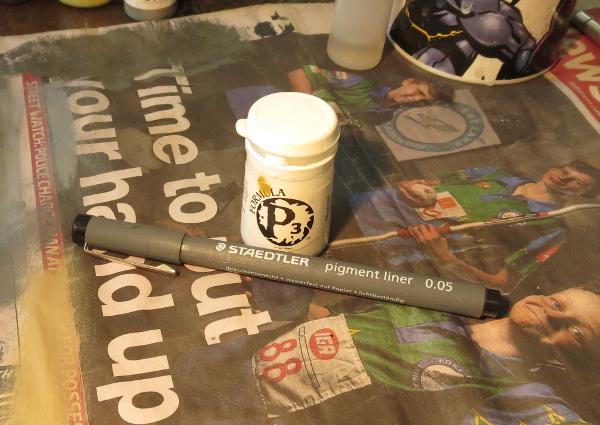
Once the wash was set, I gave the weapons and other metal parts a light drybrush with P3 Pig Iron.
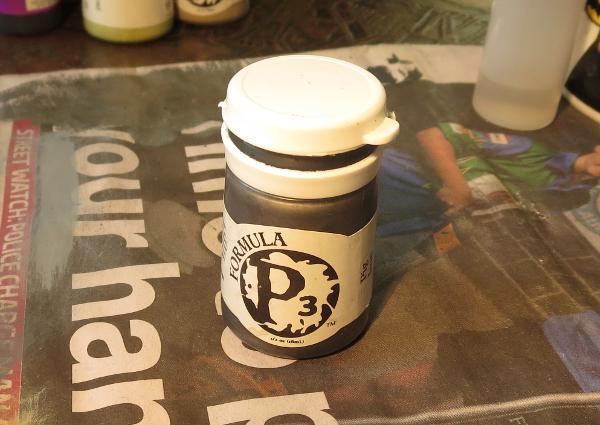

At this point, you could also give the clothing a light drybrush or a little edge highlighting with the original colours - This will lighten them up slightly if the wash was too heavy and has left them too muddy and homogenous, but otherwise isn't really necessary.
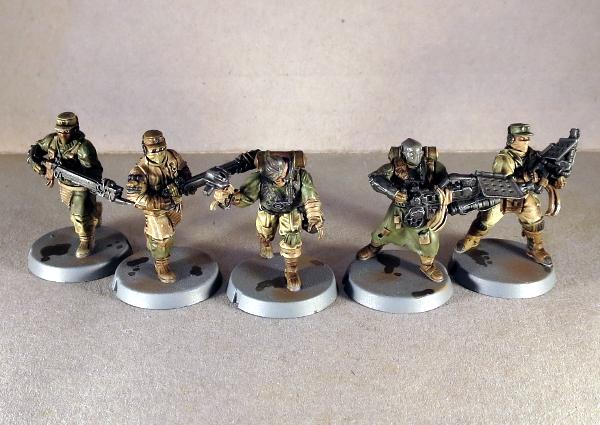
Bases were done to match my urban board set-up. This was done with a coat of Vallejo Neutral Grey, drybrushed with Light Grey.
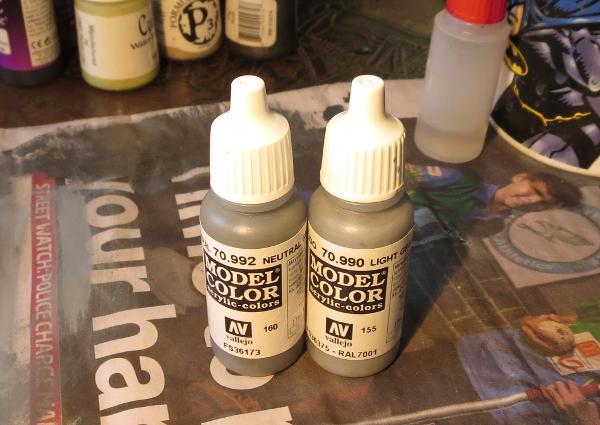
To finish up the bases, I added some patches of drybrushed Vallejo Beasty Brown and some puddles of Strong Tone.
At this point, you could easily plonk these on the table and have at it, but I always like to add eyes wherever possible to finish off my models. This is done with a fine detail brush and some white paint for the whites of the eyes, with a dot of black added either with the same fine brush or with a fineliner pen.
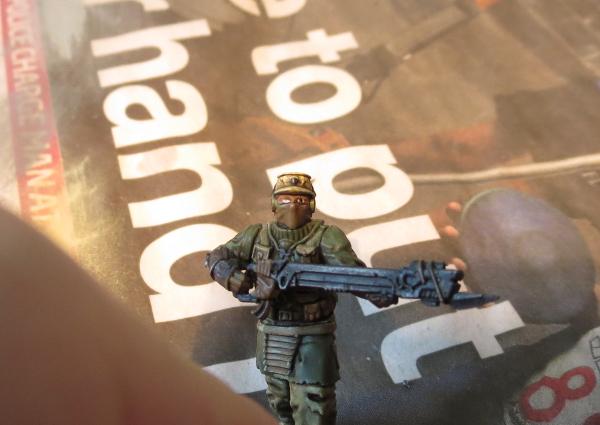
The black should cover most of the white, and touch both the top and bottom of the eye to avoid a wide-eyed, crazy look. Unless, obviously, you want a wide-eyed, crazy look.
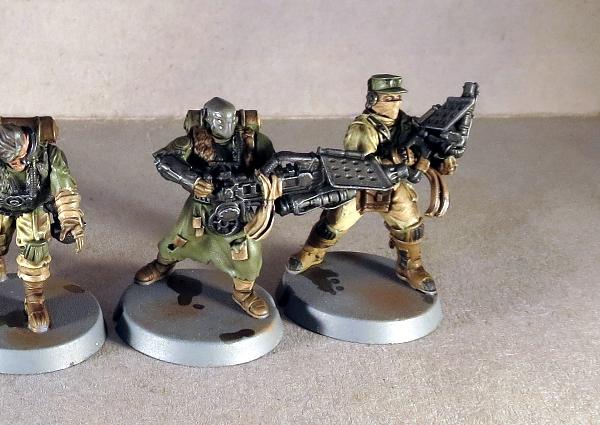
And with that, the squad is ready for action!
To paint up your own vast, screaming horde of rabble, you can pick up the Maelstrom's Edge Broken Infantry pack from the webstore here. As always, feel free to share your creations on the Comm Guild Facebook page!
For other Maelstrom's Edge modeling articles, including tutorials and walkthroughs of a wide range of different building and miniature projects, check out the article roundup here.
Terrain Spotlight: Broken Settlement, part 1
Posted on Monday Oct 30, 2017 at 05:00pm in Tutorials
- by Iain Wilson
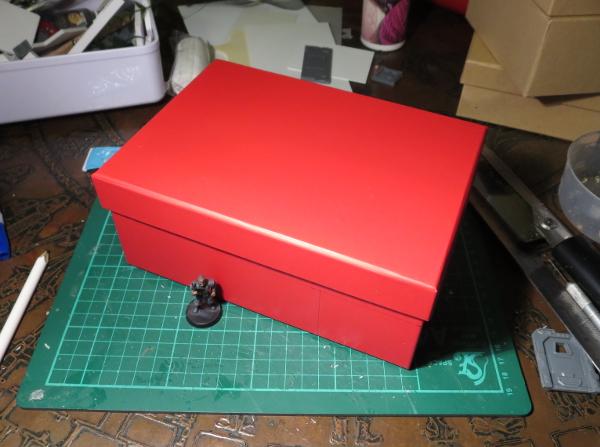
With the release of the Broken adding a long-awaited third faction to the Maelstrom's Edge universe, it seemed fitting to take a break from tinkering with the shiny new models to add some appropriate terrain to the table. So this week, I broke out some gift boxes that I had waiting for an opportune moment, grabbed some terrain sprues and got to work!
The core of the first building for my new Broken settlement is a 20cm x 15cm cardboard gift box. The plan was to more or less follow the style of my earlier gift box buildings, but with the addition of some faction-appropriate wear and tear and rough repair work.
I started by cutting out holes in the box for windows and doors, using a sharp hobby knife.
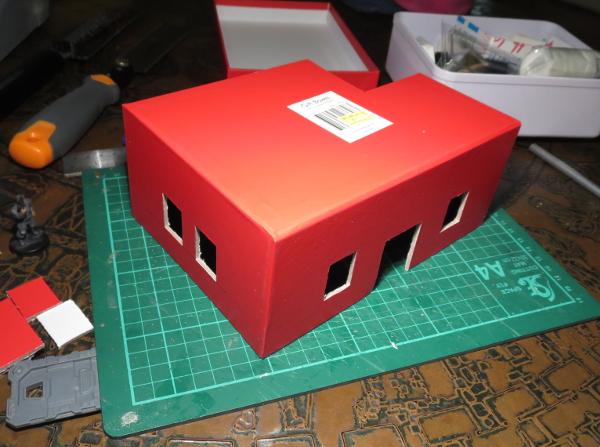
To break up the box shape a little, I cut away one corner of the box, 6cm along each side. Flipped over, this corner piece fits back in place as a recessed balcony.
I cut a hole in one wall of the balcony to add a door, and cut a matching corner off the box lid, which would form the walled roof of the building.
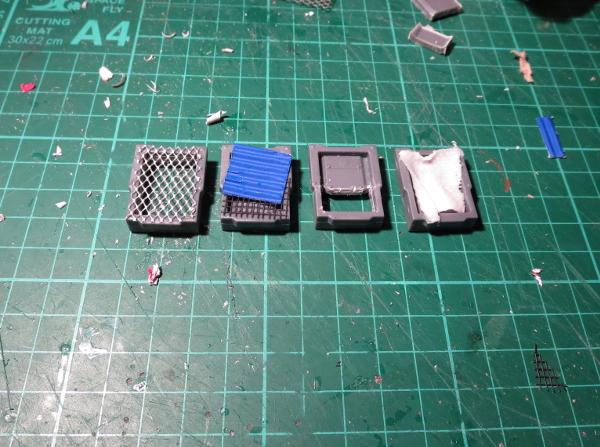
From there, it was time to glue the box onto a square of masonite, and start detailing. To make the building look like it had been through some rough times, I modified the rectangular shutter windows from the terrain sprue. For the first one, I carefully cut out the shutter using a hobby knife, and then glued some aluminium mesh over the front of the window frame.
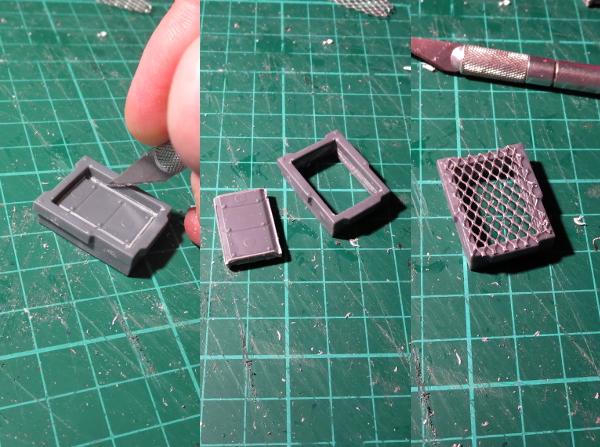
Rather than making all of the windows the same, I made different modifications to the other windows. On one, I glued some plastic flyscreen and a square of corrugated cardboard over the front of the frame, another had the shutter replaced with a piece of crepe bandage soaked in watered-down PVA glue, and on the last one I cut away just the lowest section of the shutter.
The terrain sprue parts were glued in place with superglue, and then I added some patches cut from thin plasticard and corrugated cardboard to the walls of the building.
The door on the balcony received a blanket in place of the original door with another piece of glue-soaked bandage, and a couple of ladders were used to create a railing. A pipe made from pieces of sprue joined with some plastic tubing and a vent made from a large pipe fitting with some aluminium mesh glued inside finished off the detailing on the back.
The building was still looking a little boxy, so I decided to break up the silhouette a bit more with the addition of a watchtower on the roof. This was constructed from a piece of gift box lid left over from a previous project, and some pieces cut from the ends of the terrain sprue. The ladder was glued in place with another couple of sprue pieces forming the hand grips at the top.
With construction complete, it was time to break out the paint. I started with a base coat of flat grey.
Over that went a thin layer of flat white. I didn't want this to be perfectly smooth and pristine, shining white, so kept the coat thin enough for the grey to show through a little. Once the spray was dry, some weathering was added with a sponge and some Vallejo Neutral Grey.
The metal patches and any other parts that I wanted bare metal were painted with a coat of Vallejo Beasty Brown, and then given a rough coat of P3 Pig Iron.
The base was painted with a coat of Vallejo Neutral Grey, and then a drybrush of Vallejo Light Grey, with some patches of Beasty Brown added to dirty things up a little. A splash of Army Painter Strong Tone over the metal bits and blankets, and a rough coat of Citadel Ultramarines Blue over a couple of the metal patches, and the building was pretty much table-ready.
There is still a little detail work to go, but some of that will wait until I get some more of the settlement completed so that I can match details across the different buildings to tie everything together.
So what's next?
I will be adding a couple of smaller gift box buildings with some varying levels of damage and delapidation, and I have some plans for a large peach tin that was rather conveniently opened the other day. The outsides of the buildings will gain some awnings and banners and the like, and I'll scatter some scrap around to add some flavour (and also some handy cover).
Stay tuned for more!
To build your own stellar refuge settlement, you can pick up the Maelstrom's Edge terrain sprue from the webstore here. As always, feel free to share your creations on the Comm Guild Facebook page!
For other Maelstrom's Edge modeling articles, including tutorials and walkthroughs of a wide range of different building and miniature projects, check out the article roundup here.
Tags: broken buildings modeling models spotlight terrain terrainsprue walkthrough