Search Results for 'terrain'
Entries found for "terrain": 216Showing 151 - 160 of total 216 search results
Terrain Tutorial & Templates: Vending Machines
Posted on Monday Aug 13, 2018 at 06:00pm in Tutorials
- by Iain Wilson
Someone on the Maelstrom's Edge Facebook Group page this week was looking for templates for making vending machines. While I have put together a bit of a range of assorted scatter terrain, this was something that I hadn't got around to yet, and so this seemed like a perfect excuse to have a look into it. As a result, I wound up spending a chunk of this week playing around with some cardboard and foamcore, and sketching up some panel designs in Gimp, with the end result below:
I have put together two different designs, which you can download from the Maelstrom's Edge website here. The first is a basic, square box design, while the second is a slightly more complicated build with a rounded front. The download also includes a sheet of assorted fronts for both types of machine. My original fronts were all somewhat tongue-in-cheek, because I like to amuse myself by inserting random bits of dubious humour into my gaming tables. As I realise that this isn't to everyone's taste though, I have also included a set of less silly, generic fronts. Of course, you could also just make your own, using mine as a template.
I recommend printing the templates directly onto thin card - I used some old manilla folders cut to A4 size, which is light enough to go through most inkjet printers but solid enough when assembled to survive on the gaming table. Alternatively, you could print on paper and then glue the templates to thin card and assemble from there.
The page with the fronts on can be printed on paper, although I recommend using a good quality printer paper as glue can bleed through and affect the colours on cheaper, thinner paper.
ASSEMBLY
The square machine is extremely easy to assembly. Just cut along all of the solid lines with a sharp hobby knife, and score lightly along the dotted lines without cutting all of the way through. Then fold along the dotted lines and glue the tabs inside the resultant box. Superglue is fine for this if you are confident of getting everything lined up right, or you can use PVA glue to give yourself a little more working time. The small rectangle piece is glued inside the front, over the rectangular dispenser hole.
Then glue the tabs on the bottom of the vending machine onto a piece of MDF or masonite, cut just a little larger than the bottom of the machine - I used some 3mm MDF left over from a building kit, cut to 35mm x 30mm. This helps to give the machine some weight, to help it stay put on the gaming table.
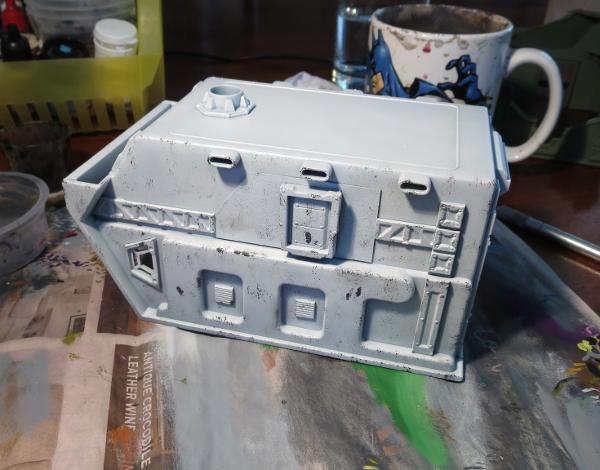
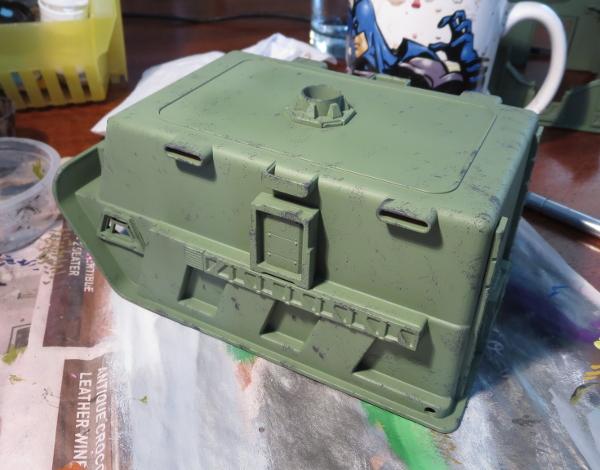
It's a good idea to paint the machine at this point, and then glue on the front after cutting out the white rectangle. Then grab a control panel from the Maelstrom's Edge terrain sprue, trim off the thin strips on the sides as below, and then glue in place above the dispensing slot - it's up to you whether you paint the panel before or after gluing it in place.
The end result will look something like this:
For the rounded front machine, you will need a little foamcore or MDF, to form the top and bottom of the machine. This avoids trying to form a curved cardboard surface using a series of little tabs to hold everything together on the curve - that's fiddly and never looks quite right.
As with the square machine, cut out the template by cutting along the solid lines, scoring lightly on the dotted lines, and then folding. There is one dotted line that folds the opposite way to the others - this line is grey instead of black. To get this line to fold in the right place, place a ruler along the line and push from the other side to crease the card up along the ruler's edge. As with the square version, there is a small rectangle that glues inside the dispensing slot.
The separate base template is used as a tracing guide to mark out your foamcore or MDF. You will need to mark out two of these for each machine, and then cut them out.
Once you have cut out the base pieces, fold the machine around them without any glue to check the fit, and trim up or recut them as necessary to get a snug fit. Then glue in the bottom piece as pictured below. Note: If you are using foamcore, you can't use superglue on the exposed foam edges. Use PVA glue instead. It's fine to use superglue to glue the bottom flaps to the paper bottom of the foamcore, though.
Then glue the top piece in flush with the top edge of the machine's sides, as below. As before, use PVA glue here as you're gluing to the foam.
You can then add a wood base and control panel as for the square machine above, paint, and then add a front panel onto the curved face of the machine. The end result will look something like this:
If you would like to have a go at building your own vending machines, the templates are here, and you can pick up the Maelstrom's Edge terrain sprue or any of the rest of the Maelstrom's Edge model range, from the webstore here.
As always, feel free to pop along and share your work, or ask any Maelstrom's Edge- or hobby-related questions on the Comm Guild Facebook page!
For other Maelstrom's Edge modeling articles, including tutorials and walkthroughs of a wide range of different building and miniature projects, check out the article roundup here.
Tags: terrain terrainsprue tutorial
Terrain Spotlight: Cardboard Tube Storage Tank
Posted on Monday Jul 30, 2018 at 05:00pm in Tutorials
- by Iain Wilson
It's been a few weeks since I built any terrain and I'm starting to feel withdrawal symptoms, so this week I have busted out the foamcore and terrain sprues, raided the recycling bin, and built a quick little storage tank for my newly assembled elite Epirian SecDef units to hide behind.
The main body of the tank is made from a small Pringles can. This of course requires you to remove the Pringles from said can, which my wife was happy to take care of for me. If you don't know anyone willing to make this sacrifice for you, you could use any other appropriately-sized tube. For the tank on my plantation dome, I used a metal tin. You could also use soft drink cans, cardboard postal tubes, or even roll your own out of cardboard or plastic sheet.
I used foamcore for the end supports. For the uninitiated, foamcore (also sometimes called foamboard) is a craft board that is comprised of a thin sheet of expanded polystyrene foam sandwiched between two sheets of stiff paper or thin card. Because it's lightweight but fairly strong, it's a fantastic material for building terrain.
I marked out the shapes that I wanted on the foamcore with a pencil, and then cut them out using a sharp hobby knife and a steel ruler.
As I wanted a worn concrete look for the ends, I used the hobby knife to roughly shave away the edges along the top and sides, and then used fine sandpaper to smooth the cut edges of the paper down.
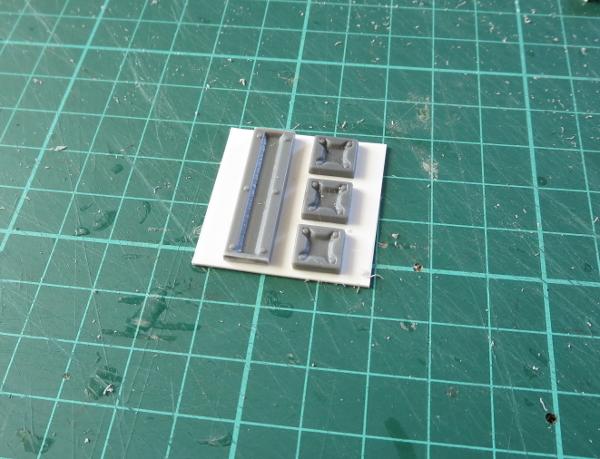
For the access port on the top of the tank, I took the square hatch and corner reinforcing from the Maelstrom's Edge terrain sprue and cut a piece of plasticard sheet to an appropriate size to fit them all on it with a little room to spare for visual effect.
I then cut four strips to run around the outside of the top plate. To replicate the curve of the tank for the two strips that would run across it, I positioned the bottom of the Pringles can on the plasticard lined up with the bottom corners of the strip and traced around it with a pencil, and then cut along the resultant arc with my hobby knife. Because the bottom aluminium strip on the can is slightly larger in diameter than the actual can, this doesn't create a perfect fit, but it gets it close enough that you can sit it in place to see where it needs a little shaving with the knife to sit flush.
The strips were glued in place with plastic cement, and when that was set I flipped the construction over and glued the terrain sprue components in place as well.
To add a little detail to the outsides of the tank ends, I cut some sections off the long support struts on the terrain sprue, and also assembled a little computer terminal by trimming down the comm panel and cutting a piece off the end of the lintel piece.
One end got two of the support strut pieces, and the other end another two strut pieces, the computer terminal and a small pipe fitting, all glued in place with superglue.
I then glued the foamcore pieces onto the ends of the tube with superglue. One end of the tube is rolled cardboard, which glues just fine to the foamcore. For the tube's aliminium end, I gave the superglue a little extra help with a primer from an 'all plastics' two-part superglue.
A little more superglue was used to stick the access port in place on top.
The final step before painting was to paint the exposed foam on the foamcore sections with PVA glue. This protects the foam when the base coat is sprayed on, as most spraypaints will partially eat the foam. If you're painting with a brush, or with a specific foam-friendly spray, this step is unnecessary.
I basecoated the whole tank with a Rustoleum quick-drying grey primer to get a consistent base for painting over, and then hit the tank itself with a spray of Army Painter Dragon Red.
I could have saved some repainting here by masking off the ends to avoid overspray from the red, but it didn't really seem worth the bother. I just used a large, flat brush to add another coat of grey (in this case Vallejo Neutral Grey) over the end pieces, added some weathering to the red using a sponge and some Vallejo Heavy Charcoal (you can find my tutorial on sponge weathering here) and added a layer of Vallejo Beasty Brown over the terrain sprue components.
To create a nice concrete look, I drybrushed over the end pieces with Vallejo Light Grey, and then added a highlight with a lighter drybrush of P3 Morrow White. The brown components received a heavy drybrush of Citadel Boltgun Metal (now called 'Leadbelcher', but I'm still working through a lot of old paint!)
Next up, I gave all of the metal parts a generous wash of Army Painter Strong Tone, and put it aside to dry.
While the wash was doing its thing, I cut an 8"x8" square of masonite, sprayed it with a coat of grey primer, and drybrushed with the Light Grey and some white. I also marked out a square in front of where the pipe fitting would sit on the end of the tank, and painted in some hazard stripes. (If you are interesed, you can find a tutorial on painting hazard stripes here.) Then I glued the tank in place using some superglue on the bottoms of the end pieces (this was fine as I had included the underside edges when I painted the exposed foam with PVA glue. Don't put superglue directly onto expanded polystyene - it doesn't end well) and added some patches of drybrushed Beasty Brown to dirty everything up. Which left the tank looking like this:
To build your own storage tank, you can pick up the Maelstrom's Edge terrain sprue, or any of the rest of the Maelstrom's Edge model range, from the webstore here.
As always, feel free to pop along and share your work, or ask any Maelstrom's Edge- or hobby-related questions on the Comm Guild Facebook page!
For other Maelstrom's Edge modeling articles, including tutorials and walkthroughs of a wide range of different building and miniature projects, check out the article roundup here.
Tags: buildings modeling painting spotlight terrain terrainsprue walkthrough
Maelstrom's Edge 2018 - Six-month Roundup
Posted on Monday Jun 25, 2018 at 05:00pm in General
2018 is halfway gone already, and so far it's been a busy year for Maelstrom's Edge! We would hate for you to have missed anything, so here's a look back at what these six months have brought us.
Our monthly model releases saw some hefty reinforcements arrive for the Broken, in the form of the Marsayan Hypnotist with his innate powers of misdirection, the equipment-tinkering Sig Jammer, a specialised Forsaken Chieftain, and of course the giant, muscle-and-scale-clad behemoth that is the Gnolti, our biggest model to date!

All of these add to the existing Broken Infantry units to allow for a more varied and tactical army. One of the great things about the Broken as a faction is the sheer range of possibility opened up by their nature as a melting pot of all of the leftovers and unwanted dregs of galactic society, and we're looking forward to exploring this further with future model releases.
April saw the release of a new plastic kit for the Epirian Foundation - The Master Bot Handler. This multi-part kit comes with a raft of weapons options to equip your Master Handlers for a variety of battlefield roles, as broken down in the 'Equipping the Epirian Master Bot Handler' tactics article that you can find here.
Over on the Comm Guild blog, Iain shared some different modeling ideas for this fantastic new kit, with a general modeling spotlight here and a conversion guide for a quad-weapon-equipped 'special character' version here.
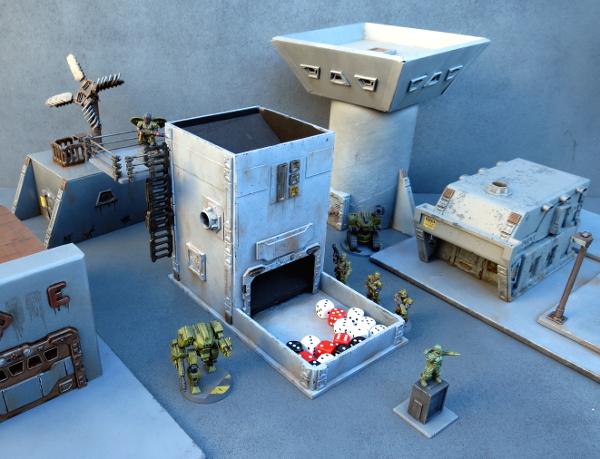
The Comm Guild blog is home to an ever-growing listing of different modeling articles. On the terrain front, we've made mini hab domes from plastic bowls, created a grove of scifi cactus from foam balls and old toothbrushes, built personal sleeper caskets for those long interstellar trips, tinkered with some scatter terrain for detailing urban tables, assembled an Epirian-themed dice tower, set up a residence in the desert, made a ruin from a cardboard gift box, and finished up with a sci fi pagoda!
The miniatures weren't forgotten either, with articles sharing modeling and conversion ideas for Karist Angel Keepers, Epirian Drones, the Broken Sig Jammer, the Marsayan Hypnotist, and Epirian Bot Handlers
We also shared basic guides on working with resin models, and magnetising your Karist Heavy Weapon troopers, and some conversion spotlights on a re-posed Gnolti, an Epirian Light Carrier Drone and Sentinel Bot and a veteran Gnolti 'Longhorn'.
So... what's next?
Over the next 6 months, we will be continuing our regular model releases, starting with our newest plastic kit: the Epirian Secdef!
And of course the Comm Guild articles will continue to bring you more tips and techniques for making the most of your models. Stay Tuned!
Join in the Maelstrom's Edge discussion on the Comm Guild Facebook page!
To pick up the Maelstrom's Edge model range, visit the webstore here.
Terrain Spotlight: Sci-Fi Temple
Posted on Monday Jun 18, 2018 at 03:05pm in Tutorials
- by Iain Wilson
This week, I'm showcasing another terrain build, but for a change of pace I thought it would be fun to build something in a more unusual style.
I've been eyeing off the Japanese building range from Plast Craft Games for some time, and in particular a three-level temple that was just screaming to be turned into a table centrepiece. So I grabbed the temple from one of my regular go-to online stores, broke out some Maelstrom's Edge terrain sprues, and set to work!
The Plast Craft Games buildings are flat-packed, assemble-yourself-style constructs in a similar vein to the various MDF offerings out there, except that instead of MDF they're made from sheets of die-cut, foamed PVC. This material is somewhere in between styrofoam and plasticard in density, and is nice and easy to work with and surprisingly sturdy once assembled.
My plan was to not get too crazy with modifying the building, as I love the general design of it. It just needed some sci-fi-ing up to fit on my table. So with that in mind, I discarded the resin screen doors that come with the kit in favour of the single doors from the Maelstrom's Edge terrain sprue. The existing doorways on the temple were exactly the right height for the plastic doorframe, but a little wider, so I filled in the gaps on either side with strips of scrap sheet cut to size. Other than that, the bottom level was assembled as per the instructions.
Similar treatment was given to the second level, although this level only has doors in two walls instead of all four.
The top level has a smaller doorway in a single wall. Rather than cut out the door hole to fit another full-sized doorframe in there, I filled in the doorway with some leftover sheet bits and glued on the square hatch from the terrain sprue. I also replaced the spire on the roof peak with another square hatch.
The railings that came with the temple were a little low, and a little low-tech for my liking, so I replaced them with ladders from the terrain sprue. This required some fudging to make it work, as I discovered when I started gathering ladders that I had run out. Luckily, I was able to cobble together a few discarded cut sections to fill the last of the railing on the second level. It's a little rough if you look too closely, but I can always pass it off as a rushed repair job (those lowest-bid contractors at work!).
I wanted to do the bulk of the painting before adding the roof sections, as I figured that would be easier than trying to work around them. So the building was given a basecoat with black spray, and then a top-down spray with grey, leaving the black in the lower recesses for natural shading.
I then picked out all the metal parts with Citadel Leadbelcher, before giving them a wash with Army Painter Dark Tone.
The balcony levels were painted with Vallejo Neutral Grey and drybrushed with Vallejo Light Grey, and the wall panels were basecoated with Vallejo Heavy Brown and drybrushed with P3 Jack Bone. At which point, it was time to add the roof sections.
I'm not sure if it was my slightly rushed assembly, or a flaw in the temple kit, but I found that the roof sections for the two lower levels were actually too short to reach the corner beams. Luckily, I had some corrugated cardboard that matched the card used for the roof almost exactly. Cut to size and with tile-grooves added by 'scoring' across the corrugations lightly with a sculpting tool, they were a close enough match to hold up to all but the closest scrutiny.
My improvised roof sections were painted black before gluing in place, and then all of the roof pieces were drybrushed with Leadbelcher and washed with Dark Tone. Finally, I picked out the lights above the doors with a drybrush of Citadel Ultramarine Blue, Ice Blue and then white, and added a masonite base sprayed with grey and white for a quick concrete effect. If I have time later, I may go back and replace this with a tiled slab to pretty things up some more.
The finished building:
To pick up the Maelstrom's Edge terrain sprue, or any of the rest of the Maelstrom's Edge model range, visit the webstore here.
For other Maelstrom's Edge modeling articles, including tutorials and walkthroughs of a wide range of different building and miniature projects, check out the article roundup here, or for help or advice, or just to share your work, feel free to visit the Comm Guild Facebook page!
Tags: buildings modeling spotlight terrain terrainsprue walkthrough
Terrain Spotlight: Cardboard Gift Box Ruin
Posted on Monday Jun 11, 2018 at 05:00pm in Tutorials
- by Iain Wilson
If you've been following my hobby articles for any length of time, you may have noticed that I'm rather fond of using cardboard gift boxes to make buildings (If you're new here, you can see examples here, here, or here). But while intact buildings are all well and good, a balanced battlefield should include a mix of line of sight blocking terrain and area terrain, and so this week I'm breaking out the old gift boxes and the Maelstrom's Edge terrain sprue for some good, old-fashioned ruins.
The structure for this build comes from two cardboard gift boxes, bought from a local discount store.
The lids were flipped over to create a walled roof, and I removed a corner of the smaller box with a sharp hobby knife so that it nestled in neatly against the larger box.
I used a door and a shutter window from the terrain sprue to mark out positions for doors and windows, by sitting them in place and tracing around them with a pencil.
Then I used the hobby knife to cut the door and window holes out, and marked out a rough plan for the building damage - the line around the building shows where the walls would be cut down, leaving more raised areas on corners, where the structure would be stronger.
The hobby knife was put to use again, as I cut along the ruin line all the way around the building.
Once done, the cardboard structure went together like this:
As a handy side-effect, the pieces removed from the tops of the walls can be saved and used to create other ruins later...
Because the ruin line wound up around the bottom of all of the window frames, I just left them bare. For the doorways, though, I chopped the door panel out from the surrounding doorframe, and cut the frame into shorter pieces to match the height of the ruined walls.
The doorframe pieces were then glued in place, and I also added some support struts on the corners of the walls, also suitably cut down to height and with the cut ends messed up a little with some clippers to simulate explosive damage. With these all in place, I glued the whole building structure to a base board of masonite.
If you're just after a quick and easy ruin, this is the point where you can call the job a good'un and go and slap some paint onto it. For some extra detailing, though, I chose to glue some chopped up card from the gift boxes and some leftovers from the cut terrain sprue bits around the building, and then using a generous amount of PVA glue added some gravel and sand.
After leaving the glue to dry, it was time for paint!
I started with a basecoat of grey spray, and then a light spray with white around the walls and the bigger rubble patches.
The exposed sections of the baseboard and the building floors was then re-based in Vallejo Neutral Grey, and then drybrushed with Vallejo Light Grey.
Everything was then dirtied up with some Neutral Grey sponge-weathering and spots of drybrushed Vallejo Beasty Brown.
I added a couple of extra details for colour - the number on the roof railing by dabbing through a number stencil with a large brush and some red paint, and a little graffiti on the back wall painted with yellow and some blue ink straight over the grey wall to give it a faded appearance.
The final step was a quick blast of black spray into the interior of the building to create some contrast.
And that's it - one ruin, ready for the table!
If you're keen to try this for yourself, you can pick up the giftboxes from gift stores all over the place, or online with a quick Google search, and the Maelstrom's Edge terrain sprue along with the rest of the Maelstrom's Edge model range from the webstore here.
For other Maelstrom's Edge modeling articles, including tutorials and walkthroughs of a wide range of different building and miniature projects, check out the article roundup here, or for help or advice, or just to share your work, feel free to visit the Comm Guild Facebook page!
Tags: building modeling spotlight terrain terrainsprue tutorial walkthrough
Terrain Spotlight: Knights of Dice Desert Residence meets the Maelstrom's Edge Terrain Sprue!
Posted on Monday May 28, 2018 at 05:00pm in Tutorials
- by Iain Wilson
A few weeks ago, I showcased a dice tower made from a Knights of Dice MDF blank and some bits from the Maelstrom's Edge terrain sprue. This week, I'm giving a similar treatment to a desert building from the KoD 'Tabula Rasa' range.
The Tabula Rasa terrain range is specifically designed to be fairly basic, both as a cost-effective way of filling your table and to serve as a base for people to add their own detail... which obviously makes these buildings a perfect match for the Maelstrom's Edge terrain sprue!
The building I've started with is the 'Desert Residence 1', which when assembled straight out of the pack looks something like this:
Before gluing the building together, there were a few modifications to make. To begins with, the doorways are a little small for the Maelstrom's Edge doors to fit in. So I sat the door over the doorway, traced around it with a pencil and then carefully cut the resultant enlarged doorway out with a sharp exacto knife. MDF cuts fairly easily, so this isn't too onerous, but if you would rather avoid it you could alternatively build a boxwork around the door, as I did on my watch tower) and just glue it over the existing doorway.
There are two differently-sized windows scattered around the building. The larger of them, like the doorways, is a little small for the shuttered windows from the terrain sprue, so I repeated the door process, using the top corner of the window hole to line up the plastic part, and then tracing and cutting a larger hole. Again, if you would prefer to avoid cutting MDF, the shutter windows work quite well just glued straight to the wall.
For the smaller window holes, I covered over two of them using the cast-off MDF pieces from the larger windows, and to this I attached part of the energy fence pylon from the terrain sprue to make some sort of mechanical gubbin (I have to admit, it looks a little like a high-tech toilet cystern to me).
For the third small window, I took the large pipe fitting from the terrain sprue, and glued a small circle of plastic mesh into the back of it. This was then glued over the window hole to make a covered vent.
As a nice little touch, all of the Knights of Dice kits come with a little crowbar-sort-of-thing in the top corner of the MDF sheet, which can be used for prying parts out for assembly, or pulling removable roofs off. With a little bit of trimming up, they also serve quite well as upright bars for attaching ladders. I trimmed the ladder from the terrain sprue off so that it was short enough to work on either of the two building sections - the hooks on the top allow it to be hung from any free stretch of roof railing without needing to glue it in place.
With the leftover piece of ladder and a couple of MDF cast-offs, I made a smaller access ladder to hang between the roof sections.
The final touch was to add some support strut sections from the terrain sprue to cover over the joint holes where the roof supports attach to the walls. I could also have removed the other joint gaps by filling with some filling plaster or putty and sanding it down smooth, but I actually like the wall joints for creating a pre-fabricated slab-assembly look.
With some paint and weathering, the final building winds up looking like this:
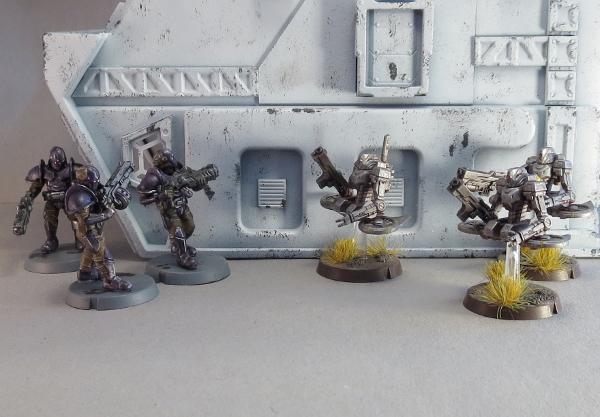
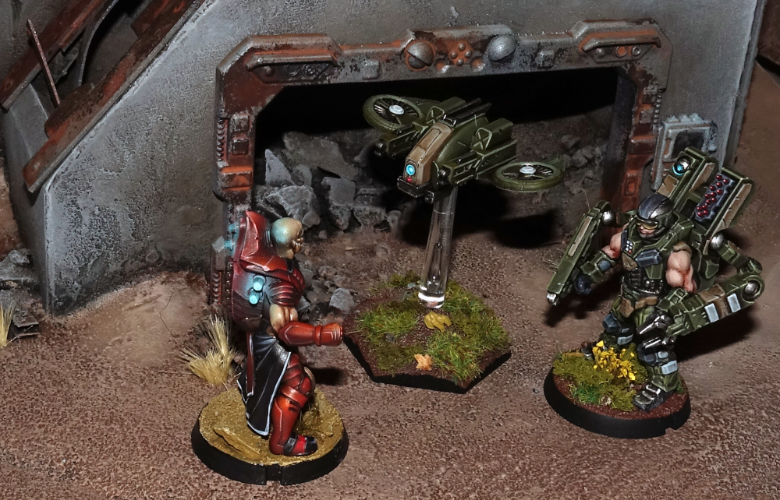
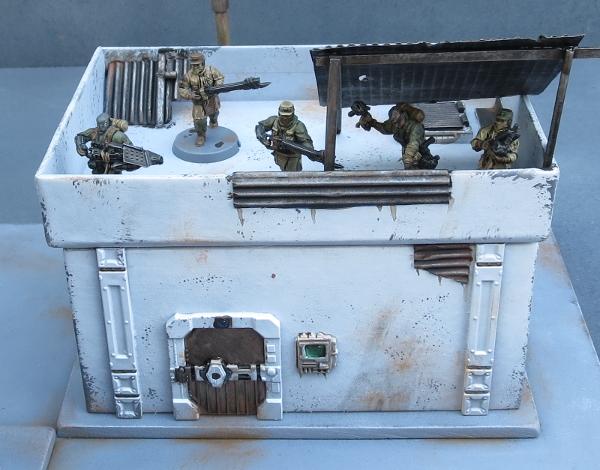
Some Karist troopers, taking up station:
To tech up some buildings of your own, you can pick up the Maelstrom's Edge terrain sprue, or any of the rest of the Maelstrom's Edge model range, from the webstore here. As always, be sure to share to see your creations, or pop in with any hobby questions to the Comm Guild Facebook page!
For other Maelstrom's Edge modeling articles, including tutorials and walkthroughs of a wide range of different building and miniature projects, check out the article roundup here.
Tags: building modeling spotlight terrain terrainsprue tutorial walkthrough
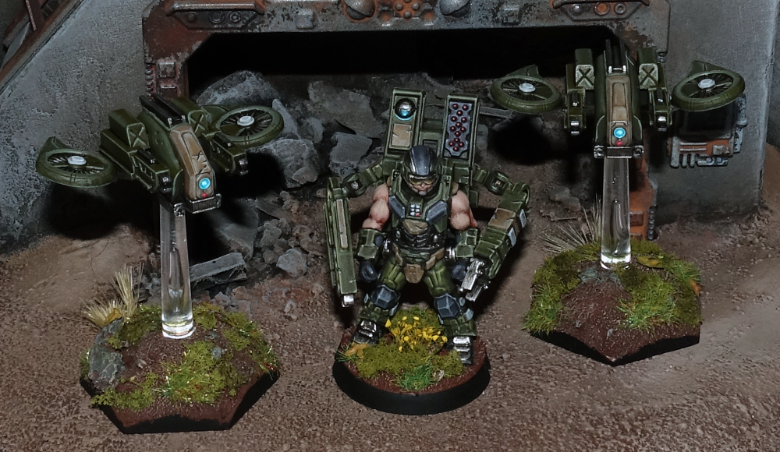
Tactics: Equipping the Epirian Master Bot Handler
Posted on Saturday May 12, 2018 at 09:30pm in Gaming
EQUIPPING A MASTER BOT HANDLER
A Master Bot Handler is one of the most powerful figures in the Foundation, able to command legions of robotic minions and carry a vast array of weaponry that common soldiers can only dream of. However, this dizzying amount of options can also make deciding exactly how to equip your own Master Handler a bit daunting. Have no fear though! Once you finish with this article, you’ll have all the insider information of what Master Handlers are capable of and know how you’ll want to equip yours.
TACTICAL ROLES OF A MASTER HANDLER
There are three main roles you can equip your Master Handler to fulfill:
- Bot Commander.
- Gun Heavy.
- Support/Melee.
BOT COMMANDER
No matter how you choose to equip your Master Handler, you’ll want to be aware that, above all else, they are a force multiplier for Foundation robotic units. So if you’re looking to field a force that has a preponderance of Contractor or SecDef (coming soon!) units, then you might want to instead just stick with taking regular Journeyman Bot Handlers as the Command Model for your detachments.
With a Master Handler, while you pay a premium in points to take them, you get a heck of a lot of value by way of improving all the robotic units in your force. With his Neural Interface, a Master Handler effectively has the Command (3) ability, which means he’s able to issue orders to up to 3 friendly units within 18” per turn. Anytime a Bot Handler (of any level) issues an order to a Bot unit, that unit gets to enable its Bot Protocols for the turn, which makes them perform much better: Hunter Warmechs get to move and shoot more effectively, Scarecrows get to fire more shots, Firefly Drones dodge incoming fire better and Spider Drones make better use of cover they’re hiding in. If you’re looking to make the absolute most out of this ability to buff nearby robotic units in this way, then there are a few options for the Master Handler that are pretty much mandatory:
Neural Nodes - Master Handlers are able to take up to 2 Neural Nodes. Each one allows them to issue an order to 1 more unit then they normally would be able to. A Master Handler has a WP of 5, which means, especially later in the game when you have a lot of Command Points available, you can put 5 Command Points onto the Master Handler and with the help of a couple Neural Nodes, be able to issue orders to 5 nearby robotic units (thereby enabling Bot Protocols on all of them).
Command Booster Micro Drone - Being able to issue orders to 5 nearby bot units is great, but with a command range of only 18”, you’ll have to keep all those units pretty well clustered around your Master Handler, which is less than ideal. However, Master Handlers are able to take a Command Booster Micro Drone, which increases their command range up to 24”. If you’re looking to make your Master Handler into a true bot commander, then taking a Command Booster allows you to keep your Master Handler back out of harms way while still issuing orders to your bot units that need them.
Firefly Defender Drones - In order to get the most out of your Master Handler as a bot commander you’ll want to keep them roughly in the center of your force, within command range of as many of your bot units as possible. Unfortunately, a Master Handler's prickly superior attitude prevents them from joining friendly units, so to keep your Master Handler safe, a great tactic can be to keep him hidden behind a big obstacle or piece of area terrain so that the enemy can't even spot him. However, a canny opponent might try to counter this by outflanking that terrain in order to get some wide open shots on your Handler. While the Master Handler’s impressive MAS 3 can protect him from a small amount of enemy fire, if the opponent does get a decent-sized unit with open shots on your Master Handler, you're probably going to lose the linchpin of your entire force, and along with it, the game. Therefore taking 1-2 Firefly Defender Drones can be a solid idea to help protect your Handler. As long as you enable their Bot Protocols, Firefly Defender Drones grant their unit (including the Master Handler) the Dodge ability equal to the number of Defender Drones in the unit (so 2 Defender Drones means the unit gets the Dodge (2) ability).
Cheap Weapons - As your goal will be to keep your bot commander Master Handler hidden from the enemy behind terrain, it doesn't make sense to spend extra points on weapons that will probably never be used. As such, sticking with the 0 point weapons (like a Flakk Gun and/or Repair Claw) is the smart choice for a Master Handler acting as a bot commander.
Master of Machines faction objective - Finally, if you want to get the absolute most out of your Master Handler as a bot commander, then taking the Master of Machines as your faction objective is pretty much a must, as it potentially allows you to enable Bot Protocols on a 6th friendly bot unit, and better yet, one that’s beyond your Master Handler’s command range:
MASTER OF MACHINES This objective may only be utilized if your force contains a Master Bot Handler. If utilized, a Master Bot Handler is automatically your force commander for any objective type that requires one. This objective type can generate a maximum of 3 VPs per game, after which you may no longer utilize the Bot Mastery ability. ----- Partial: (each end phase) If at least one of your Master Bot Handlers is on the table and the Bot Mastery ability was not utilized that turn, gain 1 VP. Full: (end of game) If at least one of your Master Bot Handlers is still on the table, gain all of this objective’s remaining VPs. Bot Mastery: Once per turn, you may automatically enable one of your unit’s bot protocols when that unit is activated (regardless of whether its activation discipline check is successfully passed). You must have at least one Master Bot Handler on the table to utilize this ability.
SAMPLE ‘BOT COMMANDER’ MASTER HANDLER
- Master Bot Handler - 16 pts.
- 1 Firefly Defender Drone - 3 pts.
- 2 Neural Nodes - 2 pts.
- 2 Flakk Guns - 0 pts.
- Command Booster Micro Drone - 3 pts.
- TOTAL - 24 pts.
GUN HEAVY
The next major role a Master Handler can fill is one of straight-up shooty death to the enemy. The Master Handler’s powerful exo-skeleton allows them to carry more and heavier guns than any other Foundation infantry model released to date. That means when equipped properly, a Master Handler’s unit can be one the most devastating shooting units in your arsenal. But be warned, this is also the most expensive configuration for a Master Handler.
Fire Assist - One very important limitation to be aware of is that, while Master Handlers have the Fire Assist (+1) ability, this only allows them to fire a maximum of 2 weapons during each round of shooting. That means the only reason you’d want to equip your Master Handler with more than 2 weapons is to give you the tactical flexibility to choose the best 2 weapons to fire in any given situation.
Cluster Missile Pods - If you’re looking to get maximum firepower out of your Master Handler, then taking 2 linked Cluster Missile Pods is definitely the way to go. Linked weapons add +1 to the number of shots the weapon normally is able to fire (and also only count as a single weapon being fired). So if you can manage to find a target where you're able to cover 3 models with the Cluster Missile Pod's AoE template, then you’re looking at getting to fire 5 shots, plus any 6’s you manage to roll count as 2 hits instead of 1!
Arm-mounted Weapons- For a gun heavy Master Handler, you really can’t go wrong with any of the arm-mounted ranged weapon options. However, you do want to pick weapons whose range and weapon profile are a good match to be fired alongside the linked Cluster Missile Pods. The Cutter Light Machine Gun is the obvious choice. A Flakk Gun can be a great choice for your second arm-mounted weapon because it is 0 points and is useful to fire instead of the Cutter when your Master Handler happens to find themselves in an up close and personal situation with the enemy. The Drone Class Laser System (DCLS) is a fine choice to take instead of a Cutter if you desire, providing your Handler with the absolute maximum number of shots possible (albeit with a PEN of only 1), that pair nicely with the shooting of the Firefly Defender Drones that are part of the unit.
Firefly Defender Drones - While Defender Drones are great at keeping the Master Handler protected from enemy fire, they are also all equipped with a DCLS as well, which means when you take a full squad of 4 of them and combine their firepower with that of the Master Handler, you can obliterate almost any enemy light infantry unit right off the table, regardless of whether they’re in cover or not!
Aerial Drone Strike - One thing that should never be forgotten is that the Master Handler also has an Aerial Drone Strike: a one-time use, incredibly powerful area effect weapon. Best of all, using an Aerial Drone Strike just counts as firing a single weapon, which means the Master Handler can fire the Aerial Drone Strike and also fire another weapon at the same time (including his linked Cluster Missile Pods, for example), and all of this gets combined with the shooting of his Defender Drones as well!
Aerial Uplink & Targeting Micro Drones - There are two great Micro Drone options for your gun heavy Master Handler. The Aerial Uplink Drone allows the Master Handler to fire his Aerial Drone Strike two times during the game, instead of just once, which is great for obvious reasons. An even better fit is the Targeting Drone. This gives the Master Handler and all of his Defender Drones +3 SKL when shooting (except during close quarters fighting), which unsurprisingly ups the deadliness of their combined firepower to near obscene levels.
SAMPLE ‘GUN HEAVY’ MASTER HANDLER
- Master Bot Handler - 16 pts.
- 4 Firefly Defender Drones - 12 pts.
- 2 linked Cluster Missile Pods - 4 pts.
- 1 Cutter Light Machine Gun & 1 Flakk Gun - 1 pt.
- Targeting Micro Drone - 2 pts.
- TOTAL - 35 pts.
SUPPORT/MELEE
While the bot commander and gun heavy roles for the Master Handler are fairly straightforward and easy to define, you can also mix and match different aspects of these roles a bit to create something unique for your Master Handler. In addition, the inclusion of a Repair Claw allows a Master Handler to perform yet another role: that of helping to remove suppression from nearby bot units.
Repair Claw - Giving your Master Handler a Repair Claw can be a great choice, not only because it is 0 points, but also because it gives the Handler the Bot Repairs (2D3) ability. This means that whenever the Handler finishes an Advance & Fire or Dash action within 6” of another friendly bot unit, he can remove 2D3 suppression tokens (STs) from them, turning him into an excellent support unit (Note that you cannot use this ability on the Bot Handler’s own unit though). Considering that you'll be keeping your Handler near your bot units to help enable their Bot Protocols, you will often find him within range to perform these types of repairs. You can also consider giving your Handler 2 Repair Claws. While this doesn’t allow him to remove any additional STs from friendly units, it does turn him into quite the close quarters (CQ) powerhouse. Since the Handler is able to fire 2 weapons per round of shooting (which includes CQ fighting), this allows him to use both of his Repair Claws to their full effect. That’s a total of 8, PEN 4 shots during CQ fighting (on top of any shots generated by his Defender Drones) which ain’t too shabby! Be warned that the Master Handler is a pretty slow mover so it can be a bit tough to get him into CQ fighting, but once there, he’ll certainly be able to cause some significant damage.
Firefly Defender Drones - Whether you’re running your Master Handler next to your bot units to remove STs from them, or trying to charge into CQ fighting, either way you’ll definitely need to protect your Handler with at least 2, it not the max of 4 Defender Drones to dissuade the enemy from picking him off and to soak up the inevitable defensive fire he takes from the enemy.
Flakk Gun - If you’re taking 1 repair claw on your support Handler, then the obvious weapon to pair with that is the Flakk Gun, which excels at short range shooting. Since a support/melee Handler will often find himself near the enemy (when removing STs from your bot units and/or running around trying to get into CQ fighting) having a powerful short ranged weapon is a great choice.
Aerial Uplink & Defense Micro Drones - While there isn’t one Micro Drone choice that really excels for a Master Handler in a support role, the Aerial Uplink Drone is a solid pick. Because you likely won’t have the great firepower of a gun heavy build, being able to unleash an Aerial Drone Strike twice during the game can be quite useful. On the other hand, the Defense Drone is perfect for the Handler that is trying to get into CQ fighting. Sure it's a one-use item, but it’s 0 points, and for the turn it's used the Handler gets the Field (2) ability (great for when his Defender Drones have been destroyed) and makes him an absolute melee monster. Plus, because the Handler can fire 2 weapons, he’s able to use the Defender Drones melee profile as well as one Repair Claw in CQ fighting!
SAMPLE ‘SUPPORT’ MASTER HANDLER
- Master Bot Handler - 16 pts.
- 2 Firefly Defender Drones - 6 pts.
- 1 Cluster Missile Pod & 1 Neural Node - 4 pts.
- 1 Flakk Gun & 1 Repair Claw - 0 pts.
- Aerial Uplink Micro Drone - 2 pts.
- TOTAL - 28 pts.
SAMPLE ‘MELEE’ MASTER HANDLER
- Master Bot Handler - 16 pts.
- 4 Firefly Defender Drones - 12 pts.
- 2 Neural Nodes - 2 pts.
- 2 Repair Claws - 0 pts.
- Defense Micro Drone - 0 pts.
- TOTAL - 30 pts.
How will you use your Master Handlers? To share your tactics or modeling ideas, or to discuss the loadouts described above or any other aspect of the Maelstrom's Edge game, visit the Comm Guild Facebook page.
You can find the Epirian Master Bot Handler, along with the rest of the Maelstrom's Edge model range, in the webstore here!
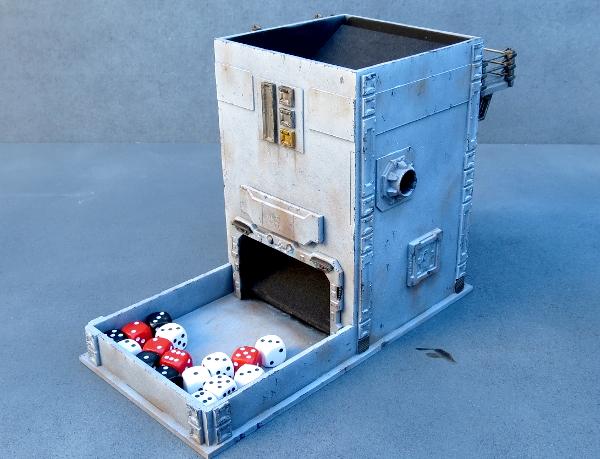
Terrain Spotlight: Epirian-themed Dice Tower
Posted on Monday Apr 16, 2018 at 05:00pm in Tutorials
- by Iain Wilson
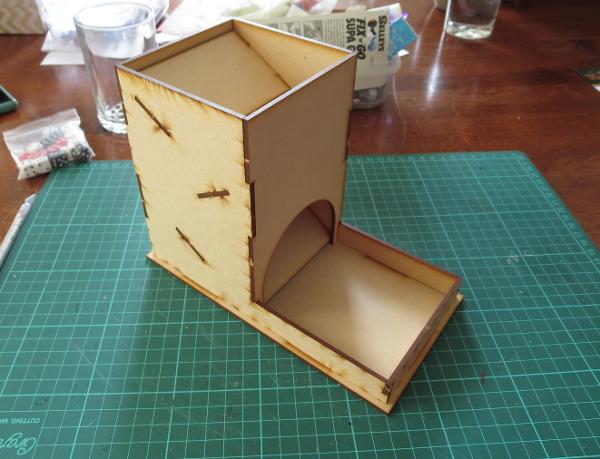
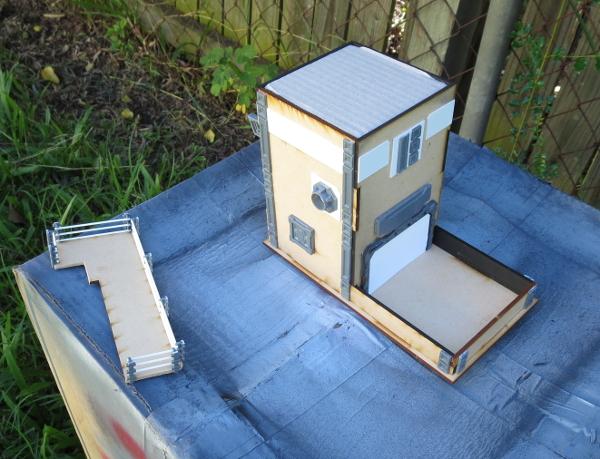
There's nothing worse than throwing a bucketload of dice on the table and having a stray ricochet take out that carefully-painted model sitting perched on the edge of a piece of terrain, or having to launch an expedition under the table when the dice decide to go on an adventure. There are a few common solutions to this problem - dice trays, rolling on another table, never painting anything, ever - but this week, I decided to build a dice tower from a Knights of Dice blank and some bits from the Maelstrom's Edge terrain sprue.

For the uninitiated, a dice tower is a box or tube that has some angled ledges inside. Instead of flinging your dice all over the table like some sort of uncultured barbarian, you drop them into the top of the tower where they roll down from ledge to ledge, eventually rolling out into the tray at the base of the tower where their predilection for wanton destruction is safely contained.
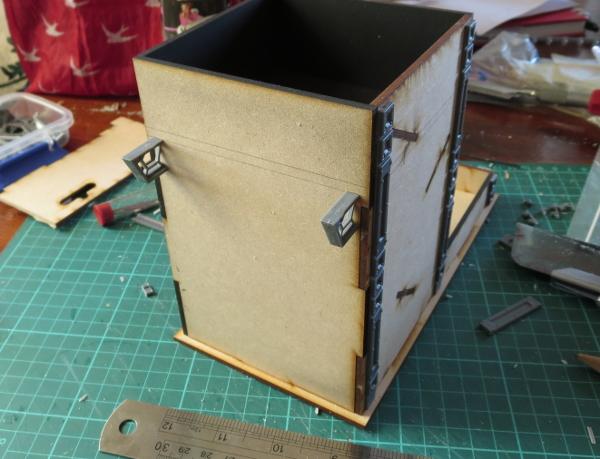
The KoD tower that I used as a base for the build is a plain, laser-cut MDF affair, that when assembled as standard looks like this:
I wanted something that would look like it belonged on the table, and so dug out some terrain sprues and tools, and went to work.
First step was to pretty up the opening at the bottom. I took a garage door from the terrain sprue, and found that it would fit into the existing arch with some cutting for the top corners, and something to fill in the top of the arch as it was higher than the door frame. So I marked out the door frame against the front wall of the tower, and also marked the scrap piece that was cut from the arch to leave an arc that would fit in above the door.
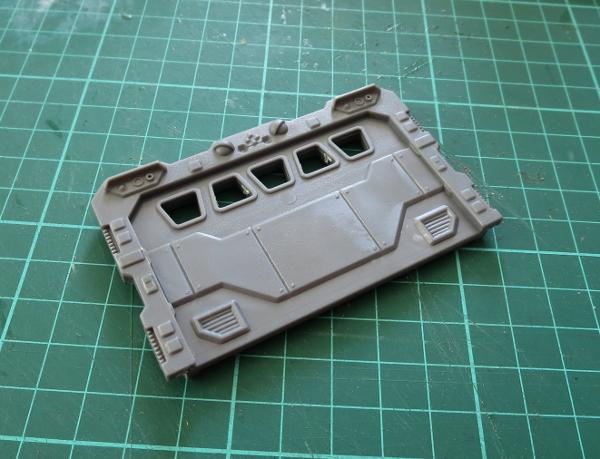

I then used a razor saw and exacto knife to cut the door out of the door frame, and glued the frame and the MDF arc in place in the archway.
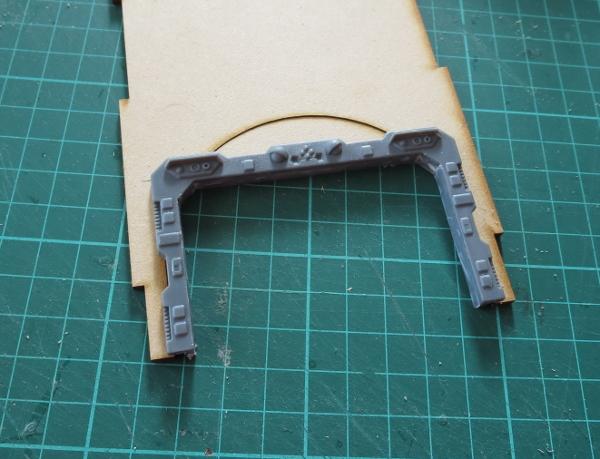
With a dry fit of the tower, I discovered that the dice were sometimes getting stuck behind the sides of the door frame, as the plastic addition made the opening for the dice narrower than was originally intended. I fixed this by taking a lintel piece from the terrain sprue, cutting it in half, and gluing the two pieces on either side of the doorway, creating a bevel to funnel the dice out the door.
One of the less pleasant things about dice towers is that they can be rather loud and echoey when the dice are working their way through. I fixed this by taking some craft foam and cutting it to the size of the ledges, and then gluing it on top.

At this point, I also sprayed the interior of the tower black to match the foam. This would also make it relatively unobtrusive on the table.

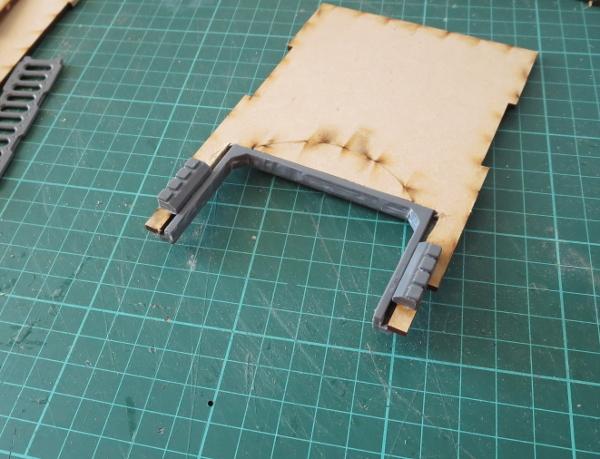
I assembled the walls of the tower, and started adding detail to the outside. I took a piece of scrap MDF, and cut it to serve as a balcony. I used the top halves of a bunch of energy fence posts and some plastic rod to make handrails. (You can find other ideas for handrails in my catwalk article here!)

To support the balcony, I cut the sides off two trapezoid windows, and glued them in place on the back wall of the tower.

Finally, two ladders and some cut down corner reinforcing pieces made an extending ladder that could be hung from the balcony, fire-escape-style.

To add a little extra detail to the front of the building, I made a large Epirian Foundation symbol using pieces from a reinforcing strut from the terrain sprue.
With the addition of a few more bits on the sides to hide the ends of the interior ledges, and a sign board made from the cutaway garage door to disguise the filled-in archway, the tower was ready for painting. To avoid getting spray on the interior, I filled in the top and the doorway with some cardboard and a piece of foamcore.
Painting was a quick and easy spray with a grey primer, and then a quick downwards spray with some white to leave the grey in the recesses and shadowed areas.
The metal parts were painted with P3 Pig Iron and then washed with Army Painter Strong Tone, and the white parts given some weathering with a sponge. (You can find a handy sponge weathering tutorial here!)

Once the wash was dry, everything was dirtied up a little with a drybrush of Vallejo Beasty Brown.

A little detail work here and there, and the tower was ready for the table.
Feeling inspired? You can pick up the Maelstrom'd Edge terrain sprue, along with the rest of the model range, from the webstore here. As always, we would love to see your creations on the Comm Guild Facebook page!
For other Maelstrom's Edge modeling articles, including tutorials and walkthroughs of a wide range of different building and miniature projects, check out the article roundup here.
Painting Tutorial: Sponge Weathering
Posted on Sunday Mar 25, 2018 at 05:00pm in Tutorials
- by Iain Wilson
We can wind up spending a lot of time painting miniatures for our games, so it can often be tempting when it comes time to paint terrain to just slap on a quick coat of spray and call the job a good'un. There are a number of quick and easy ways to add a little more detail (and subsequent awesomeness) to your terrain, though, and the difference it makes on the visual impact during your games is well worth making that little bit of extra effort. With that in mind, I would like to share a simple sponge method for adding chips and weathering to your building paintwork.
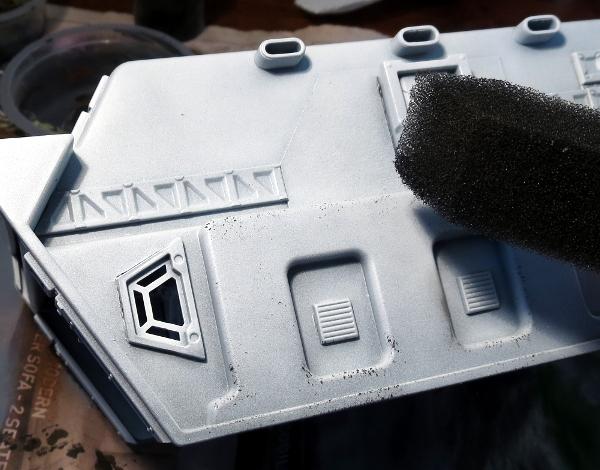
You will need a craft sponge - something fairly soft and fine-weave. I like to use a painting sponge like the one pictured below, as the pointed tip helps to get into difficult corners where necessary. You will also need something to put some paint in or on, some newspaper or paper towel, and (obviously) some paint. This method looks best when applied as dark chipping over a lighter shade of paint. I tend to use Vallejo Heavy Charcoal as a bit of a catch-all. It's darker than most of the colours I use on my buildings, and is indeterminate enough to cover for cement or aged metal. I avoid metallic paints for this sort of weathering, as they can look a little weird unless they catch the light just right. If you want some metalic touches, you can always use a dark grey and then highlight the bigger patches of chipping with a little metal colour.
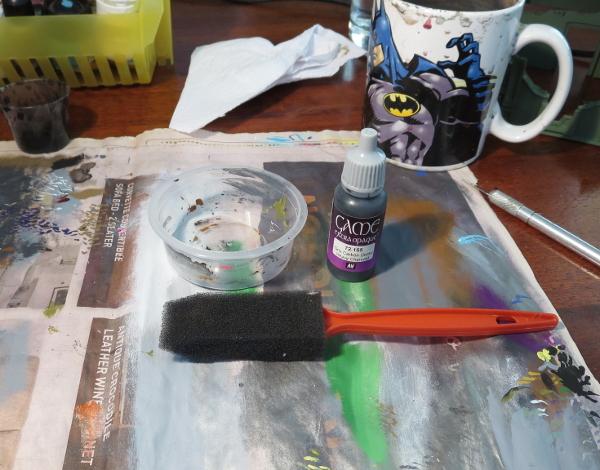
The weathering is applied once you have the basic colour and any higlighting done on your building, and the process is really simple - Drop out some paint onto whatever palette you are using and dip the tip of your sponge in the paint.
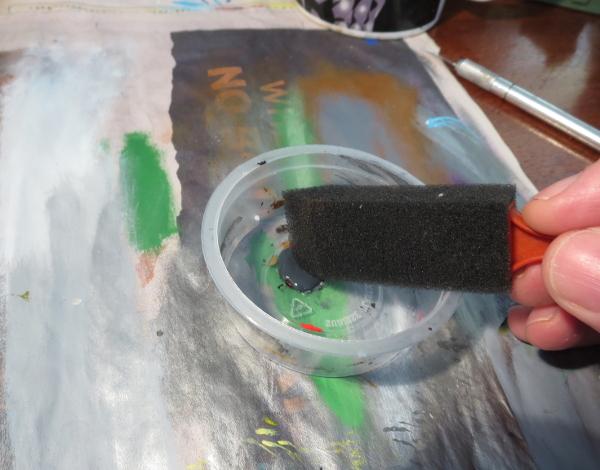
Rub the sponge on the paper to remove any excess paint. You want the sponge to be wet, but not have any gloopy patches of paint. If in doubt, press the sponge against a clean section of the paper and check the result - you're aiming for small specks of colour, not big blobs.
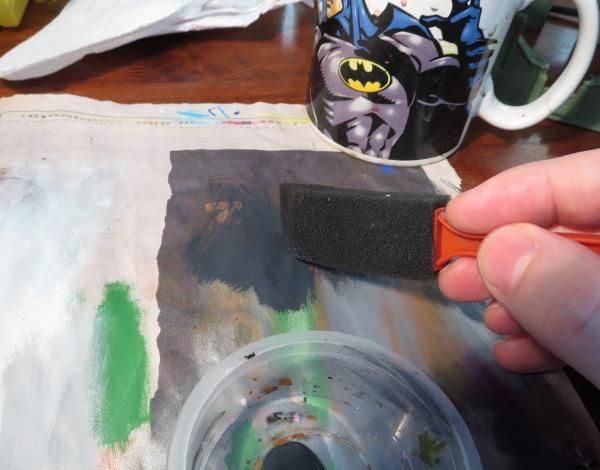
Press the sponge onto your terrain, using a straight up and down motion. You want to dab the paint on, not brush it. Experiment with turning the sponge different ways and using different amounts of pressure to vary the way the chipping is applied, reapplying paint to the sponge as necessary. Apply heavier weathering to places on the terrain that would naturally get knocked or abraded more, like protruding corners of walls or the edges of doors and windows.
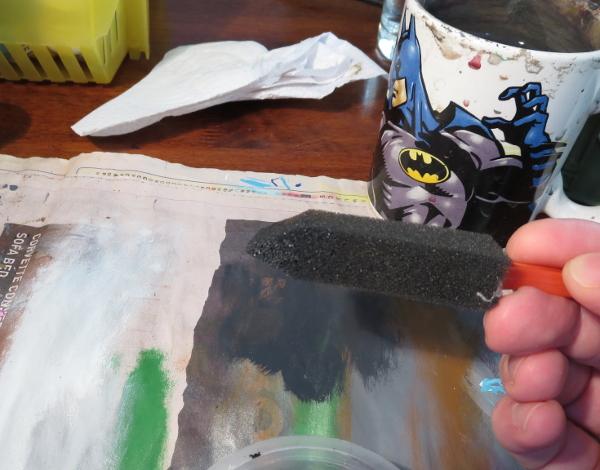
Keep going until you have worked over the whole building.
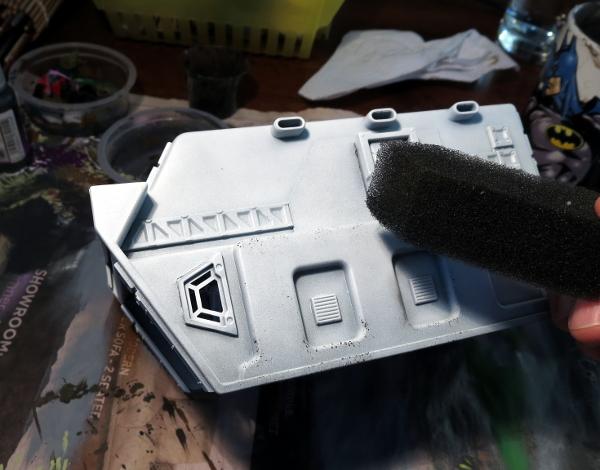
Here's the same thing on a green building.
If the sponge starts to get tacky with drying paint, you can wash it out, squeeze out as much water as you can, and then squeeze it between a couple of sheets of paper towel to get it as dry as possible before going back to the paint.
Once you're happy with your chipping, you can add other details or weathering as required. A strategic drybrush of brown in high-traffic areas, or just here and there for a bit of added grime, can go a long way to complete the weathered look.
Here's some finished examples of the technique in action:
Broken Settlement building (Tutorial)
Park Bench (Tutorial)
Sleeper Caskets (Tutorial)
Hab Dome (Tutorial)

You can find the Maelstrom's Edge terrain sprue along with the rest of the game range in the webstore here. As always, we would love to see your creations on the Comm Guild Facebook page!
For other Maelstrom's Edge modeling articles, including tutorials and walkthroughs of a wide range of different building and miniature projects, check out the article roundup here.
Terrain Tutorial: Scatter Terrain 2 - Urban Details
Posted on Monday Mar 19, 2018 at 05:00pm in Tutorials
- by Iain Wilson
Cities are more than just a collection of buildings. There are a whole host of other little details, many of which we don't even notice because we're so used to them being there, that fill in that urban sprawl. Streetlights, hedges, park benches, statues, gardens, all go towards making a city look lived in and give it character. And yet these things are so often overlooked when we put together gaming terrain. So many urban tables are just a random collection of buildings in various levels of disrepair, which may look good, but are missing those crucial details that make them look right.
I've covered how to make some of the above mentioned details in previous articles, but this week I thought I would run through a few more, using components from the Maelstrom's Edge terrain sprue, and a few assorted odds and ends.

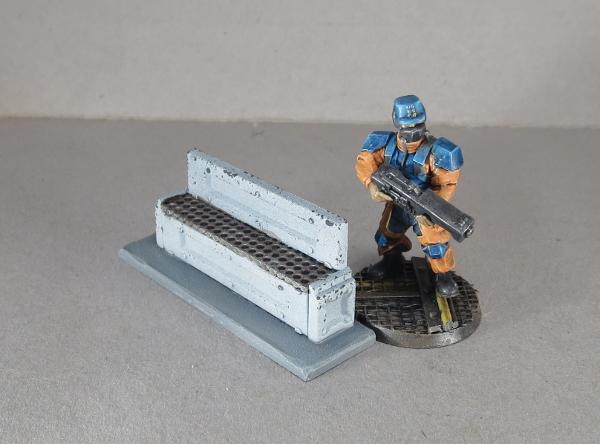
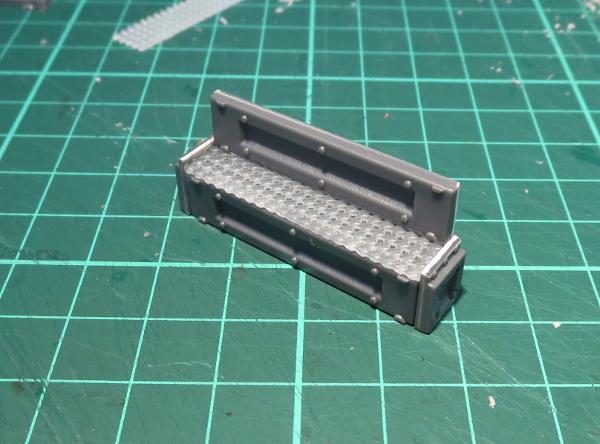
To start things rolling - Park Benches
The bulk of the bench is made up using the long segments from three support struts, and two of the short segments. Use a sharp hobby knife to cut through the struts on either end of the long, middle sections, and cut away the two short segments leaving the rivet strip on one side.

Two of the long strips and the two short segments make up the base of the bench. Glue these together as below using plastic cement.

For the seat, I have used a piece of embroidery mesh (which you should be able to find at a craft store or haberdashery), although you could choose to use plasticard or cardboard instead. I cut the mesh to fit over the top of the bench base, fitting inside the river strips on the tops of either end.

The mesh was glued in place using an 'all-plastics' glue, or a superglue with a plastic primer - just using plain superglue can work, but because the mesh is a rather rubbery plastic it sometimes doesn't hold the glue well without the extra help. On top of the mesh, I glued the third strut section, level with one long edge of the base.
While this comes out just about spot-on for size compared to a 28mm miniature, terrain features often look a little undersized due to the visual discrepancy created by the model's base making it look taller than it actually is. To help mitigate that, I glue a rectangle of 2mm plasticard under the bench to lift it off the ground a bit, which creates a similar illusion of extra height without actually having to make the bench over-sized.

Add a little paint, and the bench is ready to go on the table.
Next up - Let's inject a little art into the scene!
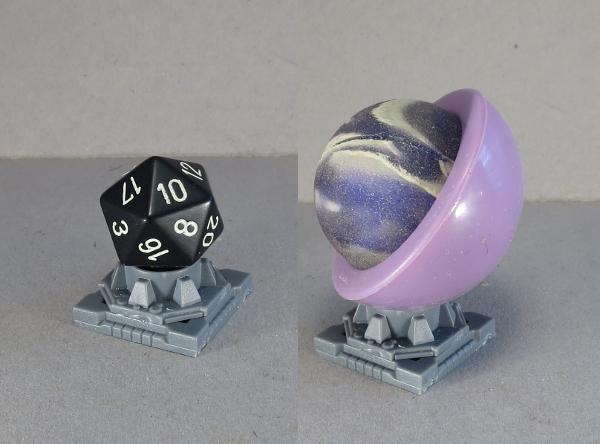
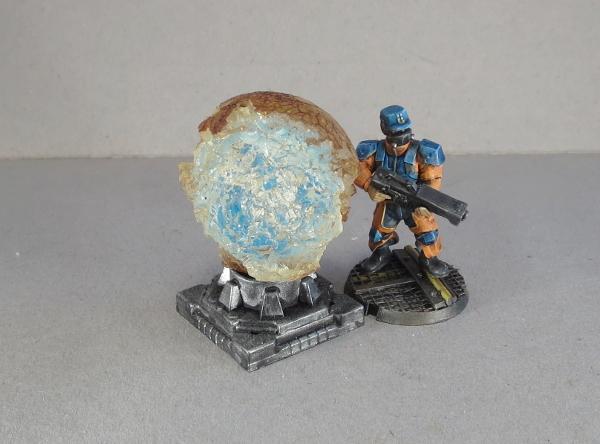
In my first scatter terrain article, I made an orb that I pictured as some sort of holgraphic map tank. I borrowed the same design to make a sculpture using an old rubber ball that I dug up out of the back yard.
The base for the bauble is simply the large pipe fitting from the terrain sprue, glued on top of the square hatch.


On top of that, you can stick a marble, as with my original orb, or any other round-ish thing that strikes your fancy -
In this case, though, as mentioned, I used a battered old rubber ball. The outside of the ball when I found it was cracked and dirty, and chipped away over much of the ball, leaving a semi-transparent, crystaline shape with a dark crust around it and a blue glow in the middle when the light hits it just right. It was too interesting a shape to not do something with it, and so I promptly glued it onto the pipe fitting base with some all-plastics glue.
Moving right along - let's add some greenery!
If you paint a lot, sooner or later you wind up with empty paint bottles. I found myself looking at my collection of empty dropper bottles and thinking that the lids were just asking to be turned into something. So I took a lid, washed it out, and cut a small pipe fitting from the terrain sprue.

The tip of the lid turned out to be exactly the same diameter as the outside of the hole in the pipe fitting (ie: just a bit bigger than I wanted it to be!) so I scored a line around the top about 1.5mm from the end, and used a hobby knife and a file to narrow down the end to that line.


I used an all-plastics glue to glue the reduced lid tip into the pipe fitting. As with the embroidery mesh used on the park bench, superglue alone isn't likely to bond as well with the lid, so the all plastic glue or a primered superglue is a better option.

I filled the inside of the lid with some 'green stuff' putty, and added a fern made from the leaves of a really dodgy-looking palm tree that came with a set of dinosaur toys bought for my daughter (It's ok, she said I could have it). A quick lick of paint, and the planter is ready for action.

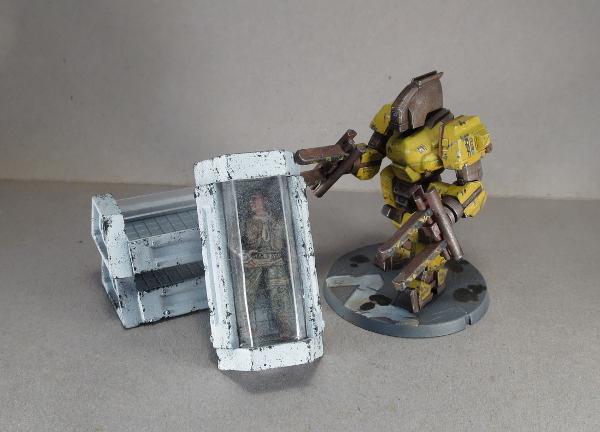
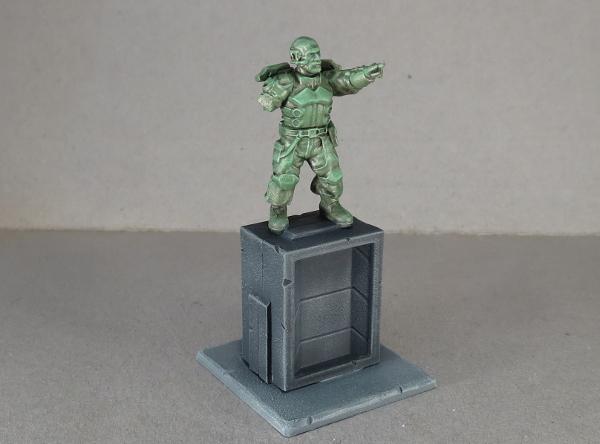
Finally, what sort of city doesn't have statues scattered around to remind people to feel all embiggened?
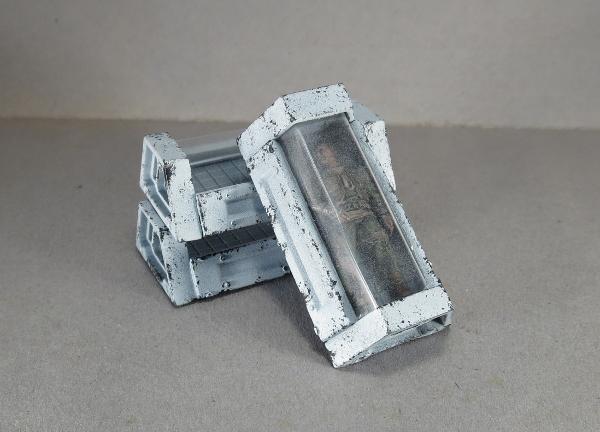
For a quick and easy statue plinth, I took two shutter windows from the terrain sprue, trimmed off the two protruding parts of the frame on the ends and the rivets on the front surface.
The two windows were then glued together face-to-face, using plastic cement.

I added a statue assembled from some leftover parts scavenged from the Epirian Bot Handler and Broken Rabble sprues, and a base of 2mm plasticard for stability.

Some paint and weathering, and he was looking suitably statuesque, ready to inspire the city's defenders or enrage the rampaging invaders.
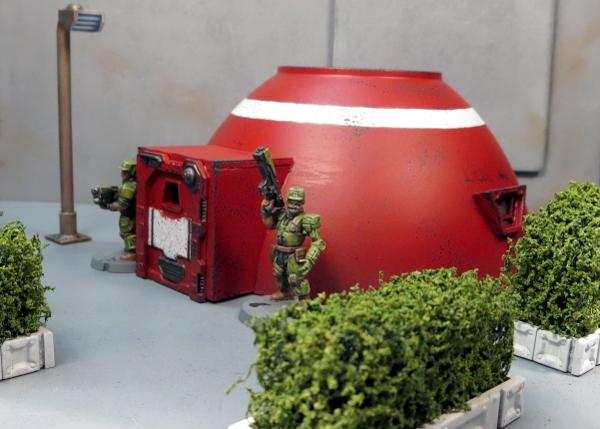
All of the above can be easily modified to suit your own table. You can use the individual pieces as scatter terrain, or glue them to building bases to add extra detail without having loose little terrain bits floating around. Be sure to also check out my first scatter terrain article, and also my tutorials on hedges and street lights

Want to share your terrain collection? We would love to see your creations on the Comm Guild Facebook page!
To pick up the Maelstrom's Edge terrain sprue, or any of the rest of the Maelstrom's Edge model range, visit the webstore here.
For other Maelstrom's Edge modeling articles, including tutorials and walkthroughs of a wide range of different building and miniature projects, check out the article roundup here.