Search Results for 'terrain'
Entries found for "terrain": 216Showing 161 - 170 of total 216 search results
Terrain Tutorial: Sleeper Caskets
Posted on Monday Mar 05, 2018 at 05:00pm in Tutorials
- by Iain Wilson
As entire planetary populations attempt to flee the destructive advance of the Maelstrom, many ships pressed into service as evacuation vehicles that not equipped with the facilities to carry large numbers of living, breathing passengers any distance. The obvious answer, where such technology is available, is to put at least some of the passengers into hibernation in sleeper caskets. This solution is not without its risks, however, as poorly maintained and over-used caskets may fail in transit, causing the interned to either wake up early or not at all. And, of course, in systems where the demand is high, the casket can easily wind up being worth more than the poor soul inside, resulting in unscrupulous captains selling off full caskets to equally morally-questionable Edge-dwellers. These new owners will either use the caskets themselves or sell them on at an even higher mark-up, sometimes back to the former occupant.
I hit on the idea of making sleeper caskets from the Maelstrom's Edge terrain sprue a while back, for use as scatter terrain or as part of a larger terrain project, and I was keen to give it a go. This relatively easy build uses a few components from the terrain sprue, some plasticard, and some clear plastic. Read on to find out how it's done.
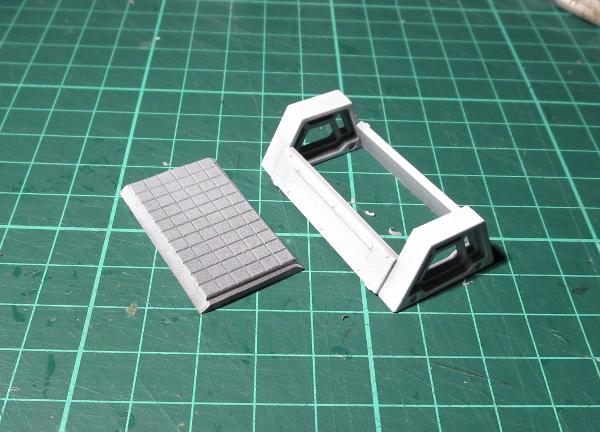
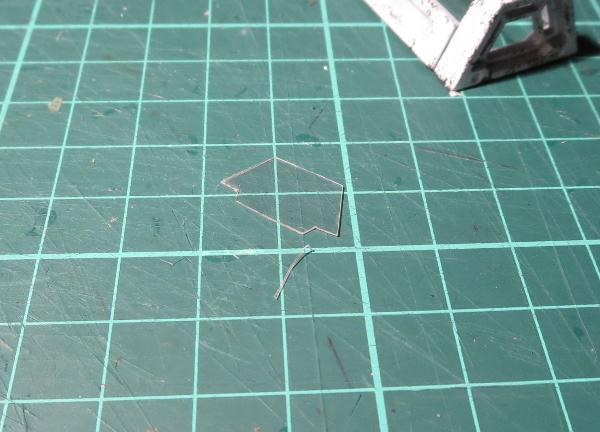
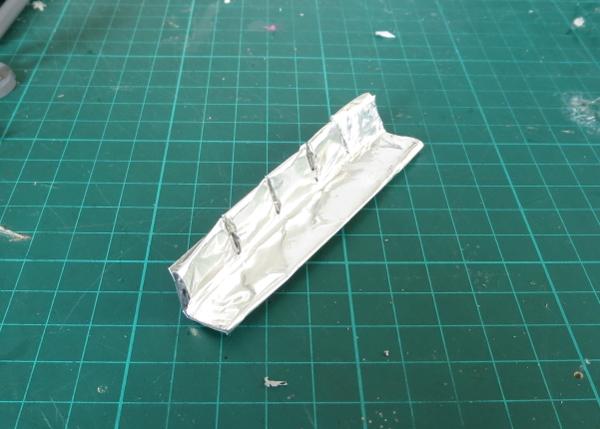
To start, take the two trapezoid windows and two reinforcing struts from the Maelstrom's Edge terrain sprue.
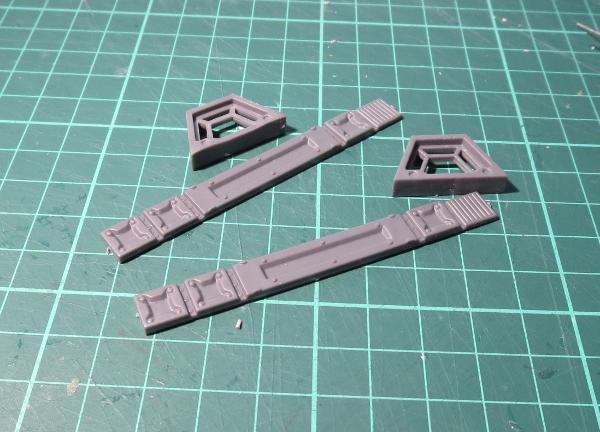
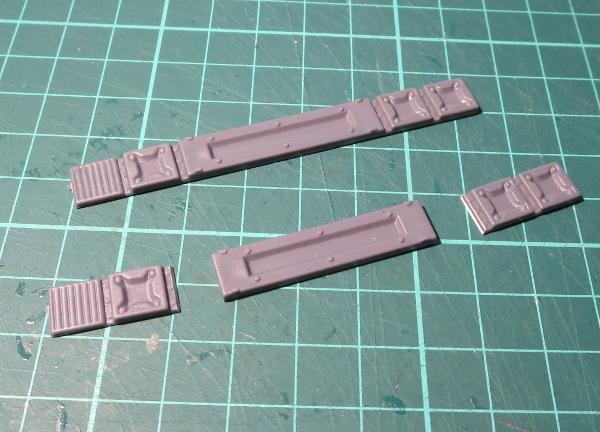
You only need the long middle section of the strut, so use clippers or a hobby knife to cut through the rivet sections on either side.
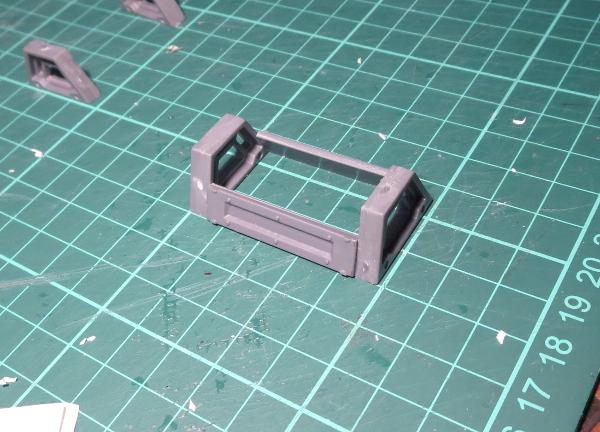
Using plastic cement, glue the ends of the strut section to the trapezoid window frames as below. The inside surface strut should be flush with the inside edge of frame, so that the 'glass' top will sit neatly inside.
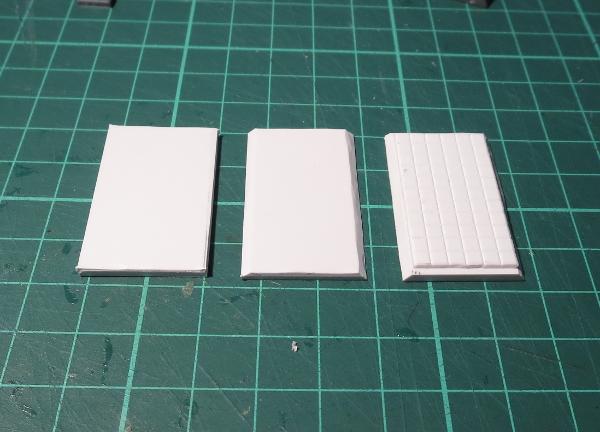
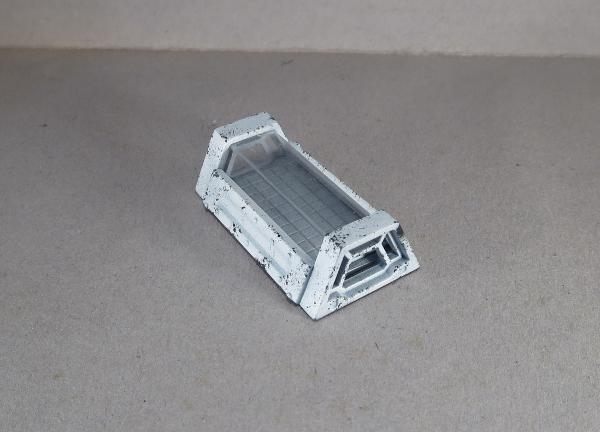
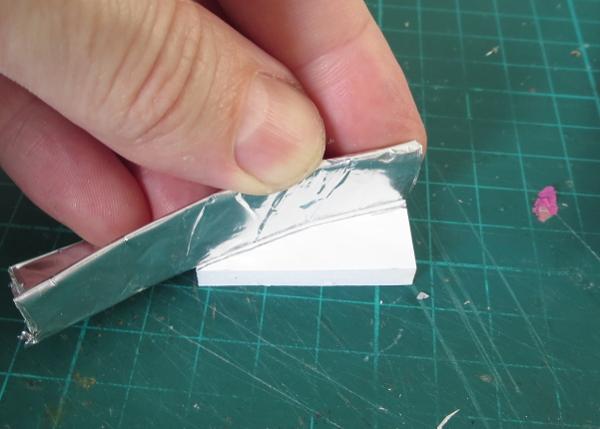
While the glue is setting, cut a rectangle of 2mm plasticard to fit inside the bottom. Bevel off the long edges so that they sit neatly against the inside surface of the struts. You can also add a layer of textured plasticard on top to provide a little surface detail to the inside of the casket.
If you're intending to use sprays or an airbrush to paint the casket, now is a good time to stop and do that. If you're brush-painting and think your hands are steady enough to not get paint over the 'glass' then you can easily leave painting until the end, although it may still be easier to do it now, particularly if you want to paint the inside - I've just left mine grey to provide some contrast against the white exterior.
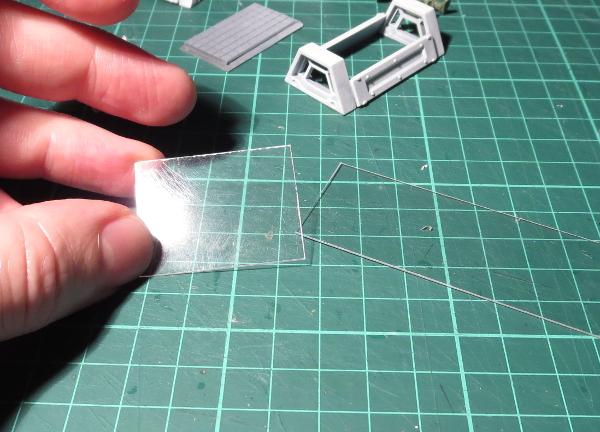
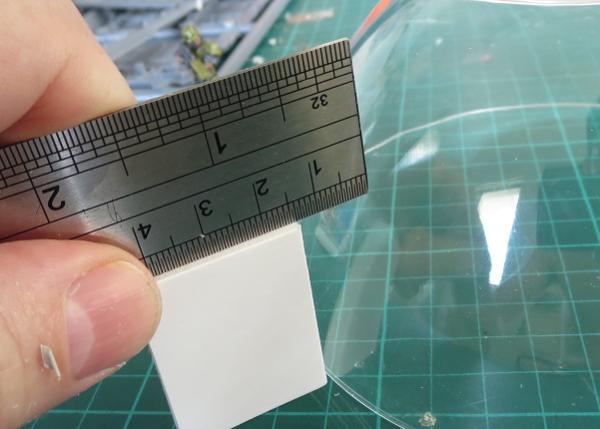
When you're ready to proceed, take some transparent plasticard or other thin, clear plastic (blister pack plastic would probably work fairly well) and cut a 30mm wide rectangle that is just a fraction longer than the strut pieces. You want just enough overlap to glue (half to 1mm on either end) - if you make it too long, you'll have trouble getting it into the casket.
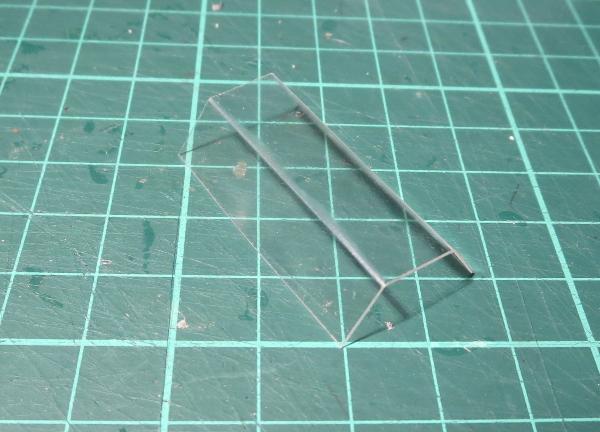
Use a ruler or other straight edge to fold two 10mm strips lengthwise down the plasticard, leaving another 10mm in the middle.

You can also cut pieces of plasticard to fit inside the trapezoid windows, to close in the ends of the casket. If you're not too finicky about details, you can leave this step out - the missing glass won't be too noticeable on the ends.
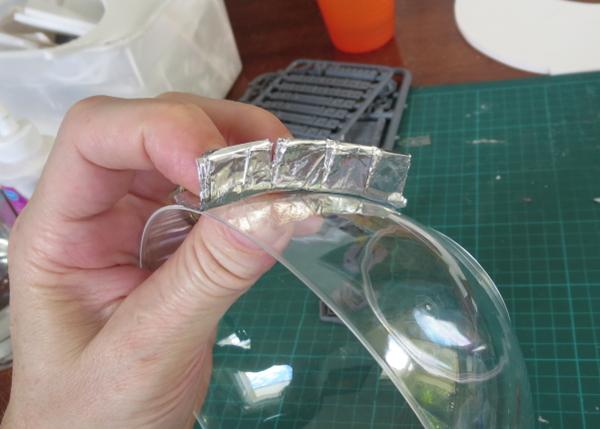
From there, wiggle the top glass into the casket (it may take some squeezing and a curse or two to go in) and glue it into either end. Add any final painting detail, and glue in the bottom.
Note - as an alternative to the above, back during your initial assembly you can just glue the struts to one of the windows and glue that assembly down to the back plate, and then glue the other window in place once the 'glass' is in.
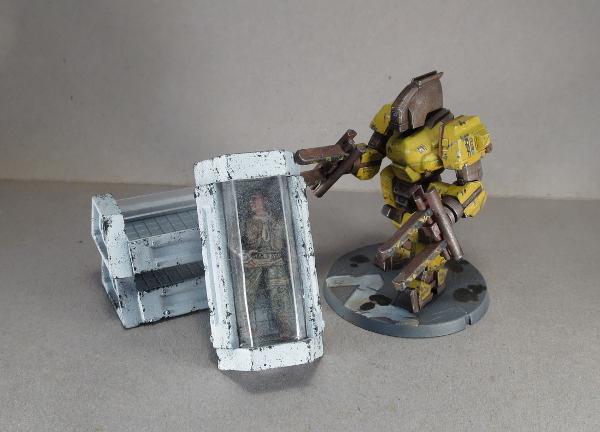
To add a little extra detail to your casket, plastic models can be easily repositioned to fit inside the casket. The 'glass' can also be given a very light frosting of white spray, for a frozen look.
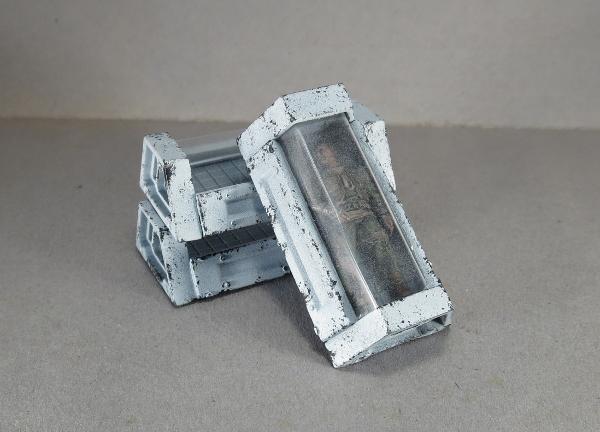
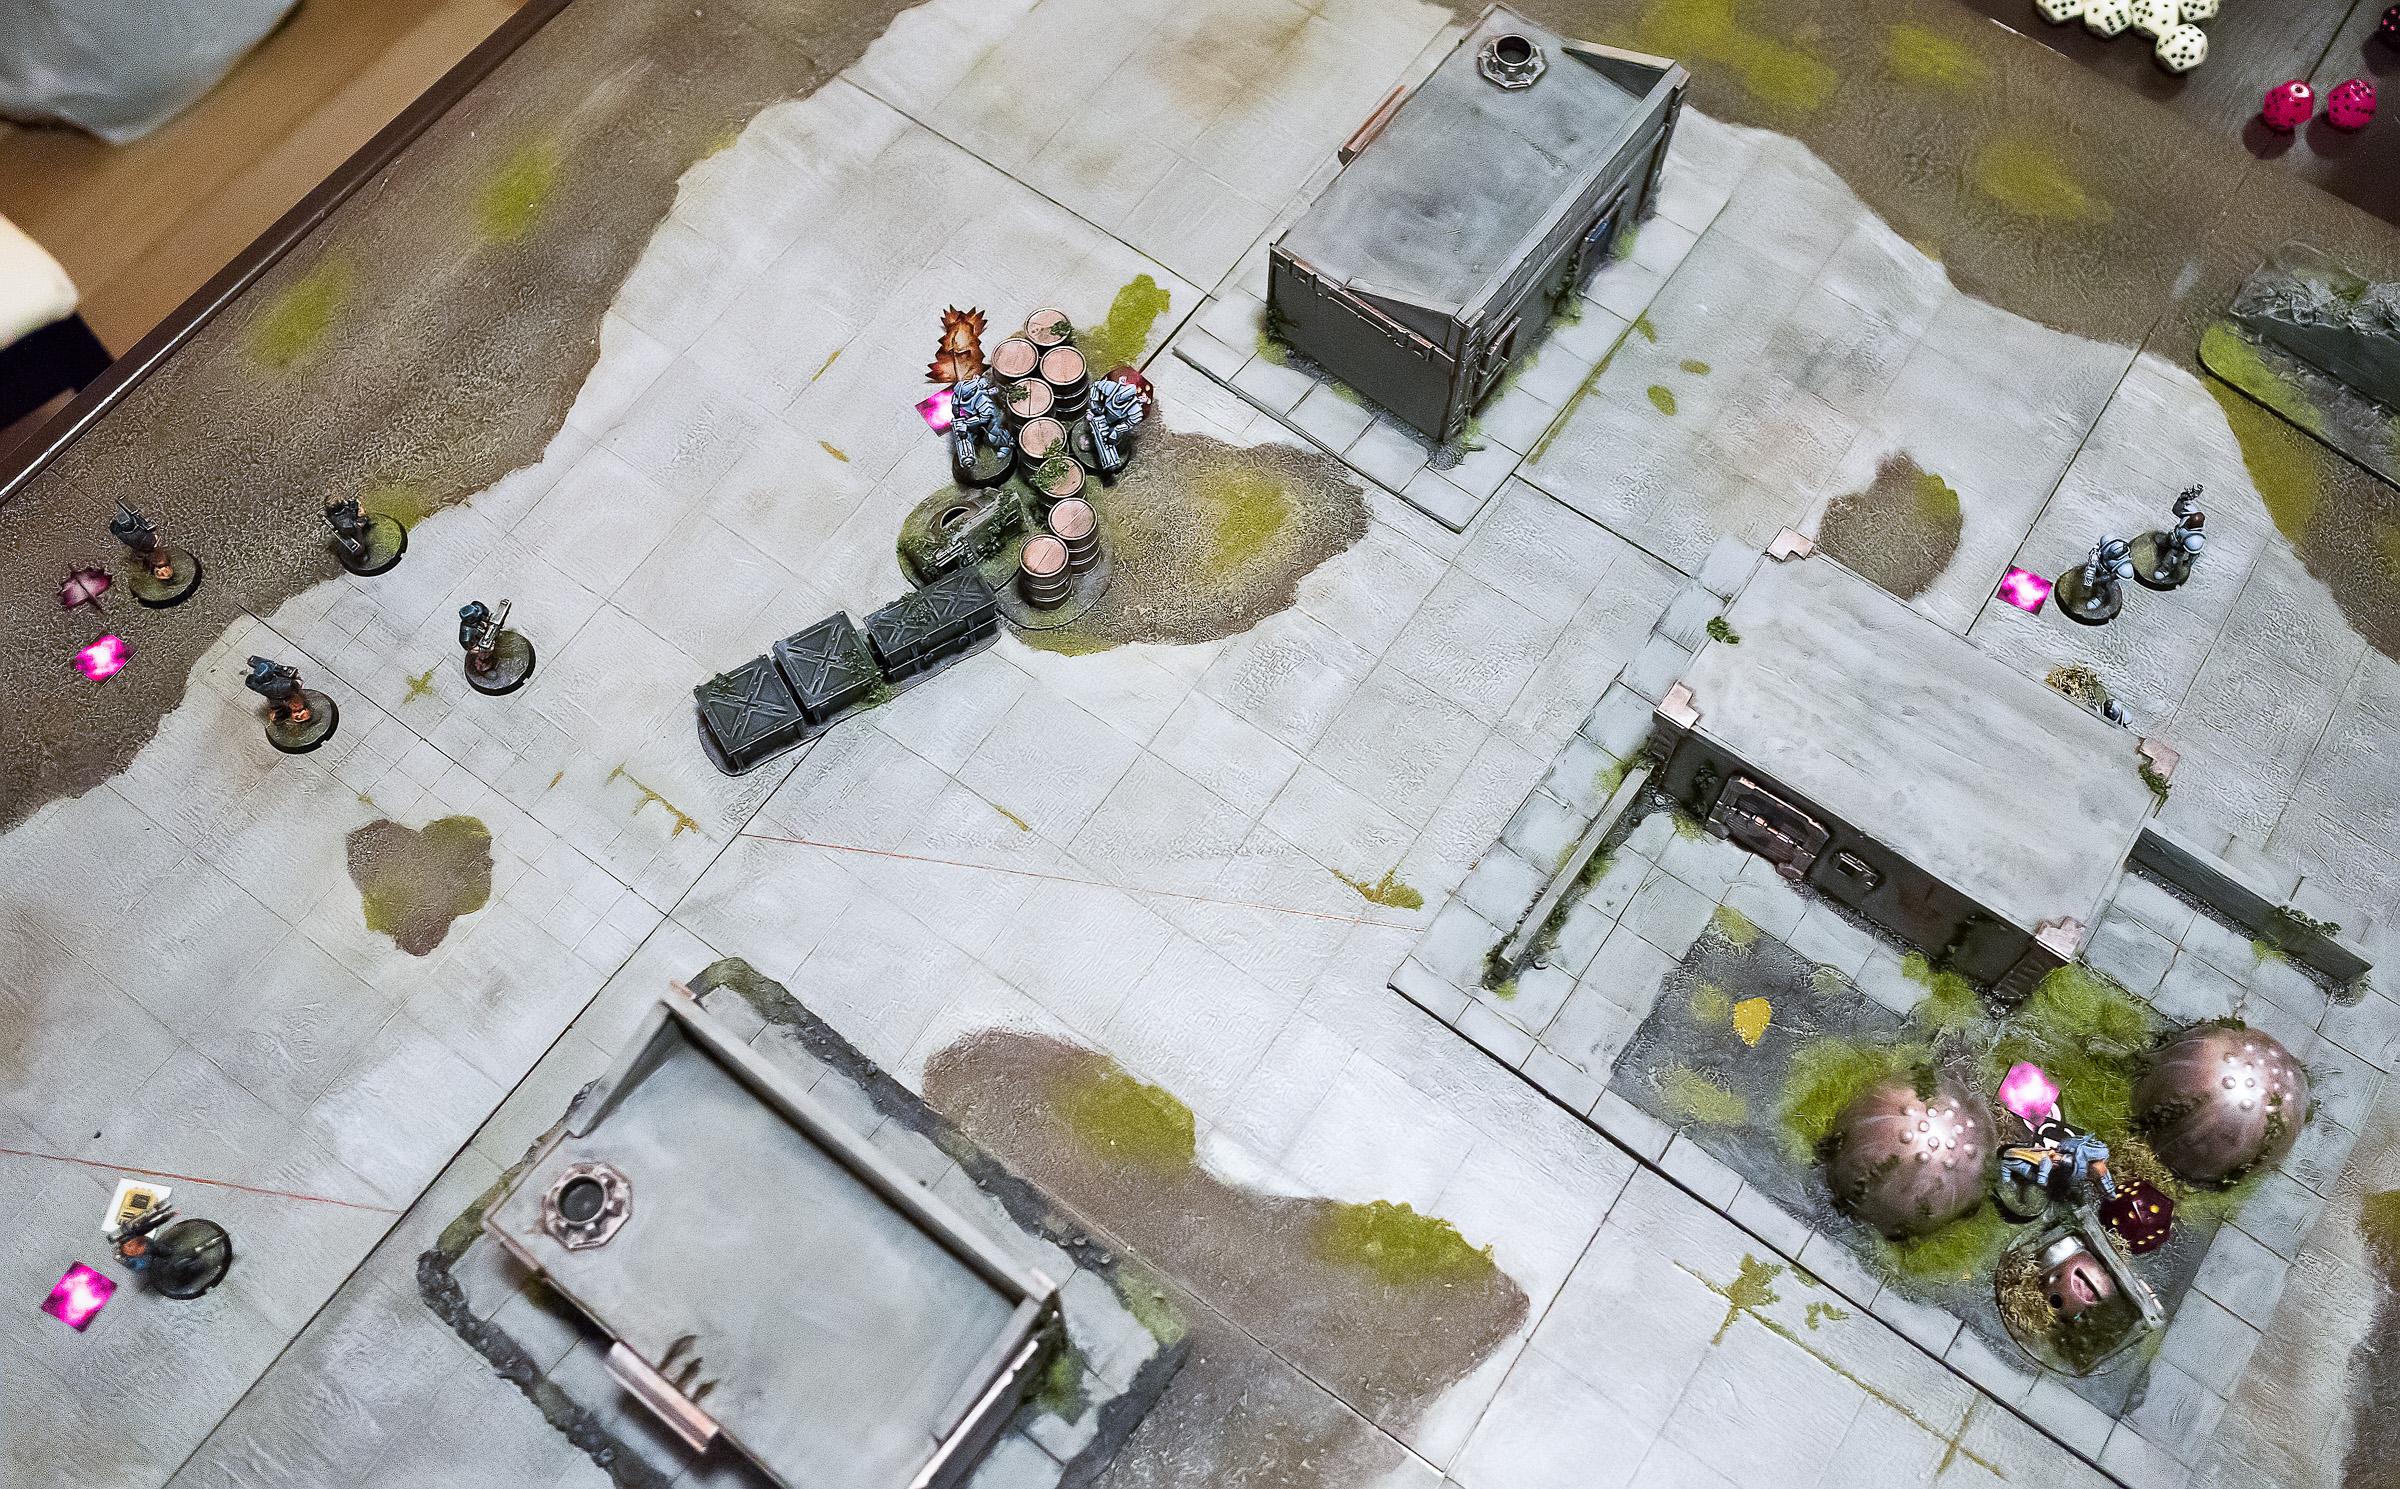
You can use stacks of caskets as line-of-sight blocking scatter terrain...

...although individual caskets will also make handy objective markers.

Of course, now that I've made up a bunch of caskets, at some point I need to make whatever might have been carrying them... Stay tuned!
To make your own sleeper caskets, you can pick up the terrain sprue along with the rest of the Maelstrom's Edge model range from the webstore here. As always, be sure to share your creations on the Comm Guild Facebook page!
For other Maelstrom's Edge modeling articles, including tutorials and walkthroughs of a wide range of different building and miniature projects, check out the article roundup here.
Tags: modeling terrain terrainsprue tutorial
Model Spotlight: Epirian Drones
Posted on Monday Feb 19, 2018 at 05:00pm in Models
- by Iain Wilson
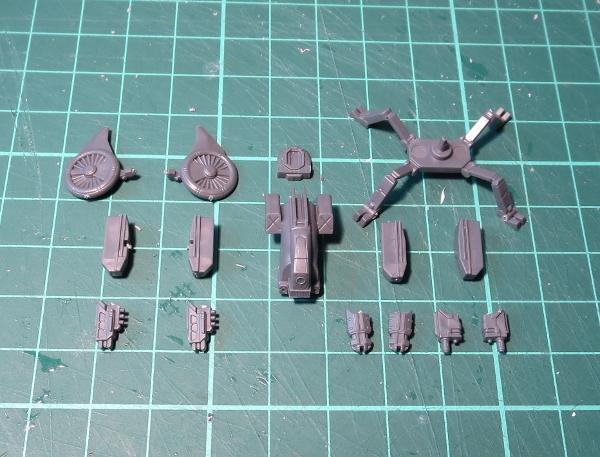
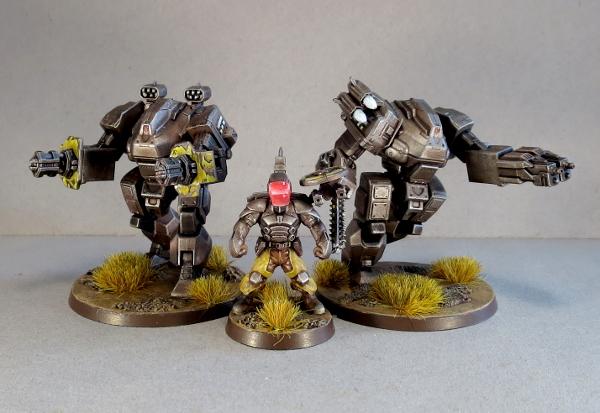
Drones - the ubiquitous workhorse of the Epirian Foundation. Built around a standardised chassis that can be bolted onto a wide array of different locotion and weapon options, the humble drone can be found all over Foundation-settled worlds performing a wide range of tasks. Particularly valued by Contractor military units, the Drone's various weaponised configurations are found at the forefront of any engagement harrassing enemy units and getting into those hard to reach places. Here, we'll take a closer look at the options available on the plastic Drone sprue.
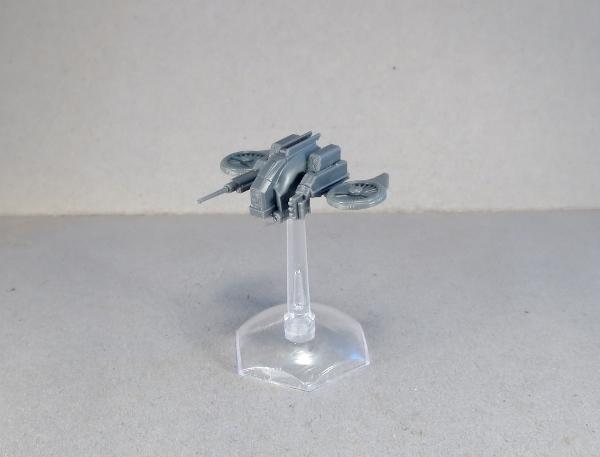
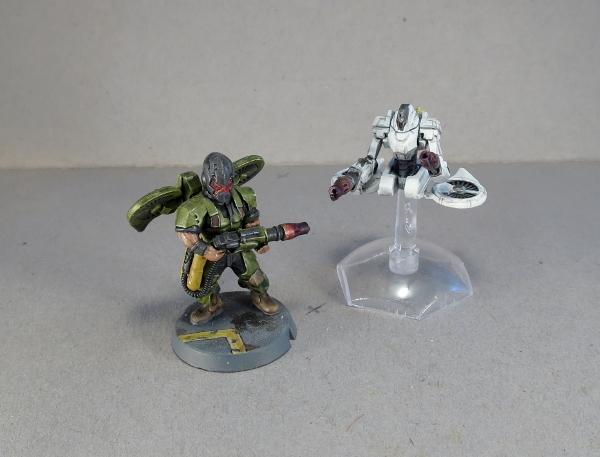
The Drone kit comes with parts to build either of two variants: the flying Firefly drone, or the agile, ground-hugging Spider drone.
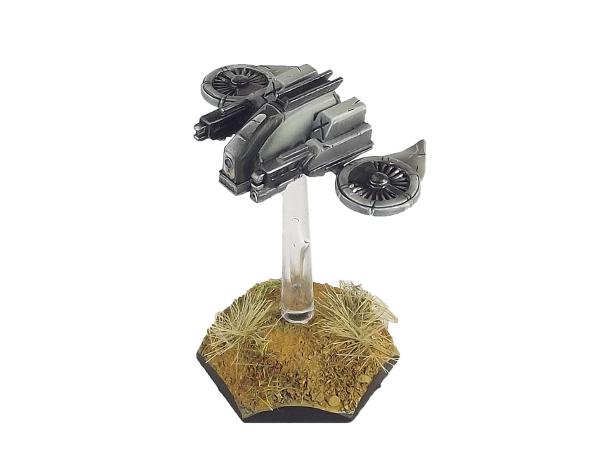
The Firefly is the fastest drone in the Foundation's arsenal, and the lightest armed. Held in the air by two dorsally mounted rotors, the Firefly is capable of vertical takeoff and landing (VTOL) and can travel up to 150 km/hr. Its primary purpose is as a forward scout, using its advanced sensor and communications suite to send information back about enemy positions. Its armour and weaponry is minimal and the Firefly can be easily taken out by even small arms fire - providing the shooter can hit its rapidly-moving frame. The Firefly is equipped with a Drone Class Laser System.
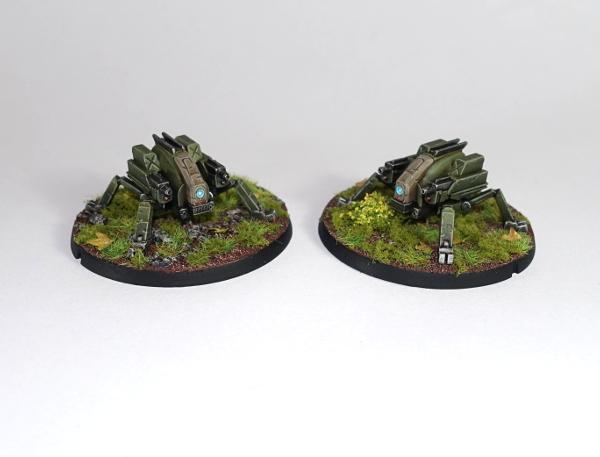
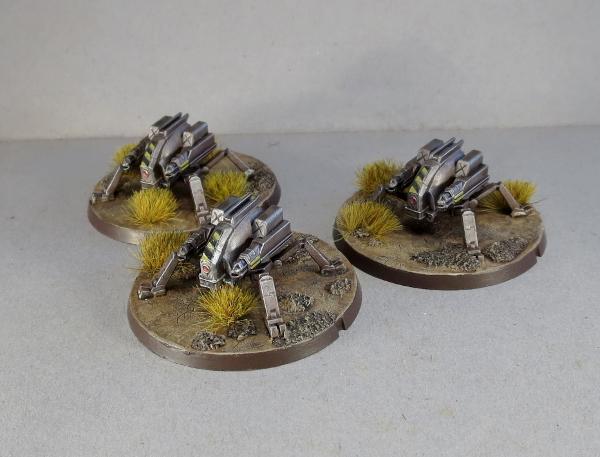
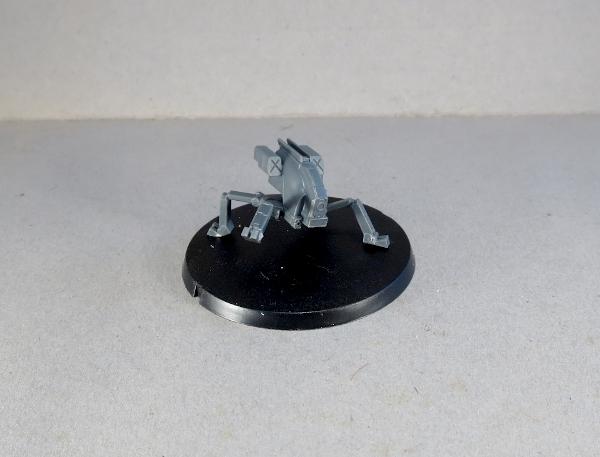
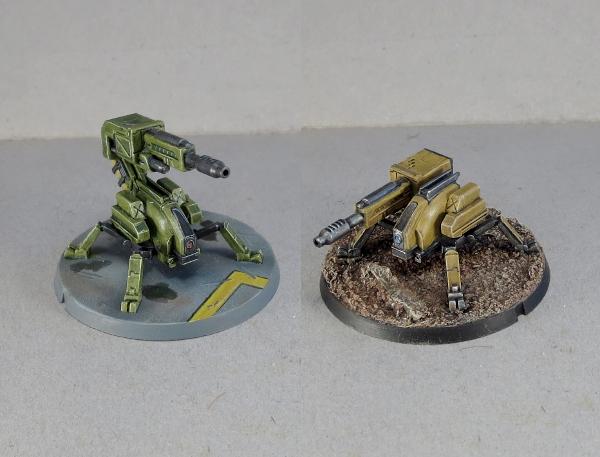
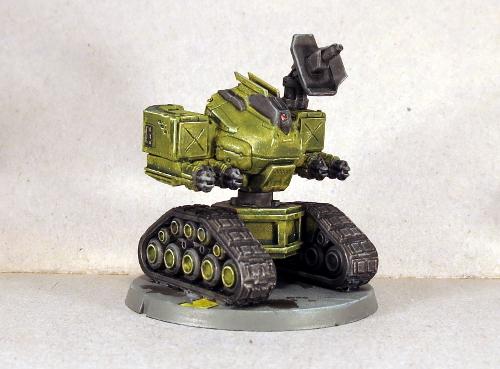
Slower than some of its drone counterparts but fitted with heavier weaponry, the Spider Drone is a popular choice for automated defences inside buildings where a Scarecrow's range is limited. Originally designed to operate within the rough terrain of mining tunnels, the Spider moves on multiple armoured legs, allowing it to keep its balance on the most unsteady of terrain.
The steadiness of its body allows more powerful guns with higher recoil to be added, and most combat Spider variants forgo the sensor suite used in Firefly, Rover and Stalker drones to accommodate more ammunition and heavier armour. Spiders can be equipped with Cutter Light Machine Guns or Flakk Guns.
Because the sprue was developed before the rules were finalised, there wound up being a couple of extra parts on the sprue that were originally intended to be another weapon option, but which also serve nicely as antenae for identifying 'leader' models, or for converting your own different drone classes, like this Sensor Drone:
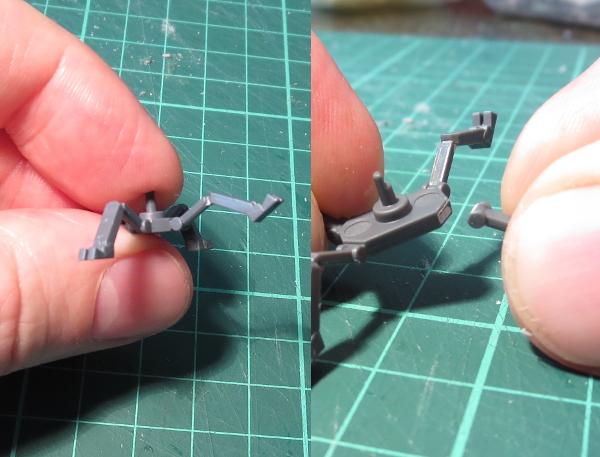
If you would like your drones to look a little more mobile, the thin legs of the Spider lend themselves well to conversions. You can easily repose them by either carefully bending at the joints, or by slicing through the joint and reattaching at a different angle.
For those wanting the Drones to pack a bit of punch on the battlefield, you could try out the reasonably simple Scorpion Drone conversion detailed here, which takes the Spider Drone and equips it with a Maglock Chaingun from the Hunter Mech kit.
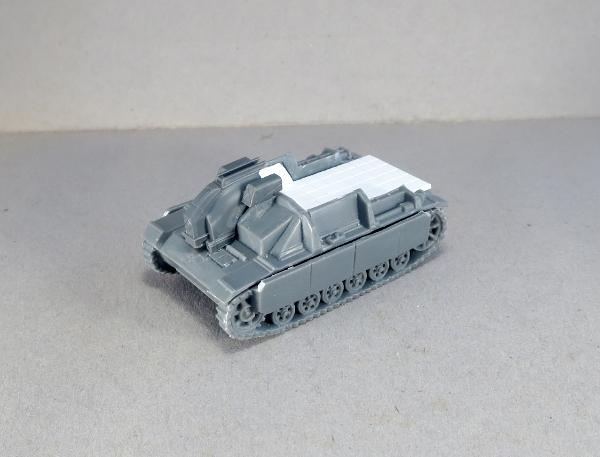
Getting a little more adventurous with the converting, I like to think that the Drone chassis would find its way into all sorts of different applications where having some robotic assist might make a task easier or more efficient. Like this Light Carrier Drone, converted from a Drone chassis and a Battlefront 15mm plastic tank kit, with a little plasticard.
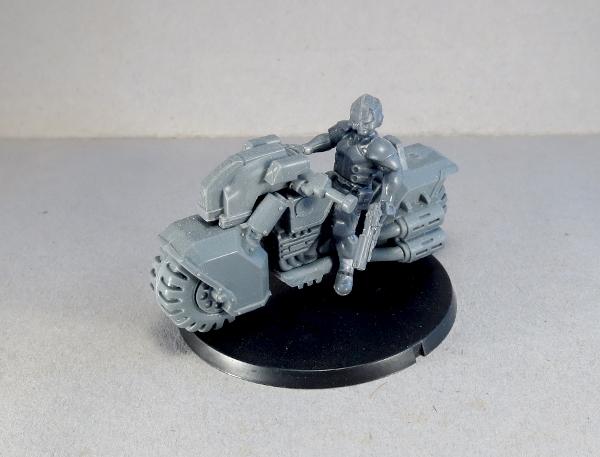
Or this (work-in-progress) Journeyman Patrol Bike, converted from a Games Workshop bike and an Epirian Bot Handler, with the Drone chassis up front for steer assist and targeting.
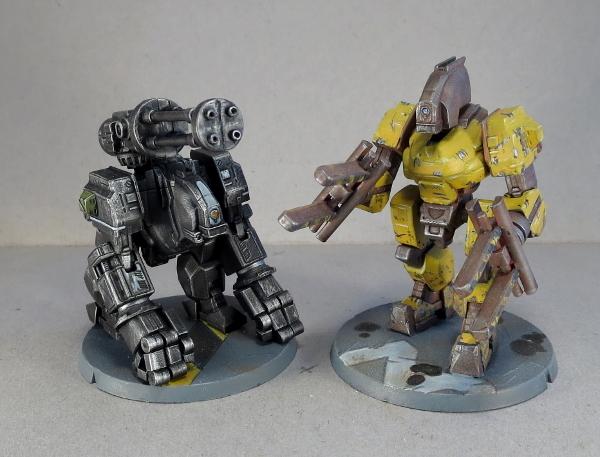
You can also use the Drone chassis as a head for larger bot constructs, like these 'Silverback' and 'Mule' Hunter Mech conversions.
All of that can, of course, leave you with a bunch of leftover flight turbines, which can be used to build a jump pack-equipped Epirian Warden, or some floating 'Sentinel' Drones, using the turbines and the top of a Scarecrow - tutorial coming soon for that one!
What have you done with your Drones? We would love to see your creations on the Comm Guild Facebook page!
To pick up the Drone kit, or any of the rest of the Maelstrom's Edge model range, visit the webstore here.
For other Maelstrom's Edge modeling articles, including tutorials and walkthroughs of a wide range of different building and miniature projects, check out the article roundup here.
Terrain Tutorial: The Foam Ball Cactus!
Posted on Monday Feb 12, 2018 at 05:00pm in Tutorials
- by Iain Wilson
You may have noticed by now that I make a lot of buildings. Sometimes, though, it's nice to get away from the urban sprawl, and venture out into the untamed countryside where enemy troops may wind up being less scary than the native flora and fauna.
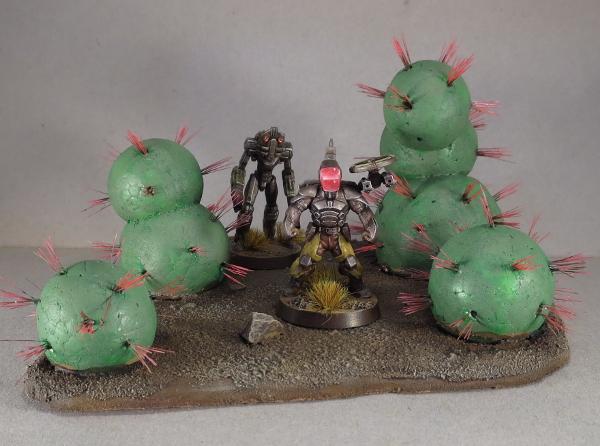
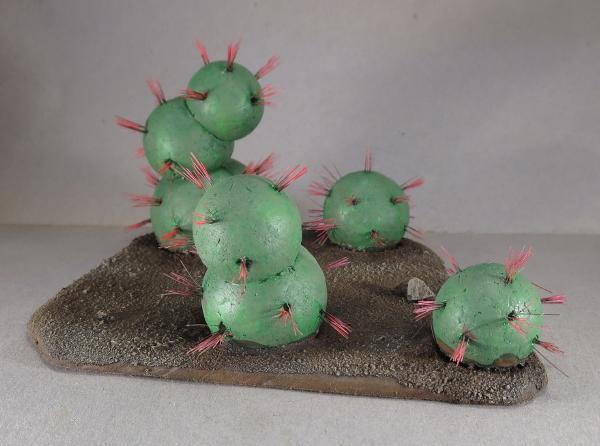
If you were gaming back in the '90s, you might be familiar with some of the scratch-built terrain that was featured in White Dwarf magazine back then. One of my favourites, and a staple on many a scifi gaming table back then, was the foam ball and toothpick-spine cactus. It was a little goofy, but also really easy to make and looked rather effective on the table in place of all those mass-produced train set trees. So I thought it might be fun to revisit the idea, and see what I could do to modernise it a little and maybe remove some of the danger of taking out an eyeball while checking line of sight. And so I came up with this:
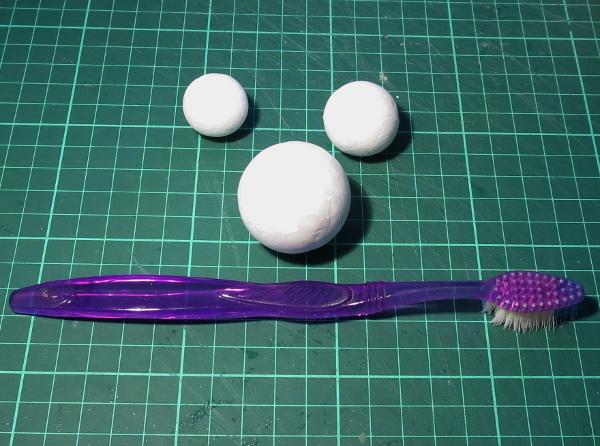
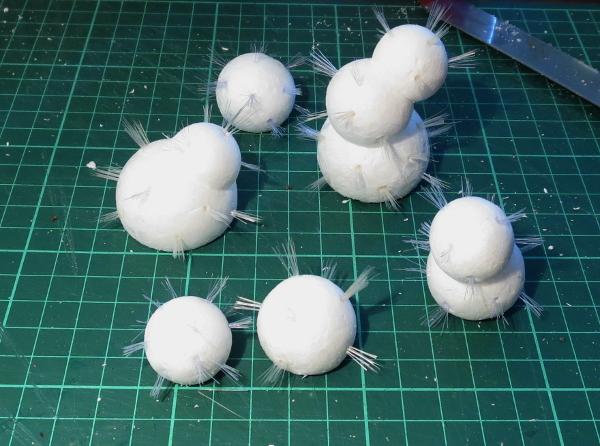
Staying true to the original, I found a bunch of different sized expanded polystyrene balls at a local discount store. To replace the old-school toothpick spines, I dug out an old toothbrush.
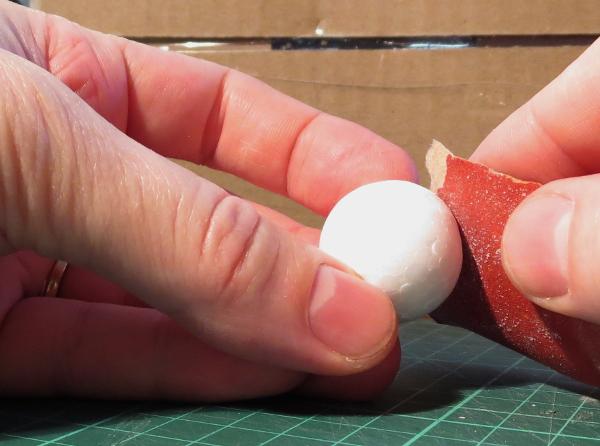
The first step is to give the foam balls a little touch-up with some fine sandpaper. This removes the mould line around the middle of the ball, and roughs up the outer surface a little to help the paint stick.
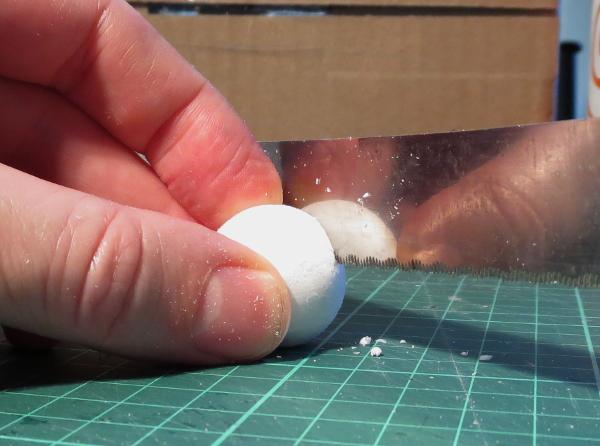
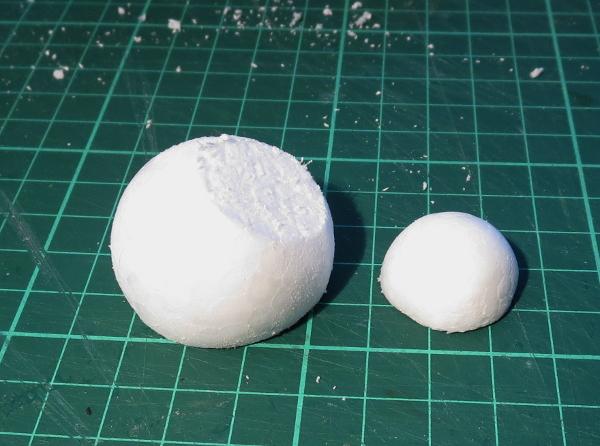
To make the ball easier to stick down to a base board, use a fine-tooth breadknife or other sharp knife to cut a slice off, making a flat surface for the bottom of the cactus.
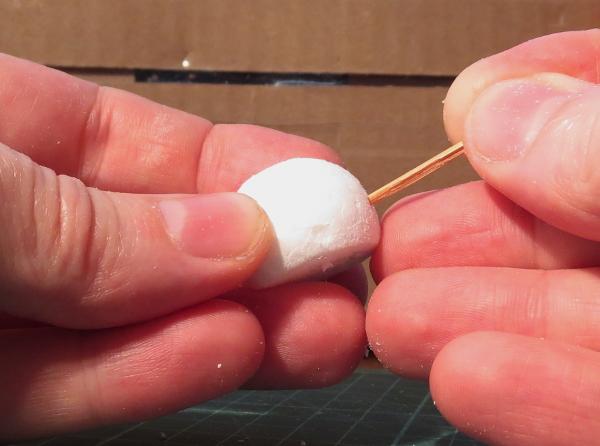
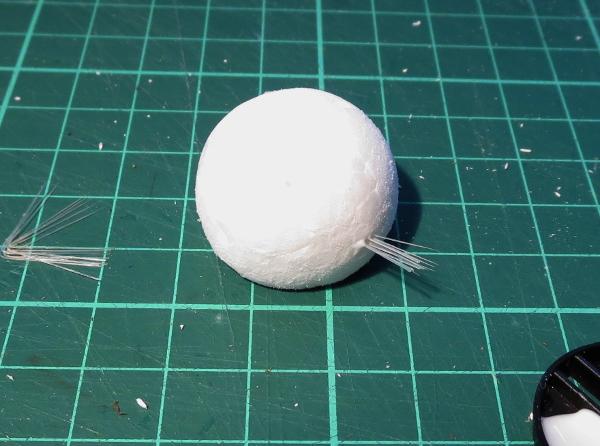
Next we need to pike some holes in the ball to add the spines. Serendipitously, I used a toothpick, but anything pointy will do the job. Make the holes at least 5mm deep, although it doesn't hurt if they go in further. They're spaced around the ball in rough layers, without being too neat about it - slightly haphazard spacing adds to the organic look.
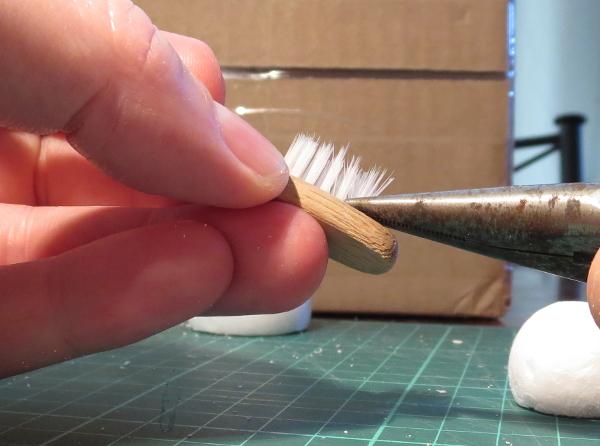
Toothbrush time! Take your toothbrush and, using a pair of pointy pliers, rip out a bunch of bristles. Try to hold them together - they tend to scatter if you're not careful when you let go.
Depending on how many bristles are in a clump, you might want to split the clump into halves or thirds, or use the whole thing as a single clump of spines. It's entirely up to the look you want.
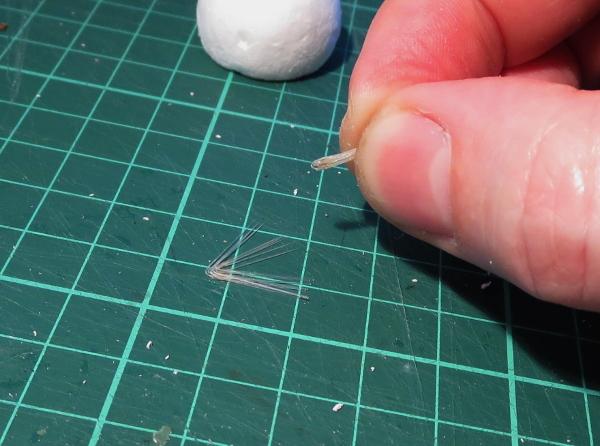
In most toothbrushes, there is a small piece of metal in the fold at the base of the bristles that anchors them into the brush. Tease this out and discard it, and then separate the bristles into the size clump you want, being careful to put the extras down so that they stay together for later.
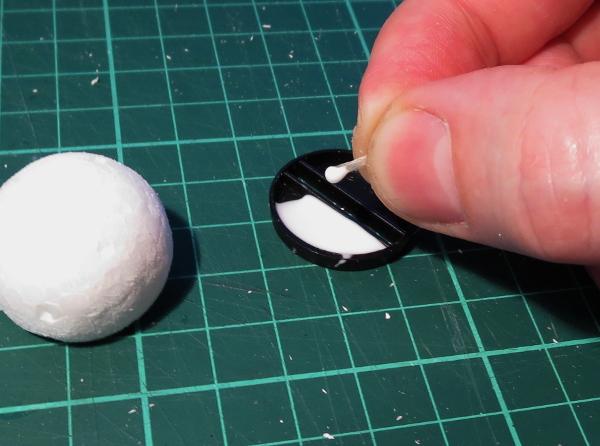
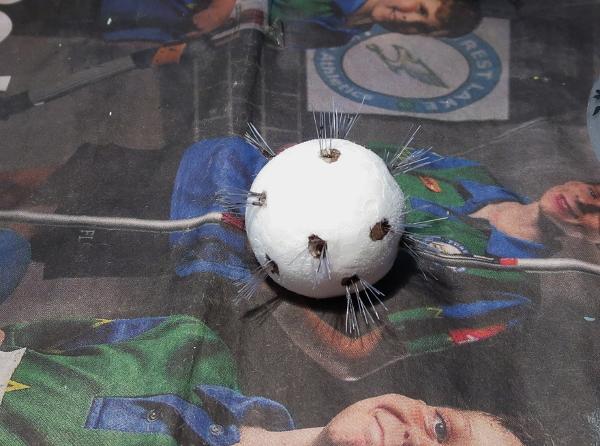
Dip the base of the bristle clump in some PVA glue, and then insert it into one of the holes in the foam ball. Mine have about half of the bristle inside the ball, to give them a good anchor and to stop them from splaying out too much.
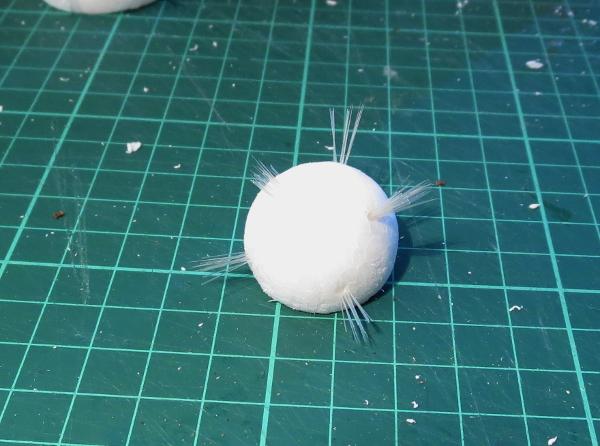
Repeat until you have all of the holes filled with bristles.
For an older cactus, you can add extra nodules by slicing off a section on the top of the first ball and gluing the flat bottom of another ball into place on top. Reinforce with a toothpick glued in the middle, if you want a little extra strength. When that's set, poke in the holes and add bristles as above.
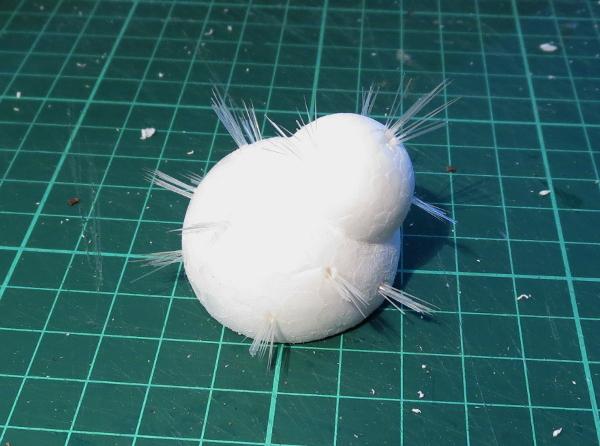
Mixing in some different configurations and different sized balls will help create a nice, varied look on the terrain piece.
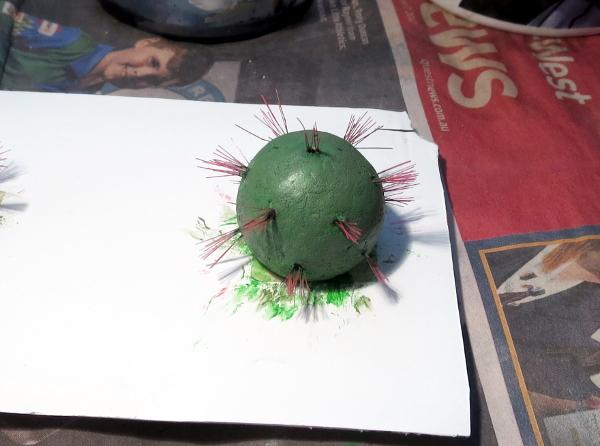
To paint, first work around the holes with a pointy brush and a dab of brown wash or thinned brown or green paint to mask the white interior of the holes. (If you're more forward-thinking than me, you could alternatively do this before you glue the bristles in, which might be a bit easier!)
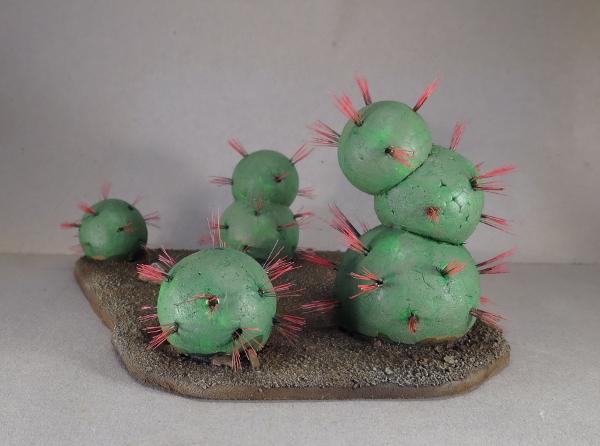
Then paint the rest. I've gone for standard green cacti, with red spines for some contrasting colour, but for alien flora you could obviously use whatever colours you please.
From there, glue your painted cacti onto a base board, and your cactus grove is ready for the table!
Do you have ideas for your own alien area terrain? We'd love to see them! Come along and share on the Comm Guild Facebook page.
For other Maelstrom's Edge modeling articles, including tutorials and walkthroughs of a wide range of different building and miniature projects, check out the article roundup here, and you can find the Maelstrom's Edge model range and boxed game in the webstore here.
Tags: scratchbuilding terrain tutorial
Modeling Spotlight: Epirian Victory Point Tracker
Posted on Tuesday Jan 23, 2018 at 11:19am in General
- by Iain Wilson
Victory. The elusive mistress that haunts our gaming hours. How do we capture her? Well, in Maelstrom's Edge, we do it by counting up Victory Points, and hopefully winding up with more of them than our opponents. The Battle for Zycanthus box includes Victory Point trackers along with the plethora of tokens and markers found within, but I decided that I wanted something with a little more spectacle, and so I built myself a VP tracker for my Epirian force.
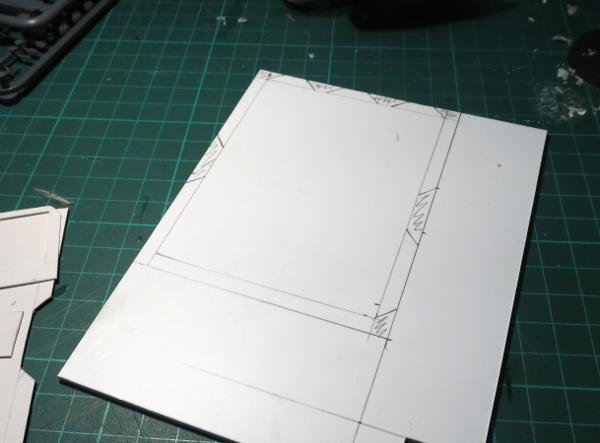
This all started with a rough concept sketch, to get an idea of how things should fit together.
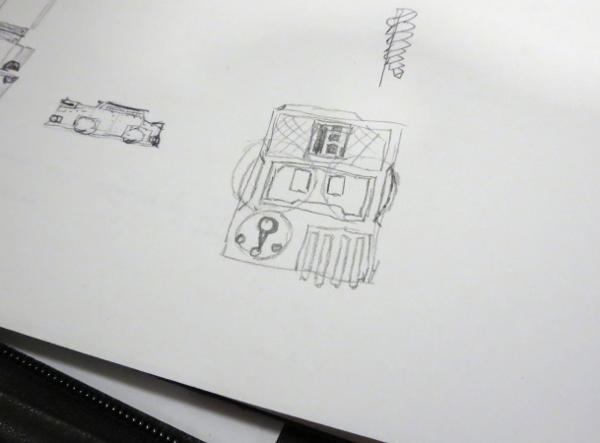
I then made a quick mockup in cardboard, as a sort of proof of concept, and to get a better feel for the size it needed to be.
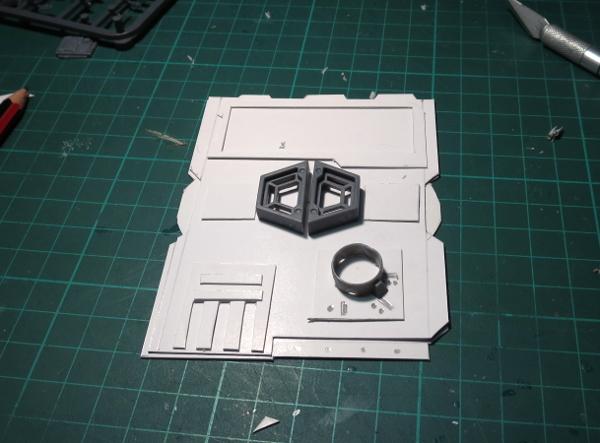
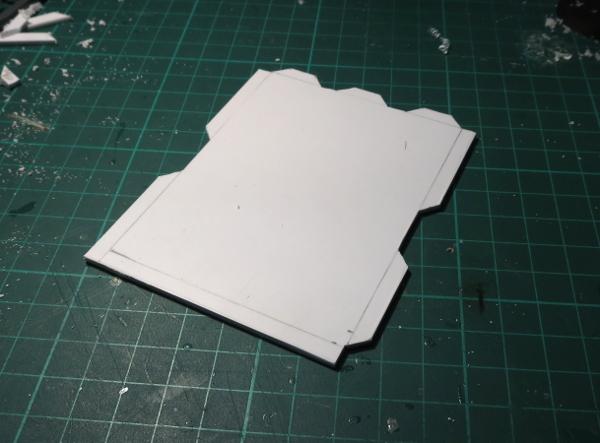
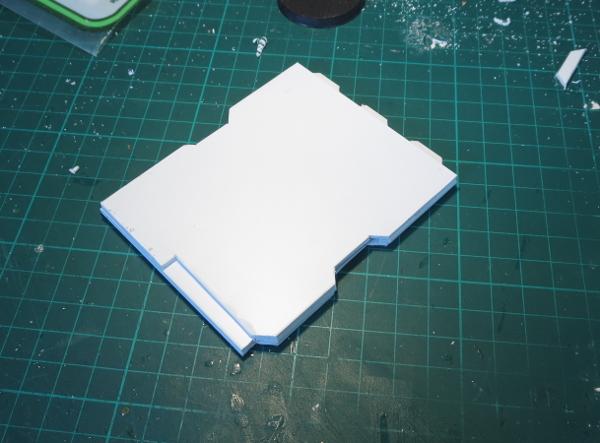
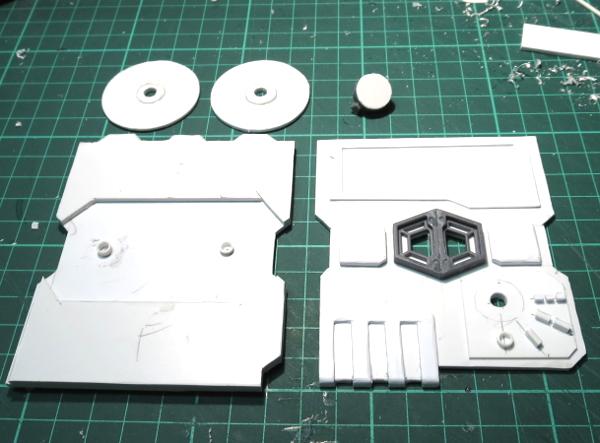
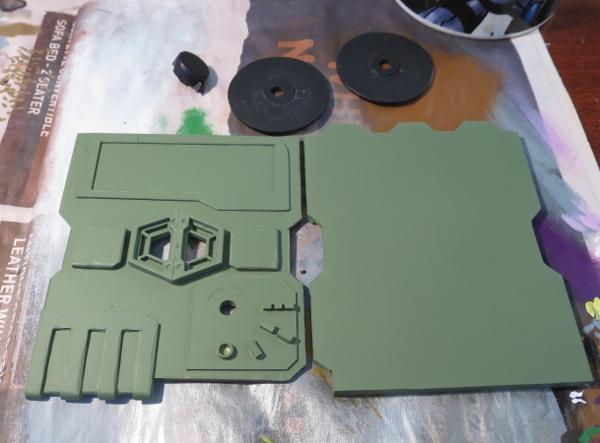
The main body of the tracker is made from layers of 2mm thick plasticard. Each layer was marked out in pencil and then cut out and the edges smoothed down.

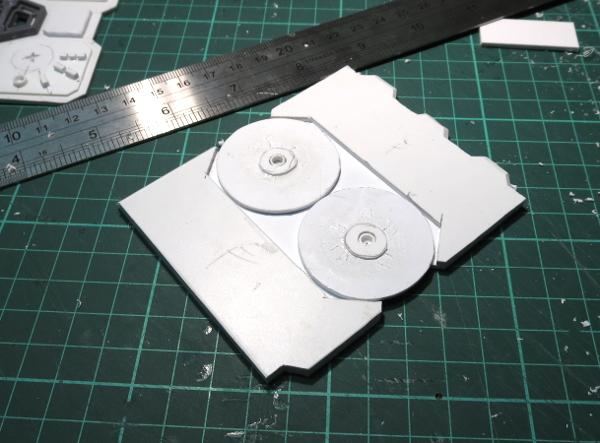
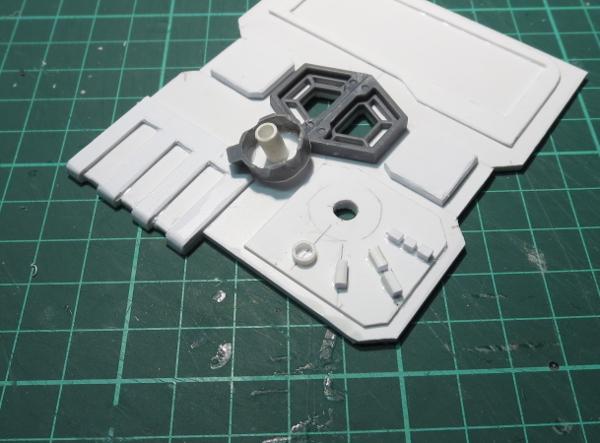
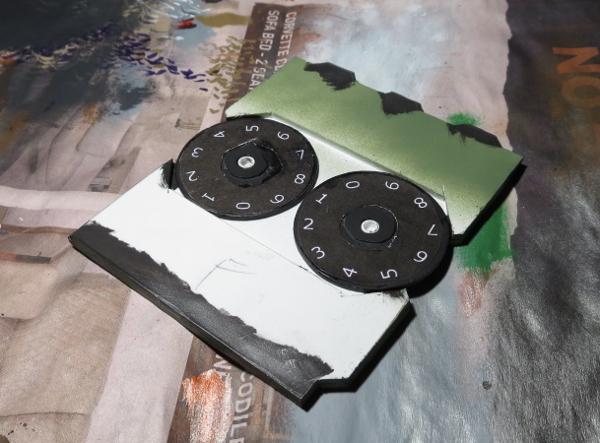
To show the current VP total, there are two dials with the numbers 0-9 marked around the edge. These are cut from thinner plasticard, with a spacer added on the top surface so that the face with the numbers on it doesn't rub against the inside of the tracker's front.
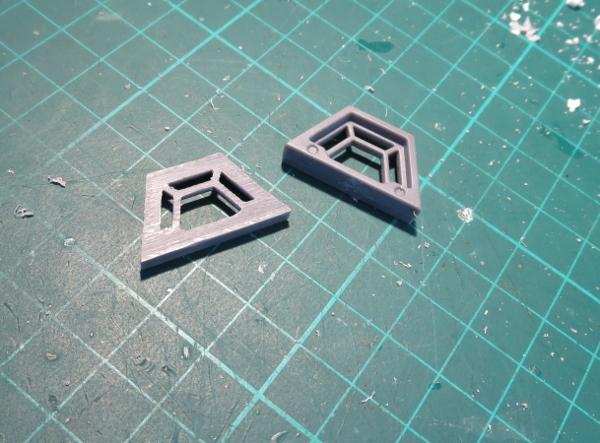
The windows for the VP display are made from a couple of trapezoid windows from the Maelstrom's Edge terrain sprue. I used a razor saw to slice through the windows just behind the interior bracing, to make them a little thinner and so that the bracing would sit flush against the front plate of the tracker.
From there, I cut a couple of trapezoid holes in the front plate to match up to the large openings in the windows, and then added a bunch of detail with various pieces of plasticard.
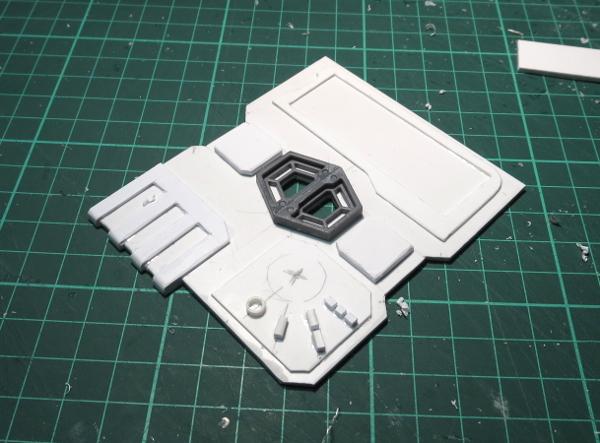
In the bottom corner, I added a rotary switch for tracking how many times the special faction objective has been tapped.
With detailing complete, it was time to paint!
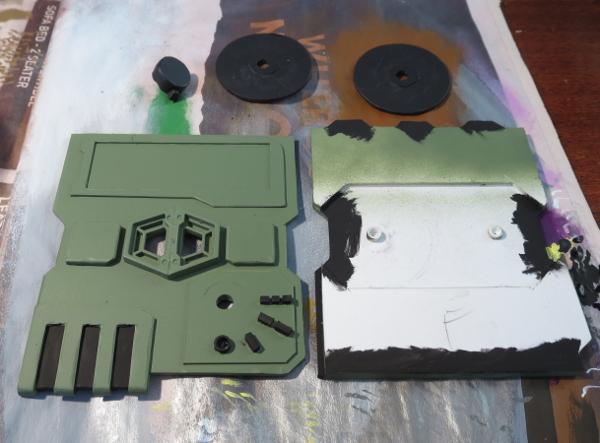
I basecoated the tracker with Army Painter Army Green spray, and used some flat black spray on the VP dials and the rotary switch.
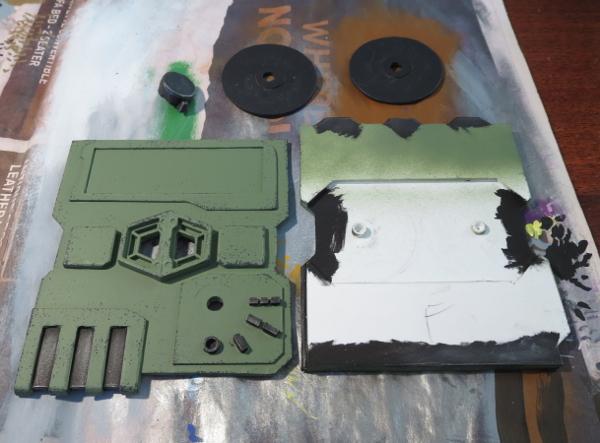
I wanted some metal detail on the tracker to break up the colour a little, so re-basecoated some appropriate spots with some black. I also added a little black inside the side openings for the dials, just to avoid having the white plastic showing through when it was assembled.
The metal parts then received a drybrush of P3 Pig Iron, and some weathering added with Vallejo Heavy Charcoal applied lightly with a sponge.

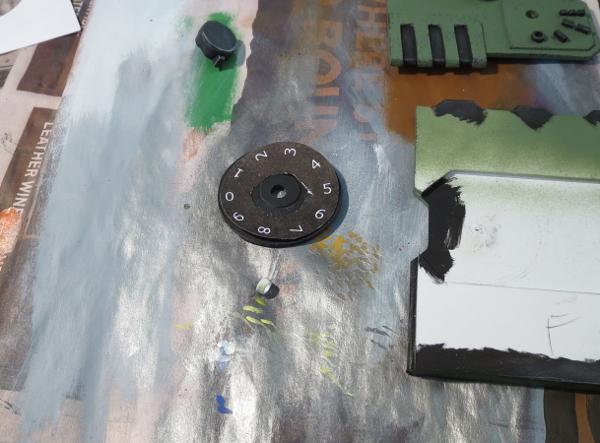
The numbers for the VP dials were drawn up on black circles in Gimp and then printed out, cut to shape and glued onto the plastic dials.
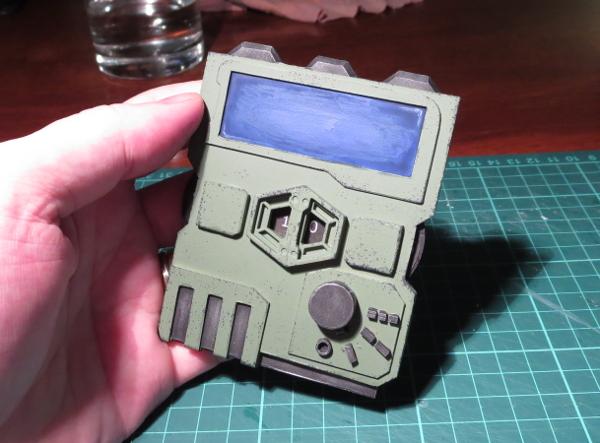
Finally, the front plate was glued in place, and the screen painted with some Ultramarine Blue and shaded with Army Painter Blue Tone.
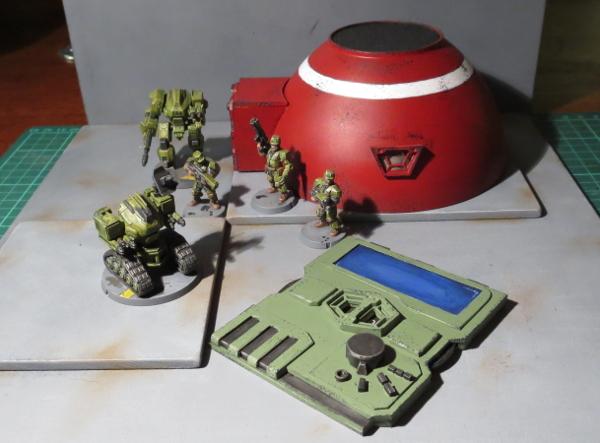
My plan is to make up some smaller versions of the mission cards to sit in the screen cavity.
And then, of course, the next step will be to make some similarly themed trackers for my Karists and Broken!
Have you built anything unusual for your Maelstrom's Edge games? We would love to see your creations on the Comm Guild Facebook page!
You can find the entire Maelstrom's Edge range in the webstore here.
For other Maelstrom's Edge modeling articles, including tutorials and walkthroughs of a wide range of different building and miniature projects, check out the article roundup here.
Tags: conversion epirian gaming modeling scratchbuilding spotlight tutorial walkthrough
Terrain Spotlight: Mini Hab Domes from plastic bowls!
Posted on Monday Jan 15, 2018 at 05:00pm in Tutorials
- by Iain Wilson
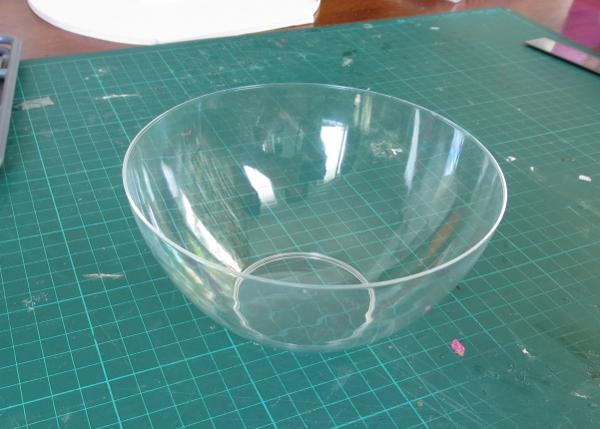
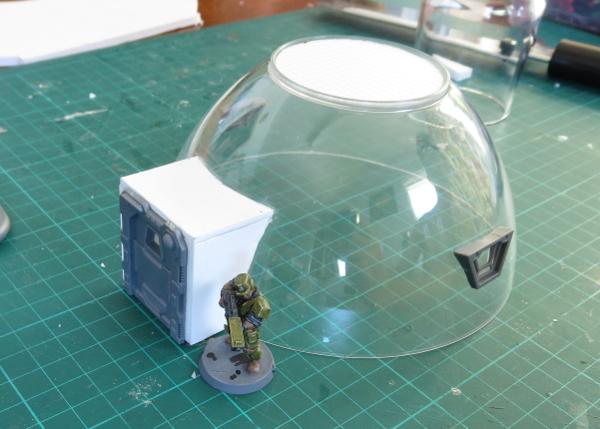
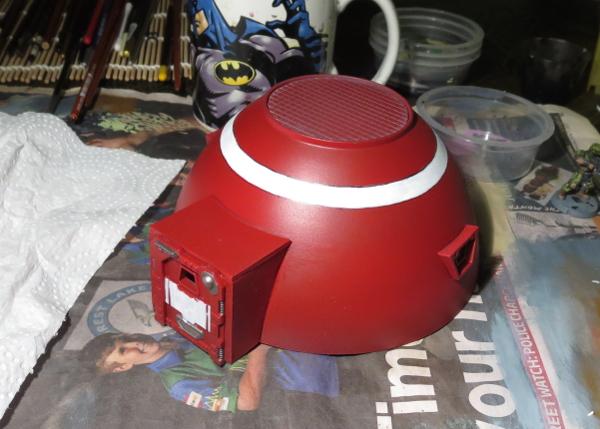
Throughout the galaxy, few structures hold up as well in hostile environmental conditions as the humble dome. They're durable, efficient, and as a bonus look nice and distinctive in a universe filled largely with pre-fabricated, angular structures. So here's a simple way to make yourself some small dome structures for your gaming table, using components from the Maelstrom's Edge terrain sprue, a little foam core board, some plasticard, and a plastic bowl.
As with the larger plantation dome that I made a while back, the basis for this building is a plastic bowl, in this case picked up in a pack of 8 from a local discount store for a couple of dollars.
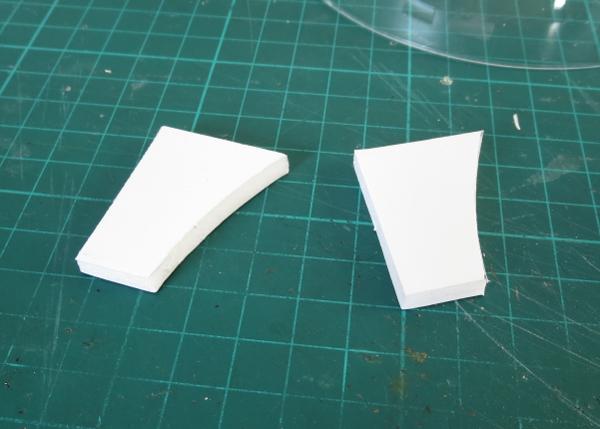
I cut two rectangles of 5mm foam core board, about 30mm wide and the same height as the inside frame of one of the small doors from the terrain sprue. These formed the sides of the building's entrance, and so would need to be curved on the back sides in order to sit flush with the side of the dome.
Sitting one of the rectangles against the bottom rim of the dome, I measured the distance between the top corner and the dome, and marked that distance along the short edge of the foam core.
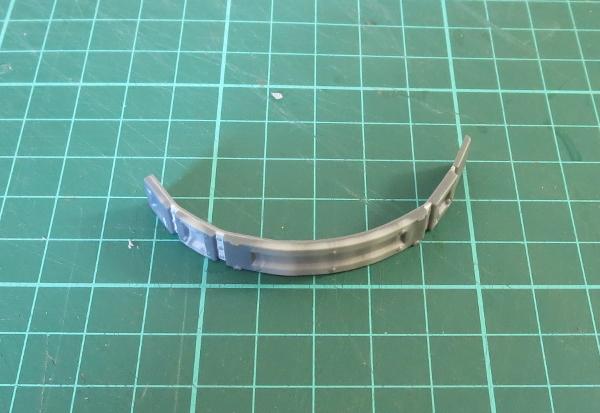
I then folded a piece of aluminium foil to made a long L-beam shape. With a pair of clippers, I made a series of cuts along one edge.
The uncut surface of the beam was then pressed against the side of the dome, with the cuts allowing it to bend to match the shape while the L-beam shape gave it enough rigidity to keep the curve when removed from the dome.
I then used the resultant curve to transfer the shape of the dome to the foam core, matching the foil beam up to the measured mark and the corresponding bottom corner of the entrance wall.
An exacto knife was used to cut along the drawn curve, angling the cut to account for the horizontal ci
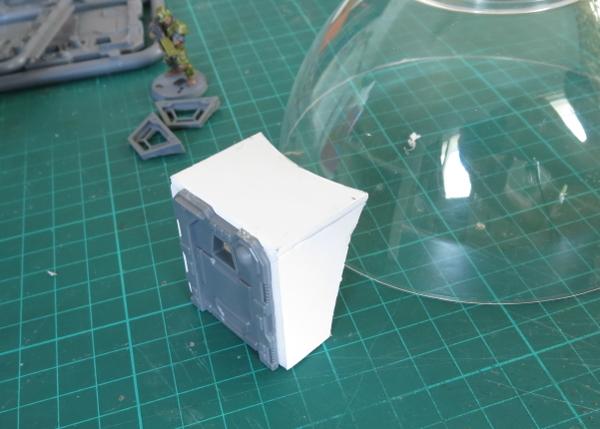
With the addition of a piece of 1.5mm plasticard, cut to shape for the roof, the entrance tunnel was glued together and test fitted against the dome, with a little fine-tuning of the curve with the exacto knife allowing it to sit flush.
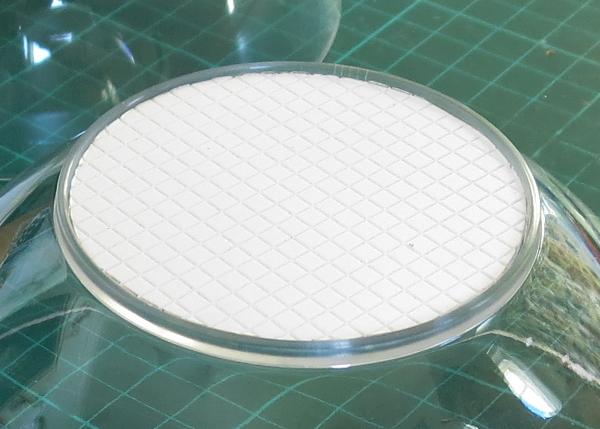
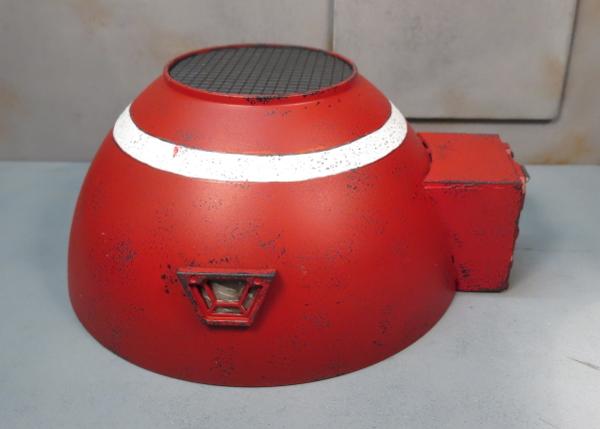
I wanted a little texture on the flat top of the dome, so I decided to use some grid-patterned plasticard. Not having a compass handy, I found a small drinking glass that fit neatly into the circular base of the bowl, and used this as a template to draw a circle on the plasticard. Once cut out, this circle was glued neatly into the recess.
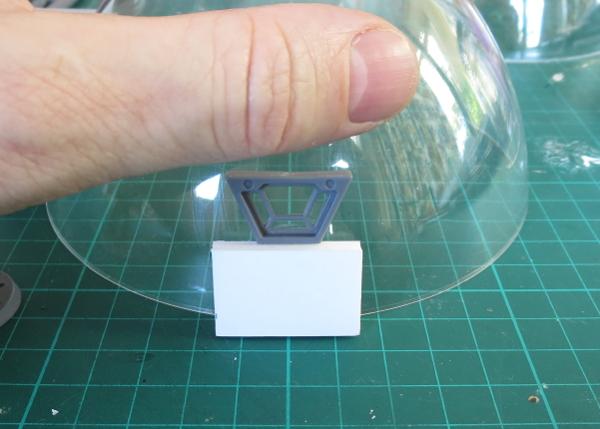
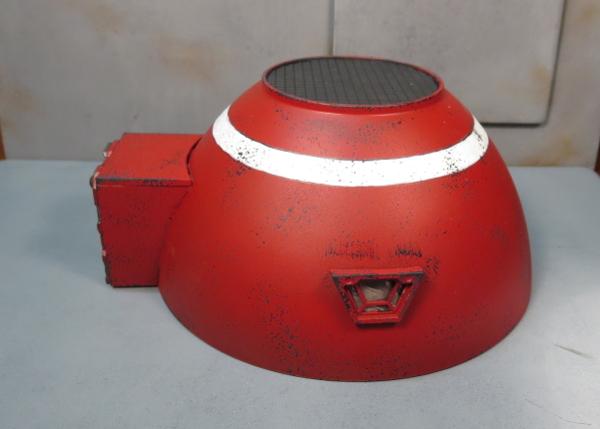
For the windows, I took the trapezoid windows from the terrain sprue and trimmed down one side to help them sit almost vertically on the side of the dome.

To glue the windows in place, I grabbed a small offcut of foam core to use as a spacer, to ensure that the windows on either side of the building sat at the same height.
With everything glued in place, the building looked like this:
So, on to painting!
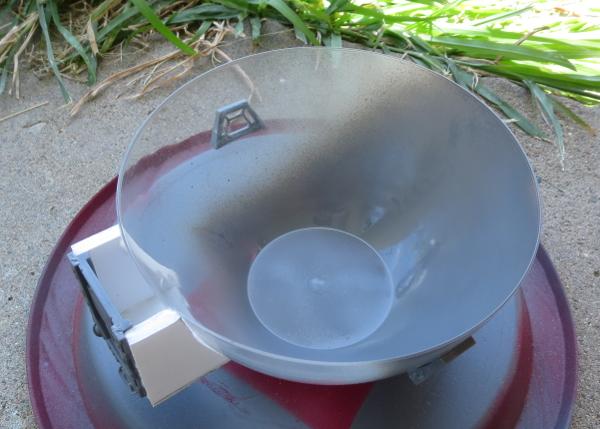
Because the dome is transparent, I sprayed a coat of primer inside to begin with. That way, if the outside of the dome gets a little scratched up from gaming use, it would show grey instead of clear.
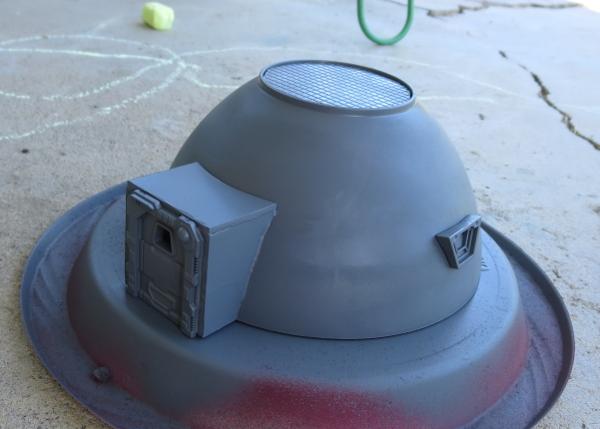
The outside was then also primed grey.
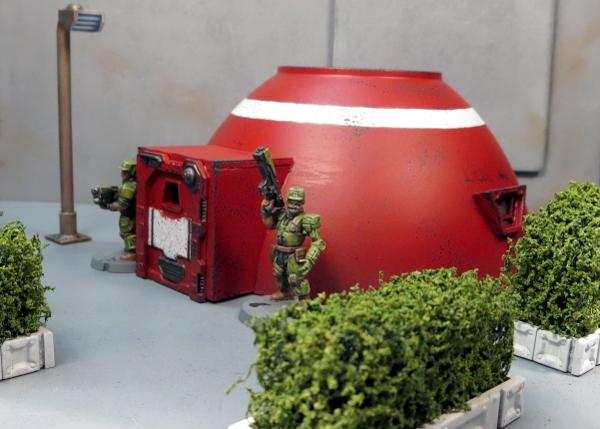
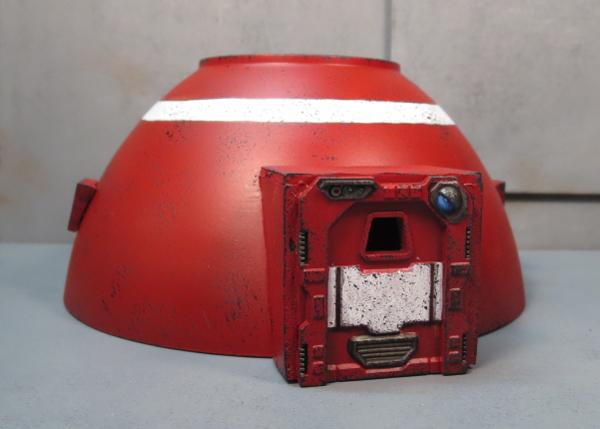
The primer was followed with a coat of Army Painter Dragon Red.
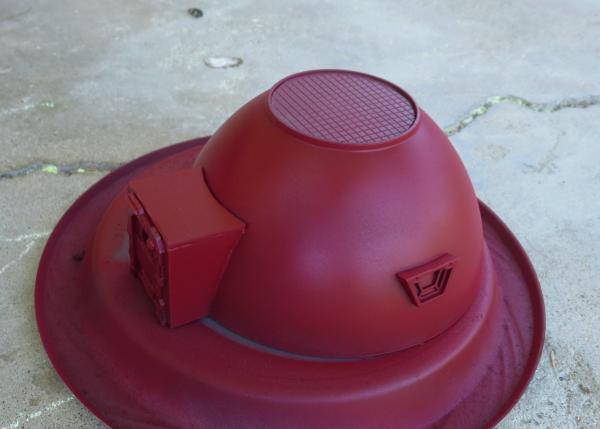
I added a white stripe to break up the red a little, and painted some metal detail with P3 Pig Iron.
Finally, some sponge weathering and the roof tiles painted with Vallejo Heavy Charcoal, a quick wash with Army Painter Dark Tone for the metal parts and the roof, and some colour on the lights above the door, and the minidome was finished!

To build your own mini hab domes, you can pick up the Maelstrom's Edge terrain sprue along with the rest of the Maelstrom's Edge model range from the webstore here. As always, feel free to share your creations on the Comm Guild Facebook page!
For other Maelstrom's Edge modeling articles, including tutorials and walkthroughs of a wide range of different building and miniature projects, check out the article roundup here.
Tags: buildings spotlight terrain terrainsprue tutorial walkthough
2017 - The year in review for Maelstrom's Edge
Posted on Monday Jan 01, 2018 at 05:00pm in General
2017 has drawn to a close, and it has been a fantastic year for Maelstrom's Edge. Here's our year in review:
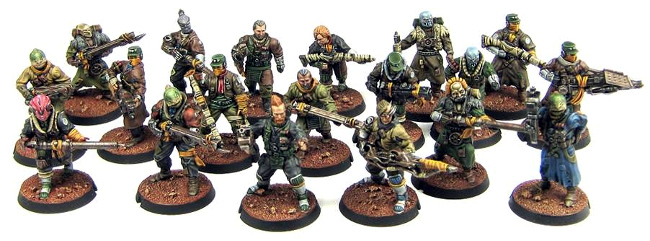
This year saw the release of the long-awaited third faction for Maelstrom's Edge: The Broken!
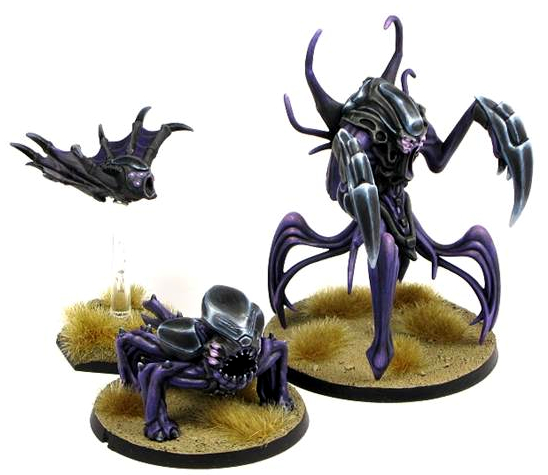
The Broken Infantry Pack consists of 4 sprues loaded with bits, that allow you to build Broken fighters from any of three 4 different unit types. And this is just scraping the surface of what we have planned for the Broken - 2018 will see plenty of new releases to fill out their roster, with additional troop types and a slew of new and fantastic alien species.
Also on the release front, we launched a supplemental range of resin models, starting with the Karist Angel Hellblaster.
While plastic models are great for all sorts of reasons, they have a rather long development leadtime, which slows down releases. Adding resin models allows us to get new things out more regularly, and also lets us develop models that wouldn't necessarily be practical or economical in plastic. So the aim going forward will be to have the core range remain in plastic, supplemented with resin models which will allow us to have a new release out every month.
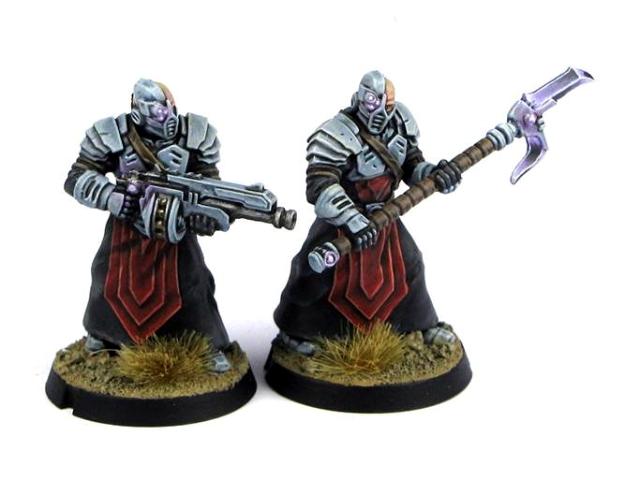
The Hellblaster was followed up with Karist Heavy Weapon troopers, and this month saw the addition of an official model for the Karist Angel Keeper (which previously had a playtest rules card but required some conversion to build a model). It's not all Karist love, though - Epirians and Broken will be seeing some releases very soon!
On the fiction front, 2017 saw the release of Tales From the Edge: Escalation. This is our second compilation of short stories, and features work by some great names in science fiction, including Alastair Reynolds, Aliette de Bodard and Liz Williams!
Escalation is available in print through the Maelstrom's Edge webstore, or as a eBook through Amazon.
To go along with the book release, we took a bit of a look at what went into creating the fiction for Maelstrom's Edge with a series of articles here: Crafting Tales from the Edge, Developing Stories for Maelstrom's Edge, and The Maelstrom's Edge Fiction Creative Process, by Tomas L. Martin.
For the modelers, this year continued our regular article releases, with tutorials and spotlight articles covering a huge range of different hobby topics. We showed you how to build a model to represent the Epirian faction objective:
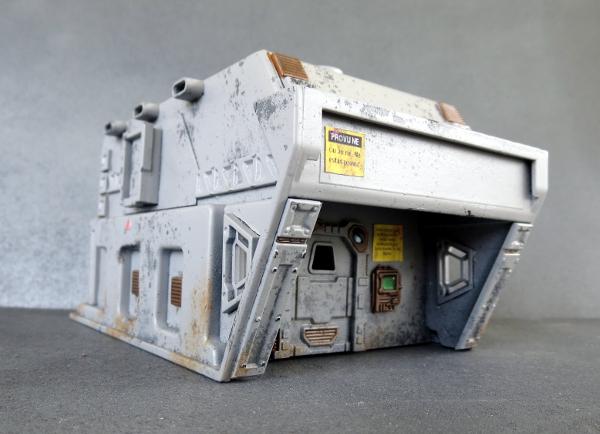
We went to town with the terrain sprue, with tutorials on shipping containers, buildings made from plastic storage trays and drainage channel, and some ideas for scatter terrain, blast craters, hedges, streetlights and 'blanket' door coverings made from bandages. We also shared templates for making a small minehead building and a larger bunker.
We also showcased a huge array of different terrain projects, including a plantation dome and a massive landing pad piece.
The models weren't forgotten, with tutorials on sculpting your own gas masks for your Epirian contractors, painting weathered-looking metal and heat stress on weapon barrels, a run-down on a quick-painting method for Broken Rabble units, and a guide to making bionic arms for your contractors from Scarecrow arms.
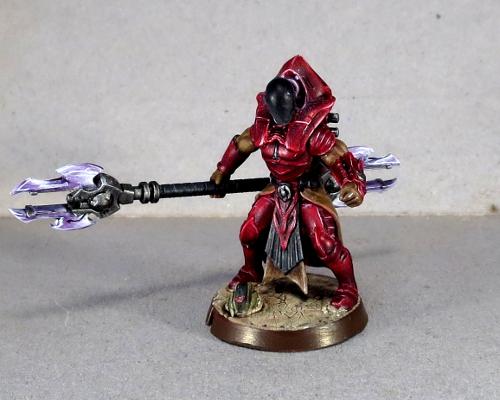
We also offered conversion tutorials and homebrew rules cards for a couple of new units types: The sneaky, sniping Reaper Cadre for the Karists, and the heavy-weapon-toting Scorpion Drone for the Epirians.
Along the way, we showcased a bunch of different modeling projects, including some small Epirian and Karist forces, some variant Epirian bot ideas, and a winged Angel conversion, amongst many others.
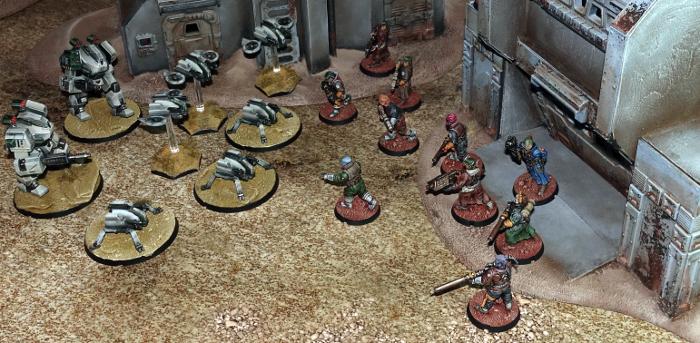
Gaming was also covered, with another fantastic battle report from DakkaDakka's Sgt Oddball - a Karist vs Epirian 'introductory' mission entitled 'The Final Act.
We also published a series of articles alongside the Broken release, taking a close look at their rules and how they fit into the game. You can find these here: Part 1, Part 2, Part 3 and Part 4.
So, what's next?
We have a slew of projects currently in development, and 2018 will see us continue with a new release each month to flesh out the three existing factions. This will include a couple of new plastic kits for the Epirians, and something a little bit... let's say 'heftier' for the Broken. Design work is also well underway for the next faction, which will bring some fun toys to the table for battle suit enthusiasts!
Stay tuned to the Comm Guild blog or the Maelstrom's Edge Facebook page for updates!
You can find all of our miniatures, the terrain sprue, and our fiction on the Maelstrom's Edge webstore here. For all of our modeling articles to date, including tutorials and walkthroughs of a wide range of different building and miniature projects, check out the article roundup here. And as always, feel free to join in the discussion in the Comm Guild Facebook Group here!
Tags: news
Spotlight: Maelstrom's Edge Terrain Sprue Tree Decorations!
Posted on Monday Dec 25, 2017 at 12:00am in Tutorials
- by Iain Wilson
With Christmas upon us, I wanted to add a bit of a holiday theme to this week's article, and so the only sensible option was to take the Maelstrom's Edge terrain sprue and build Christmas decorations from it!

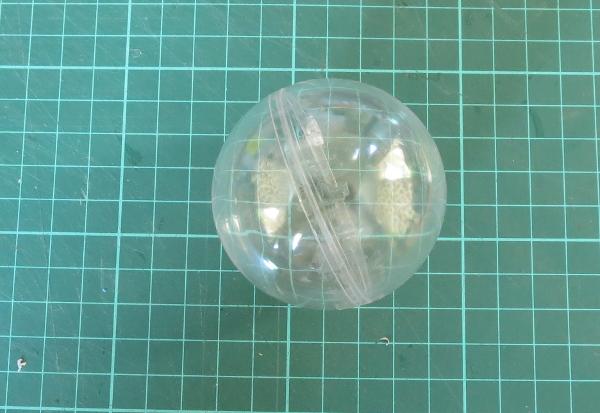
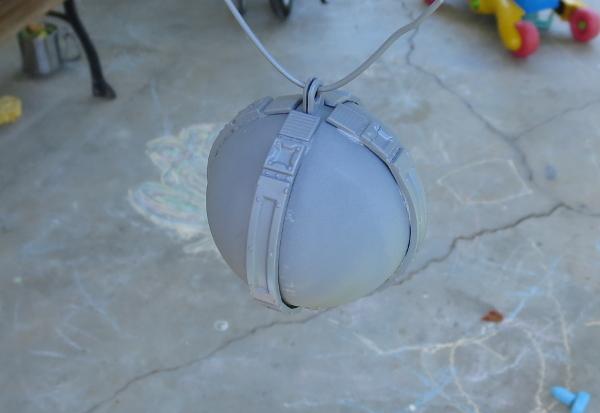
Around this time of year you can usually find various DIY bauble kits that have plastic baubles that you can stick photos or other momentos inside, or that you can paint or otherwise decorate. This particular one I think came with some rubber stamps inside for making Christmas cards and the like.
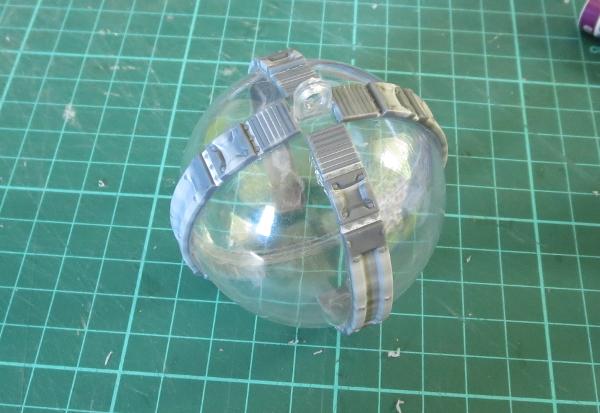
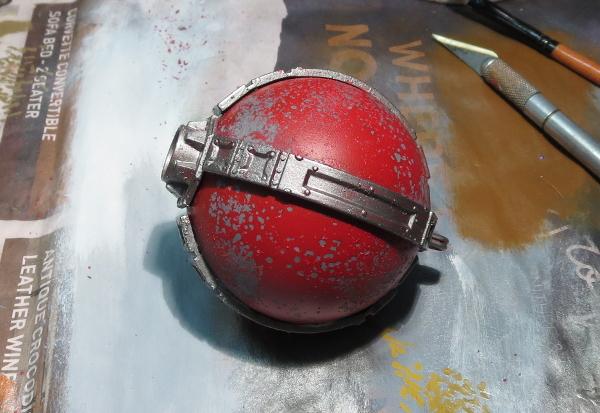
I took four of the long reinforcing struts from the terrain sprue and gently bent them into a curve over a metal tube.

These were then glued around the bauble with all-plastic glue. I used a UHU glue that turned out to be not great for gluing these struts onto flat surfaces as it contracts when it dries, which bends the struts and pops them right off the surface they're glued onto. That very property makes it a perfect glue for attaching the struts to a curved surface, though, as it will make them fit more tightly to the bauble.
The struts don't run all the way down to the bottom of the bauble, so I took the large pipe fitting from the sprue, and used a hobby knife to carve the bottom surface out to make it concave.
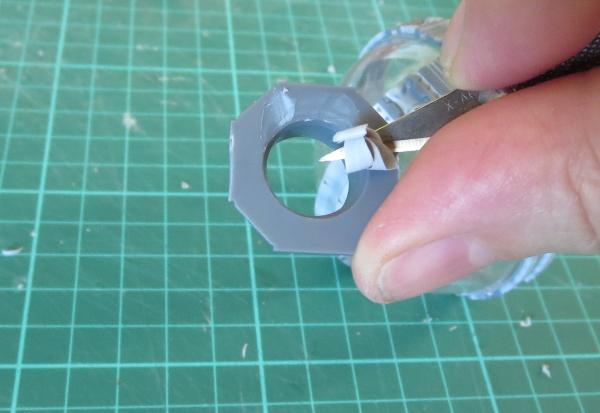
This was then glued onto the bottom of the bauble.
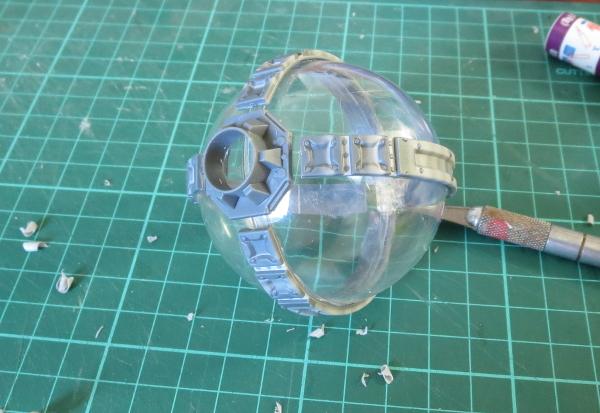
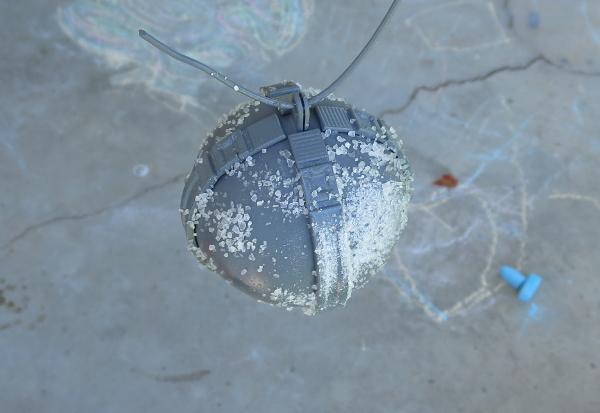
Time to paint! A quick spray of grey primer:
Season lightly with some crushed rocksalt:
Spray with Army Painter Dragon Red:
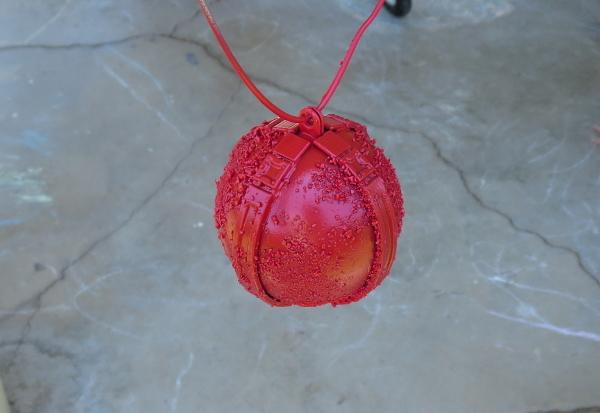
Once the spray was dry, I scrubbed away the salt under running water:
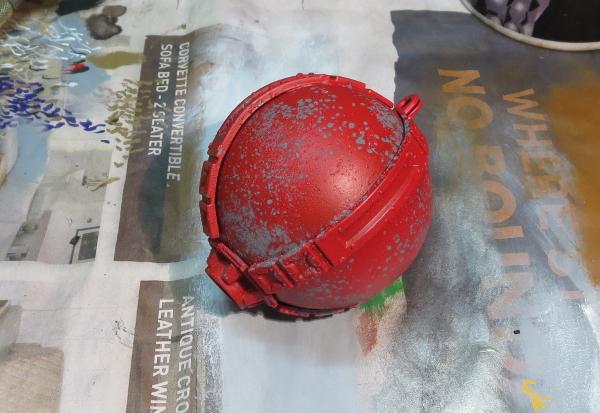
The detail pieces were then painted with P3 Pig Iron:
I followed this up with a generous coat of my old favourite, Army Painter Strong Tone ink.
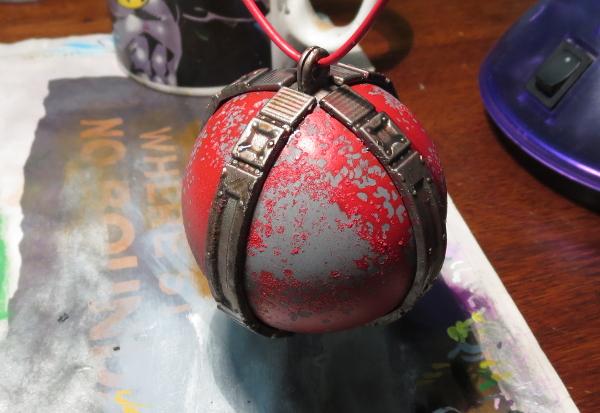
After sitting overnight for the ink to dry, a quick drybrush of Pig Iron and a little silver, and up it goes on the tree!
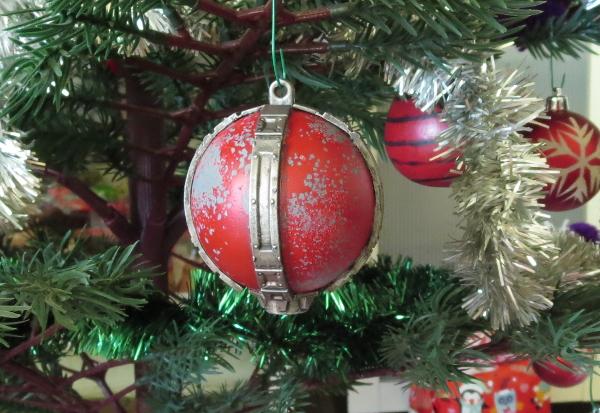
To build your own collection of mechanical... er... decorativeness, you can pick up the Maelstrom's Edge terrain kit along with the rest of the Maelstrom's Edge model range from the webstore here. As always, we would love to see your creations on the Comm Guild Facebook page!
Here's wishing everyone a safe and happy holiday season!
For other Maelstrom's Edge modeling articles, including tutorials and walkthroughs of a wide range of different building and miniature projects, check out the article roundup here.
Tags: conversion modeling spotlight terrain terrainsprue walkthrough
Terrain Tutorial: Blanket Door Coverings
Posted on Monday Nov 27, 2017 at 05:00pm in Tutorials
- by Iain Wilson
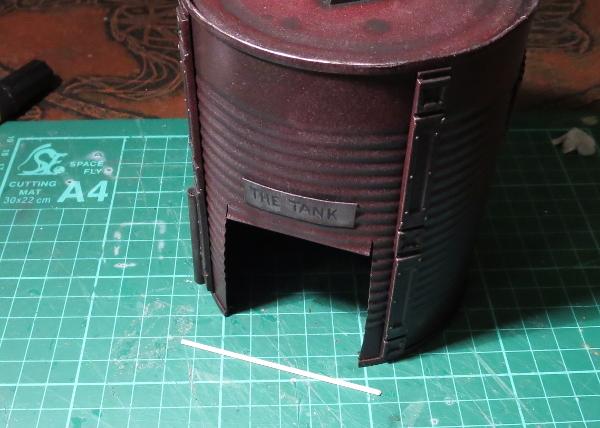
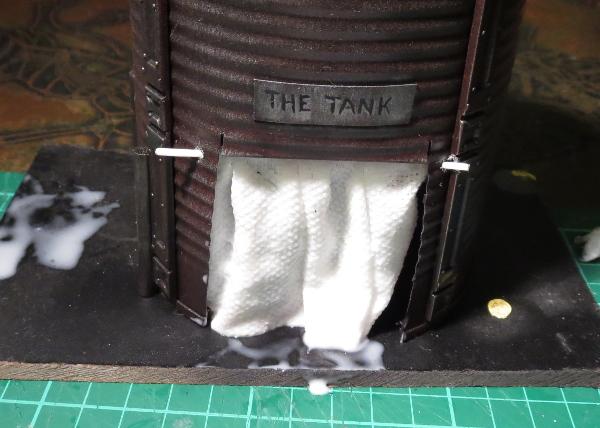
Last week I put together the second part of my Broken settlement, with some buildings made from a cardboard gift box and an old fruit tin. The fruit tin still needed a door covering, and I wanted something that looked sufficiently rough and ready. I decided to go with an old blanket to serve as a makeshift door, which wound up looking like this:
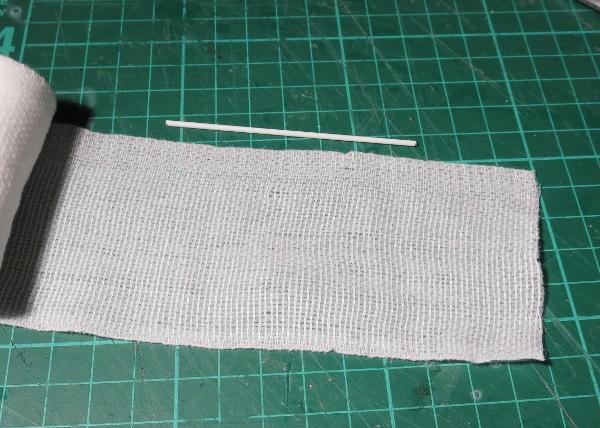
To start with, I took a length of plastic rod and cut it to run across the doorway with a little overhang on either side. This would eventually sit in place at the top of the doorframe, poked through a couple of holes drilled into the tin on either side.
I then grabbed some crepe bandage and cut a piece a little longer than the rod, to allow it to bunch up. Bunched curtains look more interested than a flat sheet, unless you want to paint a design on, in which case a flatter surface is going to be easier to deal with.
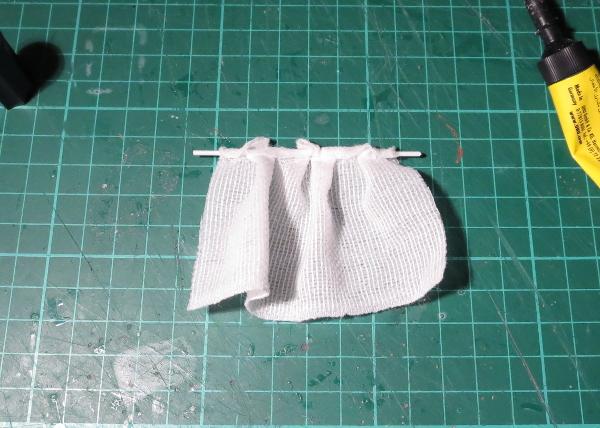
Next I glued the bandage over the rod with some superglue, bunching it up so that the ends of the rod were sticking out, and folded over the rod far enough so that the bottom of the blanket would just touch the ground when hung in place.
Now comes the messy part - I mixed up some PVA glue with a little water. The exact amount of water is going to depend on how runny your PVA glue is, but you're aiming for around the consistency of pouring cream.
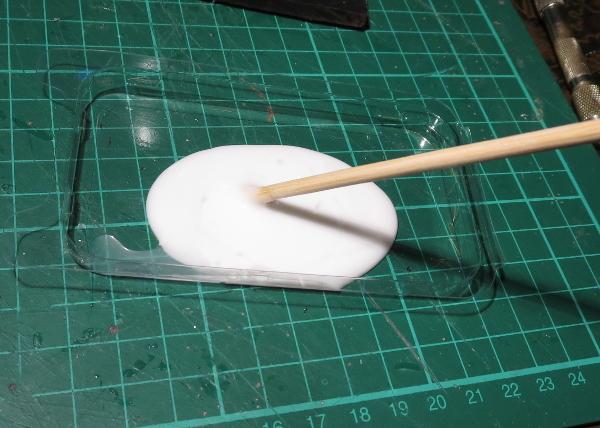
Then I dropped the bandage blanket in the glue and let it soak right in. When the glue dries, it will stiffen up the cloth, so you want it good and soaked through. If the glue is too thick, it doesn't soak in as well and you wind up with some parts of the blanket that are still soft and floppy, and others a goopy mess.
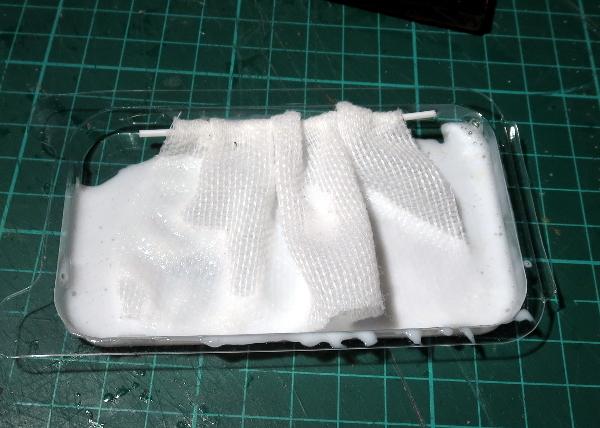
Once the bandage was nice and gluey, I hung it in place and arranged the folds to look as natural as possible, and then left it sit for two days to give it plenty of time to dry. Once dry, it will be stiff, but still slightly flexible. If it's too soft and doesn't hold its shape, you can stiffen it up a little more by painting on some additional glue, but try not to put it on too thick and fill up the weave of the fabric. If you have a brush-on superglue, you could also paint some of that onto the back of the blanket if it is accessible, but again, be sparing so you don't soak it into the weave and destroy the blanket look.
When the glue is properly dried, it's time to paint. I started out with a layer of Army Painter Strong Tone, but you could use whatever colour fits your terrain. If you use a wash or ink, make sure you give it plenty of time to dry, as the watery paint can cause the PVA glue to soften up again.
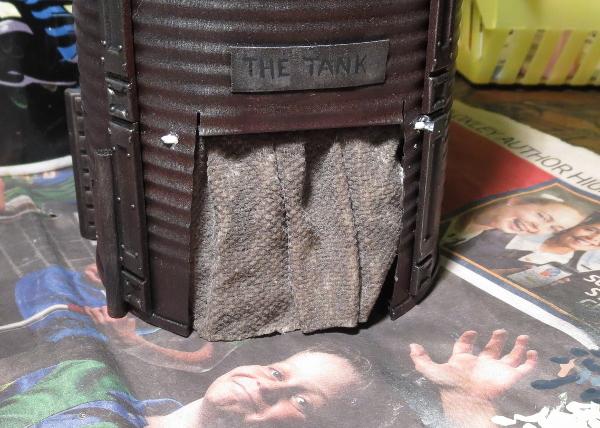
Once the wash was dry, I carefully drybrushed with some bone and white to highlight the raised parts of the blanket, and added a little more wash into the deeper creases for some extra shading.

And that's a job done!
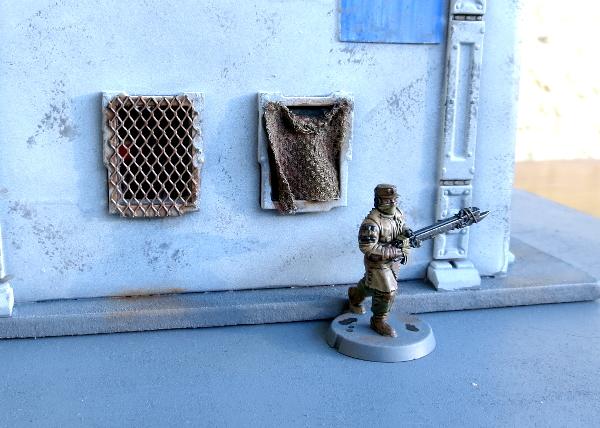
You can also use a similar technique to hang blanket coverings over windows. On this one, the blanket is tacked onto the outside of the window frame. To attach the soaked bandage to the window, I added a drop of superglue to the top corners, let that set, and then carefully teased the wet blanket into the shape I wanted it:
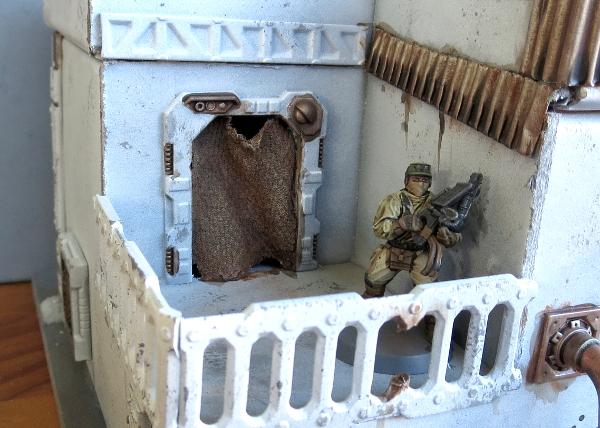
The same was done here to hang a blanket inside this door frame. This is a door piece off the Maelstrom's Edge terrain sprue with the door cut out of the frame. The blanket is superglued in place at the top corners and down the sides of the door frame and then shaped and left to dry.
On my next terrain project, I'll also be using this to add some canvas roof coverings to a building that's seen better days... Stay tuned!
To build your own stellar refugee settlement, you can pick up the Maelstrom's Edge terrain sprue along with the rest of the Maelstrom's Edge miniature range from the webstore here. As always, feel free to share your creations on the Comm Guild Facebook page!
For other Maelstrom's Edge modeling articles, including tutorials and walkthroughs of a wide range of different building and miniature projects, check out the article roundup here.
Building a Karist temple: how not to
Posted on Saturday Nov 25, 2017 at 05:33pm in Tutorials
Originally posted on Dakkadakka by Sgt.Oddball.
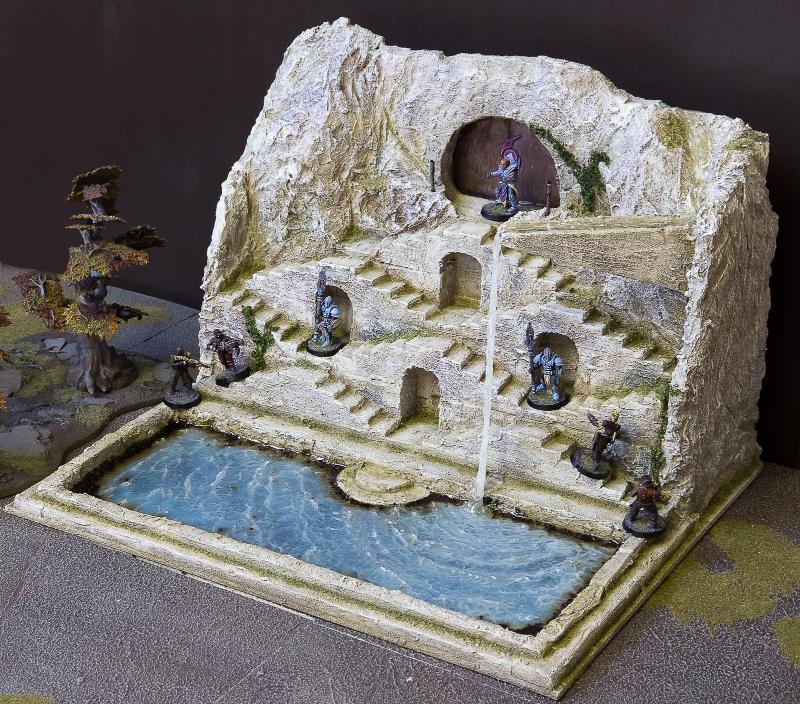
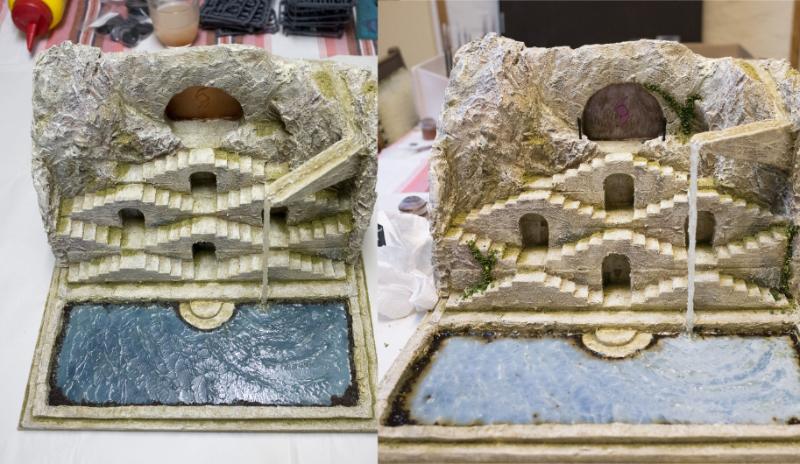
What follows is a brief overview of how I built this Karist temple, inspired by the stepwells seen most commonly in India. A couple mostly water-related things did not work out at first, so here’s how to avoid those things.
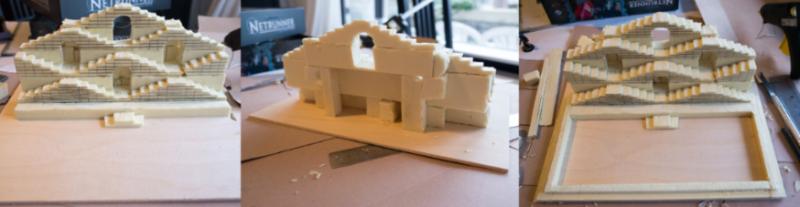
1. I took the lid from one of those boxes they put wine bottles in, measured things, and glued my foam stairs to the lid. The steps are sized to accommodate normal 25mm based dudes without them tipping over. At the back: I just used scraps of foam to hold everything up. I then used foam again to make the basin.
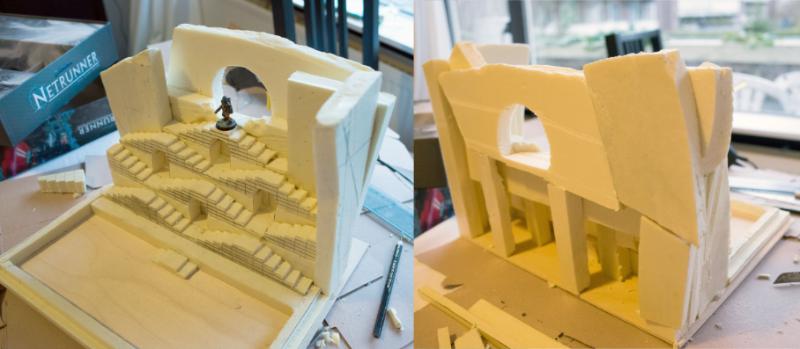
2. I then stacked bits of foam to create the rock around the stairs and the temple entrance.
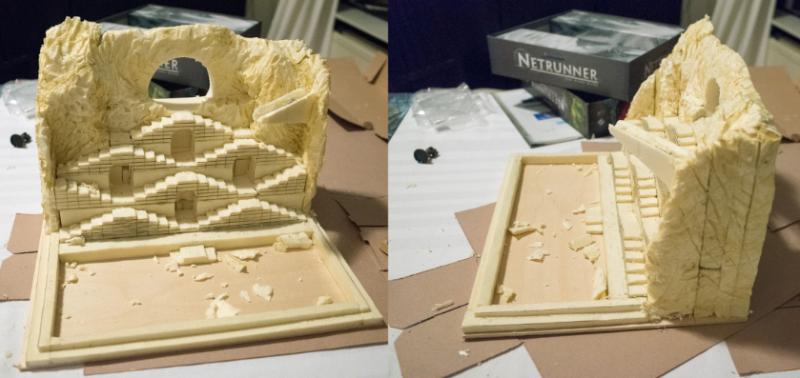
3. With fingers, a hobby knife, a serrated knife and a hot soldering iron I shaped the foam to look like rock.

4. I then undercoated the whole thing with white textured wall paint. Next, I used a hobby paint mixture to make everything rocky a yellow-sandish colour. The inside of the basin was painted a bright blue. The rock was then washed in diluted brown paint and the water area highlighted with progressively lighter shades of blue-green (lighter towards edges). The rock was highlighted with probably the base colour again and then adding in a sandy colour and white. I also used various coloured washes (reds, greens, browns) to give the rock colour some variation. All highlighting is simple drybrushing/overbrushing. In the last picture, I’ve poured Woodland Scenics E-Z water in the basin and in the water source on top, which is a resin you melt before pouring. This is the first thing you should not do. This stuff was just not suitable for this purpose. It shrunk and cracked as it cured and had a yellowish tint.
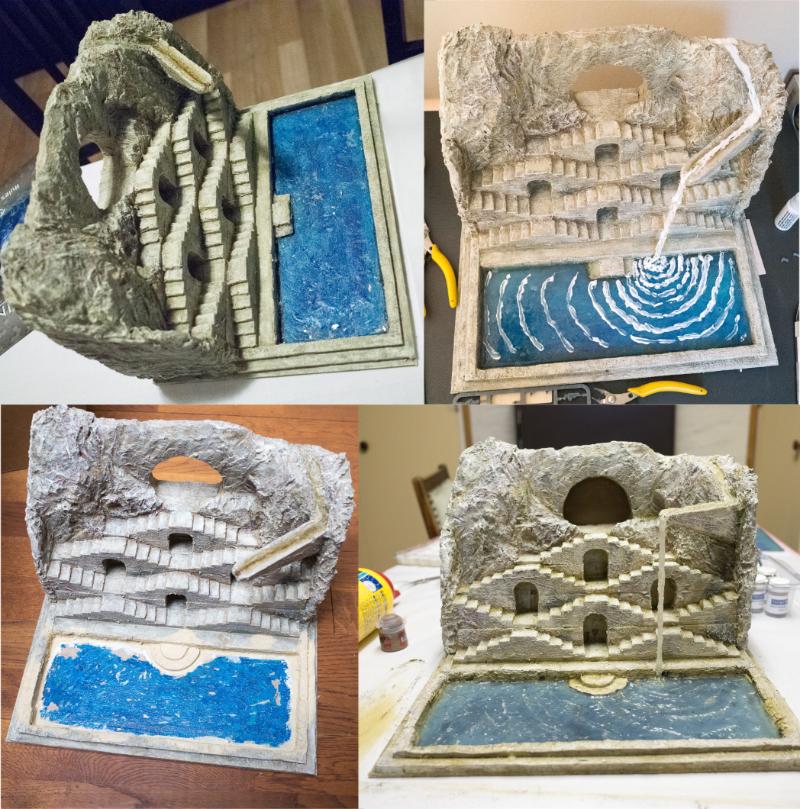
5. It’s not at all easy to remove E-Z water once it’s set, especially if you want to keep the surrounding terrain in one piece. Getting rid of it involved trying all sorts of methods, eventually a chisel was most effective. I then tried a more familiar (to me) product, which is Woodland Scenics Realistic water. This is awesome stuff and gave me a very nice pool. For the water drop and a little ripple effect I used Woodland Scenics Water effects, which is also nice.
Then I did the second thing you should not do. I figured I could add some white to the water by mixing white paint into the Water effects stuff and applying it where appropriate. However, Water effects itself is white until it cures, hence I couldn’t see how much the white paint coloured the Water effects. Of course, I didn’t bother to test my batch (all this water stuff takes forever to cure and I have no patience). Turns out I used too much white paint and all my water now looked ridiculous (basically like that picture of the uncured Water effects). The thing is, it’s impossible to get rid of. I think I tried painting over the whole thing? Not sure. Anyway, in the end I decided it was time to once again dig out the whole basin.
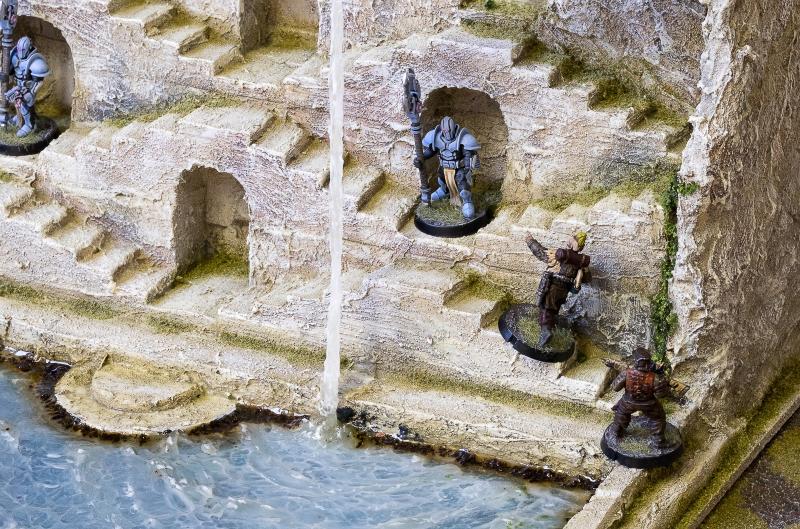
This time was worse, as the Realistic water isn’t as easily chiselled as the E-Z Water. It stays a little soft. After much perseverance I got everything out, but I destroyed some of the paint job and actual foam bits around the basin. I had to redo all that and also build new steps into the water (round steps this time). Now that I knew what not to do, again using Realistic water and Water effects got me the desired result (still room for improvement, but I’ll leave that for another project).
6. The final steps were making temple doors with the Karist logo out of plasticard, and detailing. The Maelstrom's Edge terrain sprue supplied a control panel. The doors were painted brown, then bronze, then drybrushed pewter and silver. The logo got various purple paints, washes and highlights. I used green weathering powder to colour the rock a bit in the crevices and then sprinkled on fine blended green turf for some moss, and the dried contents of some teabags around the edges of the basin to represent fallen leaves and such muck accumulating there. This muck, of, course, didn’t appear wet so I added a final coat of Realistic water (this is the white sheen you see in the last image). The colour from the tea bled a bit more than I’d like, so this is probably another thing I’d find a better procedure for next time. To finish up I glued some coarser, darker green turf to the rock to represent vines, washed that with a brown wash and then highlighted with an olive colour. I then broke a skewer in two and wrapped the ends in narrow masking tape to make two torches and planted these near the entrance, painted brown and metallic.
And that’s basically it! Apart from messing around with the water a lot (this cost me so much time, it ain’t funny), it’s a fairly simple project.
Terrain Spotlight: Broken Settlement, part 2
Posted on Monday Nov 20, 2017 at 05:00pm in Tutorials
- by Iain Wilson
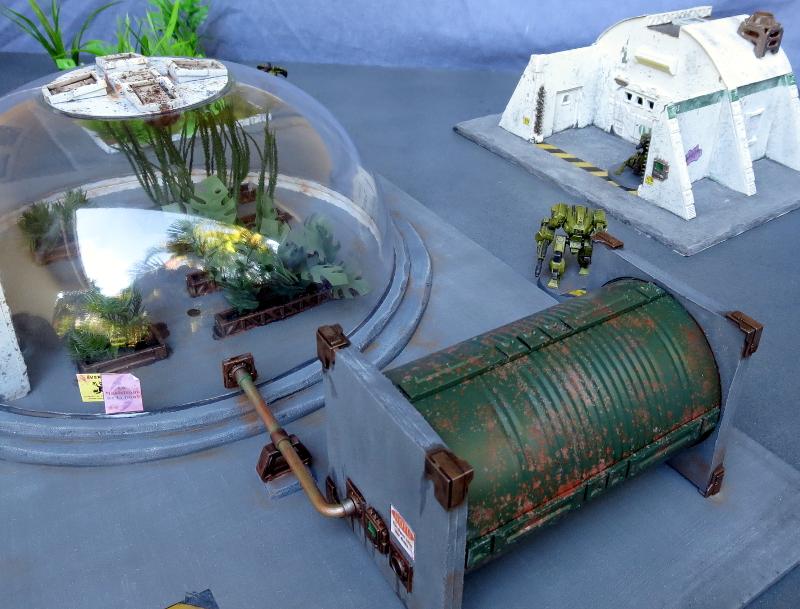
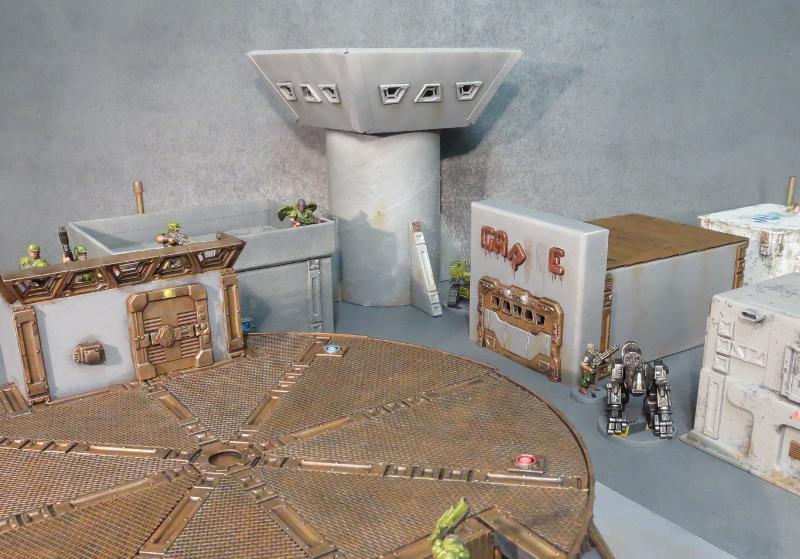
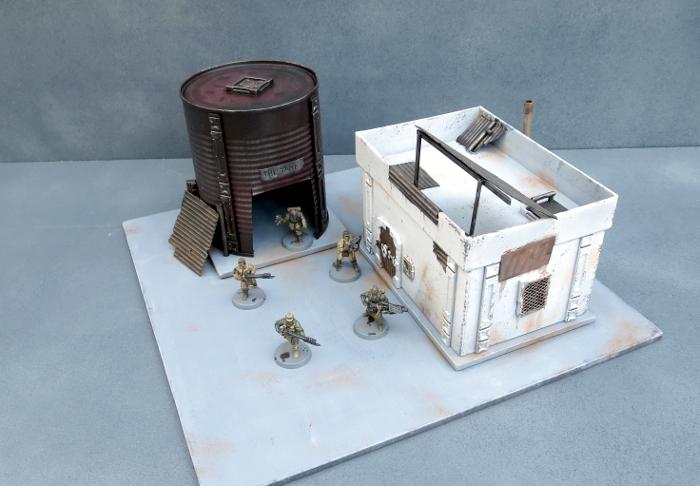
This week, I'm continuing on with the construction of the Broken settlement that I started a few weeks back, which you can find round about here, by adding in another 'renovated' building and a converted water tank shelter.
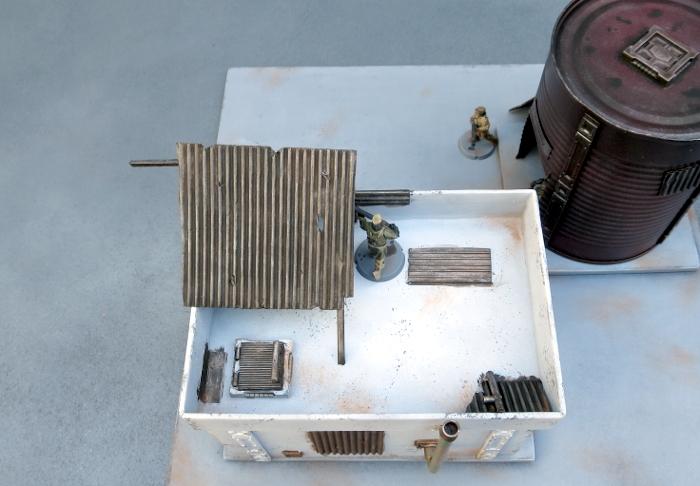
I fast-forwarded a little on construction by grabbing a small building that I made some time ago for a video showing how to make a building from a cardboard gift box and the Maelstrom's Edge terrain sprue (which you can find on Youtube here). This was partly painted as a test run for the sponge-weathering that I used on the first building for this settlement.
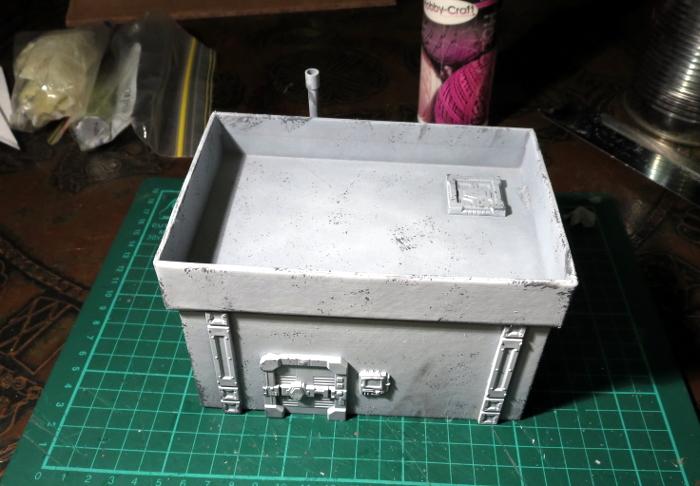
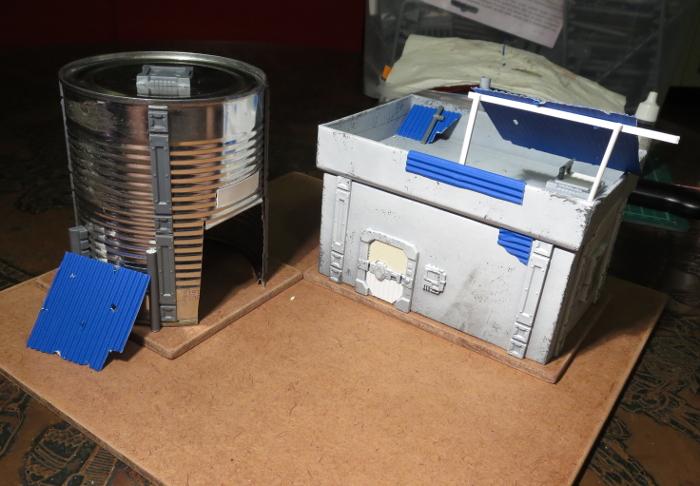
Clearly, this building was still far too pretty looking to fit into a Broken settlement, so I added a bunch of patch-plating using plasticard and corrugated cardboard, and added some mesh over the windows on the sides. I also built a framework on the roof to create a makeshift shelter or sentry point.

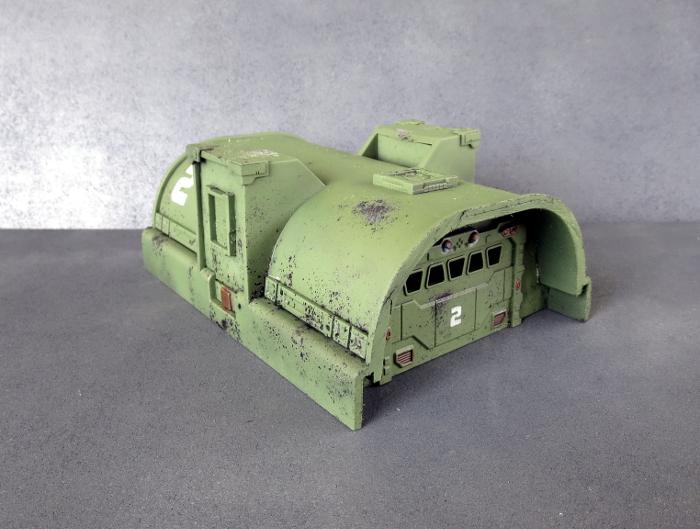
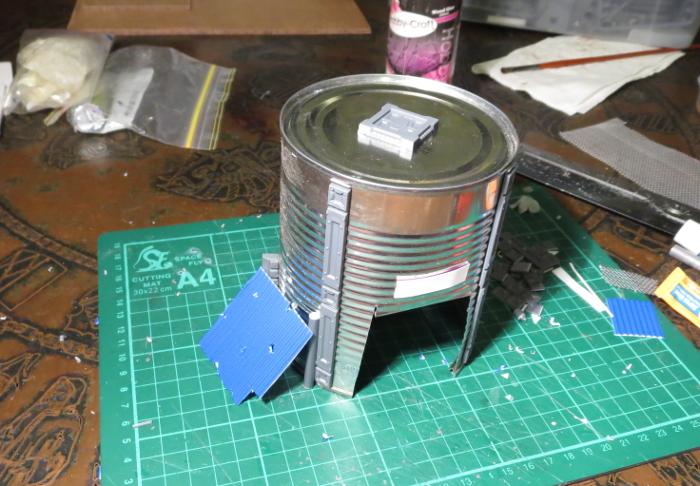
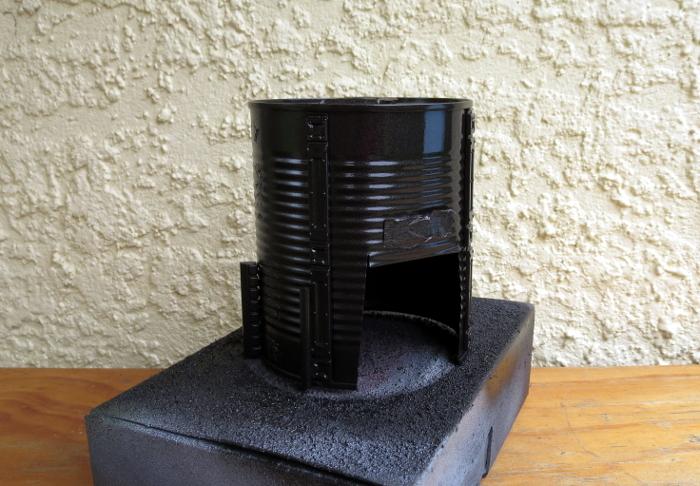
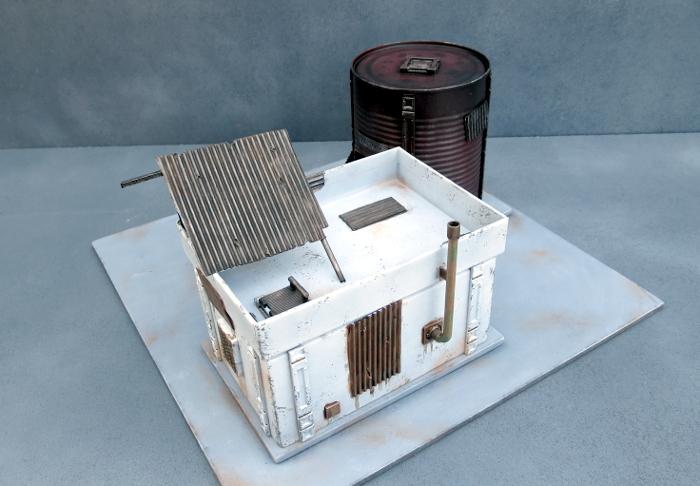
The companion building for the gift box one is made from an old fruit tin. This received a good wash and had the label removed, and then I cut a squarish hole in the side to serve as a doorway.
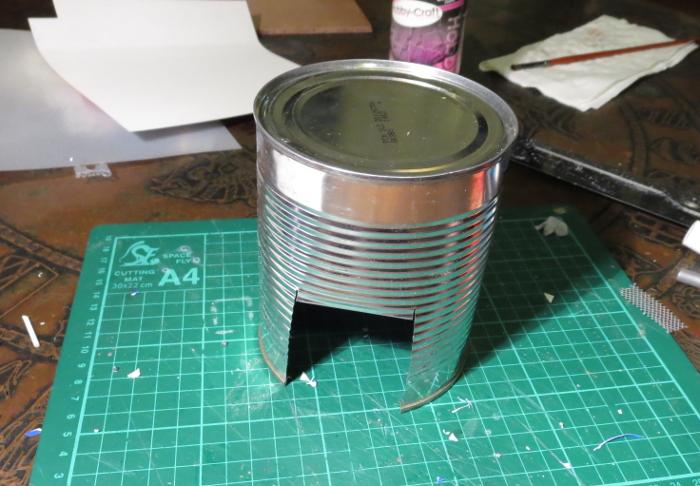
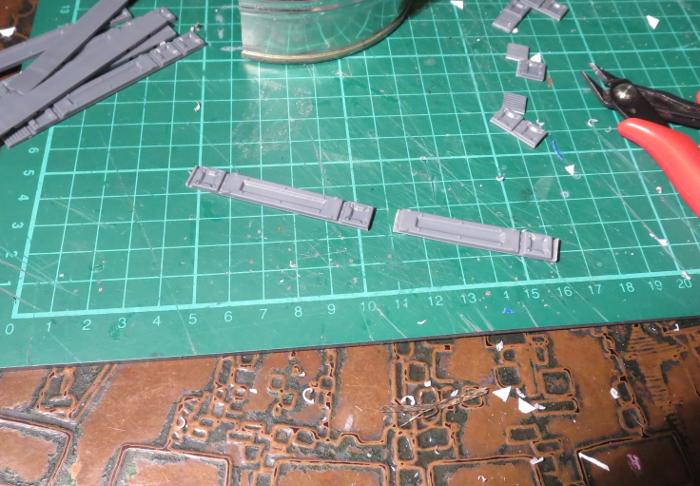
I cut a bunch of reinforcing struts from the terrain sprue to fit neatly down the sides of the tin.
With the addition of some patches, a hatch on the roof and a lean-to on the side, the old tank was ready for painting.
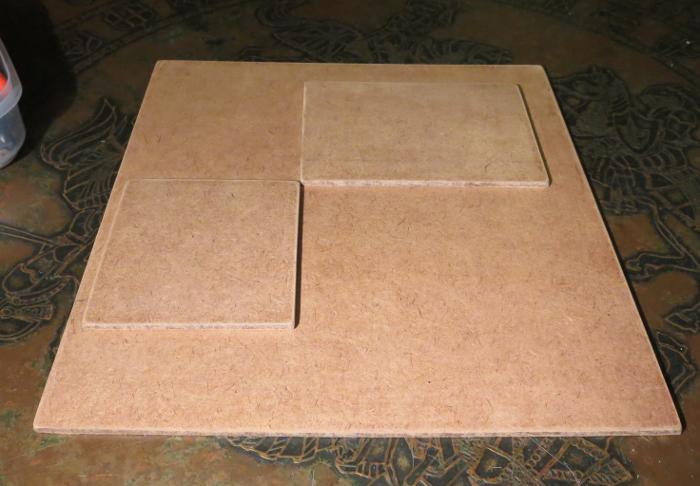
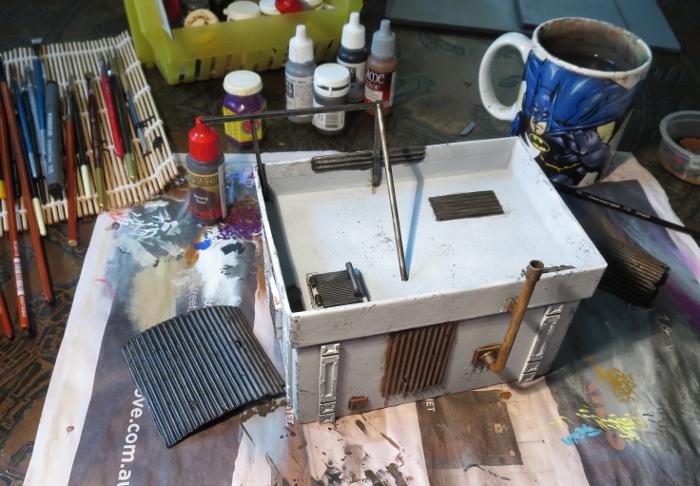
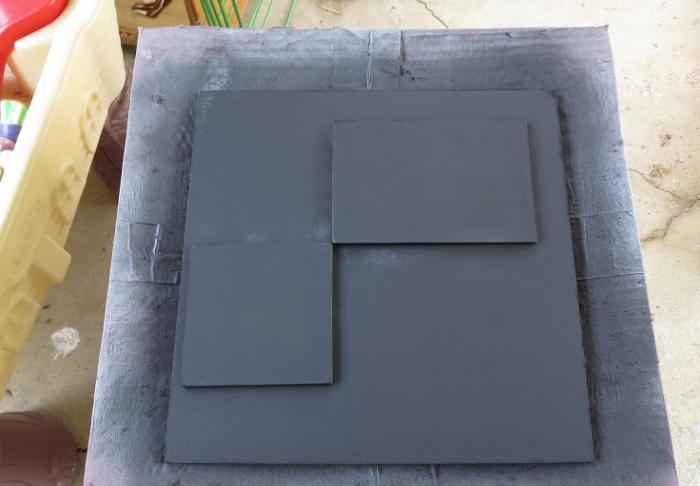
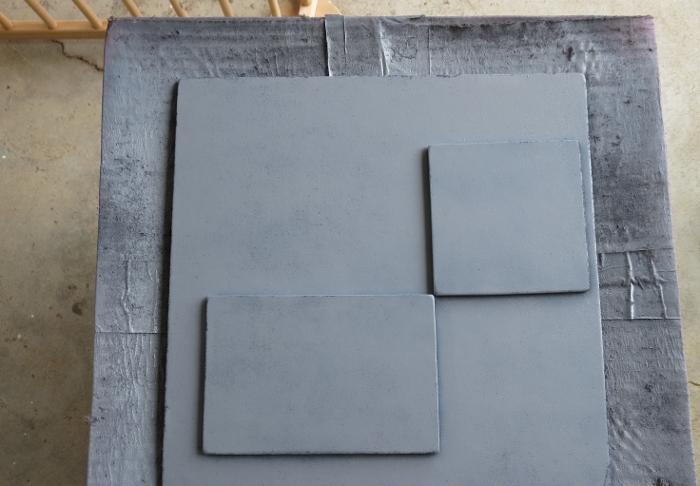
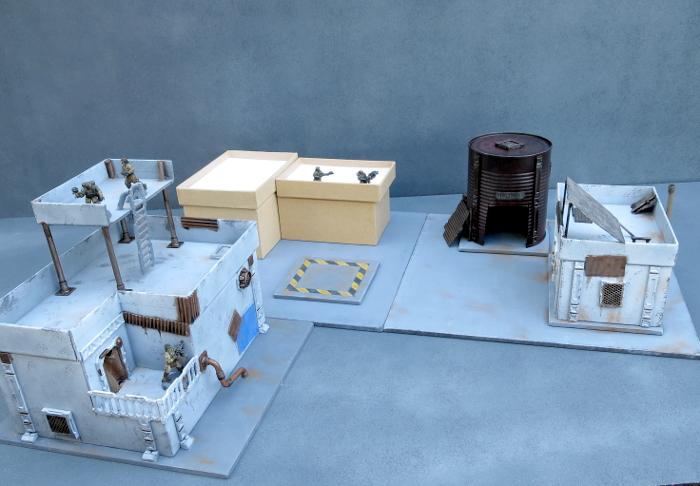
To sit the buildings on, I cut a 12" square of masonite, with a couple of smaller pieces glued on top - a rectangle for the gift box building and a square for the tank. These were cut to size and then sanded around the edges to smooth down the burrs. I then gave the top surface a light sand to break up the shine and give it some texture for drybrushing later, and then glued the building foundation pads on with PVA glue.
Everything in place, ready for painting:
Because the gift box building was already mostly painted, I could skip straight to the detail work. To check how the main bit was done, check out the first article linked back up at the start of this one.
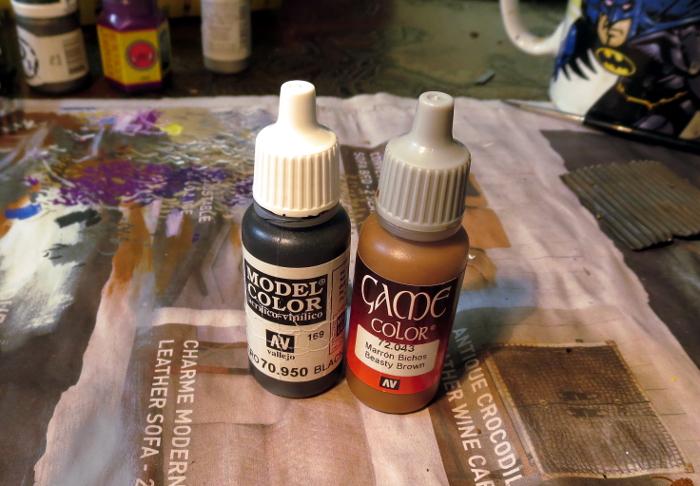
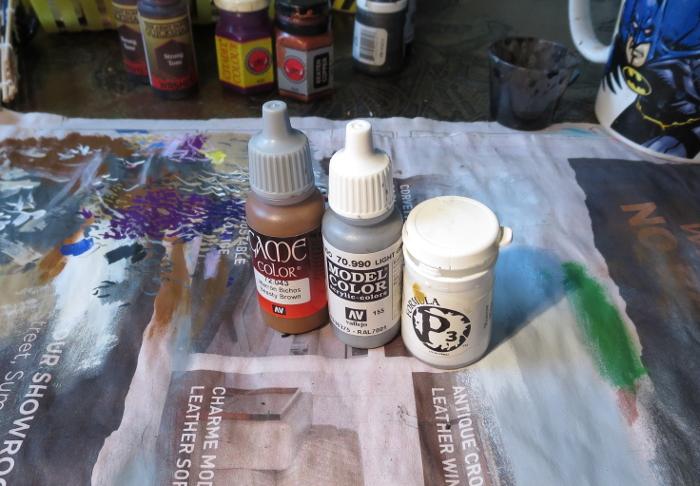
The various metal patches were given a coat of a rough mix of Vallejo Beasty Brown and black.
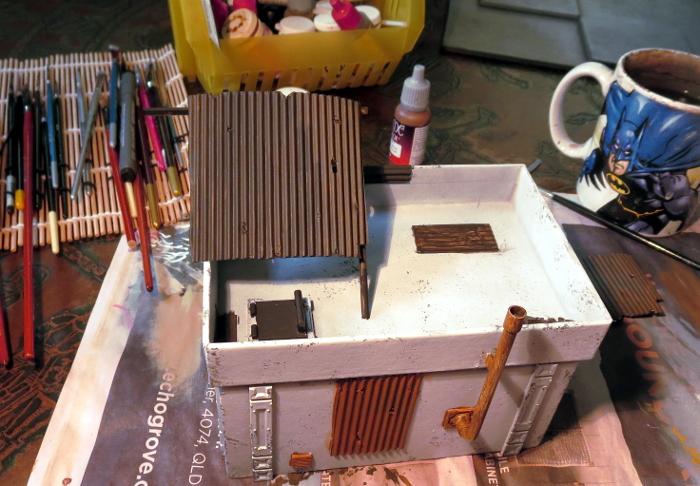
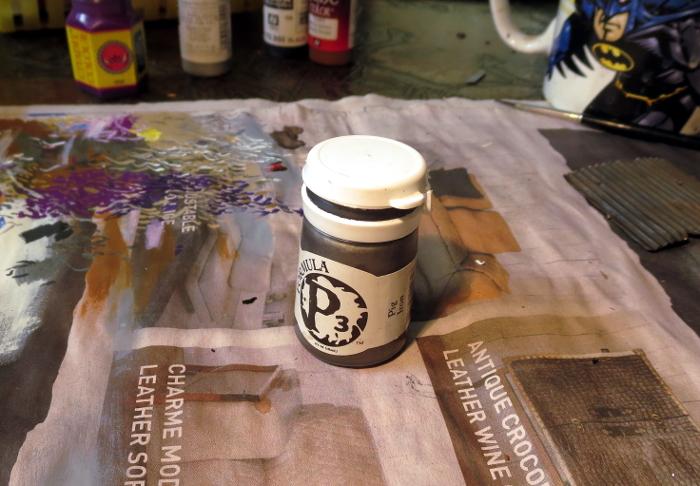
Over this went a light drybrush of P3 Pig Iron.
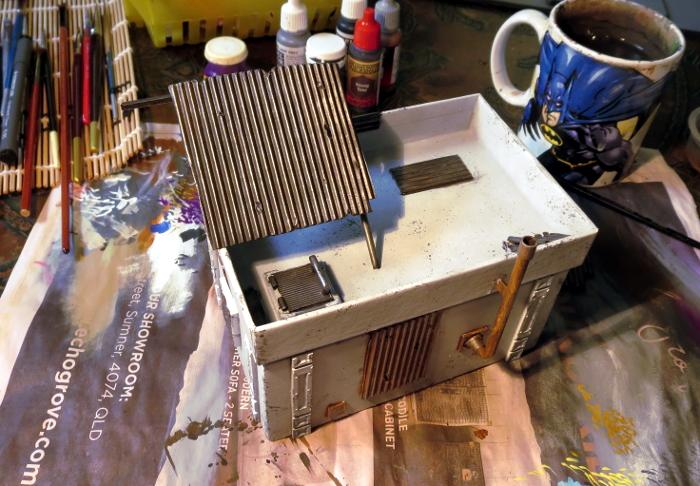
This was followed by a generous coat of Army Painter Strong Tone.
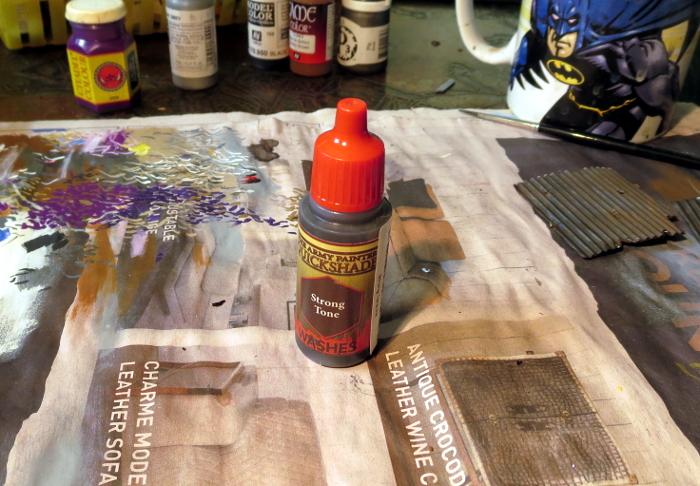
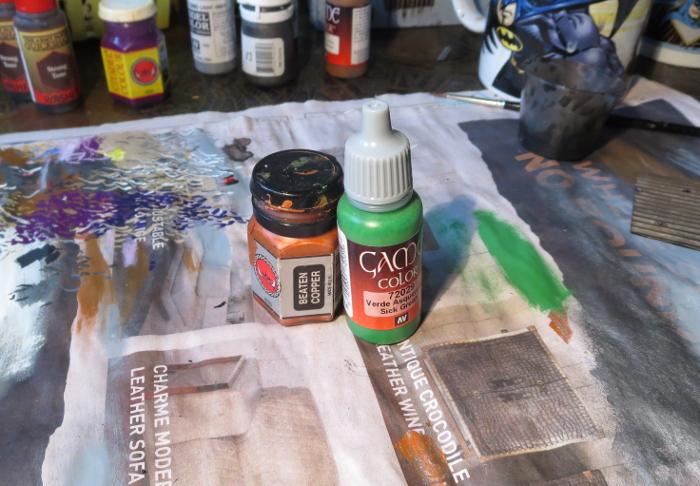
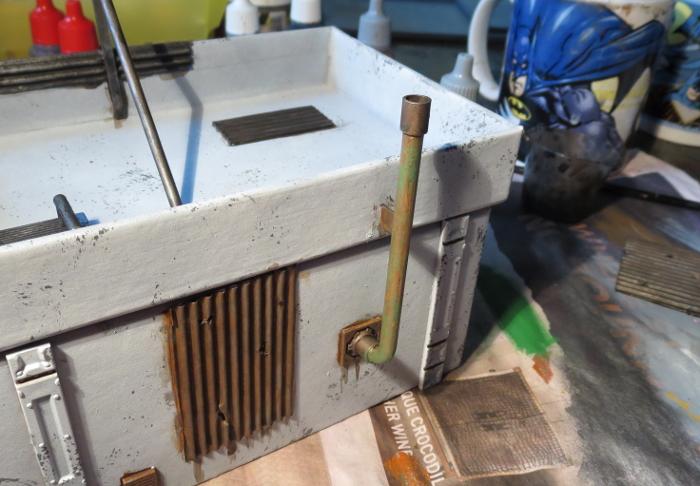
The pipe on the back wall was painted with a coat of Citadel Beaten Copper, and then given a light drybrush of Vallejo Sick Green.
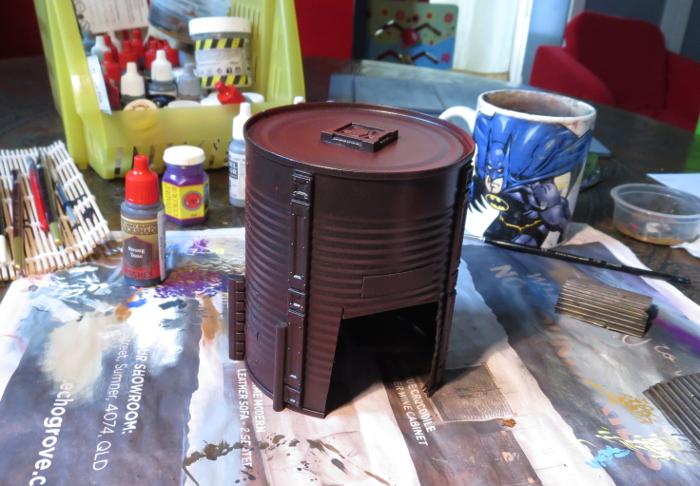
Meanwhile, the tank was given a spray inside and out with black Rustguard, to prevent it from rusting through the paint down the track.
I then masked off the detail parts of the tank building with some masking tape.
The came a coat of Rust-oleum Oil Washed Bronze. This is a rust-preventing primer like the black, so could have actually gone straight over the bare tin without the layer of black, but I wanted to make sure it was good and dark. The black base helps this without having to spray the bronze on too heavy, as it gets a bit goopy and rough.
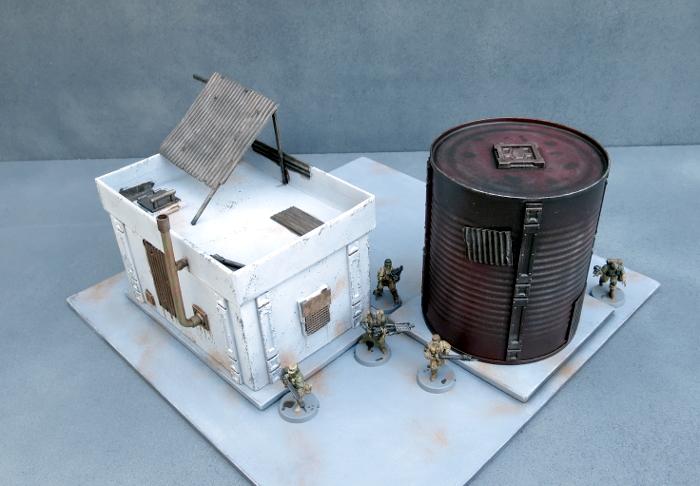
When the bronze was dry, I sprayed lightly over the top surface of the tank with some Army Painter Dragon Red, and then flipped the tank upside down and sprayed lightly around it so that the red caught in the undersides of the tin's corrugations without coating the whole thing in red.
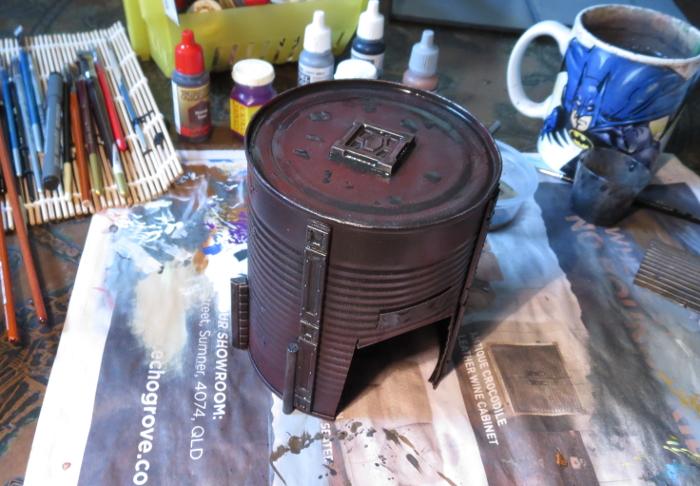
I then drybrushed the whole thing lightly with Pig Iron, going a little heavier on the detail parts to make them stand out a little from the darker tank. The detail parts were then washed with some Strong Tone, and a few puddles of Strong Tone scattered around on the top surface.
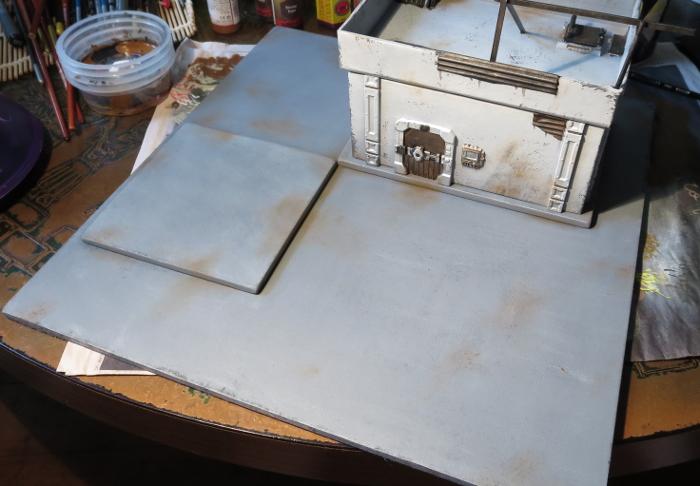
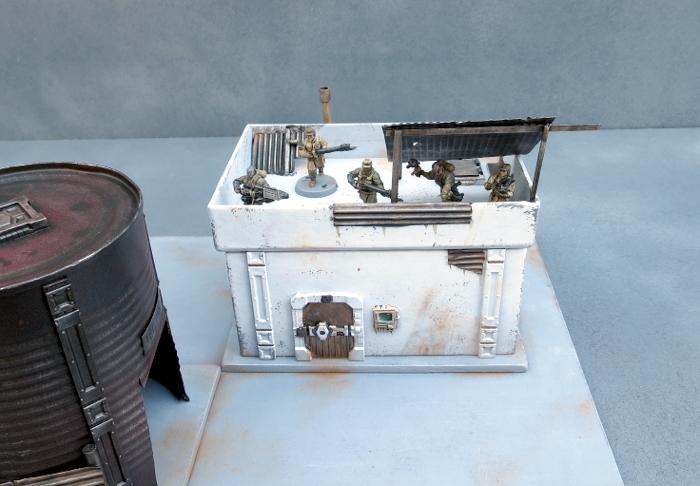
While all of this was going on, I undercoated the based board with some flat black, and then gave it a coat of a flat medium grey. I deliberately use a range of different greys to basecoat my 'concrete' terrain bases, to help reduce the uniformity of the vast expanse of concrete on the table. If you look around in a city that has a lot of concrete structures, the colours vary considerably depending on the age of the concrete and the specific mix used, so it creates a better sense of realism on the gaming table if you carry this across in your painting.
To finish off the base, it was given a drybrush of Vallejo Light Grey mixed roughly with white, and then some patches of worn grime were added with a light drybrush of Beasty Brown, on both the base and the gift box building.
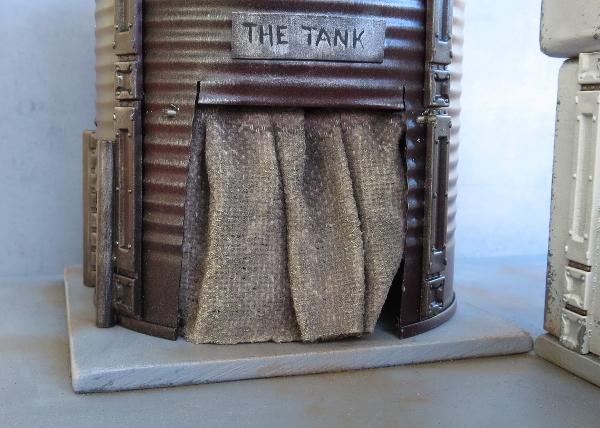
With the addition of a couple of final details (some lettering above the tank's doorway, the light above the door and the comm panel screen), this little building cluster is about done for now.
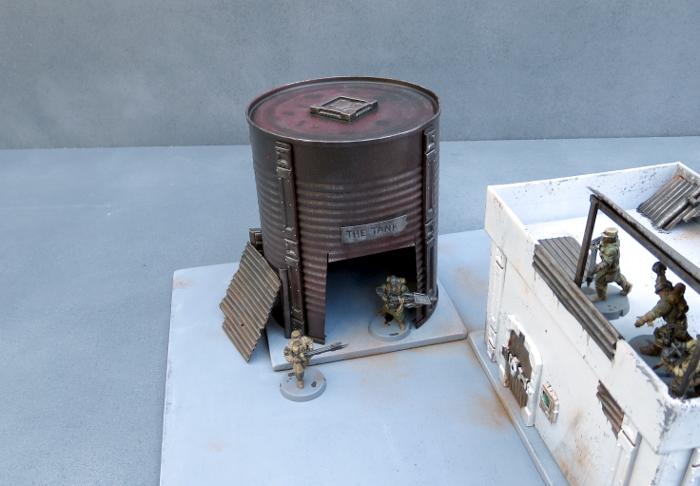
The tank still needs a blanket door covering, which I'll be going through in an upcoming tutorial, and I will go back over all of the buildings in the settlement to add some more characterful detailing once I have some more of the bulking out done, but it's at a point where it's not going to look out of place on the table as-is.

So what's next?
Aside from the door covering for the tank, I'll be moving on to another building section that will have some challenges in the roofing department and some sort of interesting detail in the courtyard.
Stay tuned for more!
To build your own stellar refugee settlement, you can pick up the Maelstrom's Edge terrain sprue from the webstore here. As always, feel free to share your creations on the Comm Guild Facebook page!
For other Maelstrom's Edge modeling articles, including tutorials and walkthroughs of a wide range of different building and miniature projects, check out the article roundup here.
Tags: broken buildings modeling models spotlight terrain terrainsprue walkthrough