Building a Karist temple: how not to
Posted on Saturday Nov 25, 2017 at 05:33pm in Tutorials
Originally posted on Dakkadakka by Sgt.Oddball.
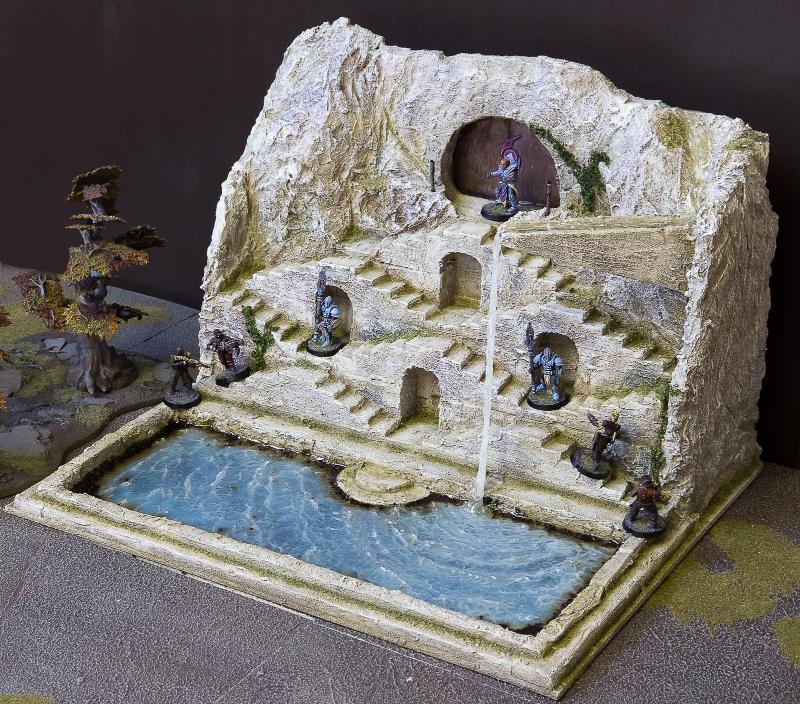
What follows is a brief overview of how I built this Karist temple, inspired by the stepwells seen most commonly in India. A couple mostly water-related things did not work out at first, so here’s how to avoid those things.
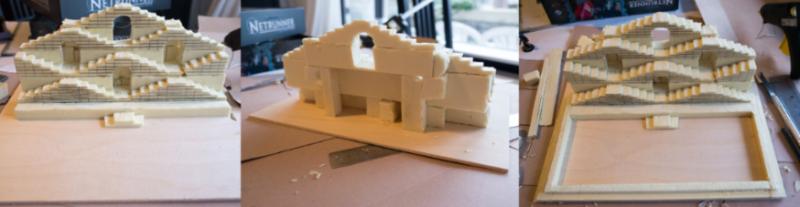
1. I took the lid from one of those boxes they put wine bottles in, measured things, and glued my foam stairs to the lid. The steps are sized to accommodate normal 25mm based dudes without them tipping over. At the back: I just used scraps of foam to hold everything up. I then used foam again to make the basin.
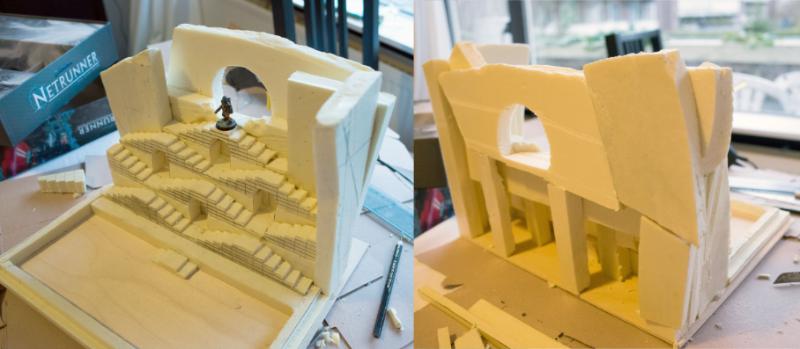
2. I then stacked bits of foam to create the rock around the stairs and the temple entrance.
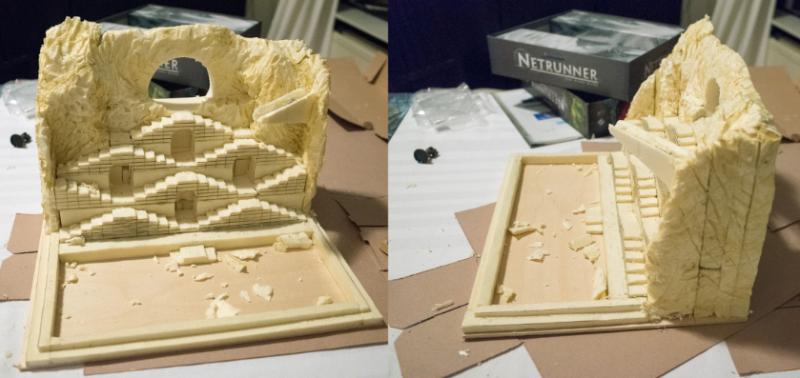
3. With fingers, a hobby knife, a serrated knife and a hot soldering iron I shaped the foam to look like rock.

4. I then undercoated the whole thing with white textured wall paint. Next, I used a hobby paint mixture to make everything rocky a yellow-sandish colour. The inside of the basin was painted a bright blue. The rock was then washed in diluted brown paint and the water area highlighted with progressively lighter shades of blue-green (lighter towards edges). The rock was highlighted with probably the base colour again and then adding in a sandy colour and white. I also used various coloured washes (reds, greens, browns) to give the rock colour some variation. All highlighting is simple drybrushing/overbrushing. In the last picture, I’ve poured Woodland Scenics E-Z water in the basin and in the water source on top, which is a resin you melt before pouring. This is the first thing you should not do. This stuff was just not suitable for this purpose. It shrunk and cracked as it cured and had a yellowish tint.
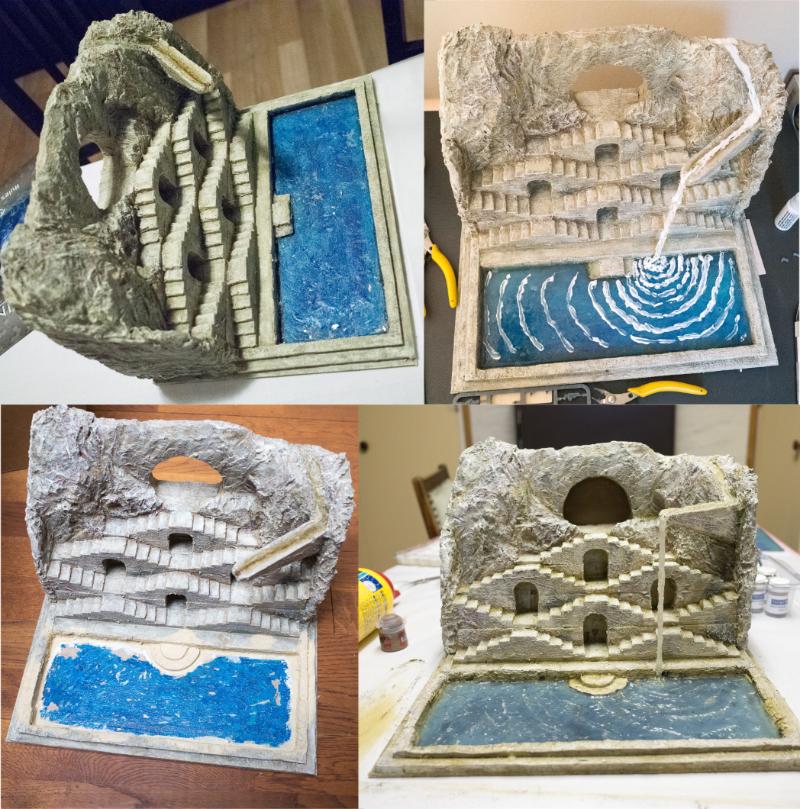
5. It’s not at all easy to remove E-Z water once it’s set, especially if you want to keep the surrounding terrain in one piece. Getting rid of it involved trying all sorts of methods, eventually a chisel was most effective. I then tried a more familiar (to me) product, which is Woodland Scenics Realistic water. This is awesome stuff and gave me a very nice pool. For the water drop and a little ripple effect I used Woodland Scenics Water effects, which is also nice.
Then I did the second thing you should not do. I figured I could add some white to the water by mixing white paint into the Water effects stuff and applying it where appropriate. However, Water effects itself is white until it cures, hence I couldn’t see how much the white paint coloured the Water effects. Of course, I didn’t bother to test my batch (all this water stuff takes forever to cure and I have no patience). Turns out I used too much white paint and all my water now looked ridiculous (basically like that picture of the uncured Water effects). The thing is, it’s impossible to get rid of. I think I tried painting over the whole thing? Not sure. Anyway, in the end I decided it was time to once again dig out the whole basin.
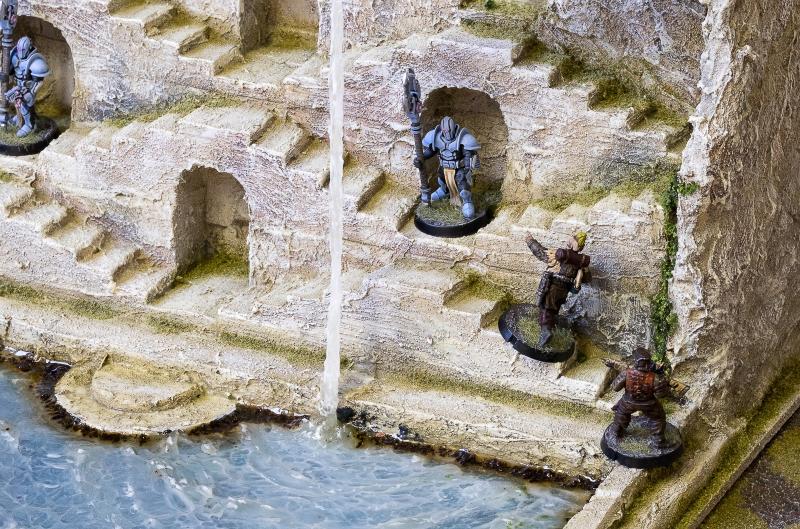
This time was worse, as the Realistic water isn’t as easily chiselled as the E-Z Water. It stays a little soft. After much perseverance I got everything out, but I destroyed some of the paint job and actual foam bits around the basin. I had to redo all that and also build new steps into the water (round steps this time). Now that I knew what not to do, again using Realistic water and Water effects got me the desired result (still room for improvement, but I’ll leave that for another project).
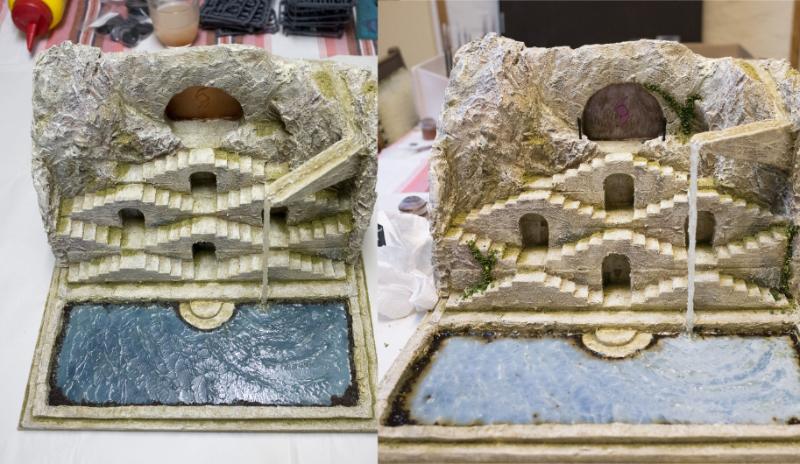
6. The final steps were making temple doors with the Karist logo out of plasticard, and detailing. The Maelstrom's Edge terrain sprue supplied a control panel. The doors were painted brown, then bronze, then drybrushed pewter and silver. The logo got various purple paints, washes and highlights. I used green weathering powder to colour the rock a bit in the crevices and then sprinkled on fine blended green turf for some moss, and the dried contents of some teabags around the edges of the basin to represent fallen leaves and such muck accumulating there. This muck, of, course, didn’t appear wet so I added a final coat of Realistic water (this is the white sheen you see in the last image). The colour from the tea bled a bit more than I’d like, so this is probably another thing I’d find a better procedure for next time. To finish up I glued some coarser, darker green turf to the rock to represent vines, washed that with a brown wash and then highlighted with an olive colour. I then broke a skewer in two and wrapped the ends in narrow masking tape to make two torches and planted these near the entrance, painted brown and metallic.
And that’s basically it! Apart from messing around with the water a lot (this cost me so much time, it ain’t funny), it’s a fairly simple project.
