Search Results for 'terrain'
Entries found for "terrain": 174Showing 11 - 20 of total 174 search results
Maelstrom's Edge Webstore News
Posted on Tuesday Jun 22, 2021 at 06:00pm in General
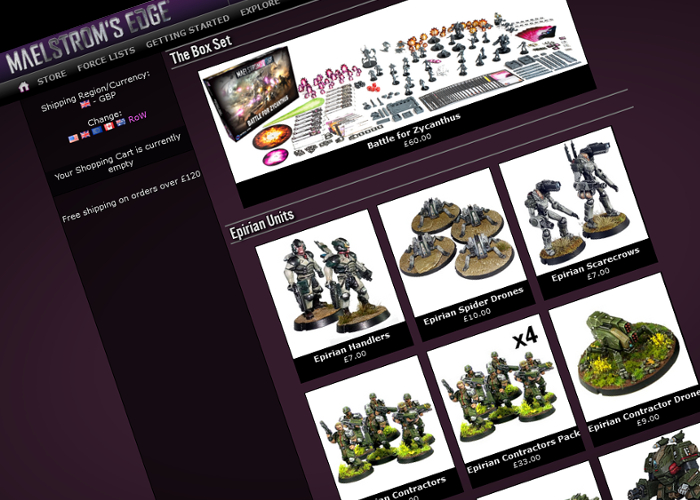
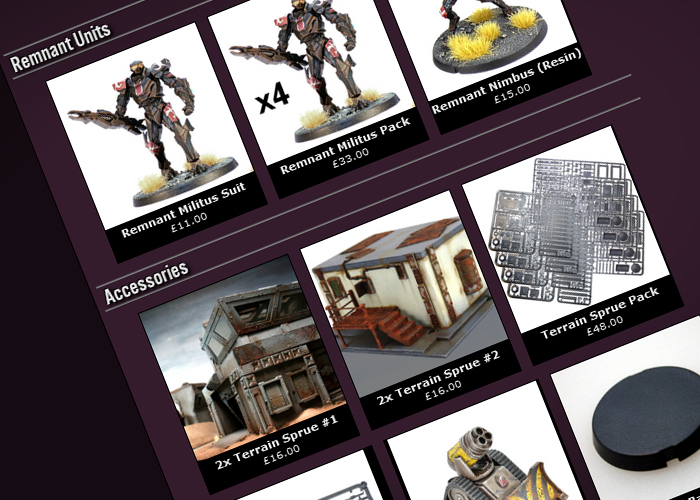
We have also added a similar pack for the Maelstrom's Edge terrain sprues, including 4 sprues each of terrain sprue #1 and #2. This should give you plenty of bits and pieces to bulk up your sci fi terrain collection.
Pop in to the Maelstrom's Edge webstore here now! Free shipping applies to qualifying orders - check your cart for details.
Model Spotlight: Revolutionary Captain!
Posted on Tuesday Jun 15, 2021 at 11:41pm in Tutorials
With the release of the Revolutionary Captain ushering the SARA subfaction into Maelstrom's Edge games, a range of new tactical options opens up for the Broken. I'll be sharing my fledgling SARA force in an upcoming army, but to kick things off I thought it would be fun to have a look at some modeling options for the fantastic Revolutionary Captain model!
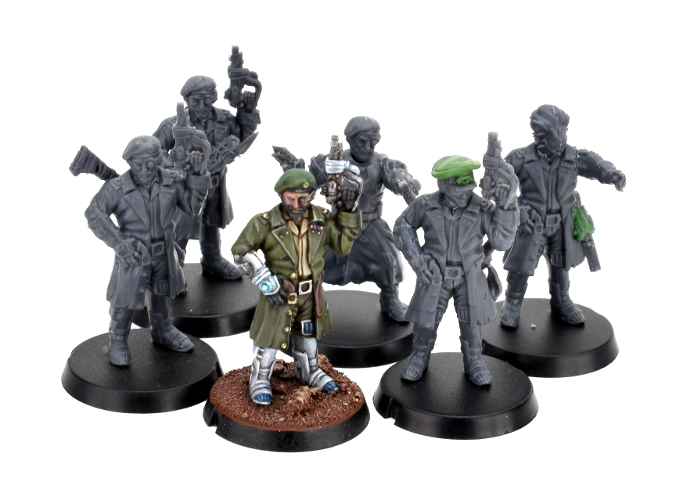
The Revolutionary Captain is a multipart, plastic model. He's not as modular as most of the Maelstrom's Edge model range, as the sculpt was in this case aiming for a specific character look. Being plastic, however, it's still relatively easy to give the model a more customised look if you feel so inclined, and I'll explore some different ideas for that below.
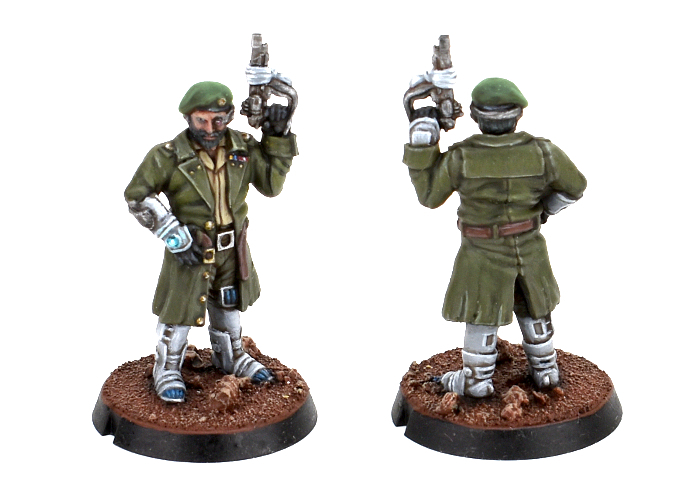
The studio model, painted by Winterdyne.
Built straight off the sprue, the Revolutionary Captain is equipped with his SARA Officer's Pistol. His rules card, which can be found here, gives him the option to take one of a number of different secondary weapons, which can mostly be sourced from the Broken Rabble kit. To equip a Beam Blastgun or Slug Rifle, the easy option is to just stick the weapon on his back. You could model a rifle strap from modeling putty, or just assume the weapon is held in place with a magnetic lock built into the back of his coat.
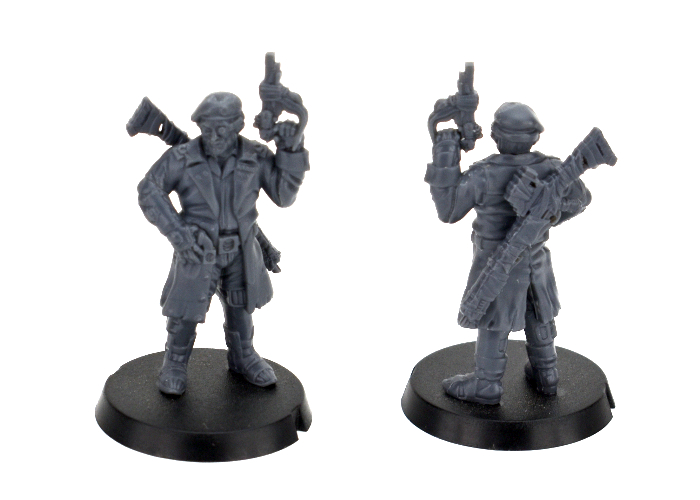
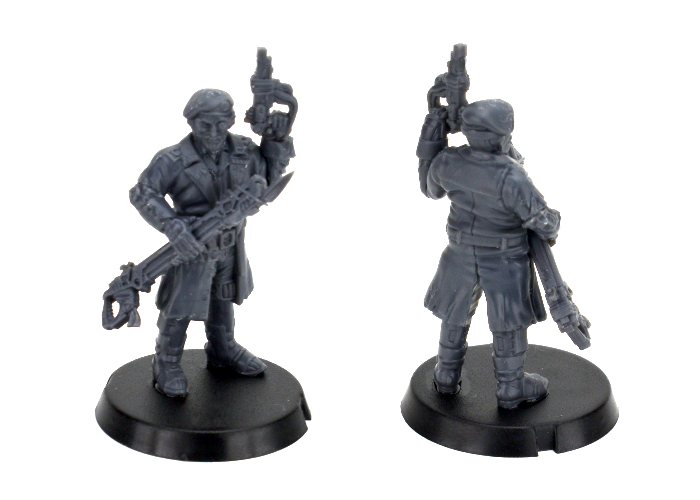
To take a more hands-on approach, for this version I sliced off his right hand, and used a forearm snipped from a Rabble sprue arm to hold the blastgun. As it still sits against his waist, there's no need to try to resculpt the coat belt where the hand was removed, as you can't see it anyway.
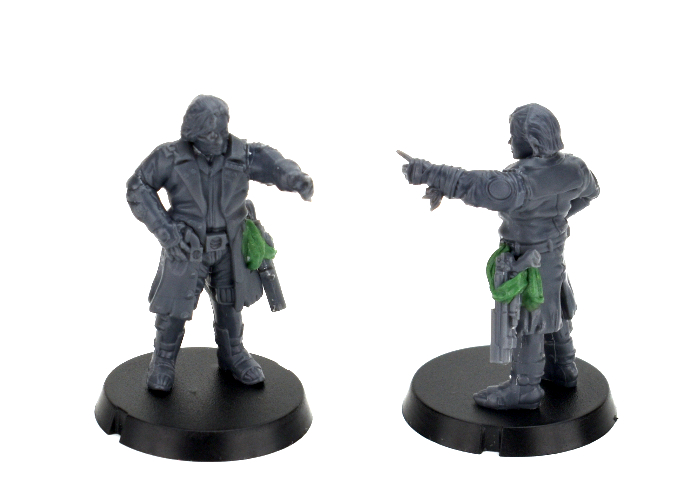
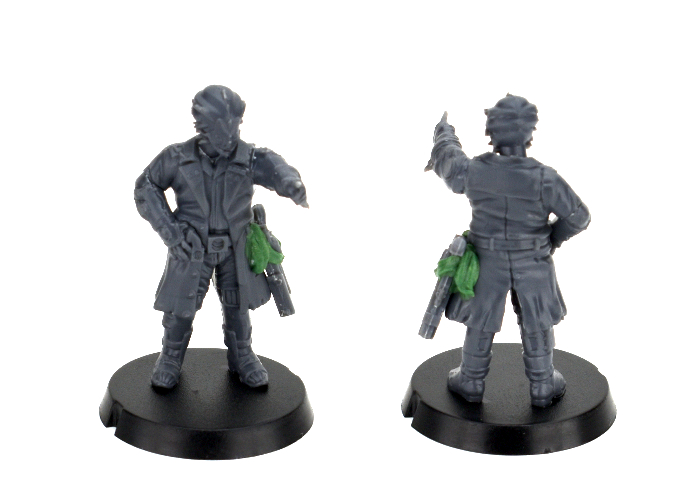
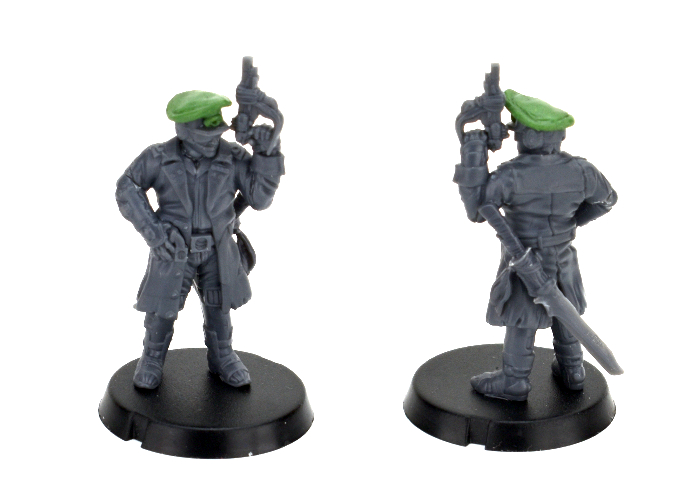
Of course, everyone knows that battlefield commanders spend a good amount of their time pointing at things. If your commander isn't either pointing at something, or standing with one foot on something, people might not even recognise them! By slicing off the Revolutionary Captain's left arm at the coat's shoulder seam, I was able to glue a pointing arm from the Rabble sprue in its place. I also replaced the head with a regular Rabble head by drilling out the neck a little with a 2mm drill bit, and glued a maglock pistol from the Epirian Contractor kit onto her hip with some strapping made from 'Green Stuff' putty to replace the officer's pistol. The putty isn't strictly necessary - you could easily just glue any of the Captain's pistol options to the belt, but the addition of the putty strap does make it look a little nicer on the model.
Of course, there's no reason for only humans to be revolting! With the neck drilled out as above, you can use any of the alien heads from the weapons sprue in the Rabble kit to create a xeno force commander.
While we're replacing heads, some Captains like a nice, sensible cap in place of a beret, so for this one I used an Epirian Contractor head (mostly for the sunglasses!) and built the cap up into an officer's hat using Green Stuff. I also added a melee weapon on his belt using part of a Karist sword from the Faction Expansion Sprue and bits from a couple of weapons on the Rabble sprue. This could easily represent either the Poisoned Blade or Trophy Melee Weapon. For a slightly easier option, you could just use the Karist sword or knife from the Faction Expansion sprue. The resin Forsaken Chieftain also comes with both of these melee options, so if you have that model you could use whichever one you didn't use on her for the Revolutionary Captain.
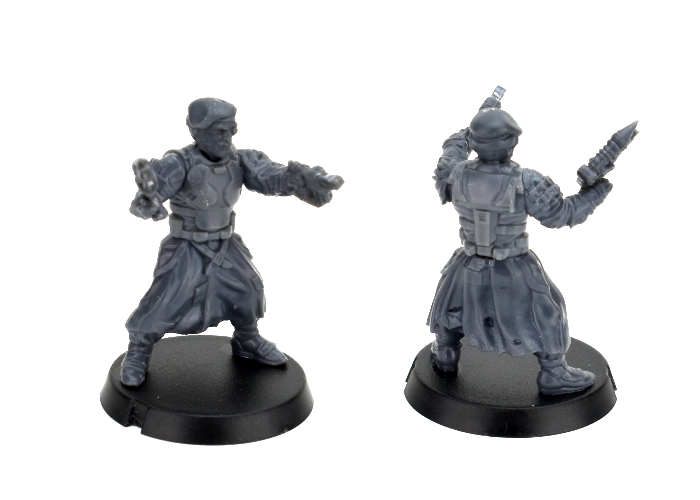
Of course, if you're hacking up your Revolutionary Captain model to replace heads and weapons, this leaves you with some useful parts to build another Captain to lead a second Detachment! For the below model, I used some parts from the Rabble kit (legs, arms and beam pistol), the left hand and head from the Revolutionary Captain, and a torso from the Epirian SecDef kit just to help him to stand out a little more from the Broken horde.
To build your own army of revolutionary doom, you can pick up the Revolutionary Captain along with the rest of the Maelstrom's Edge range from the webstore here.
What are you working on? We would love to see your models and terrain in the Comm Guild Facebook group!
For other building ideas, modeling tutorials, army spotlights and conversion walkthroughs, check out the Hobby section of the Maelstrom's Edge website here.
Tags: broken conversion model modeling sara spotlight tutorials
Terrain Spotlight: Pop-up Lamp Reactor!
Posted on Monday May 17, 2021 at 05:00pm in Tutorials
I came across this idea a little while ago in a Facebook group, and thought it was too good to not give it a go. Turns out, there are a bunch of pop-up LED lanterns currently floating about that are just perfect for turning into fantastic light-up reactors!
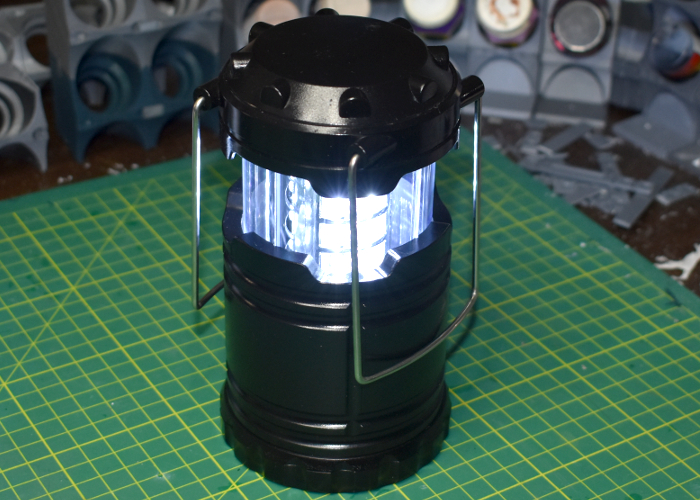
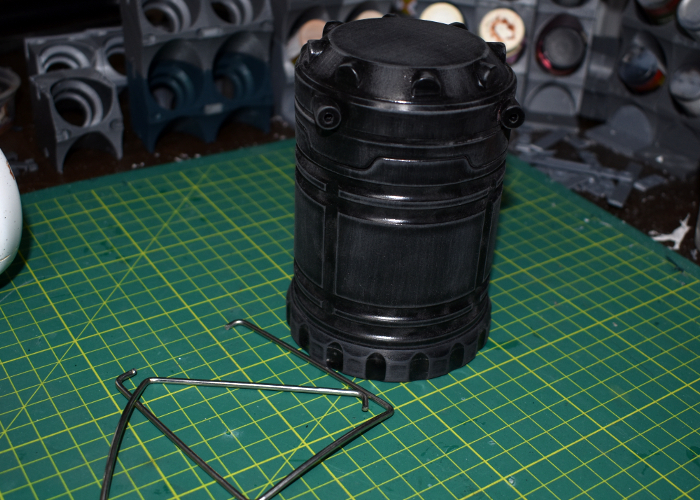
So, the foundation for this build is a pop-up lantern that I found on Amazon. There are variations available all over the place, all with a very similar design. The light comes on automatically when you lift the top of the lantern, and goes off when you push it closed.
These look pretty amazing just painted up as-is, but I couldn't resist tweaking a little. The handles are spring steel wire, pushed into holes in the top of the lamp, so I removed these and put them aside. Then I gave the outside of the lamp a light sand with fine sandpaper. This part isn't essential, but I like to do it with unfamiliar plastic as it can help the glue and paint stick better.
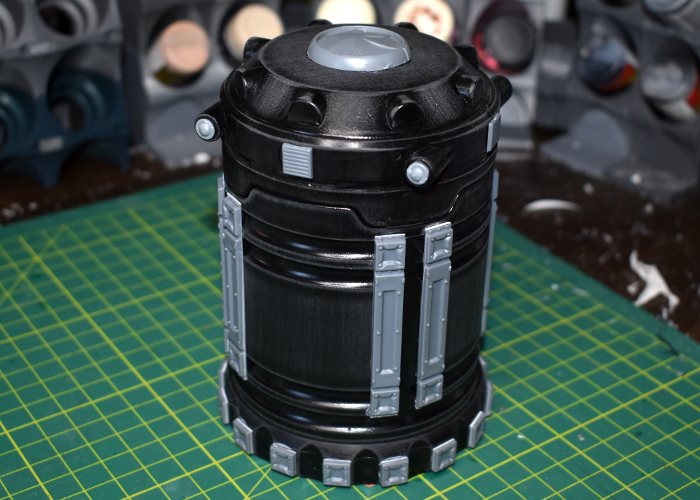
From there, I took the Maelstrom's Edge terrain sprues and added some details. I cut down some support struts from the first terrain sprue to make some bracing for the sides, and added the square end pieces from the struts onto the small protrusions spaced around the base of the lamp. I also cut the tops from some railing posts from the second terrain sprue to cover over the handle holes, and added an iris portal to the top as a heat vent.
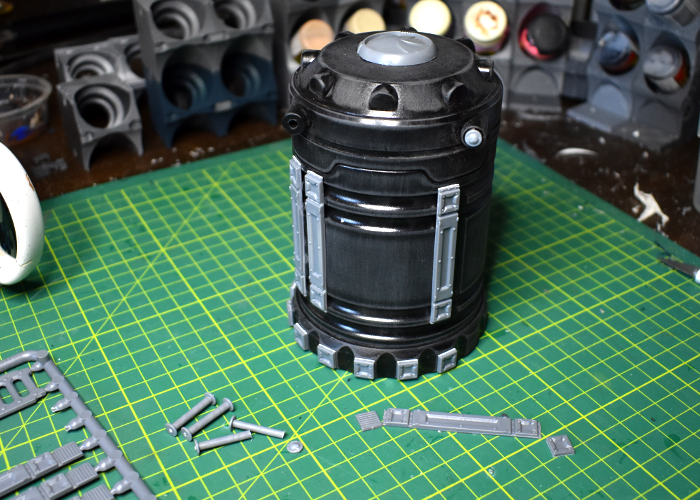
It looked like it needs just one last thing, so I used the vent pieces from the support struts to add a little more detail around the top of the lamp, and then it was ready for paint.
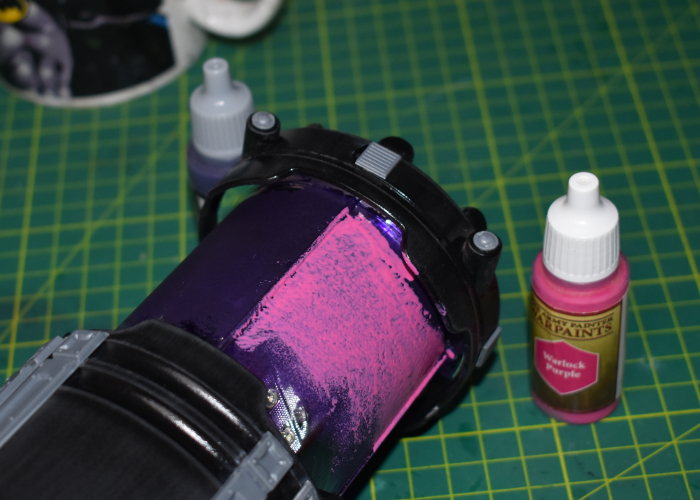
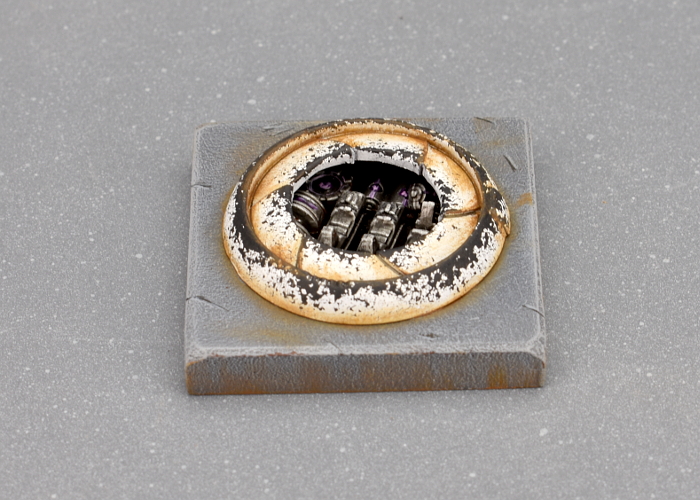
To paint up the reactor, I started with the clear plastic light cover. I used a sponge to apply a rough layer of Scalecolor Elandil Violet (a dark purple) and then when that was dry, a layer of Army Painter Warlock Purple. Normally I would do this on the inside of the clear plastic, to protect the paint, but it proved impossible to disassemble the lamp without breaking parts, so it went on the outside, and then I sealed it with a coat of Testor's Dull Coat.
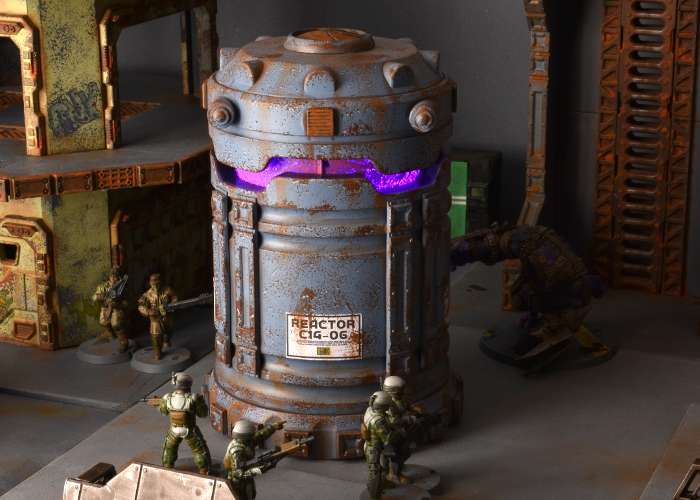
To paint the rest, I started with a basecoat of Army Painter Wolf Grey, drybrushing white onto the upper edges. After gluing on some printed signs worked up in Gimp, I then sponged on some weathering using Army Painter Dirt Spatter, adding scattered white highlights on some of the broken grey. The metal grills and iris were given a coat of Dirt Spatter, a sponge of Vallejo Heavy Charcoal, a light drybrush with P3 Ember Orange, and finally a touch of Army Painter Dry Rust. To finish up, I drybrushed some more Dirt Spatter and Vallejo Beasty Brown into the creases.
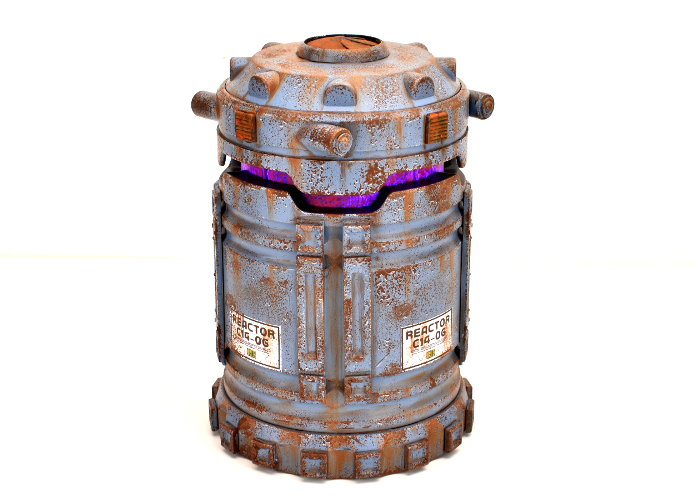
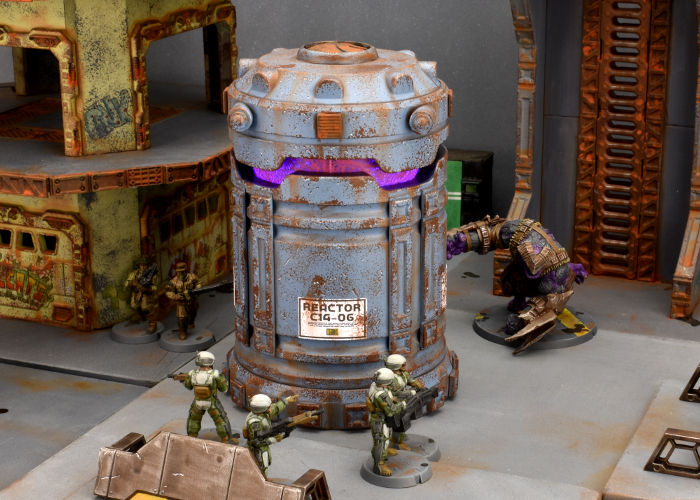
Because the fit of the light tube is rather tight, it does run the risk of rubbing the paint off by lifting or lowering it, so I've settled for turning it on and off by just taking the batteries out, instead. But other than that, I think it turned out quite well. The light is not as bright as it was originally, but it still gives a noticeable glow, even with the lights on!
Put together your own evil reactor of purple-powered doom by picking up the terrain sprues, along with the rest of the Maelstrom's Edge range from the webstore here.
Then pop on over to the Comm Guild Facebook group to show us what you're working on!
For other building ideas, modeling tutorials, army spotlights and conversion walkthroughs, check out the Hobby section of the Maelstrom's Edge website here.
Tags: buildings kitbash modeling scratchbuild terrain terrainsprue
Almost there - so here's a bonus video!
Posted on Tuesday May 04, 2021 at 01:12pm in StackaRack
If you're Iain, you turn them into terrain, of course!
Get in on the Kickstarter before time runs out! Find StackaRack on Kickstarter now: https://www.kickstarter.com/projects/spiralarmstudios/stackarack
Restocks in progress!
Posted on Monday Feb 22, 2021 at 05:00pm in Models
With London going through several lockdowns, keeping stock levels maintained in our warehouse has proven somewhat challenging, and as a result several products over the last few months have either run out or sunk dangerously low. The good news is that with things gradually easing up locally, we're now getting this all caught up again! Everything on the webstore aside from the largest of our base sizes is now back in stock!
Bases will return once we receive a currently in-progress production run, which will also include some new base sizes - part of our set-up for the new models on the release schedule for this year!
Stay tuned for new release models, coming very soon! In the meantime, you can pick up the entire Maelstrom's Edge range (aside from those pesky large bases) from the online store here!
Thanks for reading!
Karist Secret Cache Objective Marker Kitbash
Posted on Monday Jan 18, 2021 at 05:00pm in Tutorials
In games of Maelstrom's Edge, along with whatever objectives apply to the mission being played, each faction has an additional themed objective of their own. For the factions in the Battle for Zycanthus box, there are cardboard counters to use as faction objective markers, but it's always nice to have physical models to represent them instead. I shared a conversion some time ago for a kitbash of the Epirian's Automated Uplink Relay Drone (with a new, all-plastic version of this build coming up in a future article very soon!), and this seemed like a good time to balance things out with a Secret Cache marker for the Karist Enclave!
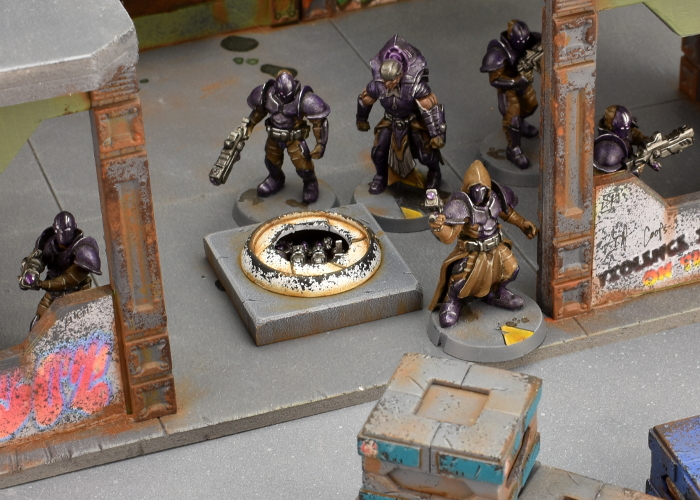
I was looking at the Maelstrom's Edge terrain sprue for a completely different project when it occurred to me that the iris hatch was a nearly perfect size for the Karist objective. The Secret Cache is a small objective, which means a model to represent it goes on a 25mm base, and as it happens, the iris is 25mm in diameter. So as an incredibly quick and easy option, you could just use the iris portal as-is. To keep things accurate, you can measure to the iris, ignoring the surround, or if your opponent agrees you could just measure to the outer edge of the portal, making it a 30mm objective marker instead of 25.
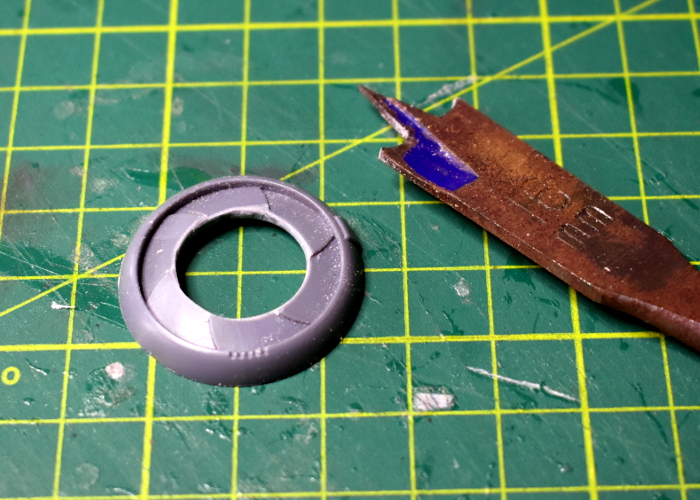
For a slightly more elaborate version, I took a portal and used a 16mm spade bit to drill out the middle of the iris.
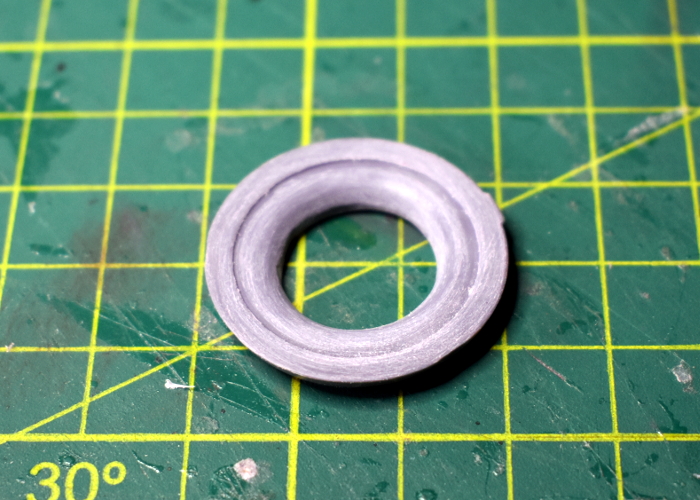
Wrapping a small piece of sandpaper around my index finger, I flipped the portal over and sanded around the underside to make it concave.
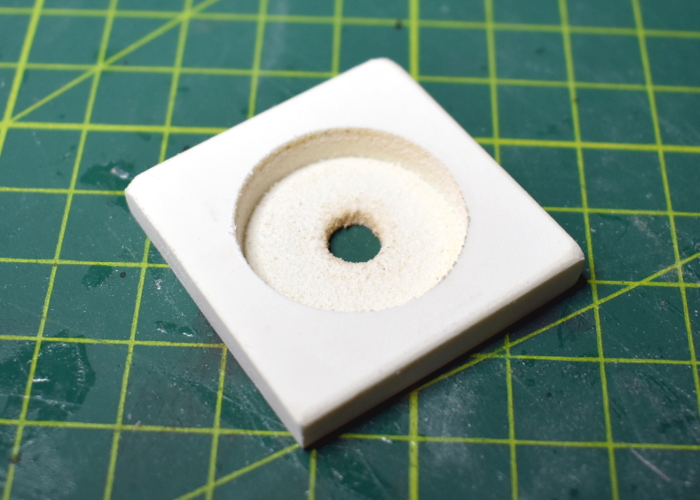
To make the base of the cache piece, I cut a small square of 6mm foamed PVC, and then drilled most of the way through the middle of it with a 25mm spade bit, before giving it a light sand.
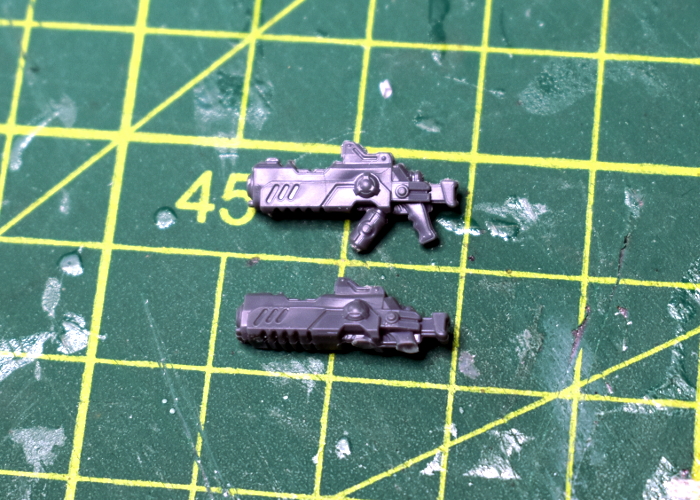
To fill the cache, I took a bunch of assorted Karist weapons from the Faction Expansion Sprue. I trimmed the bottom of the rifles down flat, sanding the bottom so that they fit neatly inside the cache cavity. If you don't have the expansion sprue handy, you could also just use spare weapons from the Karist Trooper sprue, cutting the hands off the bottom - either way, the bottoms of the weapons won't be visible once the cache is sealed up, so either way works just fine.
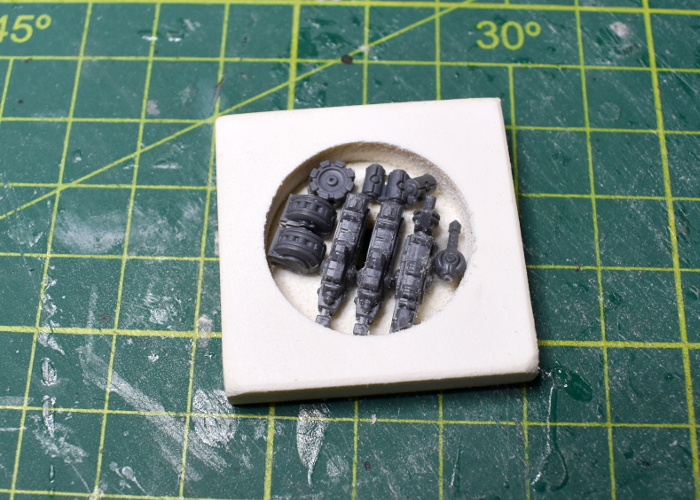
I glued the rifles in place, and then filled the space around them with grenades and a couple of ammo drums cut from grenade launchers. I also glued a small circle of plasticard into the drill bit guide hole in the bottom of the cache.
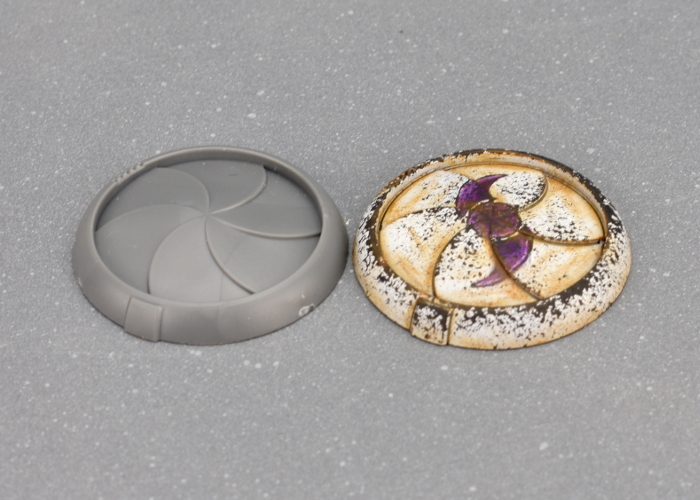
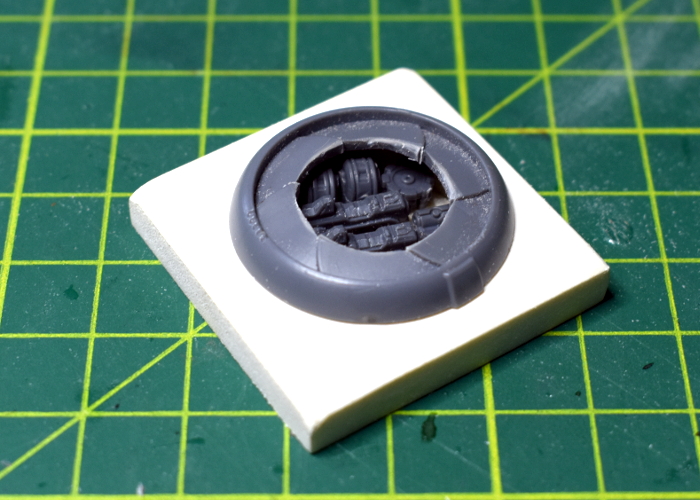
The final step before painted was to check that the portal fit neatly on top. At this point, I also used a hobby knife to cut some vertical lines into the inside of the hole in the iris, to delineate the tips of each petal. I left the portal separate for painting, gluing it in place at the end.
And speaking of painting, with some colour on the portal wound up looking like this:
Put together your own secret cache of pre-prepared doom by picking up the plastic terrain sprue, along with the rest of the Maelstrom's Edge range from the webstore here.
Then pop on over to the Comm Guild Facebook group to show us what you're working on!
For other building ideas, modeling tutorials, army spotlights and conversion walkthroughs, check out the Hobby section of the Maelstrom's Edge website here.
Tags: conversion karist modeling objective terrain terrainsprue tutorial walkthrough
Terrain Spotlight: Aircon Ducting Barracks
Posted on Monday Jan 11, 2021 at 05:00pm in Tutorials
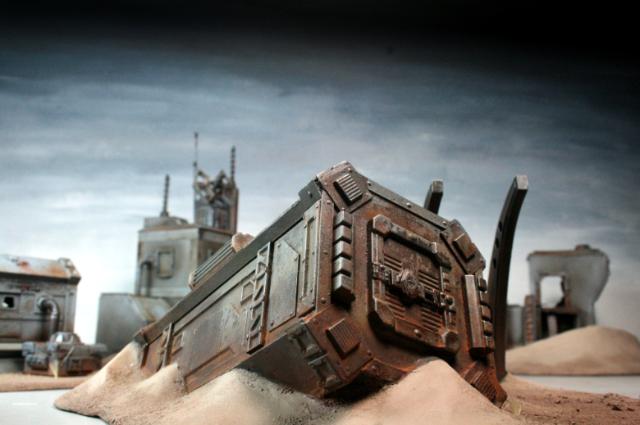
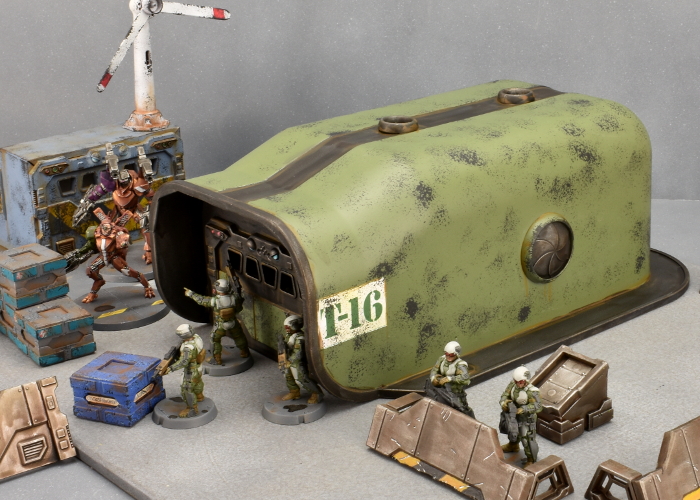
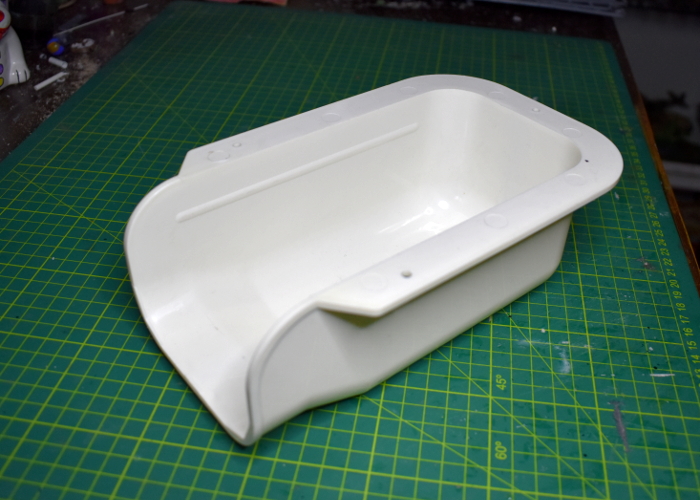
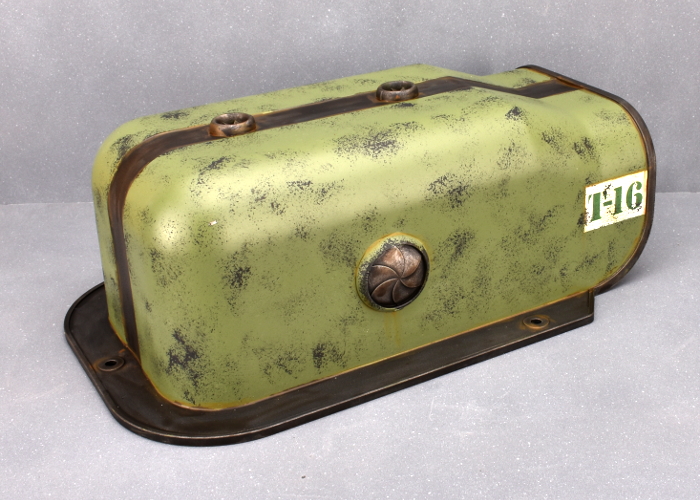
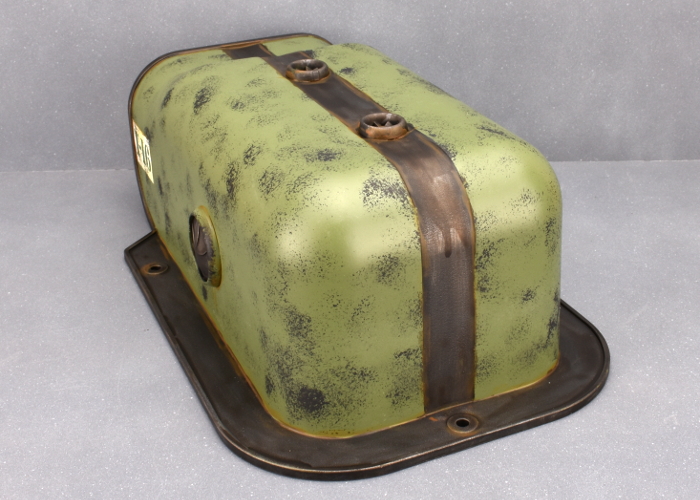
Over the Christmas break, I found myself in a local hardware store picking up some supplies for a few jobs around the house, and as so often happens I got a little distracted by random pieces of plastic. As a result, this week's modeling article is a sci fi barracks building made from components from the Maelstrom's Edge terrain sprues and a piece of plastic air conditioner ducting!
I have plundered the aircon ducting display before, resulting in a battlement-roofed bunker (which you can see here). This time around, I had picked up a longer piece that is usually used to cover over the spot where cables or drain hoses turn to go through a wall.
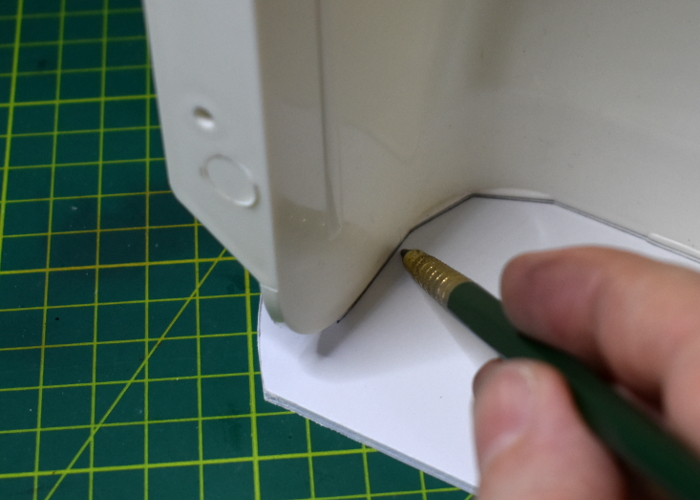
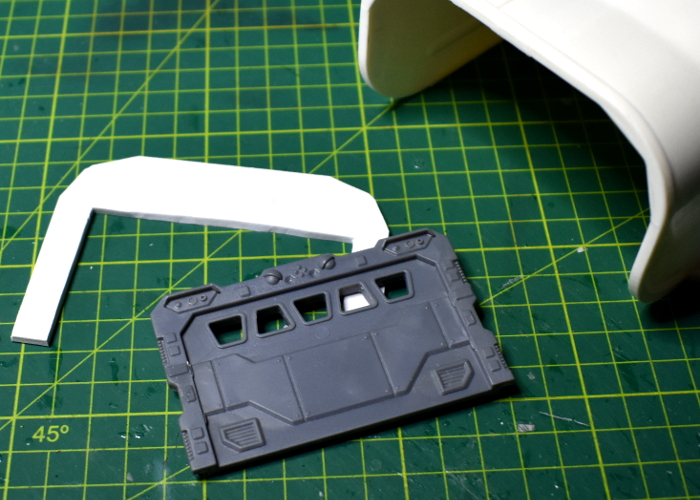
Because the shape was so perfect as is, there was very little that needed doing here, but it did need a front wall. For this, I used a piece of 3mm foamed PVC. Sitting the ducting end-on on top of the PVC, I traced around the inside with a pencil to get an accurate cutting pattern for the wall.
In the middle of the wall piece, I cut a rectangle to fit the garage door from Terrain Sprue #1.
Before gluing everything in place, I gave the ducting a light sand all over. This breaks up the shiny outer surface of the plastic, allowing glue and paint to stick better. With that done, I glued the front wall in place inside the ducting, and added some iris windows and exhaust fans from Terrain Sprue #2 for some extra detail.
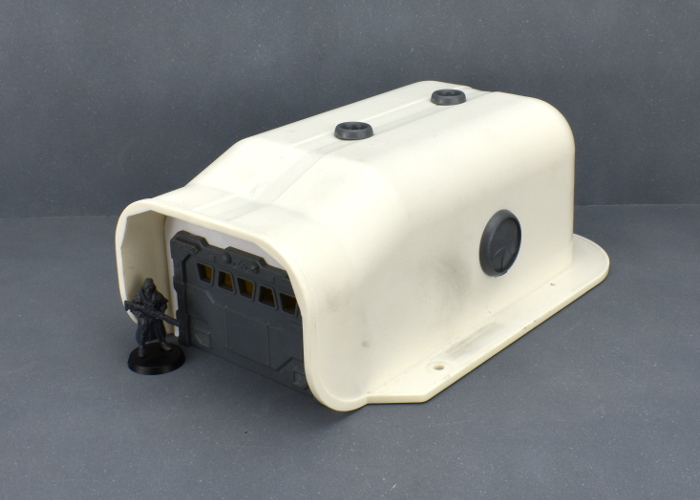
I decided against adding a base, as it didn't really seem necessary. The flange around the ducting makes it nice and stable on the tabletop, and this way it will fit in with whatever style of battlefield I choose to plonk it onto.
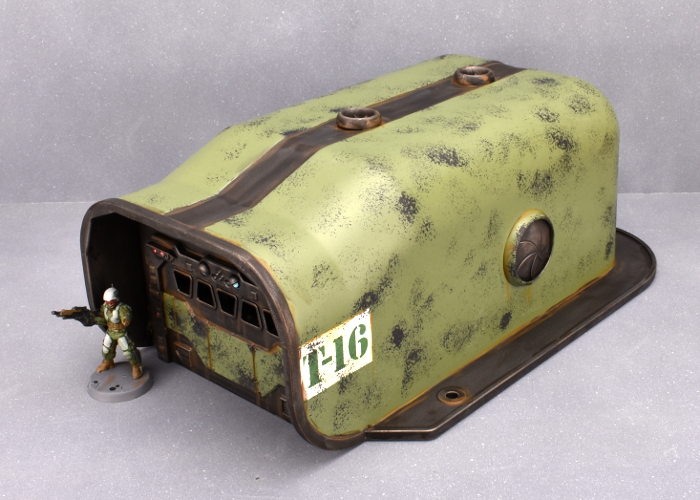
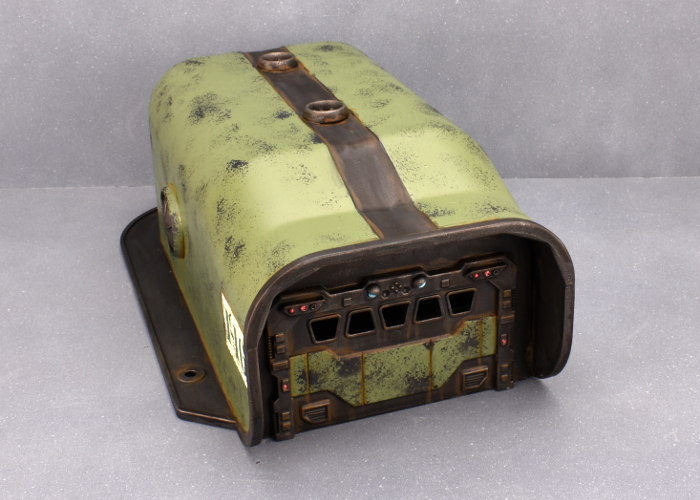
So, with some paint on, the barracks looks like this:
Put together your own sci fi barracks (of doom?) by picking up the plastic terrain sprues, along with the rest of the Maelstrom's Edge range from the webstore here.
Then pop on over to the Comm Guild Facebook group to show us what you're working on!
For other building ideas, modeling tutorials, army spotlights and conversion walkthroughs, check out the Hobby section of the Maelstrom's Edge website here.
Tags: buildings modeling terrain terrainsprue tutorial walkthrough
Maelstrom's Edge 2020 Roundup
Posted on Monday Dec 28, 2020 at 05:00pm in General
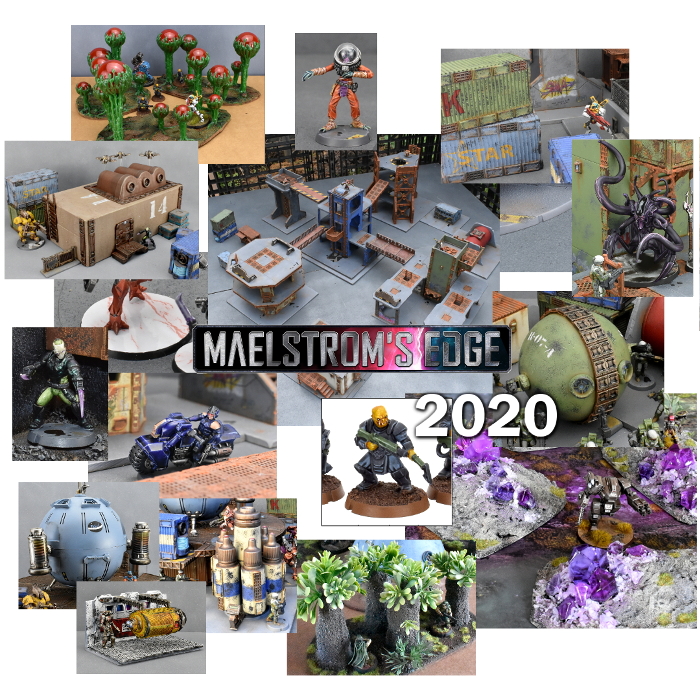
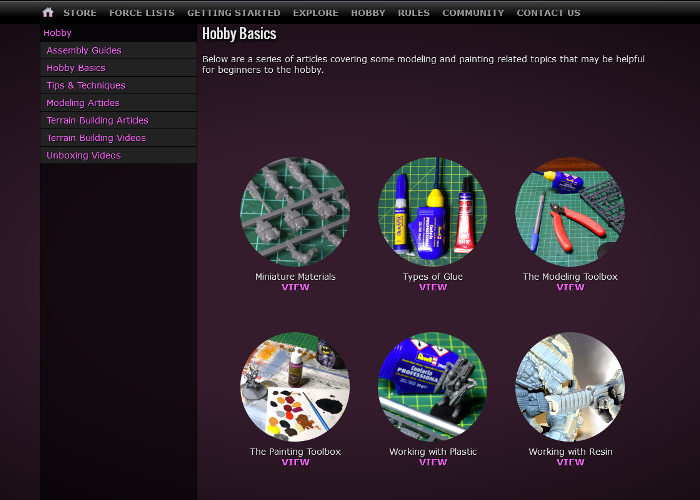
For the past several years, we've been sharing regular modeling articles on the blog, and this year was no exception. These have showcased different conversion ideas, kitbashes with other ranges, terrain projects, painting tips, and a new, ongoing series of hobby basics articles intended to help out beginners to the hobby. You can find all of our various modeling articles compiled in the hobby section of the Maelstrom's Edge website here.
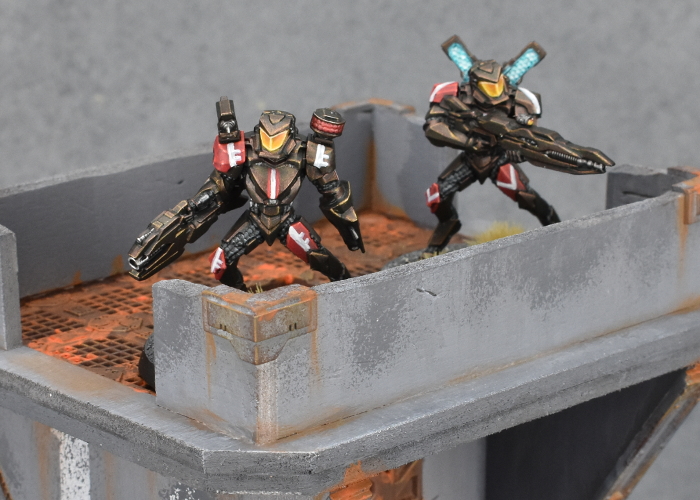
With our usual monthly release schedule disrupted, we did still release a new model for the Artarian Remnant, inthe form of the Nimbus Battlesuit. We have plenty more in the pipeline, however, inluding the next round of reinforcements for each of the existing factions, and the first couple of units are underway for another new faction!
To give people some new modeling and tactical options to explore, Iain shared some homebrew rules for an Imperial Marine faction, introducing power-armoured super soldiers to the Edge, with downloadable rules cards in the Card Downloads section here, and a Summary of their weapons and special rules here.

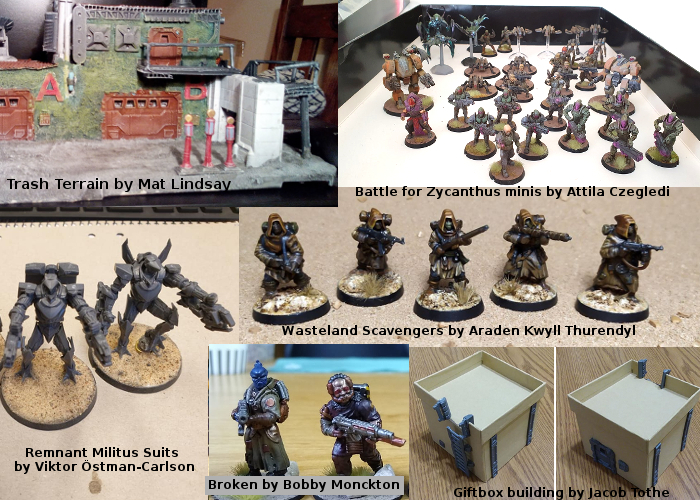
This year has also seen some great models shared by the community on the Comm Guild Facebook Group. The Group is a handy place to share your models, ask for hobby advice, or talk about the Maelstrom's Edge game. We would love to see more, so be sure to pop along and show us what you are working on!
So... what's next? The new year seems like as good a time as any to get things moving again. We have a whole host of new models in the pipeline, including new releases for all of the existing factions, and a brand new faction joining the chaos on the Edge!
Stay tuned!
For the full range of Maelstrom's Edge products, including the Battle for Zycanthus starter set, the plastic and resin model range, the ever-useful Maelstrom's Edge Terrain Sprues, novels and audiobooks, check out the webstore here.
For building ideas, modeling tutorials, army spotlights and conversion walkthroughs, have a look at the Hobby section of the Maelstrom's Edge website here.
Modeling Spotlight: The 2020 Annual Christmas Special!
Posted on Monday Dec 21, 2020 at 05:00pm in Tutorials
Christmas is fast approaching, and around this time each year I like to grab some bits and put together a tree decoration, just for the fun of building something different.
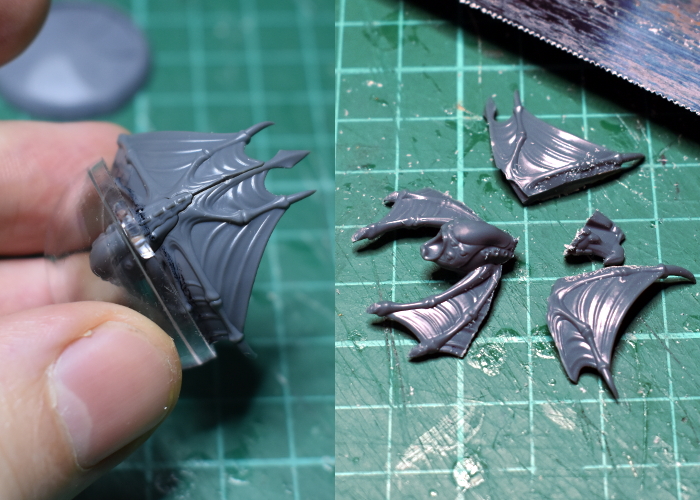
This year's decoration uses half of a plastic DIY bauble, an iris hatch from Terrain Sprue #2, and a Karist Minnow.
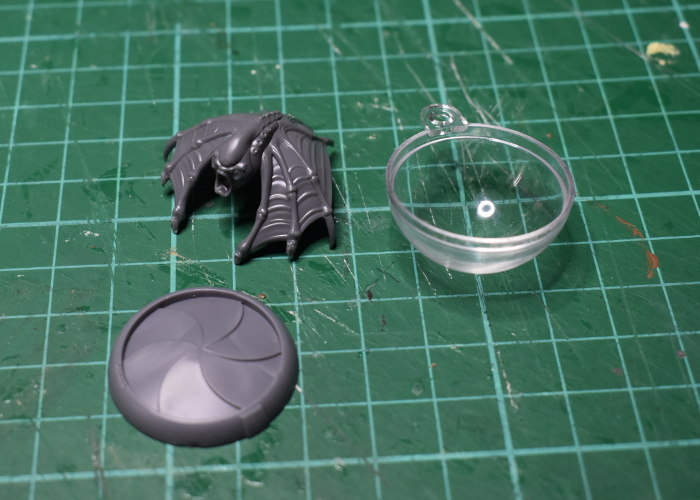
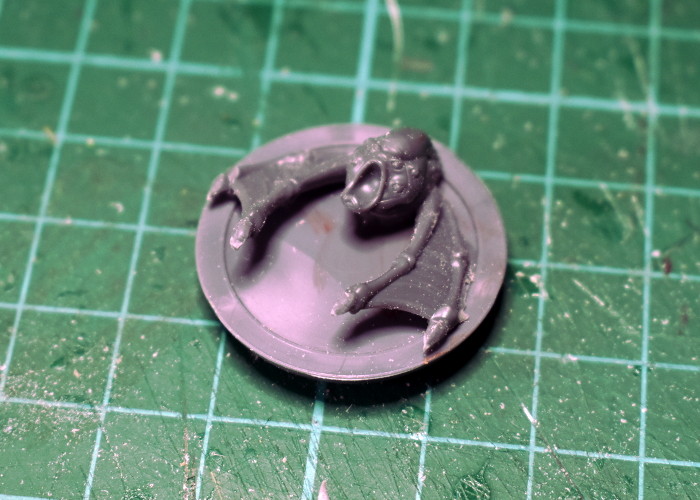
To get the minnow to fit inside the bauble half, I needed to remove a chunk of the body and wings. After trimming down the claws a little, I sat the front of the minnow inside the bauble and used a black paint pen to mark around the outside edge. Then I cut through the minnow along that line using a razor saw.
After a light sand to smooth down the cut, I glued the minnow onto the back of the iris.
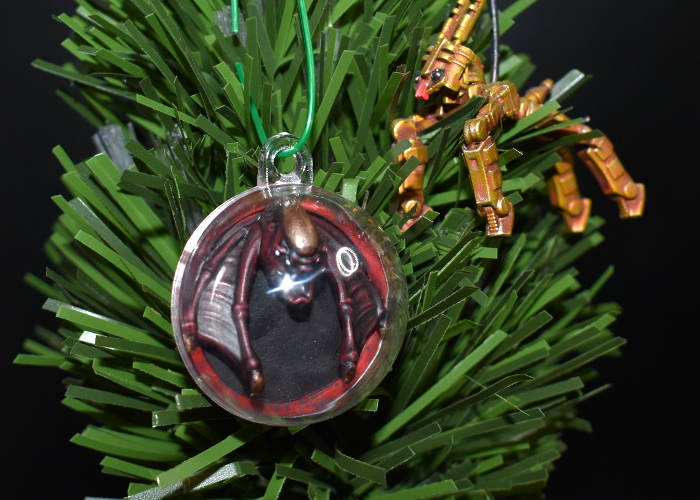
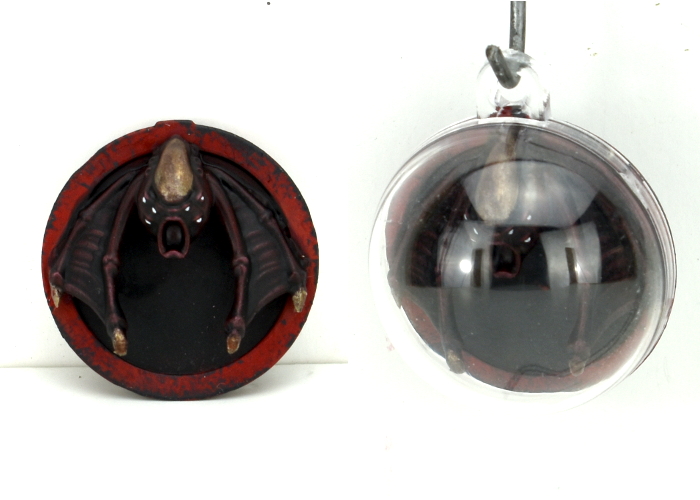
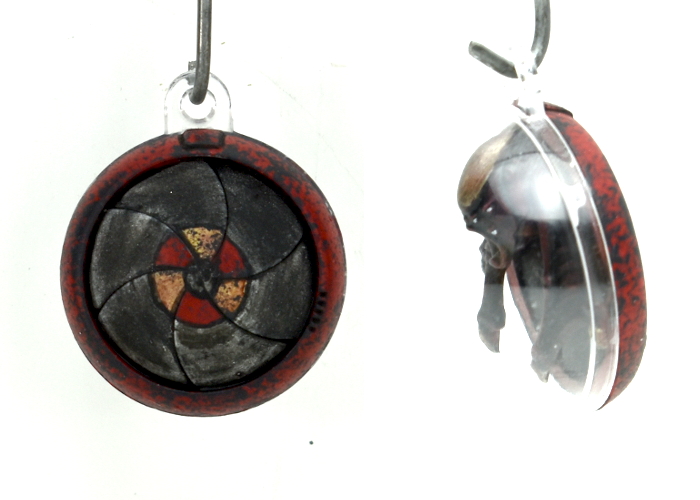
For painting, I went with a suitably Christmassy red and gold, rather than the usual black and purple for the minnow. The whole thing (less the bauble half) was sprayed with Army Painter Dragon Red, and then the Minnow given several generous coats of Dark Tone. The back of the iris piece was painted black, and the isis petals with Plate Mail Metal and washed with Dark Tone. The red parts of the iris were sponge weathered using Vallejo Heavy Charcoal, and the gold painted with Coat D'Arms Bright Gold and washed with Army Painter Mid Brown. Once everything was painted, I glued the bauble half in place, and the decoration was ready to go.
Put together your own Christmas Bauble of Doom by picking up any of our plastic or resin kits from the Maelstrom's Edge webstore here.
Then pop on over to the Comm Guild Facebook group to show us what you're working on!
For other building ideas, modeling tutorials, army spotlights and conversion walkthroughs, check out the Hobby section of the Maelstrom's Edge website here.
You can also find the previous Christmas kitbashes here, here, and here.
Wishing you all a Merry Christmas, and health and happiness for whichever holidays you observe at this time of year!
Tags: christmas conversion modeling
Terrain Spotlight: Converted Renedra Desert Buildings
Posted on Monday Dec 07, 2020 at 05:00pm in Tutorials
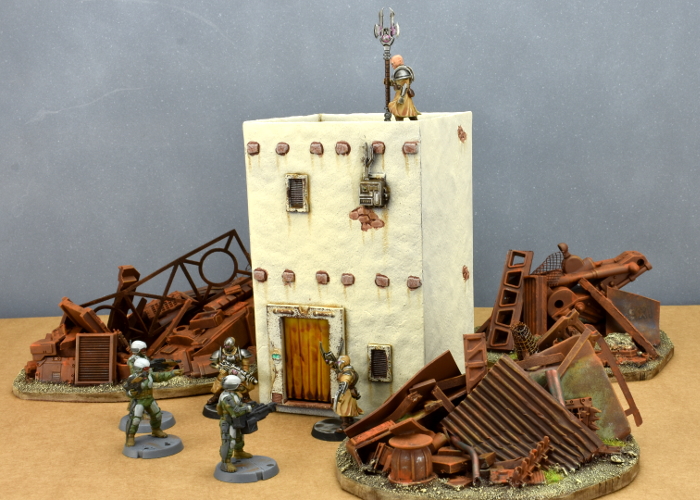
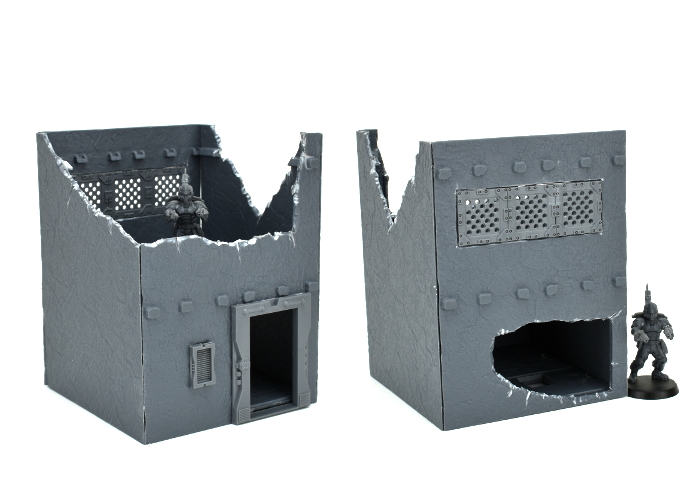
Browsing around online a few weeks back, my eye was caught by a neat looking new release from Renedra. They have a slowly-growing range of plastic historical building kits, and had just added to it with some two-story desert houses. While these are intended for historical settings, I thought it would be fun to see how they prettied up with the addition of some Maelstrom's Edge terrain sprue parts for a rustic sci-fi look. After a short and impatient wait for the post, I came up with this:
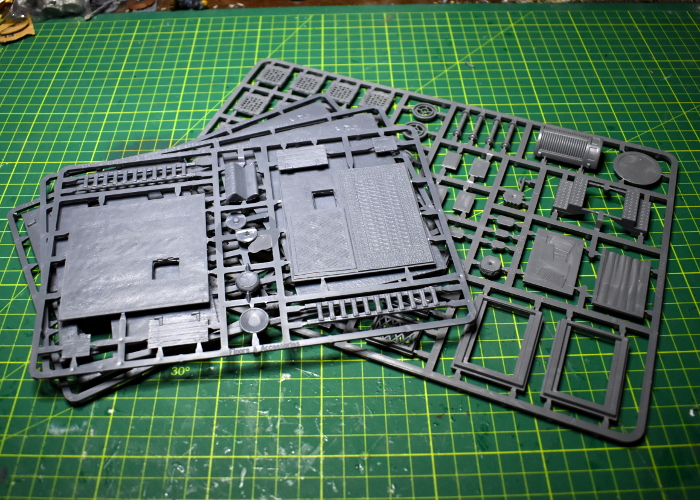
The pack I ordered includes parts for three houses. They all utilise the same floor and roof sprue, so are all the same width, just having different configurations of windows and doors, and differing overall heights. There are three sprues per building - the floor/roof sprue, and two identical wall sprues. To these, I added a Maelstrom's Edge terrain sprue.
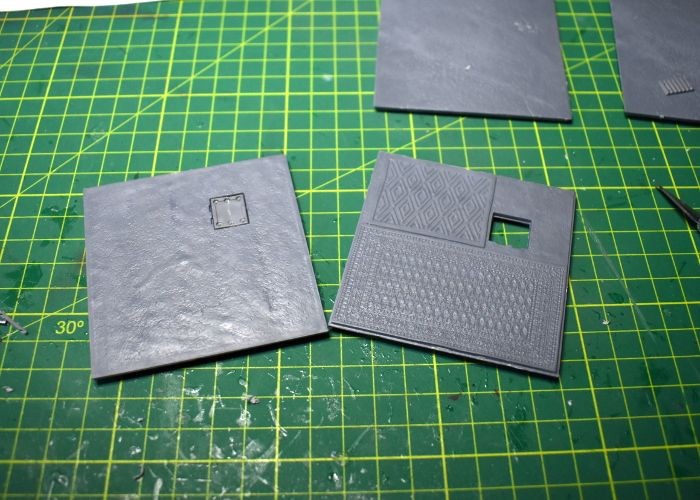
The doorways on the buildings are quite small, and have timber doors that fit into them. That wasn't going to do here, though, so I took a doorway from the Maelstrom's Edge sprue and laid it over the existing doorway, using it as a guide to trace around with my hobby knife. Then, tracing gradually deeper cuts into that guideline, I carefully cut out the hole for the new doorway.
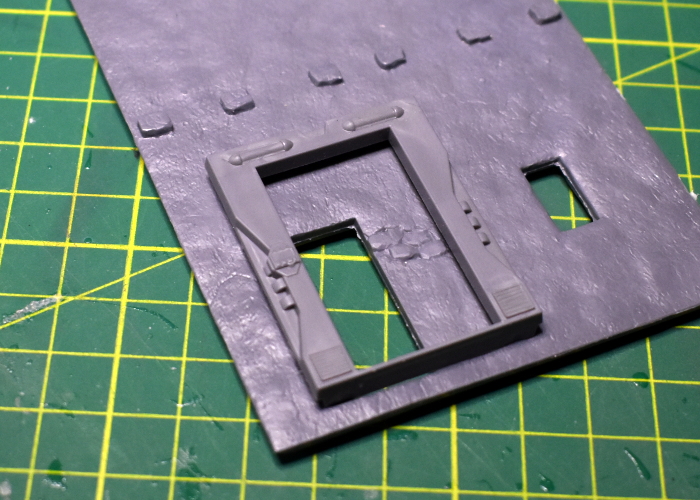
With the new door glued in place, I covered over the window cavities and the second doorway with various bits from the terrain sprue. As with the doorway, I used the curtained window as a guide to trace around in order to enlarge the original window hole.
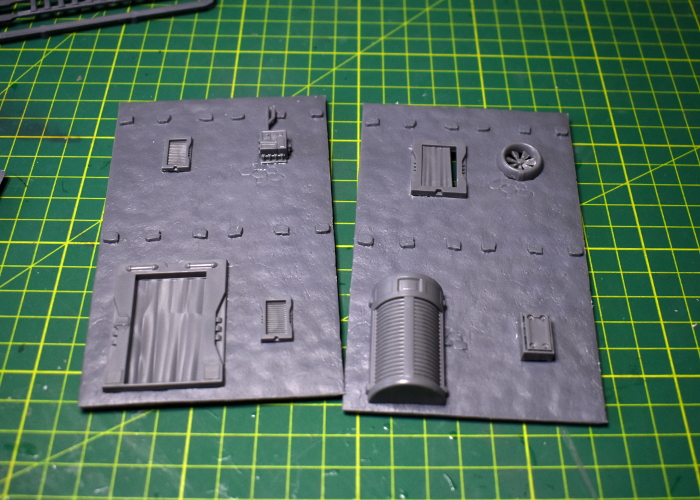
I left the side walls largely as is, adding just a couple of corrugated patches so they weren't identical.
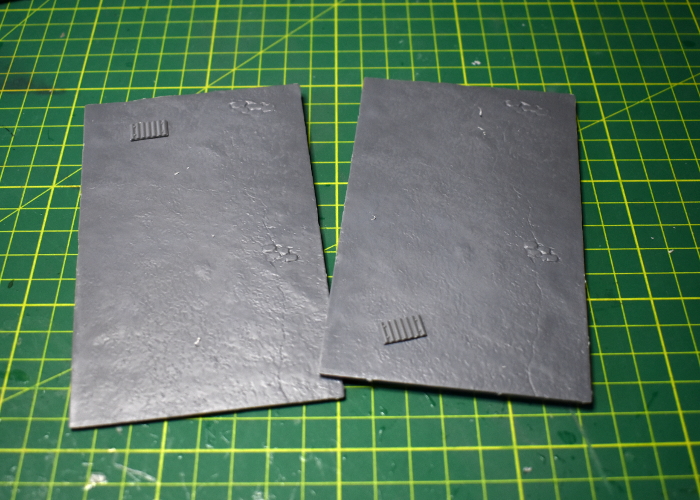
The floor/roof pieces were also left alone, although I replaced the wooden trapdoor in the roof with a metal one made from two strut panels trimmed to fit.
From there, I just had to glue everthing together. I also added a little filling putty along the corner seams and around the edge of the roof to neaten everything up a little.
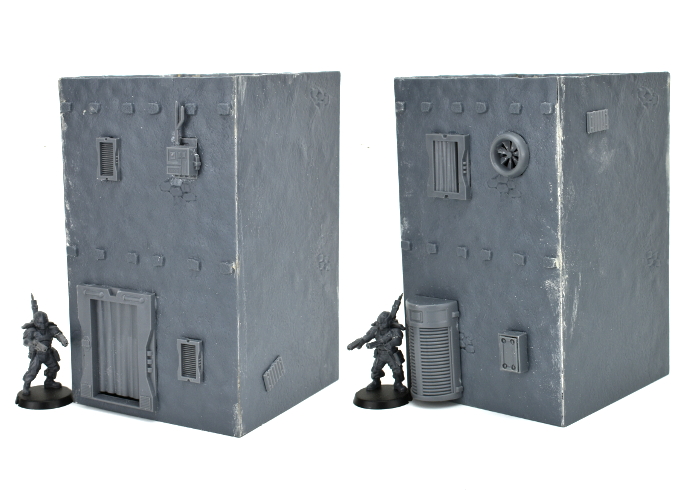
With a quick coat of paint, it wound up looking like this:
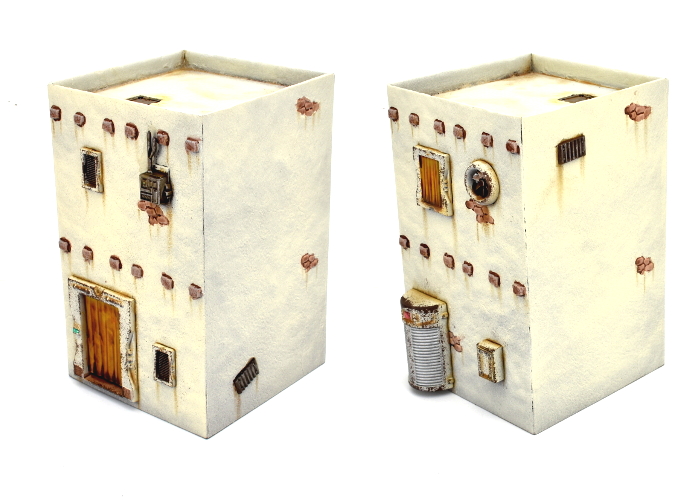
Now to get the other two finished off!
Why not give it a go? You can find the Maelstrom's Edge terrain sprues for your own terrain re-imaginings, along with the rest of the Maelstrom's Edge range from the webstore here.
What are you working on? We would love to see your models and terrain in the Comm Guild Facebook group!
For other building ideas, modeling tutorials, army spotlights and conversion walkthroughs, check out the Hobby section of the Maelstrom's Edge website here.
Tags: buildings conversion modeling spotlight terrain walkthrough