Search Results for 'terrain'
Entries found for "terrain": 216Showing 121 - 130 of total 216 search results
Terrain Spotlight: Mirrored Glass Building
Posted on Monday May 20, 2019 at 05:00pm in Tutorials
Metal and concrete buildings are all well and good, but I thought it might be fun to build something a little shinier for a change. Nothing says 'futuristic city' quite like mirrored-glass-wall buildings, after all!
I've had a play in the past with some clear plastic and mirror-effect sprays, without managing to achieve the effect I was after. Then I came across some lovely, shiny silver card in a discount store, and an idea was hatched.
The basic idea was to make a structure out of 5mm foamcore, using the support struts from the Maelstrom's Edge terrain sprue to form a framework to hold the cardboard. I started by plotting out a rough design using a bunch of struts trimmed to appropriate lengths, so I could get the foamcore dimensions correct.
After marking out the wall dimensions on the formcore, I cut them out using an exacto knife and a steel ruler.
I made a base for the structure from two stacked squares of 2mm foamed PVC. The upper, smaller square created a framework for the foamcore to sit up against, to ensure the building was square and give it some extra strength.
With the outer wall constructed, I added some reinforcement on the inside corners using some offcuts of PVC.
To create the framework for the card to slide into, I glued 5mm plasticard strips onto the walls, tracing the pattern of the support struts.
The strips are narrower than the struts, so with the strut centered on the strip a 1mm overhang was created on each side.
To help avoid the building just being a boring, square box, I left a cutaway to allow for an angled doorway. To fill this in, I cut a square of foamcore to fit across the opening, and cut a rectangle out for a door from the terrain sprue.
With the wall structure complete, I started building up the roof layers with some more PVC, cut to overhang the walls just slightly to close off the tops of the card slots. These weren't glued in place yet - that had to wait until the card was in place.
I joined the three roof levels together using angled pieces of PVC. This served the dual purpose of giving the roof an interesting shape, and also making the whole roof structure into a single piece that could be lifted on and off, which would be easier for painting than separate pieces.
At this point, it was time to paint! I decided to keep it fairly simple, as the main focus on this building was going to be the mirrored walls. I gave the whole exterior a base coat of AK Interactive Rust spray, and then a layer of a satin black spraypaint, leaving the rust in the crevasses for some natural weathering.
When the spray had dried, I cut strips of the silver card to fit into each of the wall slots.
Once all the strips were in place, I glued the roof on top.
For the final detailing, I painted the base with Vallejo Neutral Grey, drybrushed with Vallejo Light Grey. I also gave the black a light drybrush with the light grey, and then added some dirt weathering with Vallejo Beasty Brown. I also added some signage, with Epirian logos made from strips of the silver card and some gold card from the same pack for the 'yellow' lower squares. All ready for the table!
You can pick up the Maelstrom's Edge terrain sprue, along with the rest of the Maelstrom's Edge model range in the webstore here.
As always, feel free to pop along and share your creations, or ask any Maelstrom's Edge- or hobby-related questions on the Comm Guild Facebook page!
For other Maelstrom's Edge modeling articles, including tutorials and walkthroughs of a wide range of different building and miniature projects, check out the Hobby section of the Maelstrom's Edge website here.
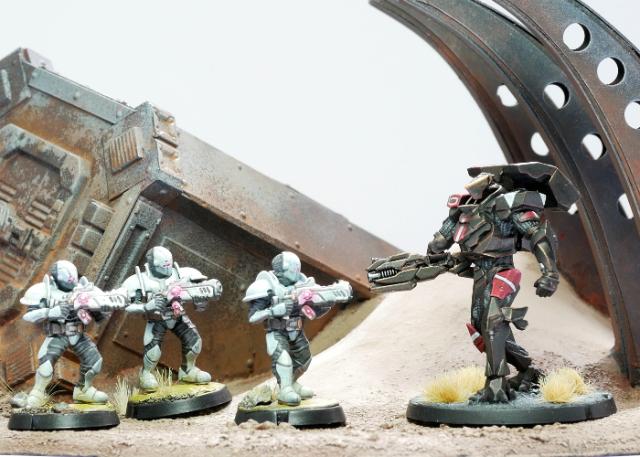
Battle Report - Karists vs Epirians
Posted on Wednesday May 01, 2019 at 05:00pm in Gaming
Tempest Elites with Ravager Vulcan pulse cannons and a Coriolis launcher deployed in rough terrain
No one saw them coming: the warriors in their smooth armoured plating, accompanied by the beautiful yet horrible Angels. They took the abandoned and dilapidated production facility at Argos, killing the few patrolling Contractors without mercy. A hastily assembled Epirian contingent, including a powerful Hunter Warmech and a squad of elite SecDef, arrived on the scene the next day to root out the zealot strike force. These Maelstrom-worshipping crackpots were about to pay dearly for their boldness.
This game sees an Epirian force commanded by Iain take to the field against a Karist incursion led by Jon. The mission is Groundfall, which has the Alpha Strike and Territories objectives. Points are gained by destroying enemy units and by capturing the 5 territory markers scattered across the board. Deployment was determined to be in opposing L-shapes: Karist bottom right, Epirian top left. The Karists have easy access to 3 of the 5 territory markers. Uphill battle for the Epirian side?
The Epirian commander wastes no time: Firefly drones zoom up the compound to take stock of the situation and drive out the Karist vanguard. Immediately they spot the biggest threat in the Karist force: a mature Angel. The huge beast seems all but immune to their laser attacks, however.
The Firefly Drones fly up the field but only manage to suppress the Mature Angel.
Elite Karist Tempests respond immediately, heavily damaging the Hunter Warmech with their Ravager Vulcan Pulse Cannons. The Angel also responds to the Epirian attack, taking cover whilst destroying two of the Firefly Drones with her tentacles.
The Hunter takes heavy damage from the Tempests.
Realising the Karist resistance was much stronger than anticipated and finding himself in a bit of a pickle from the get go, the Journeyman projects his mind into the Hunter's damaged shell and returns fire at the Angel in her position of cover. The shooting is ineffective, and the Angel remains unperturbed.
Pondering...
With his toughest asset is compromised, the handler quickly switches to one of his Scarecrow Snipers. The lone bot looses a precision round from its Railrifle into the Angel, hitting the mark this time and visibly hurting the creature.
The Angel finally takes damage from the Scarecrow. Their low-shot sniper weapons can literally be hit or miss, but they have huge damage potential.
The Karist Kaddar Nova, witnessing the opening rounds of the engagement, chooses to maintain the momentum and attempt to finish this quickly, dashing out from his position on his own and taking down another Firefly. His troopers nearby follow suit and down another of the now completely hammered squad of Fireflies. His Angel, meanwhile, takes another Railrifle round from a second sniper robot in the distance, and is now badly hurt. The Karist troops need to act fast, as more bots are fast approaching their position and laying down fire on the juvenile angels on the other flank.
The Karist commander exposes himself, but downs a Firefly, and the nearby troopers destroyed another one. In the Groundfall mission, getting the first kill of the turn is worth a lot of points.
The last Firefly crashes and burns after more Karist troopers lay down a hail of suppressive fire, giving the Enclave the first kill.
Troopers finish off the fireflies, giving the Karists the crucial first kill.
The Foundation commander, witnessing how the Karists are holding a strong firm and his own forces struggling to get in a dominating position, carefully moves up his remaining force through the compound. The contractors launch a few grenade shells into the Karist line to suppress their fire and buy their robotic comrades some time.
Contractors returning fire at the Karist troopers.
Meanwhile, an enigmatic Shadow Walker rifts into hiding near the Epirian flank, with an eye to neutralising the sniper threat. The Angel Keeper assigned to the contingent of Angels in the force has his Juvenile beasts rain down cybel energy on the advancing Drone force, keeping all eyes off the sinister agent stalking up the flank.
The Spider Drones equipped with flakk guns are too far from the action to contribute, and the Angel Hellblasters aim to keep it that way by suppressing them.
The SecDef sergeant, watching the assault unfold on his transport's screen, sighs deeply as his opinion of robotic forces is once again confirmed. Deciding he needs to show how it's done and he'd better do it now, he signalls for his squad to drop right into the Karist position. Landing with guns blazing, he is pleased to see the nearby Karist Troopers turn their heads in surprise and duck down.
SecDef troopers drop behind enemy lines.
Out of nowhere, though, appears a flock of dark fluttering creatures: Angel minnows on the hunt. They frenziedly fire their cybel pulses at the SecDef landing zone. Even though the SecDef had taken up a safe position in cover, they lose one soldier to this alien assault from above.
The Minnows move towards and target the SecDef squad that just dropped behind both trooper squads.
The larger Angel, severely weakened by the merciless sniper fire, seems to lose form and suddenly disappears from the fight just as the Hunter's guns ready for another salvo at this most dangerous foe. Moments later the Hunter explodes in a cloud of shrapnel as the Tempest Elites continue their barrage.
End of the first turn: Jon elects to remove his dangerously wounded Mature Angel in order to deny the Epirians an easy first kill in the coming turn. The Karists hold 3 out of 5 territory objectives, whilst the Epirians have the other two. Iain, having left his damaged hunter on the table, immediately regrets this as the Tempests destroy it in the first action of the second turn and score those valuable first kill points again.
The SecDef realise something needs to happen now. Ignoring the smaller Angels spewing death onto their position, they take aim and down two Karist Troopers, hoping to break the Karist line from the rear.
The SecDef are in position to damage various Karist squads, taking advantage of their assault from the rear, but they are in turn dangerously surrounded.
The Journeyman Handler, taking the SecDef's cue, coordinates the fire of his Scarecrow Sniper with the SecDef squad, catching the Karist Troopers in a crossfire that wipes them out. The tables seem to be turning.
The Scarecrow again shows its potential as it wipes out the remains of a Karist squad.
Ignoring the little Angels would prove a costly mistake, however, as they now came down on the SecDef position. Despite killing several of the flying beasts, the SecDef lose two more soldiers to the pulsing cybel energy, leaving the Sergeant alone to escape the Angel threat and run for cover.
The SecDef sergeant flees from the angry Minnows. Aerial insertion is a powerful ability, but dropping in the middle of the enemy lines comes with certain risks...
The larger Angel Hellblaster also takes a heavy toll as another cybel salvo immolates all of the approaching Spider Drones. The Kaddar Nova, sensing victory and eager to lead by example, dashes forward, emerging from the Karist lines to personally end this heretic assault.
The powerful blasts from the juvenile Angels reduce the Spider Drone squad to just their handler.
Seeing the Karist leader run out and resolved to capitalize on the hole punched in the Karist line by the SecDef's assault, the Journeyman Handler links again to one of the Scarecrow Snipers, dangerously overloading its circuits, in a desperate attempt to deal the deciding blow to the enemy. A precision shot hits the Kaddar Nova square in the chest, ending the priest's heroic ambitions immediately. Surely this would break those crazy zealots! Meanwhile, the contractors move up to secure their end of the compound and open up on the Angel Hellblasters, with little effect.
Hellblasters with their Angel Keeper in their position of cover, guarding one of the objectives.
The Shadow Walker rifts up the field once more, cursing the Kaddar Nova's poor timing, but intending to take down the Sniper bots that were wreaking such havoc on his compatriots. His pistol shots glance off the nearest bot, however, as its position is well protected.
Registering this new close-ranged treat, the nearby bots all respond: the flakk guns on the Relay drone opening up and the Sniper bot quickly taking a shot at the advancing enemy agent. The nimble Shadow Walker, however, manages to dodge unscathed through the hail of incoming fire.
Suddenly the terrifying shape of the Mature Angel reappears at the edge of the compound, immediately bearing down on the lone SecDef sergeant. The veteran soldier stands no chance against this alien monster and quickly falls to its slashing attack.
By voluntarily removing the badly damaged Angel earlier in the game, Jon ensured he would have a strong reinforcement to bring on later. She can now come back to finish off another unit, grabbing the Karists enough points to finish the game.
Realising his situation, the Journeyman Handler orders his force to retreat into cover and await further reinforcements. The Karist force remains in control of the compound, for now.
Epilogue: Iain's decision to keep his Spider drones back to hold objectives rather than sending them after Karist targets, combined with essentially sacrificing his Firefly unit by sending them out into the open unsupported allowed Jon to make the most of the mission with his more aggressive Karist units. While the Scarecrows did their best to even up the playing field, the rapid casualties inflicted on the Epirian force allowed Jon to very quickly rack up enough VPs for a turn 2 victory.
Tags: battlereport epirian karist
Conversion Spotlight: Karist Anti-Grav Buggy!
Posted on Monday Apr 29, 2019 at 05:00pm in Tutorials
A short while back, I showed off an Epirian Contractor truck that I put together using a Games Workshop Ork truck with all of the Ork bits removed. It seemed only fair to give the Karists some similar vehicular love, and so I found myself once more purloining the parking lots of the 41st Millenium, this time making off with an Achilles Ridgerunner. The moment I saw this buggy, I thought it would make a fantastic anti-grav vehicle, which was right up the Karist Enclave's alley. And so I set to for some serious wheel-removal action!
There was surprisingly little conversion actually required to make this work - I was intending for a fairly high-tech take on anti-grav, with all of the 'workings' would be internal. This helps to preserve the lines of the vehicle, and eliminates the need to build parts specifically to represent the techy stuff. So for the most part, the buggy was just built as standard. I chose the radar dish that comes in the kit instead of the open cupola, because I liked the look of it.
With the wheels being left off, I also needed to remove the axles, so these parts were all either left off, or trimmed away as necessary.
To conceal the gaps where the front axles should have been, I added a piece of thin plasticard in the wheel arch on either side, and then glued the shock absorbers running down to connect the chassis to the front armour plate. This was just intended to create a little detail, rather than having just the flat plasticard.
On the rear, I covered over where the differential piece should have gone with a couple of vents cut from the support struts on the Maelstrom's Edge terrain sprue.
Obviously, an anti-grav vehicle needs to hover, but I didn't want it sitting too high and also wanted a nice, sturdy joint for the flight stem. To this end, I drilled a hole in the bottom of the buggy, allowing the flight stem to fit snugly through, and glued a short length of plastic tube to the inside of the buggy's top section, for the flight stem peg to slot into.
To attach the stem to the base, I just drilled an appropriately-sized hole a little aft of centre, and called the job a good 'un. The stem would be glued in once everything was painted.
The original weapons needed to be replaced with Karist versions. I left off the smaller weapons that attach either side of the cab, but for the main gun, I cut the attachment joint out of the missile launcher's lower plate and glued it to a pair of Cybel Lances taken from the Karist Heavy Trooper set, with the firer's arms removed.
For the gunner himself, I used the kneeling Heavy Trooper, with a right arm purloined from the plastic Karist Trooper sprue and a hand from the Faction Expansion sprue.
From there, it was just a matter of gluing the rest of the buggy shell together. With the assymetrical cabin, it wound up looking a bit lopsided without the wheels, so I added a small pair of stabiliser wings on the rear, cut from 1.5mm plasticard.
With some paint on, the buggy was ready to fly!
If you're feeling the need for speed, feel free to pop along and share your vehicular creations, or ask any Maelstrom's Edge- or hobby-related questions on the Comm Guild Facebook page!
You can find the Karist range, along with the rest of the Maelstrom's Edge model range in the webstore here.
For other Maelstrom's Edge modeling articles, including tutorials and walkthroughs of a wide range of different building and miniature projects, check out the Hobby section of the Maelstrom's Edge website here.
Download the Maelstrom's Edge Rulebook for free!
Posted on Wednesday Apr 24, 2019 at 05:00pm in Gaming
 With work underway for a revised 'Version 2' of the Maelstrom's Edge rules, the current rulebook is now being offered for free download in PDF form! You can download it from here.
The Maelstrom's Edge Digital Rulebook is a 144 page PDF document containing the background lore of the Maelstrom's Edge universe and the rules for the game, with scores of photographs and diagrams. The document has a complete bookmark structure and clickable links in both the index and in-text references, so you can quickly navigate your way through the rules. The contents of the digital rulebook are identical to those in the printed rulebook found in the box set.
The Maelstrom's Edge Rulebook features the following content:
- The Universe of Maelstrom's Edge
- The Factions
- Game Overview
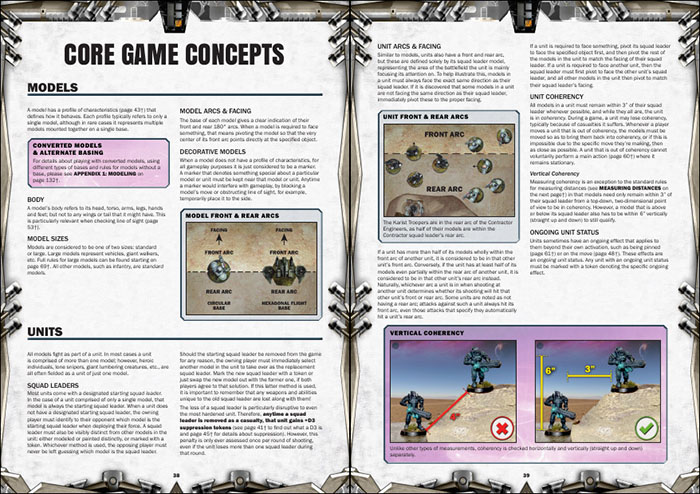
- Core Game Concepts
- Characteristics, Versus Rolls & Suppression
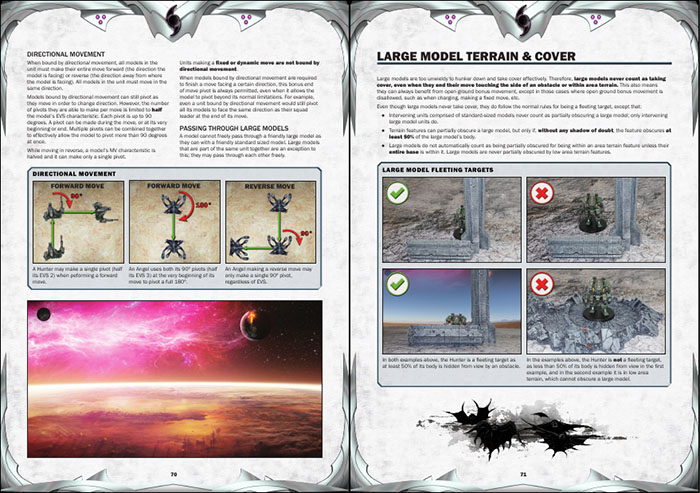
- Movement & Terrain
- Shooting & Cover
- Unit Activation & Actions
- Charge Action
- Model Type
- Large Models
- Weapon & Unit Abilities
- Buildings
- Playing a Game
- Mission Objectives
- Selecting Your Force
- Narrative Missions
- Forces of the Epirian Foundation
- Forces of the Karist Enclave
- Appendices
- Rules Finder
Download it here.
Terrain Spotlight: 'Illuminated' Viewscreen
Posted on Tuesday Apr 23, 2019 at 05:31am in Tutorials
I'm home from Salute (which was a blast!) and a regrettably very short stay in London, and now getting caught up on everything. As a result, this week's modeling article is a short and sweet one, which also creates a little more progress on my landing pad display board. One of the features I wanted to add on was a viewscreen displaying a 'Welcome' message to new arrivals to the pad. I wanted this to give the illusion of being an illuminated screen without actually having to resort to playing around with LEDs and the like, and below is a quick rundown on how I set this up.
The frame for the viewscreen was made from a garage door from the Maelstrom's Edge terrain sprue. I cut the door out with a razor saw, and then sliced up the doorframe and rearranged it into a smaller rectangle. (You could also just use a rectangle of thick plasticard with the middle cut out!) This was then painted using my normal weathered metal technique.
I wanted the back of the screen to be slightly smaller than the frame, so that the viewscreen would look like it was sitting out slightly from the wall rather than having the sides sit flush against it. So I traced around the frame onto a piece of thin plasticard, and then it cut out about 1.5mm inside the line to make it smaller than the tracing. I then glued this piece to the back of the frame, and painted around the outside edge with some Vallejo Heavy Charcoal so there wouldn't be any white peeking out from behind once it was mounted on the wall.
For the image on the screen, I grabbed an appropriate picture and added some text in Gimp, before printing it out at an appropriate size on glossy photo paper.
I sprayed the picture with a light coat of gloss sealer to protect it, and then glued it in place inside the frame.
To give the illusion of a glow, I painted around the inside edge of the frame with silver, and then added a couple of coats of brush-on gloss varnish. The gloss creates a dull reflection around the edges of the frame - it's a subtle effect, but enough to convey the idea of a low-powered screen that doesn't throw out a lot of excess light.
An alternative to this effect would have been to paint around the inner edges of the frame with colours matching the adjoining parts of the picture. This can create a much brighter 'glow' than the method I've used above, but can also look off if you look at it from the wrong angle.
With that done, it's time to get cracking on the rest of the display board, since I'm getting rather impatient to see it finished!
Build your own viewscreen by picking up the Maelstrom's Edge terrain sprue, along with the rest of the Maelstrom's Edge model range from the webstore here.
As always, feel free to pop along and share your work, or ask any Maelstrom's Edge- or hobby-related questions on the Comm Guild Facebook page!
For other Maelstrom's Edge modeling articles, including tutorials and walkthroughs of a wide range of different building and miniature projects, check out the Hobby section of the Maelstrom's Edge website here.
Tags: modeling painting spotlight terrain terrainsprue tutorial walkthrough
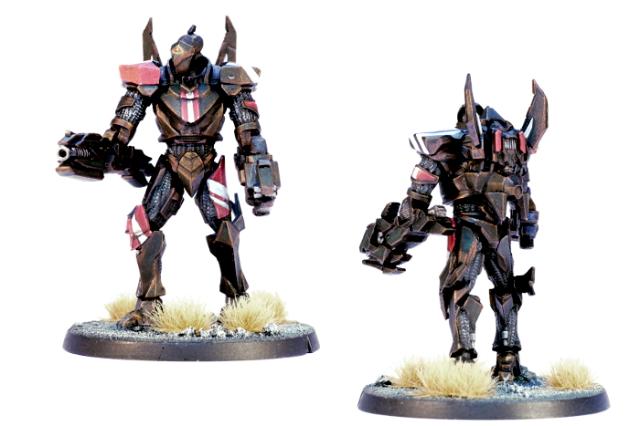
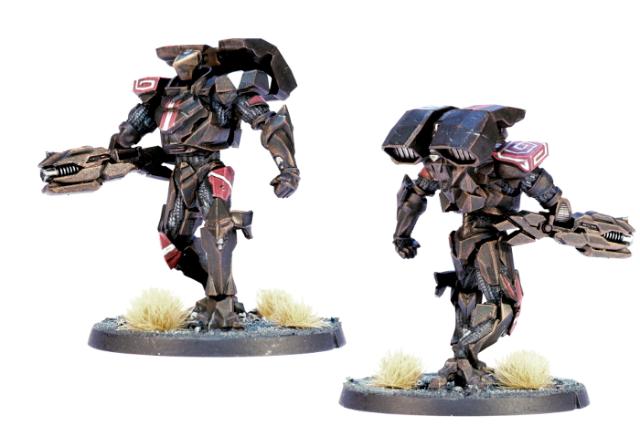
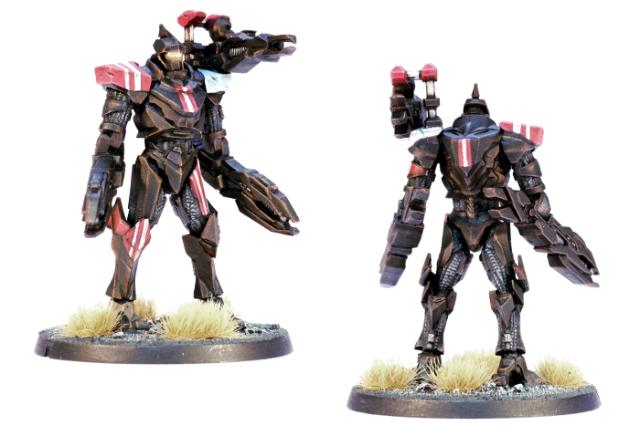
New Faction & Plastic Release: The Artarian Remnant!
Posted on Saturday Apr 06, 2019 at 12:00am in The Remnant
Spiral Arm Studios are thrilled to present our latest plastic kit: The Remnant Militus Battlesuit! This is the first kit for the Artarian Remnant, the newest faction to join the fray at the Maelstrom's Edge.
Lorican Combat Suits are the pinnacle of Artarian engineering, allowing a House Champion to have the utility and fighting prowess of many soldiers or workers. Each suit wearer is virtually a one man army, equipped with light but incredibly strong alloyed armour plating that is adapted from the same technology that is used in Remnant ship hull plating. It can absorb heat based weapons and even use it to recharge the suit's systems. The armour is quite capable of deflecting even heavy calibre ammunition, and is fully adapted to work in vacuum or underwater.

Each suit is assisted by sophisticated motion predicting micro-servo motors to give them unparalleled strength and mobility, moving with ease through dense terrain and being able to punch holes through conventional armour. Every suit also boasts a wealth of sensors including friend or foe recognition, communications frequencies, target acquisition and capability calculation, capable of identifying weak points on the target and providing suggestions as to what weapon to attack it with. All suits are slaved with targeting and intelligence information from the insertion ships in orbit, providing a strategic overview, co-ordination between strike teams and immunity to ambush.
The suits are powered by a miniature tritium energy cell, and are good for several months without recharging. This powers all suit subsystems including medical diagnostic systems which will seal over wounds including resorting to removal of limbs if necessary, and supply painkillers, stimulants and medication as required. The armour will also recycle bodily waste and their occupants can survive for weeks without resupply, although the experience would not be particularly pleasant.
The standard 'Militus' class suit forms the core of most Artarian fire teams. They can be equipped with a range of different, high-powered weapon options and are also often fitted with protective field generators or jump packs for extra mobilty.
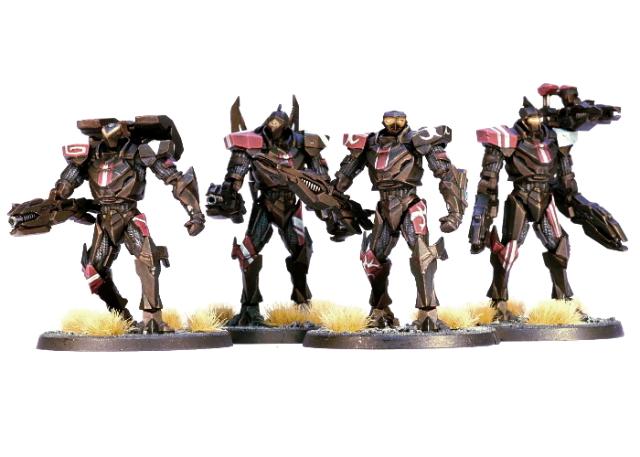
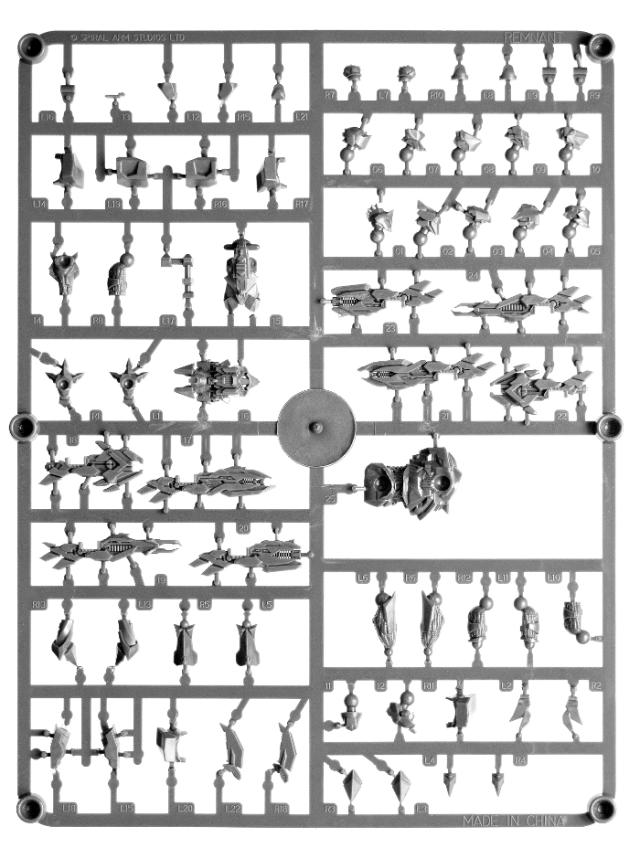
This kit contains a single, mulitpart Militus suit on one plastic sprue, along with a 45mm plastic base.
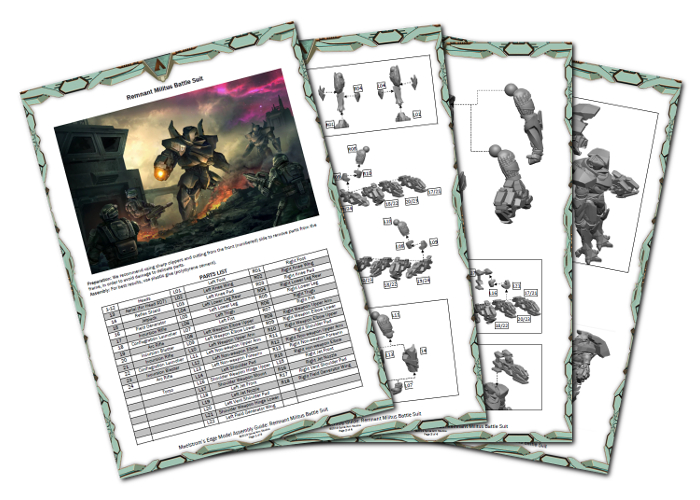
To get you building, you can find assembly instructions in PDF format here.
The Militus kit is available now from the Maelstrom's Edge webstore. Faction rules are still being finalised, as the other models for the Remnant are still being developed, but will be added to the website as soon as they are ready to go!
Painting Tutorial: Aged Copper
Posted on Monday Apr 01, 2019 at 05:00pm in Tutorials
- by Iain Wilson
For a very long time, I tried to avoid painting anything copper, as none of the copper paints I had tried ever looked quite right. Since I started getting a little more adventurous with my terrain building, though, it became harder to avoid having to figure something out that I could be happy with, and so eventually I started experimenting again to see what I could work out. This week, I'm sharing a quick tutorial showing the method I settled on.
For my example piece, I'm using a piece of a 13mm drip irrigation fitting, with the large pipe fitting from the Maelstrom's Edge terrain sprue as a handy stand for it.
The first step is to undercoat with a medium green colour - I'm using Army Painter Army Green spray, but pretty much any green will do. This just gives a bit of a green tint anywhere that the copper paint winds up a little thinner, so the actual colour isn't too important.
Next, paint on two coats of copper. Here, I've used some old (very old) Citadel Beaten Copper, but again you should be able to use whatever copper you have. Copper fittings tend to vary considerably in colour, so there's no 'right' shade to look for, other than what looks right to you.
The reason that copper paint tends to not look right is that unless it's polished (which brush-on copper paint doesn't convey) copper generally isn't actually metallic copper coloured. It's more of a dull, coppery brown. So, over the copper, paint a generous slathering of Army Painter Mid Brown wash and leave it to dry.
You could leave it there, with perhaps a light drybrush of copper over the top to pick up some highlights, or carry on and add some verdigris by drybrushing with a suitable blue-green colour. As with the copper itself, verdigris can range from a pale green through to more of a turquoise colour, so use whatever colour suits the look you want. I've used Vallejo Model Colour Emerald here, mixed with just a touch of white and drybrushed wherever it looks appropriate. You can leave as much or as little of the copper brown showing through as you want to get the desired look.
Finally, you can add some scratches with thin lines of black, highlighting the bottom edge of the line with copper. Light highlights and lines of copper without the black can also be used to show shallower scrapes and scuffs.
And that's about it. Go forth and copper up your terrain to your heart's content!
You can pick up the Maelstrom's Edge boxed game and model range from the webstore here.
As always, feel free to pop along and share your work, or ask any Maelstrom's Edge- or hobby-related questions on the Comm Guild Facebook page!
For other Maelstrom's Edge modeling articles, including tutorials and walkthroughs of a wide range of different building and miniature projects, check out the Hobby section of the Maelstrom's Edge website here.
Tags: painting terrain tutorial walkthrough
Terrain Spotlight: Alien Forest using Silicon Aquarium Plants!
Posted on Monday Mar 25, 2019 at 05:00pm in Tutorials
- by Iain Wilson
While there is a steadily growing range of awesome terrain on the market these days for sci fi wargames, one curious gap is the general lack of alien plantlife, which results in a vast majority of 'forest' type terrain being represented on the table by variations of the same, standard green trees. This week, I'm venturing outside the shady, green box, and creating an alien forest setup using silicon aquarium plants!
Aquarium plants come in a pretty vast range of different styles, sizes and colours, so can be an invaluable source of alien flora. The plants I'm using here are some sort of anemone-looking thing made from silicon and mounted in pairs or triplets on resin rocks. You could just as easily use whatever other plants you feel like (or can find in your local aquarium supply store!), but I really liked the look of these.
Forest bases need a base (obviously!), so I cut half a dozen out of 5mm masonite. I used a scroll saw with the blade set to a 30 degree angle for this, to get nice wobbly edges, and then sanded them down smooth. You could do the same with a jigsaw, or a coping saw if you prefer to avoid power tools.
Onto each base, I glued two or three clumps of 'trees' with superglue, leaving them in the resin rocks so that I didn't have to make up some sort of alternative base for them. This also helps to give them a little more height, and adds a bit of extra texture to the forest bases.
To stretch out my collection of plants a bit, and also to help break up the identical clumps, I cut through some of the resin rocks with a razor saw to split up the tree clumps.
The cut edges of the rocks were then concealed behind stacks of foamed PVC, cut from scraps leftover from a previous project. You could also use foamcore or cardboard for this (although the PVC is a bit more durable and less likely to delaminate from use) or putty or filling plaster to sculpt up a replacement rockface.
From there, I slapped a generous coat of PVA glue on each base and sprinkled on a sand/gravel mix, leaving the glue to dry before tipping off any excess sand that hadn't stuck. I also applied a generous spray of matte sealer, both to help hold the sand down and to kill a little of the shine on the silicon plants.
To paint, I glopped on a generous coat of a medium brown as a base coat - I used a Mont Marte Burnt Umber artist's acrylic for this, with the intention of matching these bases to the air conditioner fitting bunker that I made last week.
Over the brown, I drybrushed a taupe colour ('Fawn', another artist's acrylic).
The largest of the bases had some extra space left on it, so I added some young growth using some clipped pieces of plastic rod, painted up with red and yellow to match the plants.
And that's pretty much it. If you want a more over-grown look to your forests, you could easily put the 'tree' clumps closer together, or add extra undergrowth using other, smaller plants. There's a bit of a balance to find with area terrain like this, though - You want it to look good, but you also need to be able to put models in it, so I prefer to keep things fairly simple to improve their function on the table. An alternative compromise is to mount the trees onto the base with magnets instead of gluing them in place. This lets you add some extra layers of detail, while being able to selectively pluck parts of the forest out of the way as necessary to place models in there. For now, though, this is my forest all together on the table:
Feeling like assembling your own tropical alien paradise? As always, feel free to pop along and share your work, or ask any Maelstrom's Edge- or hobby-related questions on the Comm Guild Facebook page!
You can find the Maelstrom's Edge boxed game and model range in the Maelstrom's Edge webstore here.
For other Maelstrom's Edge modeling articles, including tutorials and walkthroughs of a wide range of different building and miniature projects, check out the Hobby section of the Maelstrom's Edge website here.
Terrain Spotlight: Bunker from an Air Conditioner Fitting
Posted on Monday Mar 18, 2019 at 05:00pm in Tutorials
- by Iain Wilson
Apparently even when I'm looking for something else completely, the terrain bug is difficult to avoid. On a completely unrelated trip through the hardware store for a change, I came across a rack of plastic air conditioner ducting that included a bunch of pieces that immediately jumped out as potential building fodder. Before you could say 'Get to the bunker!' I was on my way home with fingers just itching to break out the tools. The end result was a brand new ground-level access for a bunker complex!
The piece that I chose started out life as a 100mm ceiling cap, which is apparently something to do with air conditioners - I'm taking the word of the label for that! I love the idea of buildings that serve as an entryway to larger complexes below ground, and the shape of this fitting looked perfect for an atrium bunker leading to a staircase or angled lift shaft.
As the type of plastic used was shiny and of indeterminate pedigree, I started out by removing the label and giving the whole thing a light sand with fine grade sandpaper to remove the glossy outer layer. This helps the glue and paint to stick later.
The fitting is made of two separate pieces that clip together along the sides, which made cutting window holes a little easier - I popped the pieces apart, and used a shutter window from the Maelstrom's Edge terrain sprue to trace around for the hole, with one vertical edge running along the seam. Then I cut along the top and bottom of the marked hole with a razor saw, and scored the other vertical side and snapped the resultant scrap piece out of the hole. This was repeated on the other side, and again on the front for a door hole, using the armoured door from the terrain sprue as a guide.
I glued the windows and door in place using an 'all plastic' glue combo (a two-part setup that includes a tube of superglue and a 'primer' pen that is used first to help the glue stick to unusual plastics). I also added a strip light above the door for a little extra visual detail, and to cover over the screw hole that was there.
To fill in the roof, I cut two pieces of 2mm foamed PVC to the right shape to fit in the cavity. In one of these I cut a square hole for the hatch from the terrain sprue. The two pieces of PVC were then superglued together, and the hatch glued into the hole.
The fitting has a couple of handy ridges running around in the top cavity at a perfect height to form a balcony once the PVC section was glued and dropped in to sit on them. At this point I also glued the structure down onto a piece of masonite cut to an appropriate size and shape, and filled in the seam on the fitting with a little putty.
To paint, I started out with a coat of Rustoleum brown primer.
I wanted some light texture over the non-metal parts of the bunker. For this, I used a terracotta paint found in the paint section at my hardware store. This is generally used on plastic plant pots to make them look like they're made of terracotta, and has a really fine grit mixed through it to give it a sandy feel. I used a large brush and dabbed this on rather than brushing, to avoid brushstrokes showing up when I drybrushed over it.
The terracotta coat was a little patchy when it dried, with the dark brown basecoat showing through a bit darker than I wanted, so I went over it with a coat of Burnt Sienna craft paint. While that was drying, I also went over the base with a generous layer of PVA glue and sprinkled on a coarse sand and gravel mix.
The bunker was then drybrushed with a mix of Burnt Sienna and a taupe colour (actually called 'Fawn' on the bottle). The metal parts were given a heavy drybrush with P3 Pig Iron and then a generous wash with Army Painter Dark Tone, and the base was painted with a dark brown (Burnt Umber) craft paint.
Finally, the base was drybrushed with some more Fawn, and the lights painted with Citadel Ultramarine Blue, drybrushed with Ice Blue and White.
I also added a building number on the back slope, using a stencil printed out on paper and cut out with a hobby knife. I dabbed on Vallejo Light Grey with a large brush, and then a layer of white, trying not to make it too neat so that it would look a little weather-worn.
A shot of the roof:
And that's it - ready for the table!
Build your own bunker by picking up the Maelstrom's Edge terrain sprue, along with the rest of the Maelstrom's Edge model range from the webstore here.
As always, feel free to pop along and share your work, or ask any Maelstrom's Edge- or hobby-related questions on the Comm Guild Facebook page!
For other Maelstrom's Edge modeling articles, including tutorials and walkthroughs of a wide range of different building and miniature projects, check out the Hobby section of the Maelstrom's Edge website here.
Tags: buildings bunker modeling spotlight terrain terrainsprue walkthrough
Painting Tutorial: Weathered Signs using Photo Paper Decals
Posted on Monday Mar 11, 2019 at 05:00pm in Tutorials
- by Iain Wilson
Marking your buildings and other urban features with signs, graffiti and other appropriate splashes of colour is a great way of adding some touches of realism to your wargaming terrain. This week, I thought I would share a simple technique for creating faded and worn signs and markings using decals made from photo paper!
This technique won't get you bright, new looking signs - for that, you can use regular decals, or print your sign out on paper and glue it in place. What we're aiming for here are signs that have been out in the elements for a while, and are battered, chipped and faded.
Start by drawing up the design you want to apply to the building in your drawing program of choice (I use Gimp). The final applied image will be duller than your original, so you may need to experiment a bit to find the right level at first - If you want a fairly bright and legible sign, use bright colours. Use more muted colours for a more faded effect.
You will also need to flip the image so it is a mirror-image. Then print onto gloss photo paper, and cut out the design using a sharp hobby knife or scissors. Leave a tab of extra paper on one side, and just score lightly along the edge of the image on the tab side.
Apply a thin layer of superglue to the surface of the image. You need to keep this thin enough that it won't squeeze outside the bounds of the image when you press it onto the terrain surface. Don't worry if you don't get the image covered perfectly, as this just creates some handy chipping on the final image.
Press the image face-first onto your painted surface and hold it in place until the glue has had a chance to set.
Grab the excess paper tab and gently peel the paper off. It should peel away leaving the ink and a very thin surface layer of the photo paper behind. Gently scrape the paper layer away with a finger nail to expose the coloured surface beneath.
For any remaining scraps of thin paper left behind, you can rub gently with a damp fingertip to clean then away. The moisture will make your image look brighter for a moment, and white parts may go transparent, but it will fade again as it dries.
If the end result is a little too faded, you can pick the colours up a little by painting on a thin layer of gloss varnish. It won't make a huge difference, but will brighten things up slightly.
From there, you can go ahead and add other detailing and weathering to your terrain as desired. See my guide to sponge weathering here, or the slightly more advanced salt weathering technique here.
As noted back at the start, while the end result is intended to be faded and weathered, you will get a brighter end result if you use stronger colours to begin with. Black shows through best of all, so you can add extra definition to the image by adding thin black borders around everything.
Give it a go! Feel free to share your efforts, or ask for help on the Comm Guild Facebook page!
You can pick up the entire Maelstrom's Edge model range, including the terrain sprue used for the terrain in this article, from the webstore here.
For other Maelstrom's Edge modeling articles, including tutorials and walkthroughs of a wide range of different building and miniature projects, check out the Hobby section of the Maelstrom's Edge website here.