Search Results for 'terrain'
Entries found for "terrain": 216Showing 1 - 10 of total 216 search results
Iain's Unofficial Rules Updates!
Posted on Monday Dec 15, 2025 at 05:00pm in Gaming
 - by Iain Wilson
One of my side-projects lately has been slowly working through updating our old online assembly instructions to a more functional PDF format with proper step-by-step illustrations, and adding instruction documents for those that didn't previously have them, which included the plastic PDG Gaming Gun Carriage - you can find that document on the Assembly Guides page of the website here. Working on those instructions reminded me that I had always intended to add a rules page for the gun carriage to be looted by Broken forces, and so this week I took some time to throw something together, and add in a few other 'missing' models at the same time!
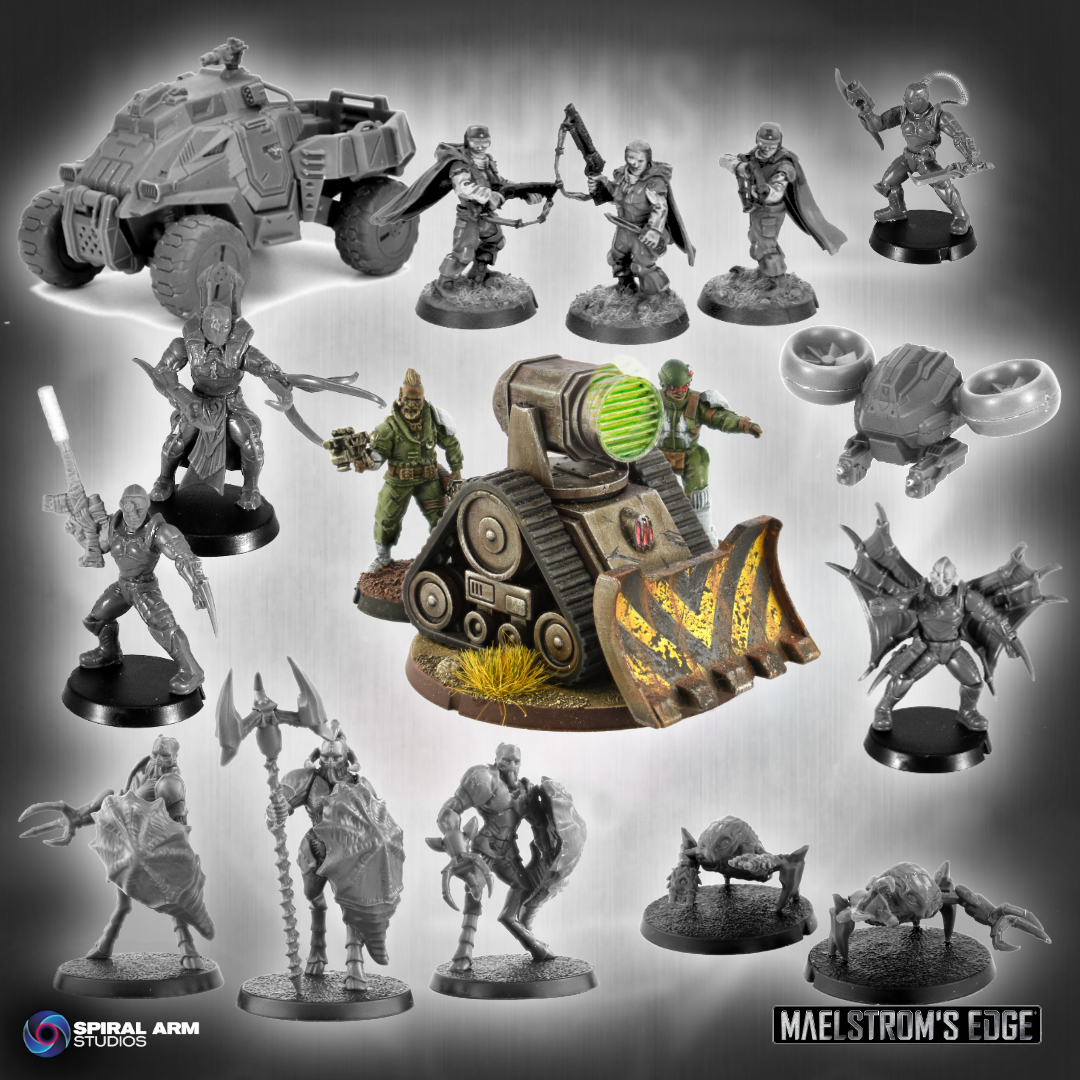
So, on the V2 Rules Downloads page of the Maelstrom's Edge website, you can find a section down the bottom with the current versions of my various homebrew rules docs for each faction. These rules cover various conversions or kitbashes I have assembled over the years using miniatures from the Maelstrom's Edge and/or other miniature ranges, and are intended as a fun way of getting these onto the table, rather than being an 'official' part of the game. If you want to build your own versions of these models to use in your games, by all means do so, but make sure your opponent is ok with you using them!
Most of these were rules previously available, but I have made the following changes:
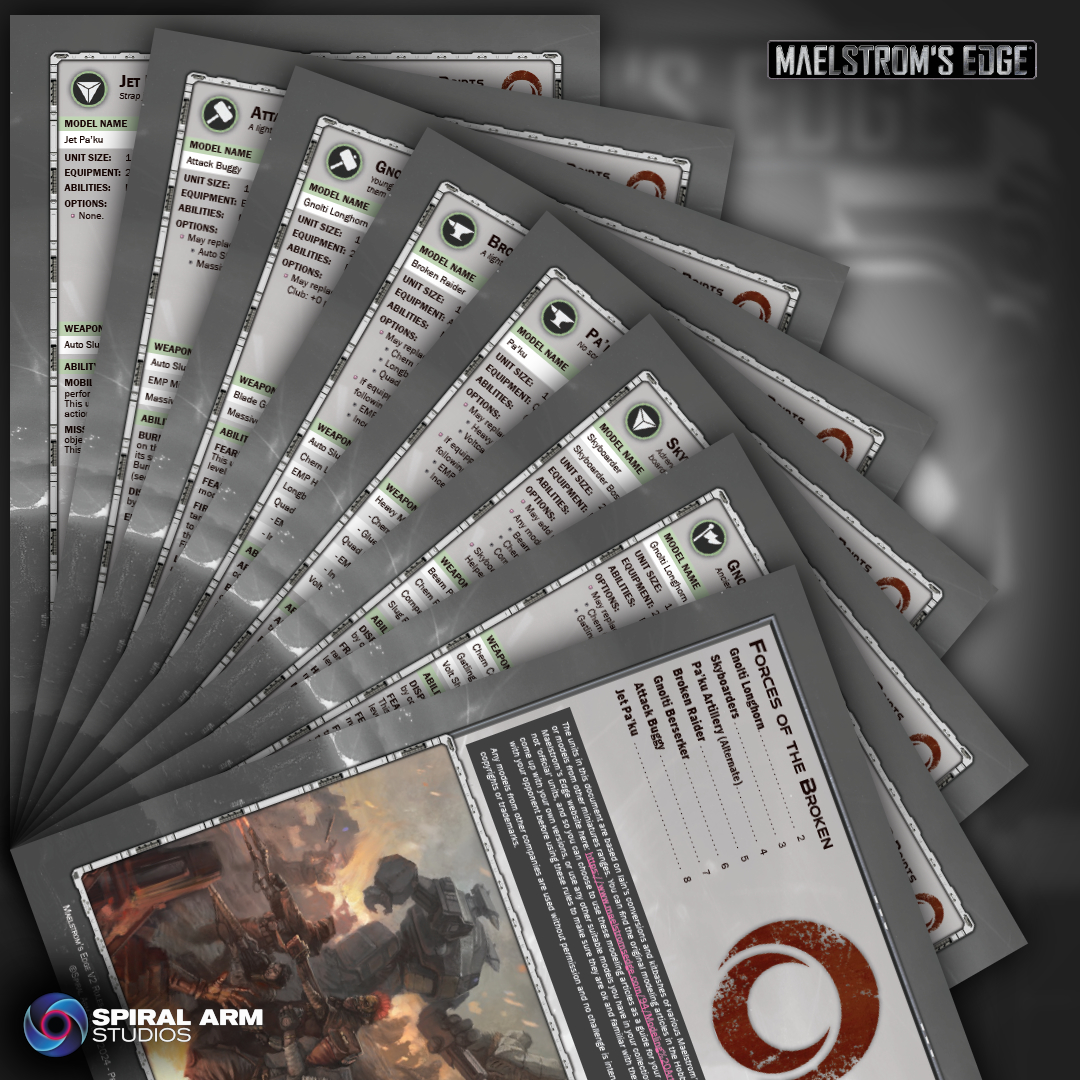
The Broken
- Gnolti Longhorn - added the Forsaken designator so that he fits into the subfaction command structure.
- Broken Thunderbolt Team added - a unit added to use the PDC Gun Carriage. While the Epirian version is a self-piloting drone, the Broken strip out the drone core and use it as a manned artillery unit with different weapon options!
The Epirian Foundation
- Hornet Drone added - heavy add-on for Firefly units.
- Contractor Pathfinders added - a unit of stealthy Contractor scouts.
- Aurochs Automated Transport added - drone-controlled transport vehicle built from the Mantic Mule.
The Karist Enclave
- Kaddar Noctis added - a new priest unit, fusing Karist tech with Angel DNA.
- New Shadow Walker variants added - the Shadow Stalker, Shadow Dancer and Shadow Weaver.
The Kaigus Pact
A new addition to my unofficial rules collection, that I couldn't resist because the models are so fun to build! I previously shared a Muharis Sentinel conversion, equipped with shields taken from the Orakan Shield Thrall kit and an Alpha staff made from a Proctat Genostaff and Orakan legs, that looked like this:
Muharis Sentinel Bulwark (Previously known as a Sentinel Spearhead)
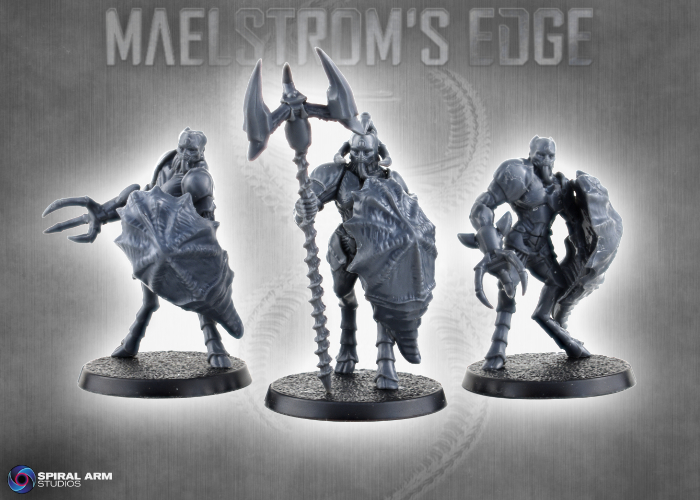
Obviously, this left me with a few Orakan models with missing shells, and so I threw together some oversized combat thralls using Muharis Ripper Claws and Proctat Genostaff heads!

Dromakin Combat Thralls
Rules for both of these units are now available in the new Kaigus Pact document, which can be found along with all of the other rules PDFs in the V2 Rules Downloads section here!.
Coming up next: Updated Imperial Marine rules! And more updated instruction sheets coming soon...
Grab yourself some conversion fodder or the new V2 rules from the Maelstrom's Edge webstore here!
What are you working on? We would love to see your models and terrain in the Comm Guild Facebook group!
For other building ideas, modeling tutorials, army spotlights and conversion walkthroughs, check out the Hobby section of the Maelstrom's Edge website here.
Tags: rules unofficial v2
Model Spotlight - The Kaigus Pact Troops Sprue!
Posted on Wednesday Oct 15, 2025 at 05:00pm in The Kaigus Pact
- by Iain Wilson
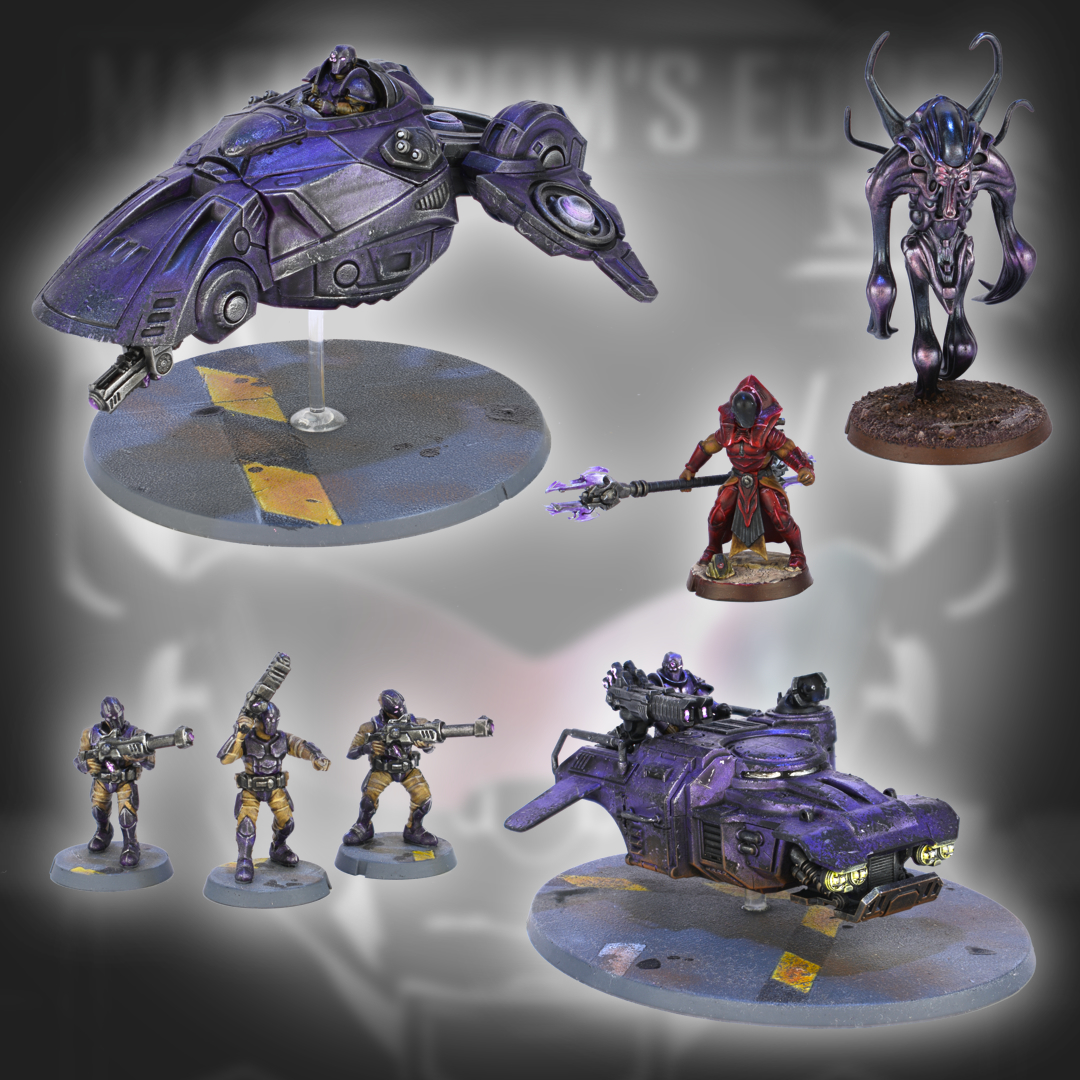
The arrival of the Maelstrom's Edge V2 rulebook was accompanied by the addition of an all new faction to the game - the Kaigus Pact! We're all very excited about them as the Kaigus Pact are very different to the other models we've released so far, with their alien appearance and organic approach to technology. This week, I thought I'd take a closer look at one of the new plastic kits - the Kaigus Pact Troops sprue.
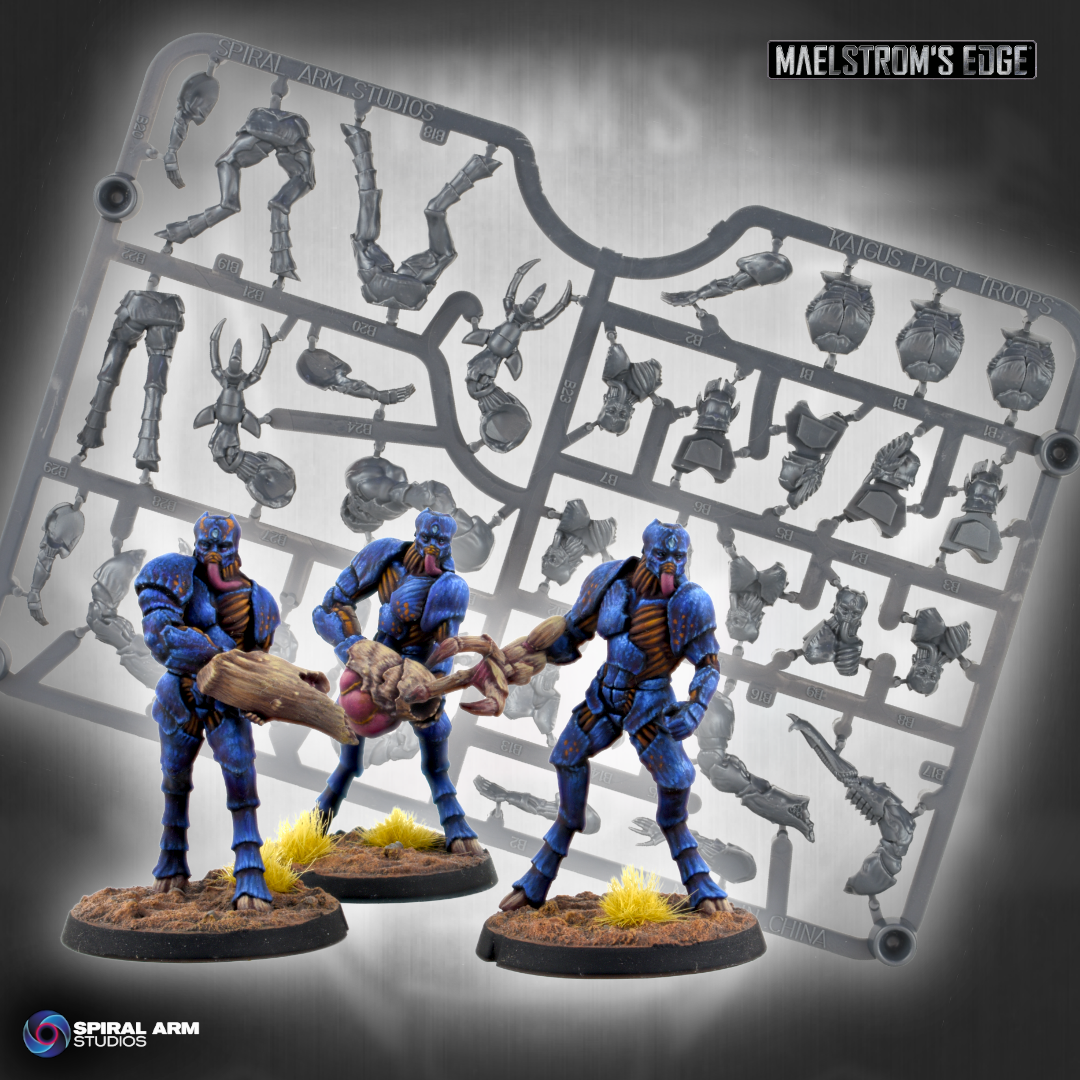
The troops sprue is one of a number of plastic sprues that we created for the Kaigus Pact launch, building three bioengineered warriors.

The Kaigus Pact Troops sprue, sculpted by Kevin Johnson.
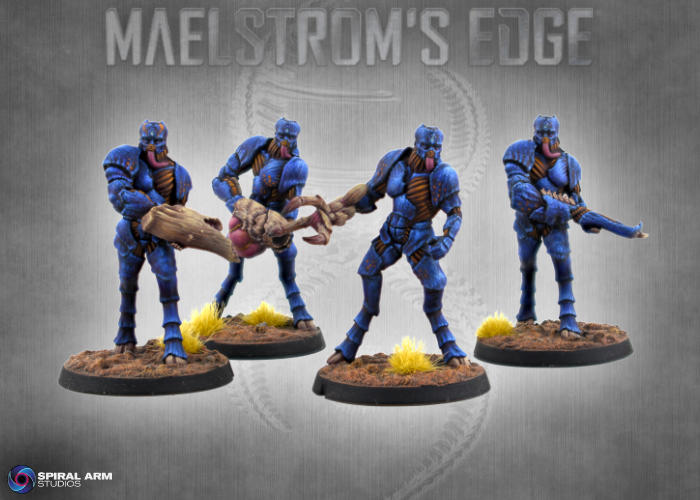
Kaigus Pact soldiers, known as Muharis, generally take to the field armed with organic weapons called Dart Hosts. These are bioengineered crustacean-like organisms that clamp over the Muharis' weapon arm and, as their name suggests, spit lethal darts with the same force as a more normal firearm. More at home in space, the massive forms of the Muharis are gangly and awkward looking on the ground, their asymmetrical torsos and giant, carapace-clad forms a stark contrast from their human forbears.
Kaigus Pact Muharis with Dart Hosts, painted by Todd McNeal.
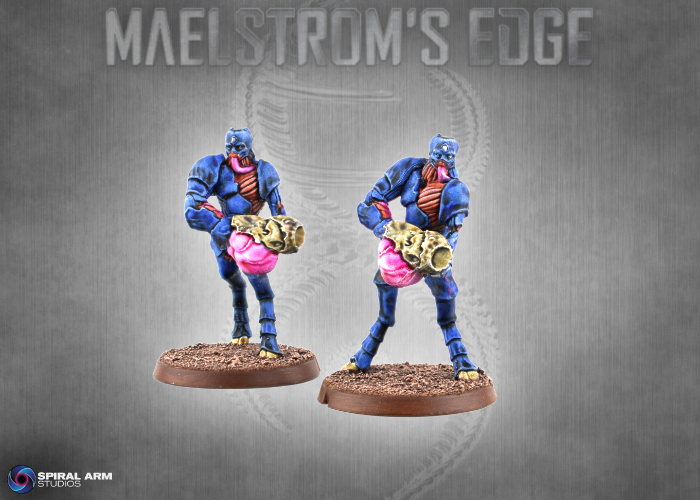
Muharis have access to a number of other lethal weapon symbiotes, including a heavier version of the standard Dart Host, the armor-piercing Spike Rifle and explosive-lobbing Brood Host. When more close-range assaults are called for, Muharis make use of the giant taloned Ripper Claw.
(Left to right) Heavy Dart Host, Brood Launcher, Ripper Claw & Spike Rifle, painted by Todd McNeal.
Regular Muharis Sentinel units have more limited access to these, while Sentinel Strongpoint units provide battlefield support with access to multiple heavier weapons.
Sentinel Strongpoint unit with Brood Launchers, painted by Iain Wilson.
The troops sprue also allows you to build Biologis troops. more specialised than the Muharis soldiers, Biologis Attendants carry a shorter ranged but poisoned version of the Dart Host. The parts from the troops sprue can also be combined with the Proctat Upgrade sprue to build a Biologis Proctat, a Genostaff-equipped squad leader upgrade for Attendant units.
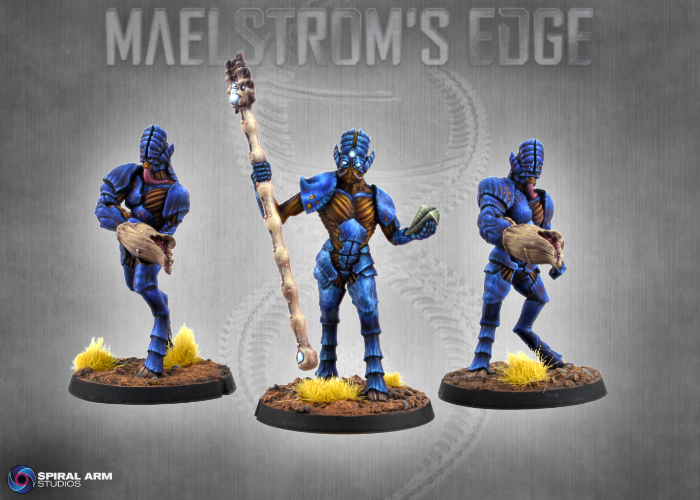
A Biologis Attendant unit, painted by Todd McNeal.
Biologis Adepts also serve as leaders in some Muharis Sentinel units, providing them the ability to spawn Thrall units on the battlefield.
A Muharis Sentinel unit with attached Biologis Adept, painted by Iain Wilson.
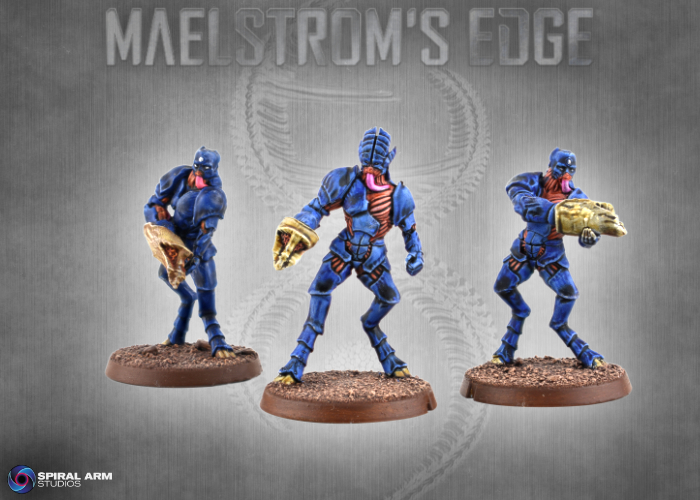
Because of the unique design of their armour and equipment, the Kaigus Pact troops are not quite as modular as some of our other plastic kits. The most notable difference is in the heads, which we couldn't separate at the neck as we usually do. Instead, the sprue provides a number of different torso fronts, so you still get a wide range of posing options by combining different legs and torso fronts.
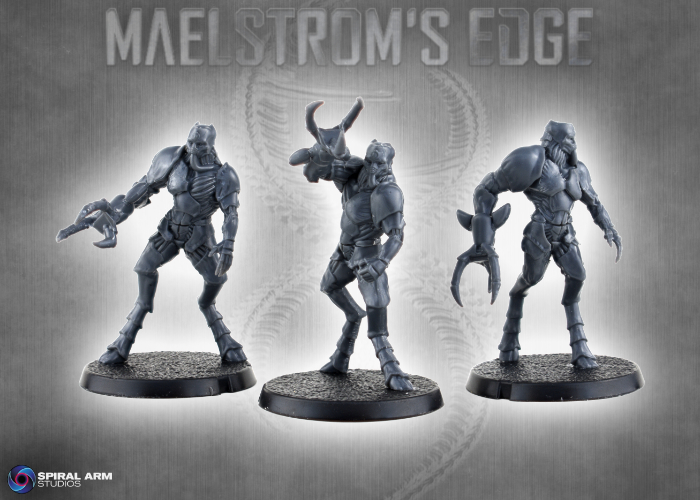
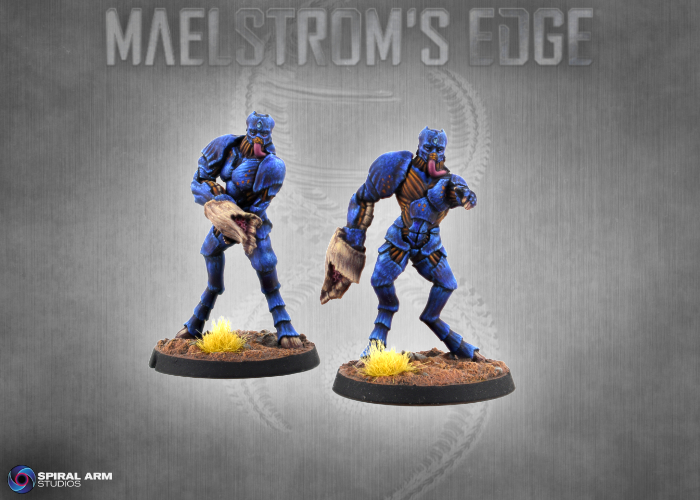
Muharis with Ripper Claws.
Being plastic, the models are of course easy to chop and change to suit yourself! While weapons are fixes to the arms, again due to their unique design structure and the limitations of plastic tooling, it's easy enough to slice weapons off and switch arms to give yourself some different posing options.
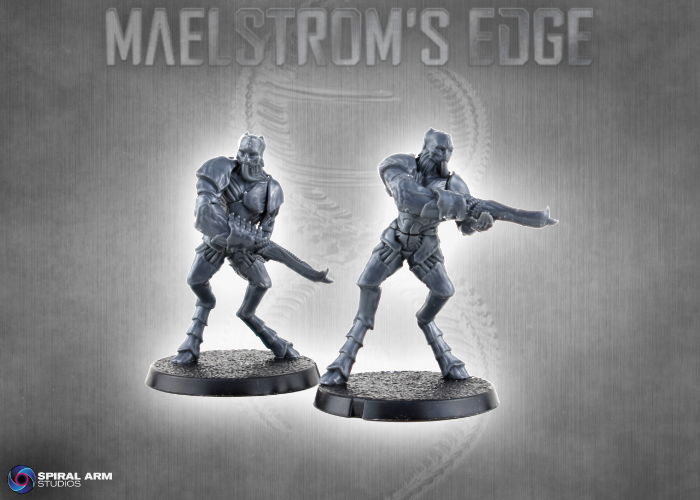
Muharis with Spike Rifles. the model on the left is the standard arm configuration, while the model on the right has had the weapon switched to a different arm, and a left arm from the Proctat Upgrade sprue.
And, of course, if you're like me and enjoy wandering outside the bounds of the 'official' game units, there's nothing stopping you from going to town with these kits and creating your own units!
A unit I'm calling a 'Sentinel Bulwark', equipped with shields taken from the soon-to-be-released Orakan Shield Thrall, and a polearm made from a Proctat staff and Orakan legs!
The painted models shown here (both Todd's fantastic studio models and my more table-level versions) are representative of the Koritanii moot, found active in Zycanthus space. The Kaigus Pact models lend themselves to a wide range of organic color-schemes - we recommend looking to sea-dwelling crustaceans for inspiration!
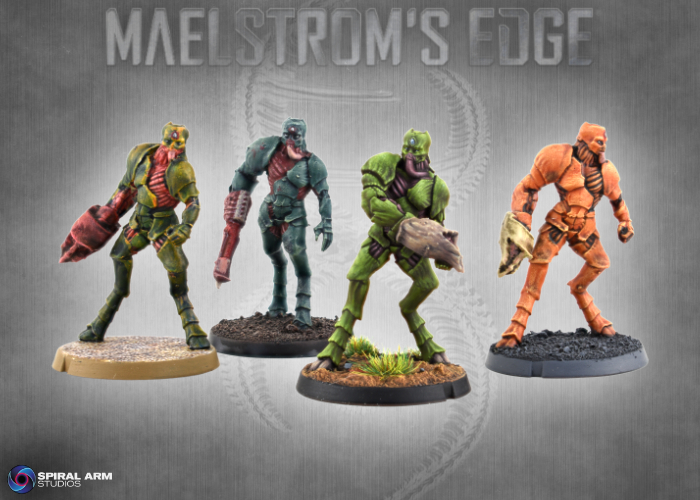
Some alternate Kaigus Pact color schemes.
The Kaigus Pact Troops box is available to buy soon, but in the meantime you can nab the sprue in the Kaigus Pact Starter Force box available now from the Maelstrom's Edge webstore here!
What are you working on? We would love to see your models and terrain in the Comm Guild Facebook group!
For other building ideas, modeling tutorials, army spotlights and conversion walkthroughs, check out the Hobby section of the Maelstrom's Edge website here. And while you're there, grab a copy of the Maelstrom's Edge V2 Beta rules!
Maelstrom's Edge V2 - Terrain
Posted on Wednesday Sept 24, 2025 at 05:00pm in Gaming
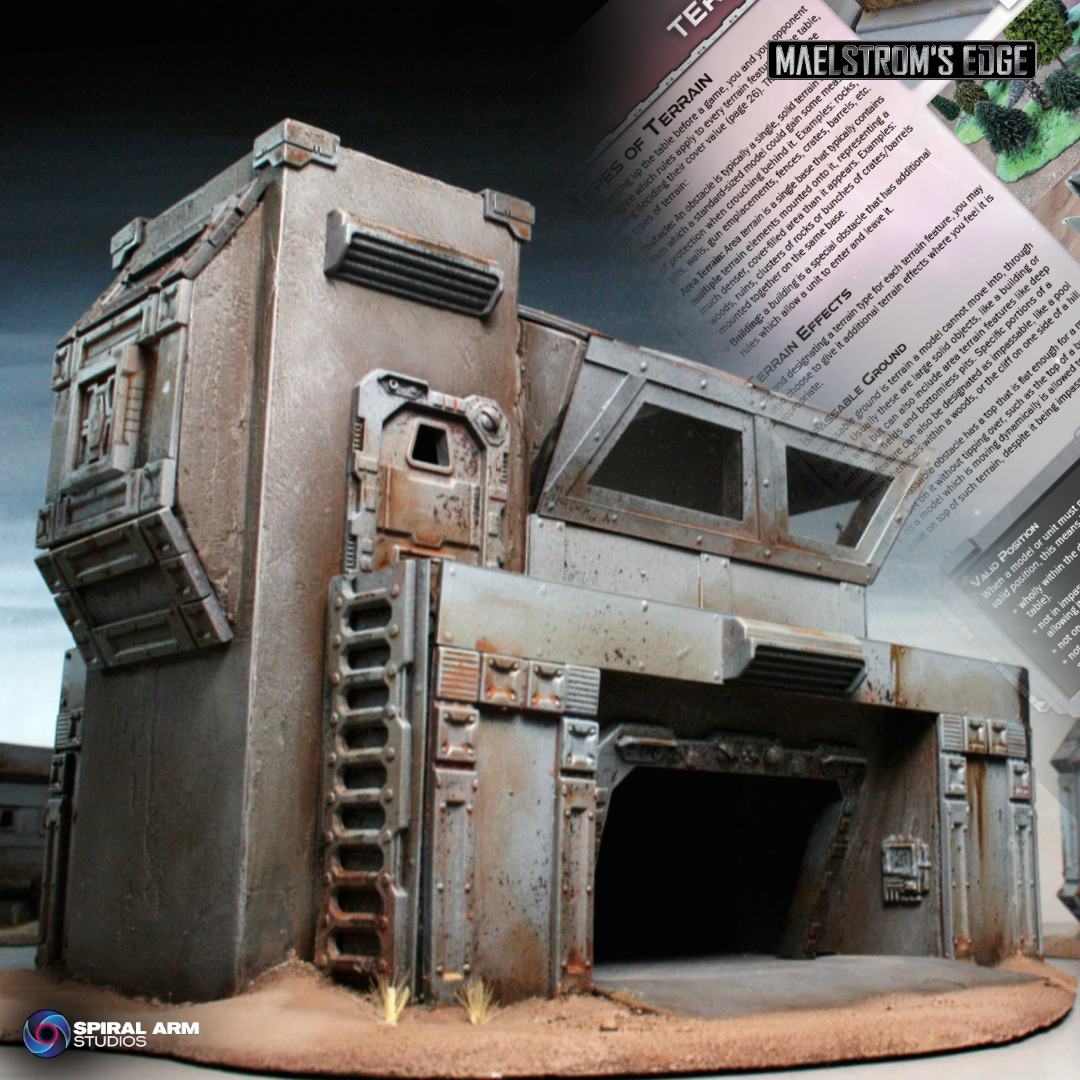
There are three main types of terrain:
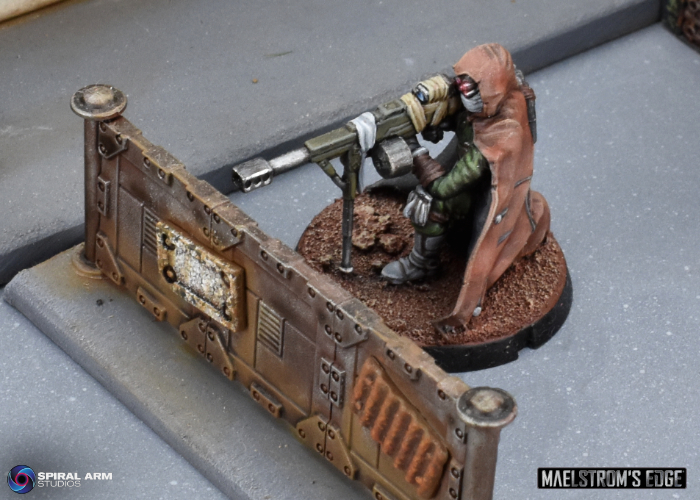
- Obstacle: An obstacle is typically a single, solid terrain feature from which a standard-sized model could gain some measure of protection when crouching behind it. Examples: rocks, hills, walls, gun emplacements, fences, crates, barrels, etc.
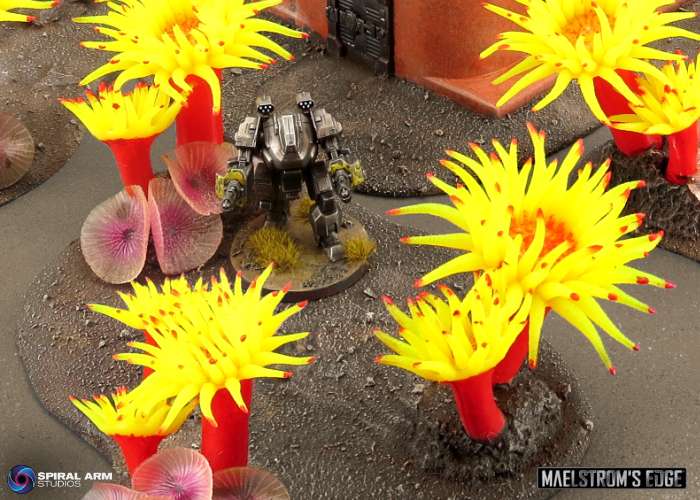
- Area Terrain: Area terrain is a single base that typically contains multiple terrain elements mounted onto it, representing a much denser, cover-filled area than it appears. Examples: woods, ruins, clusters of rocks or bunches of crates/barrels mounted together on the same base.
- Building: a building is a special obstacle that has additional rules which allow a unit to enter and leave it.
You may also choose to give terrain features additional terrain effects where you feel it is appropriate.
- Impassable ground: terrain a model cannot move into, through or over. Usually these are large solid objects, like a building or a tall wall, but can also include area terrain features like deep water, lava fields and bottomless pits. Specific portions of a terrain feature can also be designated as impassable, like a pool of toxic chemicals within a woods, or the cliff on one side of a hill.
- Dangerous ground: terrain that causes minor damage to units moving through it. Instead of deciding that a river of lava, minefield, cliff, etc., is impassable, you may opt to instead make it dangerous ground, raising a unit's suppression level when they move through it. (For more on suppression, see the article here!
- Open ground: parts of the battlefield that don’t contain any terrain features, or any portion of a terrain feature you feel shouldn’t protect a unit that takes cover there, like the flat top of a platform.
Moving through terrain generally doesn't affect how far a unit can move, although vertical movement over 2" (moving up a multi-level ruin, for example) is counted towards the distance travelled. Beyond that, we didn't want terrain to complicate movement any more than it needs to, as troops moving on a battlefield are already moving with care - a few trees shouldn't force them to slow down that much!
Terrain does affect line of sight, however! Obstacles block line of sight exactly as they appear on the table: if you are able to spot an enemy model through or over an obstacle, then your unit has line of sight to them. Area terrain, however, represents a much denser grouping of terrain than is actually seen on the tabletop. Therefore, line of sight can be drawn to models in the area terrain, but can't be drawn from outside an area terrain feature and pass entirely through it to see models on the other side.
Models are assumed to be making use of available cover as they move around the battlefield. As such, the normal shooting rules don't confer any bonus protection to a unit that is partially obscured by default. Instead, shooting units receive a bonus to their shooting if the target is completely in the open. Conversely, a unit that is touching an obstacle or in area terrain can receive a bonus defense from terrain through the 'Take Cover' status action. For more on unit activation, check out the article here!
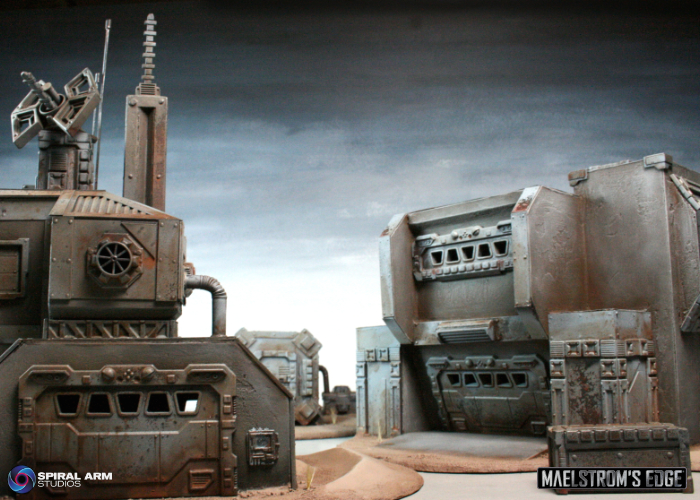
You can find the full terrain rules in the Maelstrom's Edge V2 rulebook. Grab your copy from the Maelstrom's Edge webstore now! And while you're there, you can pick up the Maelstrom's Edge terrain sprues - packed full of plastic details to add to your scratchbuilt terrain!
If you have any thoughts on the new rules, pop on over to the Comm Guild Facebook group, or start up a thread in the Maelstrom's Edge section on the Dakka Dakka forums. We welcome any feedback, and would love to hear how everyone's forces stack up in the new rules!
Faction Focus - The Broken
Posted on Thursday Sept 11, 2025 at 05:00pm in The Broken
Broken is a term used to unify all such desperate people across the Edge. Their motivations and methods vary wildly - from fervent revolutionaries to callous pirates to the few who have stared into the maw of the Maelstrom only to come away unhinged. Abandoned by their governments, rejected by the systems to which they flee for succor, the Broken must scrape, claw and fight just to see each new day.
The vast majority of Broken consider themselves Forsaken, a catchall name for those who feel that the rest of the Sagittarius Arm has given up on them. Their Freeports are self-declared independent states, and will happily negotiate pacts and trade deals with any entity willing to recognize their autonomy and bargain fairly with them.
As the Maelstrom approaches a planet, the complete breakdown of their society feels to a certain type of individual like the constraints of morality have finally been lifted. Should they escape their doomed world, these Broken souls become Jackals: bloodthirsty murderers who take no prisoners and attack the vulnerable because it brings them pleasure. Eschewing fixed bases, Jackal fleets are a scourge across the Edge, constantly on the prowl for easy targets to enrich themselves.
The rarest Broken faction, secret Spiral Arm Revolutionary Army companies have formed all across the Edge, and continually recruit new members with the mantra that if the common man doesn’t band together to save themselves, then no one will. SARA attracts many former members of planetary militaries, with whole regiments sometimes deserting their posts when they find they have been abandoned by the official evacuation effort. As a result, SARA is more organized and better disciplined than other Broken forces, with a more effective supply chain.

There are a huge number of different alien species found on worlds throughout the human-dominated regions of the Sagittarius Arm. For many, though, their size, customs, diet, or environmental needs make them difficult to accommodate on evacuation ships, and so they are considered expendable and given the lowest priority in the queue. Effectively abandoned by the Foundation, these species find refuge amongst the ranks of the Broken - the massive, scaled Gnolti, the squat, slow-moving Pa’ku, the nervous, lumbering Skoti, or the lanky, radiation-resistant Kasmenai, to name just a few. Other aliens are less numerous, but still useful and welcomed - Ichthyoid Uldagane with their pressurized immersion suits, serpentine Wiioun making themselves at home in waste reclamation tanks, or Pajah Windspeakers, occasionally found tinkering with the engines of raiding vehicles to give an extra boost of speed to a mechanized force.

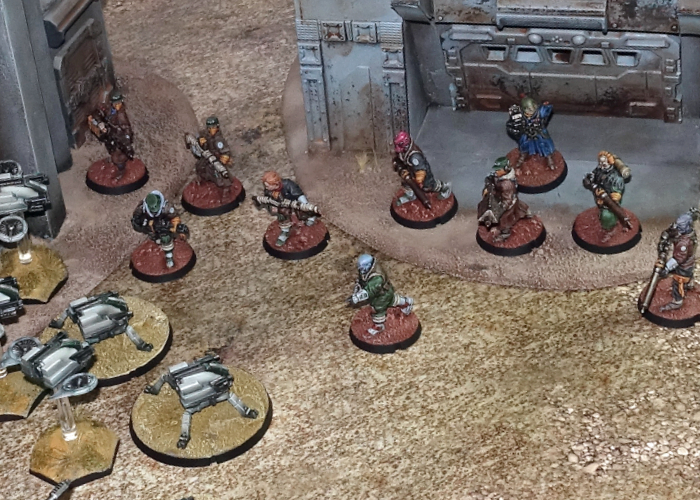
On the table, Broken forces will generally outnumber other factions, being comprised primarily of poorly trained but numerous troops. These rabble hordes are supplemented by various specialists providing technological boosts or various Xenos species with exotic abilities or brute strength. Sig Jammers and Marsayan Hypnotists interfere with an enemy's communications or targeting systems. Massive Gnolti provide a living shield for their smaller compatriots, until they get in close enough to use their massive fists to devastating effect. Snipers and Pa'ku harass enemy units with hi-tech disruptive or explosive ammunition, while Skoti use their innate teleportation to move Broken troops swiftly around the battlefield.
While their troops are less durable than most of their enemies, the Broken make up for it with their numbers and their ability to move unpredictably around the battlefield. Many Broken units benefit from the Mob Mentality ability, which grants them a bonus to their Willpower based on the size of the unit - taking the mantra of strength in numbers very literally. The Broken also have a unique edge in their deployment, with Shadow Strike allowing Broken units in terrain to leave the table, emerging from a different terrain feature in a later turn.
Find out more about the elusive Broken on the Maelstrom's Edge website here.
The Maelstrom's Edge V2 rulebook is available to order from the 15th of September. Watch this space for more news!
Let us know your thoughts on the Comm Guild Facebook group!
Terrain Spotlight: Drone Substation Quick-paint.
Posted on Friday Sept 05, 2025 at 05:00pm in Tutorials
- by Iain Wilson
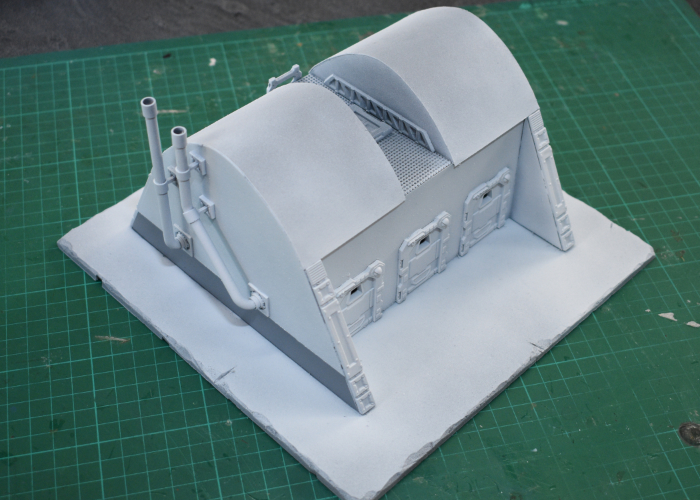
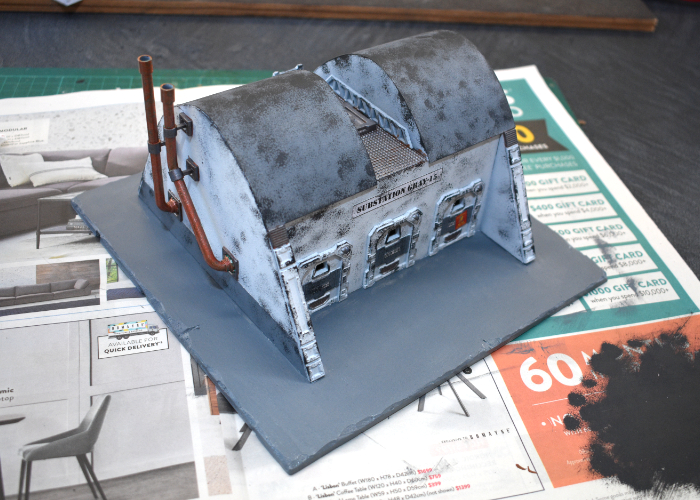
I was rummaging through some storage boxes the other day and came across a building that I had assembled a very long time ago and never got around to finishing. And since it has once again been a little while since I played with terrain, that seemed like as good a reason as any to take some time to get some paint on it!
The building in question was built from foamcore, thin card, and bits from the first Maelstrom's Edge terrain detail sprue, and was made to be somewhat ambiguous as I hadn't decided when I built it what it was actually going to be. For some reason, I had (badly) sprayed it with a slightly watery pale green paint. I obviously had a plan for this when I did it, but I couldn't for the life of me remember what it might have been.
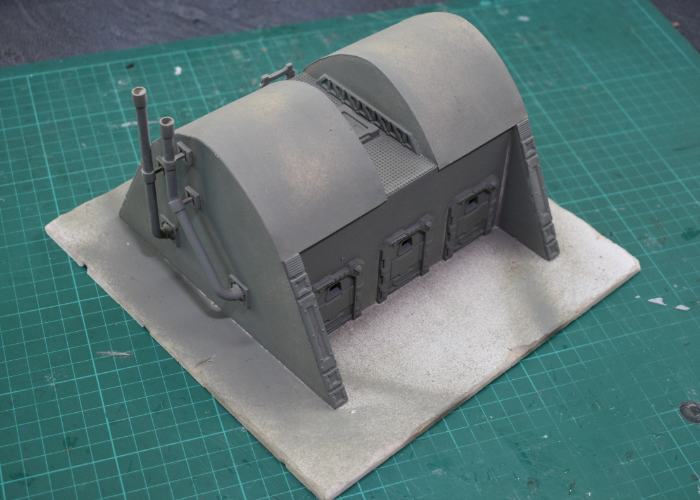
The first step, obviously, was to do something about that dodgy basecoat, so I gave the whole building a good spray with some Army Painter Uniform Grey.
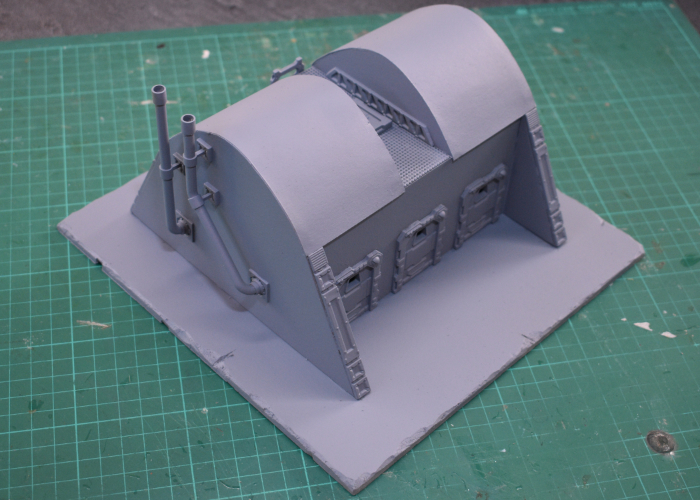
I wanted the building to be white (ish) but solid white buildings are a little boring. So to give it some detail, I broke out some masking tape and masked a strip along the bottom of each end wall before spraying with a coat of white. This was somewhat risky, as my masking tape has been sitting in my toolbox for about 15 years, and doesn't look quite right... There was a certain air of 'will it come off again?' in this operation. Luckily, though, it came off just fine.
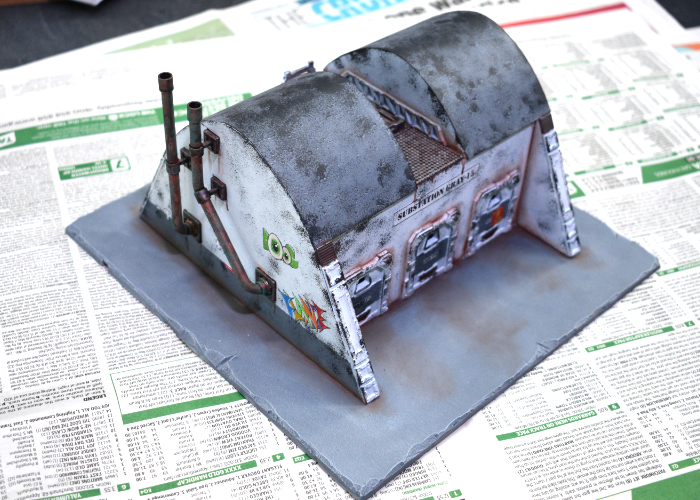
Now it was time to start painting the things that weren't going to be white. I gave the chimney pipes (made from cut off pieces of sprue and plastic tubing) a coat of VMC Emerald, and the other bare metal areas a layer of Beasty Brown. The roof and armour strips on the doors received a coat of uniform grey to match the side walls. I could have done this with masking, but that seemed too fiddly given the state of my masking tape, and these areas were easy enough to paint over neatly.
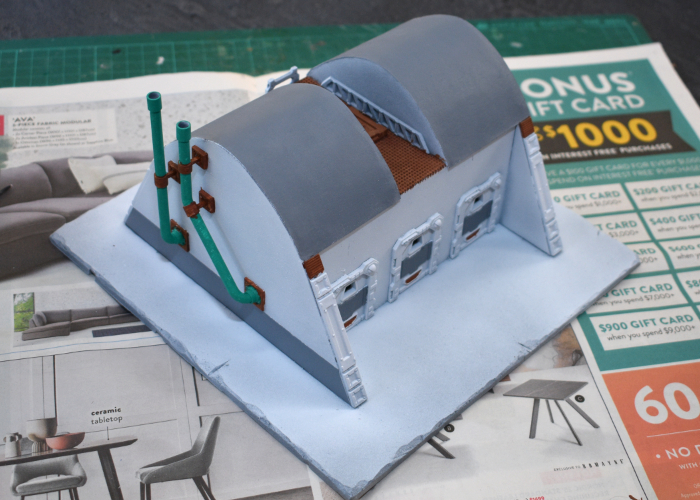
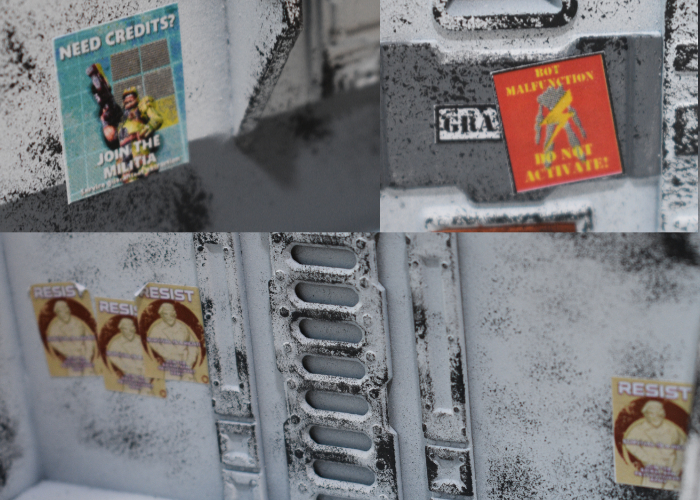
I wanted some signs here and there that looked like they had been there a while, so these needed to go on before any weathering. I printed off some appropriate signage, and glued them in place with some PVA glue.

Then it was time for aforementioned weathering. I broke out a sponge and some Game Color Heavy Charcoal, and went to work, concentrating most heavily on edges and top surfaces. This is the first part of the process where I usually start wondering if I've ruined it, but it usually comes together as it goes along...
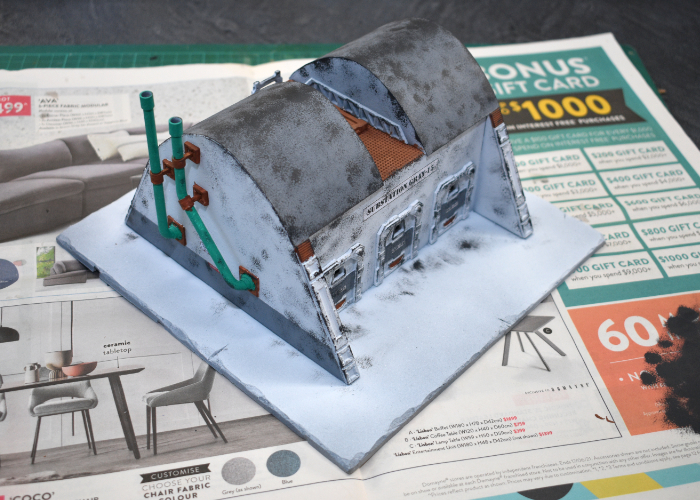
With the initial weathering in place, I added some additional signage.
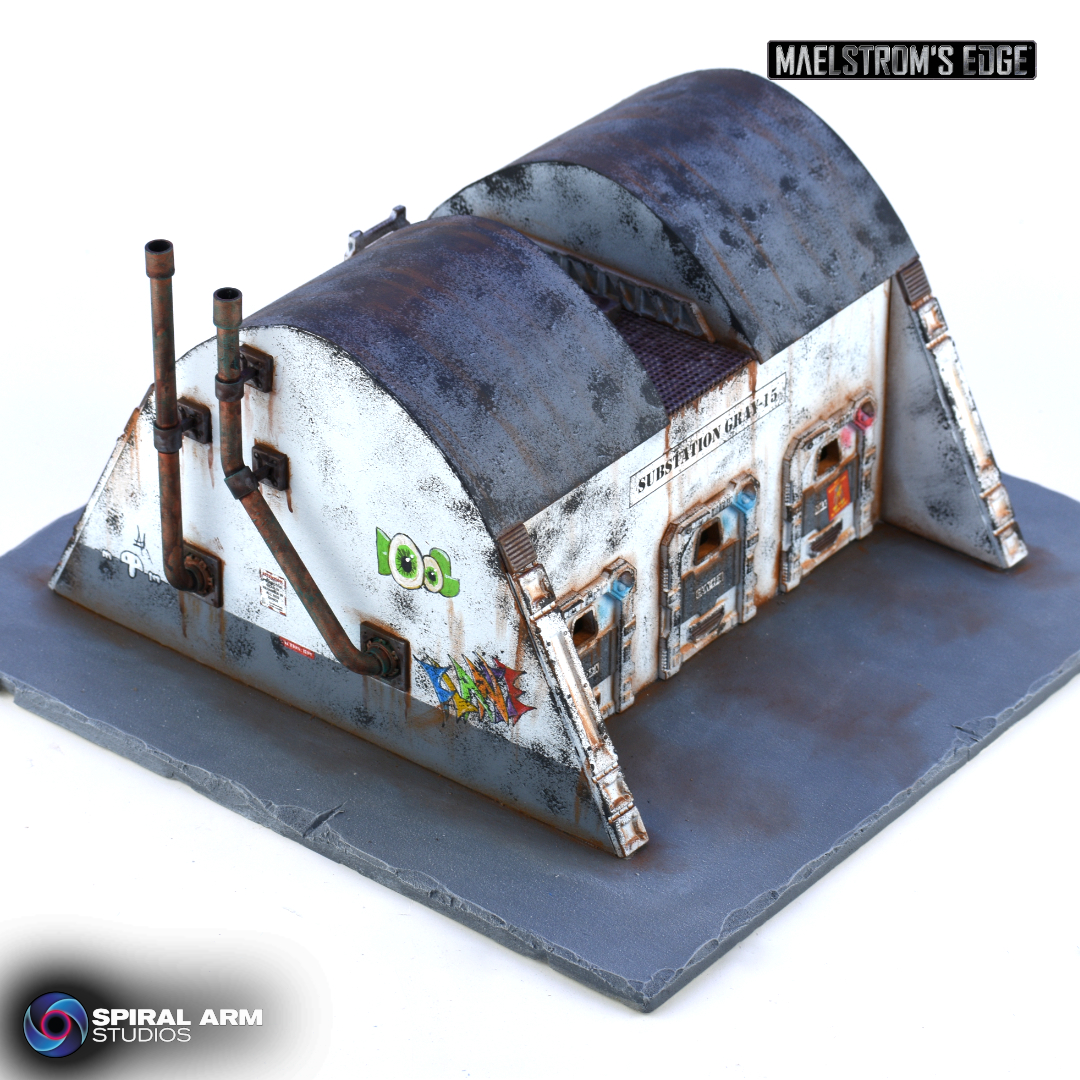
Then on with the detailing. The chimneys were painted with some old Citadel Copper, and the rest of the metal with a coat of Speedpaint Broadsword Silver. I also painted the base with a coat of Vallejo Neutral Grey.
On sponged areas that aren't white, I like to go over and add some highlights on the larger chip marks. This isn't essential, but does help to give it some more texture and looks better at table height.

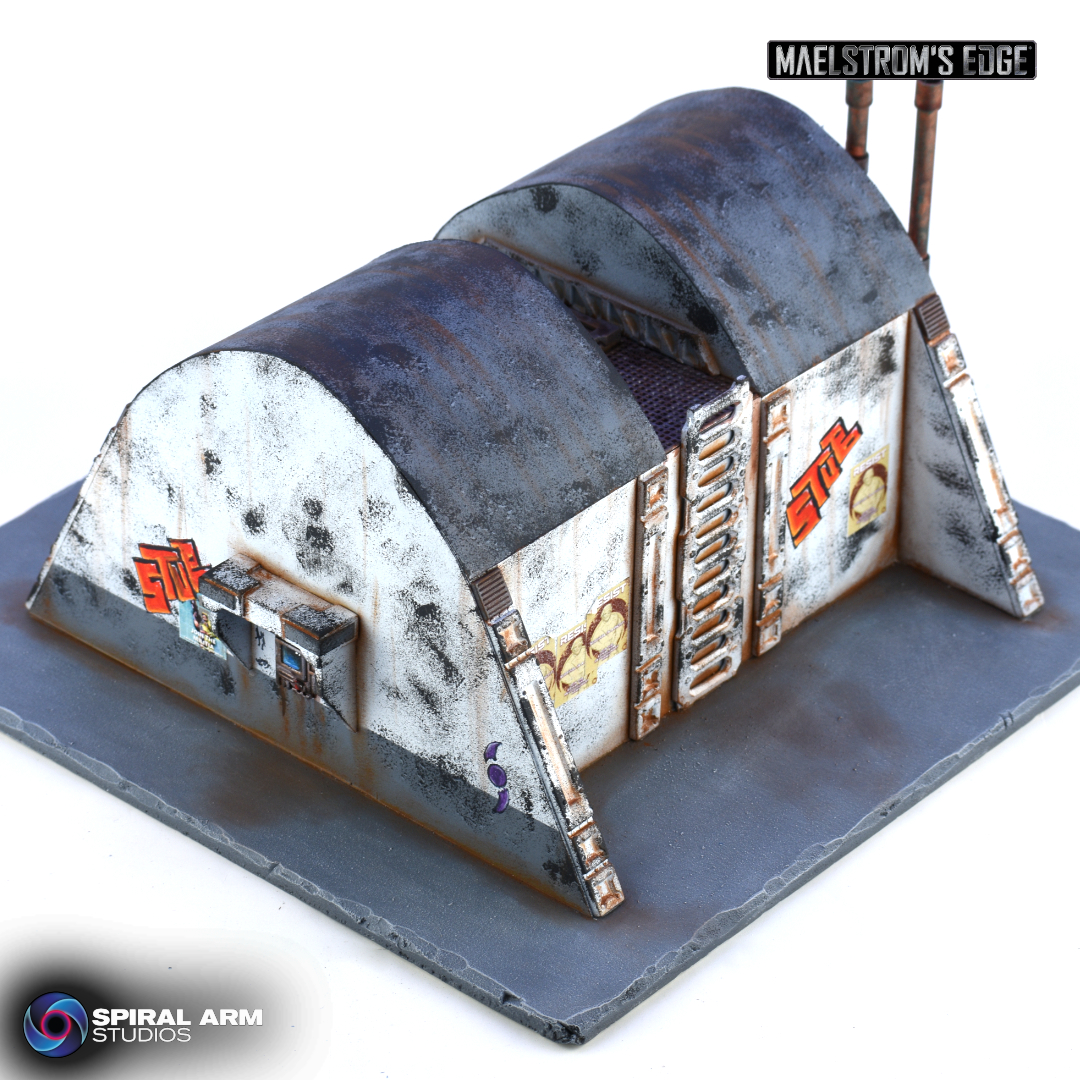
Then it was time for final detailing and weathering. I gave all of the exposed metal a coat of Army Painter Mid Brown ink, added some graffiti, and then got stuck into my favourite part - drybrushing on some dirt! I used Beasty Brown, working it into all of the creases and raised surfaces, and added some streaking here and there where it seemed appropriate.
And with dirt in place, the building was ready for the table!
(Click for bigger pics!)
To build your own building of maintenance-neglected doom, grab the Maelstrom's Edge terrain sprues from the webstore here!
What are you working on? We would love to see your models and terrain in the Comm Guild Facebook group!
For other building ideas, modeling tutorials, army spotlights and conversion walkthroughs, check out the Hobby section of the Maelstrom's Edge website here. And while you're there, grab a copy of the Maelstrom's Edge V2 Beta rules!
Tags: modeling painting terrain terrainsprue
Maelstrom's Edge V2 - Unit Activation
Posted on Tuesday Sept 02, 2025 at 05:00pm in Gaming
When a unit activates it can choose up to three actions from Movement, Status and Shooting categories. Some of these were already present in the V1 rules, but were a little more spread out and more difficult to keep track of. By consolidating and classifying the various actions, it's easier for players to remember what they can and can't do in a turn.
Movement actions dictate how fast the unit moves.
MOVEMENT ACTIONS
- MOVE: The unit moves up to its MV characteristic in inches.
- DASH: The unit moves up to double its MV characteristic in inches, but at the cost of degrading the accuracy of any shooting action it performs.
- CHARGE: The unit moves up to double its MV characteristic in inches, but must move into contact with an enemy unit, who then gets to perform Defensive Fire against the charging unit.
Status actions allow you to focus a unit towards specific goals.
STATUS ACTIONS
- ON THE MOVE: A unit on the move immediately gets to make bonus movement. In addition, a unit that is on the move is both less accurate when shooting and harder to hit when being fired upon.
- TAKE COVER: A unit taking cover gains protection from the terrain it is touching when the enemy shoots at it, and even gets a small amount of protection if it is in open ground. A unit which is taking cover cannot also be on the move, and vice versa.
- AIM: A unit that aims is more accurate when shooting during its activation.
Finally, Shooting actions cover the different options for attacking other units.
SHOOTING ACTIONS
- FIRE: The unit fires a standard round of shooting, which can cause both damage and suppression on the target.
- SUPPRESSIVE FIRE: A special round of shooting, which utilizes a weapon’s Suppression characteristic. No damage can be inflicted, but more suppression can be caused than with a standard round of shooting.
- CQ FIGHTING: A special attack against enemies in base contact with the firing unit, using melee weapons or pistols.
By selecting actions from each category in turn, a unit steps through its activation. For example, a unit can Move, then Take Aim in order to gain a boost to their shooting attacks, and then Fire on an enemy target.
While a unit can only select a single action each from Movement or Shooting, multiple Status actions can be combined so long as you stay within the maximum of three actions in total. So you could, for example, have a unit Take Cover and Aim, and then Fire upon enemy units from their more protected position.
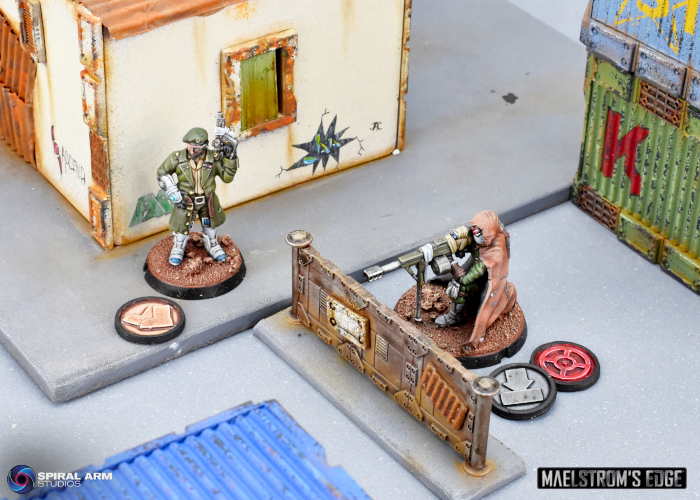
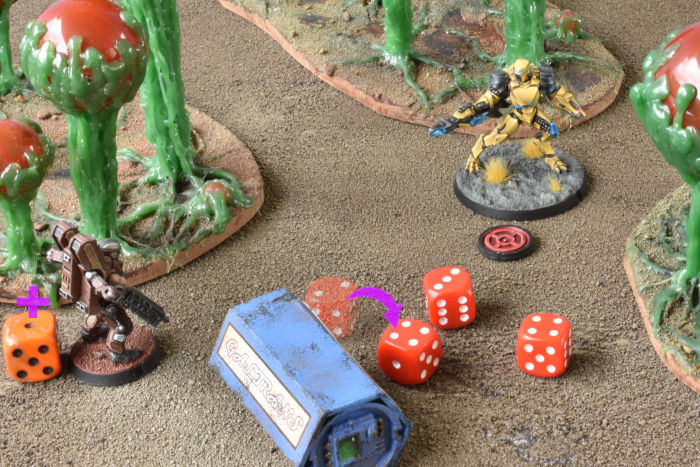
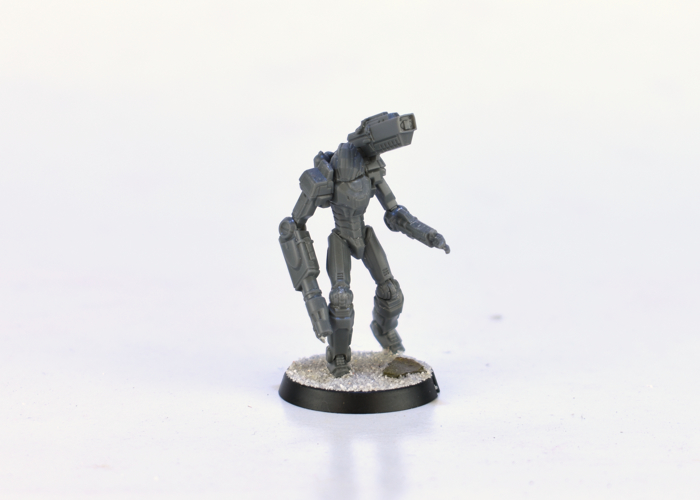
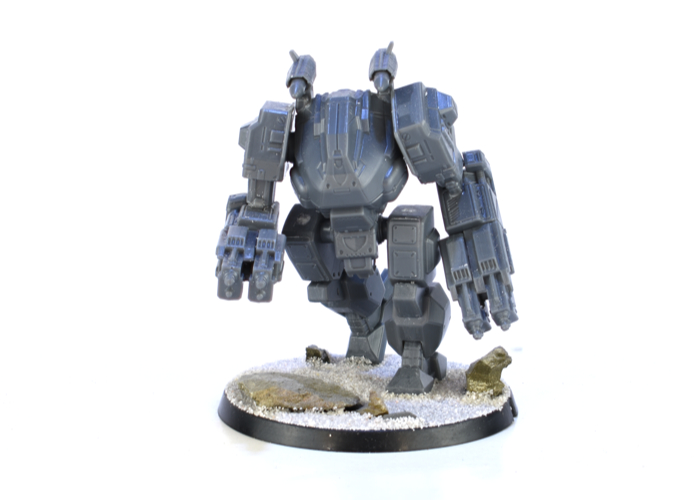
To show how this all works, here's an Epirian SecDef Field Commander facing off against an Artarian Remnant Pathfinder. In the midst of battle, they have just caught sight of each other through the ...err ... trees? and shenanigans ensue.
The Remnant player has Priority (meaning they activate a unit first this turn) and chooses to use a Move action to advance the Pathfinder through the trees to bring the Field Commander into short range (6"). They then use their Status action to Aim, applying a +2 bonus to the Pathfinder's SKL (Skill) stat.

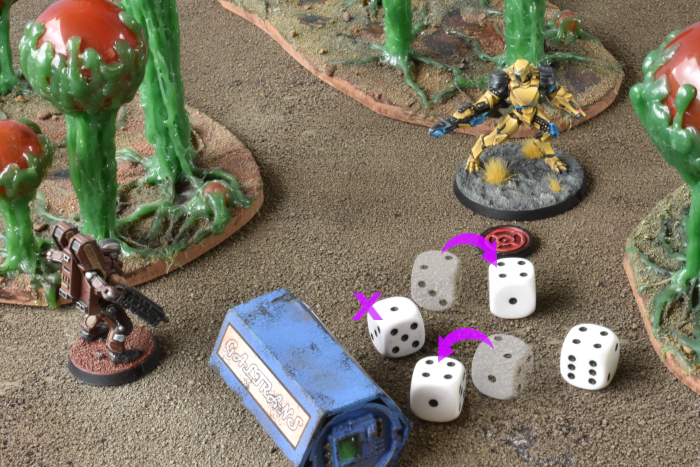
The Pathfinder's arc splitter has SHO 4, which means it normally rolls four dice to shoot, and as an SR (short ranged) weapon it receives an additional shot for being within 6" of the target. Rolling five dice, the Remnant player needs to equal or beat the Field Commander's EVS of 4. They roll two 1s, two 2s and a 4.
The Pathfinder has SKL 4, with the +2 from aiming increasing it to 6. This allows the Remnant player to adjust the rolls by up to 6 points in total. They flip the 2s up to 4s, but don't have enough points remaining to get either of the 1s up to a 4, so these remains missed shots.
The Epirian player now needs to roll to see if their armor blocks the three successful hits. They need to equal or beat the PEN (penetration) of the arc splitter, which is 3. Rolling three dice, they roll a 2, a 3 and a 4. The Field Commander's AV (Armor Value) of 4 allows them to flip the failing 2 up to a successful roll, which means all three shots are blocked.
While the Field Commander doesn't take any damage, being hit by enemy fire raises his Suppression Level, putting him on Level 1 (Marked in the picture below with the orange die).
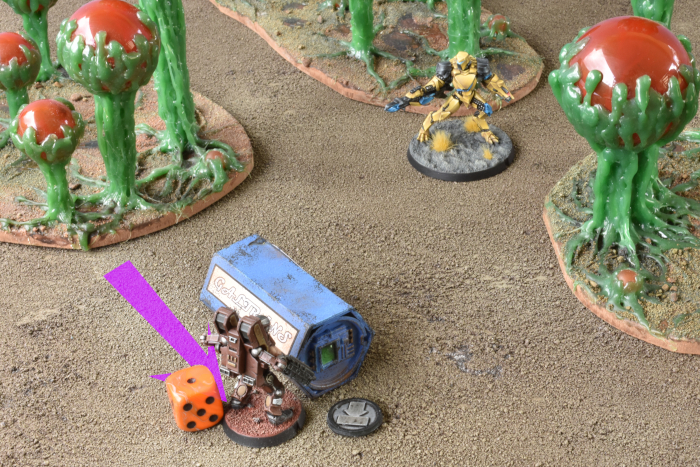
It's now the Epirian player's turn to activate a unit. They use a Move action to shuffle the Field Commander over behind the shipping crate, and a Take Cover action, which will give him some extra defense against any further enemy shooting until he activates next.
Regular models can normally only fire a single weapon per activation, but the Field Commander's Advanced Machine Assistance ability allows him to cut loose with all of his weapons at once. His two LM14 machine guns each have SHO 3, while his cluster missile launcher is an area of effect weapon, so has SHO 2 against the single model enemy unit. Grabbing two black dice for the missiles and six white dice for the machine guns, the Epirian player rolls five 2s, two 5s and a 6, needing to equal or exceed the Pathfinder's EVS of 4 to hit. The Field Commander has SKL 4 but is on Suppression Level 1, reducing his SKL by 1 point. The Epirian player chooses to use the remaining SKL 3 to flip the 3 and one of the 2s up to 4s.
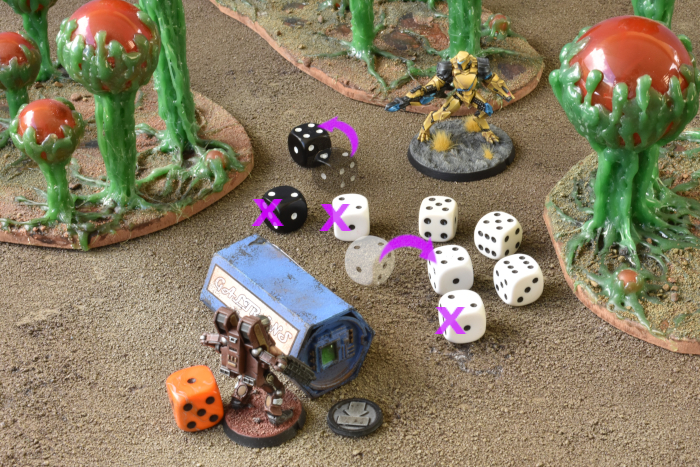
Both Epirian weapons have the same PEN 4, but the 6 is a Critical Hit, requiring a roll of 6 to block. Rolling the dice from the successful hits, the Remnant player gets a 2, a 3, a 4 and a 5, and a 2 on the Critical hit. They use the Pathfinder's AV 4 to flip the regular 2 and the 3 up to 4s, but don't have enough points left to block the Critical Hit.
This means the Pathfinder suffers a single injury, which would be enough to kill a lesser warrior. Remnant Champions are made of tougher stuff though, capable of shrugging off significant damage, and even the comparatively light armored Pathfinder has a FOR (fortitude) of 5, meaning it needs to suffer 5 injuries to be removed as a casualty. It does however raise its Suppression Level by 2 (1 for the successful hits, and another because it suffered an injury).
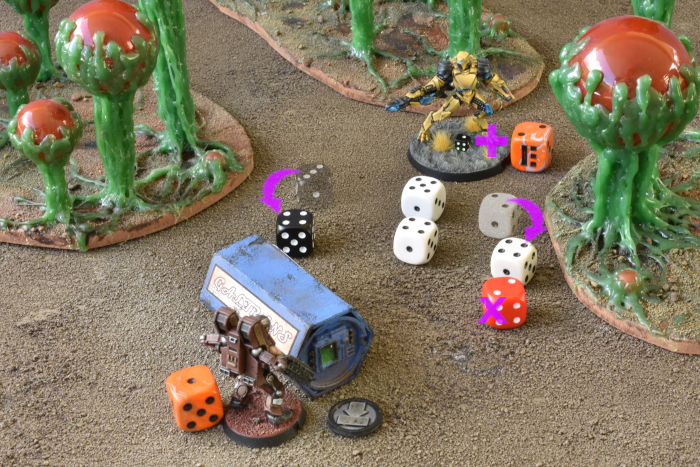
The final step in a model's activation is Recovery, allowing them to attempt to Shake Off suppression. The Epirian player rolls a D6, scoring a 4. This beats the Field Commander's WP of 3+, and so their suppression level is lowered by 1, back to 0. Play would then continue on to the next unit, if there is one, otherwise the players would move on to the next turn.
The Maelstrom's Edge V2 rulebook is now available! Grab your copy from the Maelstrom's Edge webstore now!
If you have any thoughts on the new rules, pop on over to the Comm Guild Facebook group, or start up a thread in the Maelstrom's Edge section on the Dakka Dakka forums. We welcome any feedback, and would love to hear how everyone's forces stack up in the new rules!
Revised Homebrew Broken Unit rules!
Posted on Thursday Oct 10, 2024 at 05:00pm in Gaming
- by Iain Wilson
Continuing my homebrew unit updates, I have now revised my Broken units from V1!

As with the Epirian and Karist units, these units are converted from assorted Maelstrom's Edge parts, or modified models from other games. To duplicate them, you can find the original modeling articles by following the links below, or you can choose to use whichever other appropriate models you have to hand. Note that as these are unofficial rules, you should ensure that you discuss it with your opponent before using them, to make sure they're familiar with and ok with them!
Download the rules PDF from the V2 Trial Rules page here, and check the links below for the original modeling articles for each unit!
Gnolti Longhorn - an older, wiser Gnolti in a command role.
Gnolti Berserker - a rampaging Gnolti driven into a frenzy by the madness of war.
Pa'ku Heavy Mortar - an alternate rules page for the Pa'ku Artillery unit, adding a heavy mortar option.
Skyboarders - Rabble troops equipped with hoverboards.
Jet Pa'ku - A gun-toting, boostpack-wearing Pa'ku, originally just built for the fun of it, but I couldn't resist giving it rules!
Attack Buggy - a light assault vehicle made from a Mantic Marauder vehicle.
Broken Raider - This one I don't have a conversion built for - these rules were originally put together for the V1 Trial Transport rules article. Feel free to use whatever light truck or buggy models seem like a good fit!
To build your own force of ramshackle, kit-bashed doom, grab some Broken models or STL files from the Maelstrom's Edge webstore here!
What are you working on? We would love to see your models and terrain in the Comm Guild Facebook group!
For other building ideas, modeling tutorials, army spotlights and conversion walkthroughs, check out the Hobby section of the Maelstrom's Edge website here. And while you're there, grab a copy of the Maelstrom's Edge V2 Beta rules!
Revised Homebrew Karist Unit rules - and some Epirian Tweaks!
Posted on Thursday Sept 19, 2024 at 05:00pm in Gaming
- by Iain Wilson
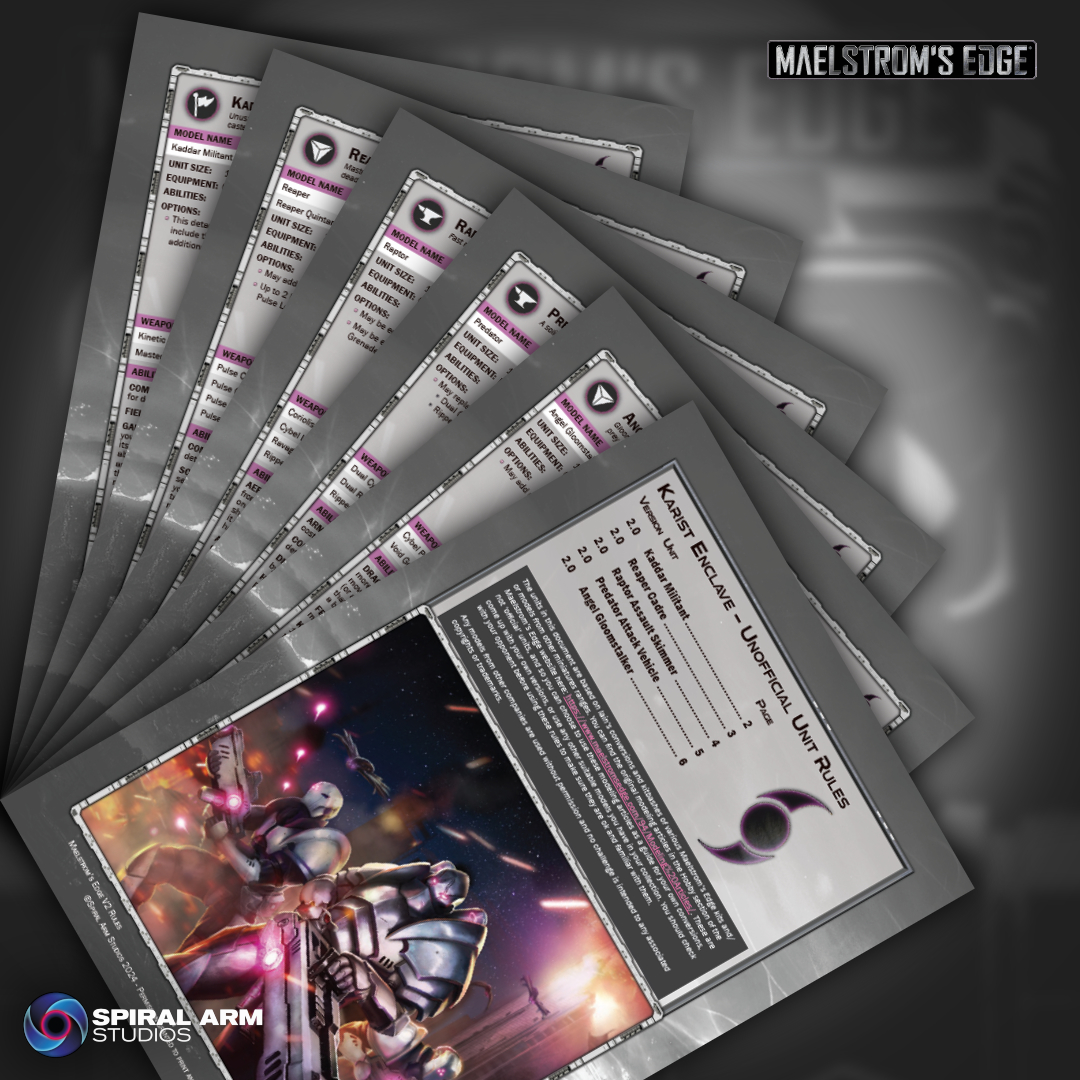
Following on from my Epirian Foundation update last week, I have now also revised my homebrew Karists from V1. This was a much smaller job, as I hadn't actually created as many Karist units, and that's clearly a terrible oversight that needs to be rectified! As such, along with updating the existing units, I have also added in a couple of extras from conversions that I had made that I hadn't created rules for yet.
As with the Epirians, these units are all converted from assorted Maelstrom's Edge parts, or modified models from other games. To duplicate them, you can find the original modeling articles by following the links below, or you can choose to use whichever other appropriate models you have to hand. Note that as these are unofficial rules, you should ensure that you discuss it with your opponent before using them, to make sure they're familiar with and ok with them!
Kaddar Militant - a variation on the usual Kaddar Nova, with a more warlike focus.
Reaper Cadre - stealthy Karist Troopers equipped with a longrifle variant of the pulse carbine.
Predator Attack Vehicle - an anti-grav support vehicle based on a Warhammer 40K Genestealer cult buggy.
Raptor Assault Skimmer - a transport vehicle based on a Gates of Antares Freeborn skimmer.
Angel Gloomstalker - a Juvenile Angel variant converted from the plastic Mature Angel kit.
Download the rules PDF from the V2 Trial Rules page here!
I've also made a couple of tweaks to the Epirian rules posted last week. The SecDef Ironhide has had its Inorganic designator swapped to Armored, Sentinel bots can now all take Shock weapons, and I realised as I was working on the Karists that I already had a unit named 'Reapers', so the newly christened 'SecDef Reaper Team' has now been re-re-named the 'SecDef Wrecker Team'. You can grab the revised rules pages on the V2 Trial Rules page linked above.
To build your own force of over-zealous, kit-bashed doom, grab some Karist models from the Maelstrom's Edge webstore here!
What are you working on? We would love to see your models and terrain in the Comm Guild Facebook group!
For other building ideas, modeling tutorials, army spotlights and conversion walkthroughs, check out the Hobby section of the Maelstrom's Edge website here. And while you're there, grab a copy of the Maelstrom's Edge V2 Beta rules!
Updated Homebrew Epirian Unit Rules
Posted on Thursday Sept 12, 2024 at 05:00pm in Gaming
- by Iain Wilson
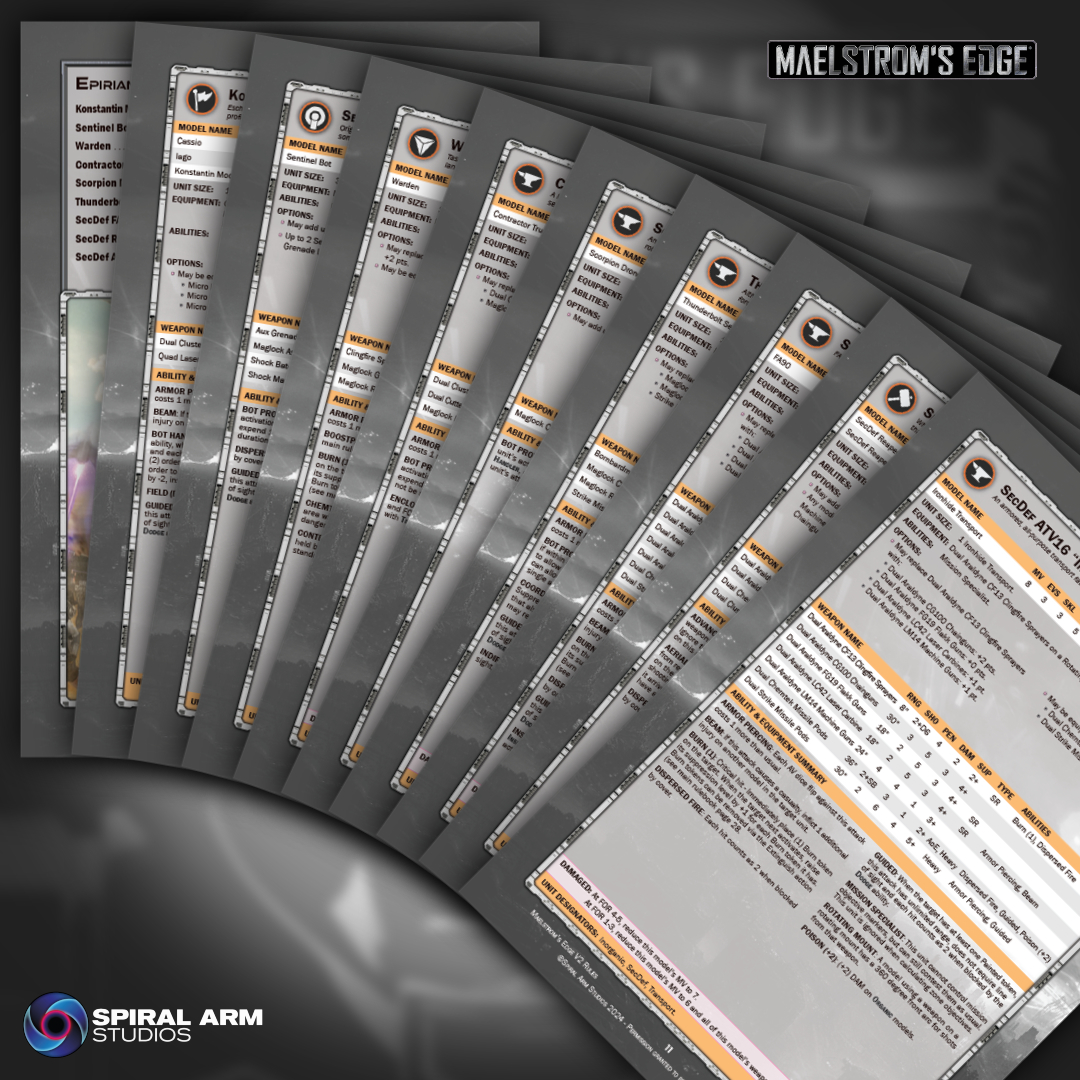
With the release of the updated Beta seeing the V2 rules in their more or less final state, this seemed like a good time to get caught up with my assorted homebrew units created originally for the V1 ruleset. To begin with, I have worked through my Epirian creations, compiling them into a PDF for easy reference.
These units are all converted from assorted Maelstrom's Edge parts, or modified models from other games. To duplicate them, you can find the original modeling articles by following the links below, or you can choose to use whichever other appropriate models you have to hand. Note that as these are unofficial rules, you should ensure that you discuss it with your opponent before using them, to make sure they're familiar with and ok with them!
Konstantin Moor, Veteran Bot Handler - a unique Commander accompanied by two custom drones.
Sentinel Bot Unit - a robotic replacement for the standard Contractor unit.
Warden - a boostpack-equipped Epirian solo character.
Contractor Truck - a light transport vehicle for moving your Contractors about.
Scorpion Drone - a modified Spider Drone with a nastier bite.
Thunderbolt Sentry Drone - an automated weapon drone built from the PDC Gaming gun carriage model.
SecDef FA90 Reconnaissance Walker - a scout vehicle adding firepower and advance intel for SecDef forces.
SecDef Reaper Team - Originally just called the SecDef Heavy Team, updated with a better name and more options.
SecDef ATV16 “Ironhide” Transport - an armored SecDef transport converted from a Miniature Scenery Tactical Response Vehicle.
The Thunderbolt Sentry Drone and Warden already had V2 Beta rules published. This document updates them to V2.1, adding a Micro Drone equipment option to the Warden and including the rules entry for the Thunderbolt's Rotating Mount, which was left off the original page.
Download the PDF here!
To build your own force of kit-bashed doom, grab some Epirian models from the Maelstrom's Edge webstore here!
What are you working on? We would love to see your models and terrain in the Comm Guild Facebook group!
For other building ideas, modeling tutorials, army spotlights and conversion walkthroughs, check out the Hobby section of the Maelstrom's Edge website here. And while you're there, grab a copy of the Maelstrom's Edge V2 Beta rules!
V2 Sample Force - Epirian Foundation
Posted on Thursday Aug 08, 2024 at 05:00pm in The Epirian Foundation
- by Iain Wilson
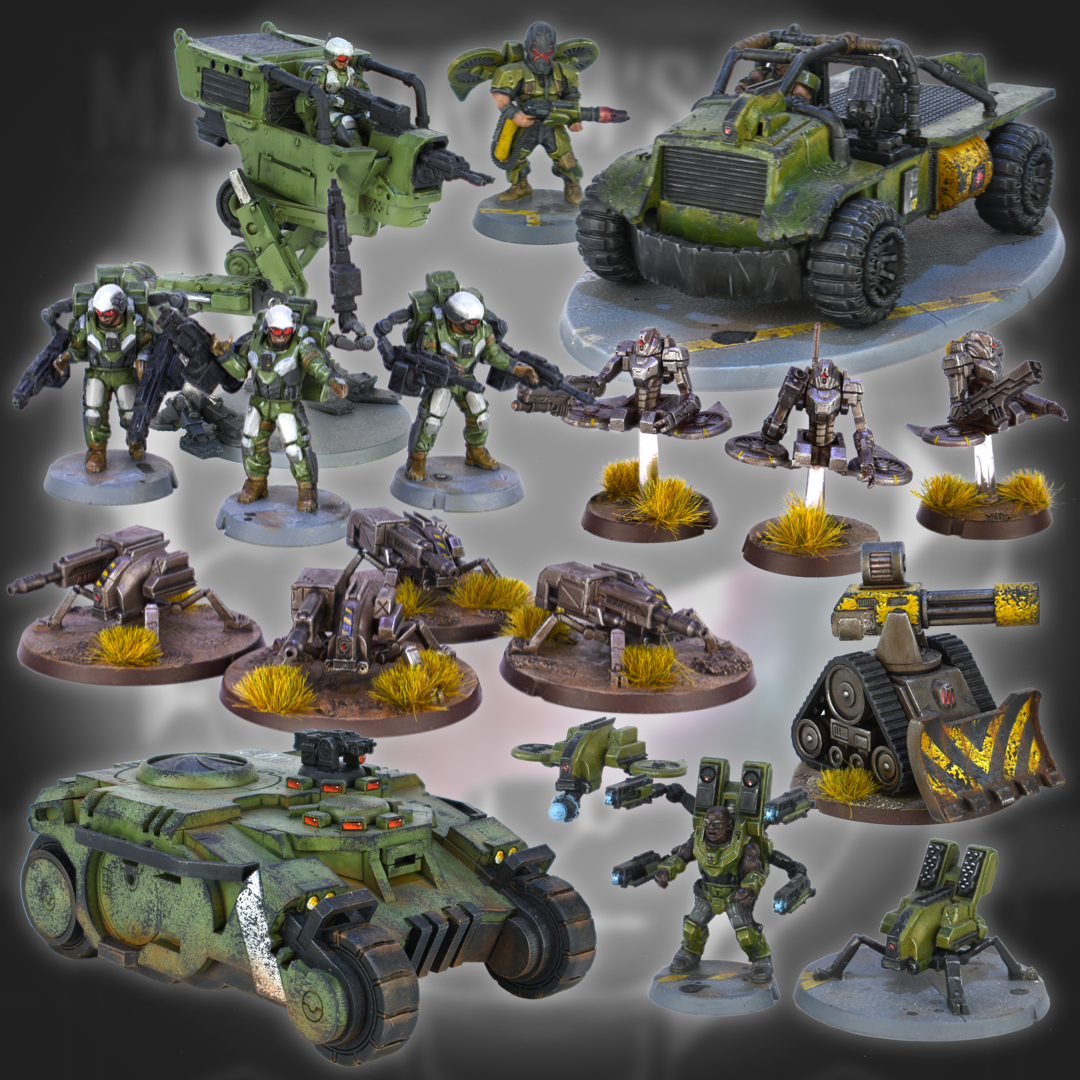
Maelstrom's Edge V2 is on the way, so this seems like the perfect time to build some new armies! The upcoming V2 Rulebook includes sample lists for each faction, and I thought it would be fun to build them all so that I can use them for some battle reports. I decided to start with the Epirians, because, well, robots are cool.
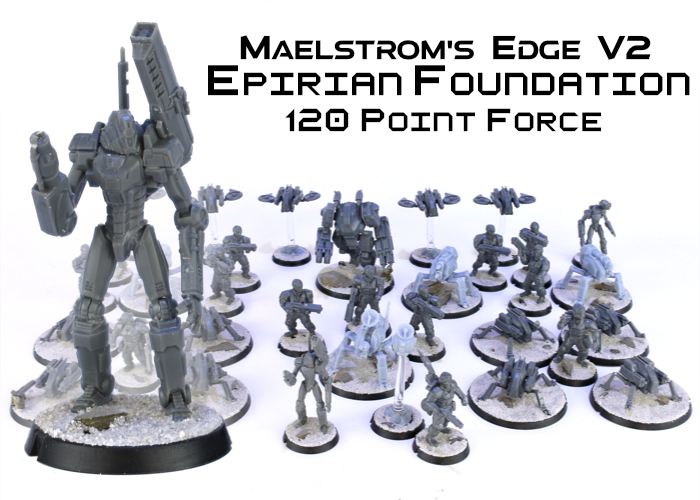
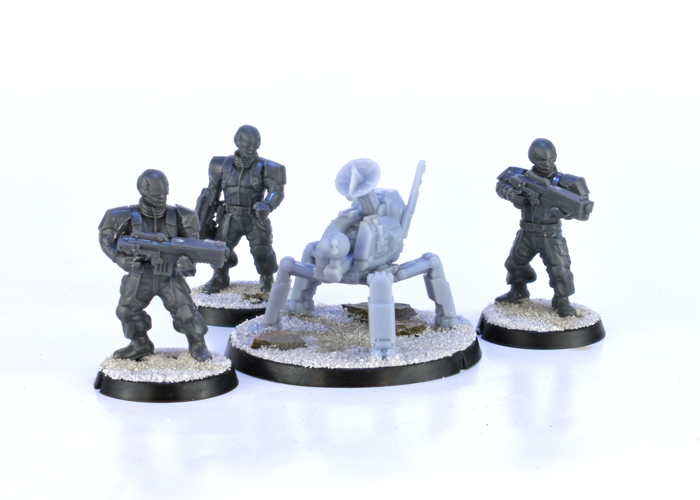
The force list for this project is focused around bots, although has a few Contractor units in there as well for variety. For simplicity, the rulebook sample list is built as a single detachment led by a Journeyman Handler and includes two Scarecrow Snipers. I decided to tweak things slightly by making one of the Scarecrows a Command unit and splitting some of the bots into a second detachment, but otherwise this force is the same as will appear in the book.
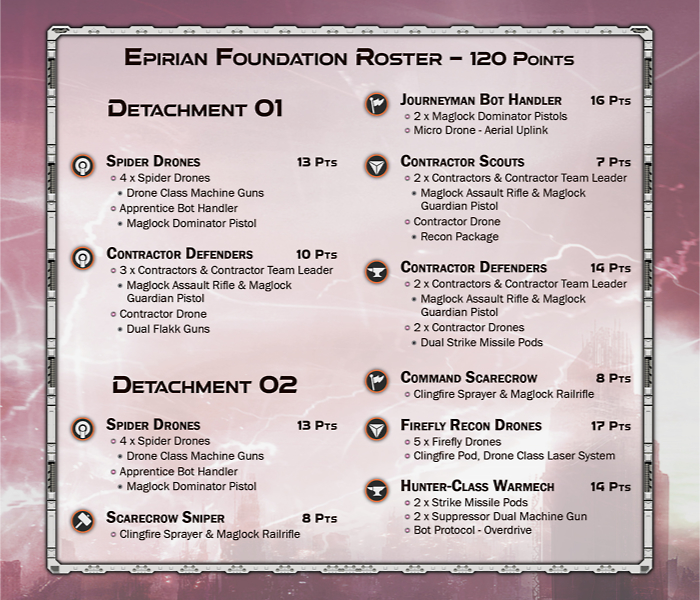
In a force led by a Handler, bots are the main focus. The Journeyman’s Bot Handler ability, improved by the Aerial Uplink, allows them to keep suppression under control for the force’s bots, while their Push the Machines ability allows you to reactivate an already activated bot unit, doubling the effectiveness of the Hunter or a Scarecrow each turn. By including the Command Scarecrow, the force gains an additional command point each turn, and having the second command model allows the force to be more spread out while remaining in a command radius bubble for orders and bot protocols.

These Command models are largely built stock, although I repositioned the head and weapon on the Command Scarecrow, and used a Broken head (with the helmet hung on the belt) for the Journeyman. The Aerial Uplink drone is a 3D print of an upcoming model.
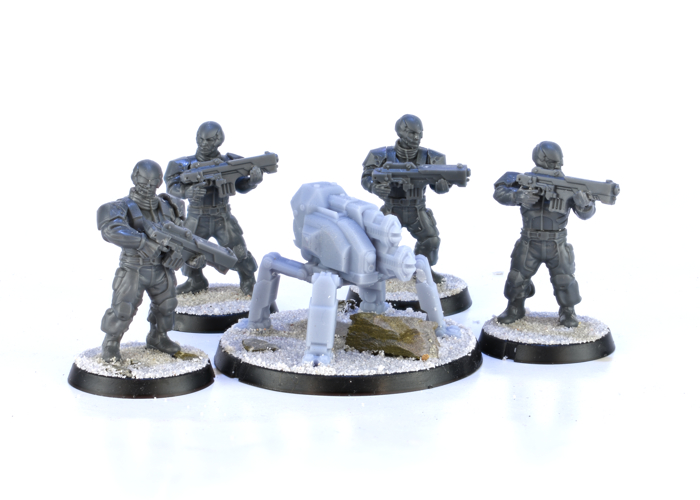
The presence of the Apprentice Handlers in the Spider Drone units gives them the freedom to move out of the Scarecrow or Journeyman’s command radius without losing the benefit of orders and bot protocols.
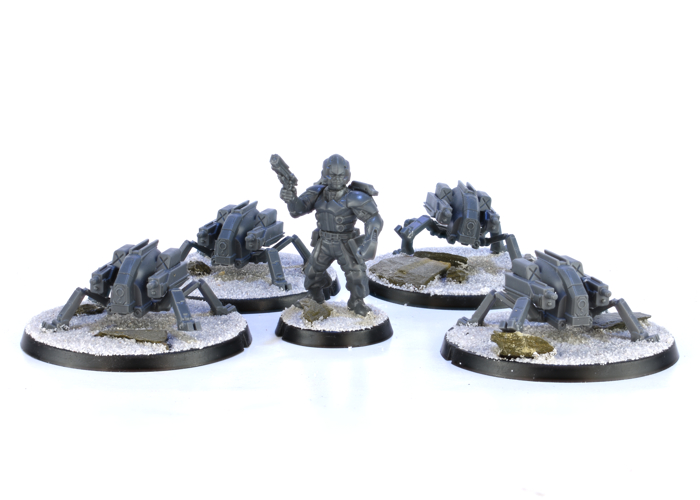

I used another Broken head for one of the Apprentices, and repositioned some of the Spider Drones' legs to add a little variety in their posing.
The inclusion of a few Contractor units helps provide some additional firepower in the force. The Recon Package in the Scout unit can paint enemy units for the attention of the Strike missiles on the Defender's weapon drones and the Hunter mech.
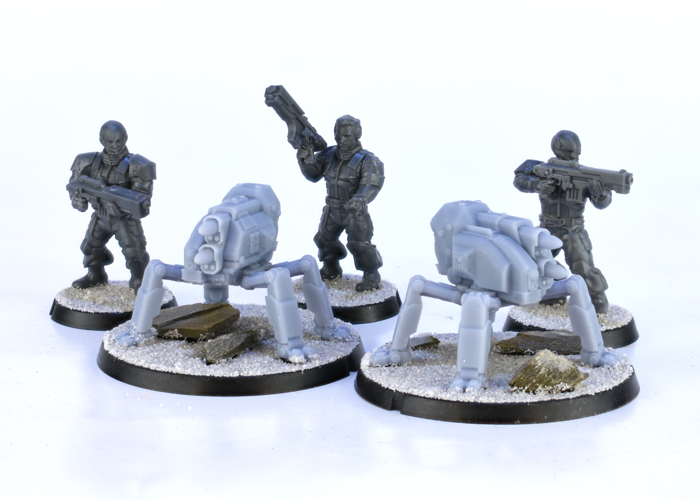
I used the arms and helmets from the Faction Expansion Sprue on the Contractors, as I wanted this force to have that better armoured look. The drones in these units are 3D prints, and these models are currently available as printable STLs, although a plastic kit is currently in development, for release as soon as possible!
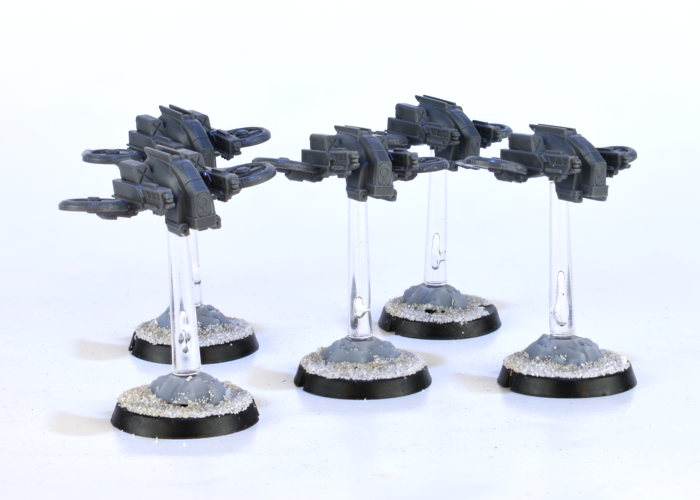
To round out the force, the Firefly drones provide some fast-moving harassment and paint enemies for the Strike missile units, while the Scarecrow and Hunter serve as mobile fire support and focus on taking out enemies too tough for the Contractors or Spiders to deal with. In addition, selecting the Master of Machines faction objective potentially gives the force an additional free bot protocol activation each turn, allowing the Hunter to move more quickly around the battlefield, the Scarecrows to pump out additional firepower, and the Fireflies to more effectively dodge enemy fire.
 With everything built and based, I'm looking forward to getting some paint on! I'm going with a blue and black scheme, as I don't have anything already in those colours, making it a nice opportunity to do something different.
Stay tuned for part 2!
To build your own force of remote controlled robotic doom, grab some Epirian models from the Maelstrom's Edge webstore here!
What are you working on? We would love to see your models and terrain in the Comm Guild Facebook group!
For other building ideas, modeling tutorials, army spotlights and conversion walkthroughs, check out the Hobby section of the Maelstrom's Edge website here. And while you're there, grab a copy of the Maelstrom's Edge V2 Beta rules!