Search Results for 'terrain'
Entries found for "terrain": 216Showing 171 - 180 of total 216 search results
Terrain Spotlight: Broken Settlement, part 1
Posted on Monday Oct 30, 2017 at 05:00pm in Tutorials
- by Iain Wilson
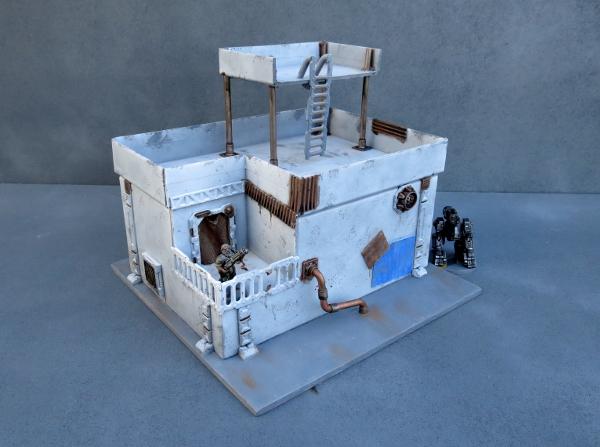
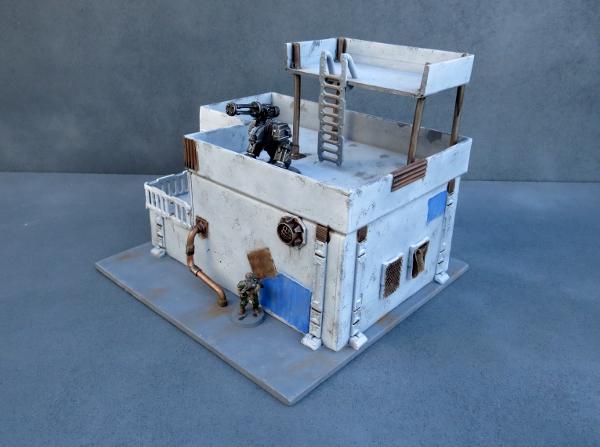
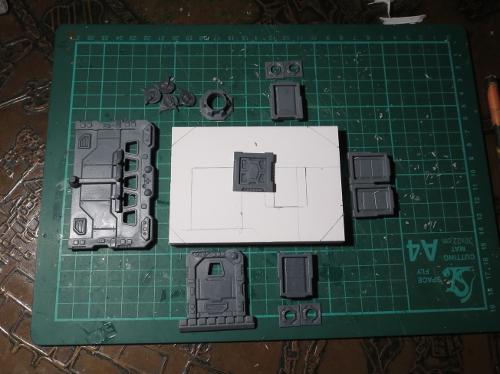
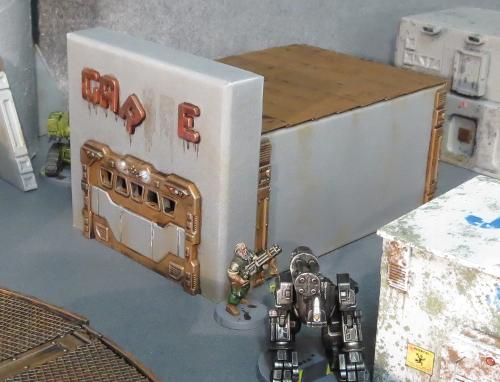
With the release of the Broken adding a long-awaited third faction to the Maelstrom's Edge universe, it seemed fitting to take a break from tinkering with the shiny new models to add some appropriate terrain to the table. So this week, I broke out some gift boxes that I had waiting for an opportune moment, grabbed some terrain sprues and got to work!
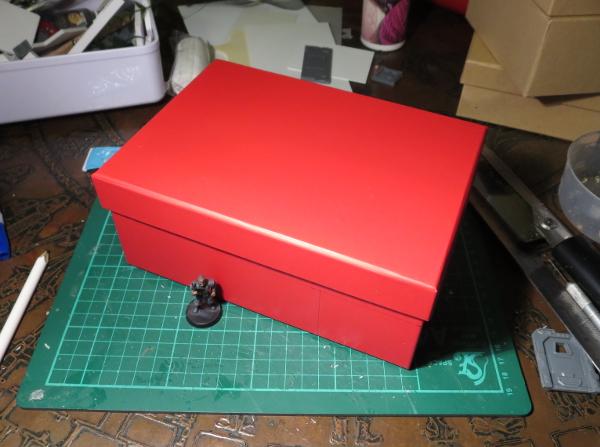
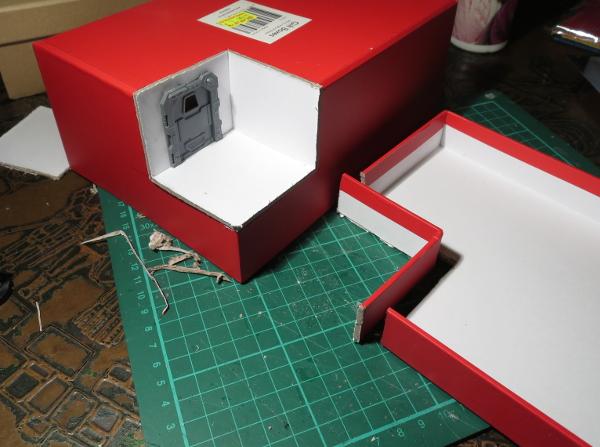
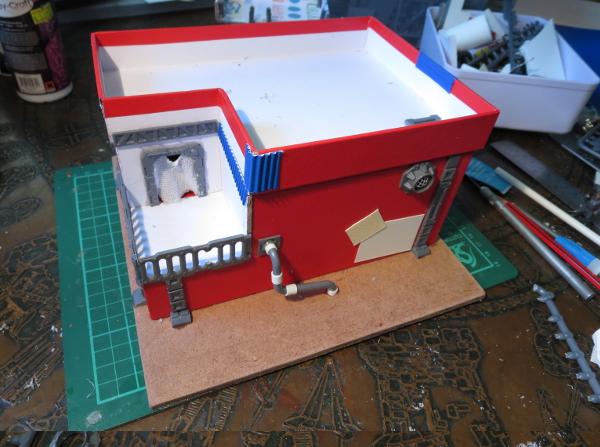
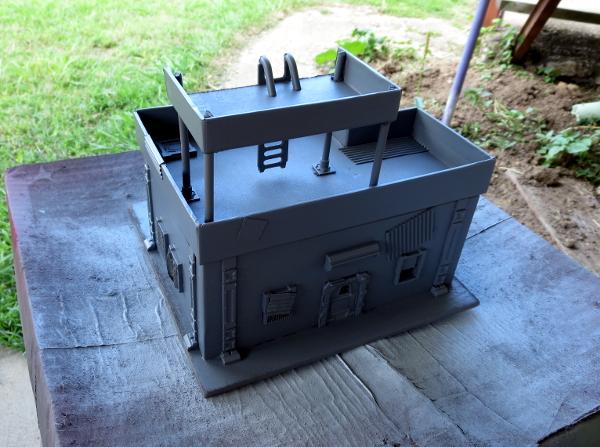
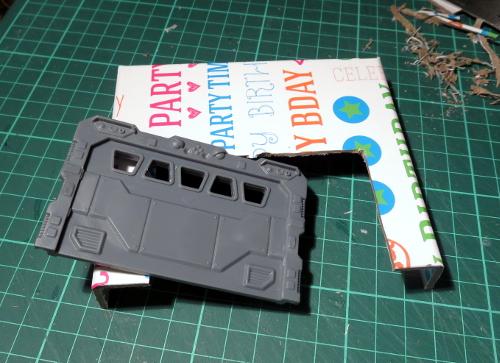
The core of the first building for my new Broken settlement is a 20cm x 15cm cardboard gift box. The plan was to more or less follow the style of my earlier gift box buildings, but with the addition of some faction-appropriate wear and tear and rough repair work.
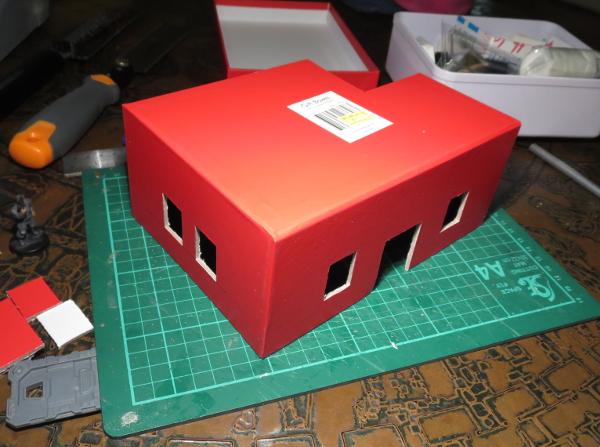
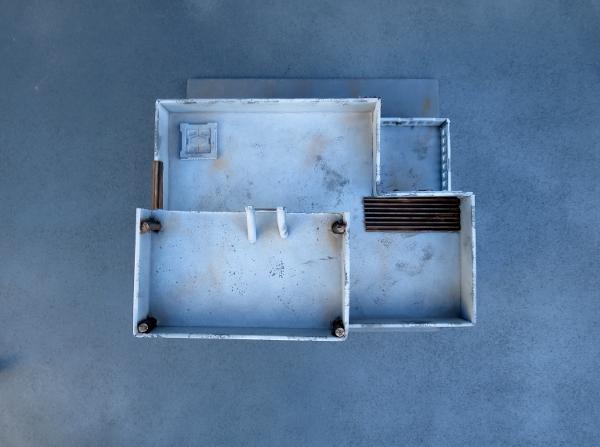
I started by cutting out holes in the box for windows and doors, using a sharp hobby knife.
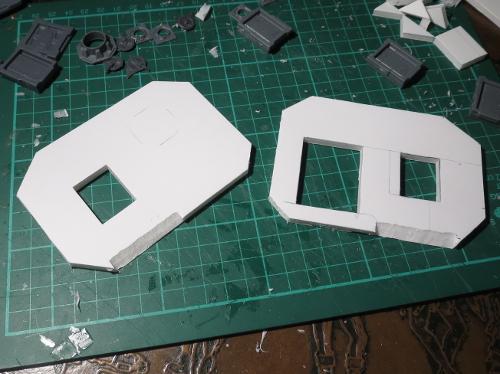
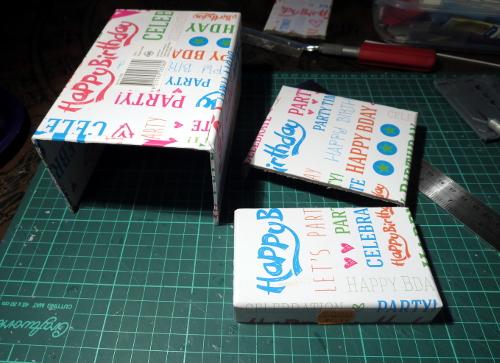
To break up the box shape a little, I cut away one corner of the box, 6cm along each side. Flipped over, this corner piece fits back in place as a recessed balcony.
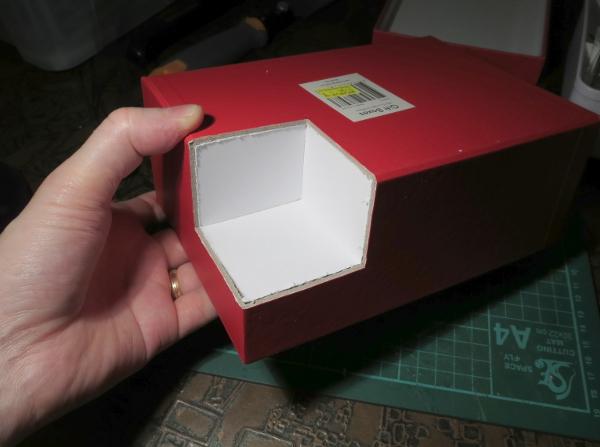
I cut a hole in one wall of the balcony to add a door, and cut a matching corner off the box lid, which would form the walled roof of the building.
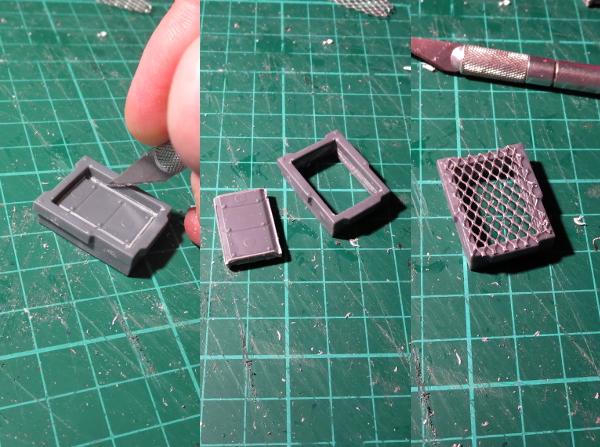
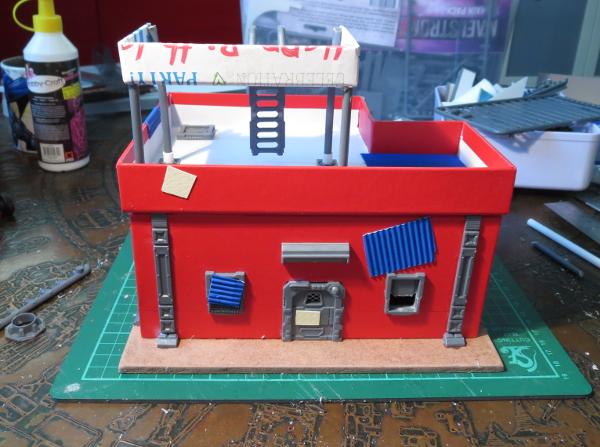
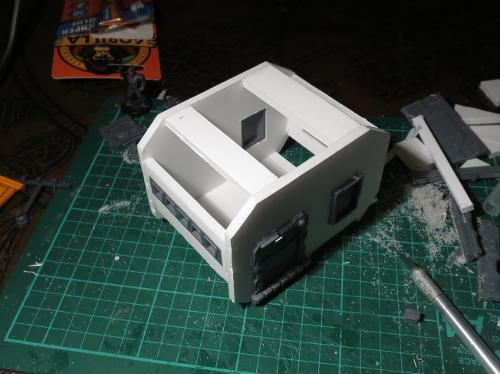
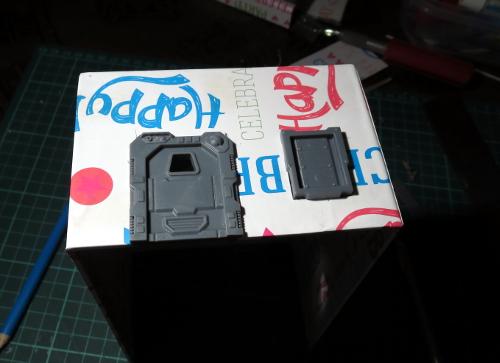
From there, it was time to glue the box onto a square of masonite, and start detailing. To make the building look like it had been through some rough times, I modified the rectangular shutter windows from the terrain sprue. For the first one, I carefully cut out the shutter using a hobby knife, and then glued some aluminium mesh over the front of the window frame.
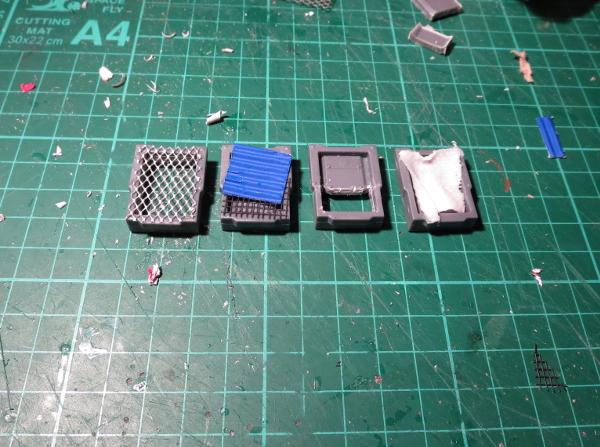
Rather than making all of the windows the same, I made different modifications to the other windows. On one, I glued some plastic flyscreen and a square of corrugated cardboard over the front of the frame, another had the shutter replaced with a piece of crepe bandage soaked in watered-down PVA glue, and on the last one I cut away just the lowest section of the shutter.
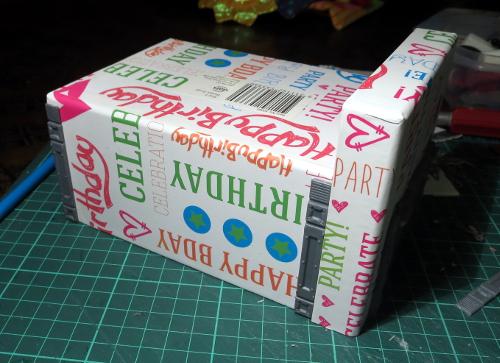
The terrain sprue parts were glued in place with superglue, and then I added some patches cut from thin plasticard and corrugated cardboard to the walls of the building.
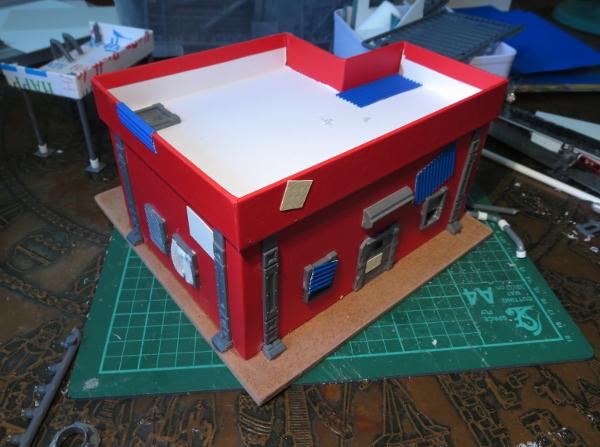
The door on the balcony received a blanket in place of the original door with another piece of glue-soaked bandage, and a couple of ladders were used to create a railing. A pipe made from pieces of sprue joined with some plastic tubing and a vent made from a large pipe fitting with some aluminium mesh glued inside finished off the detailing on the back.
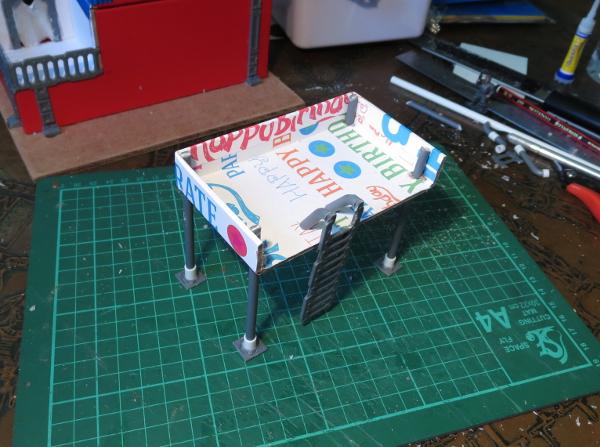
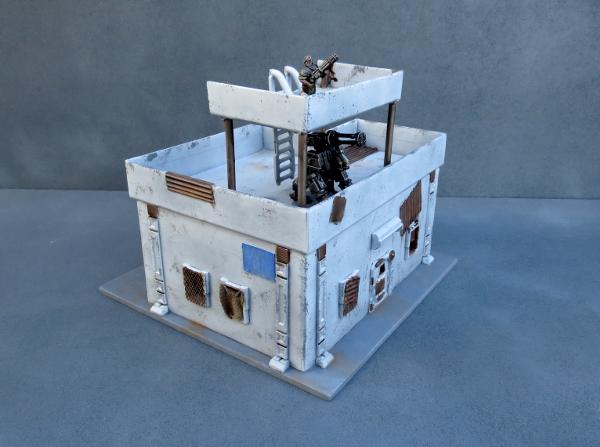
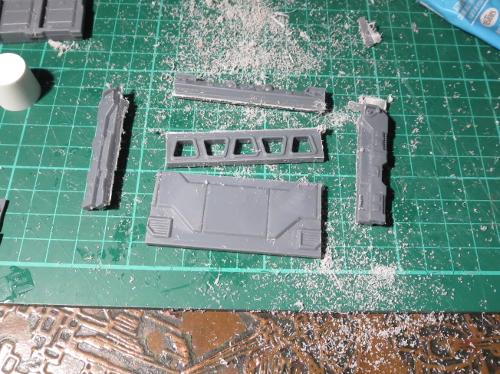
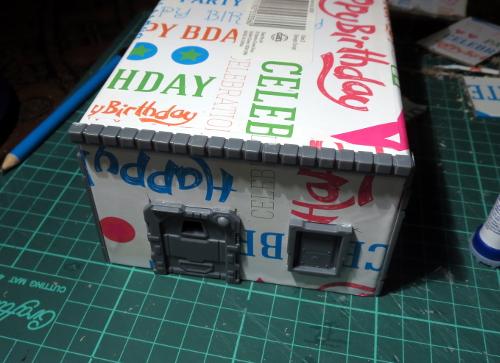
The building was still looking a little boxy, so I decided to break up the silhouette a bit more with the addition of a watchtower on the roof. This was constructed from a piece of gift box lid left over from a previous project, and some pieces cut from the ends of the terrain sprue. The ladder was glued in place with another couple of sprue pieces forming the hand grips at the top.
With construction complete, it was time to break out the paint. I started with a base coat of flat grey.
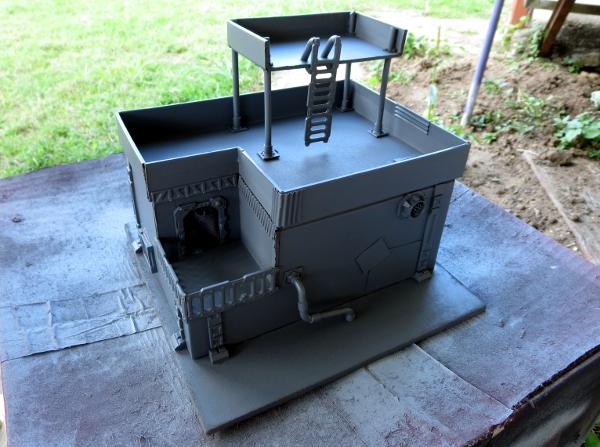
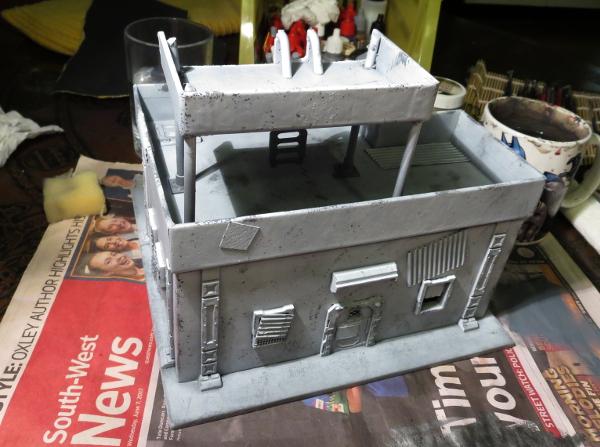
Over that went a thin layer of flat white. I didn't want this to be perfectly smooth and pristine, shining white, so kept the coat thin enough for the grey to show through a little. Once the spray was dry, some weathering was added with a sponge and some Vallejo Neutral Grey.
The metal patches and any other parts that I wanted bare metal were painted with a coat of Vallejo Beasty Brown, and then given a rough coat of P3 Pig Iron.
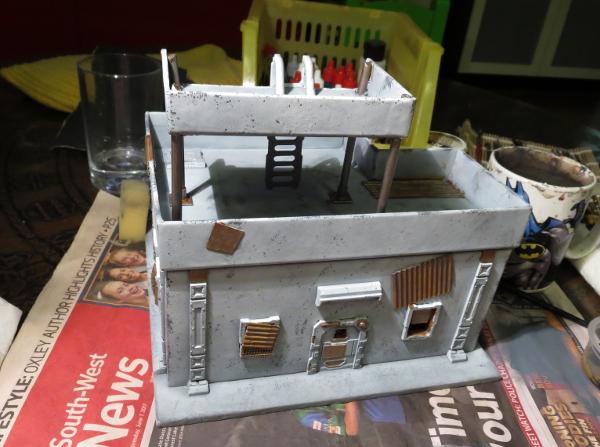
The base was painted with a coat of Vallejo Neutral Grey, and then a drybrush of Vallejo Light Grey, with some patches of Beasty Brown added to dirty things up a little. A splash of Army Painter Strong Tone over the metal bits and blankets, and a rough coat of Citadel Ultramarines Blue over a couple of the metal patches, and the building was pretty much table-ready.
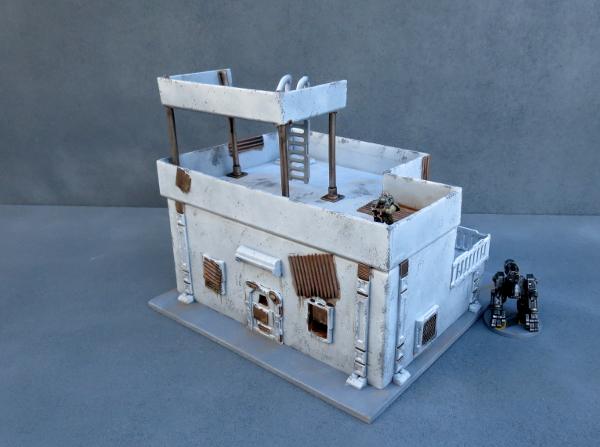
There is still a little detail work to go, but some of that will wait until I get some more of the settlement completed so that I can match details across the different buildings to tie everything together.
So what's next?
I will be adding a couple of smaller gift box buildings with some varying levels of damage and delapidation, and I have some plans for a large peach tin that was rather conveniently opened the other day. The outsides of the buildings will gain some awnings and banners and the like, and I'll scatter some scrap around to add some flavour (and also some handy cover).
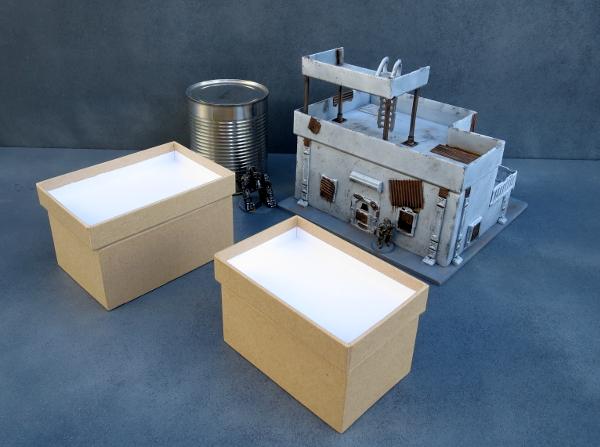
Stay tuned for more!
To build your own stellar refuge settlement, you can pick up the Maelstrom's Edge terrain sprue from the webstore here. As always, feel free to share your creations on the Comm Guild Facebook page!
For other Maelstrom's Edge modeling articles, including tutorials and walkthroughs of a wide range of different building and miniature projects, check out the article roundup here.
Tags: broken buildings modeling models spotlight terrain terrainsprue walkthrough
Painting Tutorial: Hazard Stripes
Posted on Monday Sept 25, 2017 at 05:00pm in Tutorials
- by Iain Wilson
Battlefields are a dangerous place, but that's no reason not to follow reasonable occupational health and safety protocols. So here's a quick and easy tutorial for painting hazard stripes on your terrain, to make sure that your settlement's managing body doesn't find themselves with unexpected compensation claims on top of their post-battle repair bills!
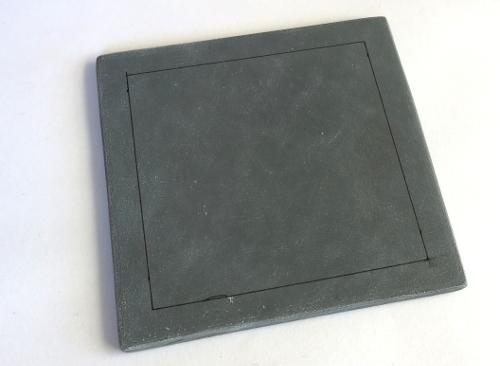
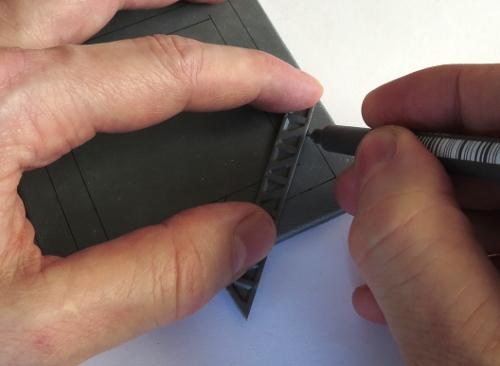
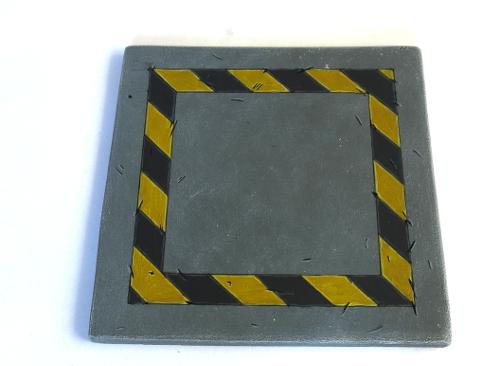
Start by marking out the area that you want to draw attention to with a ruler and a fine line black pen - I'm using a Staedtler 0.05 'Pigment Liner' here.
You can use a ruler to mark out the width that you want for the striped area, but I find it quicker and easier to just grab an appropriately-sized strip of plasticard or (as shown here) a spare support strut from the Maelstrom's Edge terrain sprue and use it as a guide.
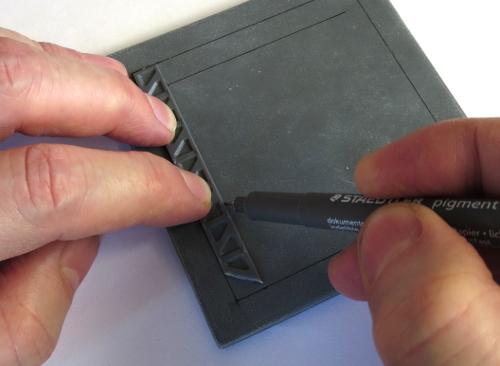
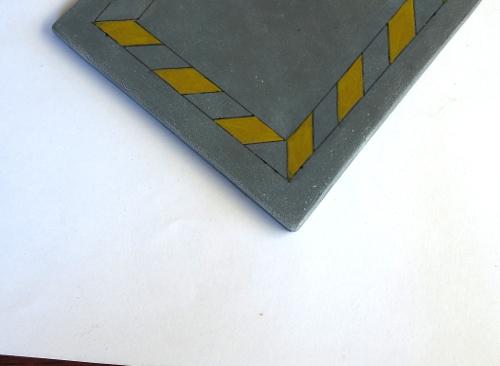
Once you have marked out the area to be striped, it's time to start adding in the lines for the striping itself. I generally use something around about a 45-degree angle, but the precise angle doesn't really matter. Place your guide strip where you want the first stripe (I started at the corner here, because it seemed like the obvious place) and draw a line either side of the strip. If you're working to the right, move the strip to line up the left hand edge with the right hand stripe, and draw a new line along the right of the strip. Repeat all the way along.
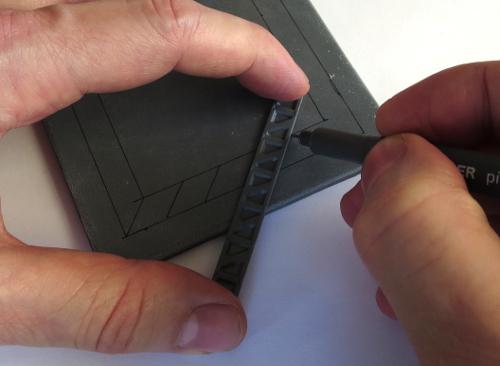
If your hazardous area has corners, there are a couple of ways to approach them. The easiest way is to just run your stripes past the corner, so that the angle of the stripes reverses around the corner.
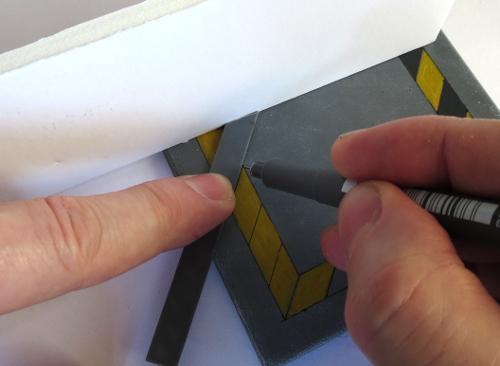
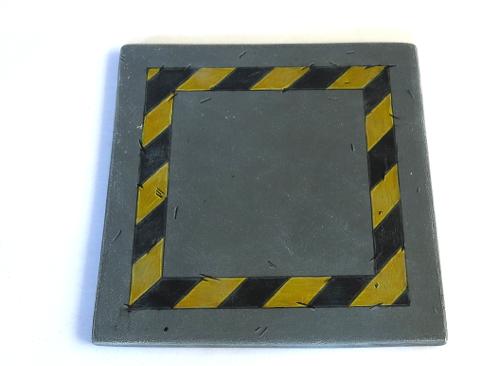
Once you're all marked out, it's a good idea to either set the piece aside for a couple of hours to let the pigment from the pen set properly, or hit it with a coat of fixative spray (which you should be able to get in the sealer section of any decent craft store) to avoid it smudging. Then it's time to fill in every second stripe with yellow. Here, I've used a basecoat of Iyanden Darksun followed by a coat of P3 Cygnus Yellow. It doesn't matter if it's a little patchy, unless you're going for a new and pristine look to your terrain.

The above shows how the stripes 'flip' when they go around the corner. Alternatively, you can run the stripes to the corner, and then start another run of stripes in the new direction. This can be fiddly for odd angles, but works fairly well for 90-degree corners.
It's also worth mentioning that if you are worried about painting neatly in the lines, you can minimise the need to do so a little by painting the whole area yellow before marking the stripes in. That way, you only have to be neat with the black, which is a little more forgiving since messy bits that run over the lines can just be turned into weathering anyway.

Extra tip - If your striped area runs up to a wall, cutting the end of your template strip at an angle lets you get it
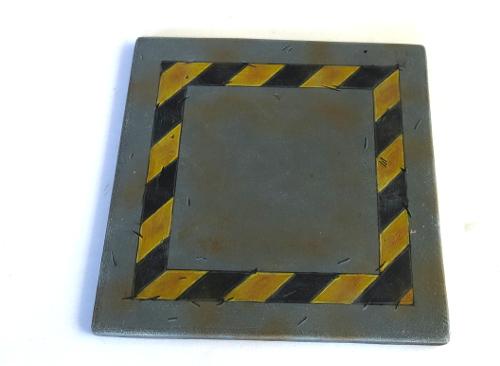
Next, fill in the 'black' areas. I prefer to use a dark grey rather than a black, as it looks a little more natural. Here, I'm using Vallejo Heavy Charcoal, from their Game Colour 'Extra Opaque' range.
If you're in a hurry, you can leave it there and it will look quite presentable. Or carry on for a little more detail...
Add some chips and scratches with your pen, wherever seems appropriate. This is a great way to conceal any spots where your paint wasn't completely inside the lines, and also adds some extra detail to the finished piece.

Then highlight the edges of the hazard stripes and the scratches with lighter yellow and grey - I just mix a little white into whichever yellow I used for the stripes, and some Vallejo Basalt Grey for the 'black' sections. I have also used some Vallejo Light Grey to highlight the scratches on the surrounding cement area.
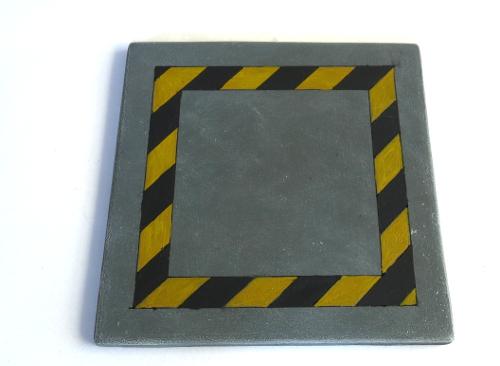
You can 'fade' the stripes, to give them a more worn appearance, by drybrushing with a little of the same colour as the area around them. My cement on this piece is Vallejo Basalt Grey drybrushed with Light Grey, so I've drybrushed over the stripes with some more light grey. The heavier you go with the drybrush, the more faded the end result.
Finally, a bit of brown drybrushed into the middle of the yellow stripes gives them some more depth, with some more brown (Vallejo Beasty Brown here) drybrushed around to dirty things up.
And that's about it. Go forth and hazard up your terrain wherever seems appropriate.
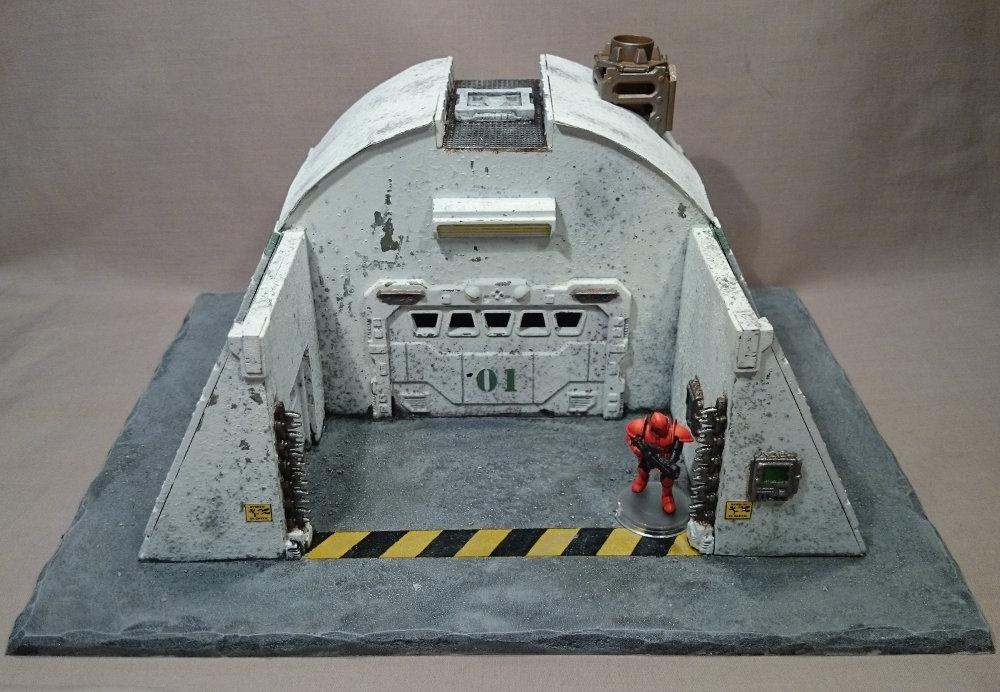
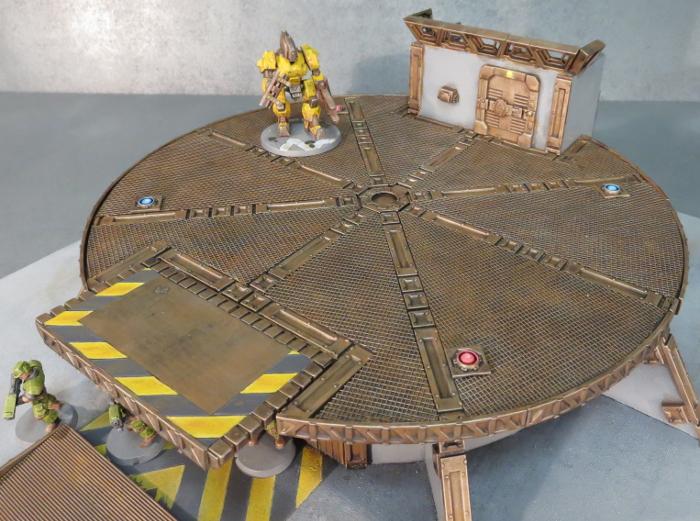
Gateways, energy fences, holes, hatchways, heat vents, and anything else that could conceivably crush, spindle or make your day unpleasant is a good candidate for some serious warning stripes.
To build your own hazardous terrain, you can pick up the Maelstrom's Edge terrain sprue from the webstore here. As always, feel free to share your creations on the Comm Guild Facebook page!
For other Maelstrom's Edge modeling articles, including tutorials and walkthroughs of a wide range of different building and miniature projects, check out the article roundup here.
Painting Tutorial: Heat Stress
Posted on Monday Sept 18, 2017 at 05:00pm in Tutorials
- by Iain Wilson
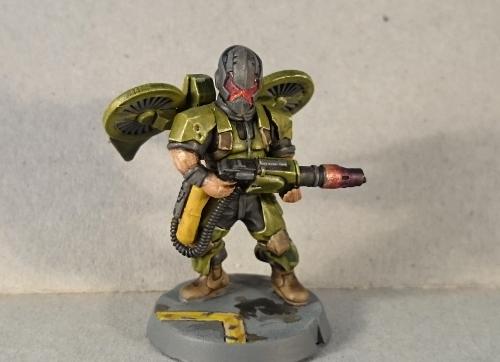
If you're tired of painting your weapon barrels silver and calling the job a good'un, this week's tutorial is for you! Here, we're going to run through how to paint a heat stress effect using Army Painter inks, perfect for Clingfire sprayers or Maglock Chainguns to make them really pop on your models.
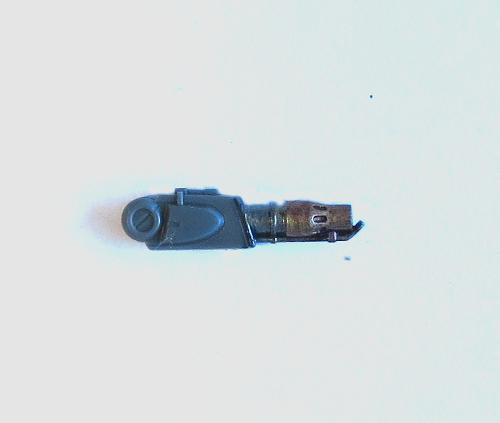
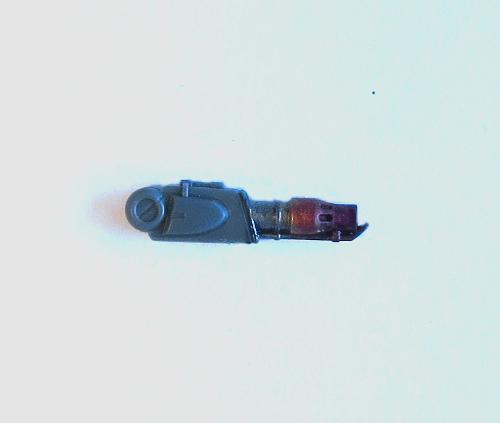
Start with a basecoat of metal. Here, I've used P3 Pig Iron, equivalent to Citadel Leadbelcher (Boltgun Metal, for the old-timers).
Paint the part that you want to be heatstressed with gold. I've used Coat D'arms Bright Gold here, but any gold will do.
Next, leaving a thin strip of gold at the end furthest from the weapon muzzle, paint the gold area with several thin coats of Army Painter Red Tone. Avoid trying to rush it by slopping the coats on too heavy, as that can cause the colour to go all blotchy. Keep the coats thin and let them dry thoroughly in between (which doesn't take long if you're keeping them thin!), and start each coat just a little bit further away from the start of the gold section, so that you build a natural transition from the gold to the red. Don't be concerned if the first coat or two doesn't look like it's actually doing much - it's a cumulative effect and the colour will build up as you keep going over it.
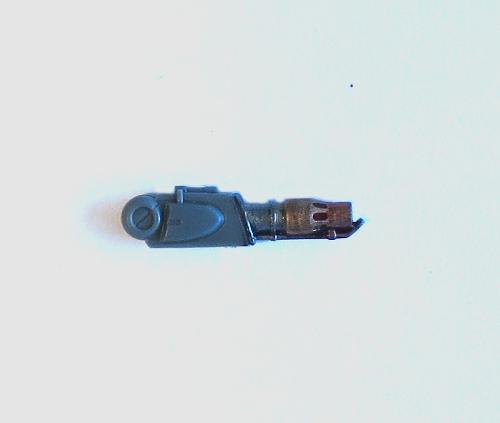
(in case you're wondering, we're doing this with inks rather than normal paints because the ink lets the metallic sheen show through.)
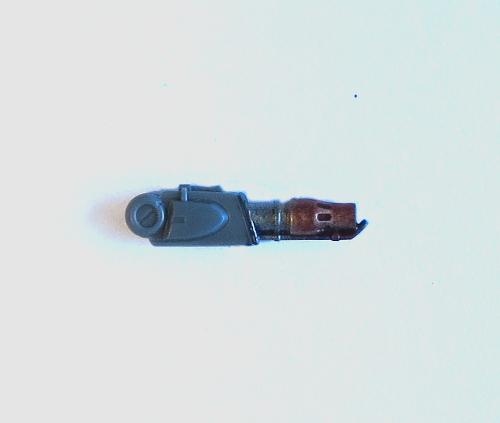
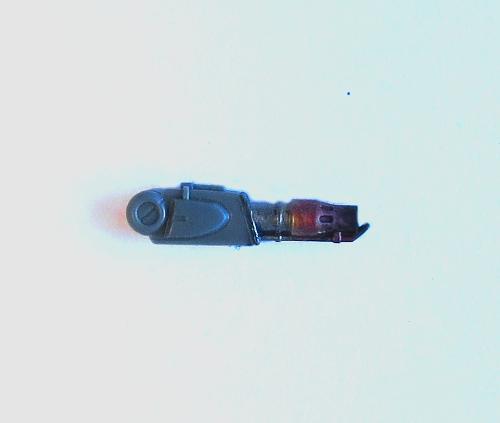
Once you have built up the red to a level you're happy with, switch to Purple Tone. Leave a section of red, and then build up a few layers of purple, starting each layer a little closer to the muzzle of the weapon to build up the transition from red to purple. As before, use thin coats and let each one dry thoroughly before starting the next.
You can also stretch it out a little on longer barrels by using some Blue Tone in between the red and the purple, to give a more gradual transition from red to lighter bluish-purple to darker purple.
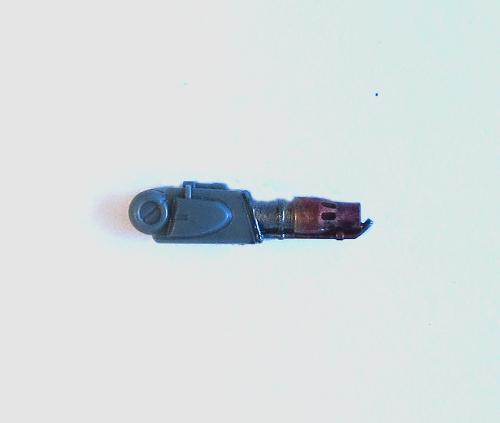
Finally, paint the muzzle of the weapon black. Thin the paint a little and work it back into the purple slightly, giving a sooty appearance to the muzzle area.
If you like your weapons looking a little cleaner, you can leave off that last step and just finish with the purple.
To build your own army of scorchy, melty doom, you can pick up the full range of Maelstrom's Edge miniatures and terrain accessories from the webstore here. As always, feel free to share your creations on the Comm Guild Facebook page!
For other Maelstrom's Edge modeling articles, including tutorials and walkthroughs of a wide range of different building and miniature projects, check out the article roundup here.
Tags: modeling painting tutorial walkthrough
Terrain Tutorial: Streetlights
Posted on Monday Sept 11, 2017 at 05:00pm in Tutorials
- by Iain Wilson
When you're putting together an urban table, little 'real' details can help immensely to bring it all to life. With that in mind, we shared a tutorial a little while back for creating simple hedges made from kitchen scourers and flock. This week we're adding to the urban chaos, and using up some of that leftover sprue, with some quick and easy streetlights.
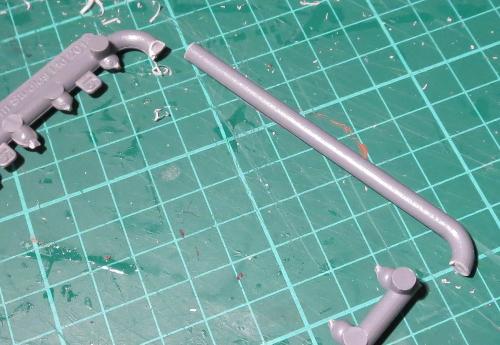
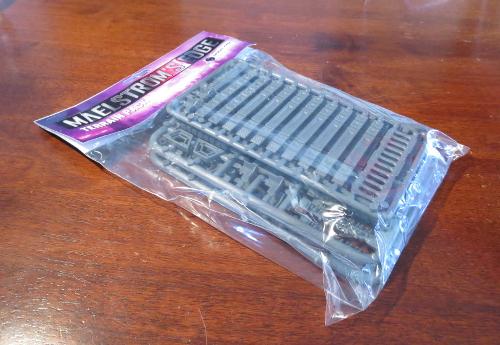
The Maelstrom's Edge terrain sprue has a whole slew of useful components on it, but it also has a nice, rounded frame that is itself rather handy for making pipes, railings or, in this case, streetlight poles. I'm using three emptied sprues (the smaller side of the two frames that make up the terrain sprue), three small pipe fittings, a striplight, some 6mm plastic tubing and some .75mm plasticard.

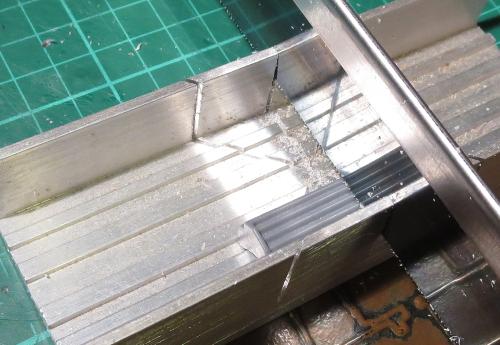
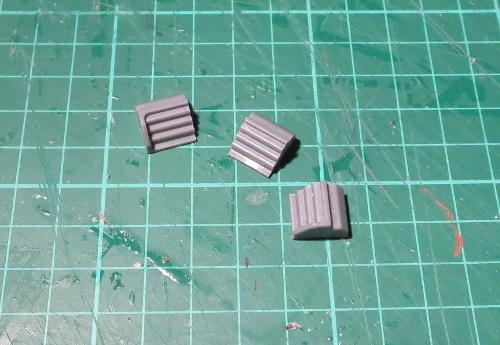
The first step is to take the striplight and cut it into 3 sections. You can do this with a sharp hobby knife if you're patient and not too attached to your thumbs, but a razor saw and hobby mitre box makes the job a lot easier.
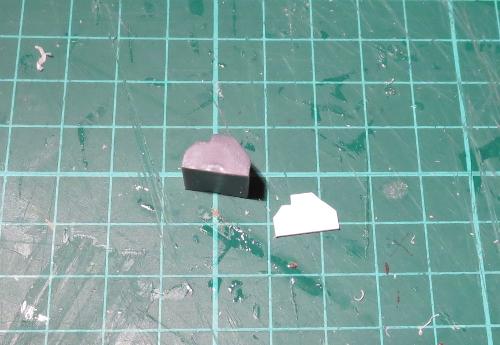
Trace around one of the end sections of the cut striplight to transfer the shape of the light's side panel to the plasticard, and then cut out four panels - 1 each for the light sections from either end, and two for the middle section.
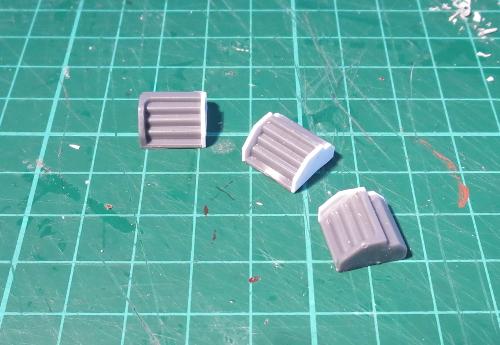
Glue these panels in place. Once the glue is dry, you can shave or file the edges of the panels down so that they are flush with the shape of the light.
The sprue frame has one end that has no connection tabs on it. This end will form the pole for the light. Cut three of them as below:
On the straight end of each of the poles, add a short piece of the plastic tube - I've used a 10mm section, but the exact length isn't important so long as it's consistent on all of your lights.
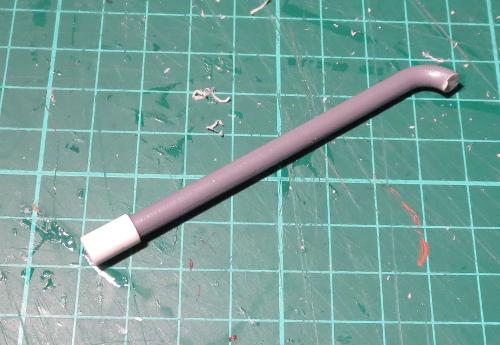
The tube then goes into the pipe fitting.
From the leftover sprue, cut three identical connection tabs.
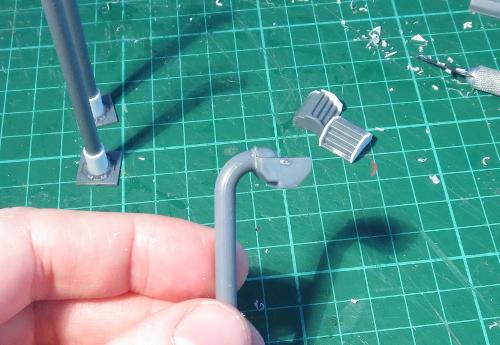
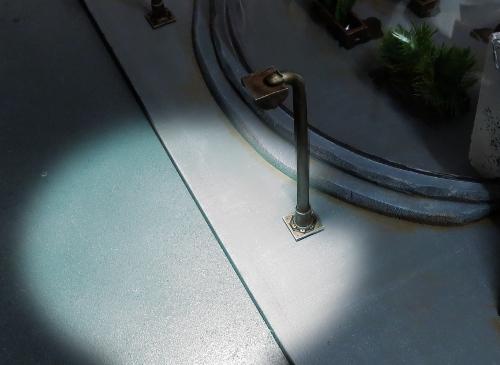
The light is glued in place on the bent end of the pole, and the connection tab is glued on top to add a little detail and bulk up the joint to match the end of the pole.
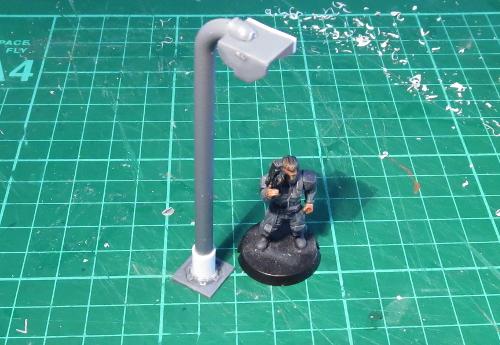
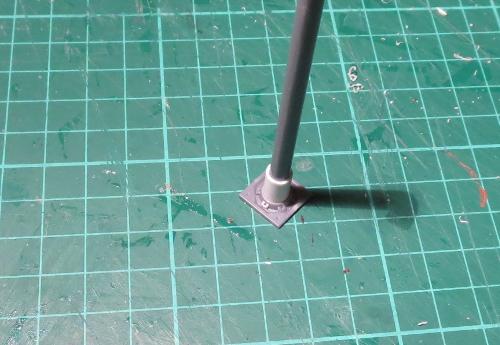
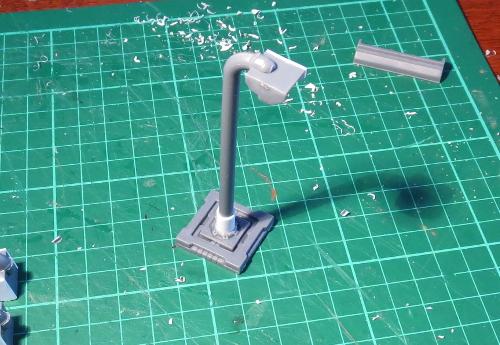
If you're intending to glue the lights onto your terrain, then you're done (aside from painting, obviously). If you want to be able to use the streetlights as scatter terrain, then you might want to glue them to a slightly larger base to make them more stable. You could use a small circle of MDF or plasticard, a spare miniature base, or alternatively the square hatch from the terrain sprue serves for a more high-tech solution.
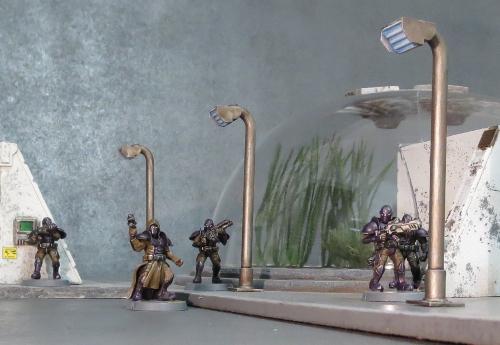
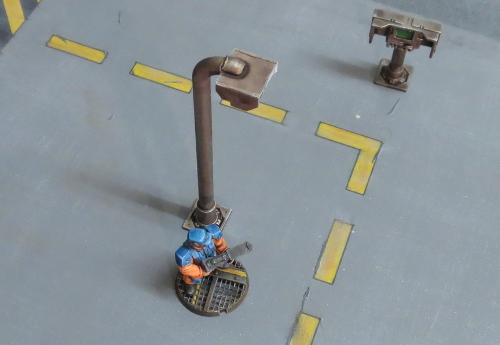
From there, it's all down to painting. The lights shown here have been painting using the weathered metal formula that features in so many of my articles - You can find the tutorial here.
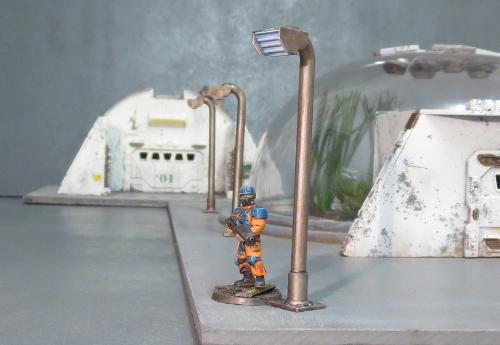
And that brings us to a close once more. Time to pop the chairs up on the tables, grab our umbrellas and saunter off into the gathering dusk...
To put together your own scifi urban utopia, you can pick up the Maelstrom's Edge terrain sprue in a handy two-pack from the webstore here.
As always, feel free to share your creations on the Comm Guild Facebook page!
For other Maelstrom's Edge modeling articles, including tutorials and walkthroughs of a wide range of different building and miniature projects, check out the article roundup here.
Conversion Spotlight: Kaddar Militant
Posted on Monday Sept 04, 2017 at 05:00pm in Models
- by Iain Wilson
The range of plastic miniatures available for Maelstrom's Edge covers all of the units and options currently available in the game. There's a lot of fun to be had by taking those miniatures and exploring other options beyond the current limits of the game, whether to field with home-brew rules or just for one-off display pieces to flex the creative muscles. This week, we're looking at a model from the latter category, built just for fun, because it never hurts to have a bigger stick.
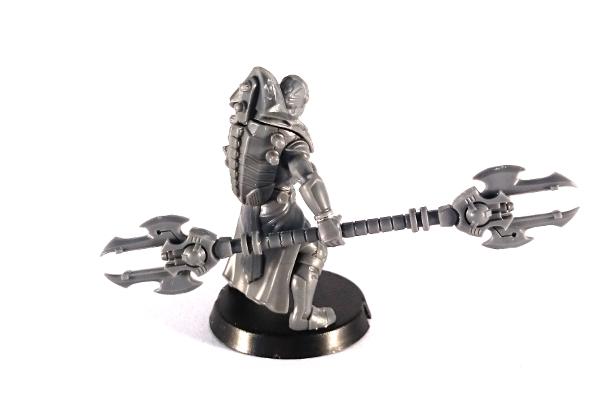
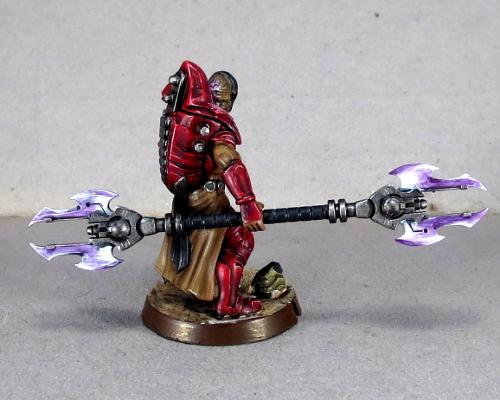
When the Faction Expansion Sprue was released, I took one look at the awesome cybel glaive on the sprue and couldn't resist the urge to create a double-ended version by sticking the head of one glaive onto the bottom end of the shaft of a second. The resultant, admittedly slightly over-the-top, marvel of blades and energy emitters needed a suitably awe-inspiring model to carry it, so I turned to the ever-imposing Kaddar Nova kit.

The head is taken from the Karist Trooper kit, with the front sanded down smooth.
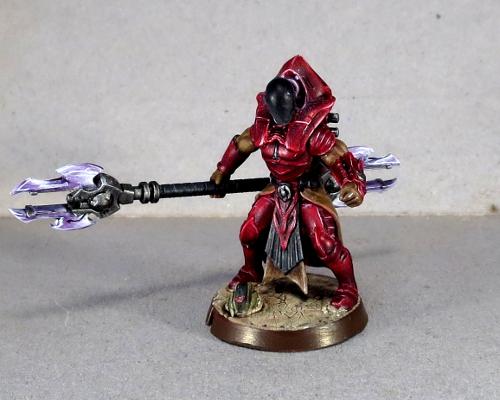
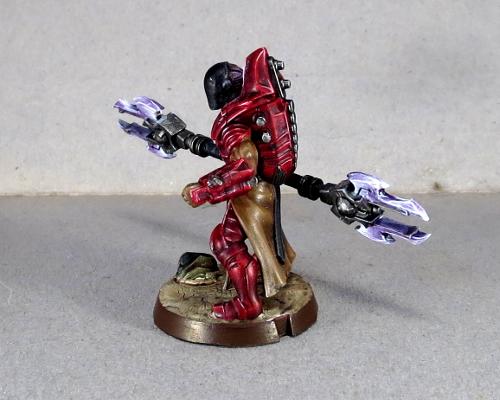
Painting started out with a basecoat of Army Painter Dragon Red. From there, I built up shadows using thin, multiple layers of Army Painter Purple Tone, before higlighting the edges with white and then a final wash of Army Painter Red Tone over the top to mesh everything together.
The cloth parts were painted with Vallejo Heavy Brown, and then shaded with layers of Army Painter Strong Tone. Similarly, the black parts were painted with Vallejo Heavy Grey, highlighted with some Vallejo Neutral Grey and then shaded with Army Painter Dark Tone.
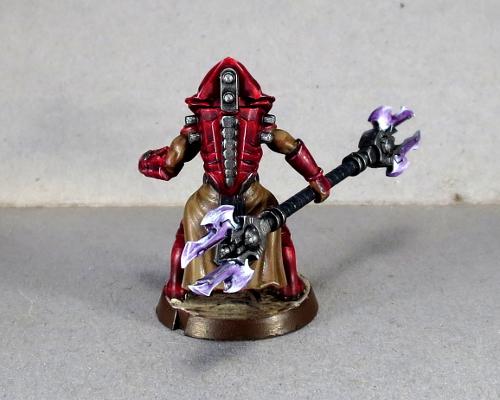
Metal parts started with some more Heavy Grey, and then a coat of P3 Pig Iron, and finally a wash with Dark Tone to give it some depth. Finally, the glaive blades were painted white and then worked up to the purple with layers of Purple Tone. The panel behind his head was given some purple light with a layer of Citadel Warlock Purple, drybrushed with a little Citadel Tentacle Pink and then a final drybrush of white.
The end result is a spiky, sinister-looking character who will probably wind up spawning yet another Karist force in my collection. I'm thinking of this guy as a 'Kaddar Militant' - a subsect of the Kaddar Priest class, who lean a little more towards brutal subjugation to get their way than is the norm for Karist forces. Stay tuned - there may well wind up being a rules card at some point in the not too distant future, tweaking the standard Kaddar Nova rules to allow for the double-ended Glaive and some revision to the normal unit selection matrix.
If this has inspired you to get creative with some plastic, you can pick up the Maelstrom's Edge terrain sprue from the webstore here. As always, feel free to share your creations on the Comm Guild Facebook page!
For other Maelstrom's Edge modeling articles, including tutorials and walkthroughs of a wide range of different building and miniature projects, check out the article roundup here.
Tags: conversion kaddar karist modeling painting
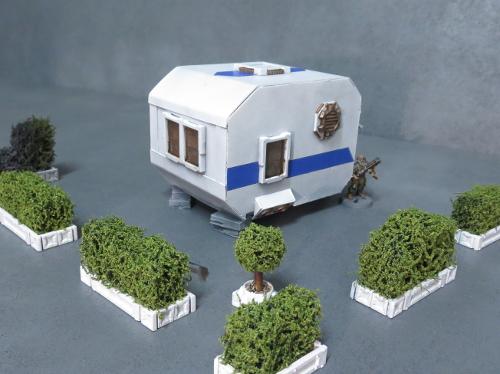
Terrain Spotlight: The Galactic Wanderer
Posted on Monday Aug 21, 2017 at 05:00pm in Models
- by Iain Wilson
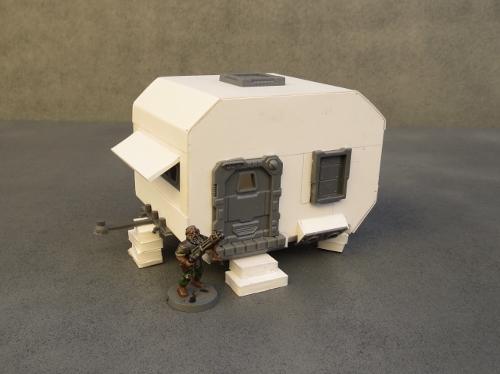
When I shared my Hedge Tutorial a few weeks ago, there was a comment made that they looked like they would be right at home in some sort of scifi trailer park. Well, I'm not one to let a challenge like that go unanswered, and so... the Galactic Wanderer was born.
Like many of my terrain builds, this all started with some foam core and a bunch of parts from the Maelstrom's Edge terrain sprue.
I cut a fairly basic, old-school caravan shape from the foamcore, and cut holes for a door and some windows.
The body of the caravan was glued together with foam glue (a white glue that I picked up a while back. It may well just be overpriced PVA glue, but it does a good job of gluing foam and grabs a little faster than a lot of PVA glues that I have tried) and the door and windows glued in place.
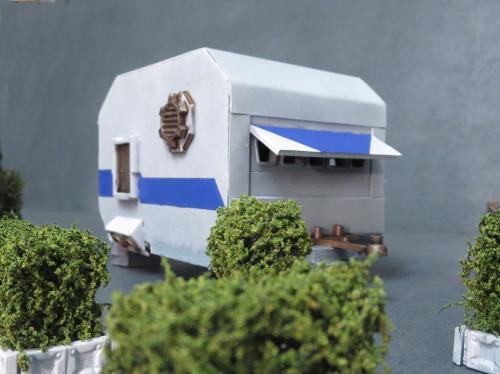
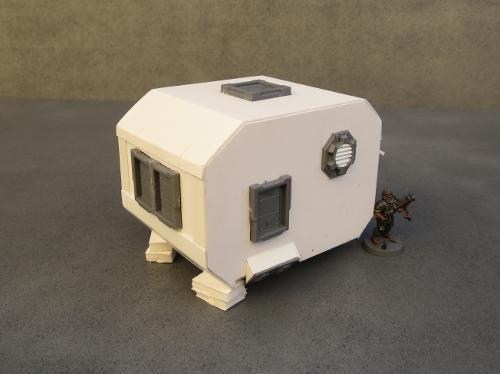
A strip of windows cut from a garage door fit quite nicely along the front wall.
An awning cut from a piece of 2mm plasticard provides a nice break in the regular shape of the caravan, and is totally there for aesthetic reasons and not at all to help conceal the fact that the strip of windows actually wound up just a little bit wonky. I also added a towbar made from a section of old sprue, a hatch in the roof, and rested the construction on some 'bricks' cut from discarded pieces of foamcore.
To help with the scifi vibe, unstead of wheels this caravan has some turbines made from the small pipe fitting from the terrain sprue with some turbines from the Epirian Drone sprue behind them. And finally, a large pipe fitting, trimmed off with a razor saw and with some strips of plasticard glued inside provides some ventilation.
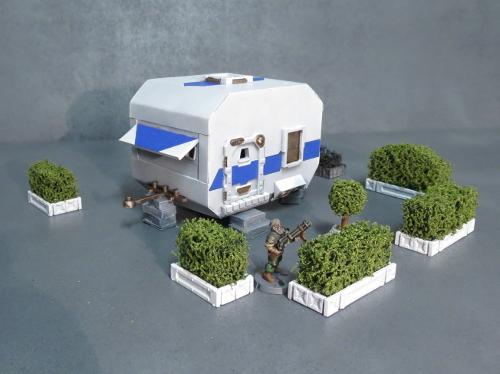
A quick spray and some striping later, and the compact, budget-conscious home of the future is ready for housing stellar refugees or indulging the wanderlust of the more well-to-do.
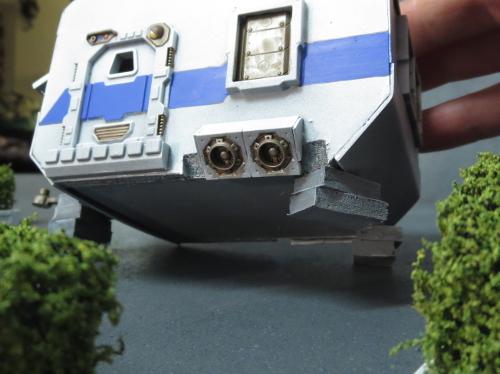
A better look at the caravan's 'wheels':
To build your own holiday villa or mobile refugee camp of the future, you can pick up the Maelstrom's Edge terrain sprue from the webstore here. As always, feel free to share your creations on the Comm Guild Facebook page!
For other Maelstrom's Edge modeling articles, including tutorials and walkthroughs of a wide range of different building and miniature projects, check out the article roundup here.
Tags: buildings modeling spotlight terrain terrainsprue walkthrough
Terrain Tutorial - Hedges
Posted on Monday Jul 31, 2017 at 05:00pm in Tutorials
- by Iain Wilson
Stands of forest or jungle trees are staples of most of our gaming collections. Sometimes, though, you want your greenery to suit a more civilised warzone, and for that, you just can't go past the humble hedge. So this week, we're looking at a quick and easy way to churn out some shrubby scatter terrain.
We start with a thick kitchen scourer. For a standard green hedge, you would ideally want a dark green or black scourer, although you could easily use other colours to make alien hedges. The scourer I'm using here is about 20mm thick, and has a really coarse texture. You could use thinner scourers by gluing a couple together, but that may wind up with a visible seam line.

Cut the scourer into strips using a sharp knife or a fine saw. The width of the strips is up to you, depending on how tall you want to make your hedges.

Next, paint the strips of scourer with some PVA glue. Work the glue into the weave of the scourer a little, but try to not leave any big lumps of glue right on the surface, as that may make the outside of your hedge a little blobby.
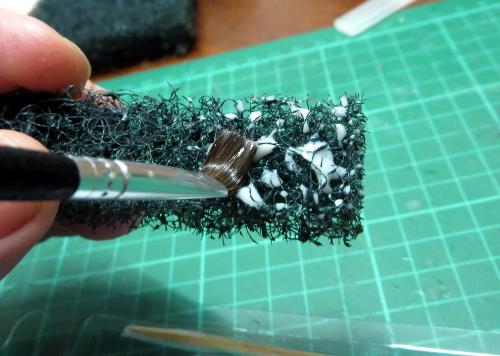
Finally, scatter flock over the glue. You'll get the best results here with a fine grade flock, which you should be able to find in most gaming stores' modeling supply sections or anywhere that sells model trains. Don't use the chunkier, dyed-sawdust stuff - it will just wind up looking like dyed sawdust stuck to a sponge.
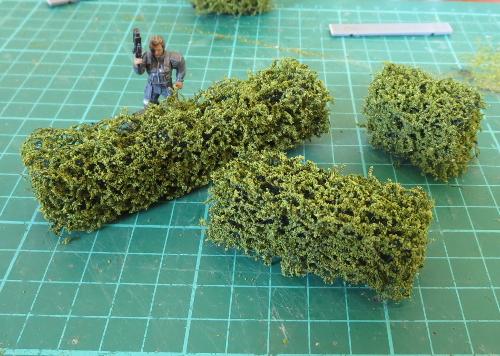
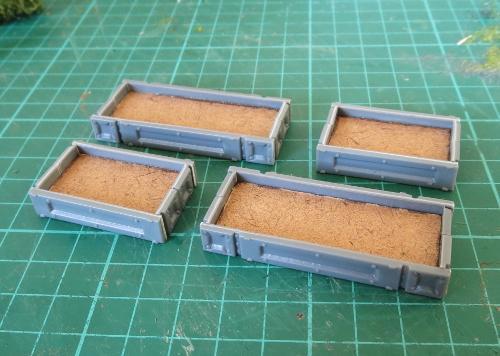
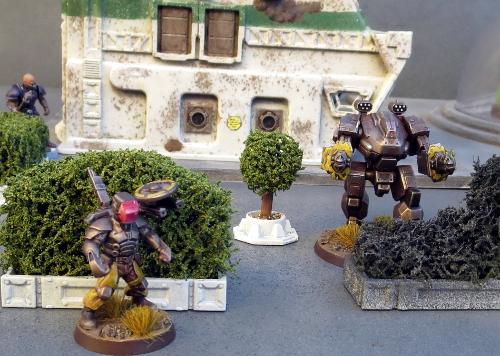
Let the glue dry, and you could easily use your hedges as is to stick onto terrain pieces or scatter around a table. For a slightly more urban look, you can add some boxwork to them using strips of plasticard or the support struts from the Maelstrom's Edge terrain sprue. For the below, I've used a strip of 5mm masonite as a base, which will help to give the hedge section a little more weight.
Paint the boxwork up however suits your terrain collection, and then glue the hedges in place with some superglue or PVA glue.
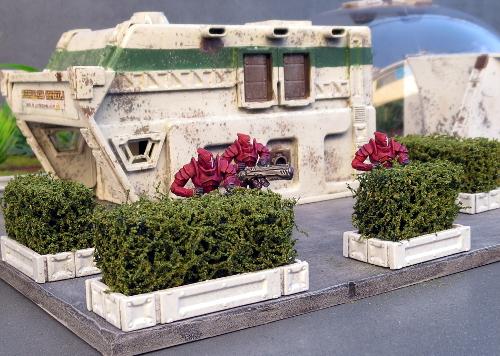
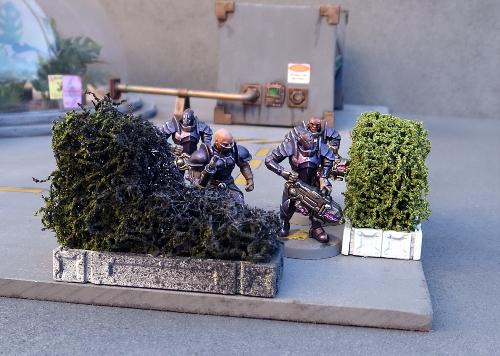
You can mix things up a little by making sections in different heights, to create some lower cover and some full line-of-sight-blocking barriers. Battle damage can be added by cutting or tearing away pieces of the scourer before adding the flock.
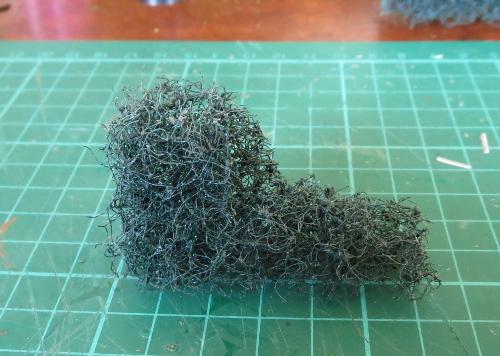
To create a burnt effect, I left the flock a bit patchy around the damaged part of the hedge, and once the glue was dry gave it a quick spray with some flat black, followed by a light dusting of flat grey.
If you want to get really carried away, you can also shape the scourer using a knife or some sturdy scissors and create some topiary features.
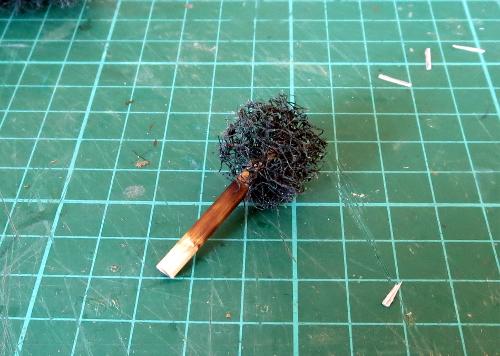
The trunk of this ball topiary was made from a short piece of a wooden skewer, dyed with a little brown ink and then glued into the scourer ball with superglue.
If this all has your green thumb itching, grab yourself some scourers and hedge away! As always, feel free to share your creations on the Comm Guild Facebook page - first one to post a miniature garden maze for their gaming table wins a cookie! (Or possibly just the adulation of the masses and fleeting fame...)
You can find the full range of Maelstrom's Edge models, including the ever-useful terrain sprue, in the Maelstrom's Edge webstore here, and a collection of modeling articles, tutorials and walkthroughs of a wide range of different building and miniature projects in the article roundup here.
Terrain Spotlight: Experimental Cybel Gate
Posted on Monday Jul 10, 2017 at 05:00pm in Models
- by Iain Wilson
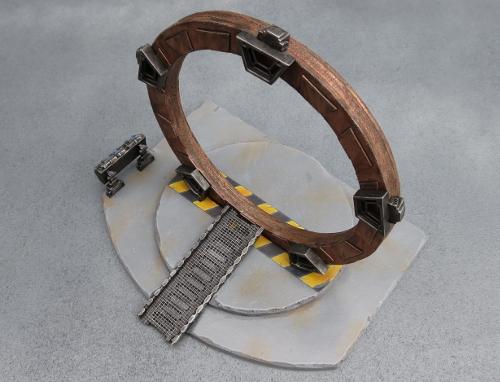
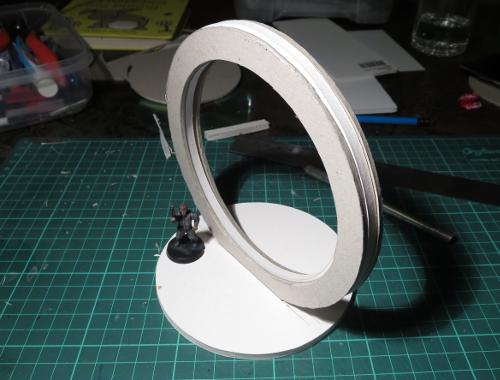
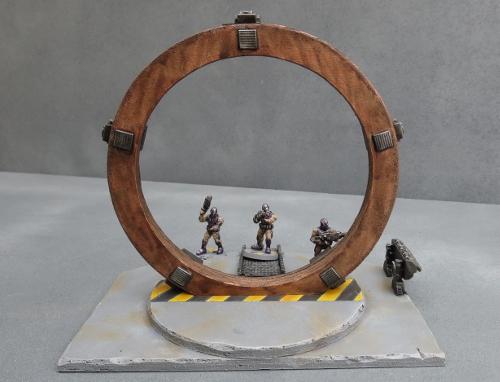
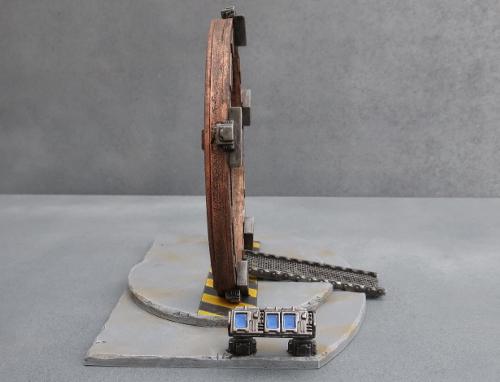
As the Maelstrom's apocalyptic conflagration closed in on the planet Devlin IV, rumours began to circulate amongst those still desperately trying to find passage off-world that scientists in a secret Epirian Foundation facility had been working on a new kind of Cybel gate that might prove to be their salvation. Whilst most Cybel gates are massive, space-borne affairs, this gate would supposedly operate from the planet's surface! While the rumour would ultimately lead to disappointment, as the project had been a dismal failure, it nevertheless gave temporary hope to many who had given up on escaping the Maelstrom's wrath and fueled a frantic search for this device.
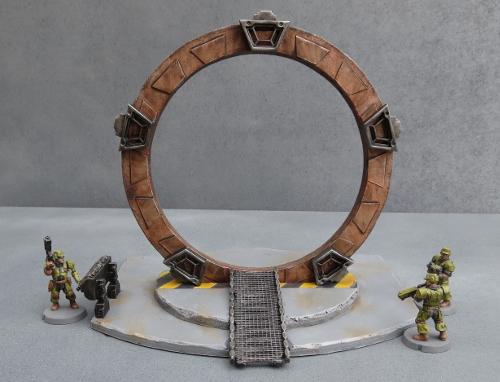
I had an idea a while back for a table themed around a Cybel gate research facility, where the experimental gate would form a centrepiece that would double as both a cool focal point and a potential objective for scenario-driven games. Capturing a resource such as this would, of course, be a worthy goal for any of the various forces encountered in Maelstrom's Edge, and there is all sorts of additional potential for thematic events when the gate is activated. Below is what I came up with, built from foamcore, cardboard, and components from the Maelstrom's Edge terrain sprue.
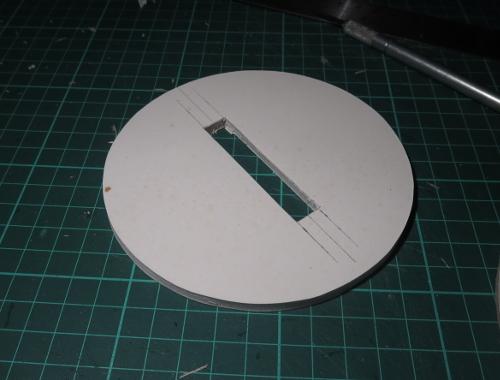
I started out creating the basic shape for the gate by tracing two concentric circles onto a sheet of 5mm foamcore and cutting the resultant ring out with a hobby knife.

I then used the foamcore ring as a template to make two more rings from thick card.

The circle cut from the inside of the foamcore ring was the perfect size to act as a base, with a channel cut down the middle for the ring to sit in.
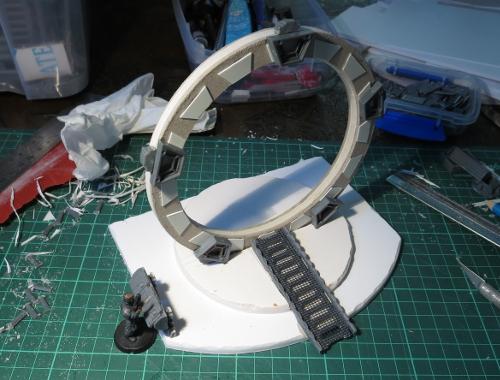
The three rings were glued together, and set in place to check the fit.
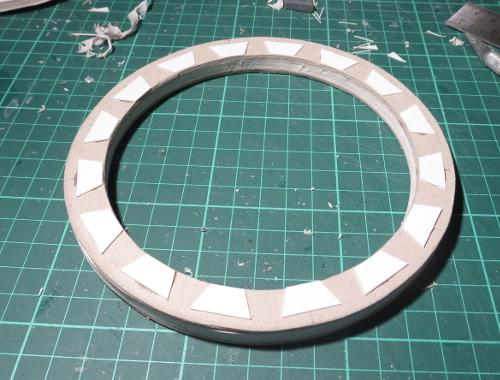
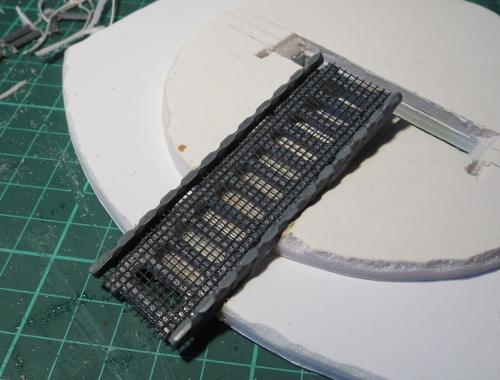
Next, I cut a bunch of trapezoid shapes from plasticard, sized to fit neatly inside the trapezoid window from the Maelstrom's Edge terrain sprue.
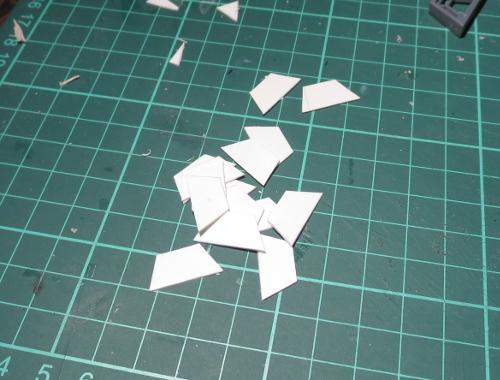
These were glued at intervals around one side of the ring.
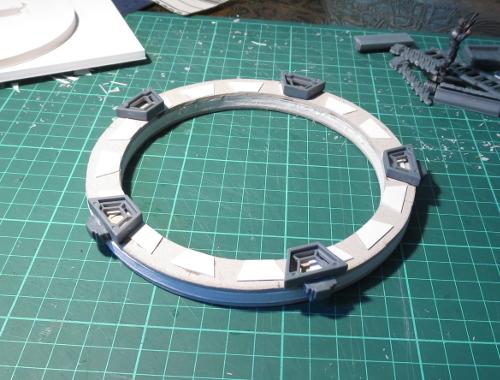
Over these, I glued 5 trapezoid windows, with power units cut from the bottom of the energy-fence posts glued around the outside of the ring.
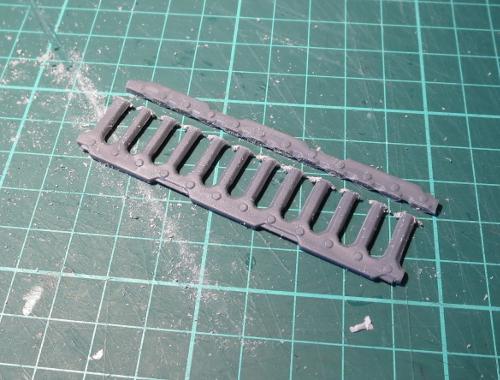
I took a ladder and cut the outside edges off with a razor saw.
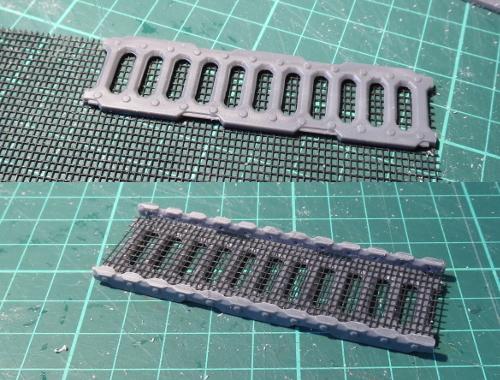
A second ladder was glued to a sheet of flyscreen, and then the flyscreen trimmed around the edges of the ladder and the cut pieces from the first ladder glued onto either side.
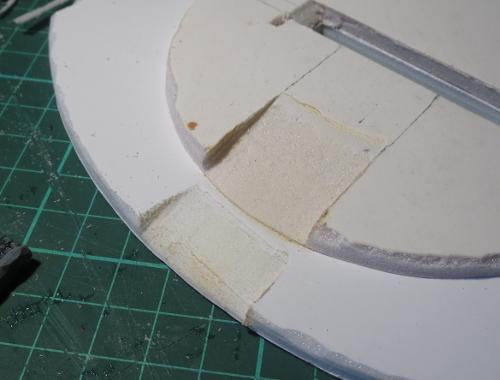
The base was bulked up a little with another layer of foamcore.
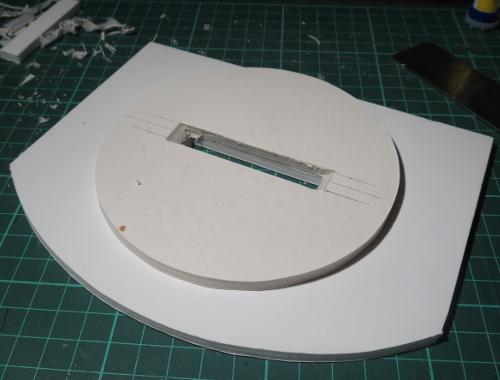
I then used a file to carve out an angled ramp down the front of the base.
The ladder assembly slots neatly into the ramp recess.
Finally, I put together a control panel using a light fixture and three trimmed computer panels.
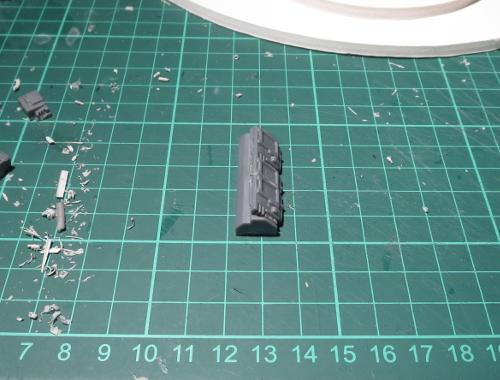
With the addition of some legs made from trimmed down energy-fence posts, the control panel was glued in place, and the gate was ready for painting.
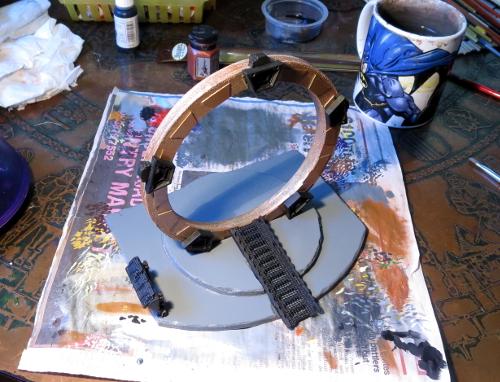
I wanted a bit of contrast in the gate assembly, so decided to go with a coppery ring and darkened steel details. To get started, I sprayed the ring with Army Painter Army Green, partly to give a nice base layer for the copper and partly because I didn't have a lot of time for painting this week, and the Army Painter sprays dry nice and quickly...

Over the green, I did a couple of coats of some old Citadel copper that I had laying around.

The base was sprayed with a medium grey colour.
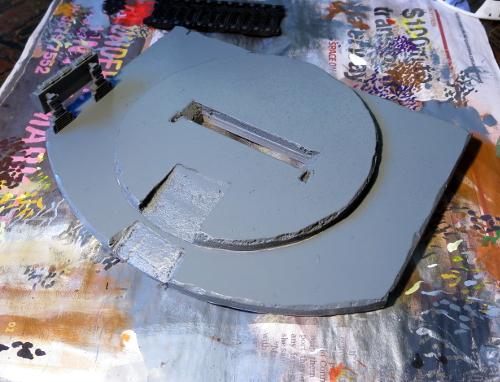
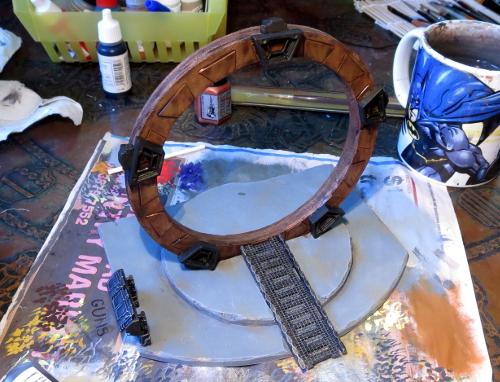
I then picked out the steel parts with black. It's a little hard to see in this lighting, but I also drybrushed the base with a light grey and added some dirt scuffing with some lightly drybrushed brown.
The ring was given a couple of coats of Army Painter Strong Tone, and the steel parts drybrushed with P3 Pig Iron and then washed with Army Painter Dark Tone.
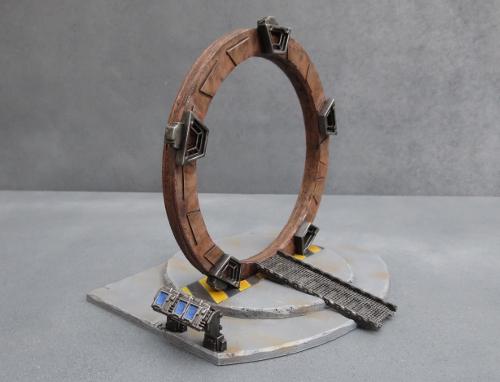
Finally, the control panel screens and some hazard lines were added, and the ring was given a light drybrush with silver to lift the edges a little.
If you would like to build your own experimental Cybel gate, you can pick up the Maelstrom's Edge terrain sprue from the webstore here. As always, feel free to share your creations on the Comm Guild Facebook page!
For other Maelstrom's Edge modeling articles, including tutorials and walkthroughs of a wide range of different building and miniature projects, check out the article roundup here.
Terrain Spotlight: Giftbox Garage
Posted on Monday Jul 03, 2017 at 05:00pm in Models
- by Iain Wilson
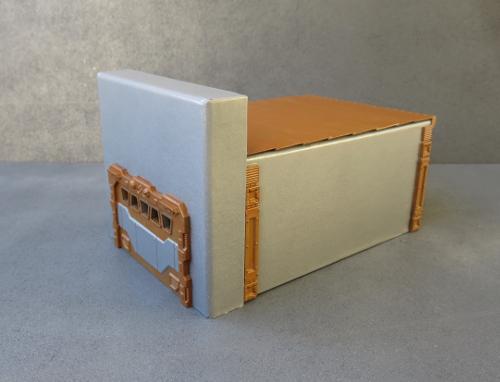
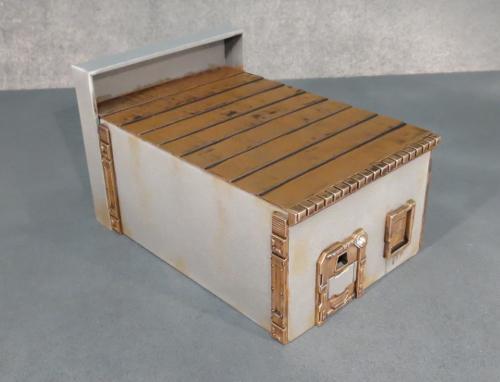
A while back, I shared a scifi western-themed building constructed from a Plast Craft Games plastic kit and the Maelstrom's Edge terrain sprue. This week, I wanted to have another try at that vaguely-western, raise-facade, scifi styling, but with more of a mass-produced, cheap colony building sort of vibe. Something a little more urban, but with a nod back to the frontier. This is what I came up with:
This is built from one of my favourite bases - the good old cardboard giftbox.
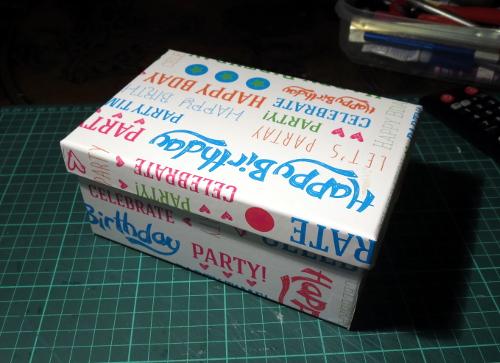
You can pick these up from just about anywhere that sells giftwares or from many craft shops, and they're generally fairly inexpensive. Craft shops will also often have raw cardboard versions without the printing on the outside, which does have the bonus of looking slightly less hideous while you're putting it together, but can have a rougher surface texture.
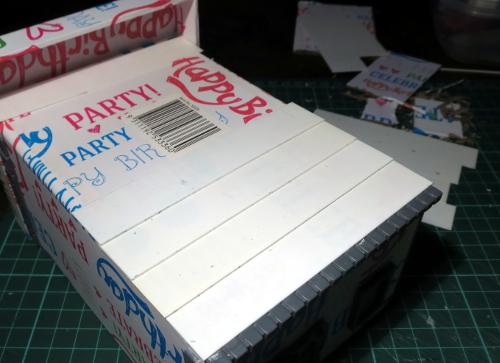
For my previous giftbox buildings, I used the lid upside down on top to form a walled-in roof area. This time, I used the lid for the facade. So the first step was to cut the lid to the height that I wanted the front of the building. I also cut away the end wall of the box, so that the hole for the front door only needed to go through the facade - The door inset is deeper than the width of the card, so would I otherwise have needed to cut a second door hole in the end of the box and hope that they lined up properly.
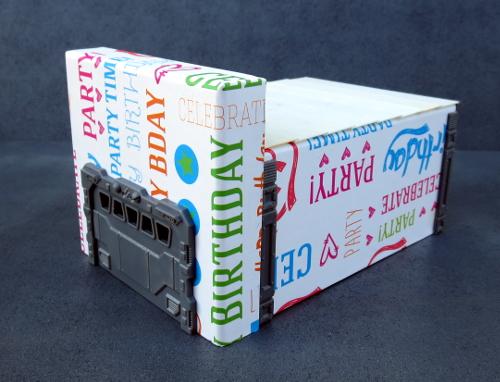
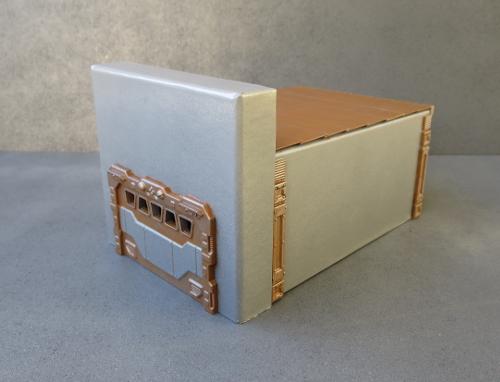
Speaking of a door hole: I took the garage door from the terrain sprue, sat it in place against the facade, and traced around the back of it before cutting out the resultant rectangle. The garage door was then glued in place.
The same process was used on the intact end of the box to add a small door and shutter window from the terrain sprue.
The facade was then glued in place.

I glued a couple of support struts onto either side of the building, for a little texture.
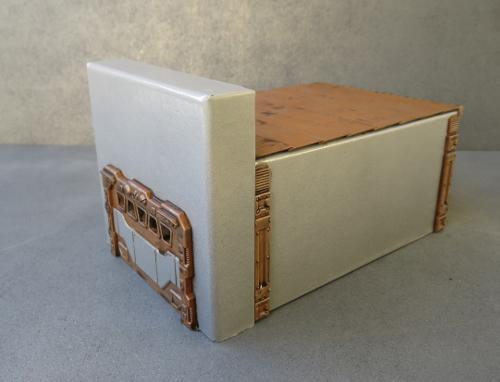
A row of lintel pieces from the terrain sprue were glued onto the top edge of the back wall.
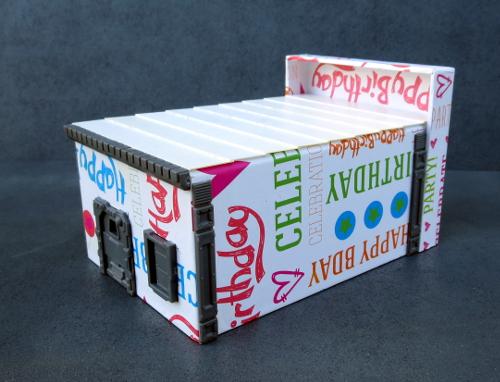
I then layered strips of plasticard along the roof, working up towards the front of the building.
The final building, ready for painting:
Quick and easy paintjob, that will be quite familiar for anyone who has been following these articles. I started with a black spray undercoat, to give a solid layer to cover over the printing.
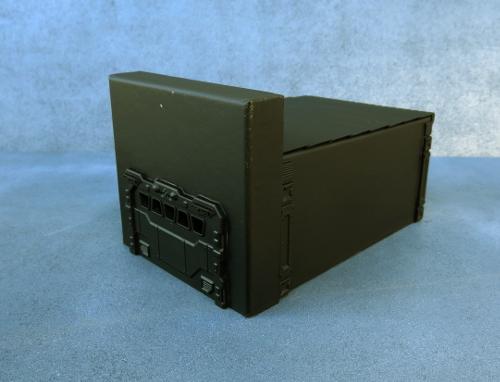
This was followed by a spray of flat grey, and while this was still wet I oversprayed this from above with a lighter grey to add a little bit of a natural highlight.

The metal parts were then picked out with Vallejo Beasty Brown.
Then a drybrush of P3 Pig Iron.
Then a wash of the most useful paint on the planet: Army Painter Strong Tone.
A final drybrush of silver over the metal bits and some detail work, and the newest addition to the table is ready to go.
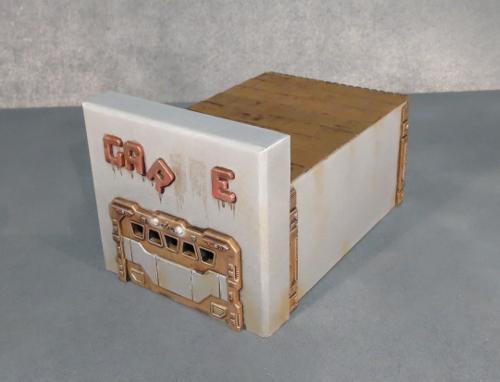
This design can be very easily tailored to different buildings through using different sized boxes and choosing different sprue components. If you would like to build your own, you can pick up the Maelstrom's Edge terrain sprue from the webstore here. As always, feel free to share your creations on the Comm Guild Facebook page!
For other Maelstrom's Edge modeling articles, including tutorials and walkthroughs of a wide range of different building and miniature projects, check out the article roundup here.
Tags: buildings conversion modeling spotlight terrain terrainsprue tutorial walkthrough
Conversion Spotlight: "Silverback" Mercenary Fire Support Mech
Posted on Monday Jun 26, 2017 at 05:00pm in Models
- by Iain Wilson
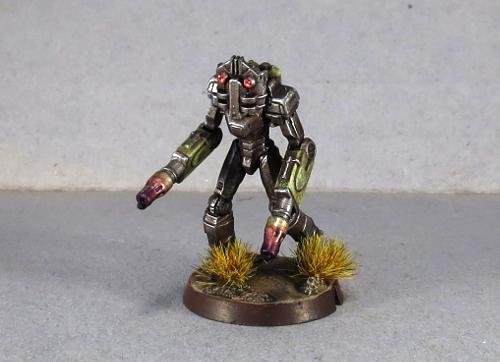
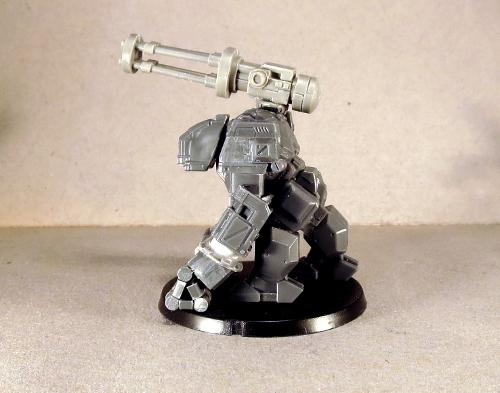
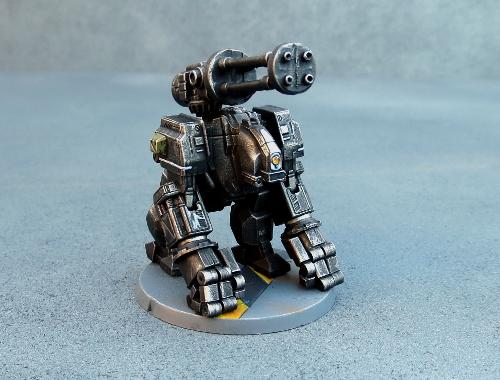
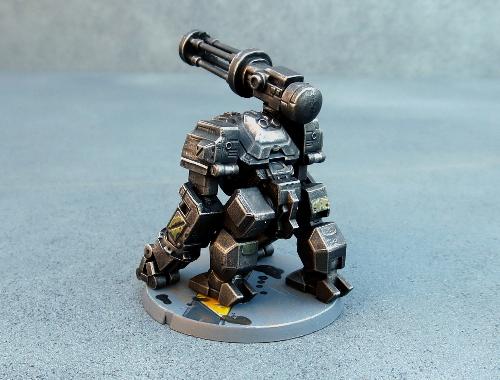
A variation on the Hunter War Mech chassis, the Silverback was an attempt by Epirian engineers to develop a mobile platform for heavy support weapons. Trading in speed for stability, initial deployments showed promising results, however over time the mech's ponderous movement began to be perceived as a liability. When this was compounded by some odd personality quirks that tended to develop in the experimental twinned bot cores used to give the Silverback increased tactical capability, the model was slowly phased out by Epirian forces. Some were sold to planetary security forces, while others found their way onto the black market, where they became a favourite of mercenaries who favoured a more blunt approach to martial engagement.
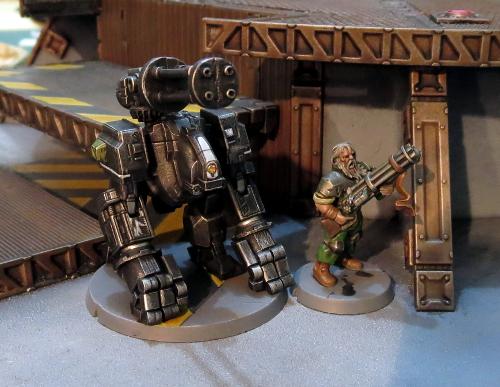
A mercenary bot handler and his Silverback charge.
The Epirian Hunter is a fantastic kit which presents some fun modeling possibilities straight out of the box. Sometimes, though, it's fun to do something a little more extreme, and it's from this that the Silverback was born. This wasn't made with any rules in mind, just something fun to build... although now of course I have some ideas percolating around for mercenary units, so this may be something I come back to in a future article.
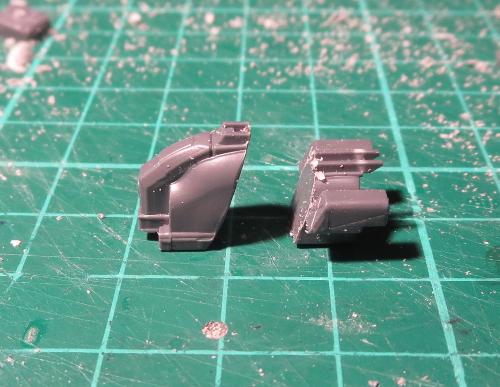
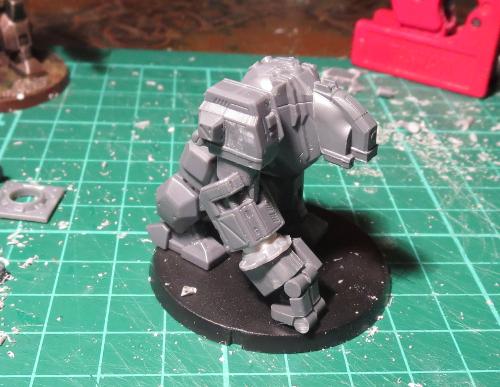
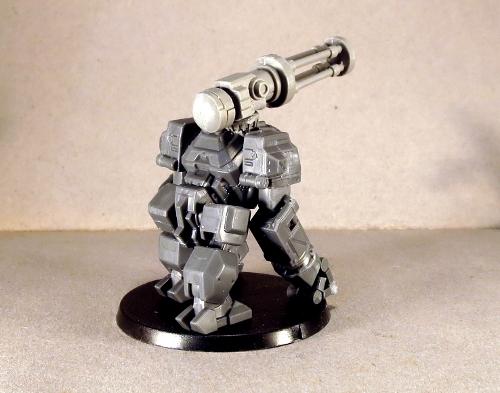
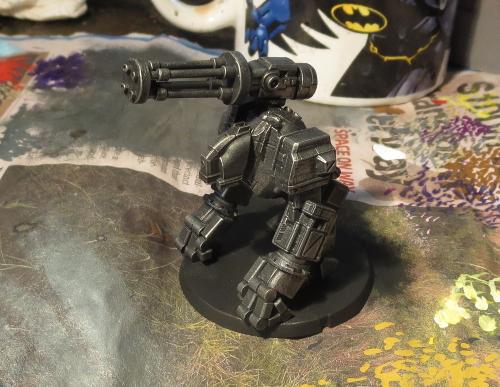
To give the Silverback more gorilla-like proportions, I cut down the tops of the thighs level with the top of the protruding panel on the side. This also required slicing off the locating pin and reattaching it lower down. I also added a bit more of a bend to the left leg by slicing carefully through the top of the knee joint, cutting out a small wedge, and regluing the leg at the new angle.
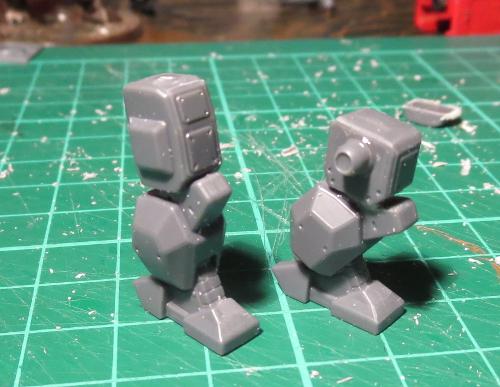
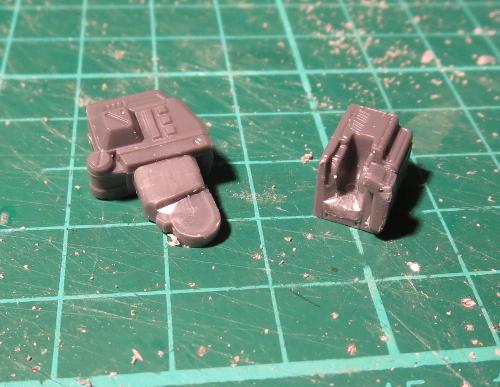
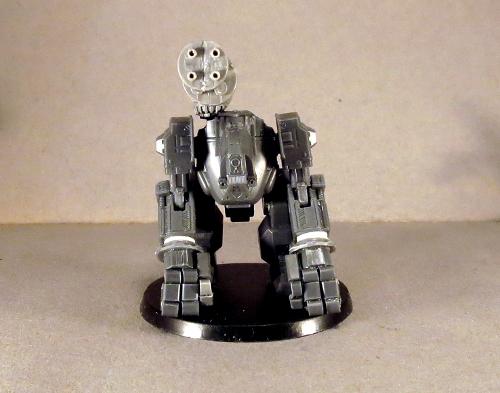
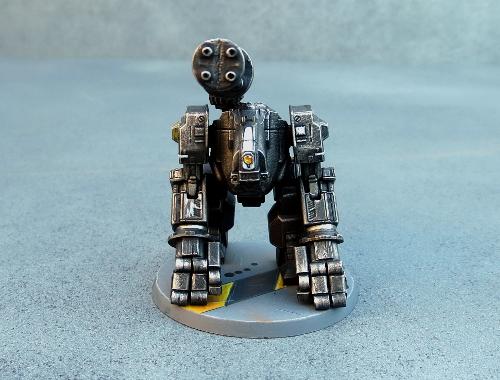
With the torso angled forwards, the top of the existing 'head' serves admirably as a neck. To add a new head, I used a razor saw to slice a drone chassis in half.
The front piece was then glued in place on the torso.

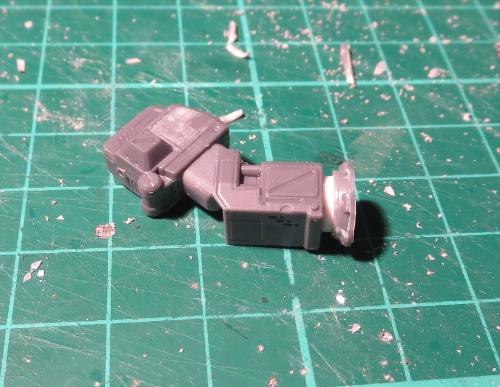
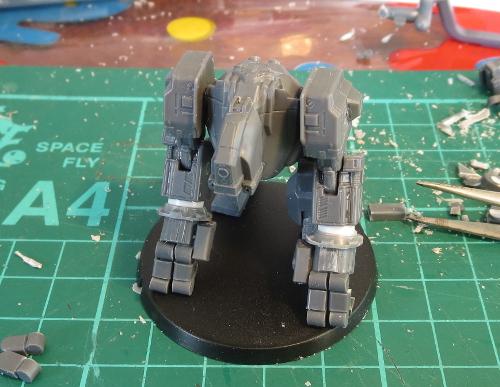
I wanted the arms a little straighter than is allowed by the hunter's elbow arrangement. So I trimmed away the back of the forearm piece, allowing more movement in the joint.
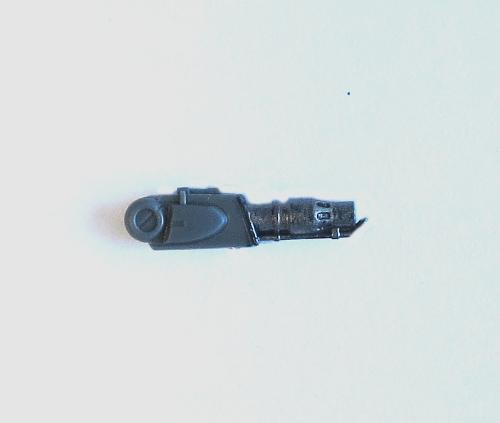
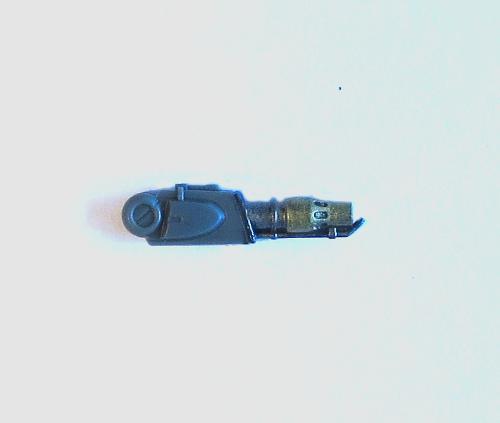
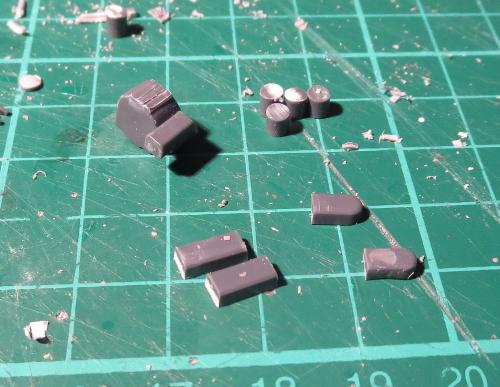
I then took some small pipe fittings from the Maelstrom's Edge terrain sprue and trimmed the square border off.
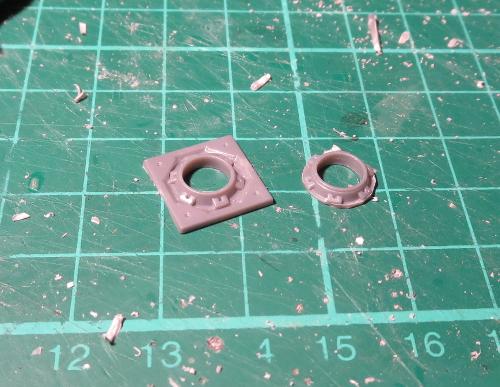
A small piece of plastic tube was then slipped into the fitting, and this glued in place against the 'hand' end of the forearm.
The hands were constructed from the back half of the drone chassis and small pieces cut from the drone's sprue (recycling for the win!).
With everything glued together, the arm was glued in place.
I initially only had two joints on each finger, but it just didn't look quite right, so I added an extra joint when I built the second arm, and then went back and did the same to the first one.
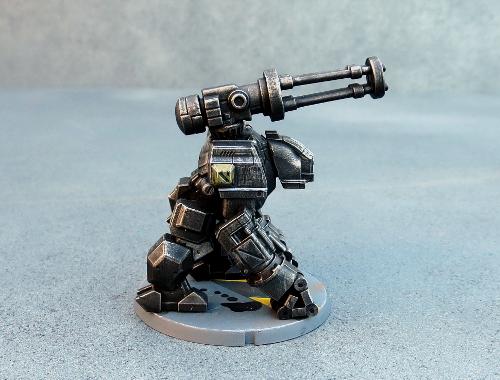
Another couple of small sprue pieces formed the ends of the thumbs, and I added a weapon purloined from a Games Workshop Tau battlesuit kit.
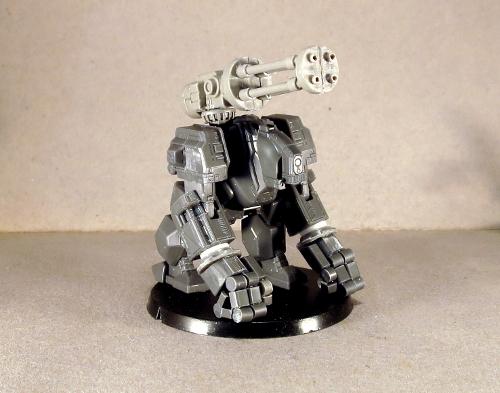
I wanted a dark, slightly sinister paintjob to emphasise the brutish nature of the mech, so started with a black undercoat.
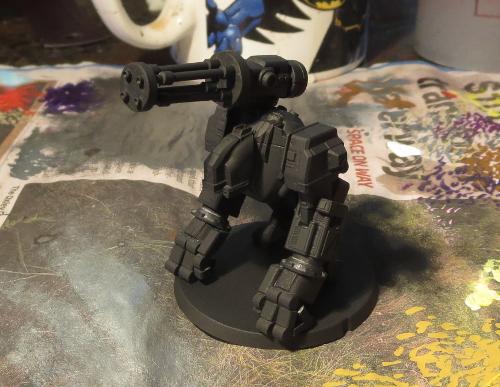
Over this I did a heavy drybrush of P3 Pig Iron.
Then I washed the whole thing with a generous coat of Army Painter Dark Tone.
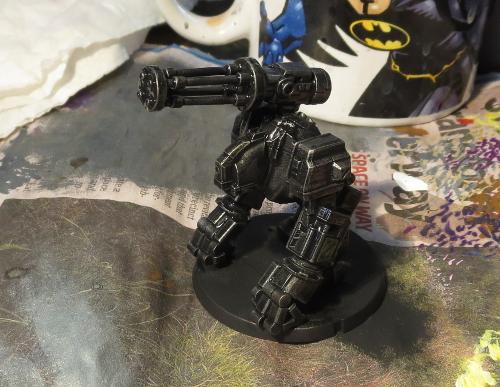
Once the wash dried, I lightly drybrushed all over with some more Pig Iron, and then did the detail work. A few panels here and there are picked out in different colours to give it a bit more of a ramshackle appearance, in keeping with its mercenary nature. It's not an award-winning paint-job, but is a nice, quick method for getting a table-ready model.

Feeling the urge to hack up a Hunter or two of your own? You can pick up the Hunter, Drone or terrain sprue from the Maelstrom's Edge webstore here. As always, feel free to share your creations on the Comm Guild Facebook page!
For other Maelstrom's Edge modeling articles, including tutorials and walkthroughs of a wide range of different building and miniature projects, check out the article roundup here.
Tags: conversion hunter modeling painting