Quick and Easy Painting with Washes
Posted on Monday Oct 17, 2016 at 05:00pm in General
 - by Iain Wilson
Not everyone has the time to spend paintstakingly blending, shading and detailing their models. Sometimes, you just want to get them on the table quickly, so I thought it might be useful to explore some options for fast and painless army painting.
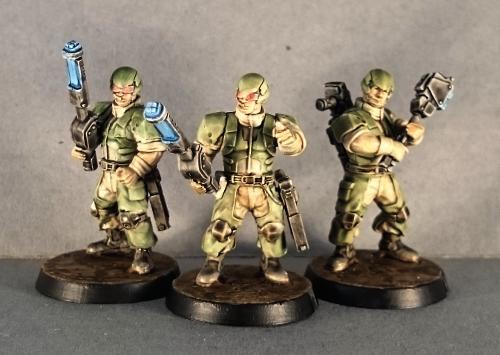
I'm going to start with some Epirian guinea pigs, painted exclusively with washes! This is a really easy technique to get to grips with, and while it won't get you an award-winning work of art, it does give you perfectly serviceable-looking models that look great on the table.
For those unfamiliar with them, washes are thin paints designed to sink into the model's crevices whilst leaving less colour on the raised detail (Also sometimes called 'inks' - Not to be confused with 'glazes' which are translucent paints that tint the surface they're painted onto evenly). So while it's a little less precise than blended highlighting or 'juicing' (applying super-thin coats of increasingly dark colour to build up shadow or colour transition), we can use washes over a pale base colour to highlight and shade a model all in one fell swoop.
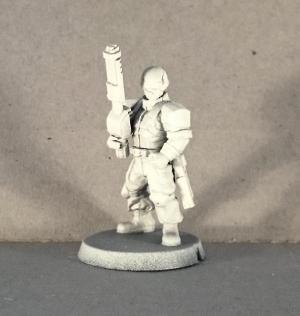
I start by giving the model a base coat of white.
Now I'm going to start applying washes to build up the colours I want, leaving the model to fully dry between each. On this model, I've started with a coat of Army Painter Soft Tone over everything except for the weapons. This is pale enough that other colours will go ok over the top - if you're using darker tones, it's best to try to keep them strictly on the areas where you want them, otherwise you'll need to touch up your basecoat to cover up the overspill before painting each part of the model. Apply a generous coat of wash and leave it to thoroughly dry before moving on to the next step.
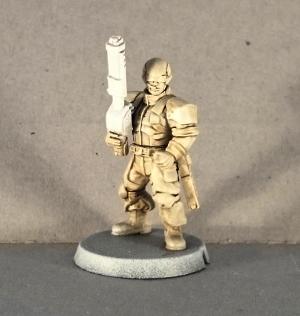
Next, I've gone over the armour and chaps with Army Painter Green Tone, and picked out the boots, belt, kneepads and weapons with Secret Weapon Soft Body Black (this has a little more pigment in it than most other black washes I've tried, so is good for painting over pale colours without needing half a dozen coats to build up shading).
I've left the tip and front facing of the Shock Baton free of the black wash, as once that layer of wash is dry I have applied a coat of Army Painter Blue Tone to those. I've also gone over the exposed skin areas with Army Painter Flesh Tone, and painted his goggles with Army Painter Red Tone.
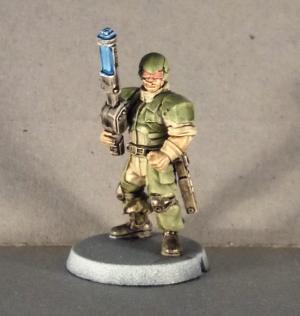
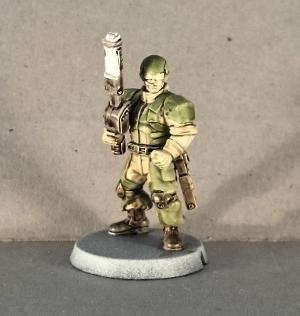
For a final step, I gave his weapons another coat of black, and detailed the base. I've gone for a cracked earth look on the base, just for something quick. There are specialist paints out there for doing this sort of thing, but this one was done with regular paint and wood glue - I'll be posting a tutorial on how to do that later on.
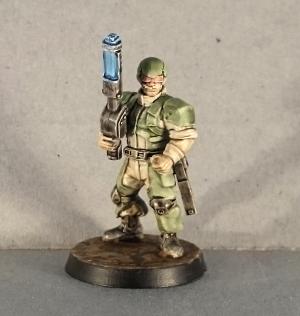
At this point, the model is ready for the table. You can add extra detail if you feel like it, and of course you can use different wash colours to suit your preferred colour scheme.
Go ahead and give it a try, and feel free to share your creations on the Comm Guild Facebook page (https://www.facebook.com/groups/MaelstromsEdge)!
Tags: expansionsprue painting washes
