All Your Base, Tutorial Part 2
Posted on Wednesday Dec 07, 2016 at 05:00pm in Tutorials
 - by Iain Wilson
Last week, we looked at a few different ways to pretty up your bases, with industrial, rocky and snowy themes. This time around, I want to share a couple of my favourites - metal decking and ferns.
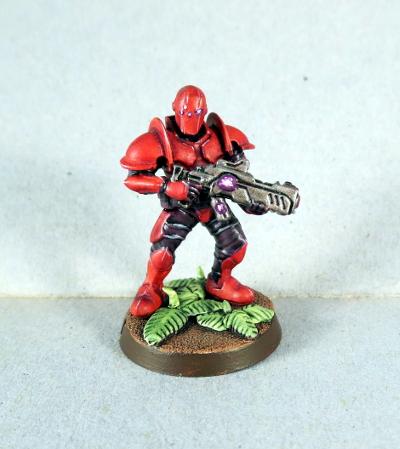
Ferns
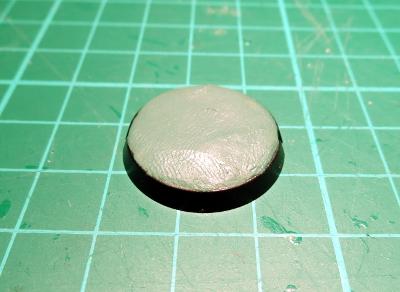
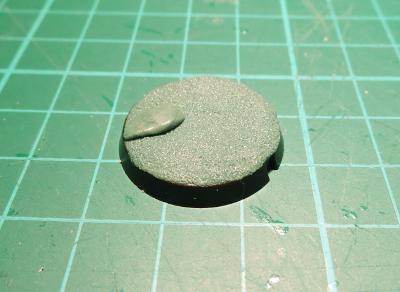
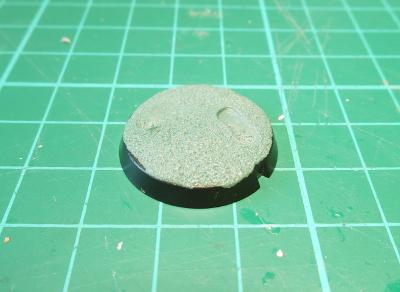
I start these off by building up some texture on the base, partly to look pretty and partly because the putty ferns that you're about to make will stick better to the layer of green stuff than to the plastic base.
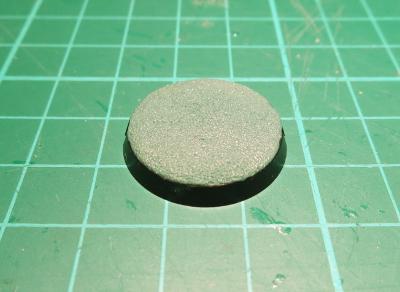
Mix up some green stuff*, and press a 1-2mm thick layer all across the top of the base. Don't worry about fingerprints at this stage - they'll go away at the next step.
*For the uninitiated, 'green stuff' is the common name for a product called 'Kneadatite', which is a 2-part epoxy putty used for sculpting. I'll be putting together some basic green stuff tutorials in the near future.
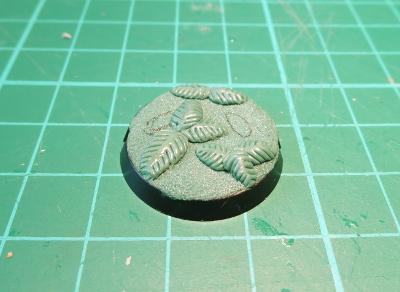
Next up, take an old toothbrush and press the bristles into the green stuff to create a rough, pebbly texture all over the putty.
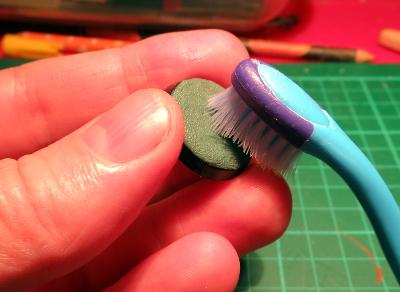
When you're done, it should look something like this:
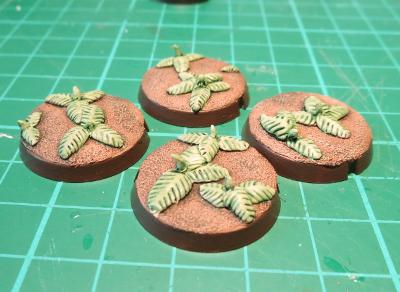
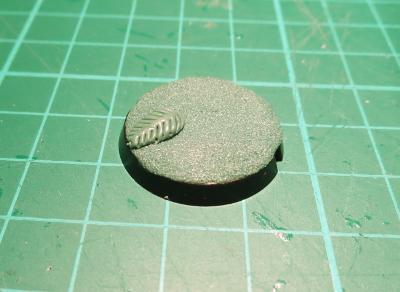
Once the putty is set, mix up a small amount and break off a 2-3mm ball. Roll this between your fingers into a teardrop shape, and press it onto the base just enough for it to stick there.
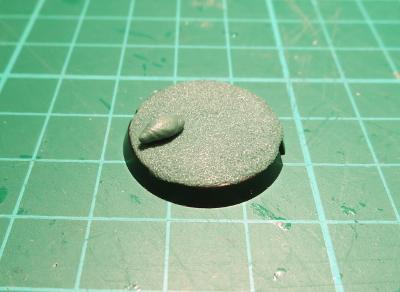
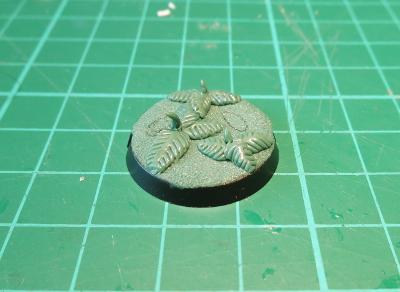
Using a round clay shaper, the back end of a hobby knife, or some other smooth, round tool, roll the teardrop out until it is mostly flat. For best effect, it should be flatter and thinner at each end than in the middle - this helps give the leaf some shape and make it look less like it's just laying flat on the ground.
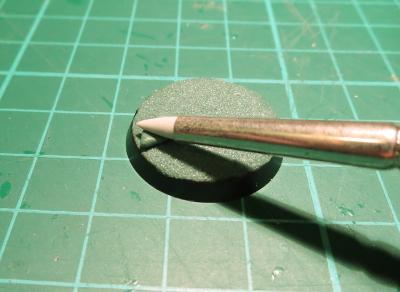
Now take a hobby knife and score a series of parallel lines down each side of the leaf, running from about half a millimetre out from the centre line and angling slightly forwards out to the edges of the leaf.
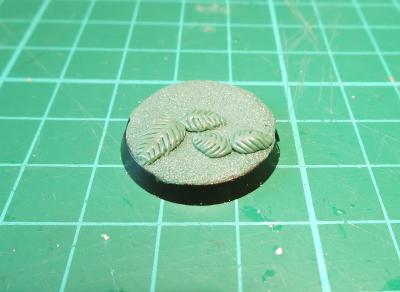
Repeat for a second leaf, butting the back end of the leaf up against the first and running it off in a different direction. Create other plants around the base using the same technique, remembering to leave room for the model's feet.
Note: If you're a little unsure about getting the placement right to fit a model on there, one easy way to give yourself a guide is to press the model's feet into the ground layer of putty before it sets.
Alternatively, you can draw around the model's feet with a micro pen, or dot with paint wherever the model's feet will go.
Once your first layer of leaves have set, you can build up your plants by adding extra layers on top, leaving each layer to set before moving on to the next.
When you're happy with the buld-up of your ferns, roll out some small spikes of green stuff and press them in upright in the middle of each plant to represent a new, furled, leaf growth.
Leave to set, and then paint in appropriate colours. For the below, I've used Citadel Tallarn Flesh with a layer of Army Painter Strong Tone for the dirt, and Coat D'Arms Putrid Green with a wash of Army Painter Green Tone for the plants.
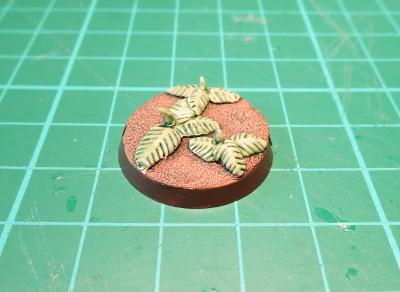
If you want a little more realism in the plants, add some tinges of brown to the lower leaves, as these are older leaves that will be starting to die off, and scatter some brown, discarded leaves around the base.
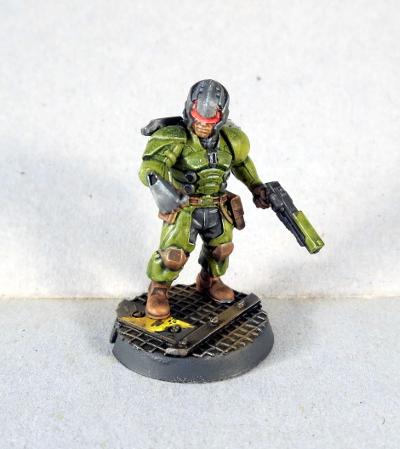
Metal Decking
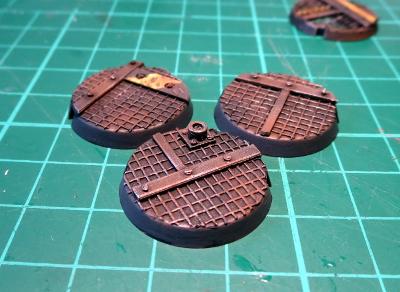
There are all sorts of options out there for buying textured plastic sheeting which can be cut to size and glued to your bases, but this can get expensive. For a cheaper option that still looks effective, I use plastic flyscreen.
Start by applying a thin coat of superglue all over the top of the base, and then glue down a small square of flyscreen.
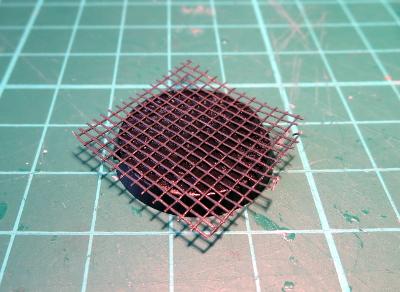
Once the glue has set, cut around the edge of the base with a sharp knife.
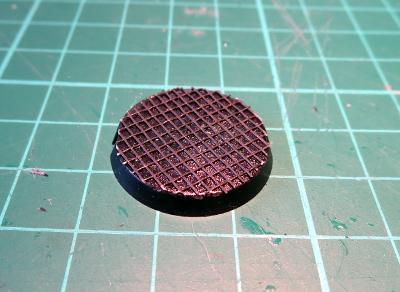
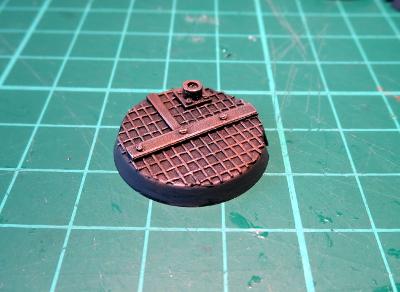
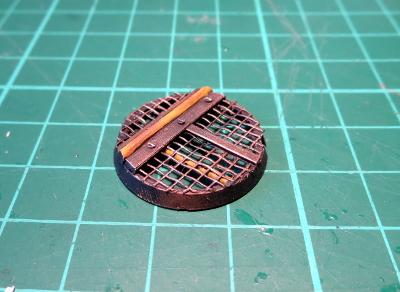
Now we can add some detail. Glue on small strips of plastic sheet or thin card to create panel reinforcing.
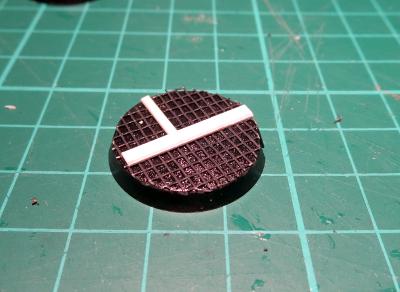
You can add rivets by drilling holes in the stripping with a 1mm drill bit (I recommend using a pin vice rather than a motorised tool for this, as it's really easy to gouge the holes out sideways with a motorised drill) and gluing in pieces of 1mm plastic rod, as below - I've shown the undercoated pic here, as it shows the detail better.
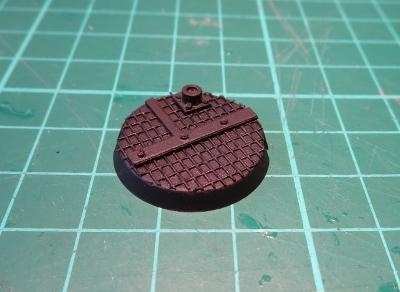
You can add whatever other detail seems appropriate. In the above pic, you can see a small pipe fitting or connection port made with a small square of plastic with a short length of tubing glued to it, with rivets added on the corners to hold it down.
Once you're happy with the level of detail on the base (and you generally don't need much) it's time to paint. For the below, I've just used a black spray undercoat, followed by a heavy drybrush of Citadel Boltgun Metal followed by a wash of Army Painter Strong Tone. Once the wash is dry, I finished up with a light drybrush of Coat D'Arms Hairy Brown to dirty things up here and there, and a light highlight of Citadel Mithril Silver on the edges.
You can also add sections of hazard striping, coloured lines or deck numbers for some more colour.
As an alternative, if you're feeling brave, you can go for more of a mesh catwalk look by cutting the top off the base before applying the flyscreen and other detailing.
All of the ideas presented here and in the previous article are, of course, just starting points. You can add to or combine these different effects to create your own style, or look to real-world or movie set inspiration for something completely different.
Feeling inspired? Want to share how you have based your models? Jump into the Comm Guild Facebook page and show us what you have come up with!

Like this? Like us on facebook to see more...