Battle report: Taking Positions
Posted on Monday Dec 26, 2016 at 05:00pm in Gaming
Originally posted on DakkaDakka by Sgt. Oddball.
Fluff bits are in italics, game bits in plain text.Introduction
Dionne pressed a slip of paper in front of Bacaro. “Here, this is good as you’ll get. The centre lies here in the woods. The scientific crew is packing up their stuff as quick as they can, it’s up to you to get them out safely. The Karists have been spotted in the woods, so I hope you’re on time. Good luck!” With that, Dionne hopped back into the prowler that had just arrived and now blew up a cloud of dust as it tore away into the distance. The whole city was in chaos since the Karists had started their offensive on yesterday morning. Utilising the element of surprise, they had established a more or less coherent front, concentrating on key positions on the outskirts of town. The Director had issued orders for the evacuation of all northern districts and the securing of anything of importance, amongst them VIPs and technical equipment. Having been driven off from the Tusculi Compound at first contact with the Karist forces, Bacaro happened to come across this remote research centre en route to his rallying point. Apparently, the scientific crew here were taking their sweet time getting their stuff together and now risked becoming Karist hostages. Snatching up the bit of paper with the layout of the centre, Bacaro gave the order to advance, still not really sure what to expect. The idea was to help evacuate the entire centre, but priority was to be given to four apparently hot shot Cybel energy scientists, of whom he’d never heard. His only clue was: “look for people with garish outfits, they’re bound to be important scientists”. This would be another crappy day.Mission and objectives
Here’s for our second game, still learning the rules and general flow of the game. The mission was Split Research, which means players got points for keeping an artifact safe, and also for capturing 4 VIPs running around the board.Terrain
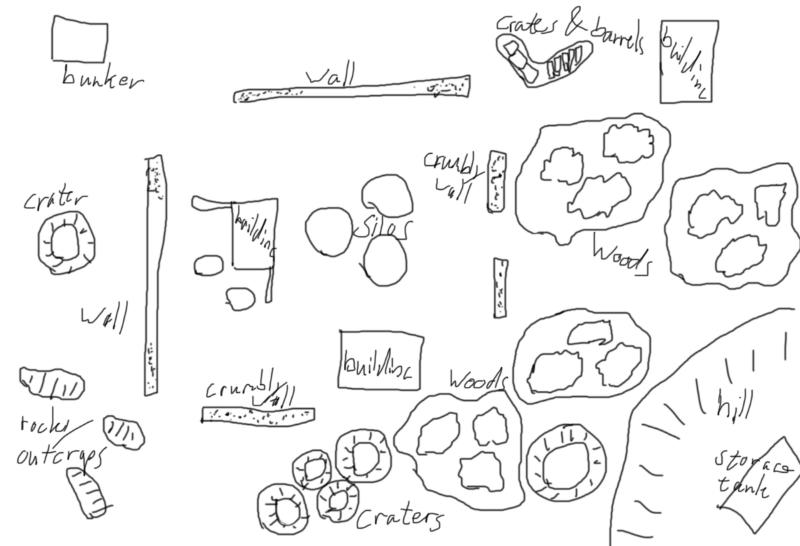
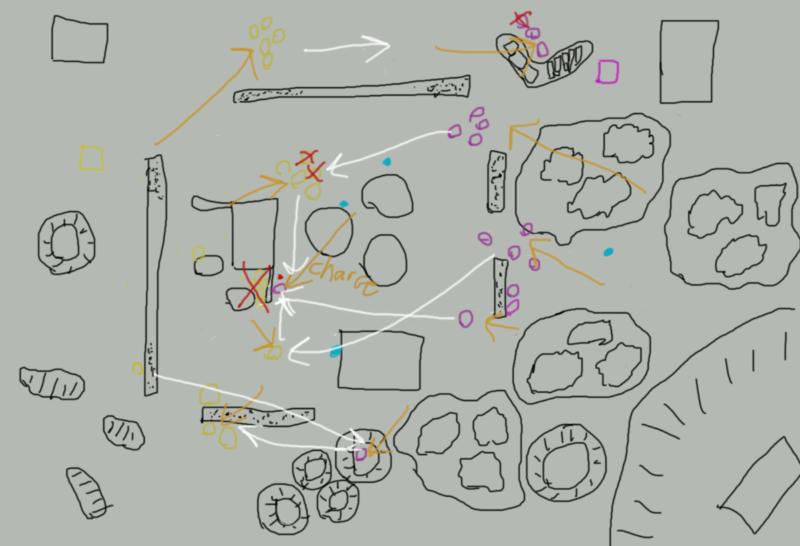
Dionne's doodle
All terrain was assigned cover value 2. The woods and craters are area terrain, the rocky outcrops, buildings, crates & barrels and the walls are obstacles. We didn’t use the actual building rules, so units couldn’t enter.
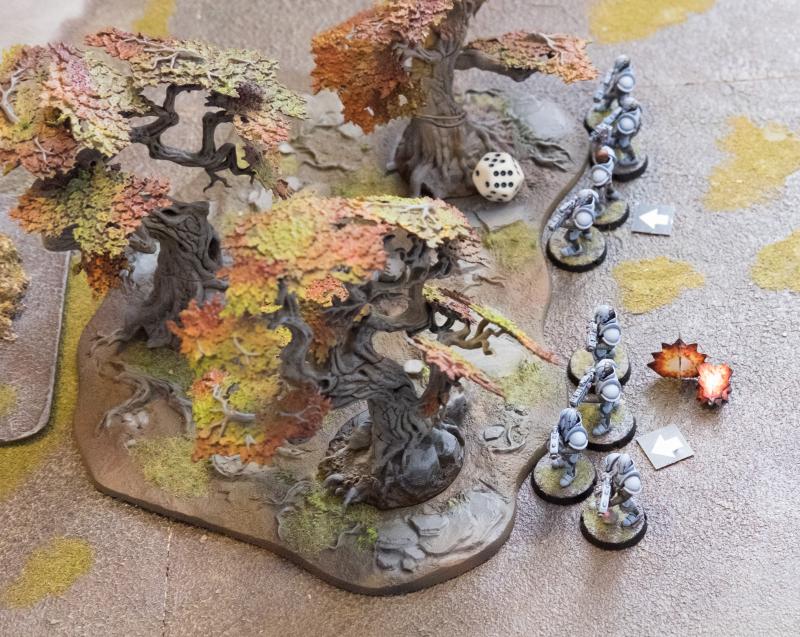
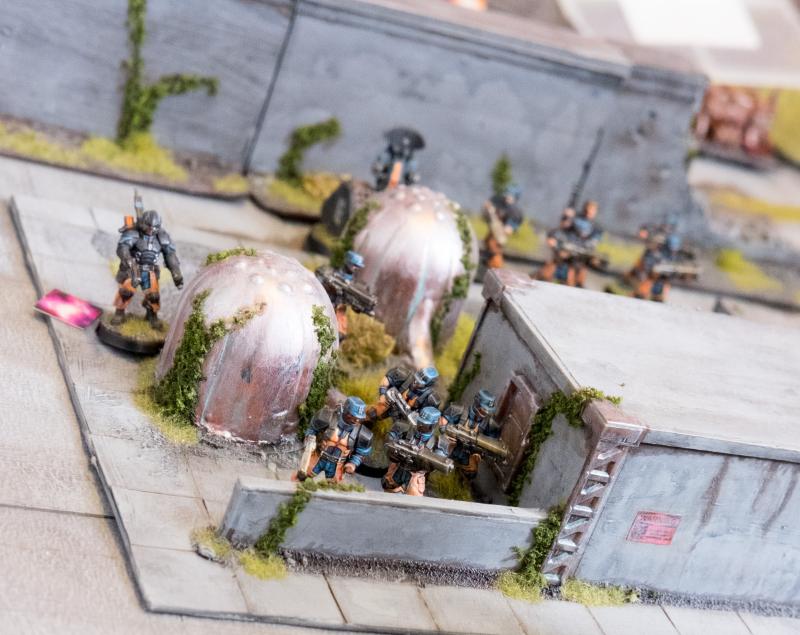
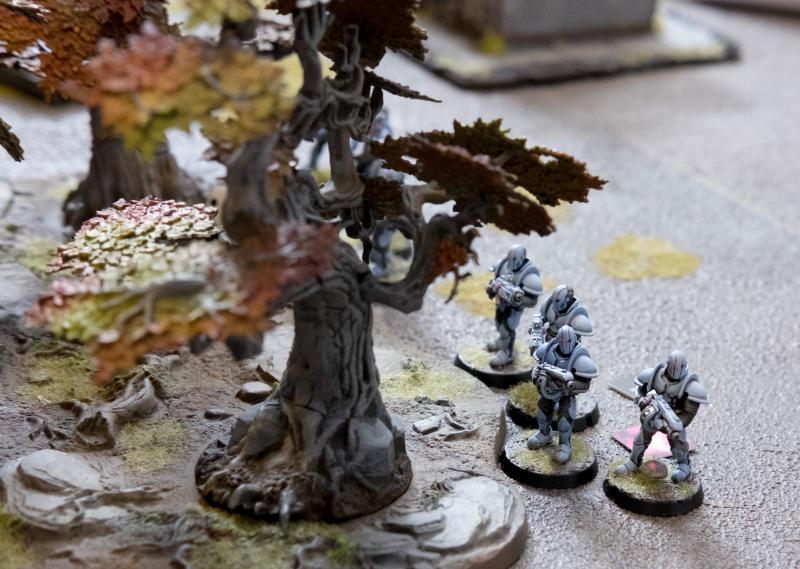
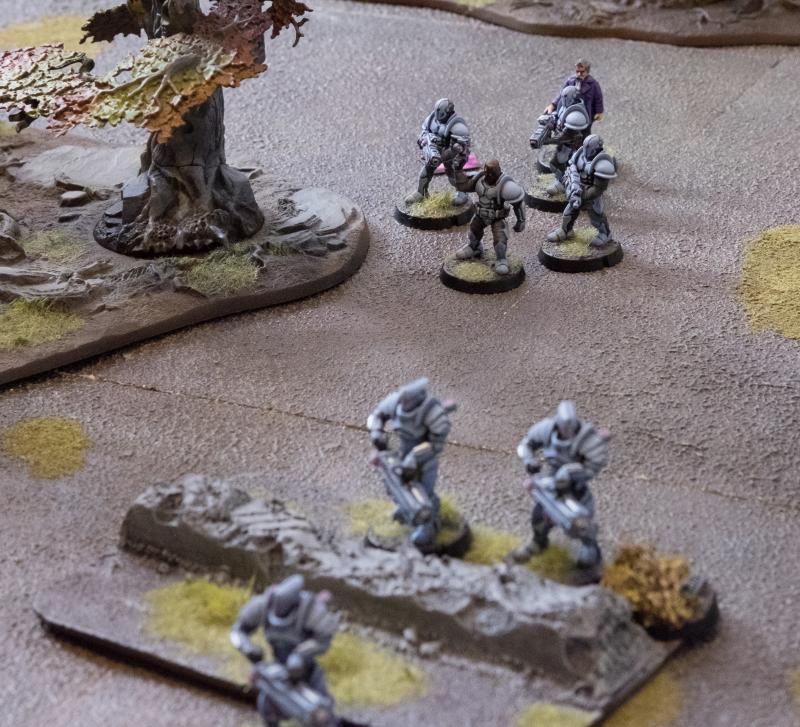
After his successful defence of the Tusculi Compound, Kaddar Nova Myro was tasked with grabbing whatever valuables the surrounding area had to offer. Elyssa, the enigmatic Shadow Walker, had pressed him to venture into this woods and capture some scientists. Myro didn’t see the point of taking home some people who probably did have valuable knowledge, but would just as probably not see the rightness of their cause and just be a general pain in the behind. He did, however, figure that a research centre such as this would harbour some useful supplies. It was with this dual purpose that he now peeked out from behind the treeline and ordered his troops to make a pincer move around the centre and allow no means of escape. They were just in time, from behind the further wall he could see activity of what was doubtless Epirian security forces attempting to beat them to the prize.
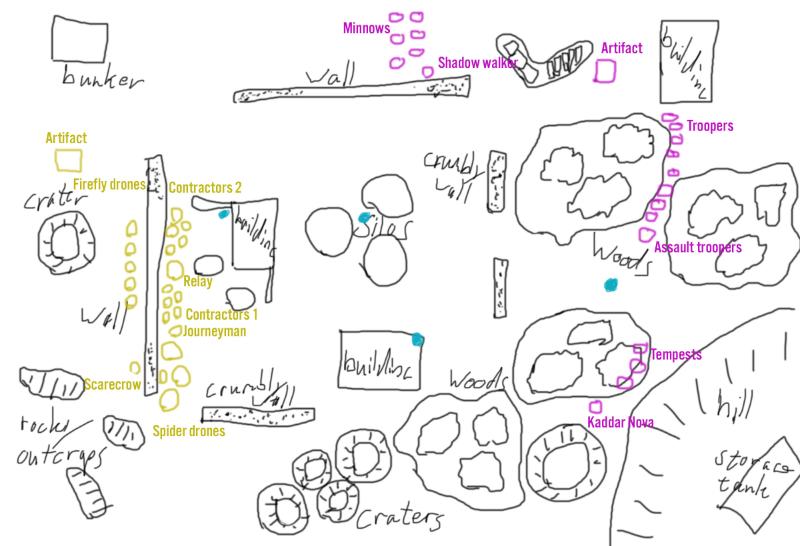
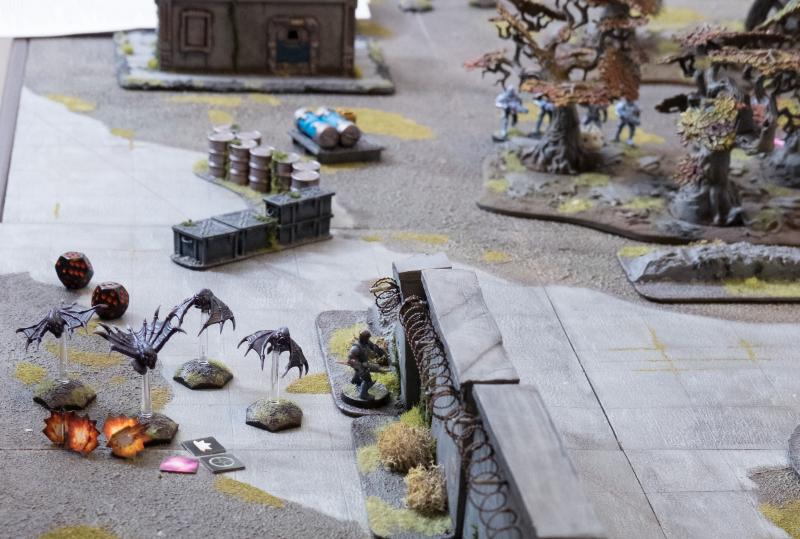
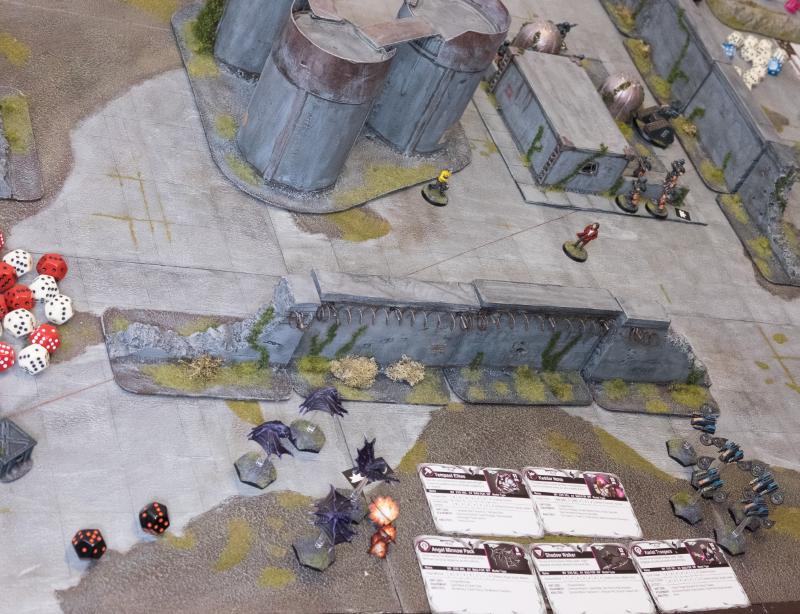
Big flank deployment was rolled for. The Karists bid to be attackers, deploying as shown after the Epirian defenders had turtled around the big rear wall.
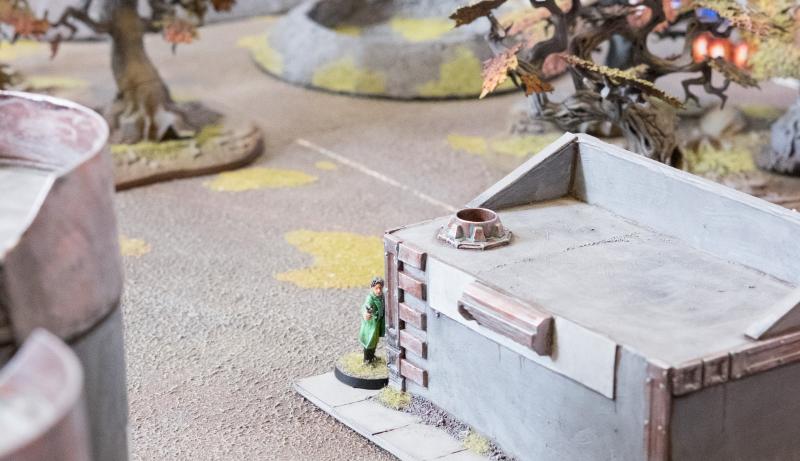
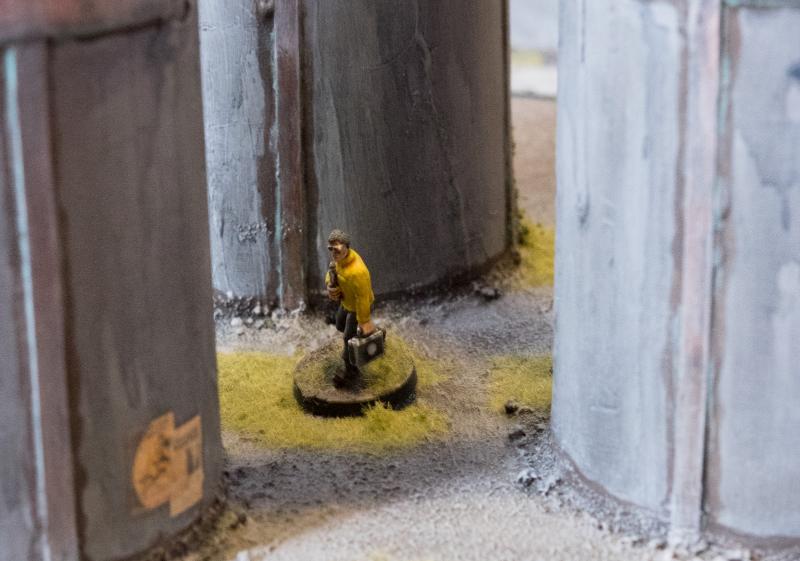

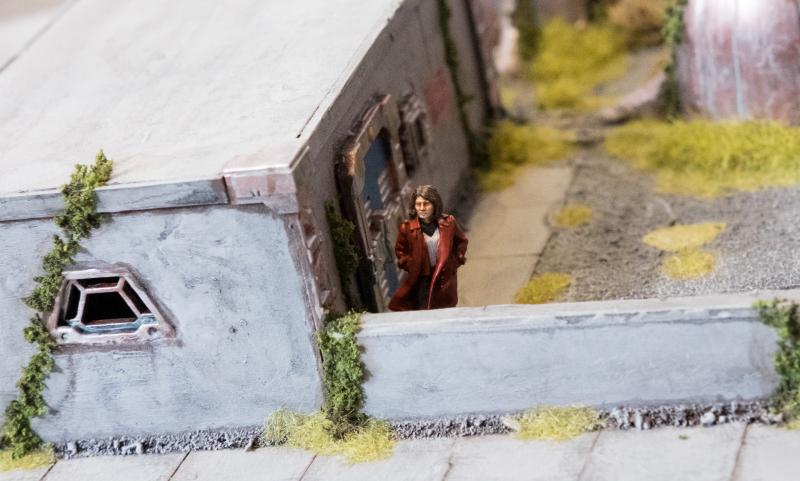
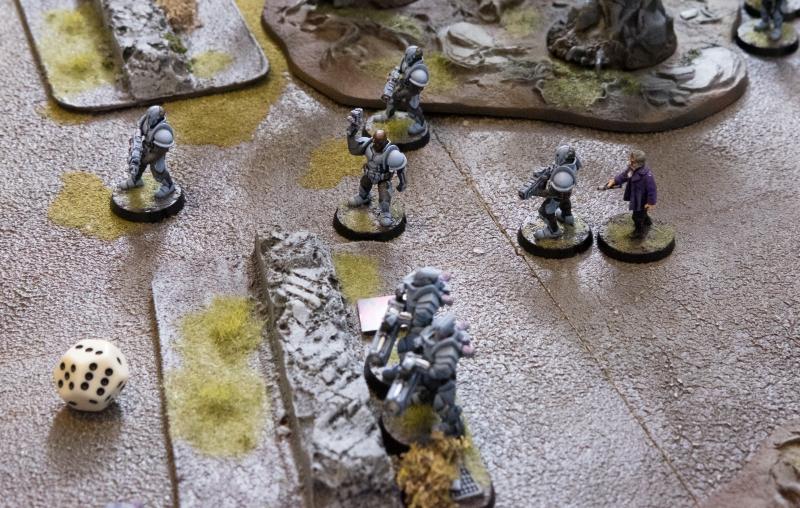
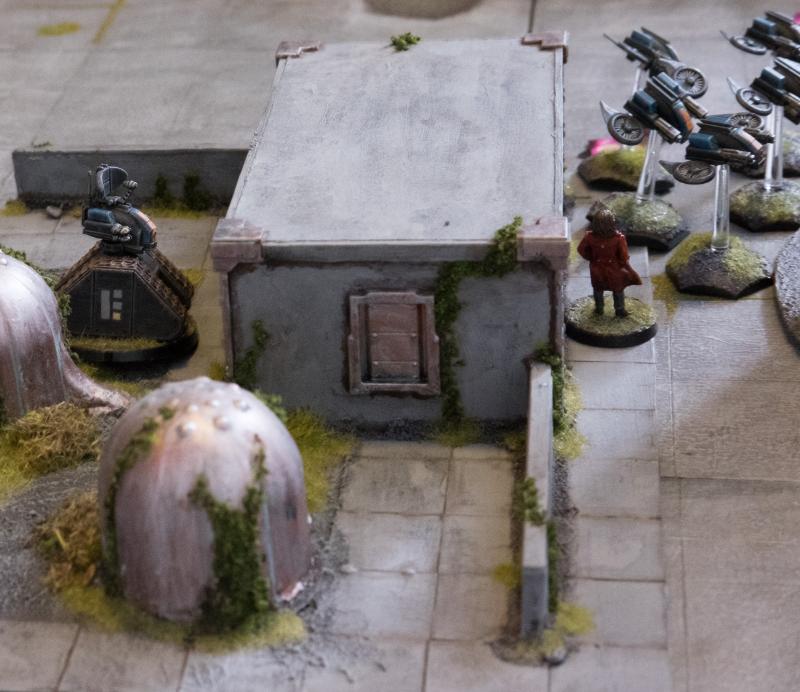
The four VIPs deployed, waiting to be taken.
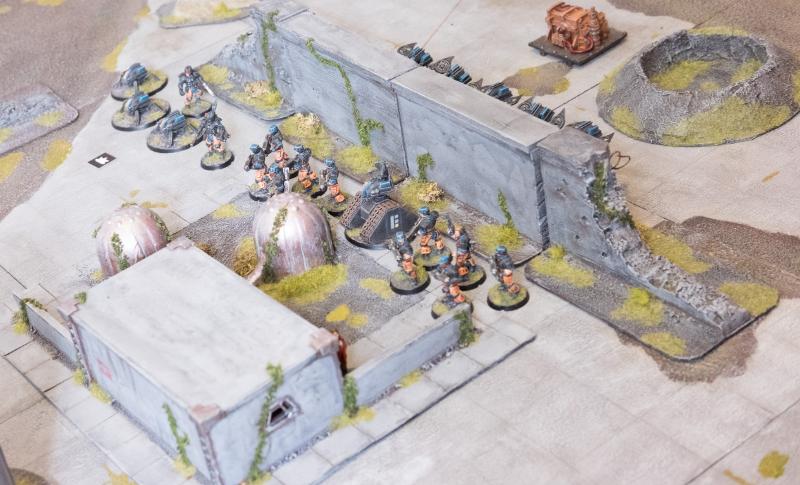
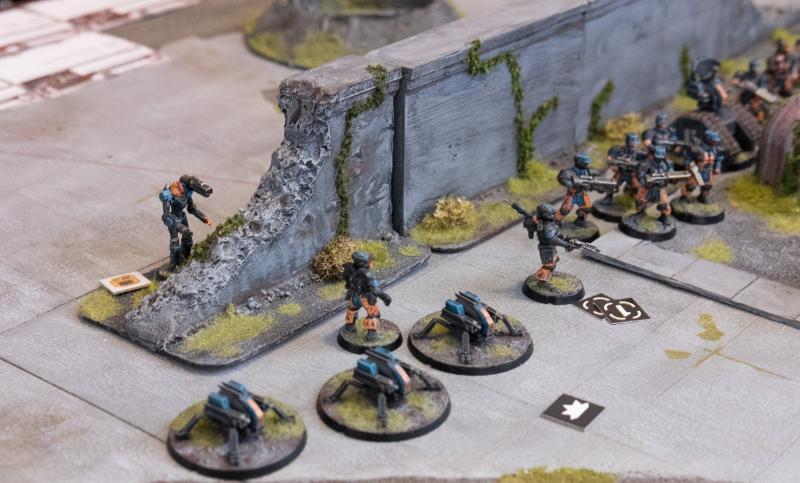
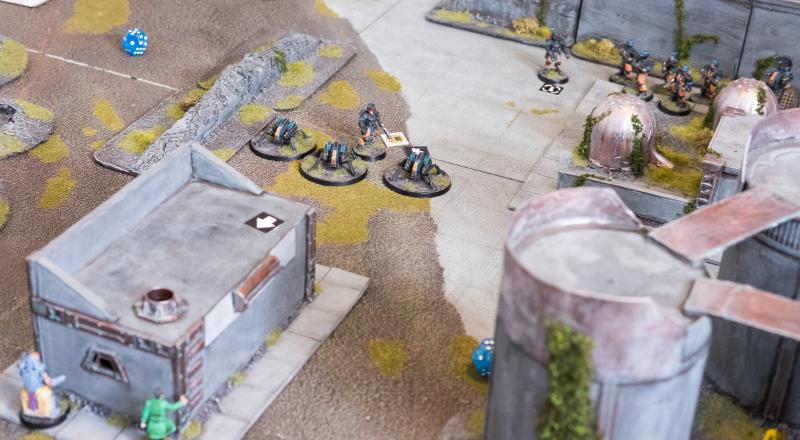
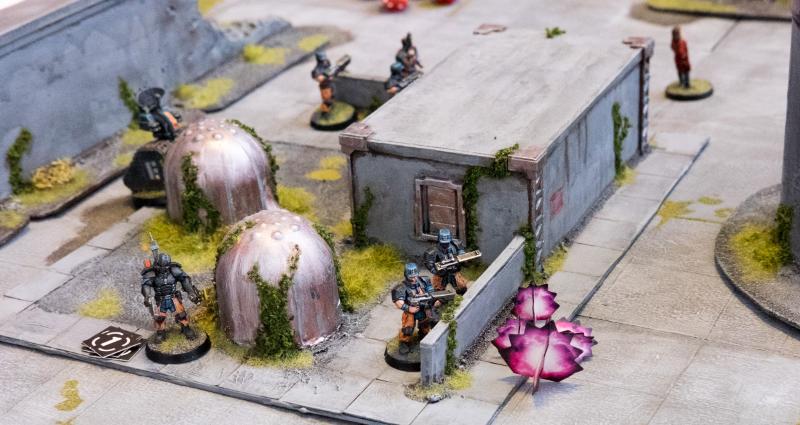
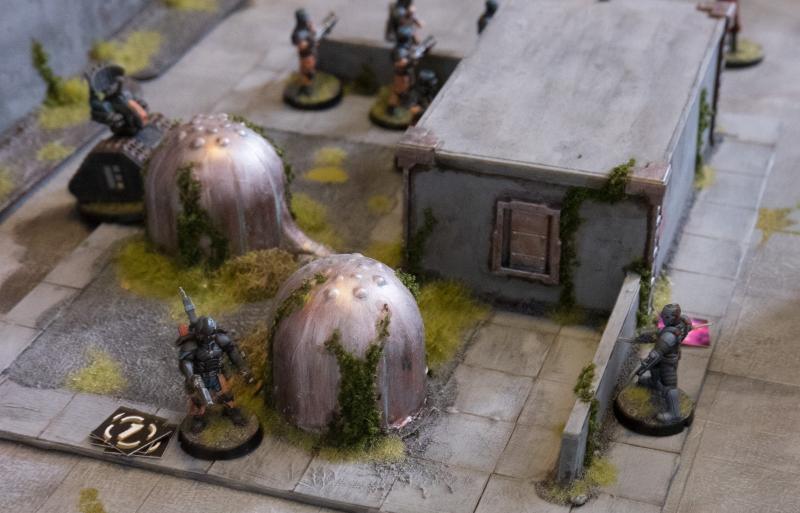
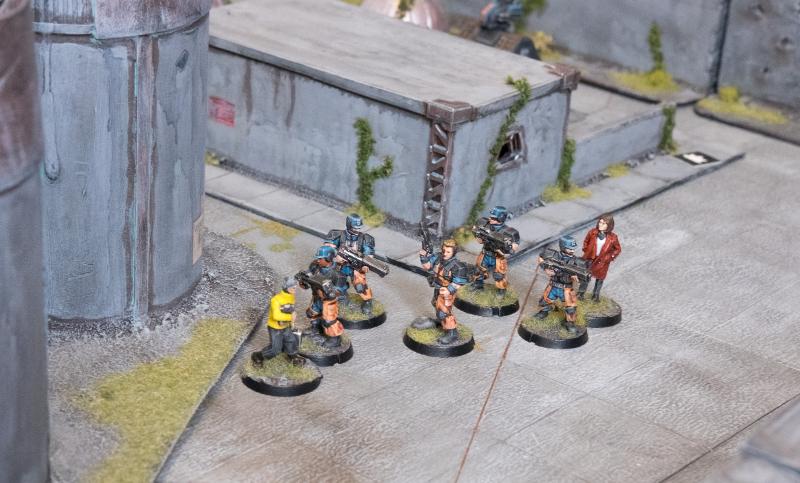
Epirian Deployment. The rusty generator is the Epirian Artifact.
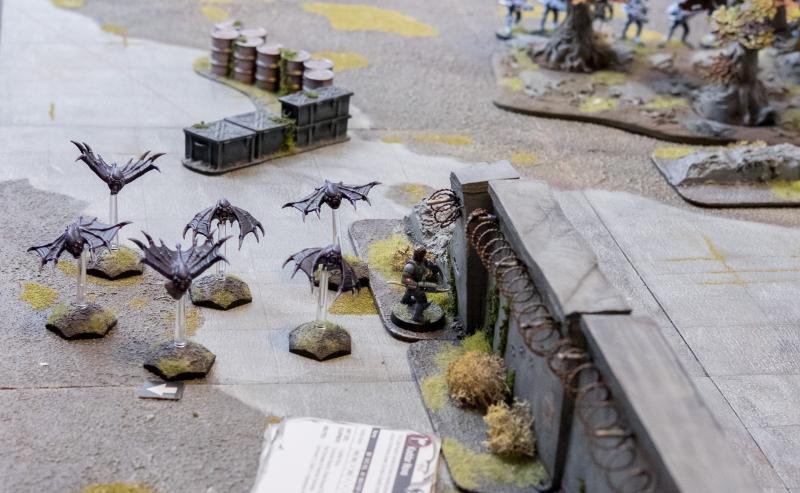
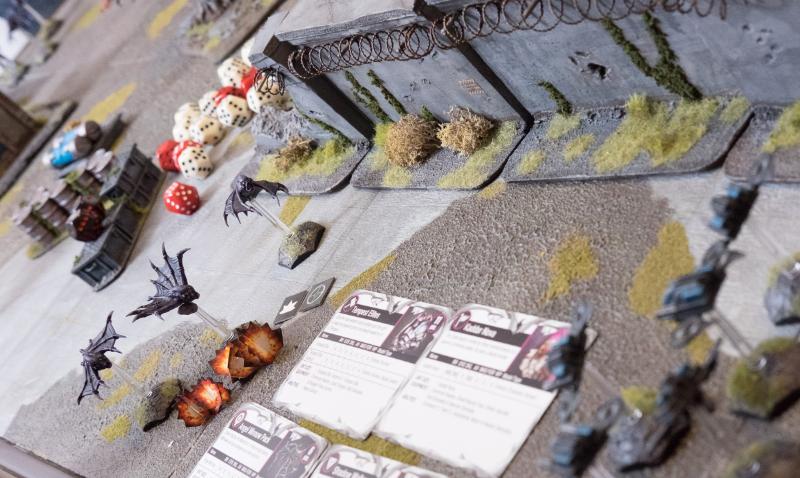
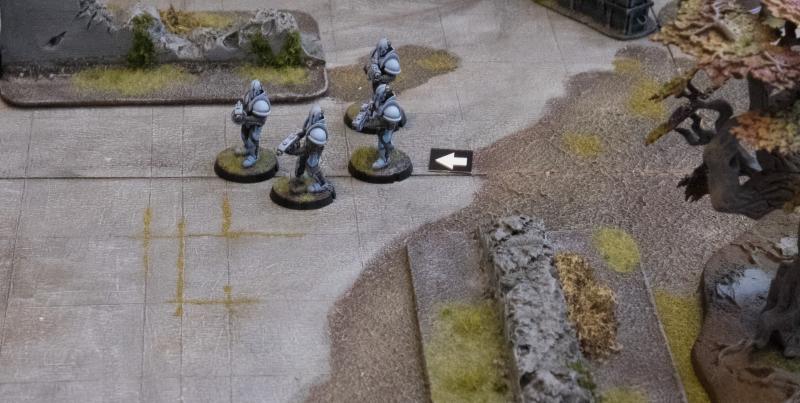
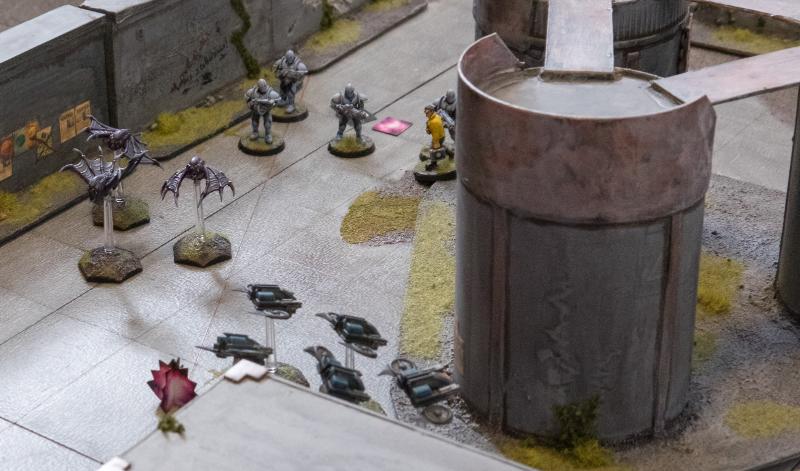
Minnows and Shadow Walker.
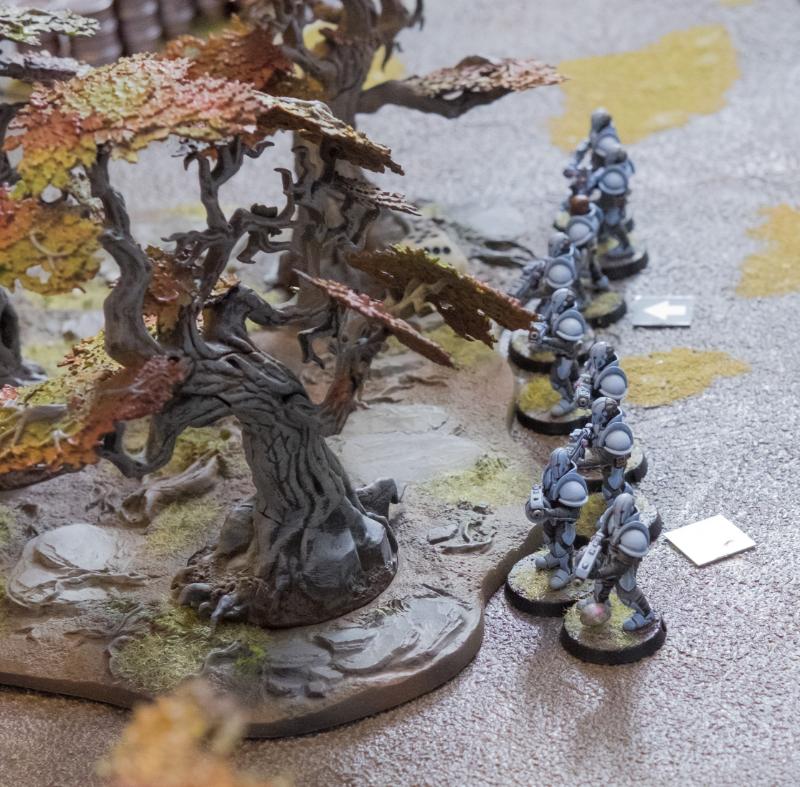
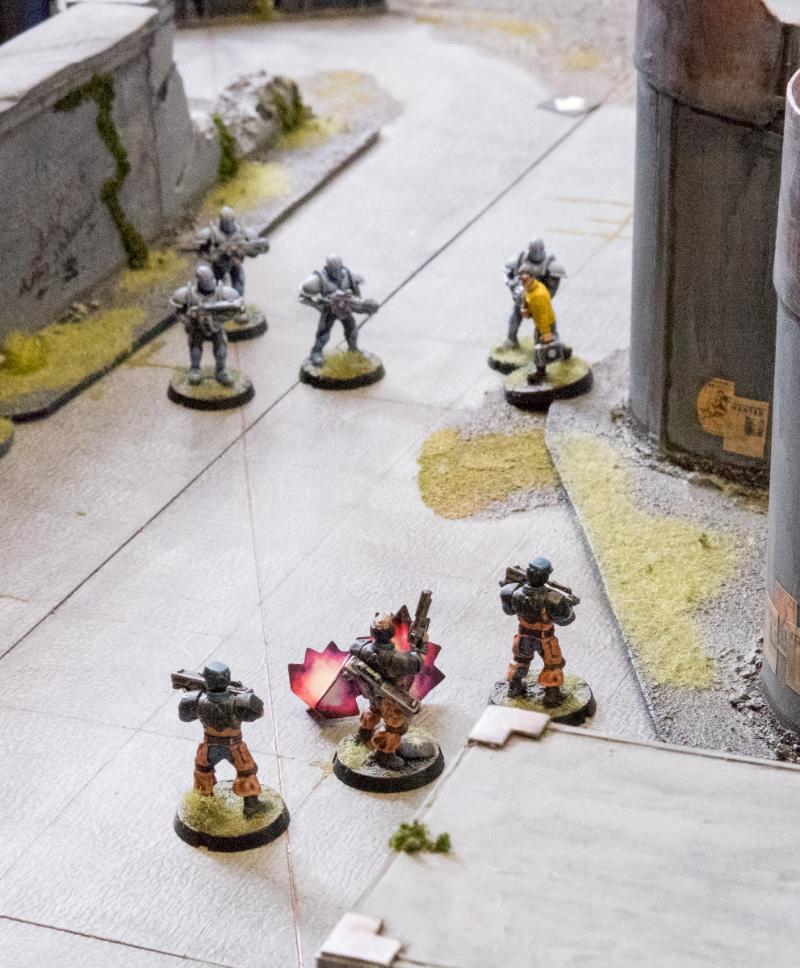
Troopers and assault troopers.
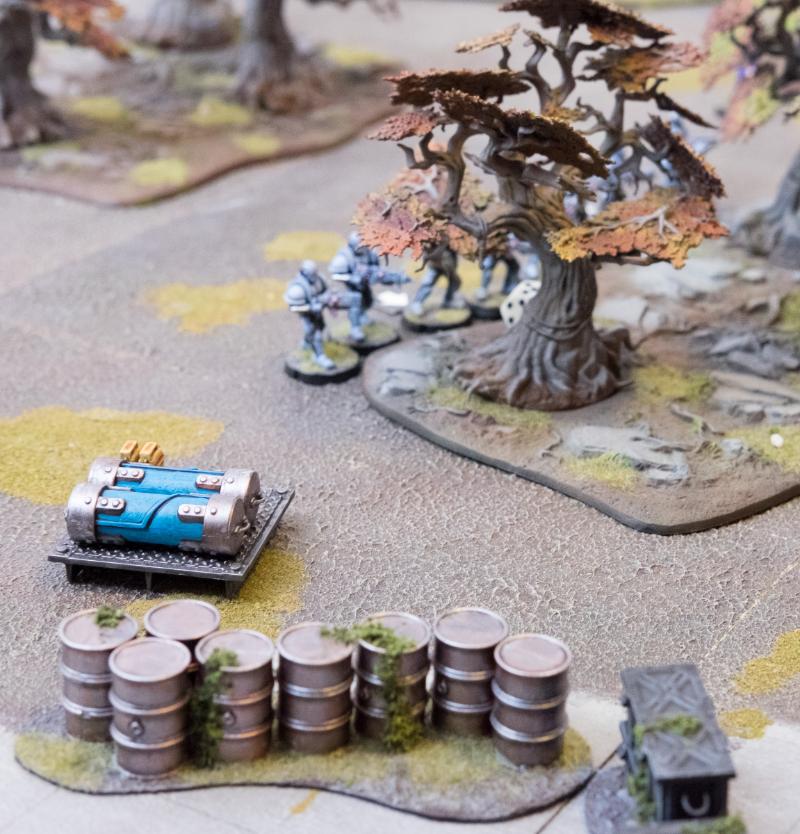
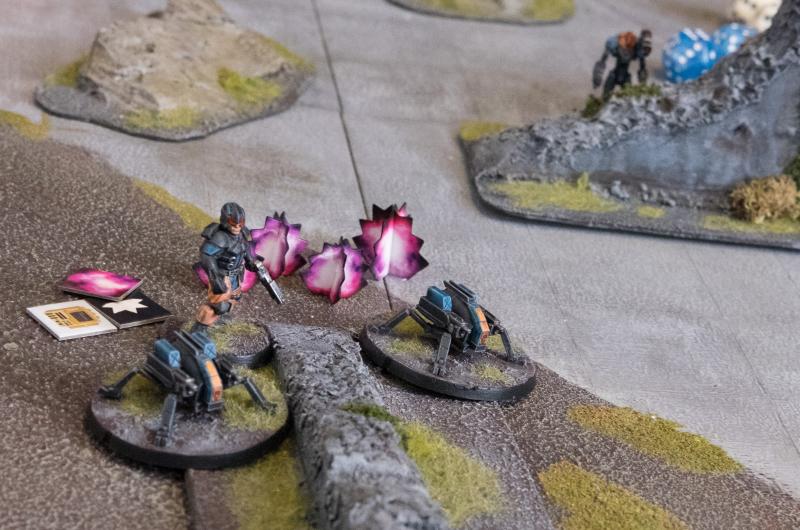
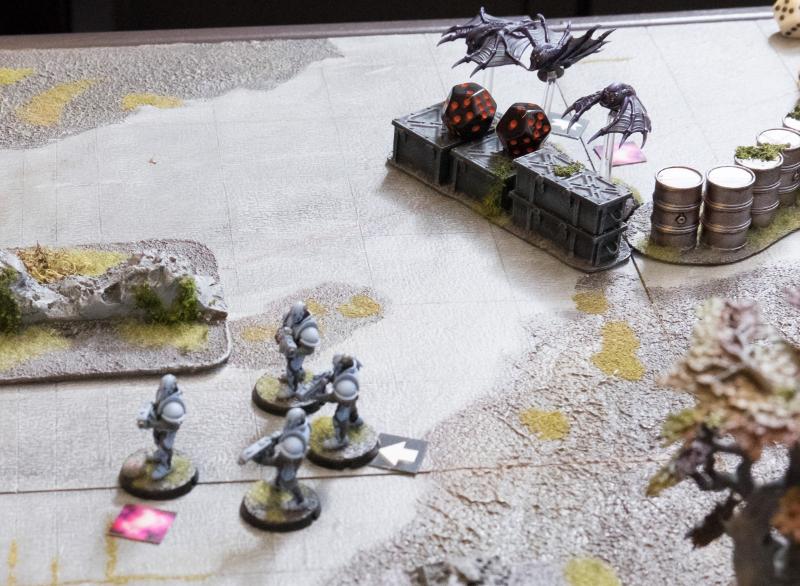
The Karist Artifact is the set of blue storage tubes.
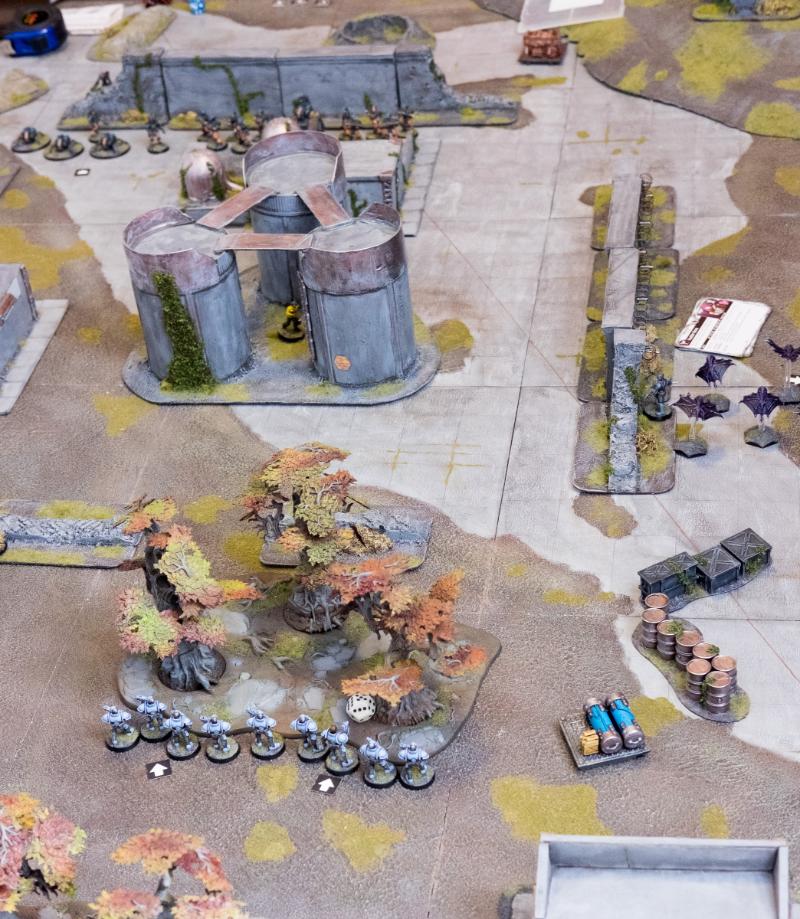
Half board overview.
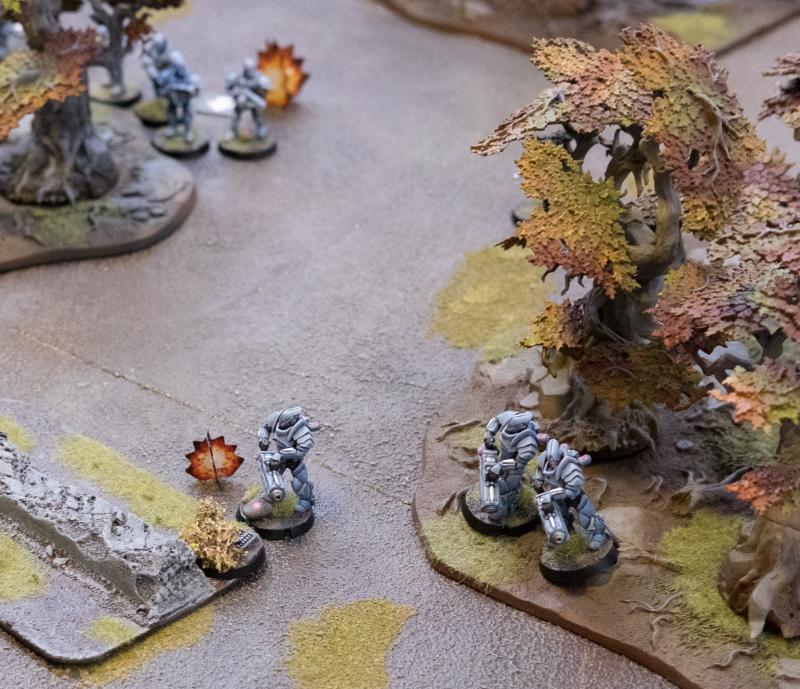
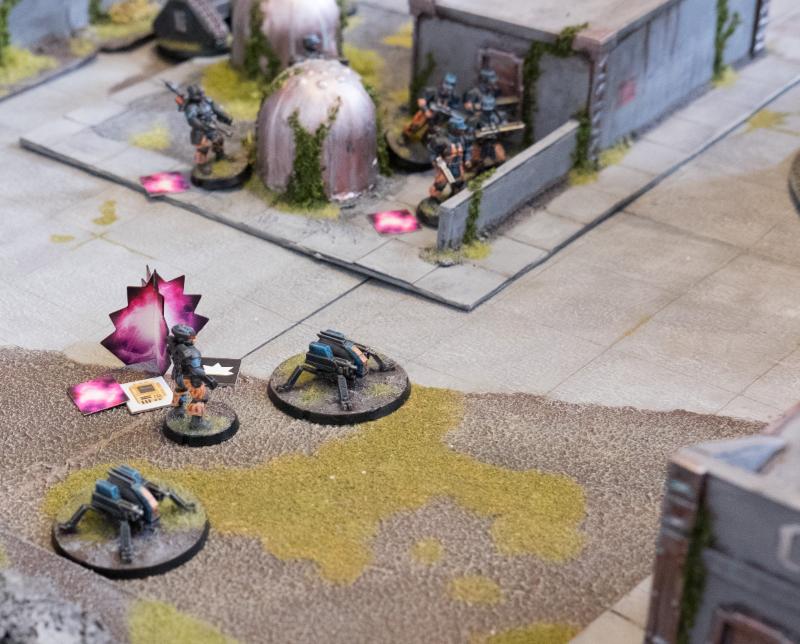
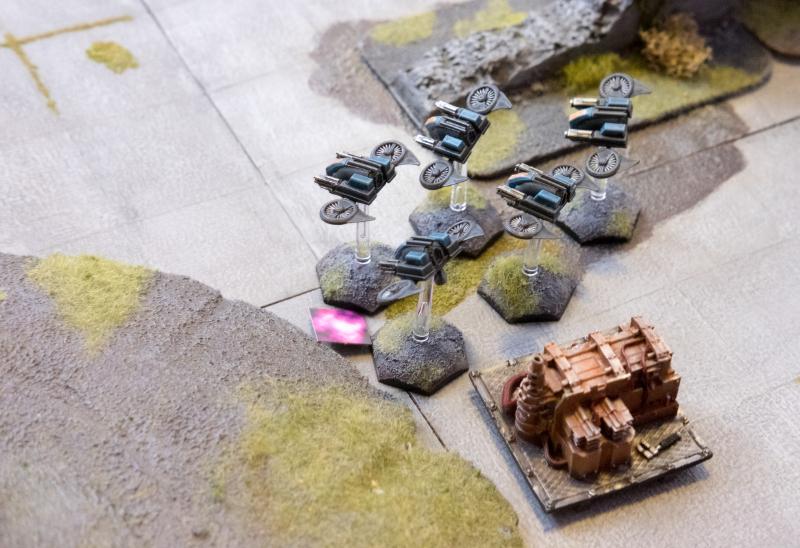
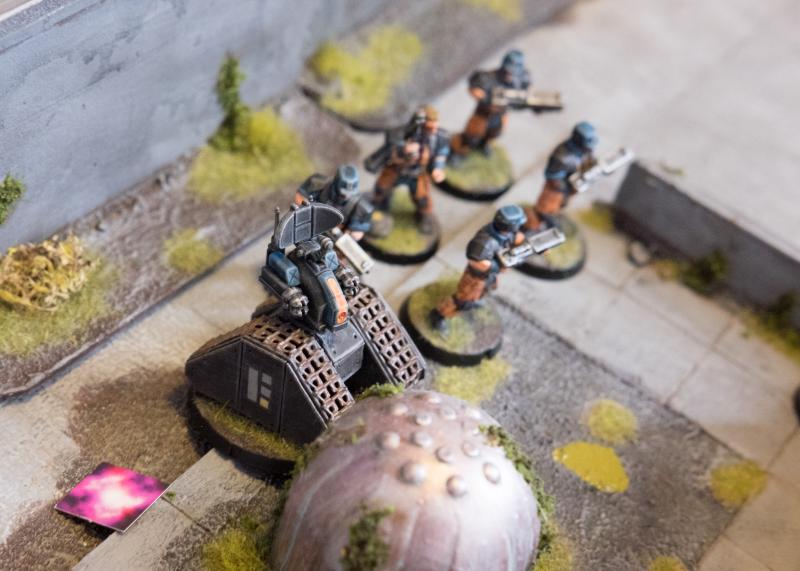
Tempests with deployment STs.

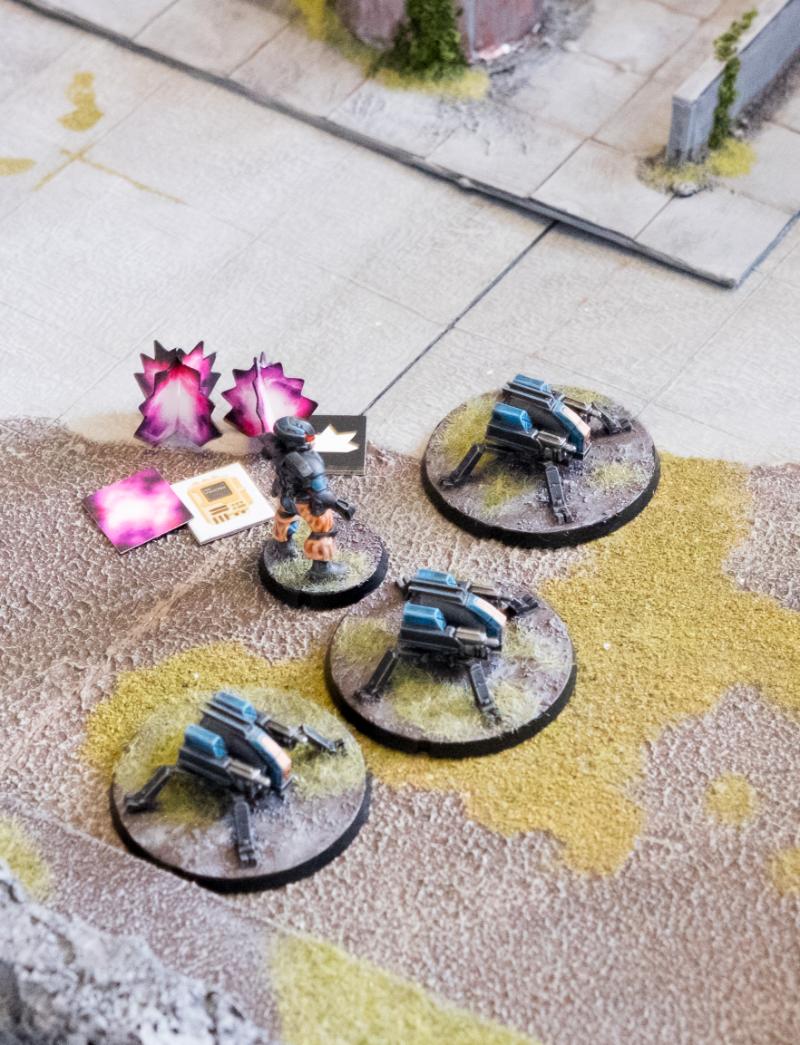
Epirian commander has 3 CPs assigned, the Spiders are deployed pinned.
The Karist commander has two CPs, is on the move and has his reactor in kinetic boost mode (which would normally not be the best idea, but it doesn’t matter in this case as he’ll be the first activation).
Karist force (90 pts)
- Kaddar Nova Myro;
- 4 Troopers with a Radwave Emitter, deployed On the move;
- 5 Assault Troopers with 2 Ripper grenade launchers, deployed On the move;
- 3 Tempest Elites with Ravager Vulcan Pulse Cannons (with 3 deployment STs);
- 6 Angel Minnows, deployed On the move;
- Shadow Walker Elyssa.
Epirian force (90 pts)
- Journeyman Bot Handler Bacaro with a command micro drone and a grenade launcher;
- 5 Contractors with 2 grenade launchers;
- 5 Firefly Drones;
- 3 Spider Drones with Cutter light machine guns and an apprentice handler;
- 5 Contractors with 2 grenade launchers;
- Scarecrow with Maglock Railrifle and Clingfire sprayer.
Turn 1
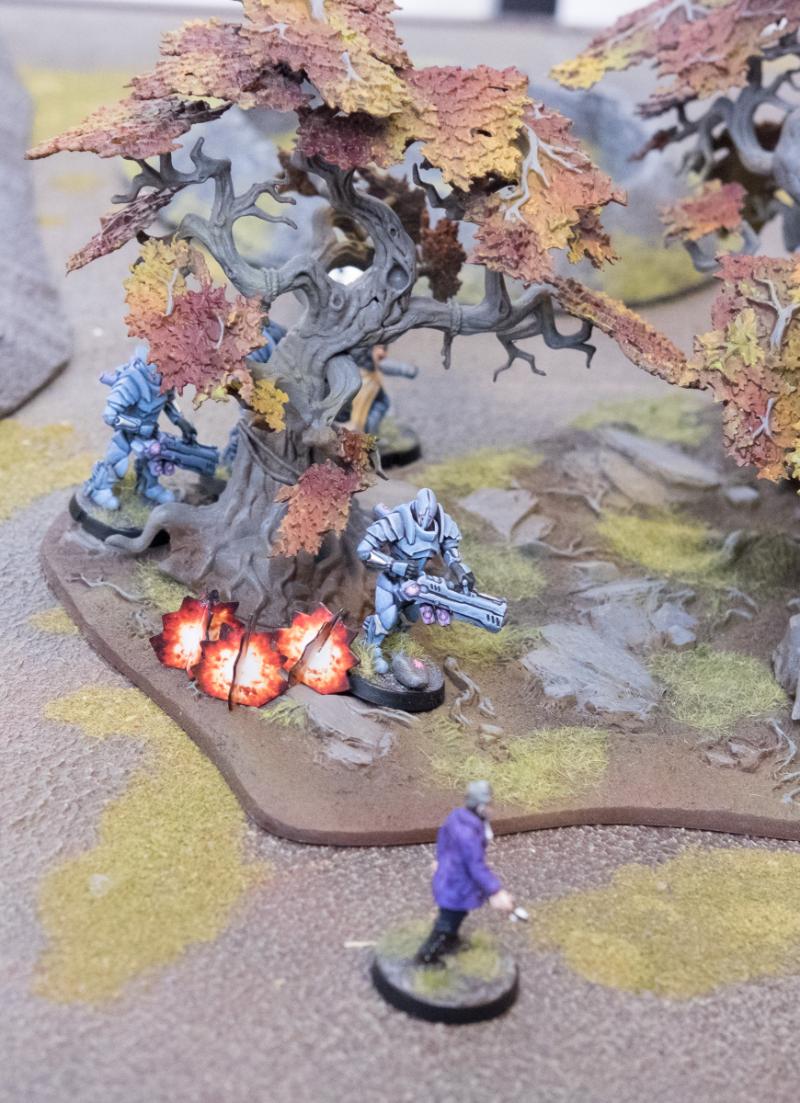
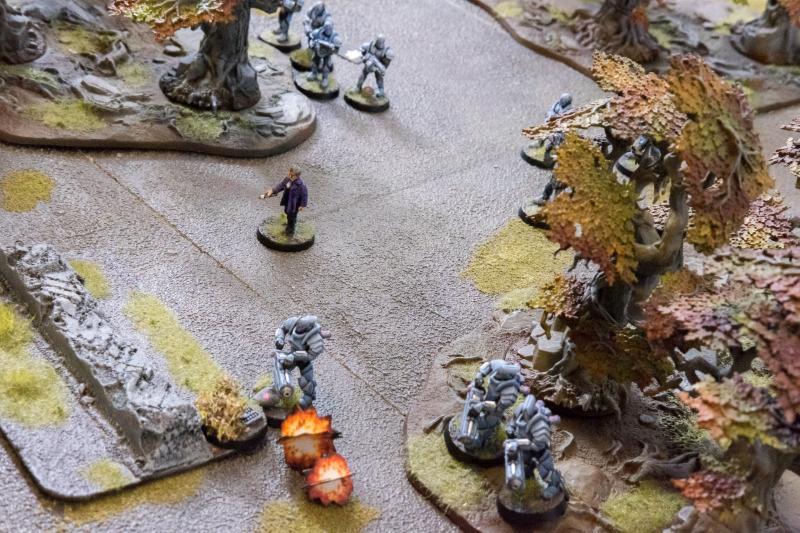
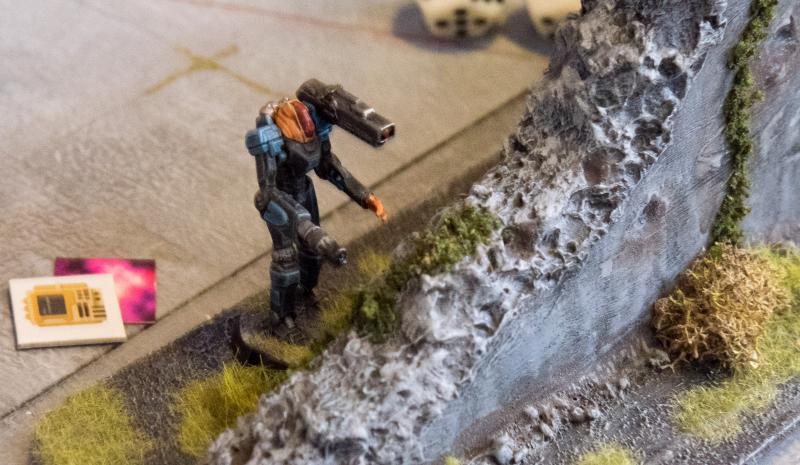
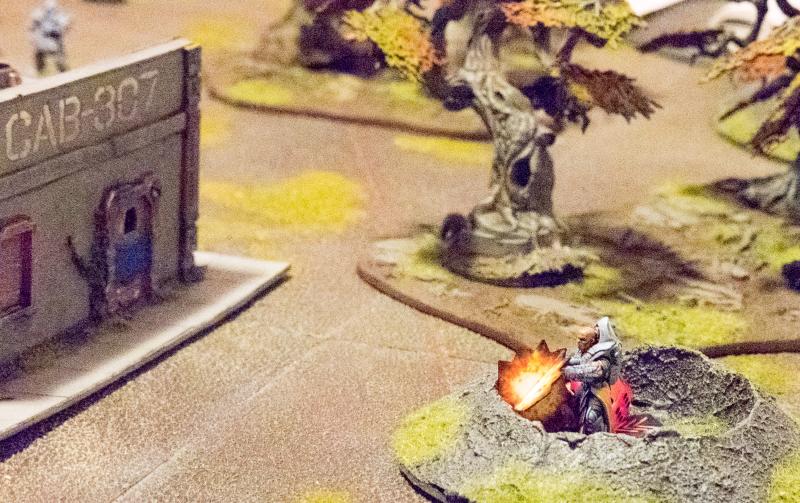
The Epirians had just swarmed into the centre. Time for action. Myro engaged his reactor and dashed ahead to the nearest building, where one of the scientists had just ran out. He stopped dead in his tracks as Myro fixed a piercing stare at him, but he had no time to waste on these people now, a squad of Drones across the centre had just sprang into action and started peppering his troops…
1st activation: Kaddar Nova Dashes ahead into cover near one of the objectives.
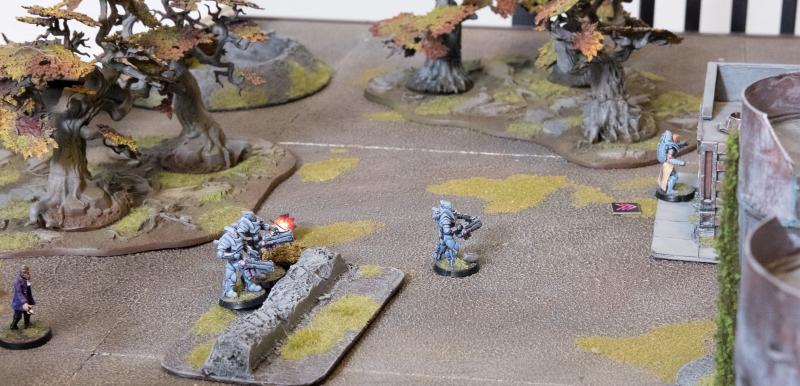
Storms! The Karists had beat him to it and were swarming out of the woods just as he entered the compound. Bacaro linked his mind with his trusty Scarecrow and aimed to snipe the first Karist to show his face. The powerful railrifle gave off a deadly burst and a Karist Trooper dropped dead just as he emerged from the treeline.

2nd activation: The Scarecrow gets his bot protocols activated and shoots at the Assault Troopers just visible behind the woods, resulting in a kill and 4 STs.
Again eager to follow his mentor’s lead, Apprentice Bot Handler Kasero quickly typed commands on his bot interface, ordering his Drones to advance, but stay low and follow the Scarecrow’s lead. The small but powerful machine guns let loose at the treeline where the first Karist had fallen.
3rd activation: The Spider Drones Dig-In after having their bot protocols activated and shoot wild at the Assault Troopers. They all miss, but the Troopers suffer another ST.
First blood for the Epirians. Myro bit his lip. He couldn’t let the Epirians pick off his followers as they tried to herd the scientists their way. He shouted to his Tempest Tetrarch to secure the hidden supply cache planted here weeks ago by Elyssa and lay down covering fire. The lumbering armoured forms sprung into motion and unleashed their Vulcan cannons at the advancing Epirian Drones.
4th activation: The Tempests Dash to their faction objective and fire at the Spider Drones. The Epirian player avoids losing a Drone by taking the one penetrating hit on the Apprentice Handler whose MAS2 can take the DAM1 hit.
Bacaro watched with satisfaction as the enemy’s dreaded artillery was unable to harm the carefully dug-in Spider Drones, but was then distracted by a report of alien forms appearing on the left flank. Remembering the impact these aliens had at Tusculi, Bacaro wasted no time in calling down an aerial drone strike on the reported area. A cloud of smoke appearing from behind the centre wall and cheers heard across the comm link told Bacaro the strike was a success.
5th activation: The Journeyman Advance & Fires an aerial drone strike at the Minnows. Despite their high Evasion and on the move bonuses, 1 Minnow perishes and the unit takes 7 STs.
Meanwhile his Contractors were taking the enemy artillery under fire. He only hoped the untested engineers would keep their cool this time. The enemy was seen to duck into cover, so he’d chalk that up as a success anyway.
6th activation: One of the Contractor squads advances up to the building wall and fires at the Tempests, who take one damage despite their cover, resulting in 4 STs. The Contractors, however, are now dangerously bunched together. Quintarch Samuel was pained to have lost a brother to one of the enemy’s soulless machines, but rallied his team and ordered them to advance for the cause and avenge themselves upon the machines. The thumps of the Ripper Grenade launchers were followed shortly by an explosion and the sound of metal bits flying.
7th activation: The Assault Troopers fail their activation check and must perform a Shaken action. Firing wild at the Spider Drones, the small blast templates from the grenade launchers generate a lot of shots and, ignoring cover, manage to destroy a Drone and add 5 to the suppression total.
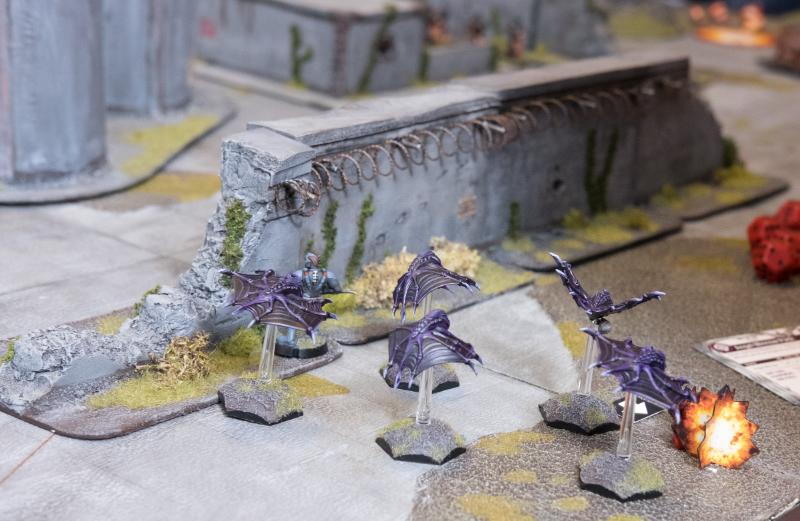
Elyssa, leading the advance on the flank, could only just duck into cover in time as a savage aerial barrage hit the area where she and the Angel Minnows were, she thought, advancing unnoticed around the centre. The remaining Minnows who emerged from the cloud of smoke had understandably lost their nerve and were flapping around in confusion, but then seemed to regain their resolve, luckily. Moments later they were in trouble again as Epirian Drones were appearing on the flank and shooting their lasers at the little angels.

8th activation: The Minnows fail their activation check and must take a Shaken action, but don’t need to retreat and fire wild at the Epirian artifact, but do no damage. They then shake off most of their suppression.
Following up the aerial drone strike on the approaching aliens, the Firefly Drones engaged their engines and took the Minnows under fire as they emerged from the smoke, two more of the horrible creatures dropped to the ground.
9th activation: The Fireflies Dash over to the Epirian artifact and fire their low power lasers at the Minnows, killing two and adding 3 STs.
10th activation: The automated relay does nothing (generating a victory point)
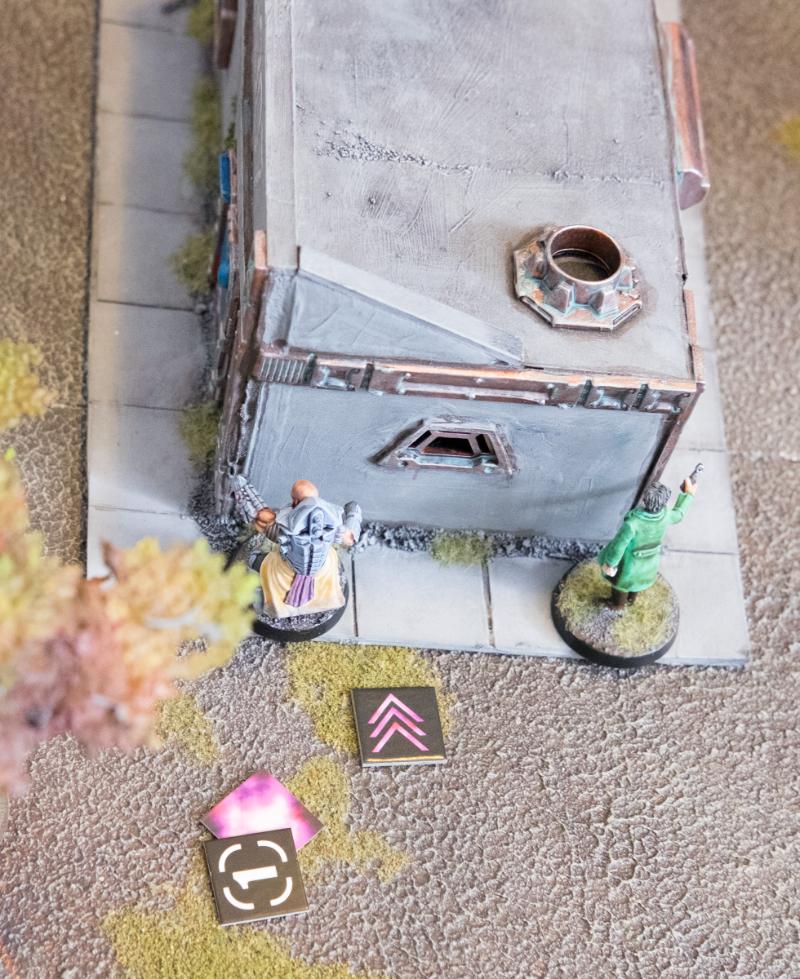
Elyssa decides there is no time to waste. She came here to capture some Epirian scientists known for their work on Cybel energy. If they could be made to see the truth about the Maelstrom, their knowledge would be of great value to the cause. The scientists, still in the midst of their evacuation preparations, were now caught in the crossfire and running around the centre in confusion. Elyssa spotted the research team leader taking cover behind the big silos in the middle of the centre and ran over to bind him.
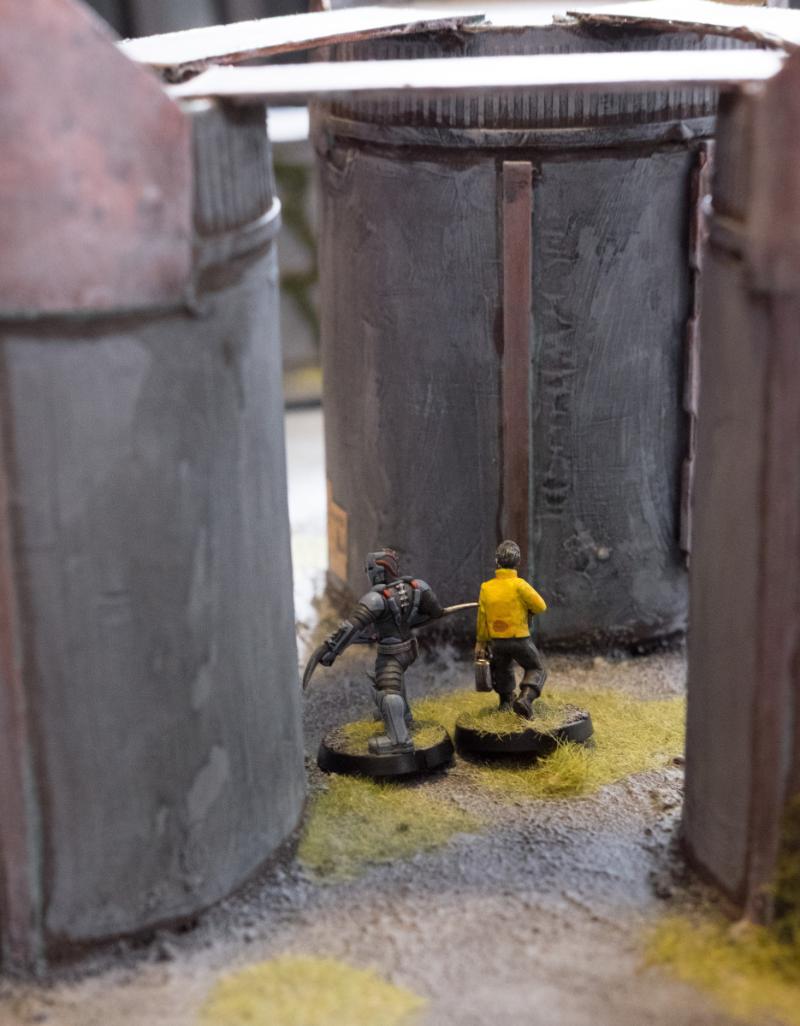
11th activation: The Shadow Walker Dashes, making a dynamic move to the middle of the board to claim one of the objectives.
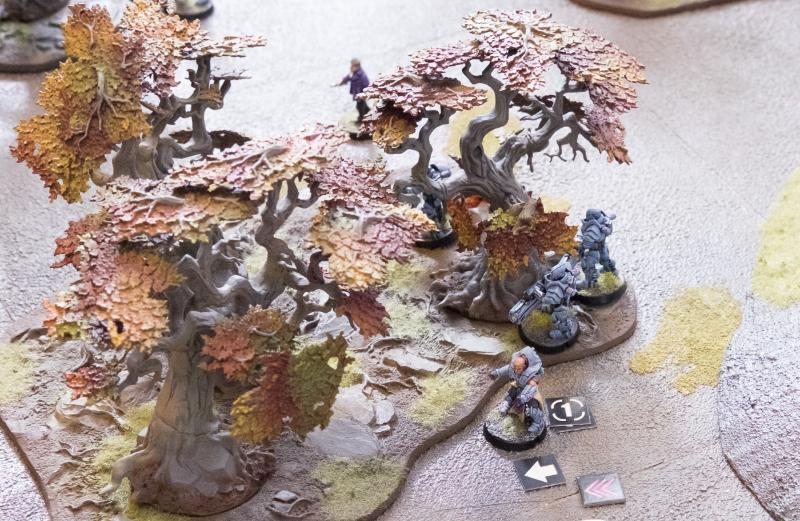
The Troopers under Elyssa’s charge saw her run over to one of the scientists, and followed her example. Loosing some shots for cover, they jumped across the concrete to where another one of the science crew was frantically trying to avoid getting shot and grabbed him.

12th activation: The Troopers Dash over to a second objective, with shooting adding 2 STs on one of the Contractor units.
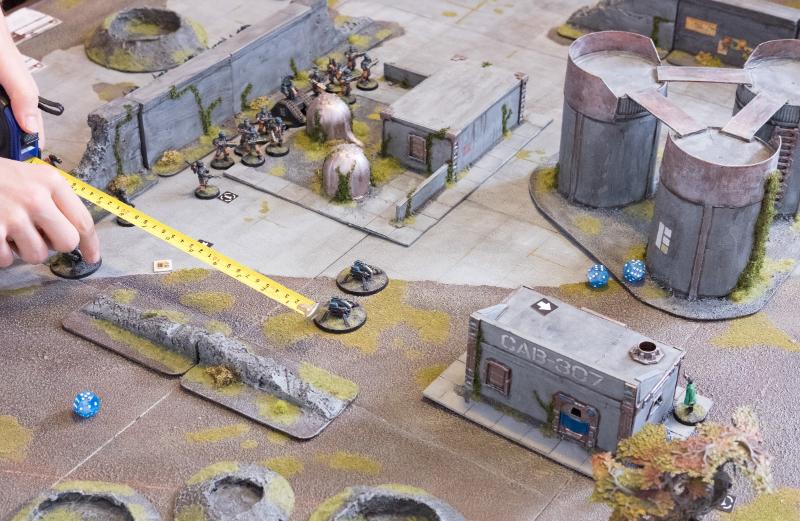
Tromp, the Contractor Team leader on the left flank took a last glance at the photos he’d had pressed into his hands after his boss was tasked with evacuating this centre. He had a specific job: make sure certain storage containers did not fall into enemy hands. Securing them would be nice, but he needn’t waste an opportunity to destroy them instead. Nobody had told him what was in these containers, but he was now sure he saw them stacked at the other end of the centre. Their team had secured one of the scientists who was somehow acting quite hysterically, and now ordered his engineers to lob some grenades the way of the containers. Unfortunately, the range was too great for accurate fire and the pesky containers remained sitting there defiantly.
13th activation: The second team of Contractors Digs in, taking positions around the building, and try to damage the Karist artifact, but fail. (Image was taken after VIPs got moved.)
This ends turn 1. The Karists scored 13 VPs: 8 for their artifact being entirely undamaged, four for holding 2 VIPs and another for controlling their faction objective. The Epirians score 11, having one fewer VIP.

The VIPS were then moved 6” and turn 2 commenced.

Turn 1 end map: orange is movement, white is shooting. VIPs haven’t yet been moved.
Turn 2
The Epirians get priority and generate 4 command points, whilst the Karists generate 3 CPs.Focusing all his attention on eliminating the aliens, Bacaro links his mind to the Firefly Drones, powers up their lasers and cuts down another alien, whilst the rest turn their tails under the fusillade of laser fire. With this threat taken care of, Bacaro can now focus on the silly scientists.
1st activation: The Fireflies get their evasive maneuvers protocols activated and Dash ahead, once more shooting at the Minnows, now with high power lasers, killing one and adding 3 more STs.
Myro was quite displeased with his Elites’ cowardly hiding amongst the trees. Frantic shouting saw them advance one more and rain fire on the opposite Epirians, who were horribly slaughtered. This was more like it. Much as he valued every life, Myro had his priorities right and didn’t hesitate to brutally propagate the Karist cause if need be.
2nd activation: The Tempests advance and fire at the Contractors opposite. Utilising the re-roll granted by their faction objective, 7 hits remain after applying cover, resulting in four penetrating hits of which two are explosive. Three Contractors fall and 6 STs are added.
Elyssa, distracted by the advancing Epirians on her flank, temporarily lost sight of her captive, who suddenly jumped and ran out into the crossfire. Moron. Elyssa figured a dead scientist was useless anyway and decided to fall upon the Contractors who were getting mauled by the Tempests’ Ravager cannons. As soon as she perceived the guns going silent, she ran out, drawing her Cybel blade and slipping it into the throat of one of the surprised engineers, then gutting the remaining Contractor before he had time to react.
3rd activation: The Shadow Walker charges the Contractor team and kills the remaining two, then shaking off the STs gained in the process.
Kasero was starting to regret his rash action, he’d already lost a Drone and was in the middle of a hail of fire, whilst to his left a whole team of Contractors was brutally slaughtered by combined fire from the enemy artillery and an assassin appearing out of nowhere. This was no place to stick around. Tapping new orders, he and his remaining drones hoofed it to the cover of a ruined wall behind them.

4th activation: The Spider Drones receive an order and have their protocols activated, but still fail their activation and must retreat. Pinned behind a wall, they shake off 8 STs, but are still left with 3.
This could not be happening again. Why was he again sent against the Karist offensive with inadequate forces on ridiculous missions? Fired up by his anger, he decided to go after the sinister figure that had come up and killed his engineers, only to then hide behind the low wall. Drawing his Dominator pistol, Bacaro fired at the assassin, but his nimble foe darted out of the way just in time.

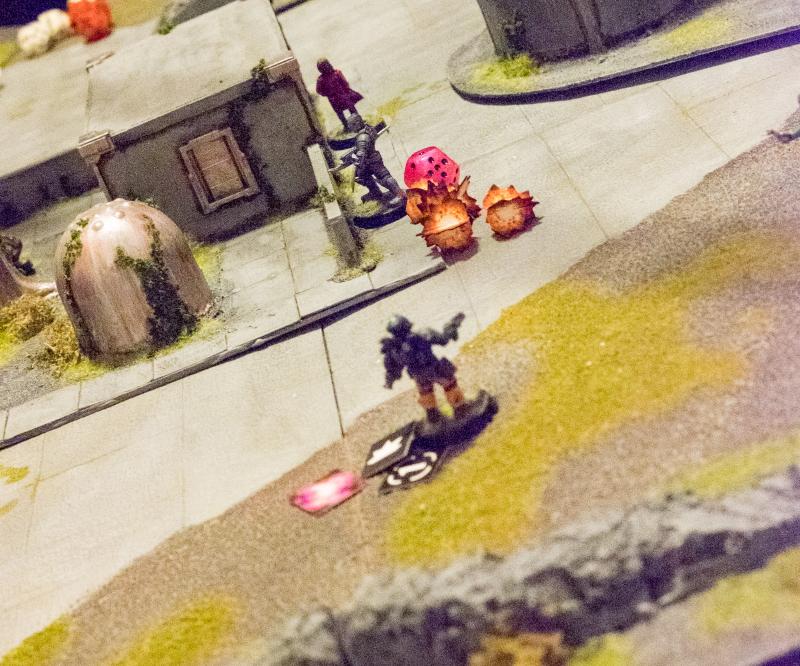
5th activation: The Journeyman advances and fires at the Shadow Walker who isn’t harmed but does get suppressed. (Image taken after Nova’s next activation.)
Myro was eager to press his advantage. Elyssa and his Tempests had neatly cleared this flank. Now it was time to go after the supplies the Epirians were so eager to guard. Engaging his reactor, he dashed into the nearby crater with superhuman speed and fired his gauntlet at the Drones attempting to hide from his troops behind a ruined wall. Being attacked from two sides, they had nowhere left to hide.
6th activation: The Kaddar Nova advance and fires, piling more suppression on the Spider drones but failing to destroy any despite denying their cover from this angle.
Samuel and his Troopers dragged their hostage along, pressing up further into the science centre and loosing some shots at the enemy individual who was threatening to corner Elyssa.
7th activation: The troopers Dash forward to keep contact with their objective and fire wild at the Journeyman, missing him, but adding 1 ST.
Bacaro had to think fast. He had to deal with this assassin, but was now himself taken under fire by an enemy squad, and also witnessed his Spider Drones being cornered by what appeared to be the enemy leader, judging by the amount of shouting he was doing. Quickly prioritising, Bacaro linked with his Scarecrow and aimed at the enemy leader. He must not have been his normal calm self, however, as he failed to hit with his Scarecrow’s railrifle.
8th activation: The Scarecrow gets an order to activate his protocols and selects the Hold & Fire action. The robot gets a sniper hit on the Kaddar Nova, but then rolls a 1 to pen.
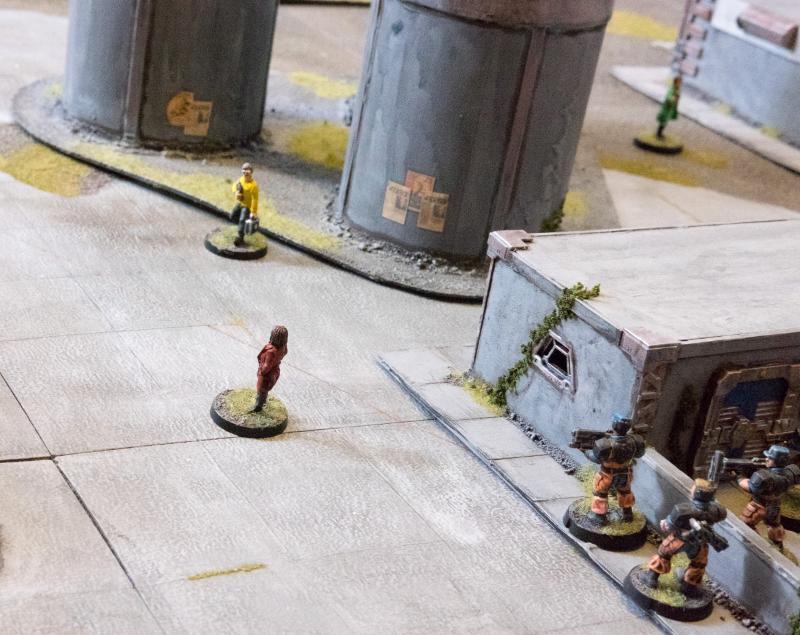
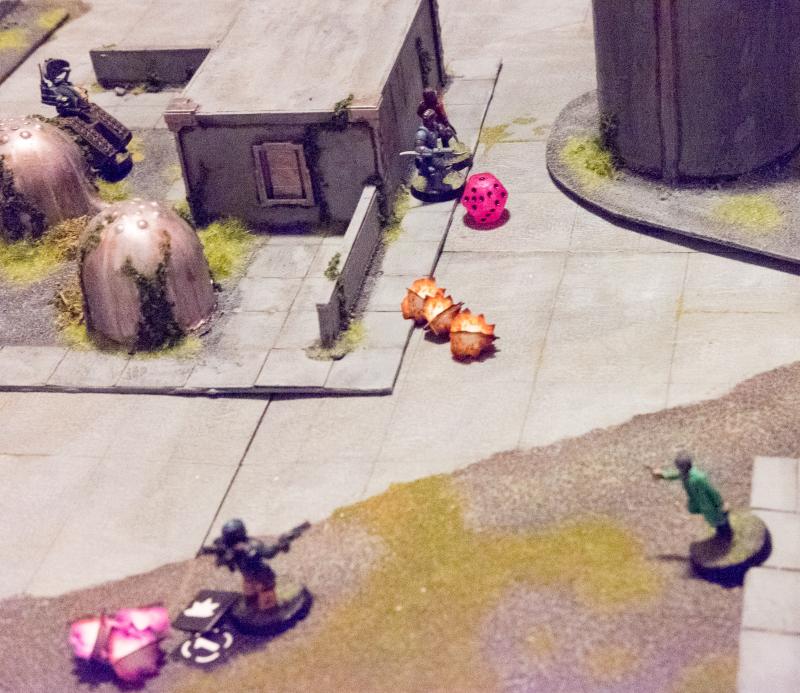
Team leader Tromp couldn’t believe his eyes. Here was one of the scientists awkwardly running out from the cover of the silos into open ground, risking his life for apparently no good reason. Then he saw the reason for the scientist’s silly walk, he was bound at the wrists. A quick shout saw his team emerge from cover to secure this brave man who had seemingly escaped from Karist custody. Cornering their building, Tromp saw the figure of the brutish assassin facing off against his commander. Taking aim, he shot his maglock rifle and grinned triumphantly as the enemy dropped to the ground.
9th activation: The Contractors Dash to claim the yellow VIP. We realised just after this shot that they can’t actually control both VIPs. Wild fire at the Shadow Walker does enough damage to drop her to FOR1.
The Assault Troopers, watching as an enemy team breaks cover and secures one of the scientists, run out themselves and fire their grenade launchers straight at them. Better to lose the scientists than to have their enemy keep them.
10th activation: The Assault Troopers Dash out, electing to be on the move, and fire wild at the Contractors. Again the blast templates cover many guys, resulting in 2 dead Contractors and 4 STs.
Meanwhile, the little angels, having taken so much fire, fly off to the cover of a stack of crates to recover their nerves.
11th activation: The Minnows have to retreat, but do shake off all their STs.
12th activation: The Relay does nothing.
This ends the second turn. The Karists score 10 points against the Epirians’ 11, making the score 23 for the Karists against 22 for the Epirians. Both sides have acquired the minimum number of points to win, so the first to lead his opponent by 3 will win the game. Points really add up fast in this mission as long as the artifacts remain unharmed.
This is after the VIPs have been moved.
Turn 3
The Karists claim priority, the Epirians spend 5 CPs to bring back the unit of Contractors.Seeing their protectors diminished to just three engineers, the nearby scientists disperse and run for cover. The Karist Assault Troopers waste no time in advancing further into the centre, ready to capture their prizes. On their advance they again fire their Rippers and Pulse Carbines into the Contractor team, none survive.
1st activation: The Contractors are not in cover and not on the move (so as to be able to capture an objective) and do no survive the round of fire from the Assault Troopers, who capture an objective on the way.
Still determined to destroy the enemy leader, Bacaro again guides his Scarecrow’s fire. His increased focus pays off: the Karist priest drops behind the crater rim. Is he finished?
2nd activation: I have no image here, but the Scarecrow Holds and fires with activated protocols, but in the end only does enough damage to drop the Nova down 1 FOR.
Having braved the chaos around him long enough to shoot down the enemy leader, Bacaro now hunkers down and takes another quick shot at the enemy assassin, but again he misses.

3rd activation: The Journeyman fails its activation check and digs in, his shots put 2 STs on the Shadow Walker.
Elyssa and Myro exchange a quick look, which for these experienced friends is enough to understand each other’s plans and position. Although they are both wounded, they know they must now press on to finish the job. Elyssa turns to capture the scientist who just fled from her failing Epirian protectors. As she turns, she returns fire against the Epirian commander, but her aim suffers from the wound she took and her shots go wild.
4th activation: The Shadow Walker gets an order, removes 4 STs and advances towards an objective whilst firing at the bot handler for 2 STs.
The Tempest Elites, now well in control of their part of the field, loose another salvo at the drones hiding behind the wall, making sure they do not interfere with their wounded commanders’ efforts to seize their prizes.

5th activation: The Tempests Advance & Fire at the Spider Drones, who are not only pinned but make good use of their protocols and discard most hits. They do take 6 STs.
Freshly dropped off at the outskirts of the centre, only half understanding what’s going on, another team of Contractor Engineers arrives to assist Bacaro. They waste no time in laying fire on the Karist Priest hiding amongst the craters, but cannot confirm a definite kill.

6th activation: One unit of Contractors returns as reinforcements, Dashing on to the field and firing wild at the Kaddar Nova, only causing 2 STs due to the priest being in cover.
The Firefly Drones’ automated protocols instruct them to secure their flank, having driven off the small aliens. The little machines swoop over the wall and lock on their target: the Shadow Walker assassin. Engaging their high power laser, they bring down their foe and secure this position.

7th activation: The Fireflies Dash over here, in position to contest the objective, but manage to kill the Shadow Walker after taking 2STs from defensive fire.
Meanwhile, the Karist Trooper squad continues to advance into the centre, pinning down the Drone squad with their shooting.
8th activation: Karist Troopers advance and fire, keeping in touch with their objective.
Although the little Minnows were driven back and thought defeated by their foe, it is not in the nature of Angels to turn tail and run. The two surviving beasts, having licked their wounds behind the crates and barrels, again took to the air and made a run at a piece of machinery emitting a faint pink light strangely attractive to these angels…
9th activation: The remaining Minnows Dash and shoot at the Epirian artifact, managing to take it down 1 FOR.
Following the flow of the battle through the Epirian Automated Uplink Relay, sector command is weighing options. On the one hand, Bacaro seems to be able to secure at least some of the Epirian scientists, amongst whom Dasha Kryklyvy, the one command is really concerned about. Do they gamble and hope Bacaro can claim the others as well, or are they content with Dasha and give up both the valued machinery and containers and the other scientists, so that Bacaro’s force may retreat relatively intact and be sent to support the beleaguered forces of Shotan at Asperia? Decisions, decisions…
10th activation: The relay does nothing.
Kasero is relieved to see reinforcements enter the field. Choosing tact over valor, he retreats his Spiders to hook up with the reinforcements and take on the enemy together.
11th activation (no image): Spider Drones have to retreat, and shake off 7 STs.
Kaddar Nova Myro watched in horror as the pack of Fireflies suddenly raced across the wall and doused Elyssa in bright laser fire. She went down, and didn’t rise again. In his heart Myro knew she was done for. Feeling suddenly very weak, Myro clambered out of the crater and sought protection near his Tempests at the edge of the forest.
12th activation: Putting his reactor in Shield mode, the Kaddar Nova is forced to retreat and moves into the woods.
Suddenly, all Epirian forces appear to retreat from the area. What’s going on here? The Epirians were certainly not overpowering his brothers, but neither were they defeated. Well, reflected Myro, this gave them the perfect opportunity to seize whatever resources and scientists were left and, most urgently, see if anything was still to be done for Elyssa…
At the end of turn 3, the Karists score 13 points: an undamaged artifact for 8, two VIPs and the faction objective. The Epirians only score 4: a damaged but undestroyed artifact and the faction objective. This means the Karists take a decisive lead and win the game!
There were some interesting swings in this game, but in the end the Epirian’s failure to damage the Karist artifact and sometimes brutal consequences of forgetting to sufficiently disperse his troops brought defeat. It’s really cool to come to understand the importance of the various rules elements in MEdge that you can’t really get a feel for without playing some games. So far the Epirian player has a little more difficulty making the most of his forces. They lack some of the rock hard firepower of the Tempests and seem to need a little more finesse than we can display in these first two teaching games. As for this mission, the wandering VIPs really keep everyone moving which is neat, and the artifacts really need to be taken care of starting turn 1, considering the amount of points they give out each turn if left undamaged.

Like this? Like us on facebook to see more...