Entries tagged [buildings]
Terrain Tutorial: Plastic Storage Tray Buildings
Posted on Monday Feb 06, 2017 at 05:00pm in Tutorials
 - by Iain Wilson
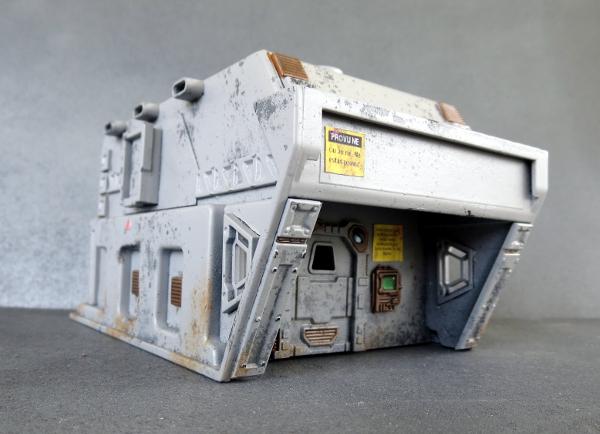
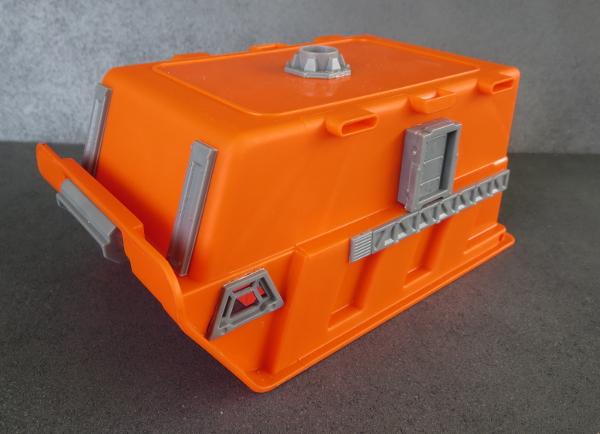
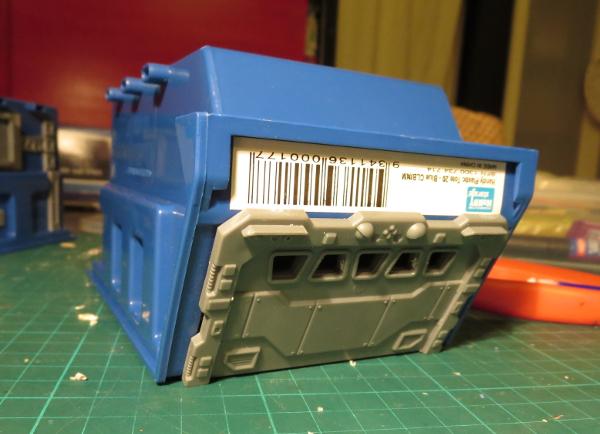
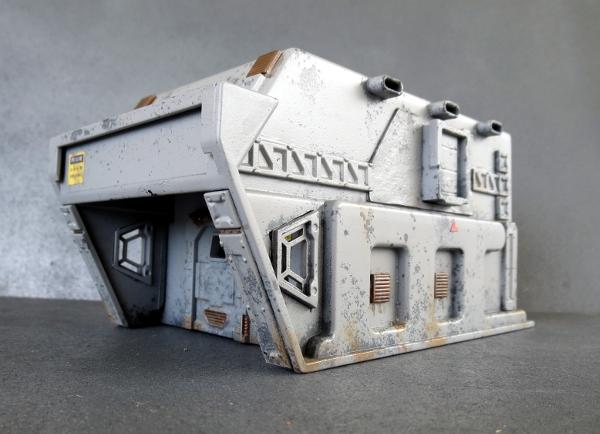
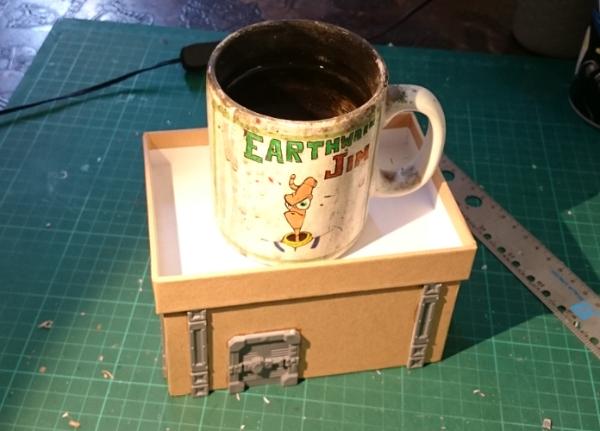
The Maelstrom's Edge Terrain Sprue contains a slew of assorted plastic bits and pieces that can be used to pretty up your home-made scifi terrain, including a bunch of essential elements like doors, windows and pipe fittings. A few months ago I posted a tutorial on using cardboard gift boxes to create quick and easy buildings, which you can still find here. This time around, I'm using plastic modular storage trays to create buildings like this:
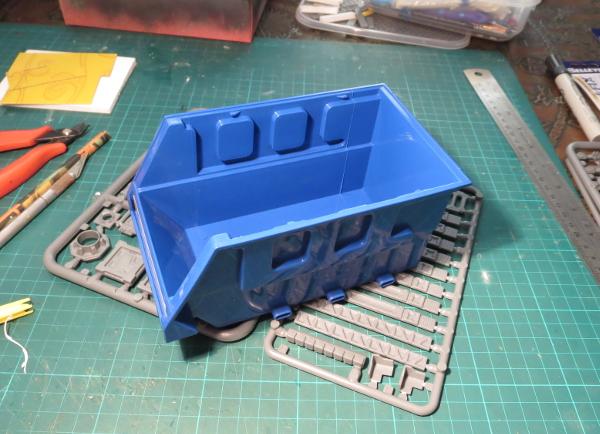
These trays can be found at most hardware stores, or anywhere online that sells plastic storage - you can find a few different examples on Amazon, and they're generally pretty inexpensive and available in a bunch of different sizes.
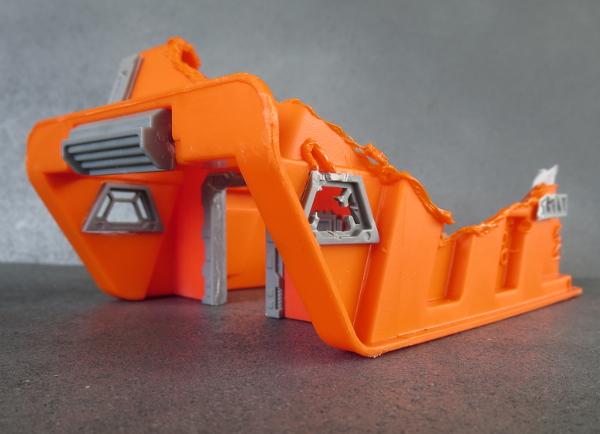
Here's a glimpse of what we're going to do to it:
Before getting started, a quick note on glue.
Obviously, versatility for making wargaming terrain isn't a prime design consideration for the people making these trays, and so the plastics used for them can be a little variable to work with. Plastic (polystyrene) cement won't work on them, but for the most part I've found that superglue works just fine. If they have a waxy feel to the plastic, or if you try the superglue and it doesn't hold particularly well, there are specific glues out there for dealing with recalcitrant plastics that look something like this:
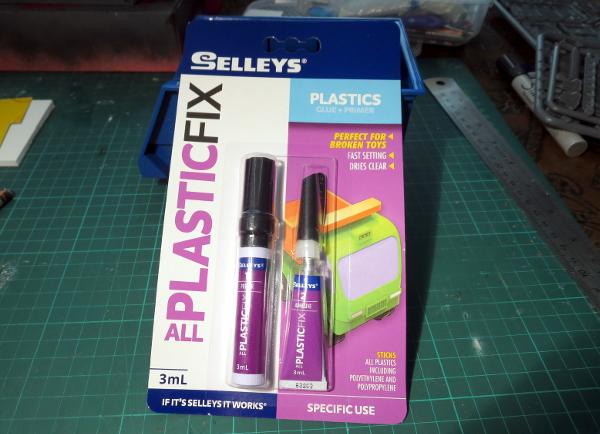
This is a two-part system that uses a primer to help the glue stick. Just apply the primer, then apply the glue, push the parts together, and they'll never come apart again. I don't use it all the time simply because it's more bother than a single tube of glue, but for those trickier jobs it works a treat.
Edit: It can also help when gluing this sort of shiny plastic product to give it a sand with some fine sandpaper. This breaks up the glossy surface, giving the glue a better purchase.
SO, onto the building!
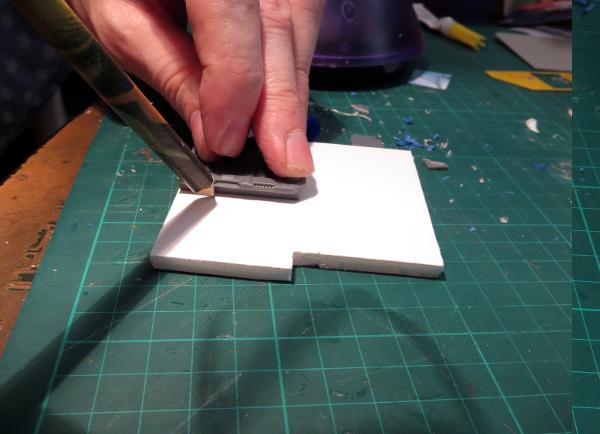
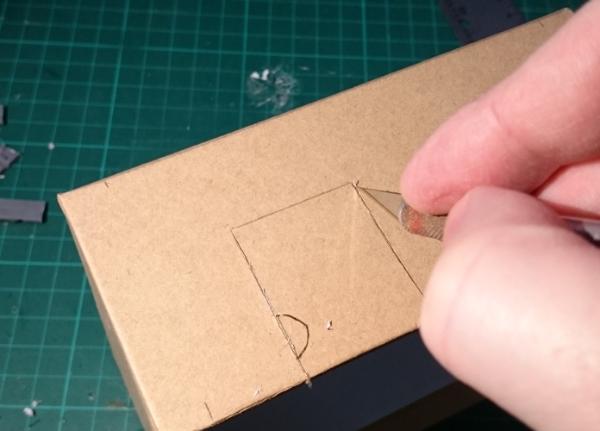
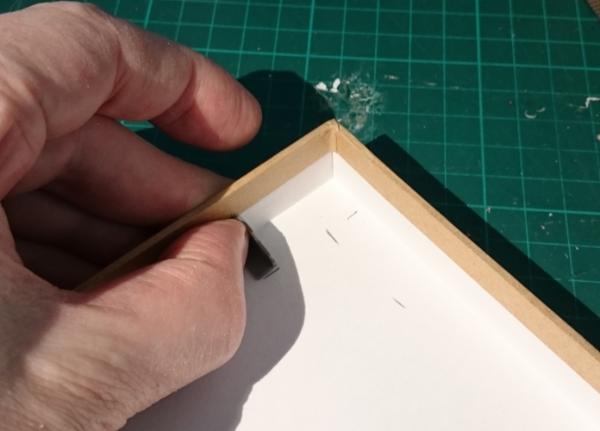
There are a few parts on the terrain sprue that are designed to be inset into a wall. If you're using any of these, I recommend cutting the holes for them as the first job, to avoid accidentally popping glued parts off when the plastic flexes while you're trying to cut it.
I'm starting here with the trapezoid windows, which will go into the front sides of the tray. This adds a nice little detail at what will be the front of the building, and also serves in this case to get rid of some imprinted text on the sides of the tray. I vary the orientation of these depending on the exact shape of the tray that I use, as different trays will have different angles at the front. Go with whatever looks best with the trays you use - for this one, I'm putting the long edges vertical.
To cut out the hole for them, hold the window against the side of the tray and trace lightly around it with a sharp knife.
You can then drop the window and carefully cut along the traced lines. If you have a Dremel-style rotary tool with a saw or small router bit, that might save some effort here, but otherwise just going slowly and carefully with the knife and not trying to cut right through in one go does the job.
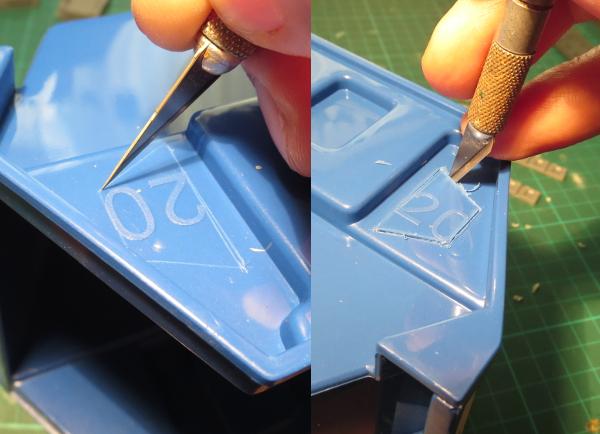
Once you have all for sides cut through, check the window for fit and neaten up as necessary. The mould line on the window serves as a handy guide to get the windows on both sides of the building pushed through their respective walls an even amount.
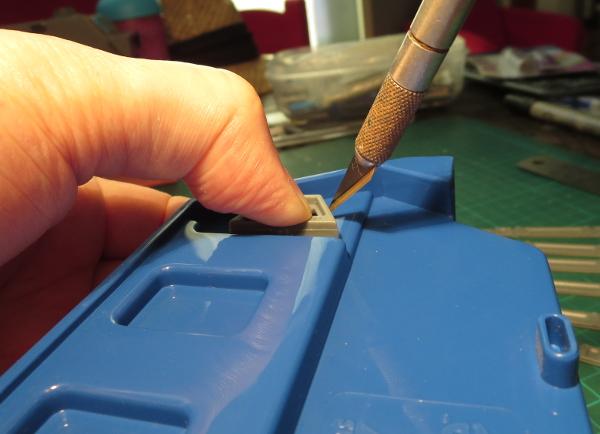
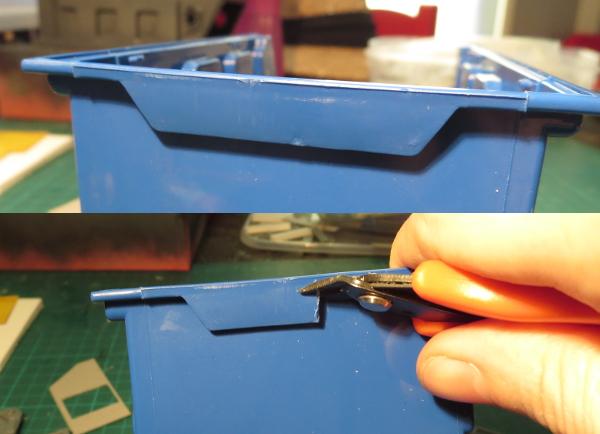
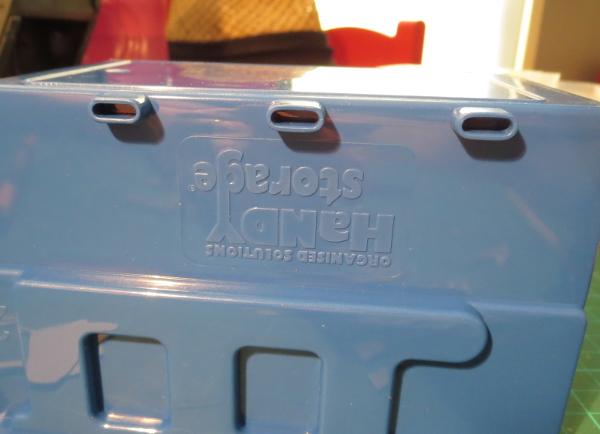
There is generally a small lip of plastic at the back of these trays that is used for clipping them onto racking. If you're feeling lazy you can just leave it there and work around it, but I find it looks better to remove it. A decent pair of clippers will get rid of the bulk of it and then you can just clean up with the knife.
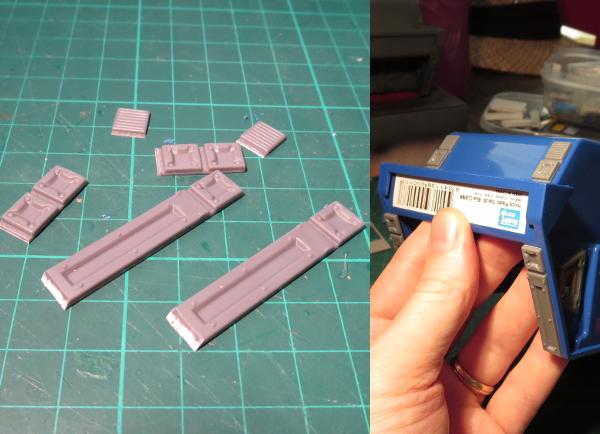
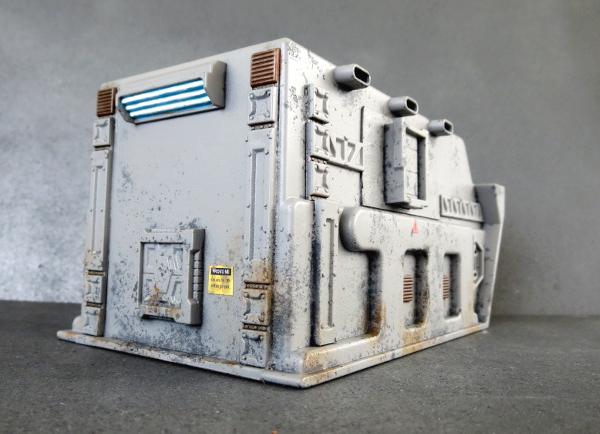
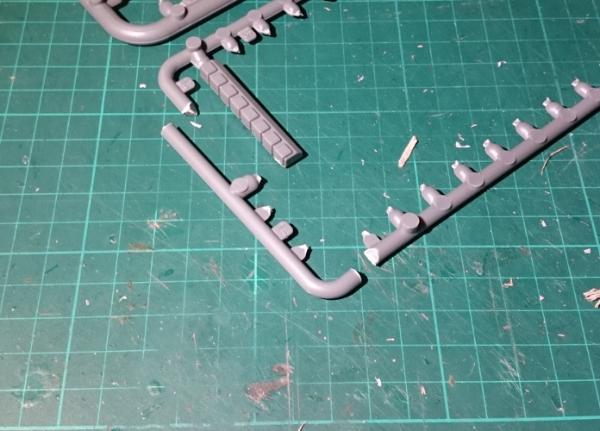
The reinforcing strips off the terrain sprue are the real heroes of this build, as they do such a great job of making otherwise bare plastic look like a manufactured structure. They can be used intact where there is room, like this:
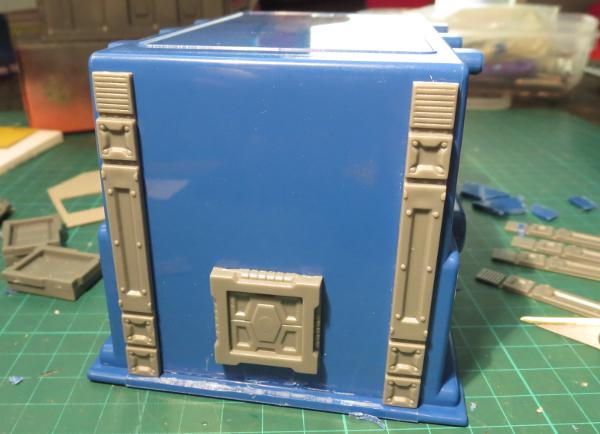
Alternatively, you can chop them up along the edges of the panels to fit them around the moulded shapes on the tray.
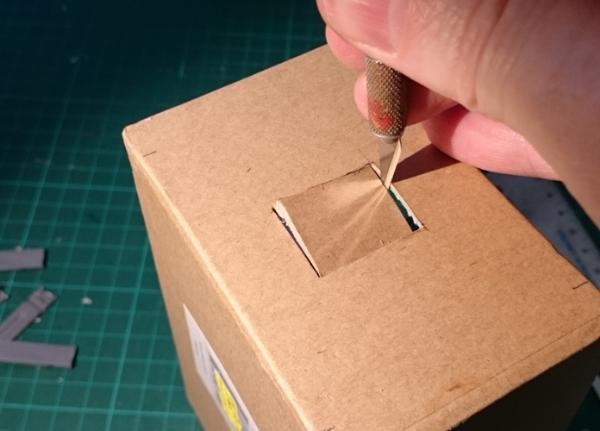
There will sometimes be writing imprinted onto the sides of the tray.
This can be removed by cutting it out and replacing with detail parts, as with the trapezoid windows back at the start, or the shutter windows on this building:
Alternatively, you can cover it over with a little cardboard, plasticard or foamcore cut to an appropriate shape. Here, I've used a small piece of thin cardboard to cover the bulk of the text, with a rectangle cut in the middle for a shutter window. These are designed so that they can be inset into the wall, but they look fine just stuck directly onto the surface as well, and that saves cutting more holes in the plastic.

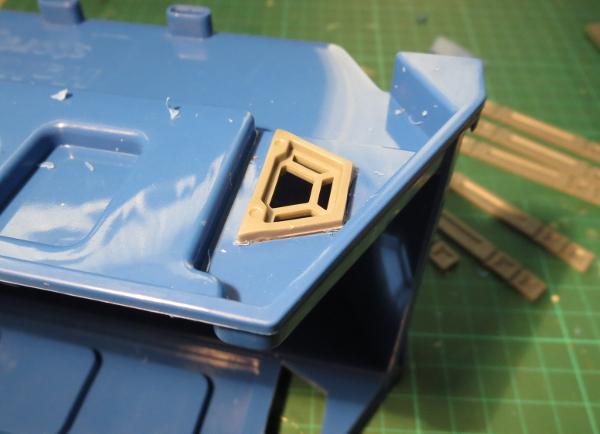
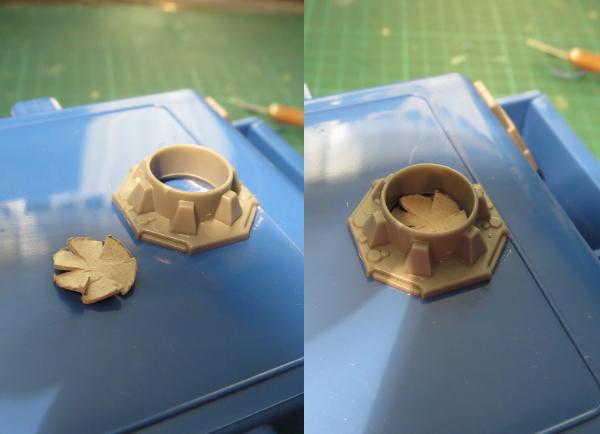
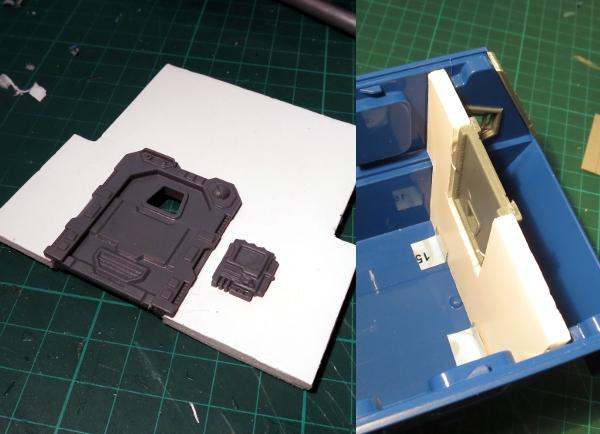
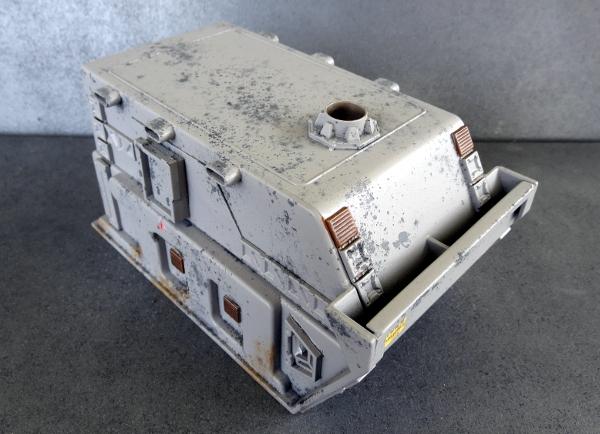
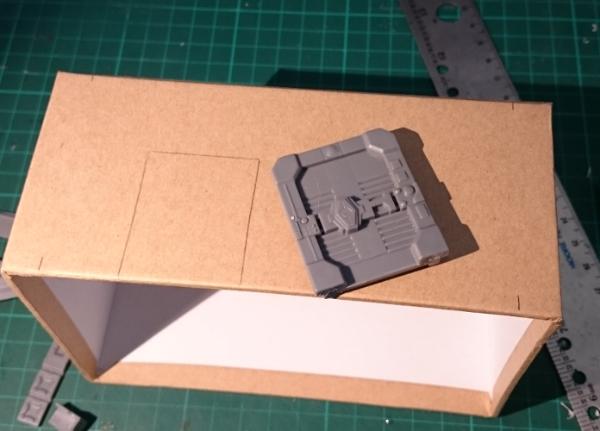
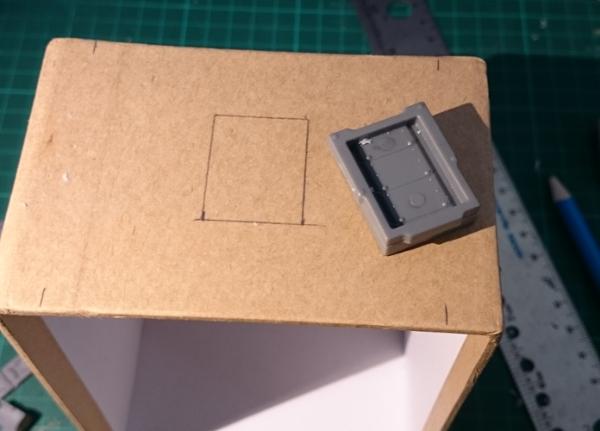
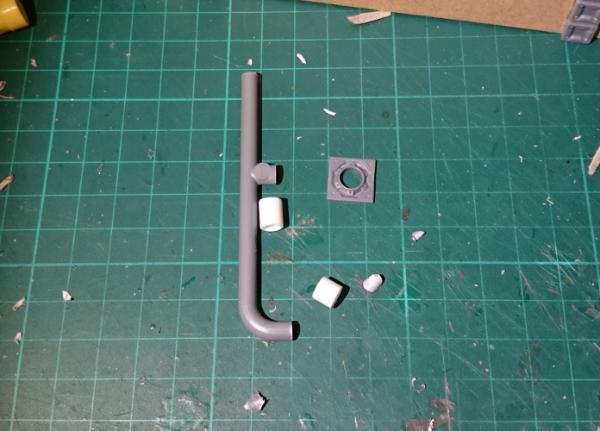
There is also usually a small nub on the bottom of the tray (which is forming the building's roof) from the moulding process used to manufacture the tray. I like the cover these over with the large pipe fitting from the terrain sprue:
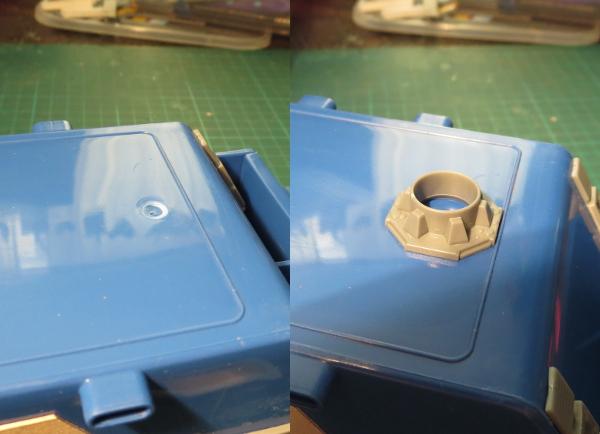
This can then have some plastic rod added to create a chimney, or a fan blade cut from a circle of cardboard to make an exhaust fan.
The exact layout of parts on the sides of the building is driven by the shape of the moulding, and by how detailed you want your building to be.
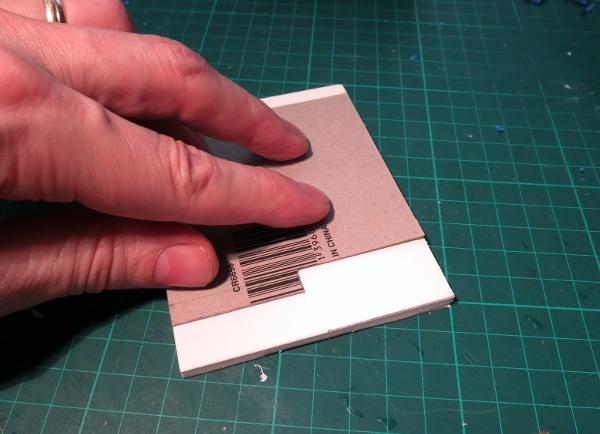
With the outside all detailed up, it's time to seal in the front. I generally use foamcore for this for ease of cutting and strength, but plasticard or cardboard would also do the job, as does corrugated plastic sign board. There can be a little trial and error getting a piece cut to fit just right with the shape of the tray - I start by fitting to the bottom of the tray (the widest part), pushing the cut piece into the tray up to the narrower point which is usually about halfway in, marking the foamcore with a pencil using the interior of the tray as a guide, and then cutting to match.
If you're making up a bunch of these buildings using identical trays, it's a big time-saver to make a template out of a piece of cardboard or plasticard and use that to mark out your wall pieces.
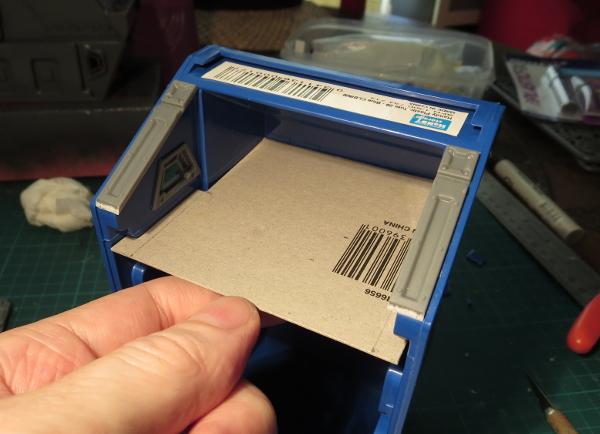
You can then trace around whichever door you are using.
Cut out the door hole and glue the door in (remember not to apply superglue directly to the foam interior of the foamcore, as it will melt). Once the door, control panel, and anything else you're putting on the wall is attached, just slide the wall into the tray and glue it in place.
On this building, I added a service counter using a trimmed down lintel piece.
As an alternative to the small doors, some trays fit the garage door quite well, although sometimes with a little trimming to shape required.
Alternatively, some trays are sized just right to glue the garage door directly to the outside front of the tray, which creates an interesting angled front, although loses you the nice little awning for models to hide in.
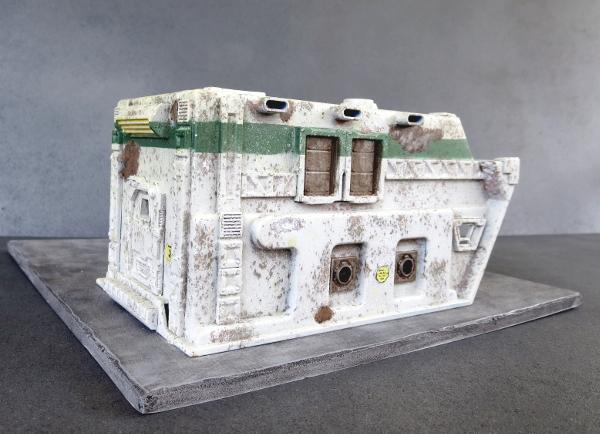
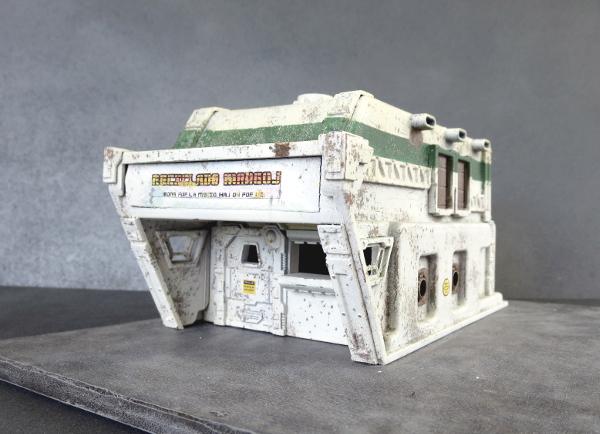
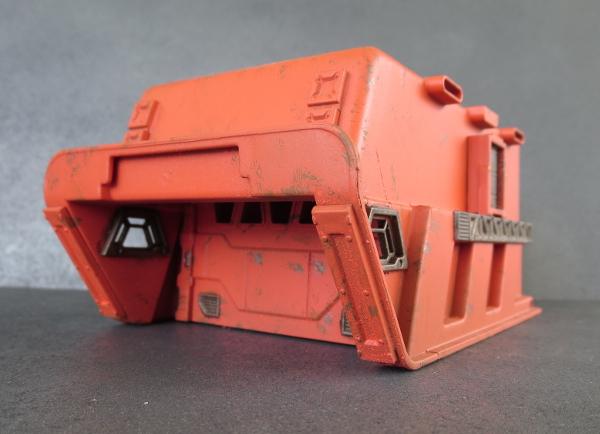
Once you have the building all detailed up, all that's left is to paint it.
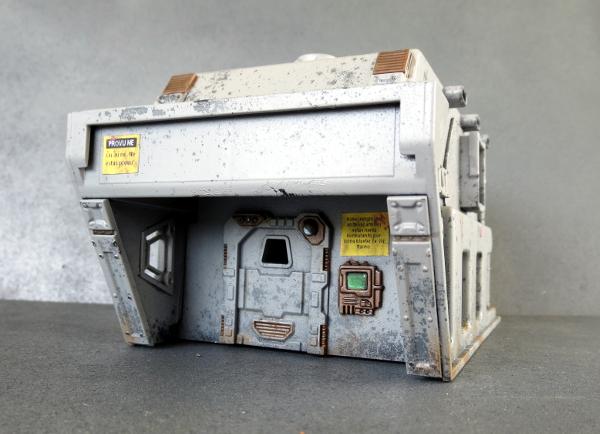
These are a perfect canvas for weathering effects - I'll be looking to cover some different techniques for that in coming tutorials.
As with the glue, painting can be a slightly variable experience, depending on the specific plastic used. You can use an etching primer if you want to make sure it will stick, but I've been getting by with regular spray paint and sealer.
Unsealed, the paint can scratch off, although just how easily will depend on the plastic and the quality of your paint. If you're planning on using a rigorous weathering technique like salt weathering, I recommend applying a light coat of sealer over the base coat to make it a little more durable.
When you're done, a good spray of matte sealer over the top should keep everything where it belongs.
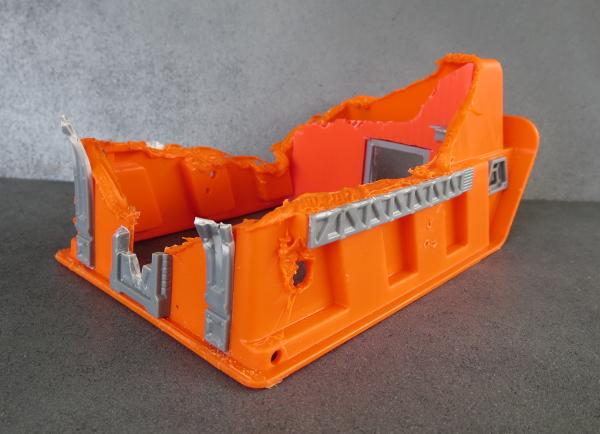
For a break from solid buildings, you can create ruins by chopping out the bottoms of the trays and applying suitably damaged terrain parts.
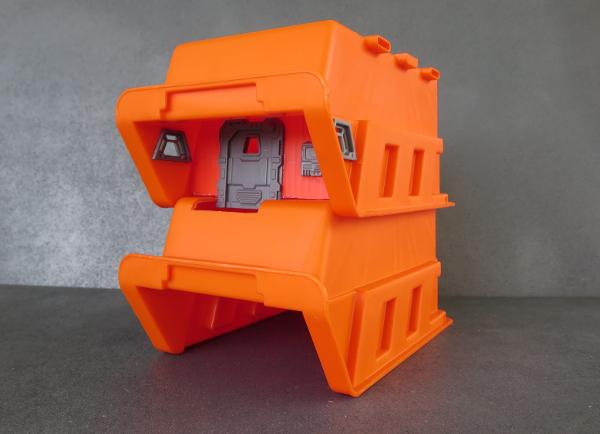
Or for something a little more ambitious, the modular nature of these trays makes it relatively easy to stack them up and make multi-story units. This one below will eventually have a little balcony off the front of the upper level, perfect for hiding sneaky sniper units.
You can quickly and easily assemble a table-full of modular terrain units using a bunch of identical trays, or mix-and-match different size or brand trays for more of a ramshackle, cobbled-together settlement, just perfect for a stellar refugee camp or a temporary staging base, and buildings can be easily customised to fit different roles in the settlement.
If this has inspired you to create your own modular settlement, grab yourself some terrain sprues from the Maelstrom Edge online store here, and as always be sure to share your creations on the Comm Guild Facebook page!
Tags: buildings terrain terrainsprue tutorial
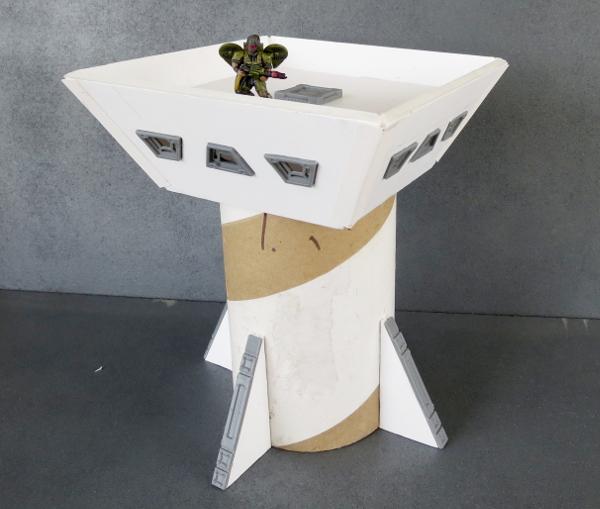
Terrain Spotlight: Watch Tower
Posted on Monday Dec 19, 2016 at 05:00pm in Models
- by Iain Wilson
It felt like far too long since I had built any terrain, and so this week I decided to throw something together out of some leftover scraps and odds and ends from some Maelstrom's Edge terrain sprues. And so, a watch tower was born!
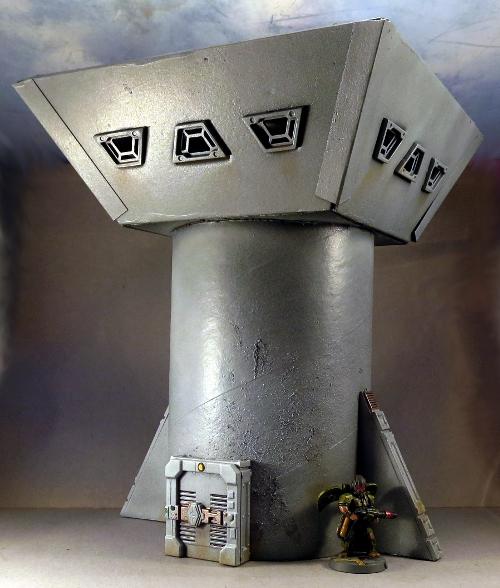
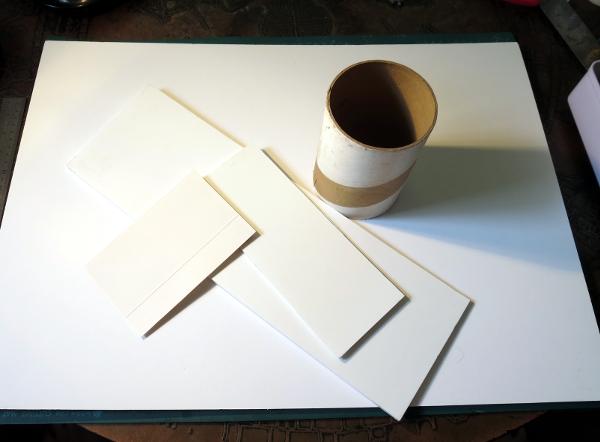
I started with just a vague idea of how this was going to turn out, and gathered up a bunch of useful materials: foam core, some thin cardboard, an offcut from an old postage tube, and of course the terrain sprues.
I also made use of a door assembly that I put together for a tutorial a little while ago and hadn't got around to sticking onto anything yet. This was build from one of the small doors off the terrain sprue, with boxing added around the back from a couple of the reinforcing detail strips.
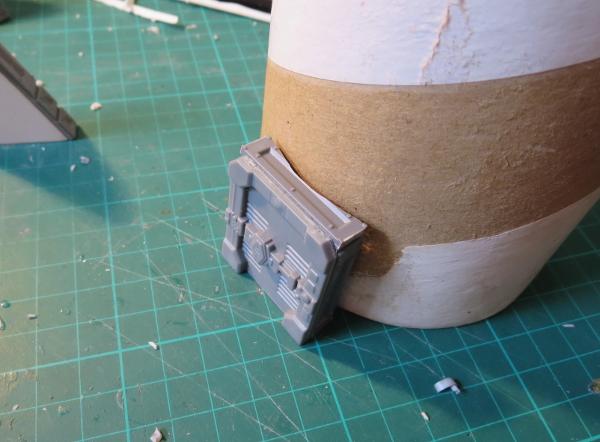
To fit the door to the curve of the tube, I rubed some chalk on the bottom of the tube, pressed the door against the tube with the top panel overhanging the chalked edge, and then rubbed it back and forth a couple of times to transfer the chalk to the inside of the panel. The it's just a matter of cutting away the chalked part of the panel with a sharp knife.
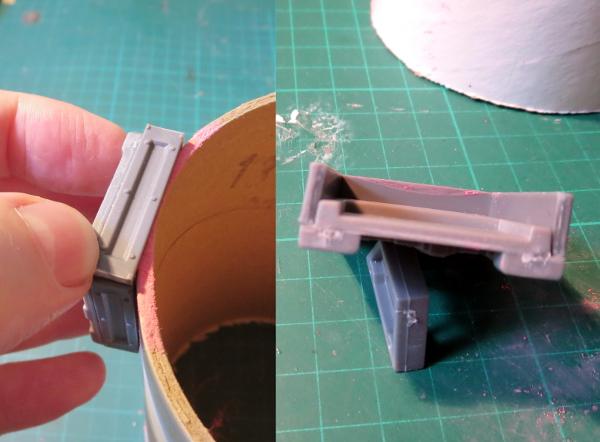
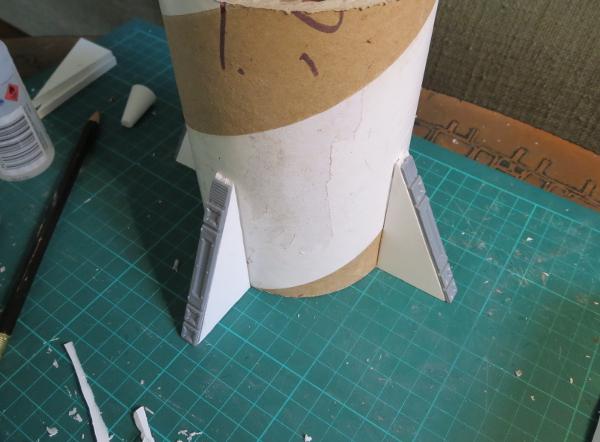
I wanted some buttresses spaced around the bottom of the tube. It's always a good idea when making gaming terrain to consider how the terrain piece will fit into the game. If you want your buildings to be more than just line of sight-blocking cubes, having some small protrusions around them that can be used for partial cover (buttresses, pipes, small balconies, etc) that models can lurk behind on their way across the battlefield is great for making them more useful on the table.
The buttresses were made from some 5mm and 3mm foamcore glued together, with reinforcing strips running up the angled outside edge.
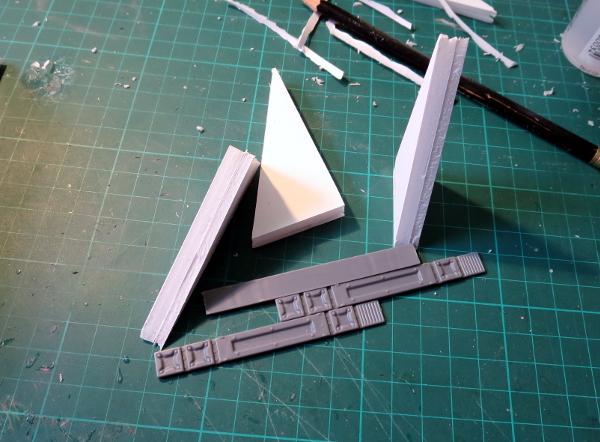
These were then glued in place at 90 degree spacings around the bottom of the tube.
Then it was time to build the watch chamber to go on top.
Taking some 5mm foamcore, I marked out the first wall.
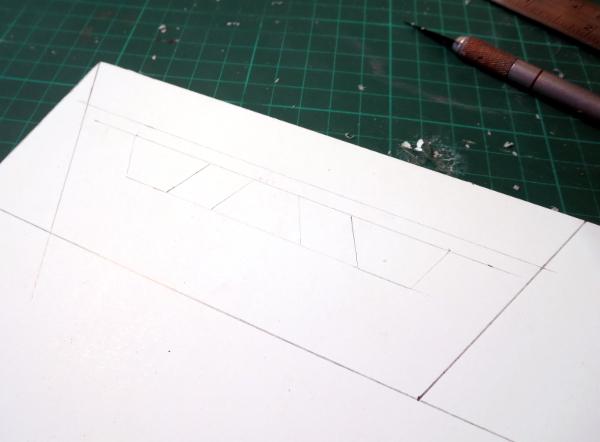
Using a sharp hobby knife, I carefully cut this out, and then used it as a template to make three more.

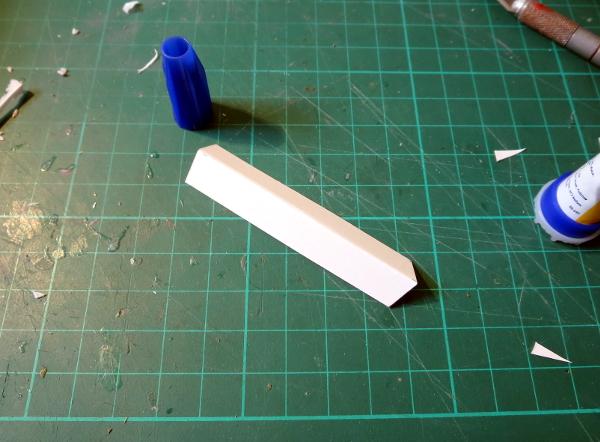
Trapezoid windows from the terrain sprue were glued into the window cavities, and then I chamfered off the back edges of the walls slightly to help them fit together for gluing. This wasn't particularly exact - that would have required far too much maths for a sunday afternoon, due to the angle of the walls. They'll be held together quite firmly by the glue and some cardboard reinforcing on the corners, so it doesn't matter too much if they don't meet up perfectly flush.
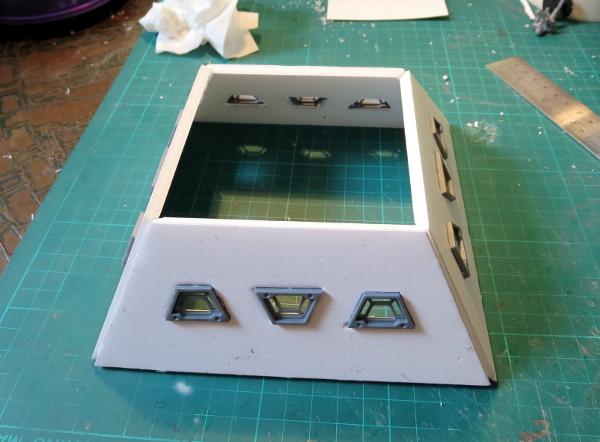
Speaking of cardboard reinforcing - these are just some 2cm-wide strips of thin card, cut with a bit of an angle at the top so that the outside corners don't stick up past the tops of the walls. Once superglued to the outsides of the corners, these add a bit of strength to the wall joints.
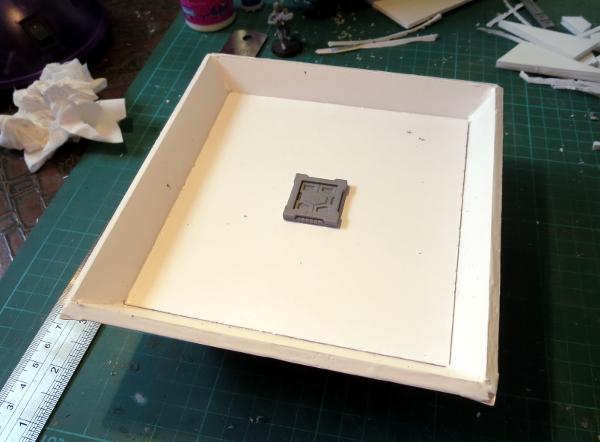
A square of foamcore with chamfered edges drops in to form the floor.
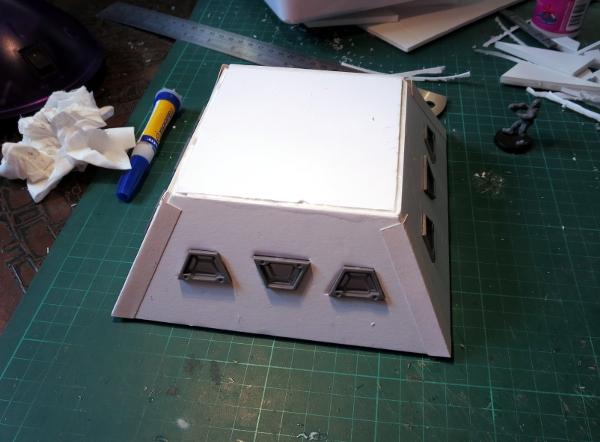
A similar but slightly larger square went in just above the windows, to create a roof with a nice little balcony. This comes back to the functionality aspect again - I like to have lots of buildings with game-friendly space on top. A hatch from the terrain sprue adds an access point from within the building.
(Note - if you care about having functional-looking and/or painted interiors in your buildings when they can be seen through the windows, remember to sort out the inside before gluing the roof on! Alternatively, painting the interior black before adding the roof makes it much less visible once everything is sealed up, or you could just glue small pieces of card over the insides of the windows so you can't see through them, and paint them up as opaque glass.)
Then all that remains is to glue the watch chamber to the top of the tube.
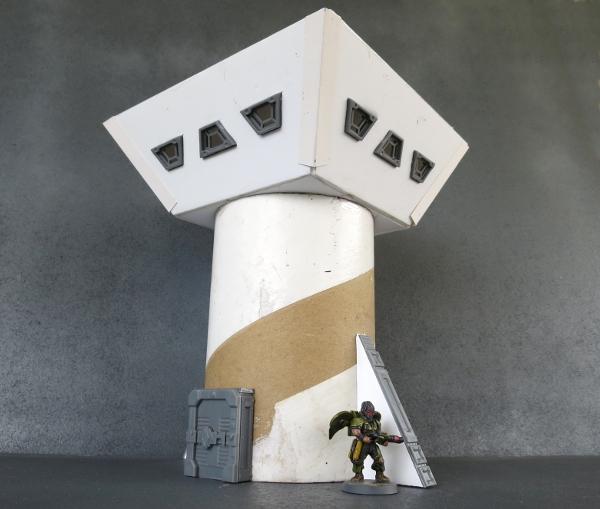
Once all of the glue is set, the watch tower is ready for painting and basing!
If you want to try your hand at building a watch tower of your own, or are feeling inspired to try something different, you can pick up the terrain sprue from the Maelstrom's Edge website here.
Be sure to share your creations on the Comm Guild Facebook page (https://www.facebook.com/groups/MaelstromsEdge)!
Tags: buildings terrain tutorial walkthrough
Terrain Thursday - Sgt. Oddball's Terrain
Posted on Thursday Nov 03, 2016 at 05:00pm in The Epirian Foundation
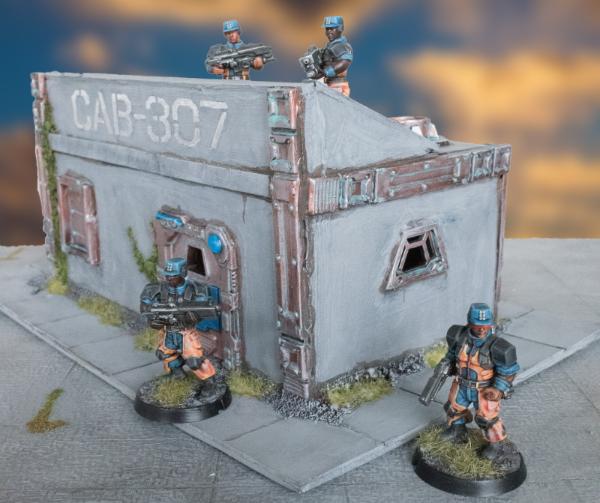
Today we share this nice compound by Sgt Oddball over on Dakka. The metals are weathered very nicely and the simple flocking at the base of the building and stencilling on the face of the building really pull the whole model together nicely.
Tags: buildings epirian terrain terrainsprue
Terrain Thursday - Ruined Hab Block
Posted on Thursday Oct 27, 2016 at 05:00pm in General

From our studio collection is this nice piece which shows a building that has been destroyed and is being reclaimed by the ground. Similar to our other hab block buildings, this building serves as a nice reminder that ruins work very nicely in wargames, and not every building needs to have four walls and a roof!
Tags: buildings ruins terrain terrainsprue
Giftbox Terrain Video
Posted on Thursday Oct 20, 2016 at 05:00pm in General
We thought today we'd highlight the timelapse video above which shows the construction of a building from scratch using the Maelstrom's Edge terrain sprue, previously covered in step by step photos in a previous blog post here at The Comm Guild.
Tags: buildings terrain terrainsprue video
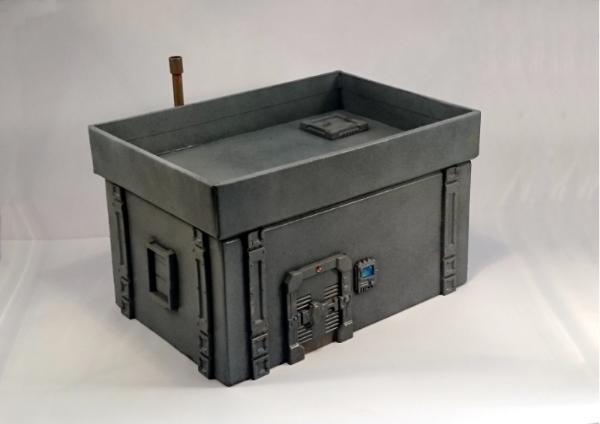
Terrain Thursday: Electric Box Buildings
Posted on Thursday Oct 13, 2016 at 05:00pm in General

Dakka user and friend of Maelstrom's Edge, Panic, has been an amazing early adopter of the terrain kits. He came up with the great idea of taking an electrical box from a hardware store, slicing some holes into it, and adding Maelstrom's Edge terrain components. The above image shows the finished piece all nicely painted up.


Any basic box that has texture on it already serves as an excellent base for terrain sprue components. One word of warning with electrical boxes though - they are a total pain to cut, so patience is definitely needed!
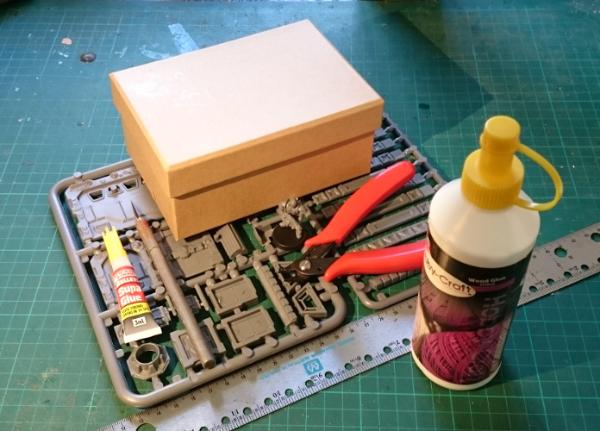
Gift Box Building with the Maelstrom's Edge Terrain Sprue
Posted on Thursday Oct 06, 2016 at 05:00pm in Models
- by Iain Wilson
The Maelstrom's Edge terrain sprue is a fantastic resource for enhancing your games. Packed as it is with different bits and pieces for crafting buildings and scifi accessories, it serves as a handy base to combine with foamcore, cardboard, plastic containers, the cat*, foam packaging inserts, plumbing supplies, or anything else you can think of to create distinctive and personalised battlefield terrain.
*Don't glue things to the cat. Seriously.
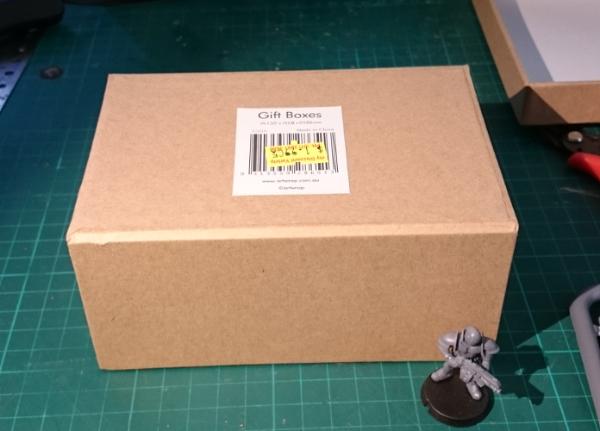
For now, I'd like to focus on one particular way to use the sprue, by crafting a basic building using a cardboard gift box.
These are fairly readily available all over the place, are generally made of a fairly sturdy cardboard, and are (best of all) cheap. You can also get them with all sorts of pretty patterns on them, but you'll probably want to paint them, so that’s less important, really.
Here’s a quick video showing the build process:
You will need: a giftbox, the terrain sprue, some glue (superglue for gluing the plastic parts on, PVA/wood glue for gluing the box lid on) clippers, a pencil, a sharp knife, and a ruler can be useful for marking out parts.
I want a building with a walled roof, as that gives some nice line of sight-blocking terrain while giving troops somewhere elevated to stand. So the box will be turned upside down, and the lid will eventually be glued on top, also upside down.
First step is to cut the parts you want to use off the sprue and clean up any mould lines.
I'm using the long support pieces vertically on the walls of the building, so they need to be trimmed down to the height of the box. That's simply a case of taking the lid off, holding one of the supports against the box to mark where to cut it, and then cutting them all off at that point.
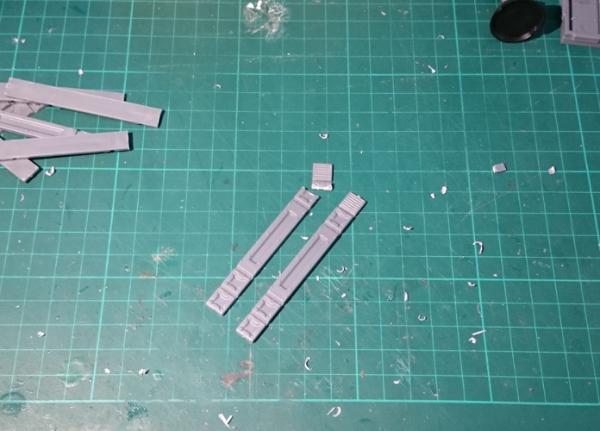
Put the leftover pieces aside - they'll come in handy for other projects.
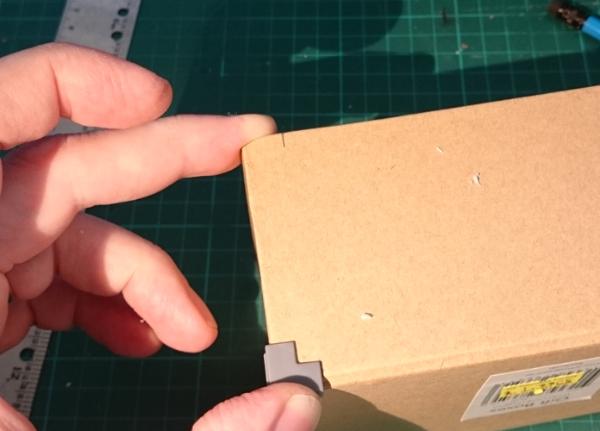
Next, measure out where the supports will go on the building. I tend to use them slightly in from the corners of my buildings, rather than as corner bracing - this looks neater, as they don't meet in a flush corner if you butt them up against each other right on the edge.
You can put them wherever you like, so long as it's consistently spaced around the building. Here, I've used a corner brace to mark out the spacing, by placing it up against the corner and marking against the side of it. Repeat top and bottom on both sides of each wall.
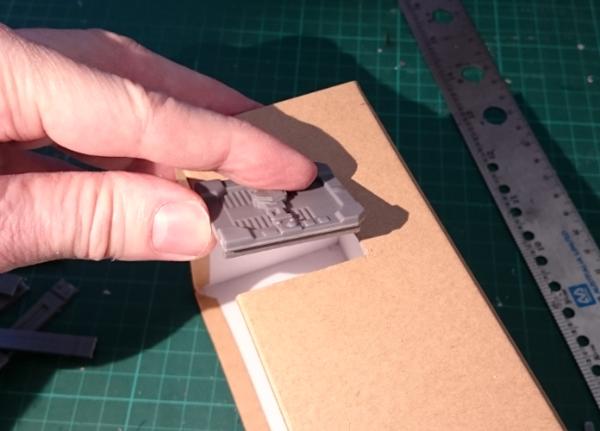
Next, work out where you want to put your door. Hold it in place against the building wall and draw around the back of the door frame with a pencil.
Do the same for the windows - I've gone for one on each end of the building.
Then take your knife and carefully cut out the door and window holes. Note that the windows don't actually have to be inset into the walls - the box frame design means that they actually look pretty good just glued on the outside. So you can save yourself some cutting if you're in a hurry. I do prefer to inset them, though, as it looks a little more polished.
Once the holes are cut out, check that the parts fit in securely - trim up if necessary.
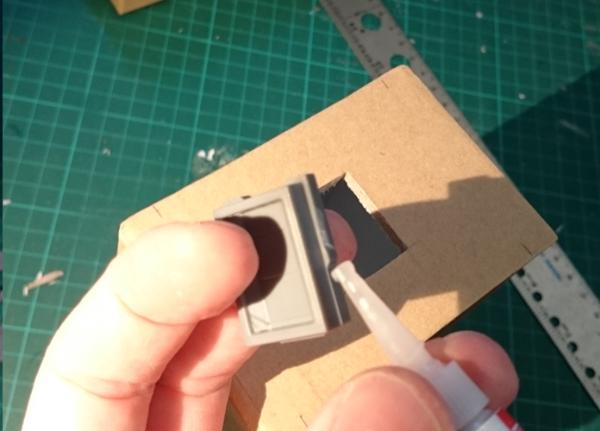
Then it's time to glue everything in place. Apply a small amount of glue around the door and window frames and push them into place. You can 'hide' the glue behind the protruding frame on the sides and bottom of the windows, so that you get less overflow onto the cardboard.
Run a line of glue down the back of the supports, and press them into place against your pencil marks on each wall.
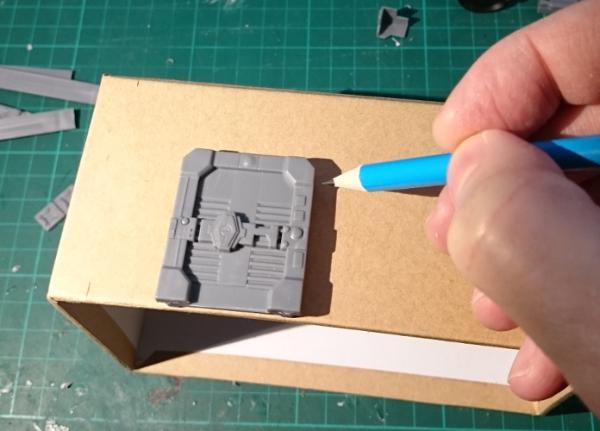
Next, grab your box lid, and on the inside mark out where you want the roof hatch to go. Once again I've used the corner brace to mark out an even distance from the sides of the box lid. Then glue the hatch in place.
Now we can glue the roof on. Spread some PVA glue liberally over the top side of the building, press the lid on upside down, and sit something heavy on top to hold it snugly in place while the glue sets.

You could use superglue for this if you don't have any PVA or if you're in a hurry, but the PVA glue gives a better bond if there are irregularities in the cardboard that stop the two pieces from meeting perfectly flush.
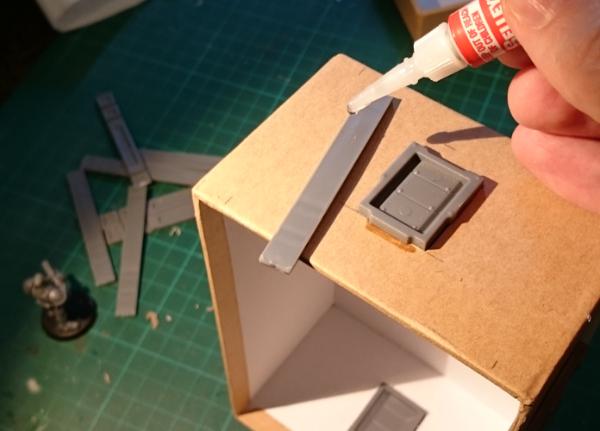
While the roof is setting, we can hack the sprue a little to add some extra detail to the back of the building. Cut a corner piece off the narrower side of the sprue, as below. This will become the pipe for a small chimney or air vent.
Clean off the extra tabs and the mould line, and grab the small pipe fitting off the sprue.
A handy feature of this part of the sprue is that it fits perfectly into a 1/4"(7mm) plasticard tube, which in turn fits snugly into the small pipe fitting. So cut yourself two short segments of tubing - one for each end of the 'pipe'. If you don't have any plasticard, you can also use a strip of thin cardboard (cereal packet or the like) wrapped around the sprue instead.
Glue the tubing (or cardboard strips) onto the 'pipe', glue the curved end into the pipe fitting, and check the fit against the back wall of the building. You can trim up the protruding sprue support as necessary to make sure the chimney sits vertically and the pipe fitting is flush against the wall. Then glue in place.
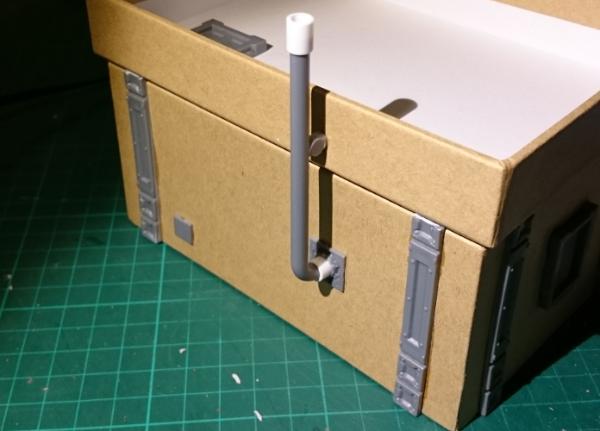
I have also added one of the small vent pieces that was trimmed off the wall supports right at the start, just for a little extra detail, and glued a comm panel onto the front wall beside the door.
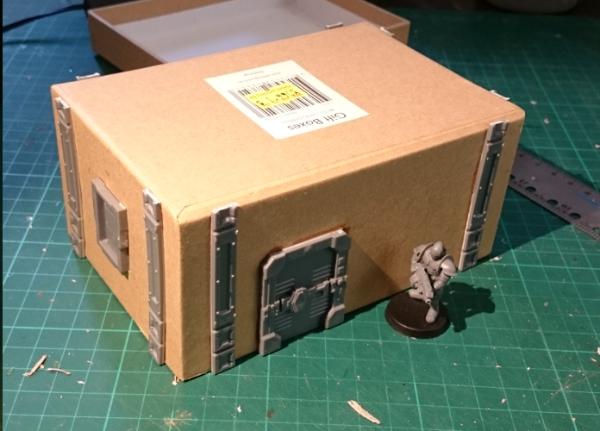
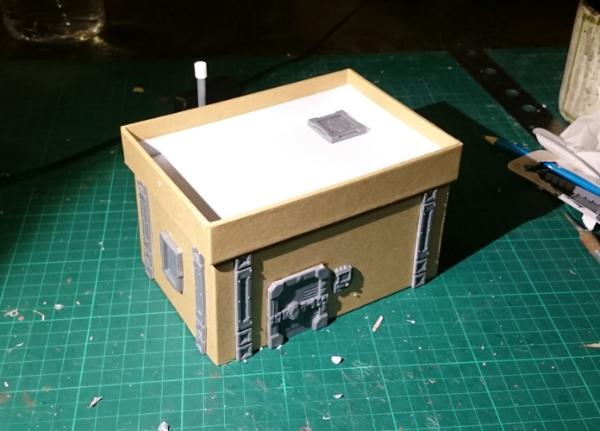
So the finished building looks something like this:
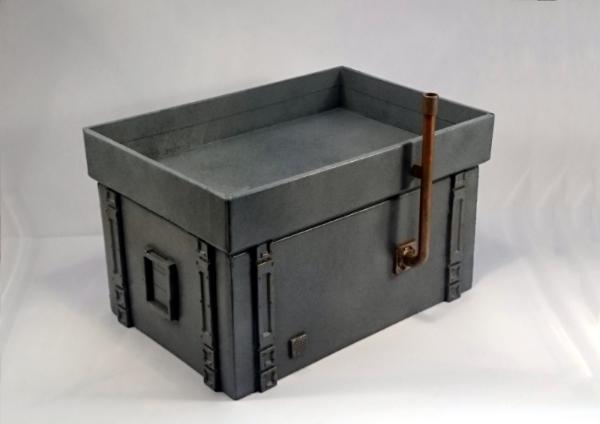
This can then be decorated however you like. I would recommend a good spray paint for the basecoat, particularly if the boxes you are using have a glossy finish. The building below was basecoated with black spray, and then given a spray coat of a medium grey, and a final highlight with a light grey spray from above, to leave the darker colour in the recesses and undercuts.
The 'chimney' pipe was painted in copper with a light drybrush of green to dirty it up, and some details like the comm panel screen and the light above the door picked out for a little extra colour. You could also add on building numbers, posters, warning signs, or anything else that you might find on a real building - we'll be covering some different ways to pretty up your battlefield terrain in a later article.
Pick up the terrain sprue from the Maelstrom's Edge online store here and give it a go! You can share your creations on the Comm Guild Facebook page here: https://www.facebook.com/groups/MaelstromsEdge
Terrain Thursday: Strategic Outpost
Posted on Thursday Sep 29, 2016 at 05:00pm in Models
We have quite a few pieces of terrain in our studio collection now. One of our absolute favourites is the strategic outpost.
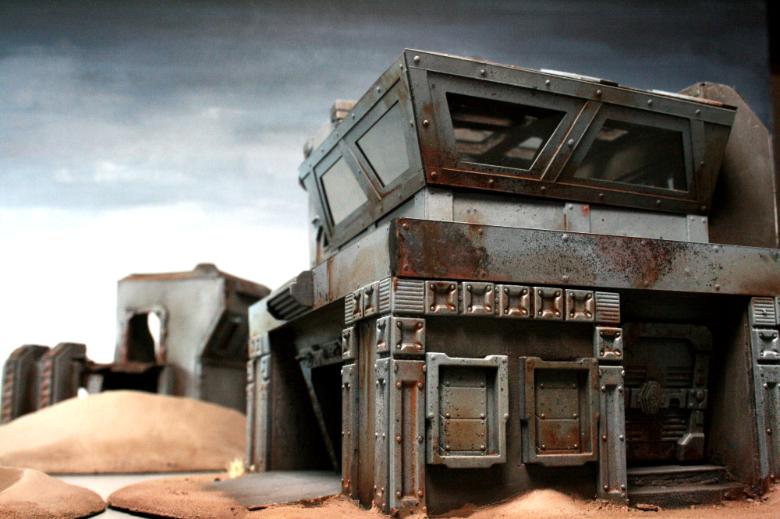
The upper floor's windows are transparent plastic, and not visible in the photos is a cool staircase leading to the upper floor.
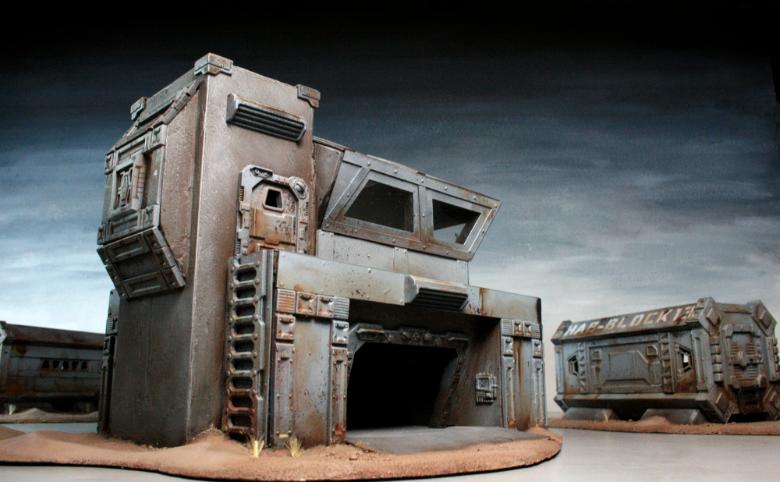
This building was primarily made out of foamcore, thin plasticard and normal card, and the Maelstrom's Edge terrain sprue.
Terrain: A couple of nice hab units
Posted on Thursday Sep 22, 2016 at 05:00pm in General
Today we share some nice buildings made by Alex and his son over at Lead Balloony


These nice, simple buildings make great use of the computer terminals and small doors, along with some additional decorative elements on the other faces of the buildings. All affixed to some olive pots of all things!
