Conversion Spotlight: "Silverback" Mercenary Fire Support Mech
Posted on Monday Jun 26, 2017 at 05:00pm in Models
- by Iain Wilson
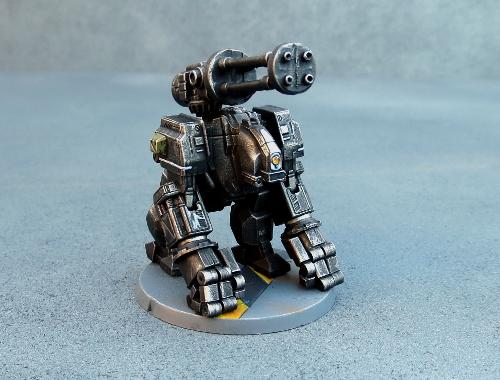
A variation on the Hunter War Mech chassis, the Silverback was an attempt by Epirian engineers to develop a mobile platform for heavy support weapons. Trading in speed for stability, initial deployments showed promising results, however over time the mech's ponderous movement began to be perceived as a liability. When this was compounded by some odd personality quirks that tended to develop in the experimental twinned bot cores used to give the Silverback increased tactical capability, the model was slowly phased out by Epirian forces. Some were sold to planetary security forces, while others found their way onto the black market, where they became a favourite of mercenaries who favoured a more blunt approach to martial engagement.
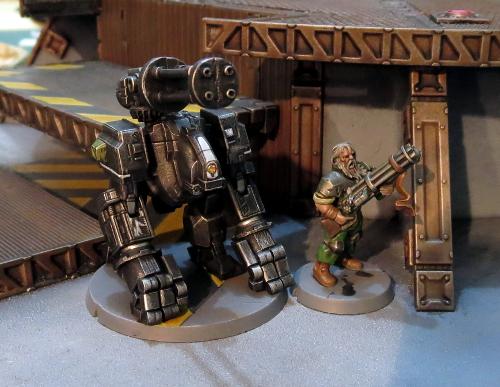
A mercenary bot handler and his Silverback charge.
The Epirian Hunter is a fantastic kit which presents some fun modeling possibilities straight out of the box. Sometimes, though, it's fun to do something a little more extreme, and it's from this that the Silverback was born. This wasn't made with any rules in mind, just something fun to build... although now of course I have some ideas percolating around for mercenary units, so this may be something I come back to in a future article.
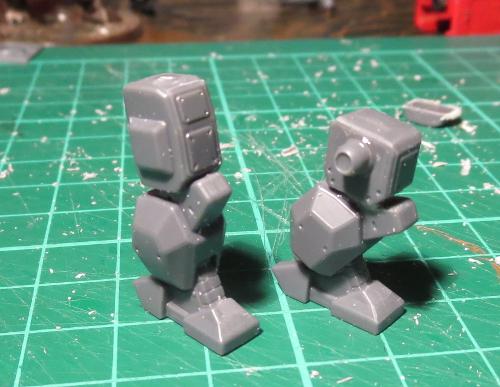
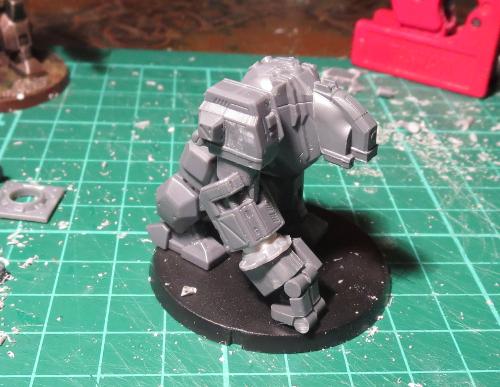
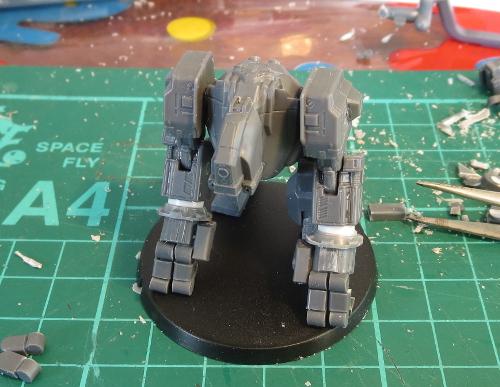
To give the Silverback more gorilla-like proportions, I cut down the tops of the thighs level with the top of the protruding panel on the side. This also required slicing off the locating pin and reattaching it lower down. I also added a bit more of a bend to the left leg by slicing carefully through the top of the knee joint, cutting out a small wedge, and regluing the leg at the new angle.
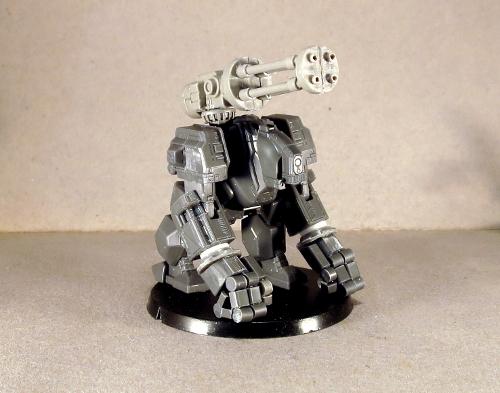
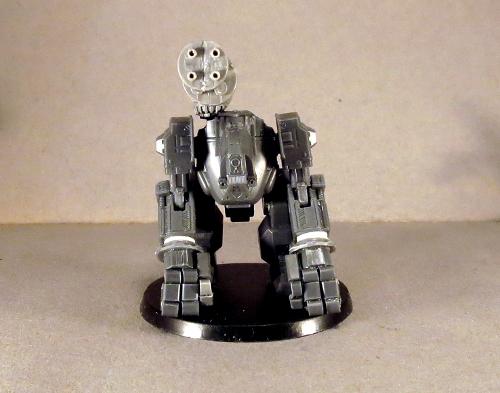
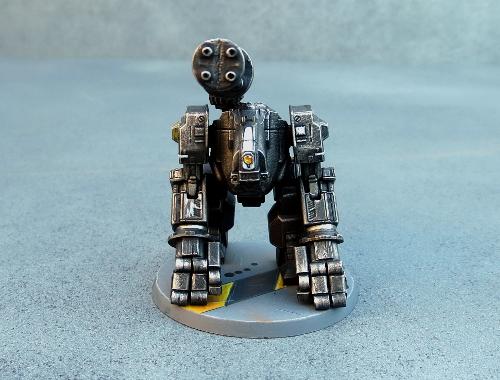
With the torso angled forwards, the top of the existing 'head' serves admirably as a neck. To add a new head, I used a razor saw to slice a drone chassis in half.
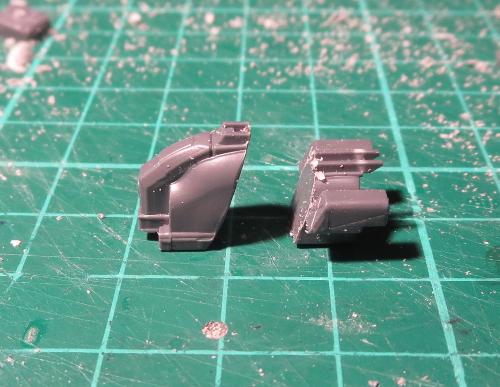
The front piece was then glued in place on the torso.

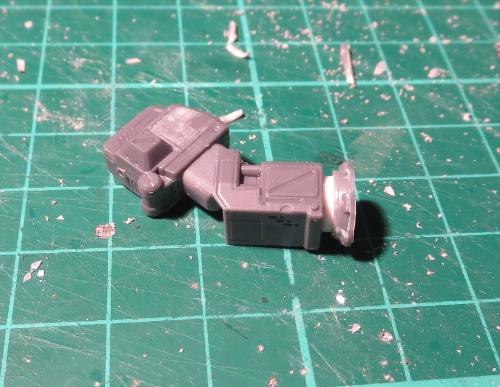
I wanted the arms a little straighter than is allowed by the hunter's elbow arrangement. So I trimmed away the back of the forearm piece, allowing more movement in the joint.
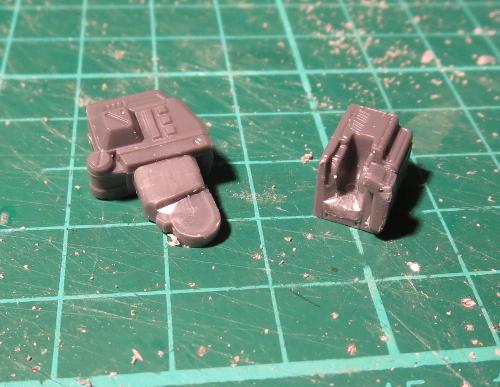
I then took some small pipe fittings from the Maelstrom's Edge terrain sprue and trimmed the square border off.
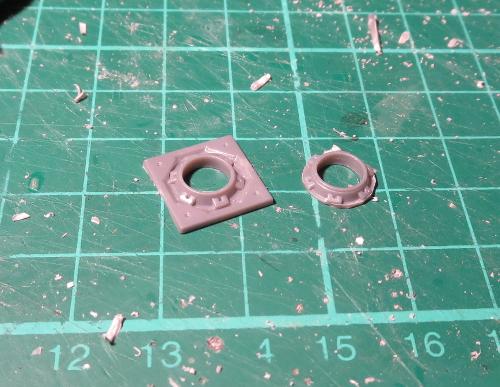
A small piece of plastic tube was then slipped into the fitting, and this glued in place against the 'hand' end of the forearm.
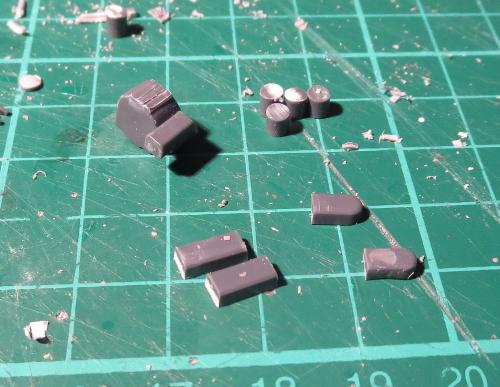
The hands were constructed from the back half of the drone chassis and small pieces cut from the drone's sprue (recycling for the win!).
With everything glued together, the arm was glued in place.
I initially only had two joints on each finger, but it just didn't look quite right, so I added an extra joint when I built the second arm, and then went back and did the same to the first one.
Another couple of small sprue pieces formed the ends of the thumbs, and I added a weapon purloined from a Games Workshop Tau battlesuit kit.
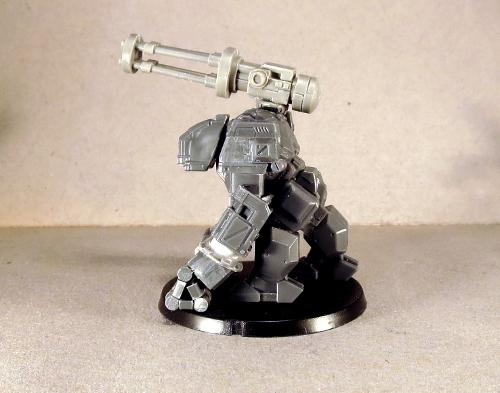
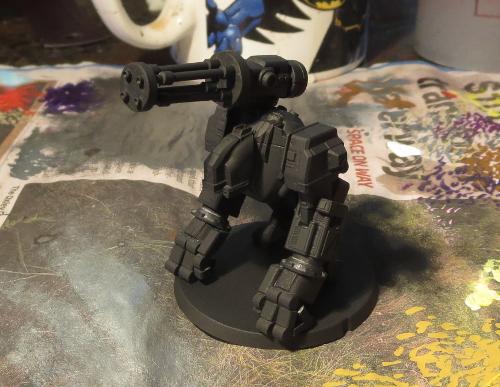
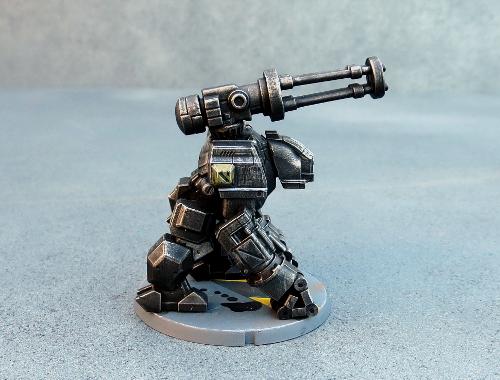
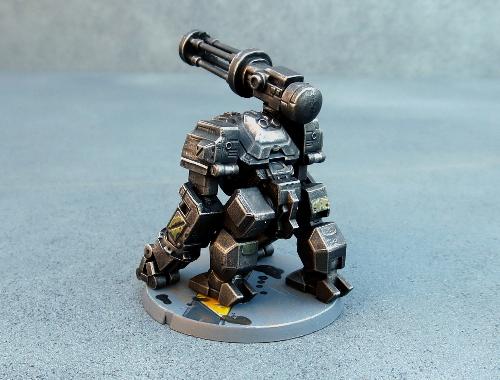
I wanted a dark, slightly sinister paintjob to emphasise the brutish nature of the mech, so started with a black undercoat.
Over this I did a heavy drybrush of P3 Pig Iron.
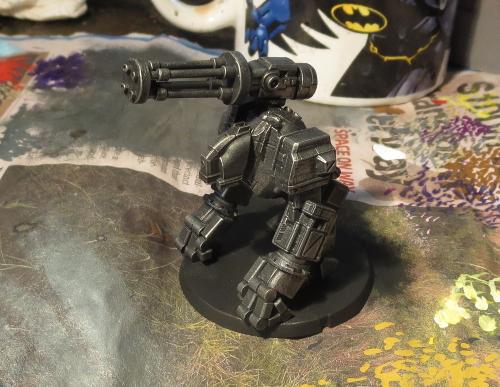
Then I washed the whole thing with a generous coat of Army Painter Dark Tone.
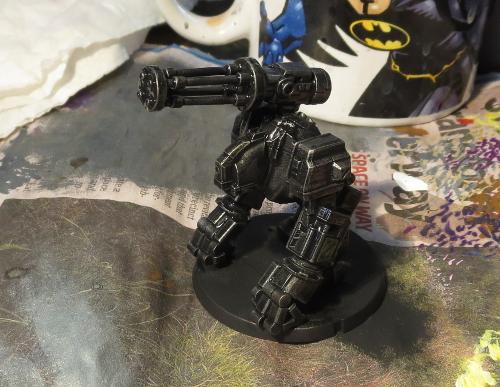
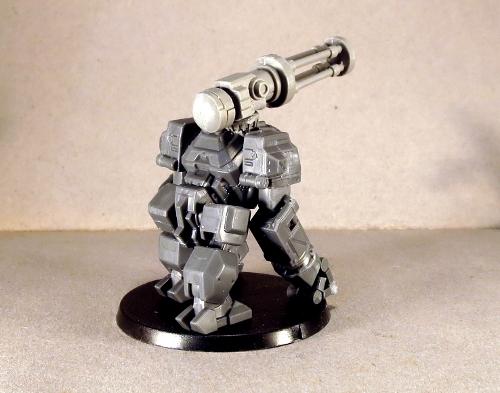
Once the wash dried, I lightly drybrushed all over with some more Pig Iron, and then did the detail work. A few panels here and there are picked out in different colours to give it a bit more of a ramshackle appearance, in keeping with its mercenary nature. It's not an award-winning paint-job, but is a nice, quick method for getting a table-ready model.

Feeling the urge to hack up a Hunter or two of your own? You can pick up the Hunter, Drone or terrain sprue from the Maelstrom's Edge webstore here. As always, feel free to share your creations on the Comm Guild Facebook page!
For other Maelstrom's Edge modeling articles, including tutorials and walkthroughs of a wide range of different building and miniature projects, check out the article roundup here.
Tags: conversion hunter modeling painting
Terrain Spotlight: Landing Pad
Posted on Monday Jun 19, 2017 at 05:00pm in Models
- by Iain Wilson
Terrain is a bit of a passion of mine. It can make such a difference to your games having a table full of nice-looking terrain pieces, and this is helped along with the addition of a shiny, impressive centre piece to dominate the battlefield.
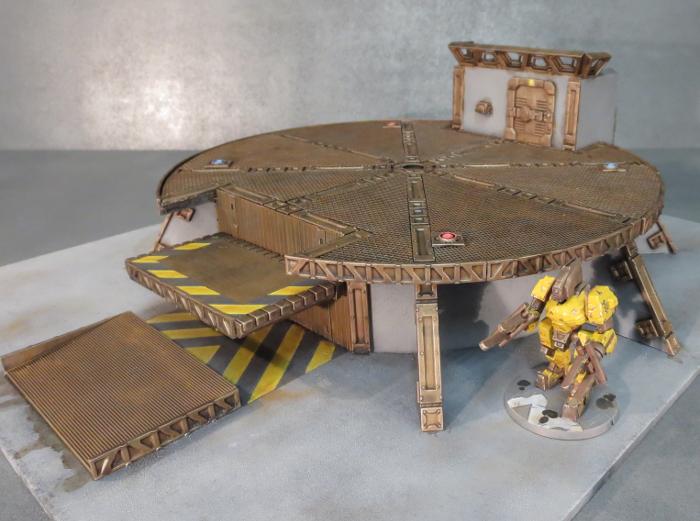
With that in mind, I set to work this week to build a landing pad for my table. Landing pads look great visually, can be easily tailored from game to game with the addition of some crates, landing craft or other small terrain features on top and make for nice line of sight blockers in the middle of the table.
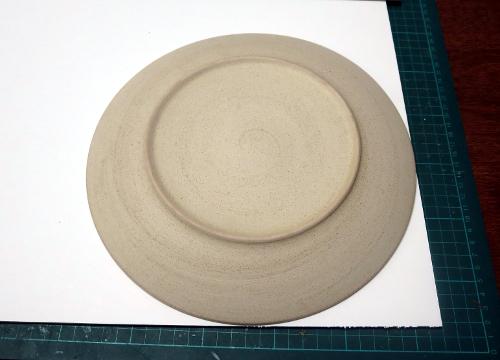
I started out, as so many of my projects do, with a few Maelstrom's Edge terrain sprues and a sheet of 5mm foamcore. A dinner plate served as a handy template for the pad itself.
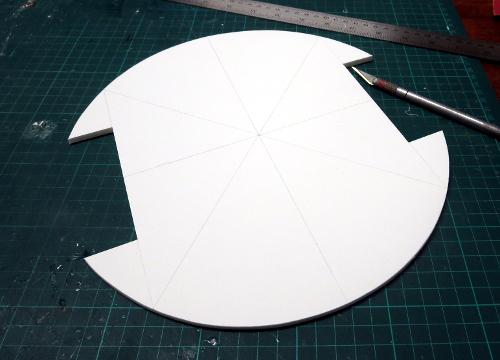
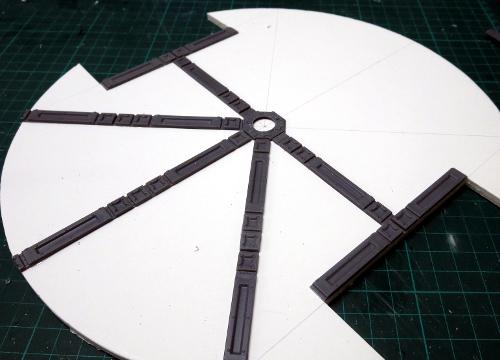
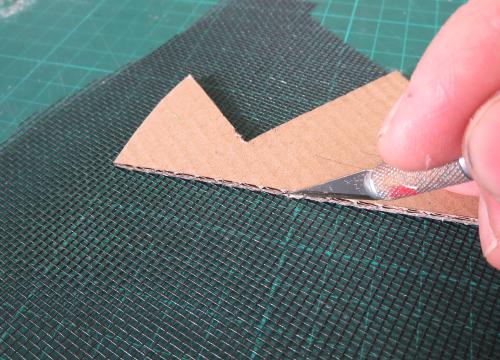
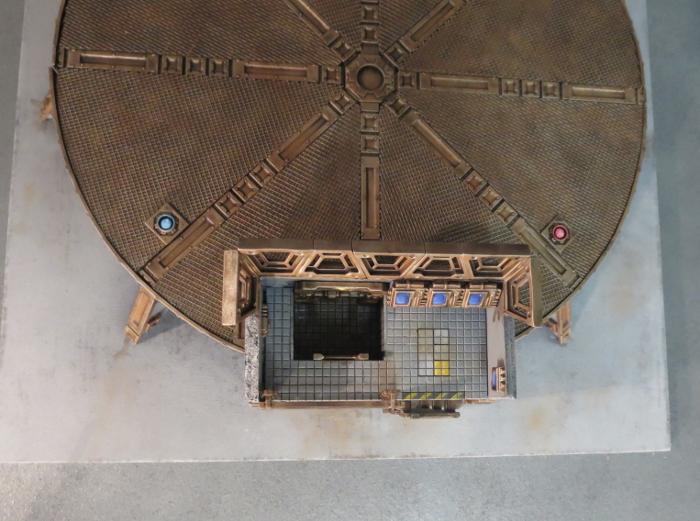
After tracing around the plate, I drew in an inset rectangle on opposing sides, to break up the circular shape a little in order to make the pad a little more visually interesting. The the shape was cut out with a hobby knife, and some guide lines drawn on for some detailing.
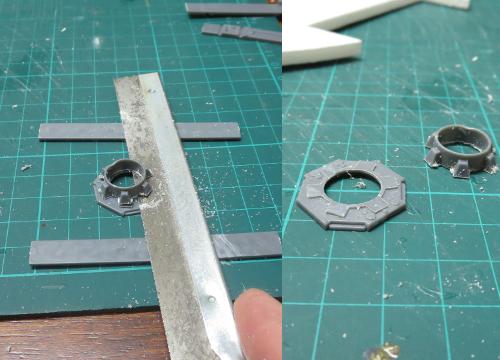
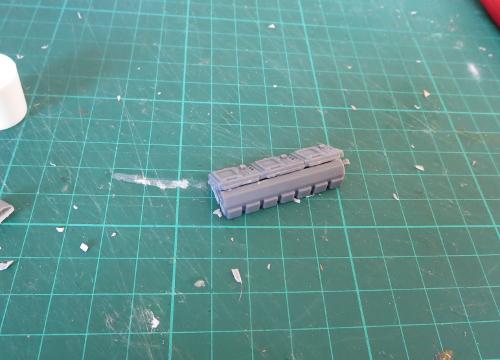
A round detail in the centre of the pad was created from the large pipe fitting, cut down to match the thickness of the support struts. I used a couple of spare struts as height gauges for a razor saw to cut through the pipe fitting sideways.
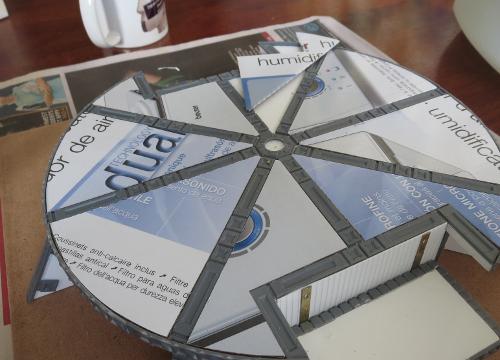
I then laid support struts out along the guide lines, cutting them to length so that they extended to the edges of the pad.
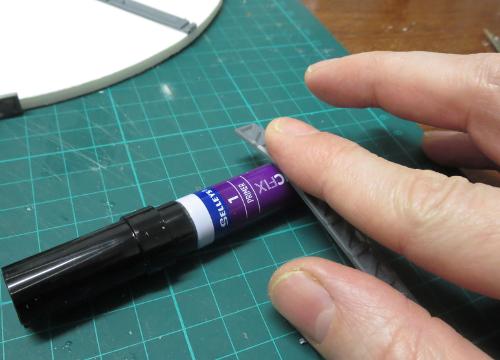
For some detail around the edge of the pad, I took some more support struts and rolled them carefully over a glue primer tube to give them a curve.
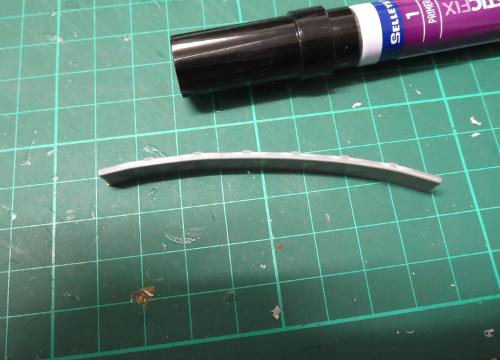
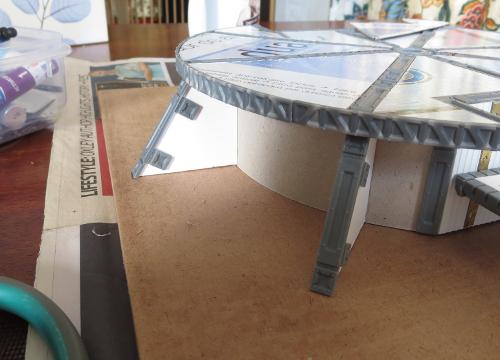
These were then glued around the edges of the pad, and held in place with some hat elastic until the glue set.
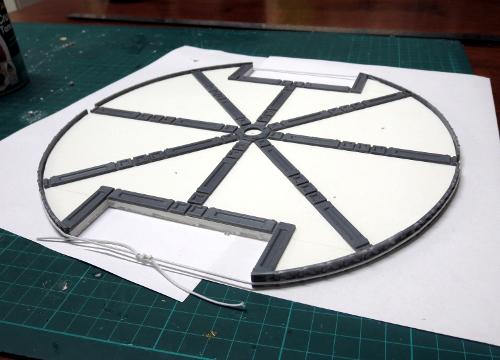
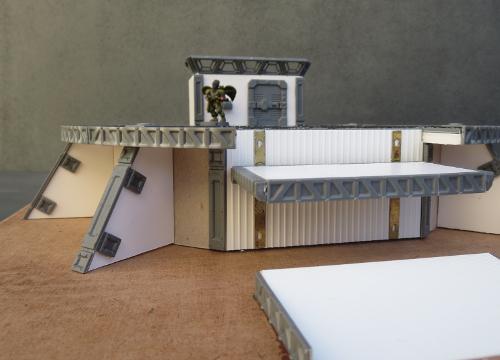
A landing pad on the ground is functional enough, but not much good for blocking line of sight, and certainly won't impress the neighbours. So I made a formwork from some more foamcore to go under the pad. In between each of the formwork supports, I spaced some off-cuts of foamcore to serve as guides for the outer wall.

The outer wall was made from thick card, which was bent around the outside of a coffee mug.
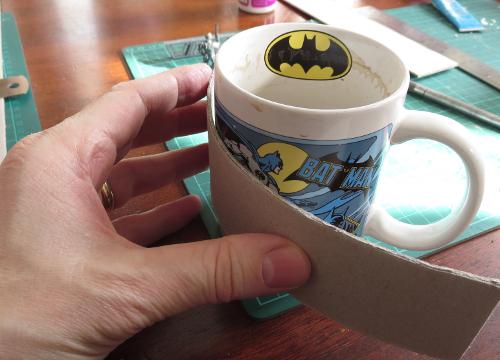
This was then glued in place around the outside of the support formwork, with the help of a few cardboard tabs to reinforce the joints.

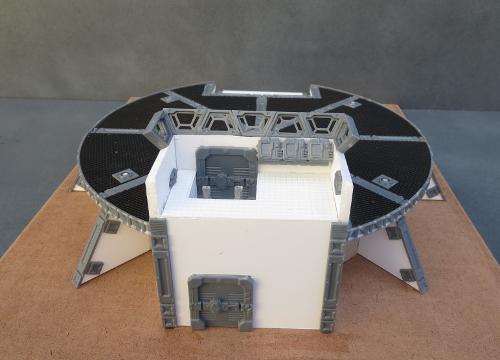
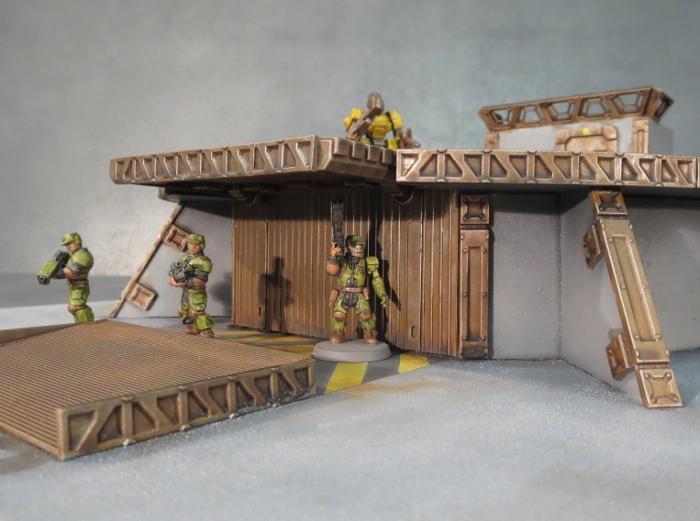
A little more foamcore and some doors from the terrain sprue created the bare bones of a control tower.
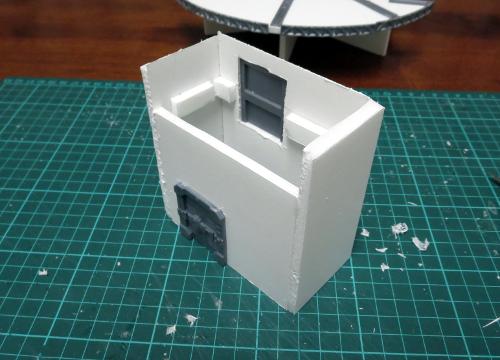
This will have multiple access points, through the lower door, a second door off the pad surface, and a ladder from the ground to the control platform. The ladder can be just glued directly to the wall, but this never looks quite right to me, as it would make climbing it a little problematic unless you cut recesses in behind it. In this case, I decided to space it out from the wall instead, using some off-cuts from the terrain sprue lintel piece.
Because the inside of the upper door can be seen from the control platform, I used a second door on the inside wall. Two doors back to back are a little thick for 5mm foamcore walls, so I trimmed the inner door's back down flush so it would fit in neatly.
The floor of the platform was made from some tile-pattern plasticard, with a recess created for the inner door - this would have a short ladder up to the main platform.
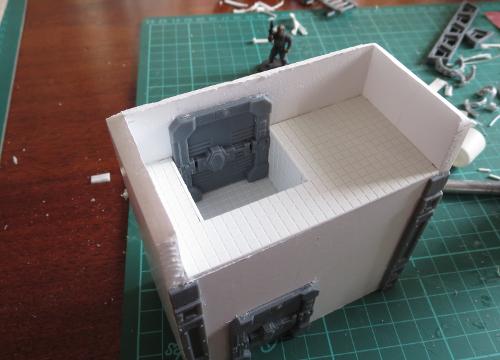
I also made some computer terminals using some computer panels and lintels.
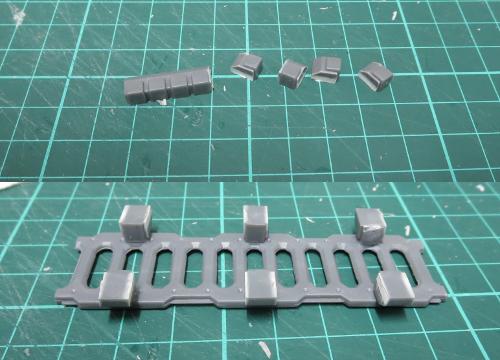
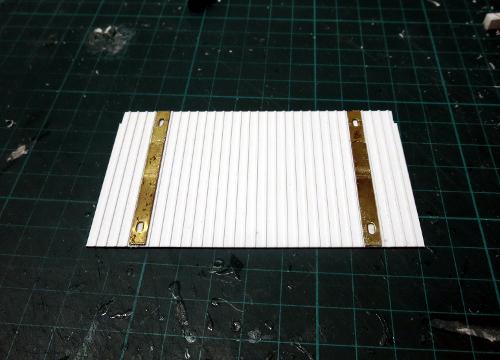
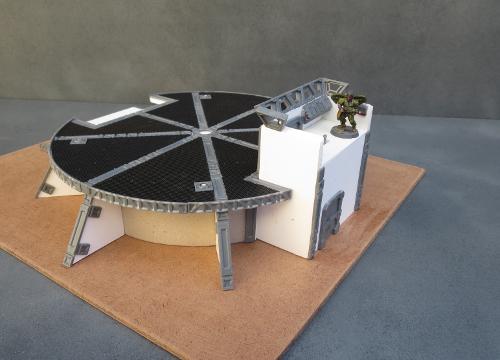
Opposite the control tower will be a lift. I wanted this to be functional, just for a little fun. So I made a wall section from some textured plasticard and glued on a couple of picture hooks that I had flattened out with some pliers and a hammer.
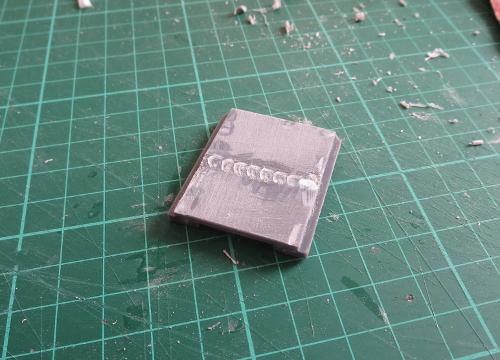
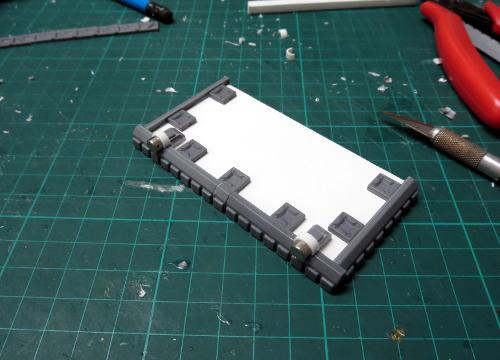
The lift platform was made from a rectangle of foamcore with detailing around the edges provided by some lintels and a support strut. On the bottom of one of the long sides I affixed some nice, strong, rare earth magnets. These allow the lift platform to be attached anywhere along the flattened picture hooks, and are strong enough to hold it up even with models standing on it.
The base of the platform still needed some more detail, so I made some buttresses to going around the perimeter. These are just a wedge of foamcore and some pieces cut from support struts. Normally I layer a piece of 5mm and a piece of 3mm foamcore to match the width of the support strut, but this time I decided to go for something a little more visually striking and just used a piece of 5mm foamcore with extra reinforcing pieces added on either side.

These buttresses were then glued around the base of the platform, lining up with the support struts on the platform top.
The top of the platform needed some more detail, and so I cut some wedges of card to slot in between the support struts.
These were sprayed black, and then painted with a coat of PVA glue and pressed onto some plastic flyscreen. I used a sharp hobby knife to cut around the edges.
(Spraying them black before gluing the flyscreen on makes painting a little easier, as it can be tricky to cover all of the tiny little nooks and crannies in the flyscreen)
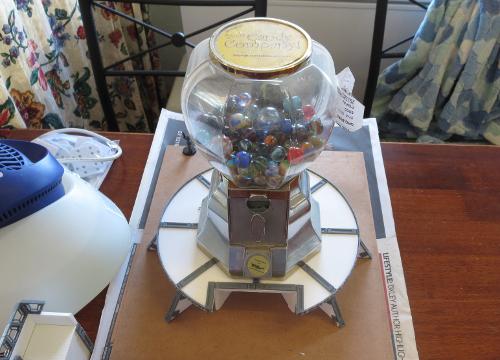
While the glue was setting on the flyscreen, I took the time to glue the landing pad down onto a base board of masonite. A handy, nearby gumball dispenser filled with marbles served as a weight to help the glue bond everything nice and tight.
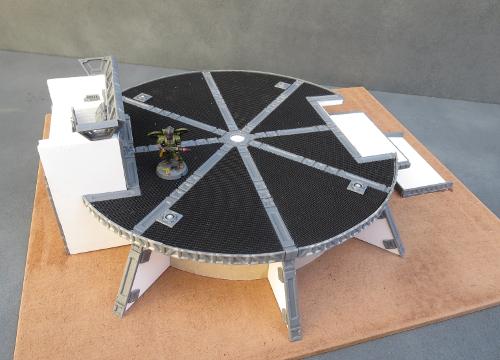
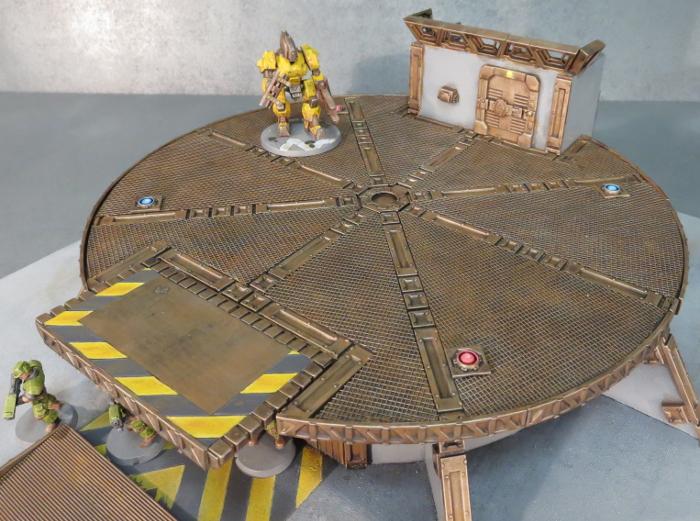
When everything was set, I glued the flyscreened wedges into place on the platform, and added some landing lights made from small pipe fittings and offcuts of sprue.

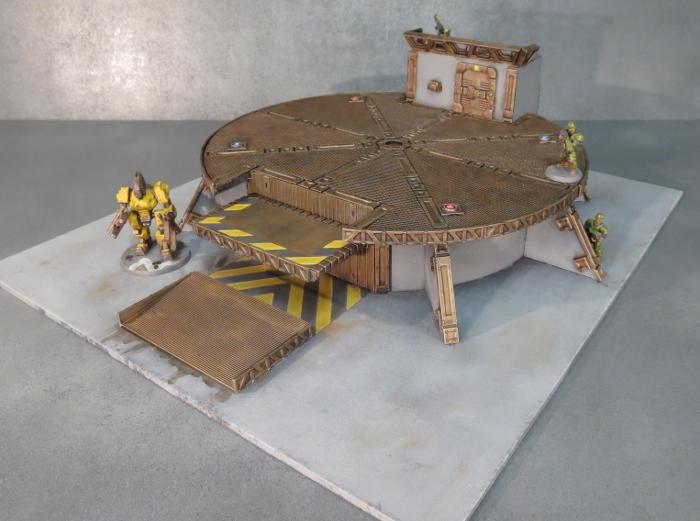
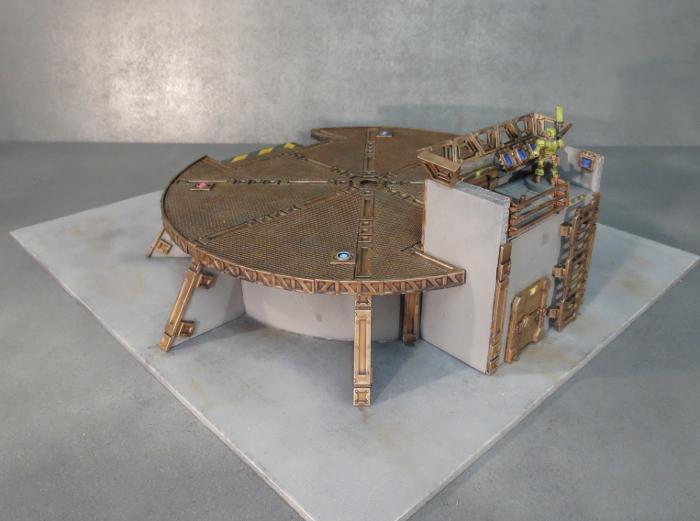
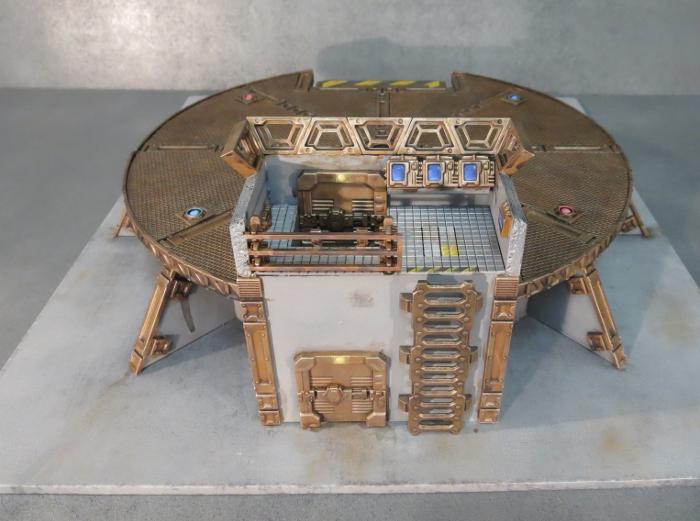
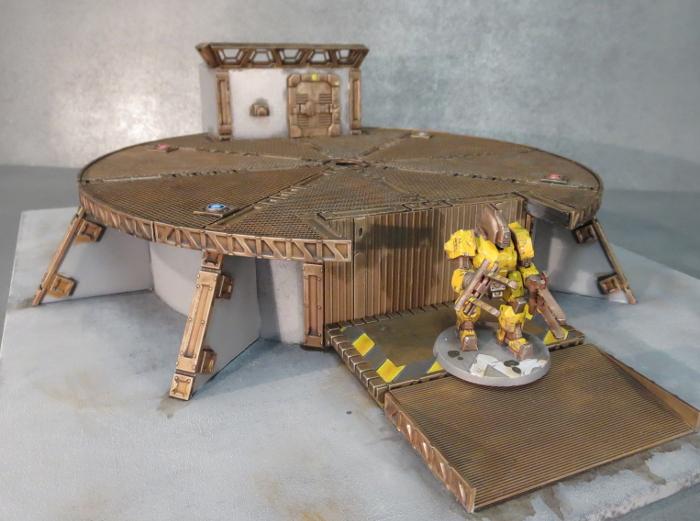
With the control tower then glued in place and a row of trapezoid windows added for controller protection, a ramp up to the lift built on the other side of the pad, and a few other little details here and there, construction was complete.
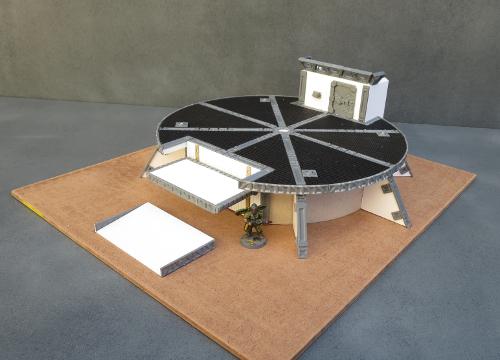
Painting was kept fairly simple: I basecoated with black spray, and then added a coat of grey for the base and walls. The metal parts were then painted using my weathered metal method shown here. Add in the details (including the obligatory hazard striping) and the job's done!
For other Maelstrom's Edge modeling articles, including tutorials and walkthroughs of a wide range of different building and miniature projects, check out the article roundup here.
Conversion Spotlight - Kaddar Nova Mini-Diorama
Posted on Monday Jun 12, 2017 at 05:00pm in Models
- by Iain Wilson
Sometimes it's nice to take a break from putting together armies and just paint something for fun. There's nothing better than taking some plastic and doing something new and shiny with it for getting some creative juices going, and it's a great way to explore the rich background of the game.
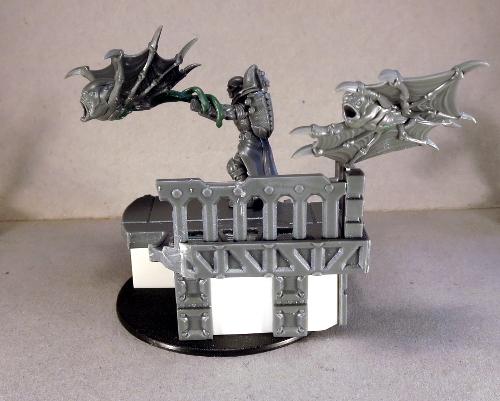
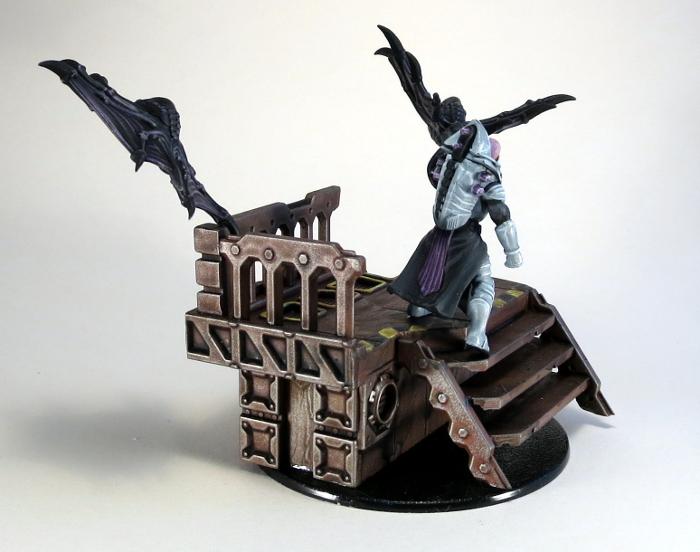
When I first got my hands on the plastic Kaddar Nova kit, I had an image of him standing in some imposing fashion unleashing a minnow like a trained hunting bird. I built the bare bones of this little diorama some time ago, but only just found the time to get it finished off and painted.
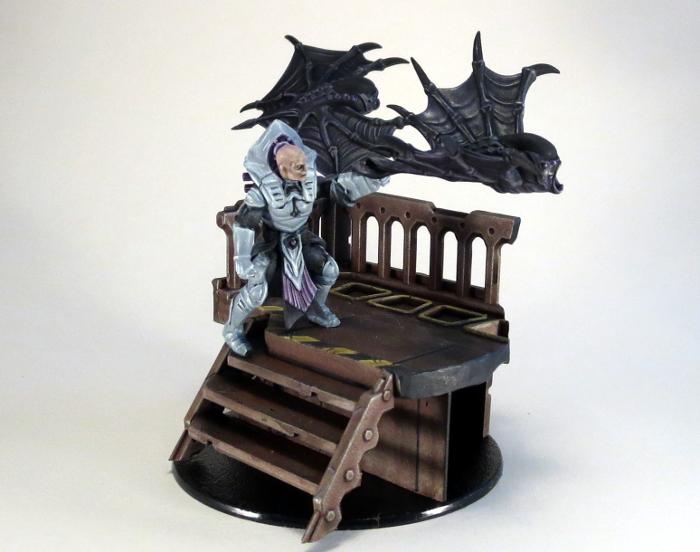
This piece was assembled from 3 different kits. The balcony was assembled almost entirely from components from the Maelstrom's Edge terrain sprue, with a little plasticard to fill in around the sides. The balcony floor is cut from a garage door, with the windows filled in with the gratings from the support struts cut into a trapezoid shape. The railing is made from a ladder, with one side trimmed off. The trimmed off side served for the sides of the staircase, with the stairs themselves made from lengths of support strut glued in detail-side down.
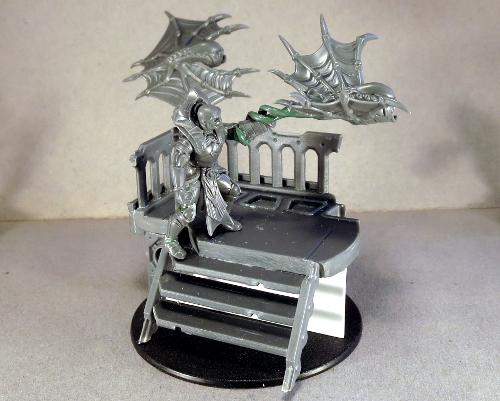
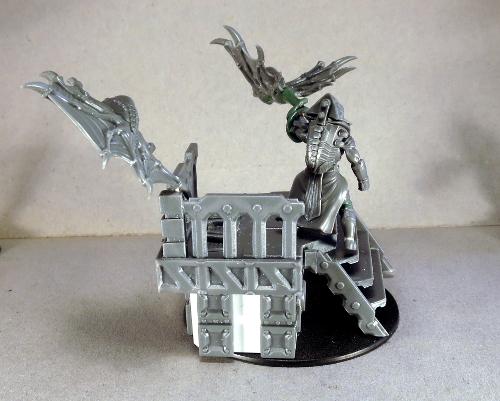
The Kaddar Nova is largely stock, although there was some small alteration of the legs (narrowing the groin area to bring his legs closer together and bending out the right foot so that his toe-tip would touch the lower stair).
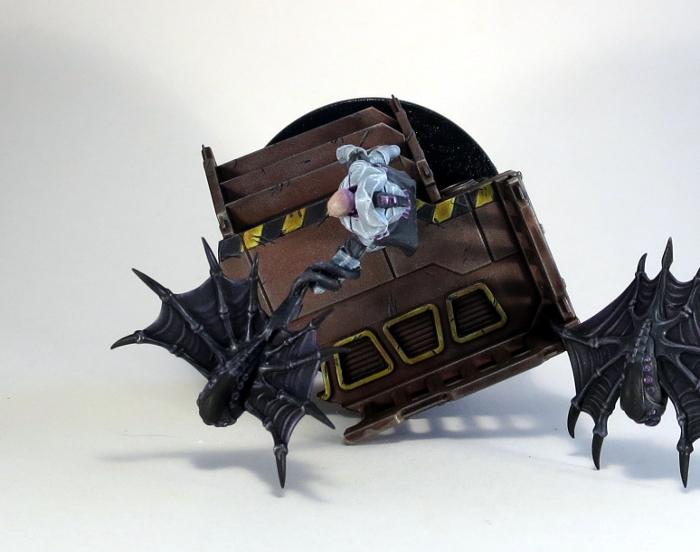
Likewise, the Minnows are assembled as normal, with the one launching off the Nova's hand losing his original tail and a new one made with a length of wire and some green stuff. The wire is glued into a small hole drilled in the Nova's forearm, which is covered up by the putty.
When painting something unusual, I like to try pushing my boundaries a little as a change from the repetitiveness of painting gaming forces. For this piece, I decided to go for a nice, bright, white armour, as I generally tend towards darker colour schemes. The trick with white, oddly enough, is to not make it white. Most white things aren't actually white to look at. Shadows add layers of grey, and reflections add other shades to the mix. (This goes for black, as well!) I wasn't about to try painting reflective armour this time around, but I did use Vallejo Light Grey blended into the white to shade the armour. The end result is possibly a little more grey than white, but I'm still pretty happy with how it turned out.
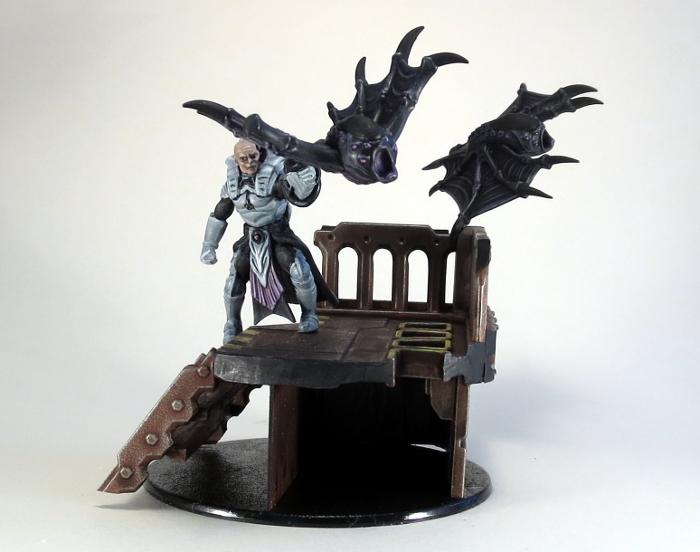
The Minnows were painted using a slight variation of the scheme I used for my winged Mature Angel a couple of weeks back. They were undercoated black, and then drybrushed with dark grey (Vallejo Heavy Charcoal, in this case) and then with purple (some old Citadel Warlock Purple and Tentacle Pink mixed together). This was then washed with some Army Painter Dark Tone to smooth out the drybrushing.
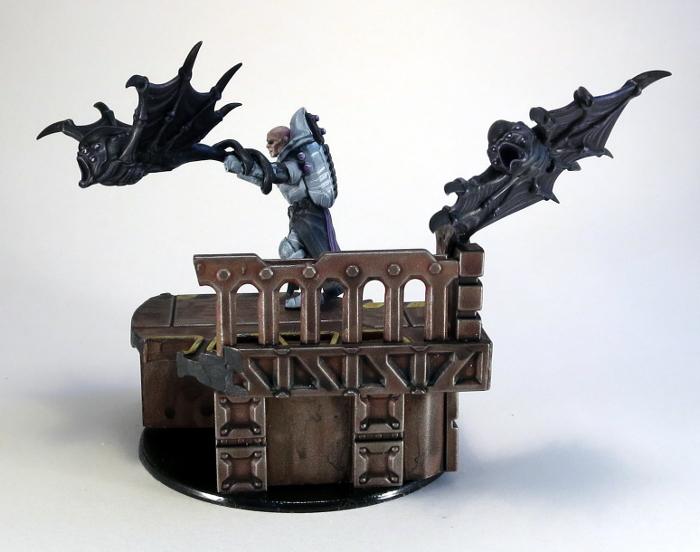
The balcony was painted using the weathered metal recipe shown in the article here, with the addition of some scratches, hazard stripes and yellow detail around the window/vents to break up the expanse of rusty metal a little.
The end result is a simple little scene that I think is nicely evocative of the Maelstrom's Edge setting. If you want to try something similar, you can pick up the components used here from the Maelstrom's Edge webstore. As always, feel free to share your creations on the Comm Guild Facebook page!
For other Maelstrom's Edge modeling articles, including tutorials and walkthroughs of a wide range of different building and miniature projects, check out the article roundup here.
Tags: conversion diorama kaddar karist modeling nova painting
Terrain Spotlight: Comm Tower
Posted on Monday Jun 05, 2017 at 05:00pm in Models
- by Iain Wilson
One of the things I really enjoy about working with the Maelstrom's Edge terrain sprue is that with a little imagination and a sharp knife, there are so many potential uses for most of the parts. I think I've used the ladders, energy fences and pipe fittings far more as other things than I have for their original purposes.
This week's build is no exception, as I had a bit of a brain-flash as I was looking at the energy fence posts and decided to build a communications array!
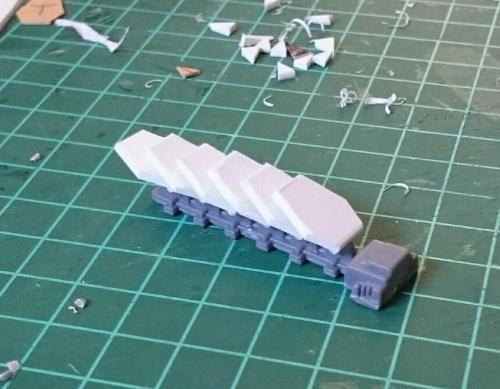
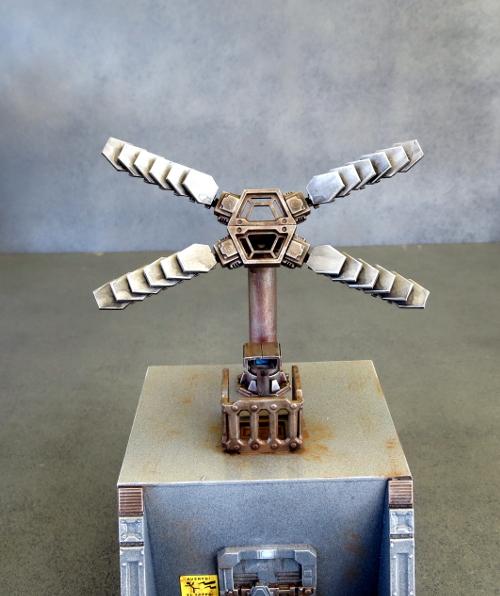
The main focus of this terrain piece is, of course, the cross-shaped array on the roof. The transceiver panels on this array are each built from a fence post and a series of hexagonal shapes cut from a sheet of plasticard. I cut a few test panels from cardboard to get the size and shape right, and then used one of those cardboard testers as a template to mark out the plasticard.
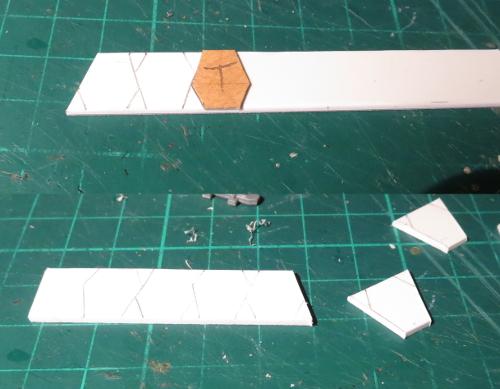
Once cut and cleaned up, the panels had a small length of plastic rod glued to the back, and then glued in place onto the fence post.
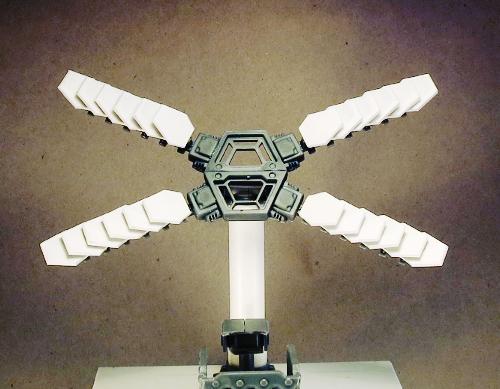
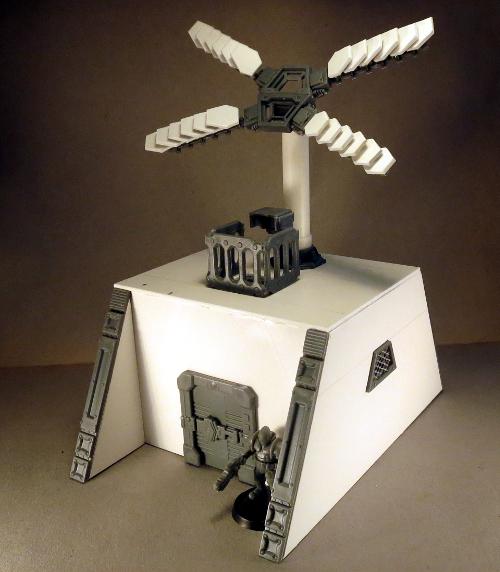
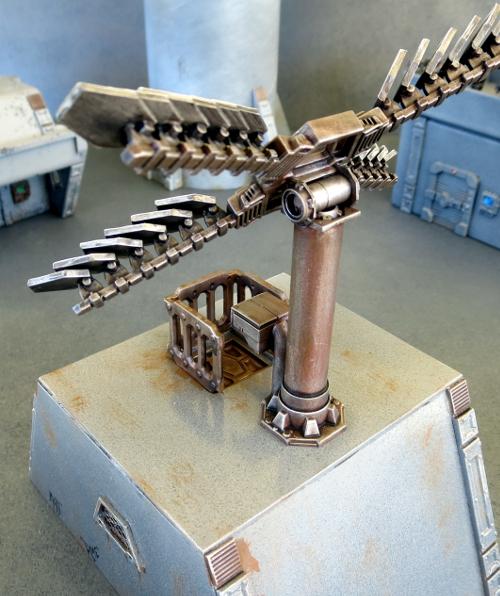
The four resultant transceiver arms were glued onto a pair of trapezoid windows to form the array. I sat this on a post made from plastic tubing and some pipe fittings, with a control panel mounted on the front for servicing and fine-tuning - because as any sci-fi buff would tell you, intergalactic regulations require any piece of important equipment to have a control interface positioned somewhere accessible from outside, but exposed to enemy shooting.
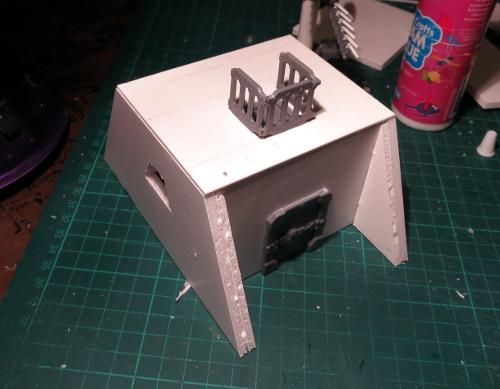
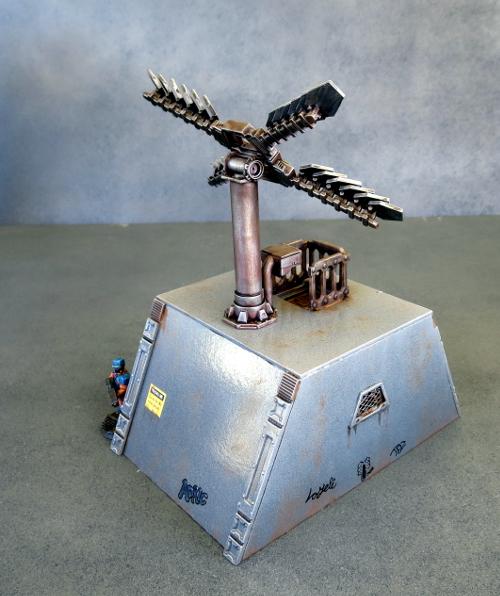
The array obviously needed something to stand on, so I made a basic building frame out of foamcore.
I set a hatch into the roof, and surrounded this with a railing made from a cut-up ladder - because while the control panel needs to be exposed, the Epirian Foundation still (on paper, at least) follows strict OH&S standards.
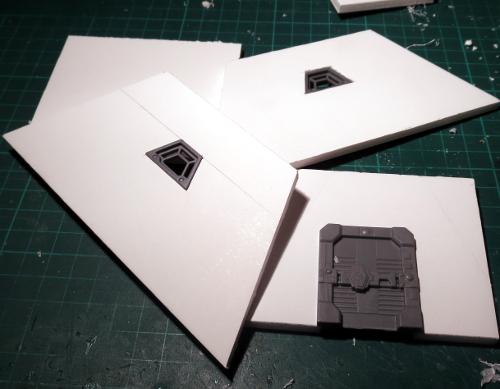
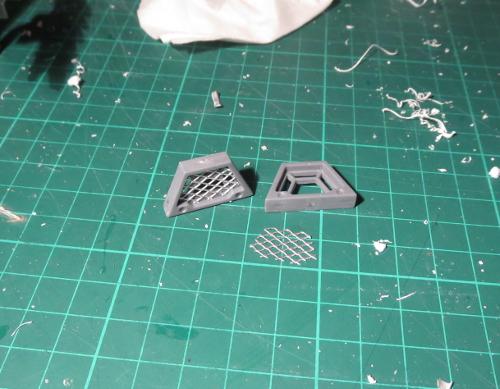
I wanted to use trapezoid windows in the sides of the building, to tie back to the shapes in the array, but they needed to look different to the array centre to reduce the number of people looking at the building and asking why it had windows on its aerial. So I cut some pieces of aluminium mesh to fit snugly inside the window frames.
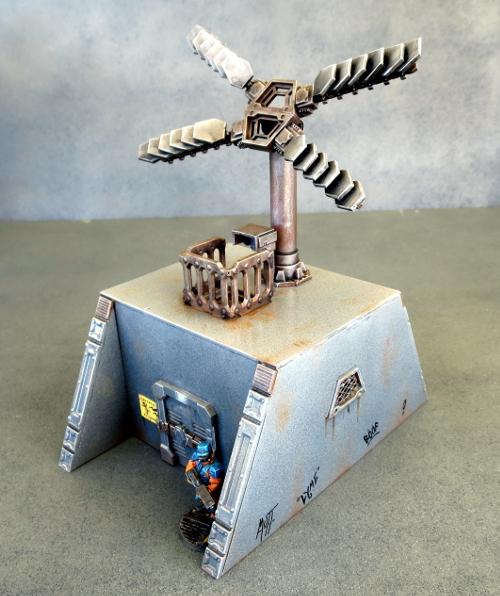
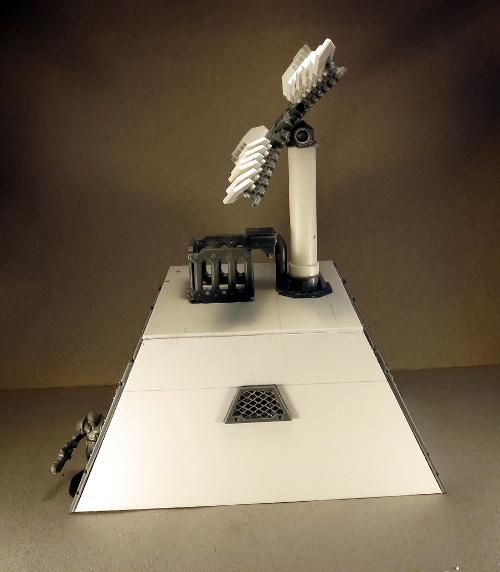
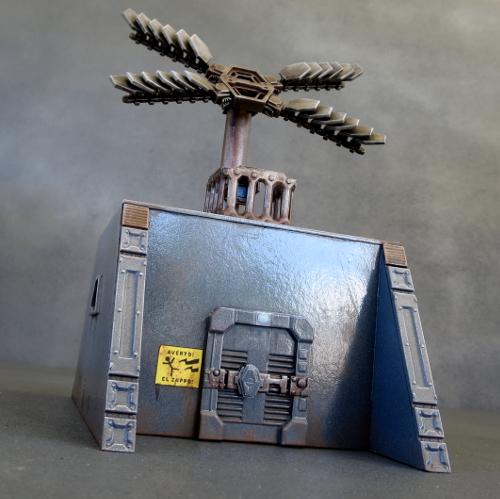
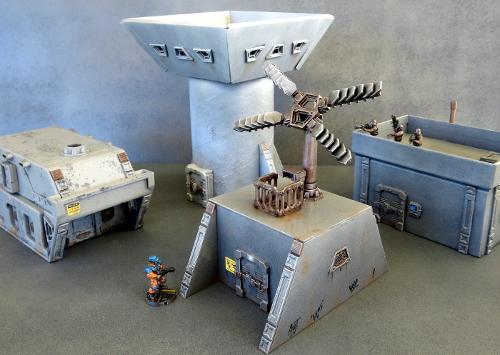
With everything glued in place, the comm building looks like this:

I kept the painting on this one a fairly simple grey, to match some other terrain from previous articles. The building section was sprayed with a medium grey undercoat, and the array sprayed red on the less important parts and black on the transceiver plates and 'moving' parts.
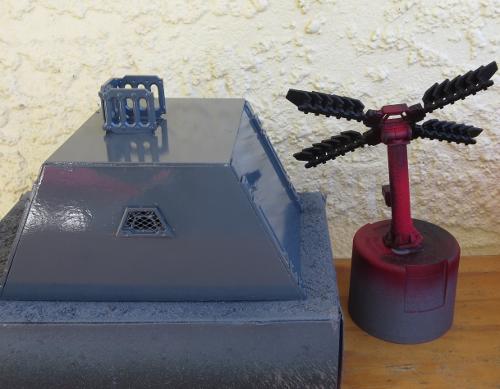
The building then had a light spray with a lighter grey, pitched from above so that the darker grey would stay in the indentations and form some natural shadows. The array and the metal parts on the building were painted using the weathered metal recipe from the article here. Then I finished up with weathering added with drybrushed brown, the door light and control panel screen painted in blue, and then added a couple of printed signs and some fineliner graffiti on the side and back walls.
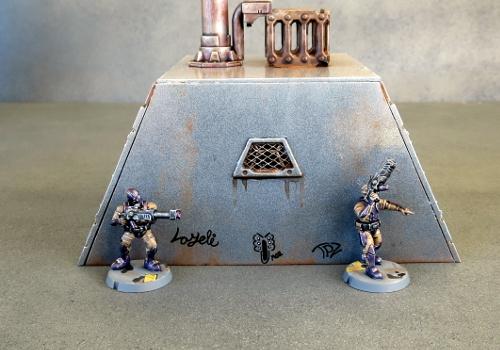
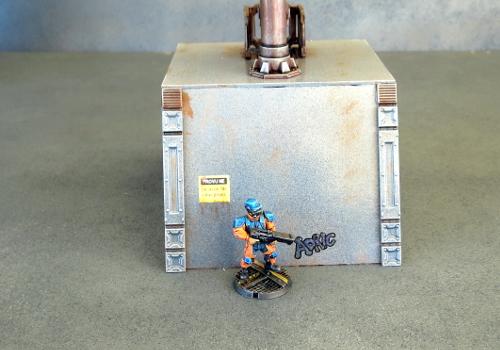
A cheery, grey city in progress...
If you would like to build your own communications array, you can pick up the Maelstrom's Edge terrain sprue from the webstore here. As always, feel free to share your creations on the Comm Guild Facebook page!
For other Maelstrom's Edge modeling articles, including tutorials and walkthroughs of a wide range of different building and miniature projects, check out the article roundup here.
Tags: buildings modeling models spotlight terrain terrainsprue walkthrough
